 Xasin
XasinIt's been a little while since the last project log, but don't worry, things have been moving forward quite well. The most impressive sight of this is, of course, the completed casing, so I shall let you wait no more:
Read up below the break to hear about adorable tiny components, the PCB, and designing and printing the case!
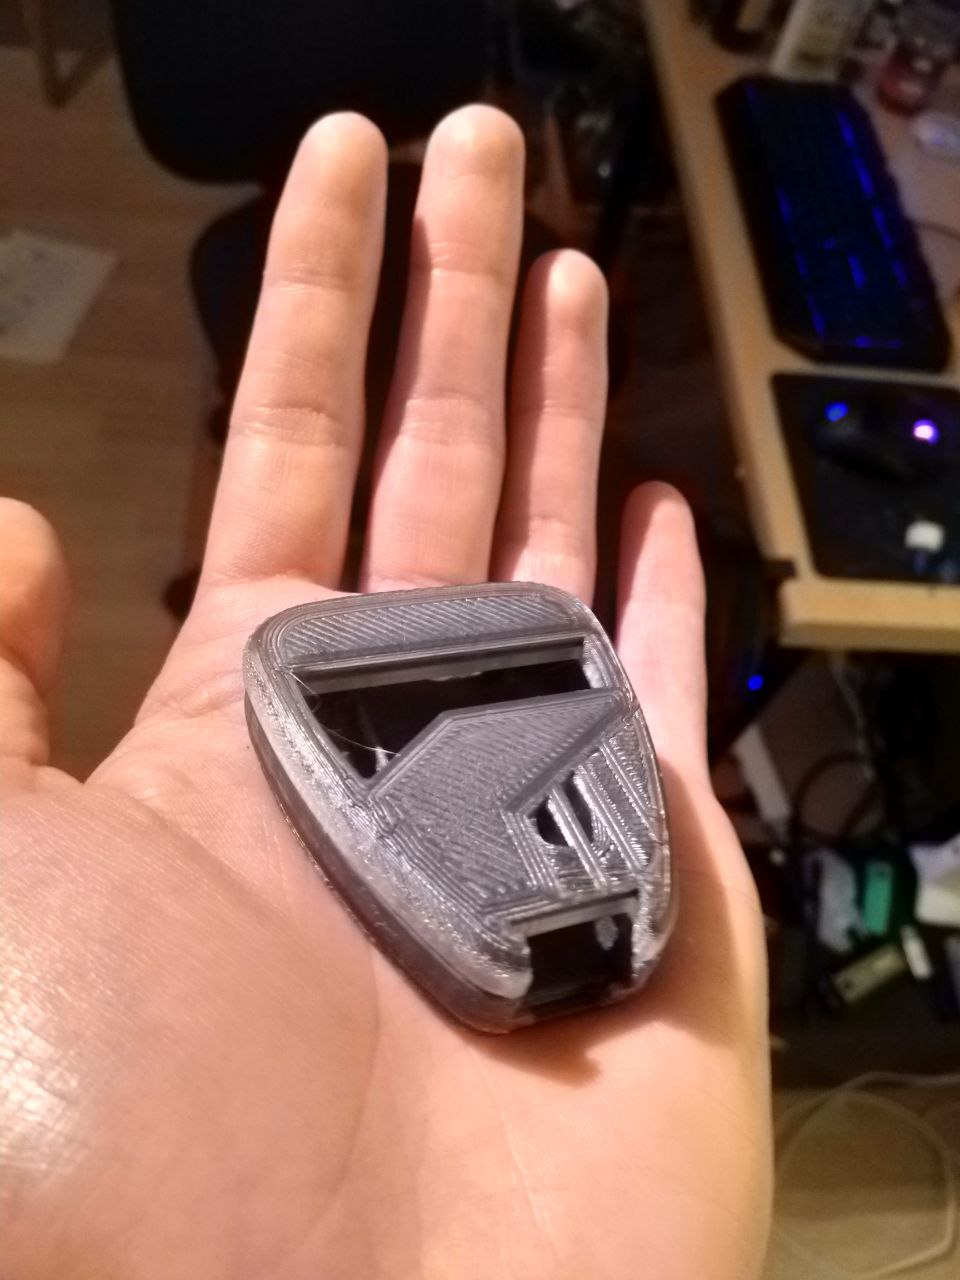
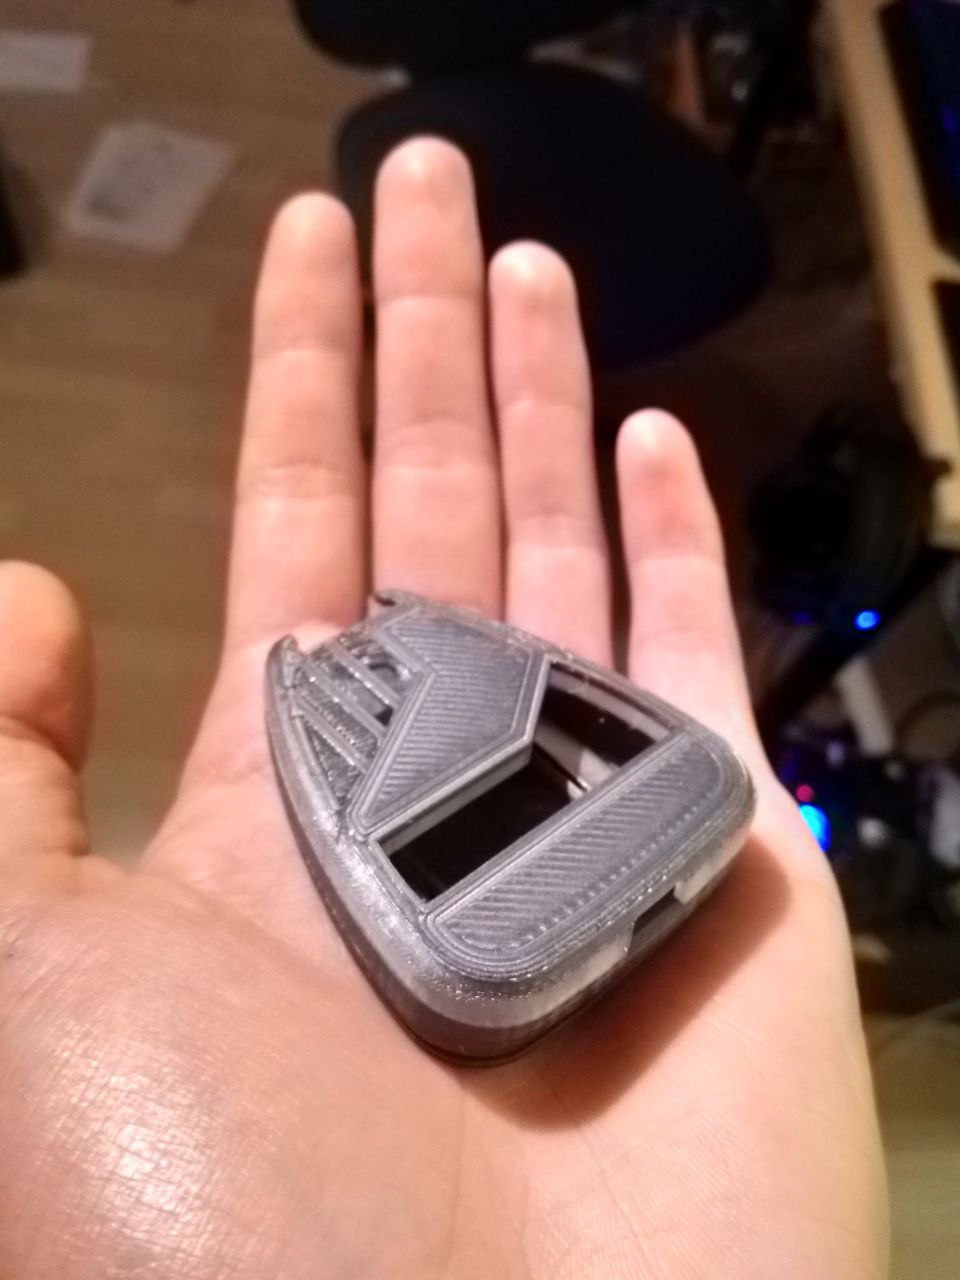
State of the casing:
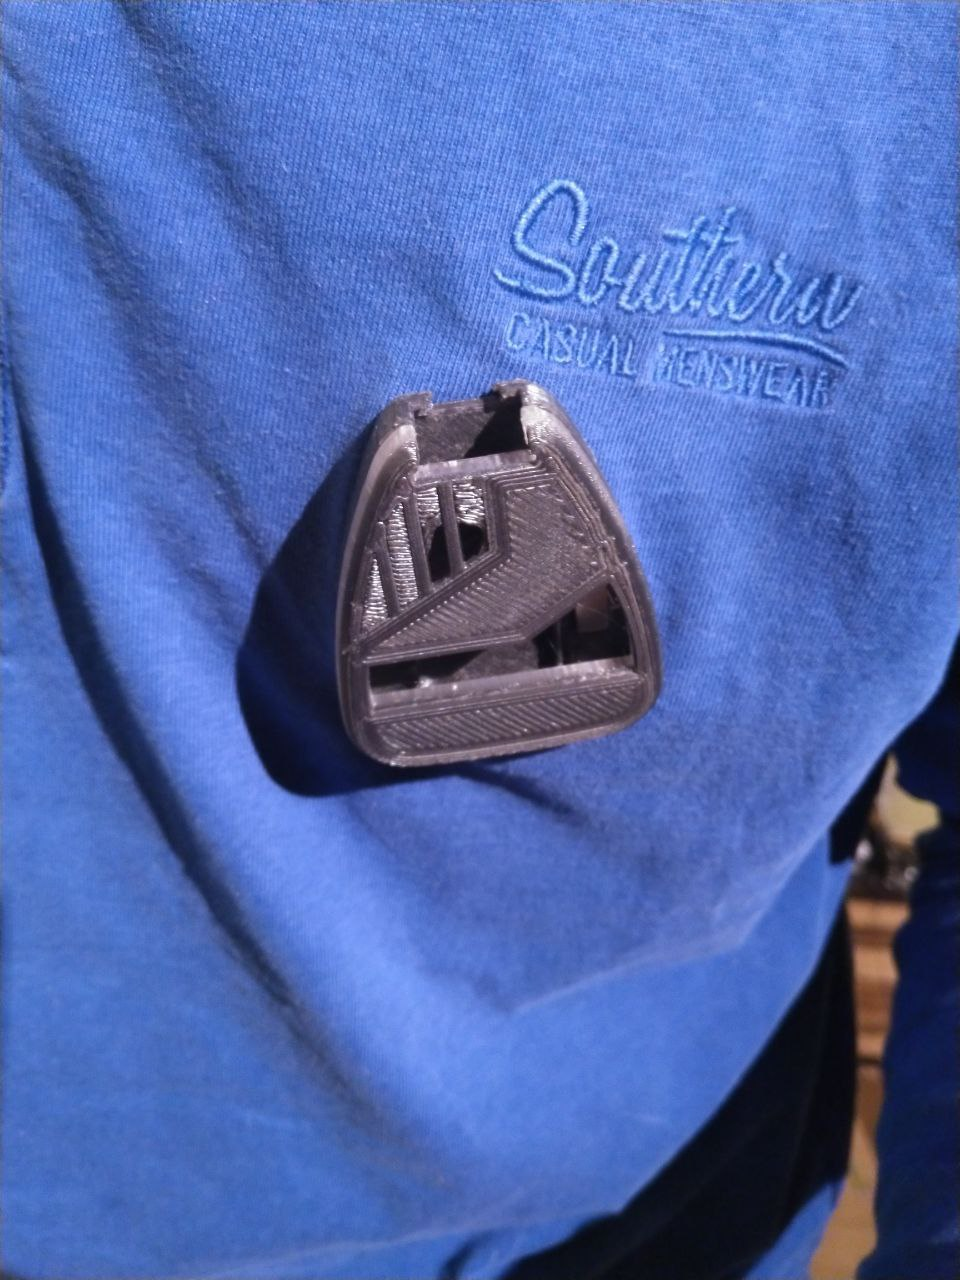
Over the last... Three days, actually? The casing has come a LONG way.
Believe it or not, but aside from a few glitches that FreeCAD threw in, nothing that was not fixed by a restart or refresh, it held up incredibly well. It certainly is a tribute to people like Realthunder that we have such a capable FLOSS CAD available.
Words always fail to describe the design well, so here are a few images of the casing as modelled:


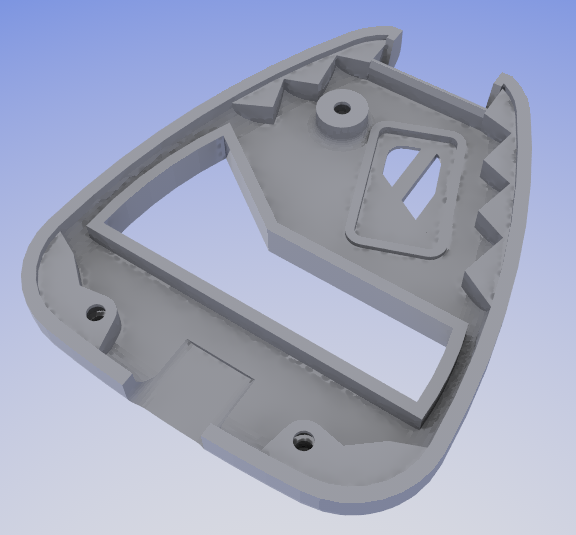
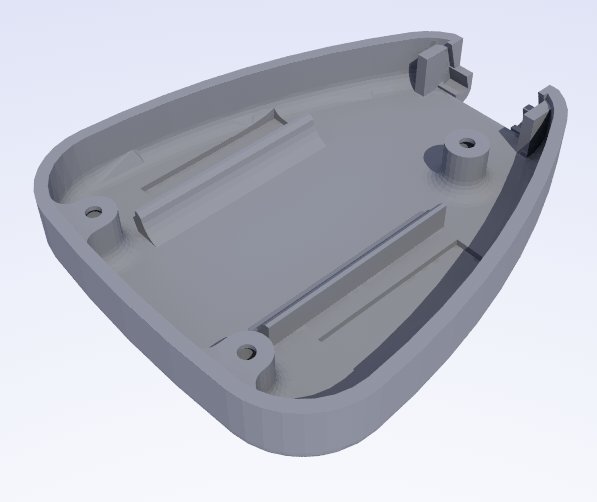
The assembly of the casing has been a little tricky, and despite being less than a day old it already has a second revision.
The first model had too small of a pin on the bottom that held the screw nuts, which led to a weak point that failed rather quickly.
This was already mitigated by using larger diameters and a bit of extra spacing, just to be sure.
The print itself is also a little more adventurous. It must be paused twice, once to swap the filament for the top half to a translucent material, providing a see-through "halo" that is later illuminated by the outwards-facing LEDs, and a second time to insert the nuts, which will be printed over to provide embedded threads. As they are tiny M1.5 screw nuts, actually getting them in there is finicky, but works well enough!
All in all, the casing looks great, and once the PCB is inserted to keep the halves aligned (as the PCB itself serves as a middle piece between the two halves), the casing will be sanded down to fit.
Have a look:
![]() State of the PCB
State of the PCB
 State of the PCB
The PCB has also been ordered not too long ago!
Aisler will still need a few days to manufacture it, and with how the design ended up, we will need to hope that they don't run into issues.
In fact, their Gerber post-processing almost deleted a few traces without any warnings on my end, and also forgot to actually drill the screw mounting holes.
Someone really needs to change that... But I digress.
The components, however, have arrived after just barely more than two days, which is a record even for DigiKey. It was like a surprise tiny Christmas - and truly tiny at that. Just take a look at some of our favourites!

In total, the PCB BOM was about 100 EUR, but this does not include a few small sensors that were out of stock, so it would be more along the lines of 120 EUR for a full set. For a device as crammed as Tap, however, this is about right, so it was expected.
Soldering this will presumably take one whole, focused day of work. That's nothing unusual, but the small components will make it quite careful and time-consuming.
I will absolutely have to make a timelapse of the soldering process or at least the placement of the components.
And definitely stick around for an upcoming video on Tap once it is all put together!
There will be a lot of features to show off, ranging from the ring of LEDs and how it can illuminate it, to the OLED screen, all the way back to the sound design and tapping and swiping based interfacing methods.
Discussions
Become a Hackaday.io Member
Create an account to leave a comment. Already have an account? Log In.