 Petteri Aimonen
My initial plan for the enclosure was just to order it 3D printed. Even home printed enclosures look nice enough, and commercial printers like HP Multijet Fusion give very nice looking results for affordable prices. The cost for the complete enclosure printed in HP MJF PA12 material is about 6 EUR in 10 pcs quantities. Very good.
But then in spring 2021 I hit an issue with another project of mine: HP MJF PA12 is only fire rated to UL94 HB. The IEC 61010-1 safety standard for measurement instruments requires enclosures to have a rating of UL94 V-1 or better.
There is an available 3D printing material PA2210FR with the required rating, and in spring the price seemed acceptable at around 12 EUR per enclosure. But now the price has ballooned to 30 EUR per enclosure, which is way too much for the price point I'm aiming for.
An alternative would be to either use a standard off-the-shelf enclosure, or just sell this without complying with the CE mark requirements. I do not want to do either of these.
I did some home tests for HP MJF PA12 material, and it appears that at 2 mm thickness it does meet the UL94 V-1 requirements, but my home tests are pretty unreliable and proper testing would cost more than I want to spend at this point.
For bigger volumes, the vacuum casting offered by PCBWay is an option also, but at 10 pcs quantities the quote I received was 40 EUR per enclosure.
So, time for plan B: silicone molds. Years ago I read Michal Zalewski's excellent Guerrilla guide to CNC machining, mold making, and resin casting. I've wanted to try it out as soon I just had some project that would benefit. I even built a vacuum pump and chamber out of an old fridge compressor and cooking pot a few years back, but didn't go further than that.
I've followed the guide quite closely. I made the mold using my CNC3020 out of SikaBlock M450 modelling board, bought from Modulor. It was a joy to machine, but has a slightly porous surface. I'm going to try some spray lacquer to make it smoother. I designed the "mold mold" so that I could cast two identical silicon molds out of that, and those placed together would yield the final part.
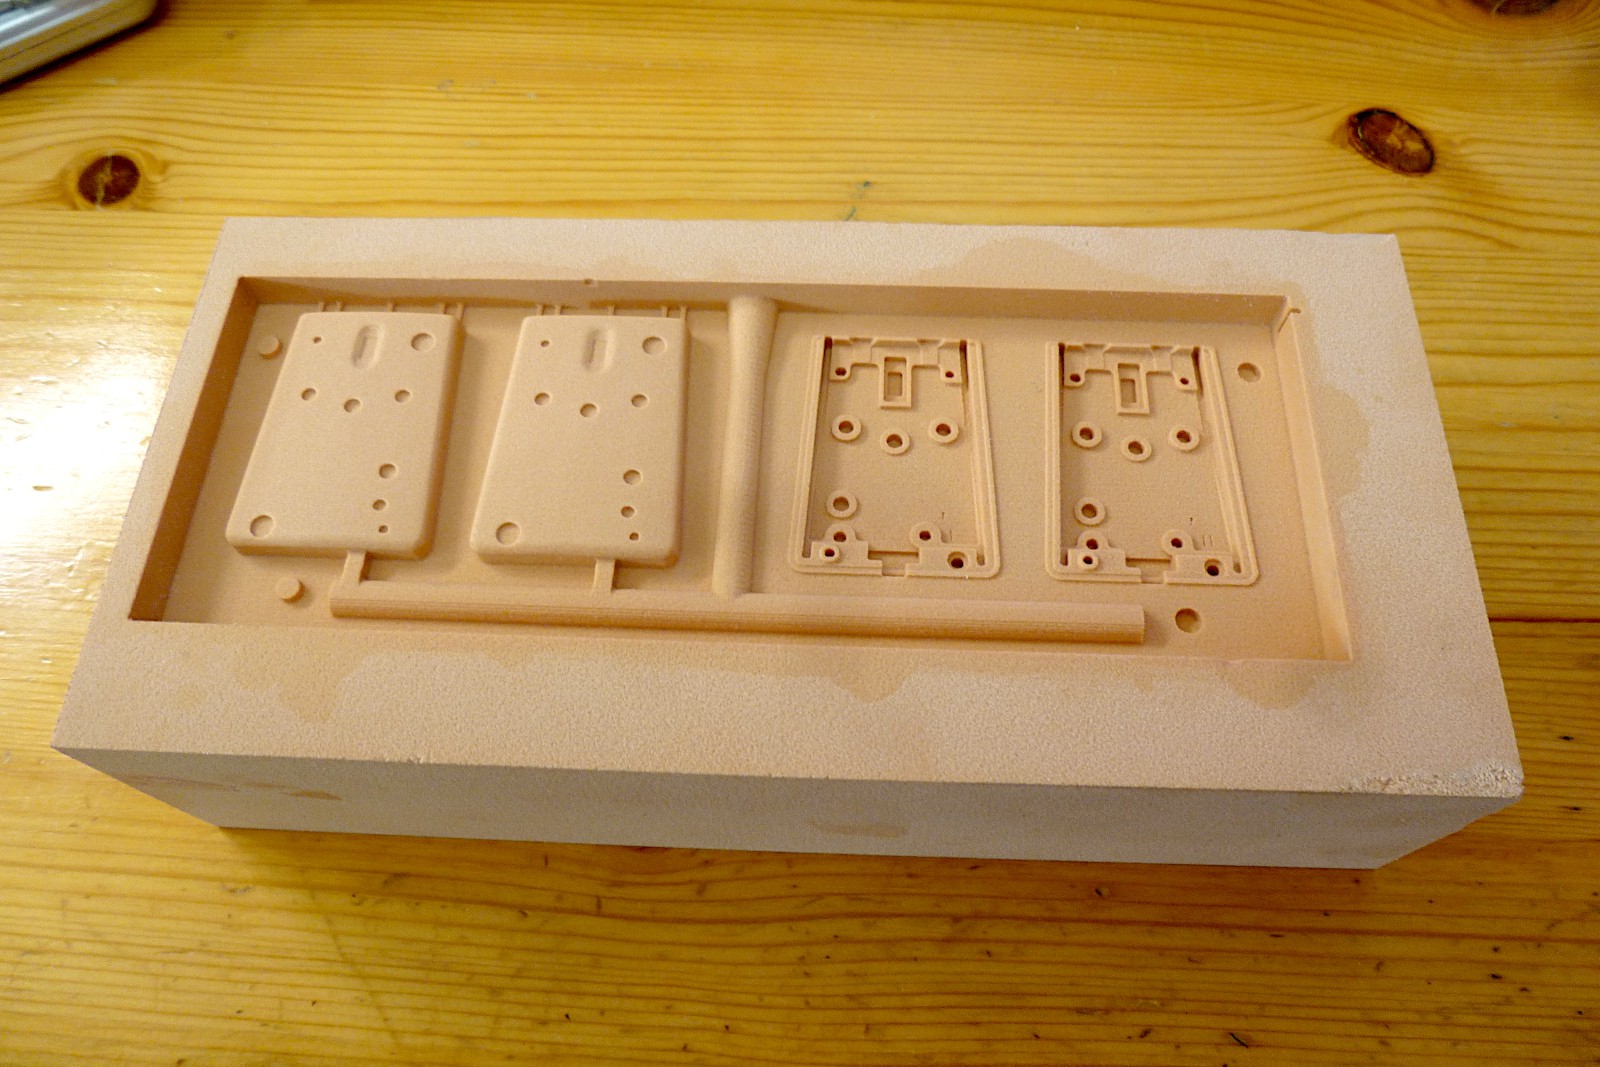
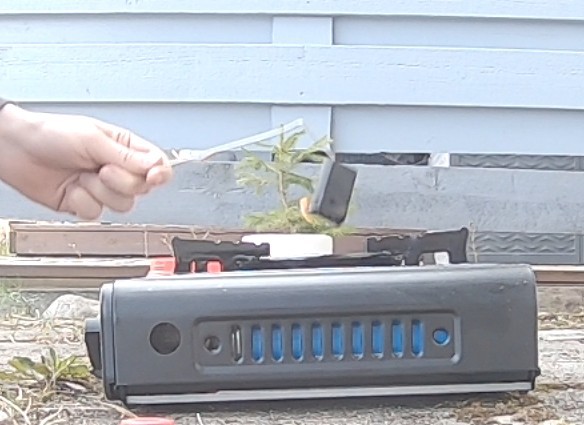
My part is not the easiest to cast because it requires a two-part mold and has quite intricate details that can easily trap air. The flame resistant TASK 7 resin I'm using also has a very short pot-life of 2.5 minutes. In my first tests, it started to harden before it could flow through to the upper parts of the molds.
I then switched to vacuum casting: the cooking pot lid has a convenient hole that I can pass a 5mm silicon hose through and into the round channel in the silicon mold. I clamp the hose shut while drawing vacuum to the pot. As soon as the resin is mixed, I put the end of the hose in the mixing jar and carefully let the vacuum draw the resin into the mold. One just has to be careful to keep the end of the hose submerged, otherwise air gets drawn in also.
As soon as the resin starts coming out of the air holes at the top, I let air into the vacuum chamber. This collapses any remaining low-pressure air bubbles to about 5% of their original size.
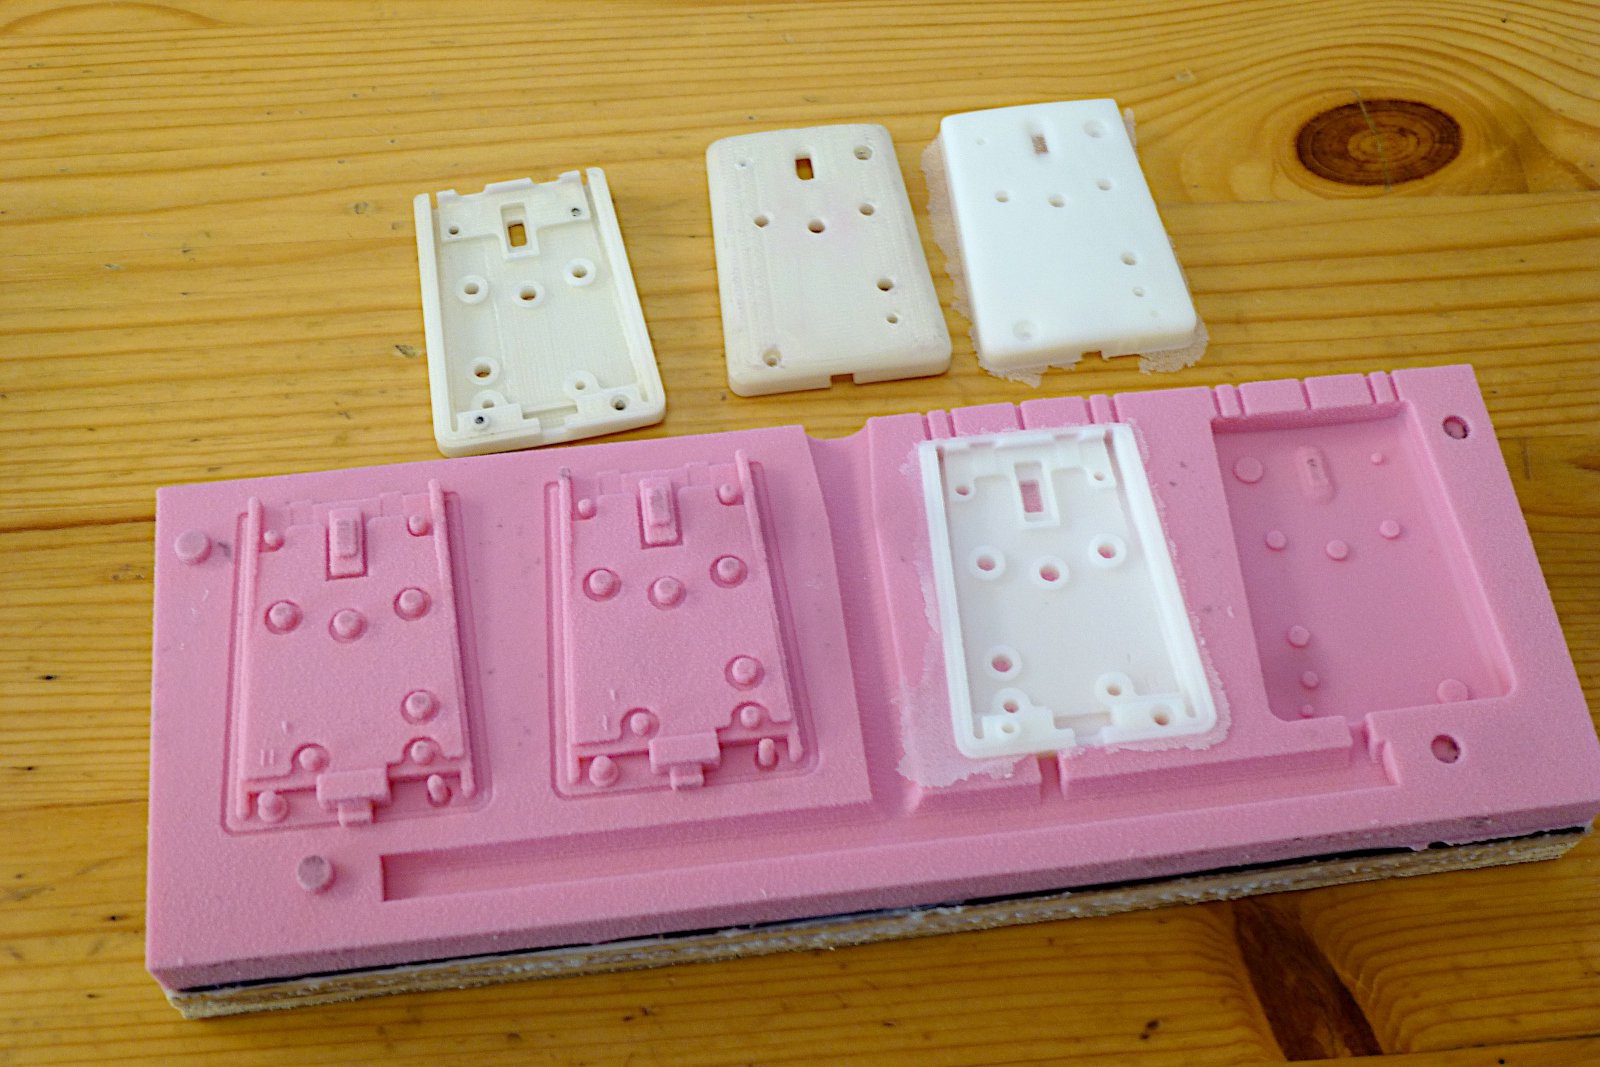
Above is two enclosure halves printed on Prusa i3 MK3S, and two made with vacuum casting. The surface is very nice, but I still need to work on the mold design to reduce the amount of cleaning needed. The dimensional accuracy is also better than 3D printing, so I can reduce the tolerances a bit for a better fit.
Discussions
Become a Hackaday.io Member
Create an account to leave a comment. Already have an account? Log In.