 Alastair Young
The first cuts showed that I really, really needed an integrated STOP. The spindle switches are now awkward to reach behind the monitor, and don't stop the steppers, and the stop in LinuxCNC doesn't stop the spindle. Not safe.
So I have added a contactor, a three button start/stop/estop box and a couple of relays wired thus:
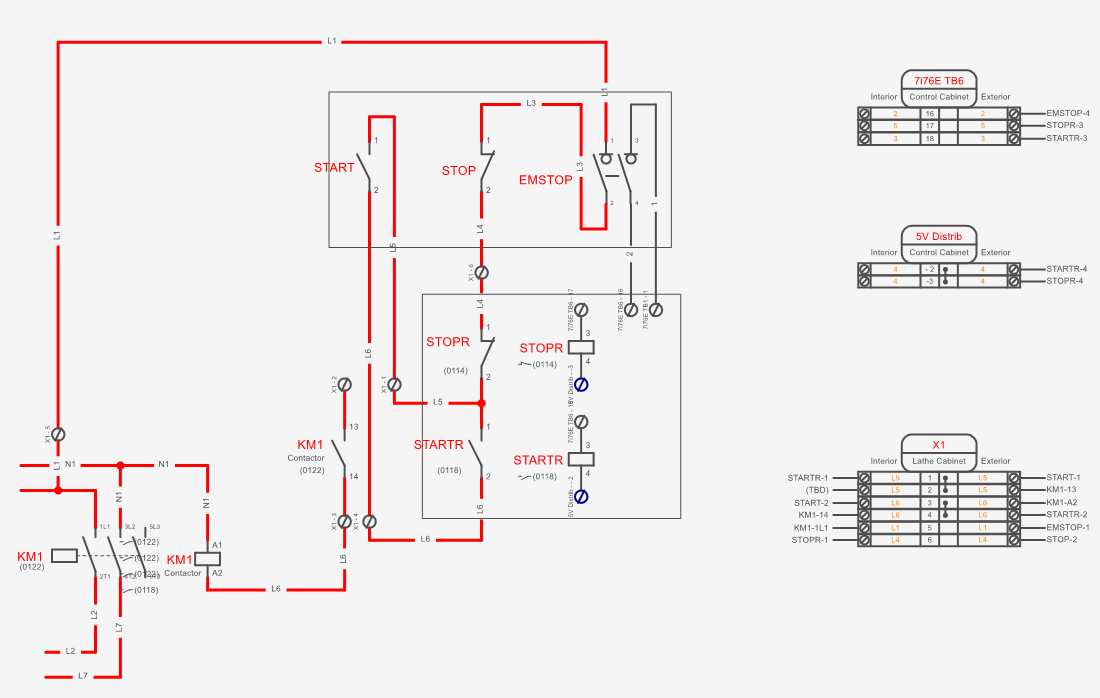
The relays are in the control cabinet, and the contactor is in the Shoptask panel along with a terminal block to wire it together. The operating theory is based on the use of the manual buttons which are wired with 110V along with the contactor coil and the auxiliary contacts on the contactor. In this mode a momentary push of the START button energizes the contactor which then latches on. A momentary push of the STOP button breaks the circuit and the contactor unlatches. Likewise with Estop. The two relays mimic the STOP and STOP buttons, the STOPR being in series and the STARTR in parallel. A second switch in the estop goes back to the mesa card and runs at 24V field power. HAL is set to set to energize the relays momentarily when the spindle enables and disables, and will also energize the STOPR relay when the machine is disabled. In this way the estop in LinuxCNC disables the spindle, and the manual estop triggers the LinuxCNC estop. When the machine is enabled but the spindle is disabled, the manual buttons can still start/stop the spindle (without LinuxCNC knowing), likewise when the controller is plugged in but powered down (or LinuxCNC not running). For times when the controller is unplugged I have a DIN socket mounted on the Shoptask cabinet to plug the loose cable in with two pins wired together to simulate the close STOPR relay. Manual use of the machine is thus maintained. The output from the contactor goes to the existing spindle buttons to select spindle and direction.
The HAL code for this is here.
On the Pi power side, I used some more of the 18G 4 core cable to run the 5V up to the Pi and monitor, including an inline switch for Pi bootup. Initially I just used two wires keeping the other two as a spare, but found I was dropping over 0.4V which was bringing up a low voltage warning on the Pi. So now the monitor has its own pair and the drop is only 0.2V, and I have tweaked the power supply up to 5.2V. The Mesa card spec says it is good to 5.5V so no worries there.
A weird issue with Pi power and cheap USB hubs prevented the Pi from booting, but I swapped out the hub with a different one to solve that.
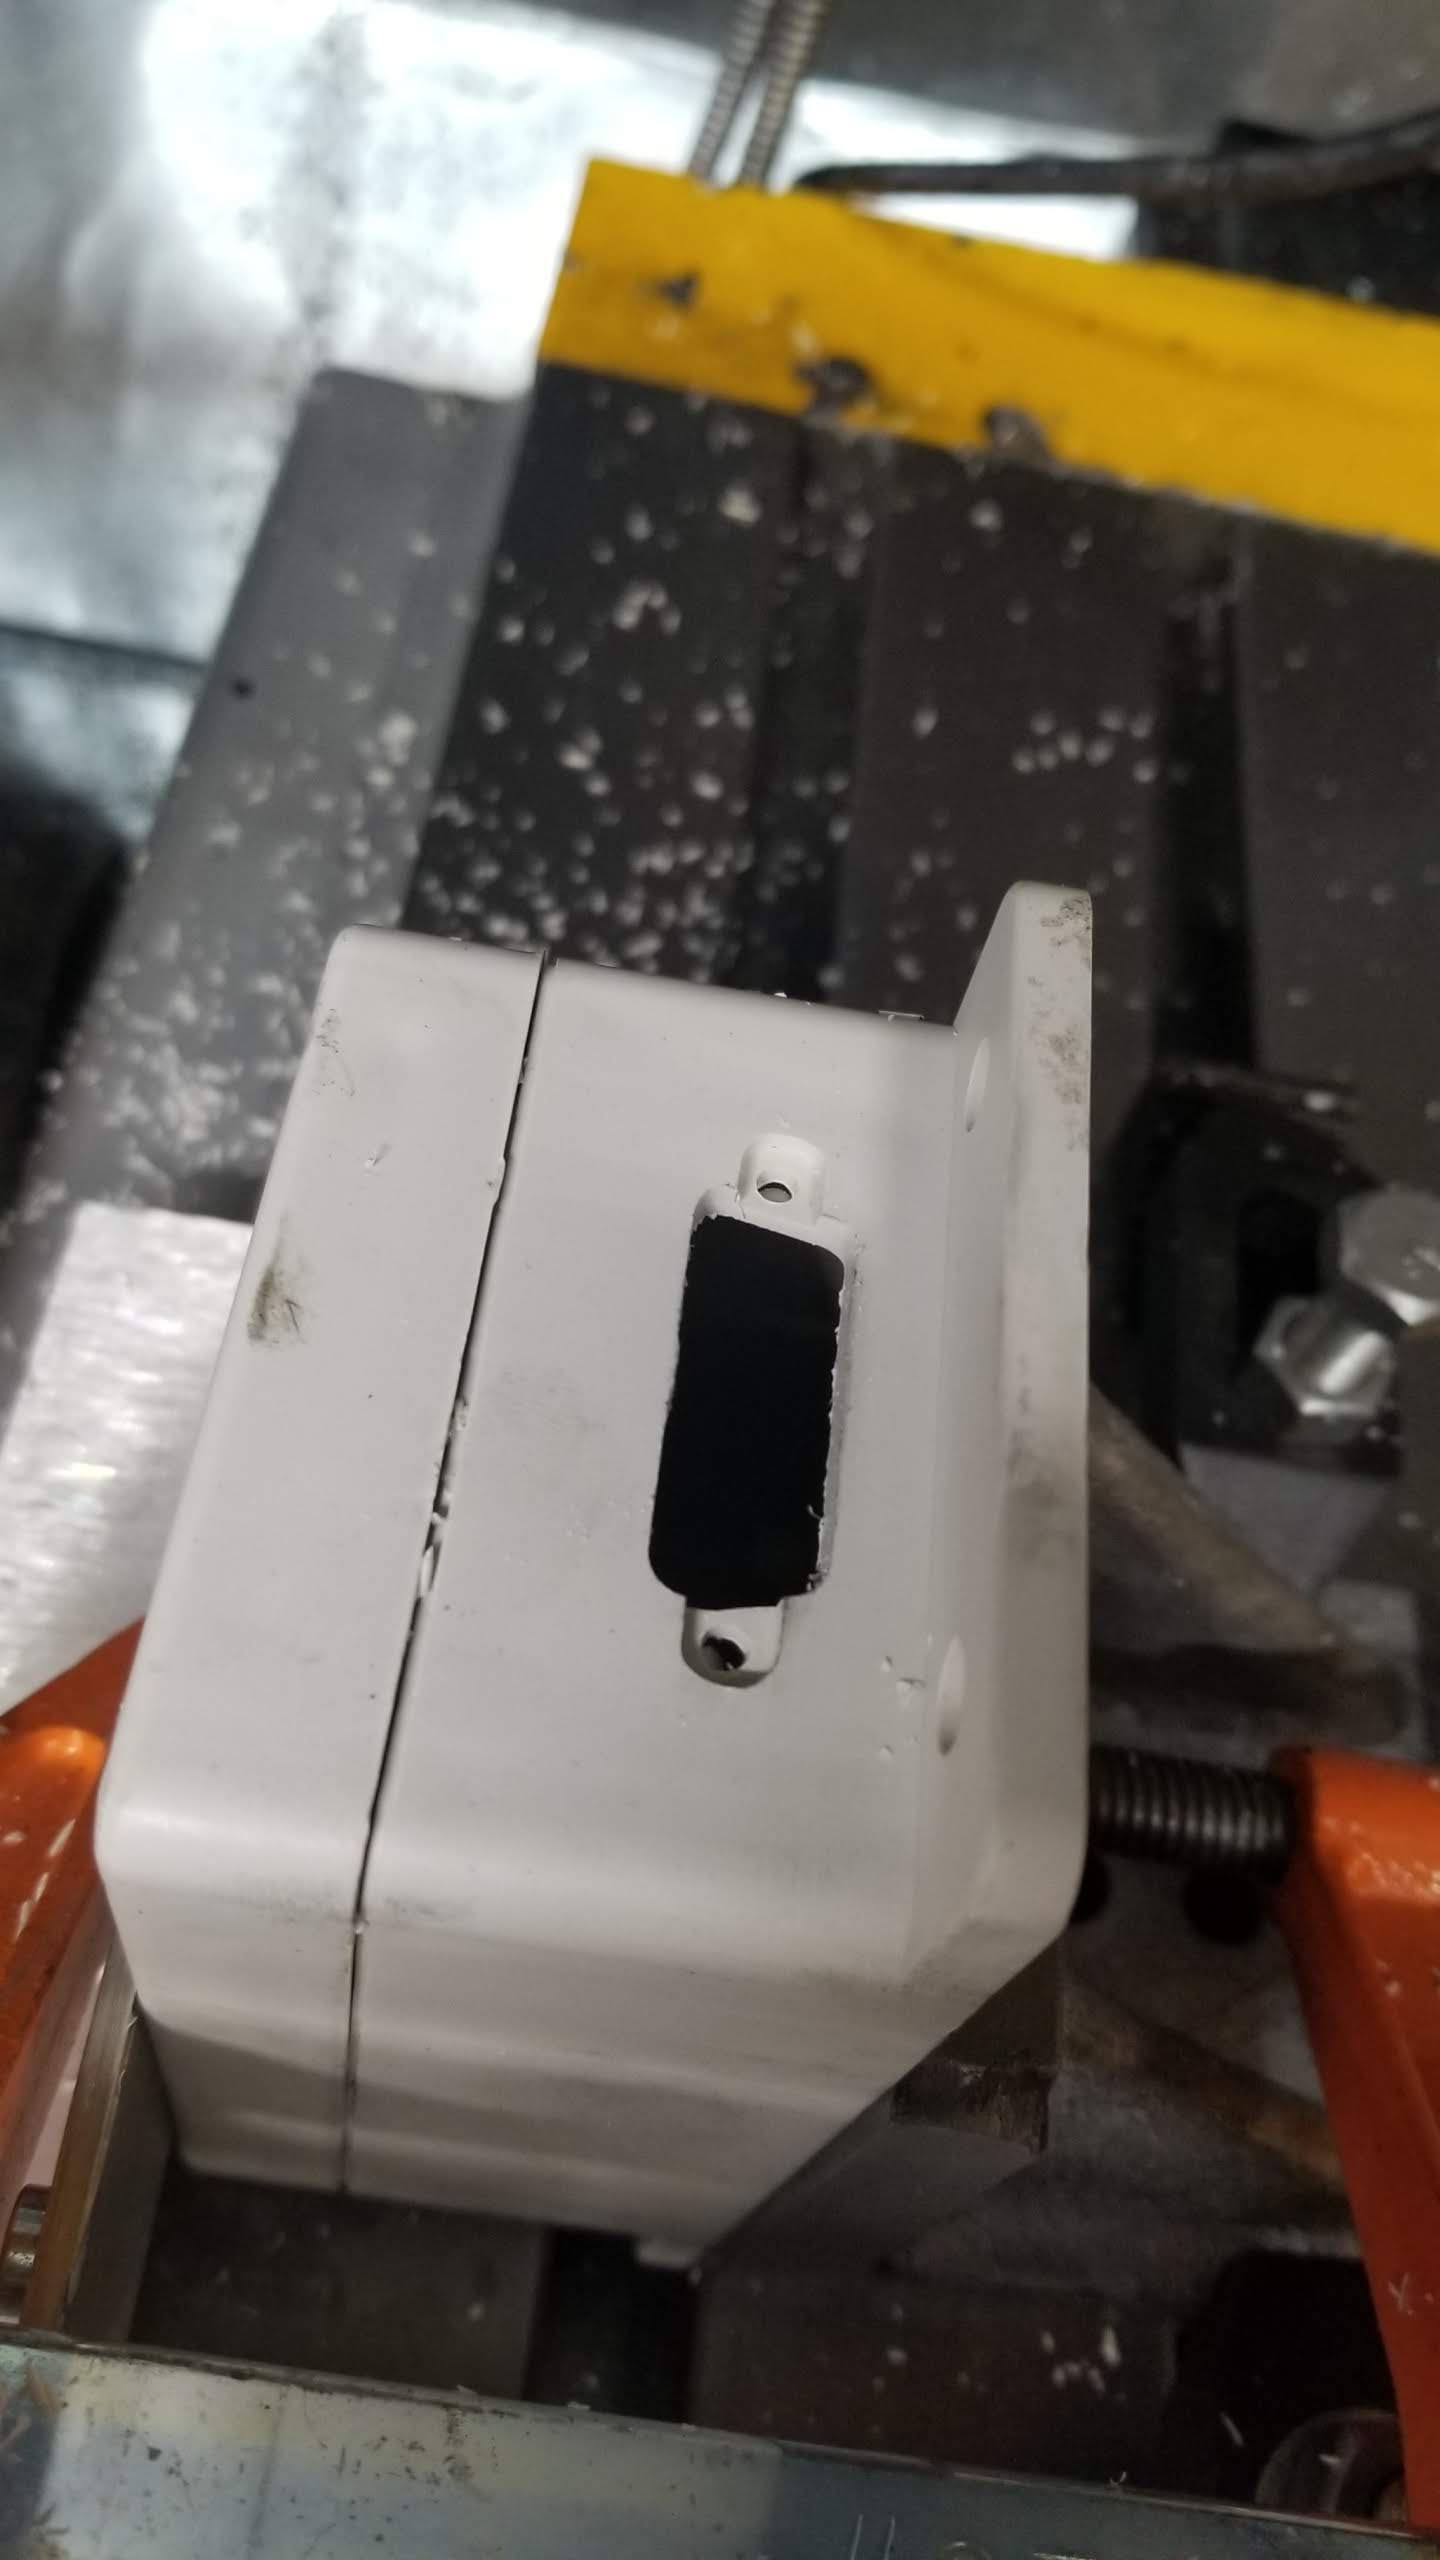
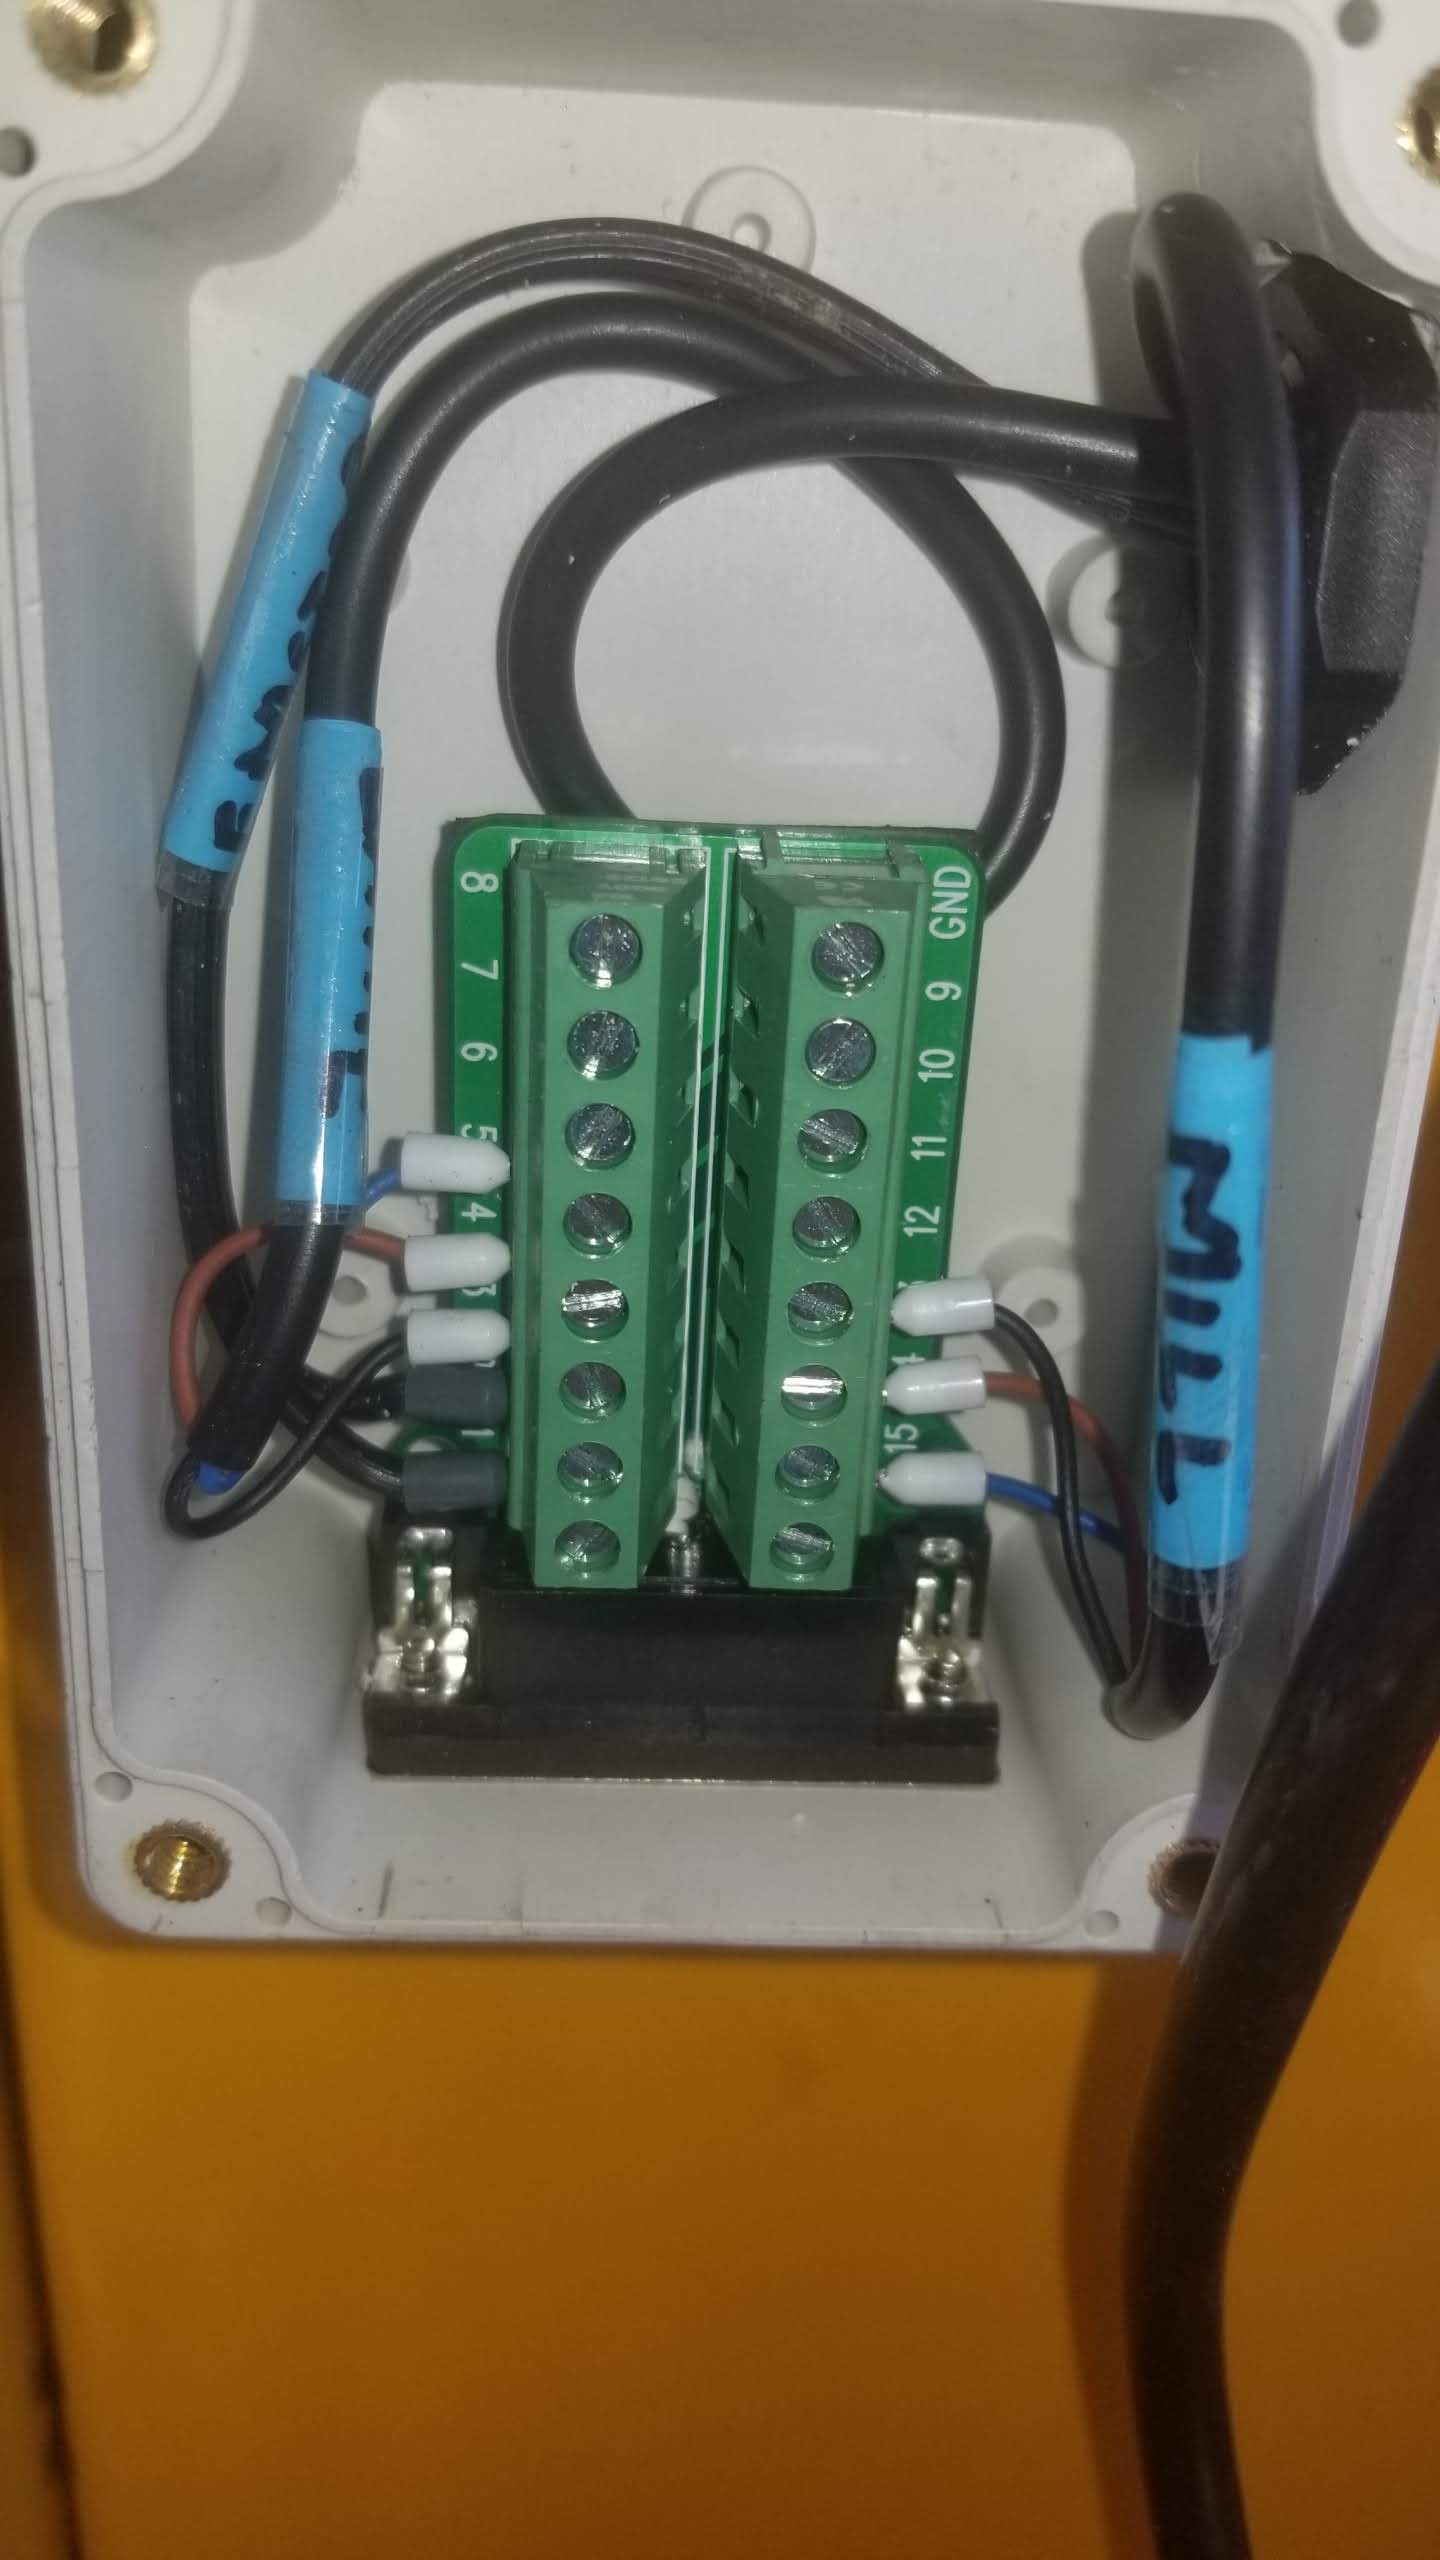
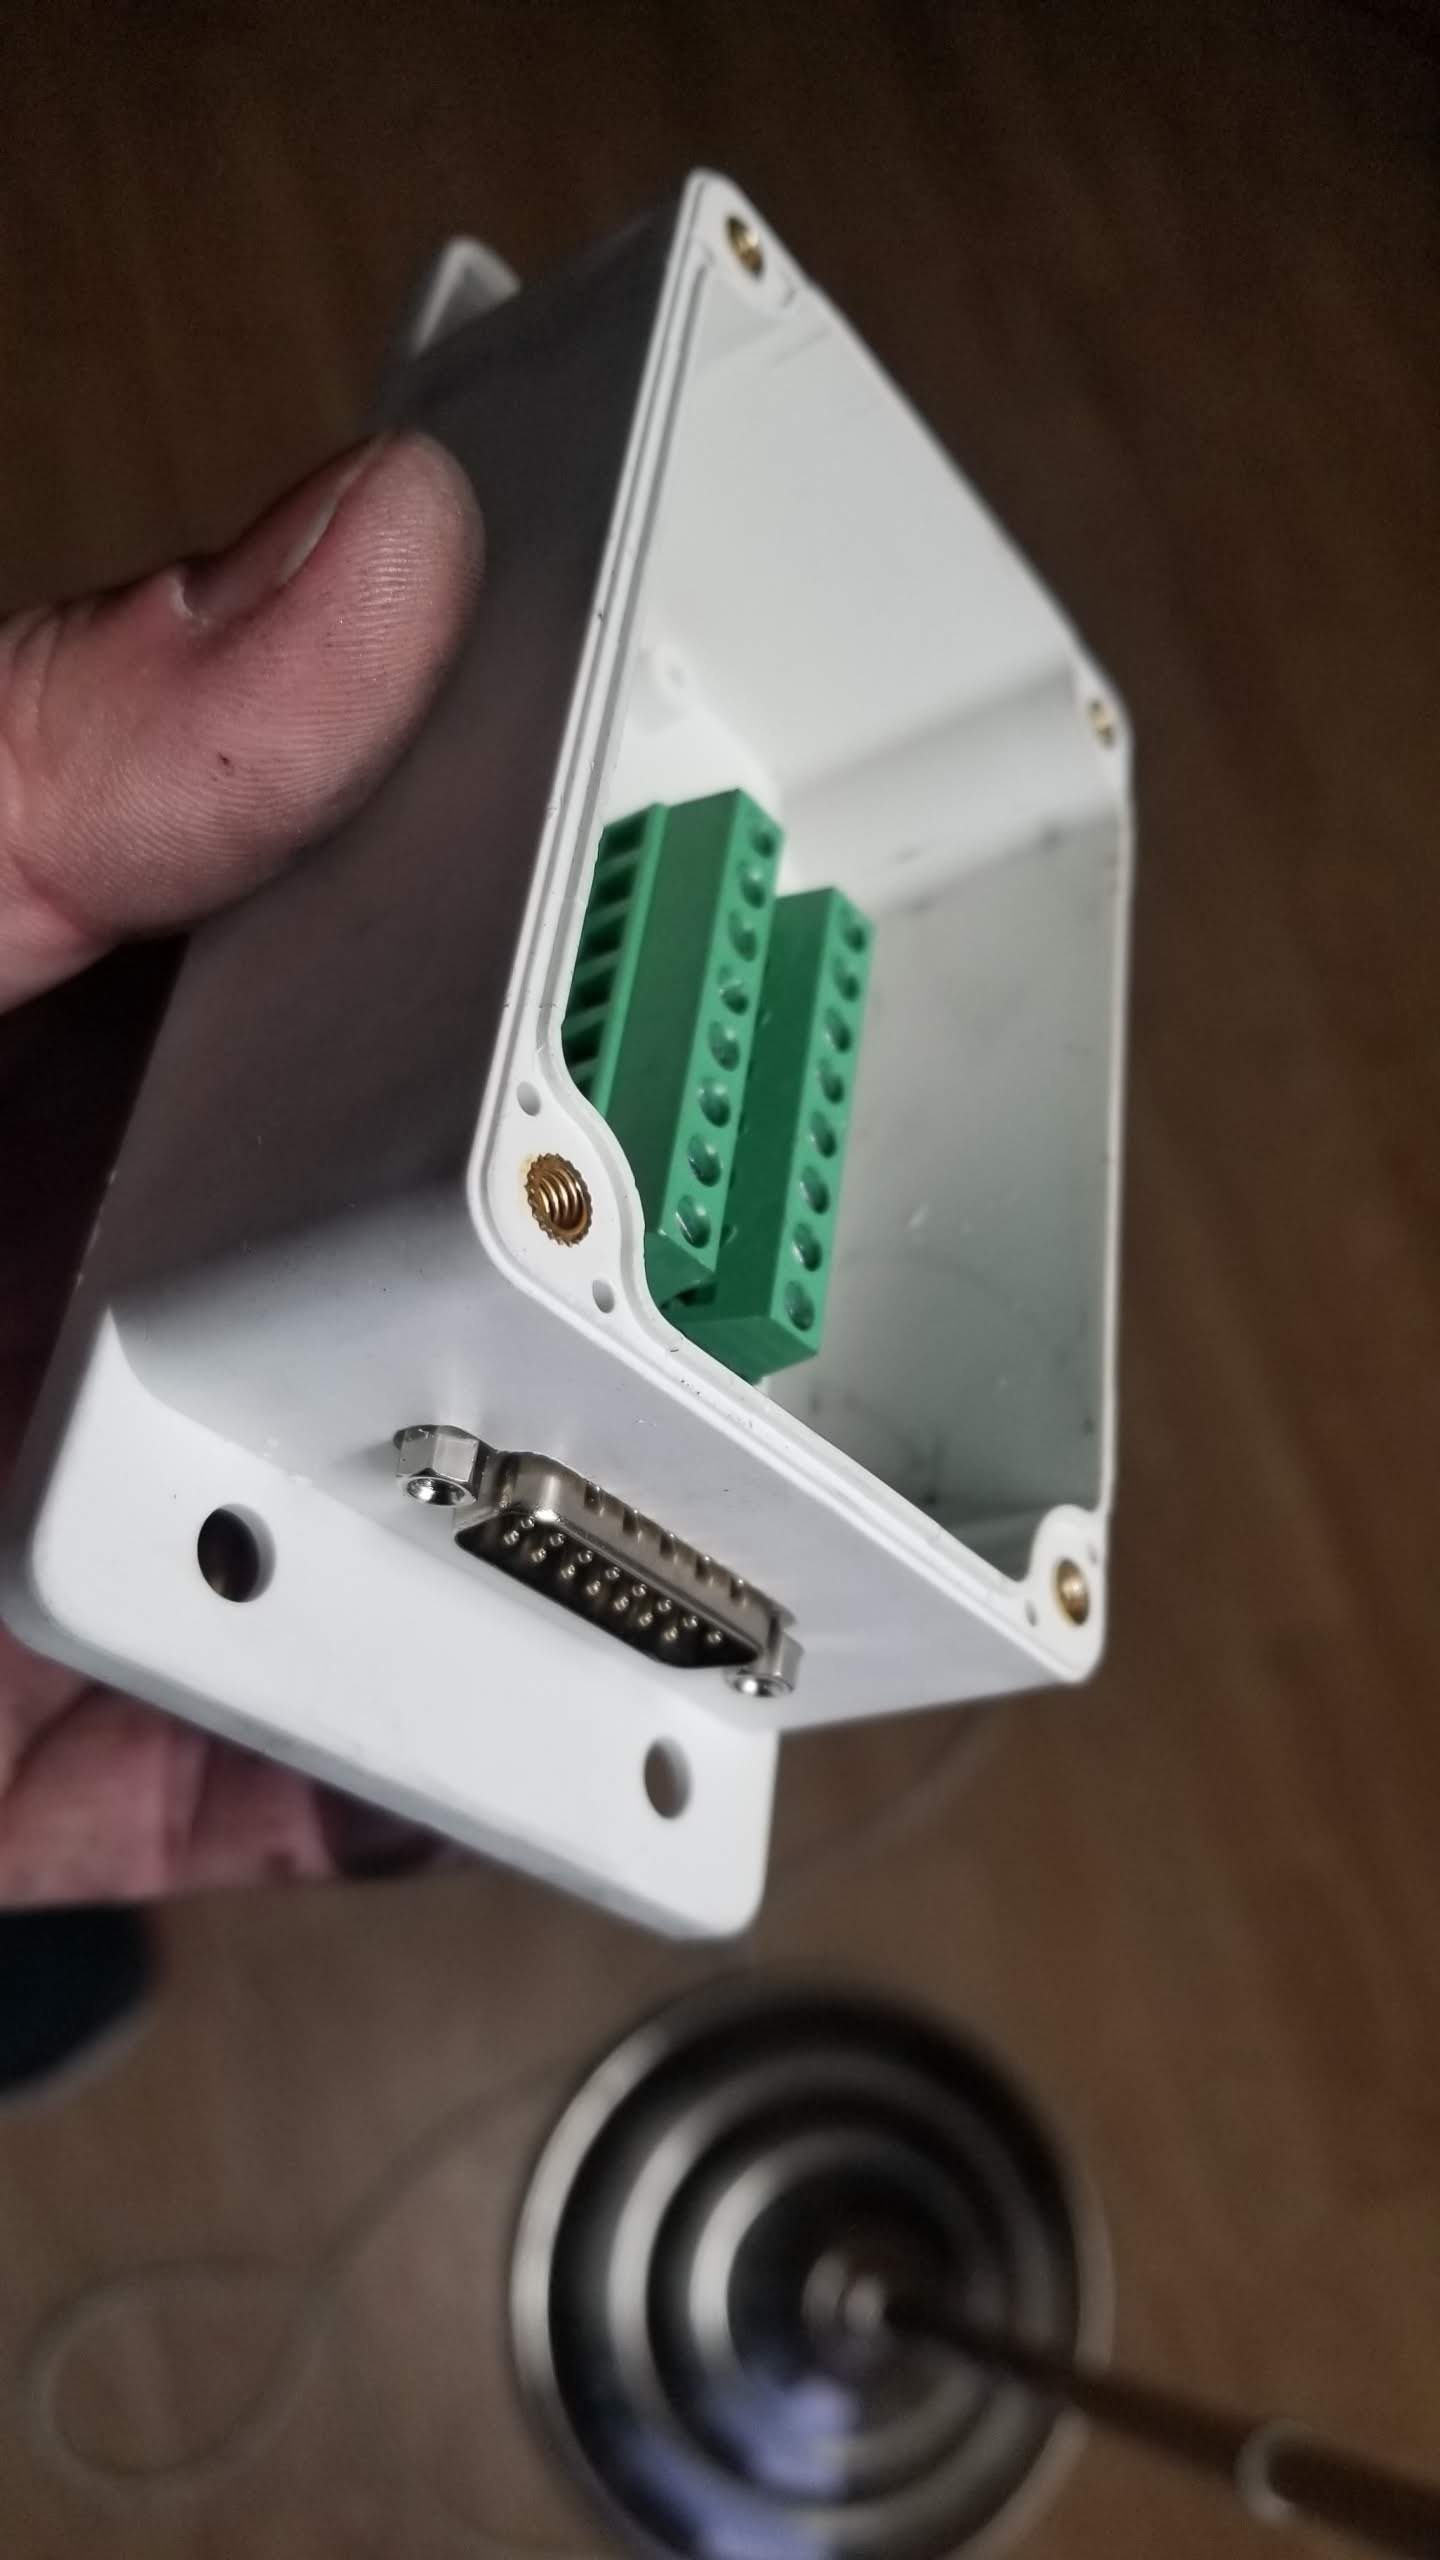
Low voltage communications are now handled with DB15 breakout. So far this has the estop and spindle pulse encoders running through it. It is wired ready for the lathe quadrature encoder and coolant solenoid. Much fun was had having my new CNC mill make a DB15 hole in the plastic box.
Discussions
Become a Hackaday.io Member
Create an account to leave a comment. Already have an account? Log In.