 jdelbe
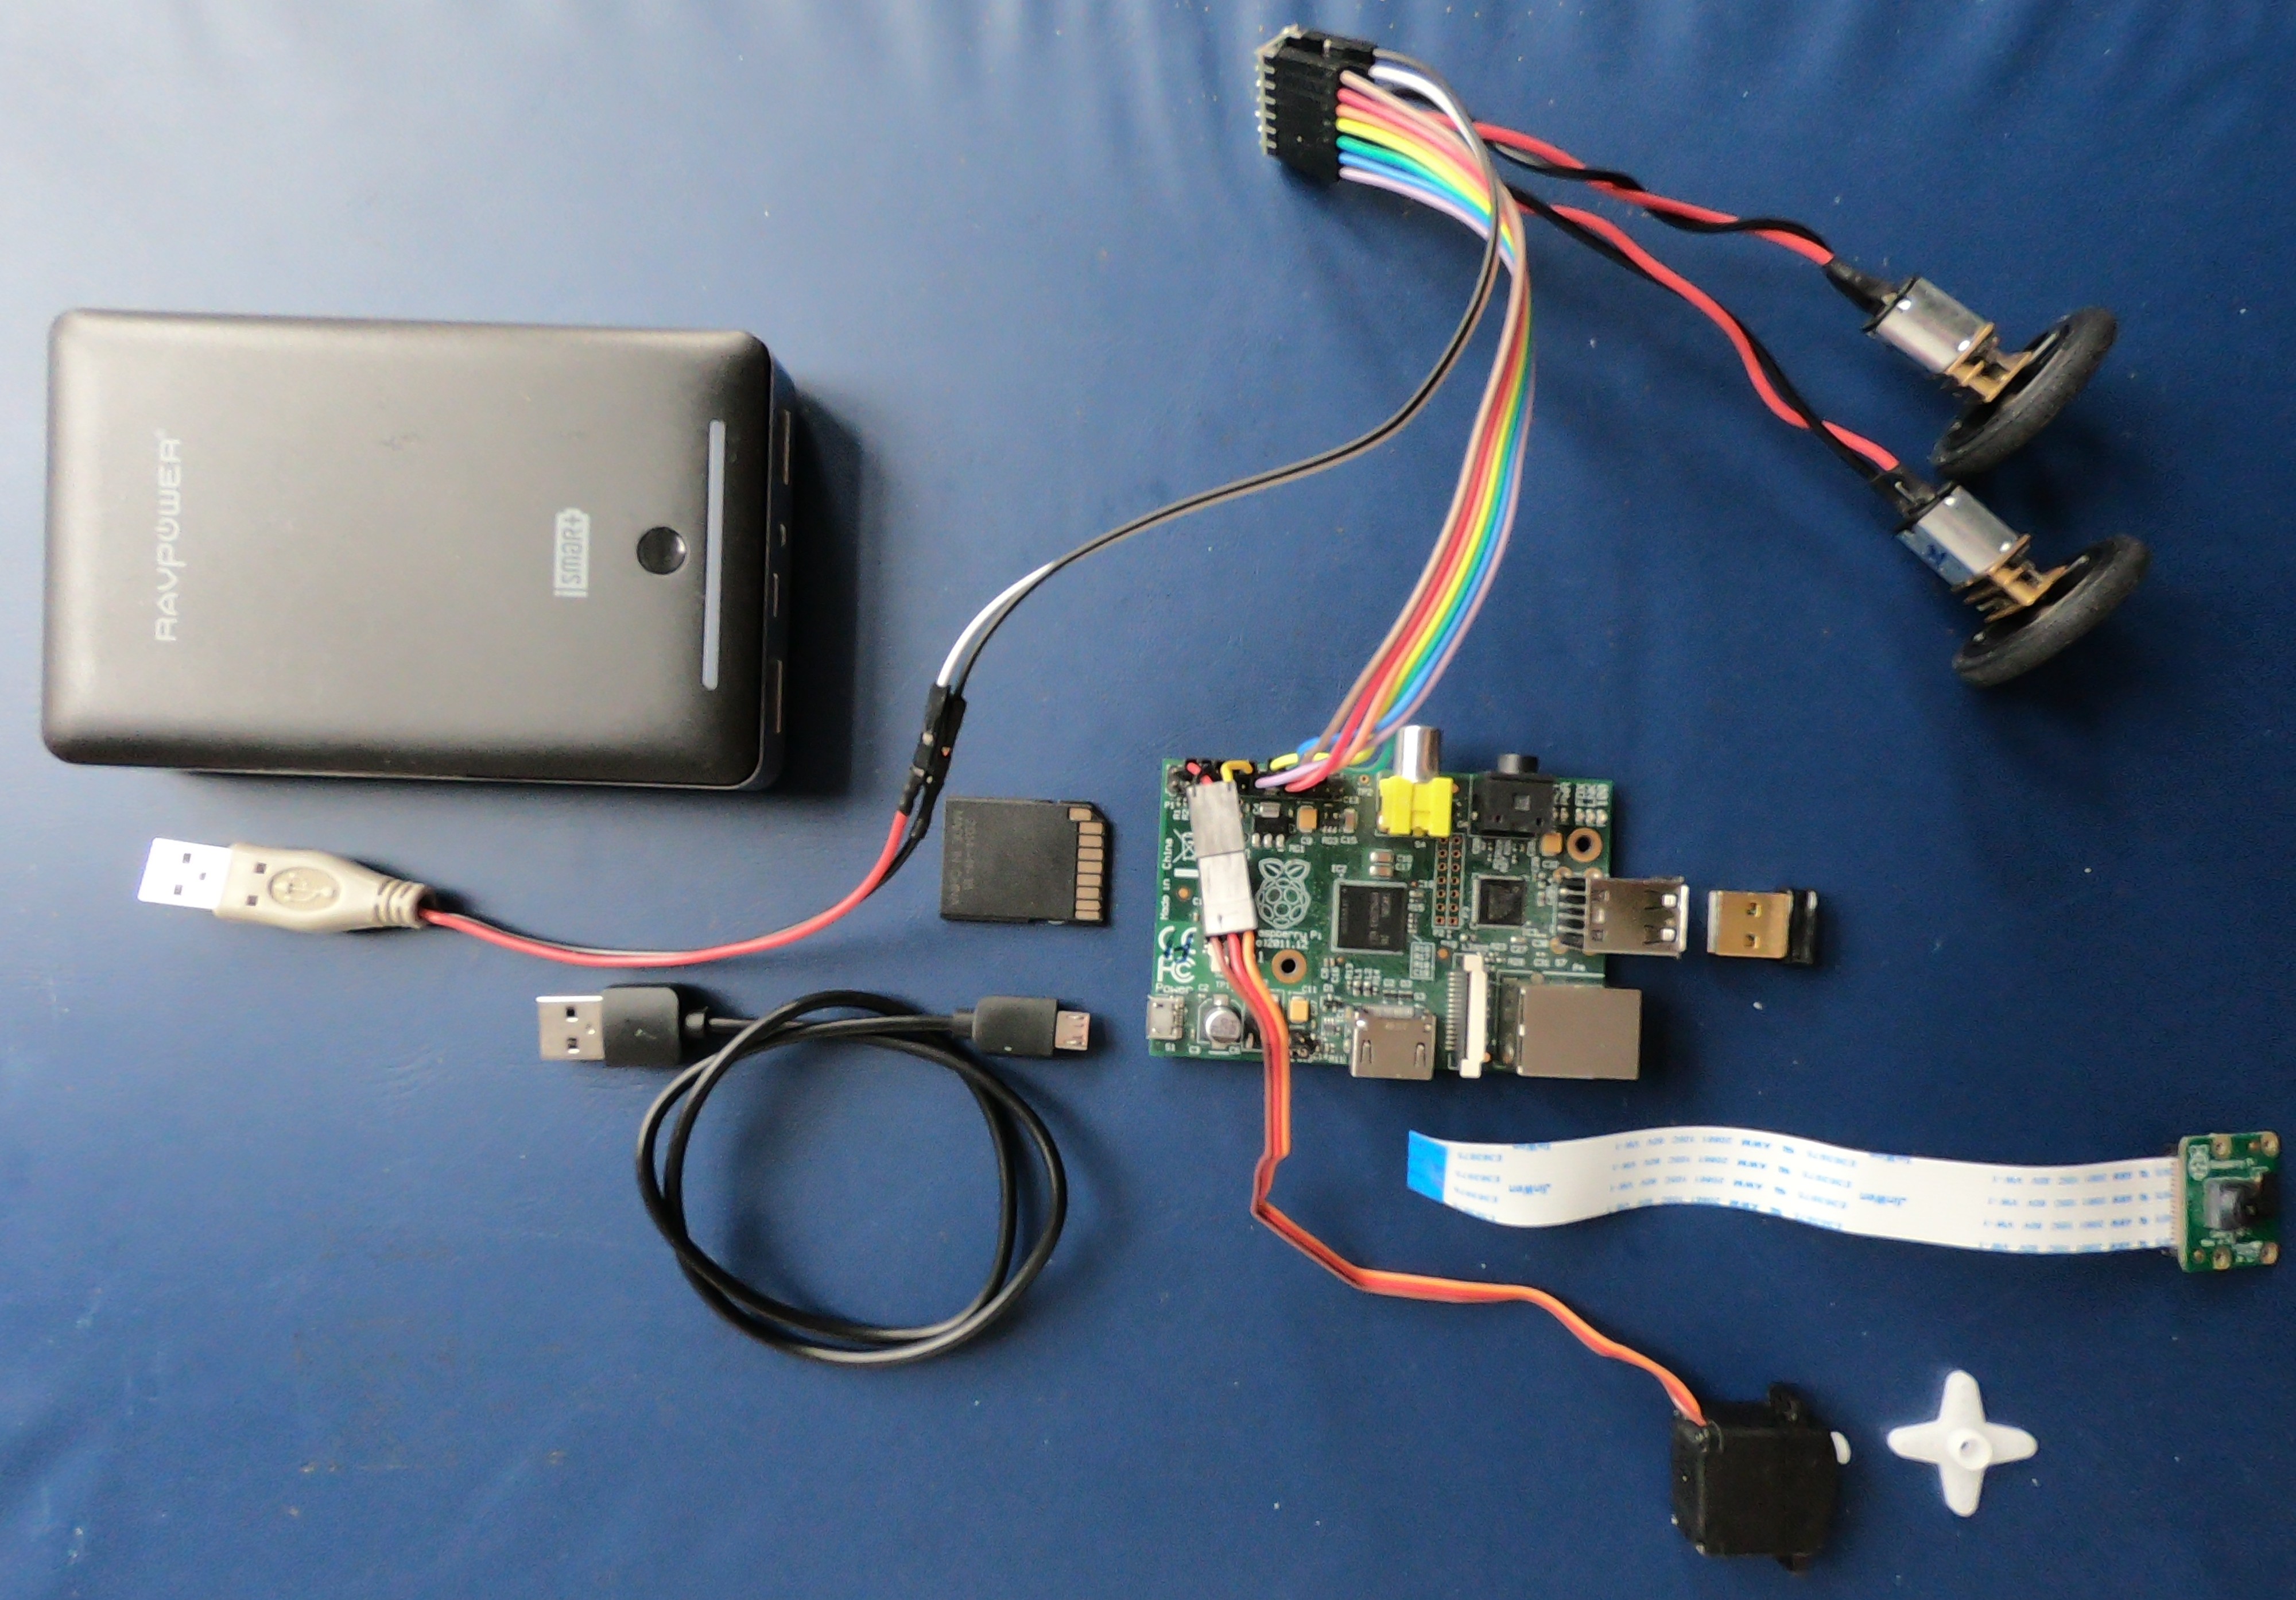
Component selection
1. Raspberry Pi
This project started because I absolutely wanted to make use of something I had lying around for some time: a Raspberry Pi 1 Model B (with a whopping 512MB of RAM !!). This was great a few years ago, though it lacked wireless connectivity.
Nowadays a Pi Zero W would probably replace it perfectly and make the whole build much smaller.
2. Micro motors + driver
Pololu has an extended choice of micro brushed DC motors. I had determined that I wanted the 100:1 version, meaning enough torque to carry a real payload (speed was not so much a priority). I even took the extended shaft option for encoders, since I wanted room for potential evolution.
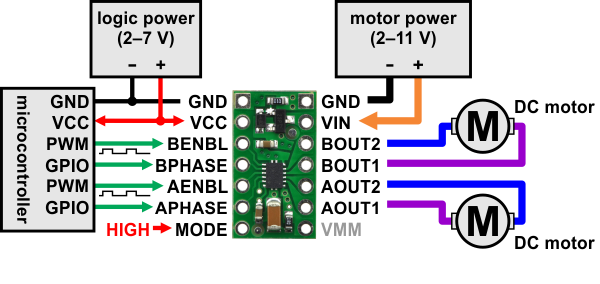
The DRV8835 page has all the information needed. It is perfect for the selected motors and supports a simple differential drive mode that I wanted. It also states "built-in protection against reverse-voltage, under-voltage, over-current, and over-temperature", so I did not need to add important safety features myself.
3. Power Bank
To power everything up, I opted for a convenient and standard USB power bank. I was able to find one with dual output: One is rated 2.1A max, plenty enough for the Raspberry Pi, the other 2.4A. This covers exactly the continuous 2 x 1.2A per channel that the motor driver can deliver. It does not cover the 2 x 1.5A peak it can reach, but in practice this has been good enough.
4. Camera + micro servomotor
While deciding to get a an embedded camera for the robot, I did not know exactly what I would do with it (video streaming? image processing?). Having no quality-vs-speed criteria yet, and because I definitely wanted good software compatibility from the start, the official camera module from the Raspberry Pi Foundation seemed like the natural choice.
The last component is a simple and standard 5V-compatible analog micro servo, directly power by the Raspberry Pi. It provides the tilt for the camera, thus avoiding any blind spot when teleoperating.
Wiring
1. Preparation
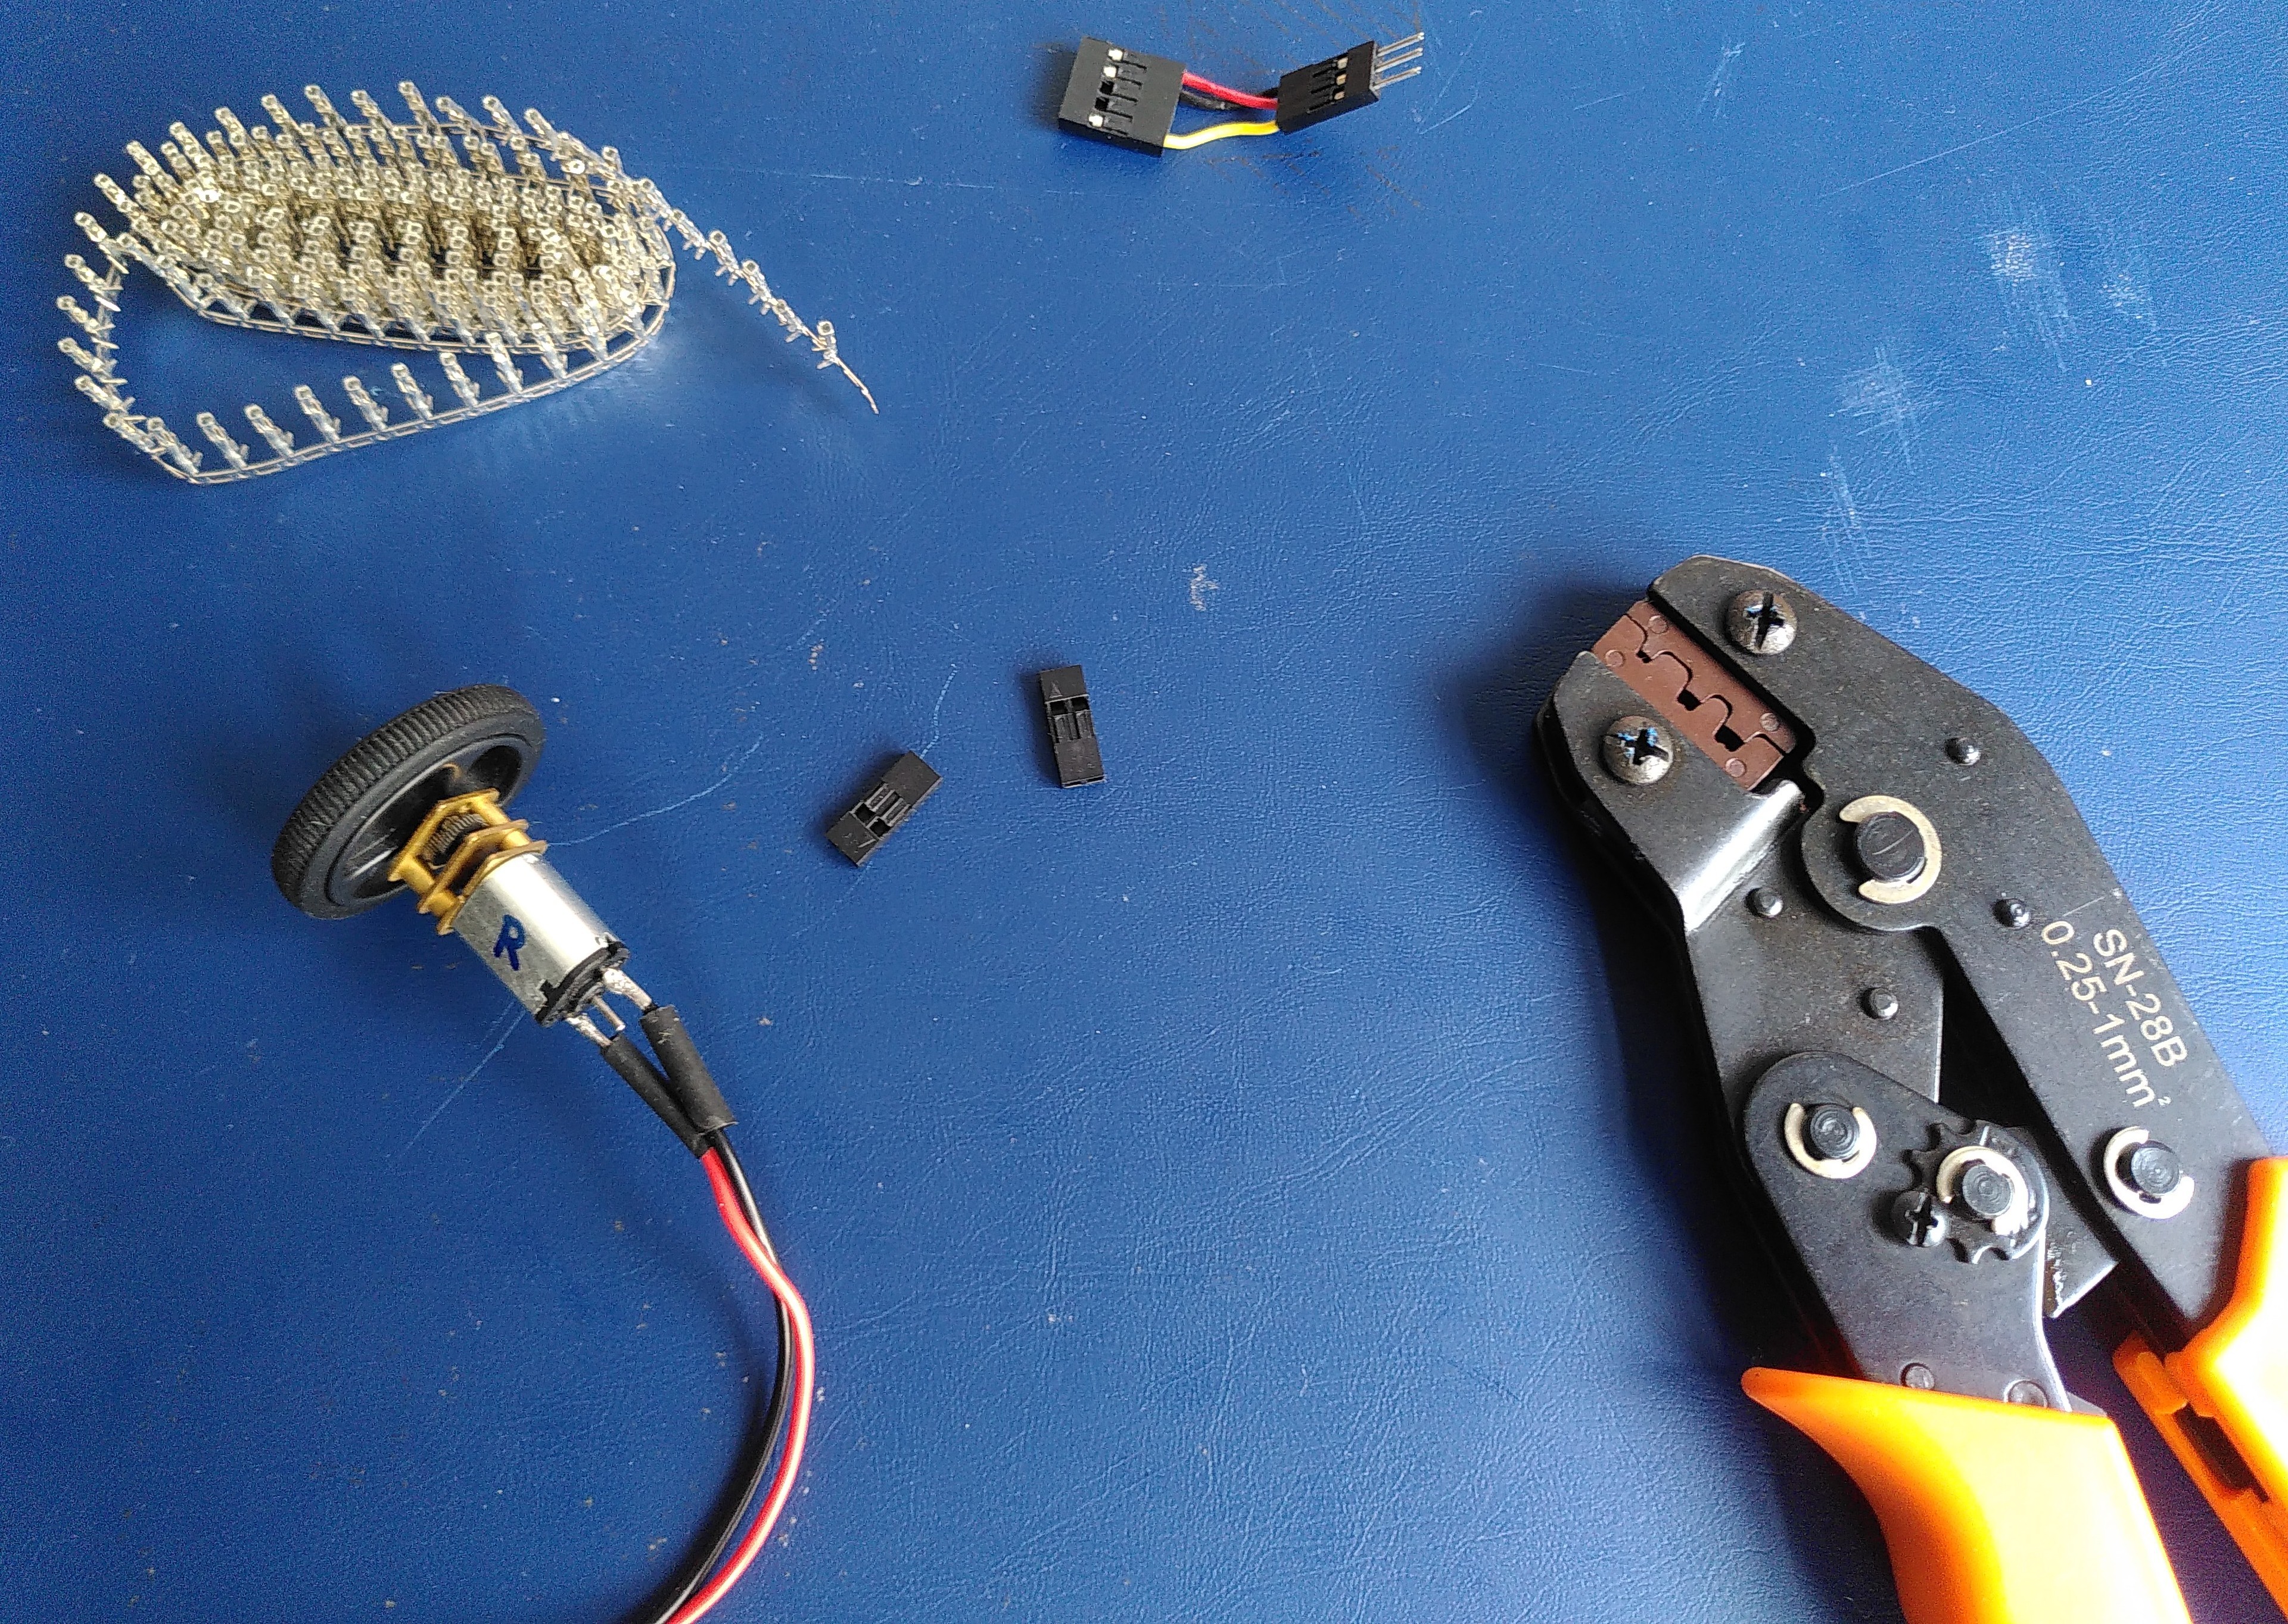
I try to avoid soldering whenever possible, hence making Dupont connectors and crimping pliers my first choice.
This GPIO pinout website is very complete when it comes to the Raspberry Pi, and the truth table and schematics of the motor driver are on its product page.
2. Putting it all together
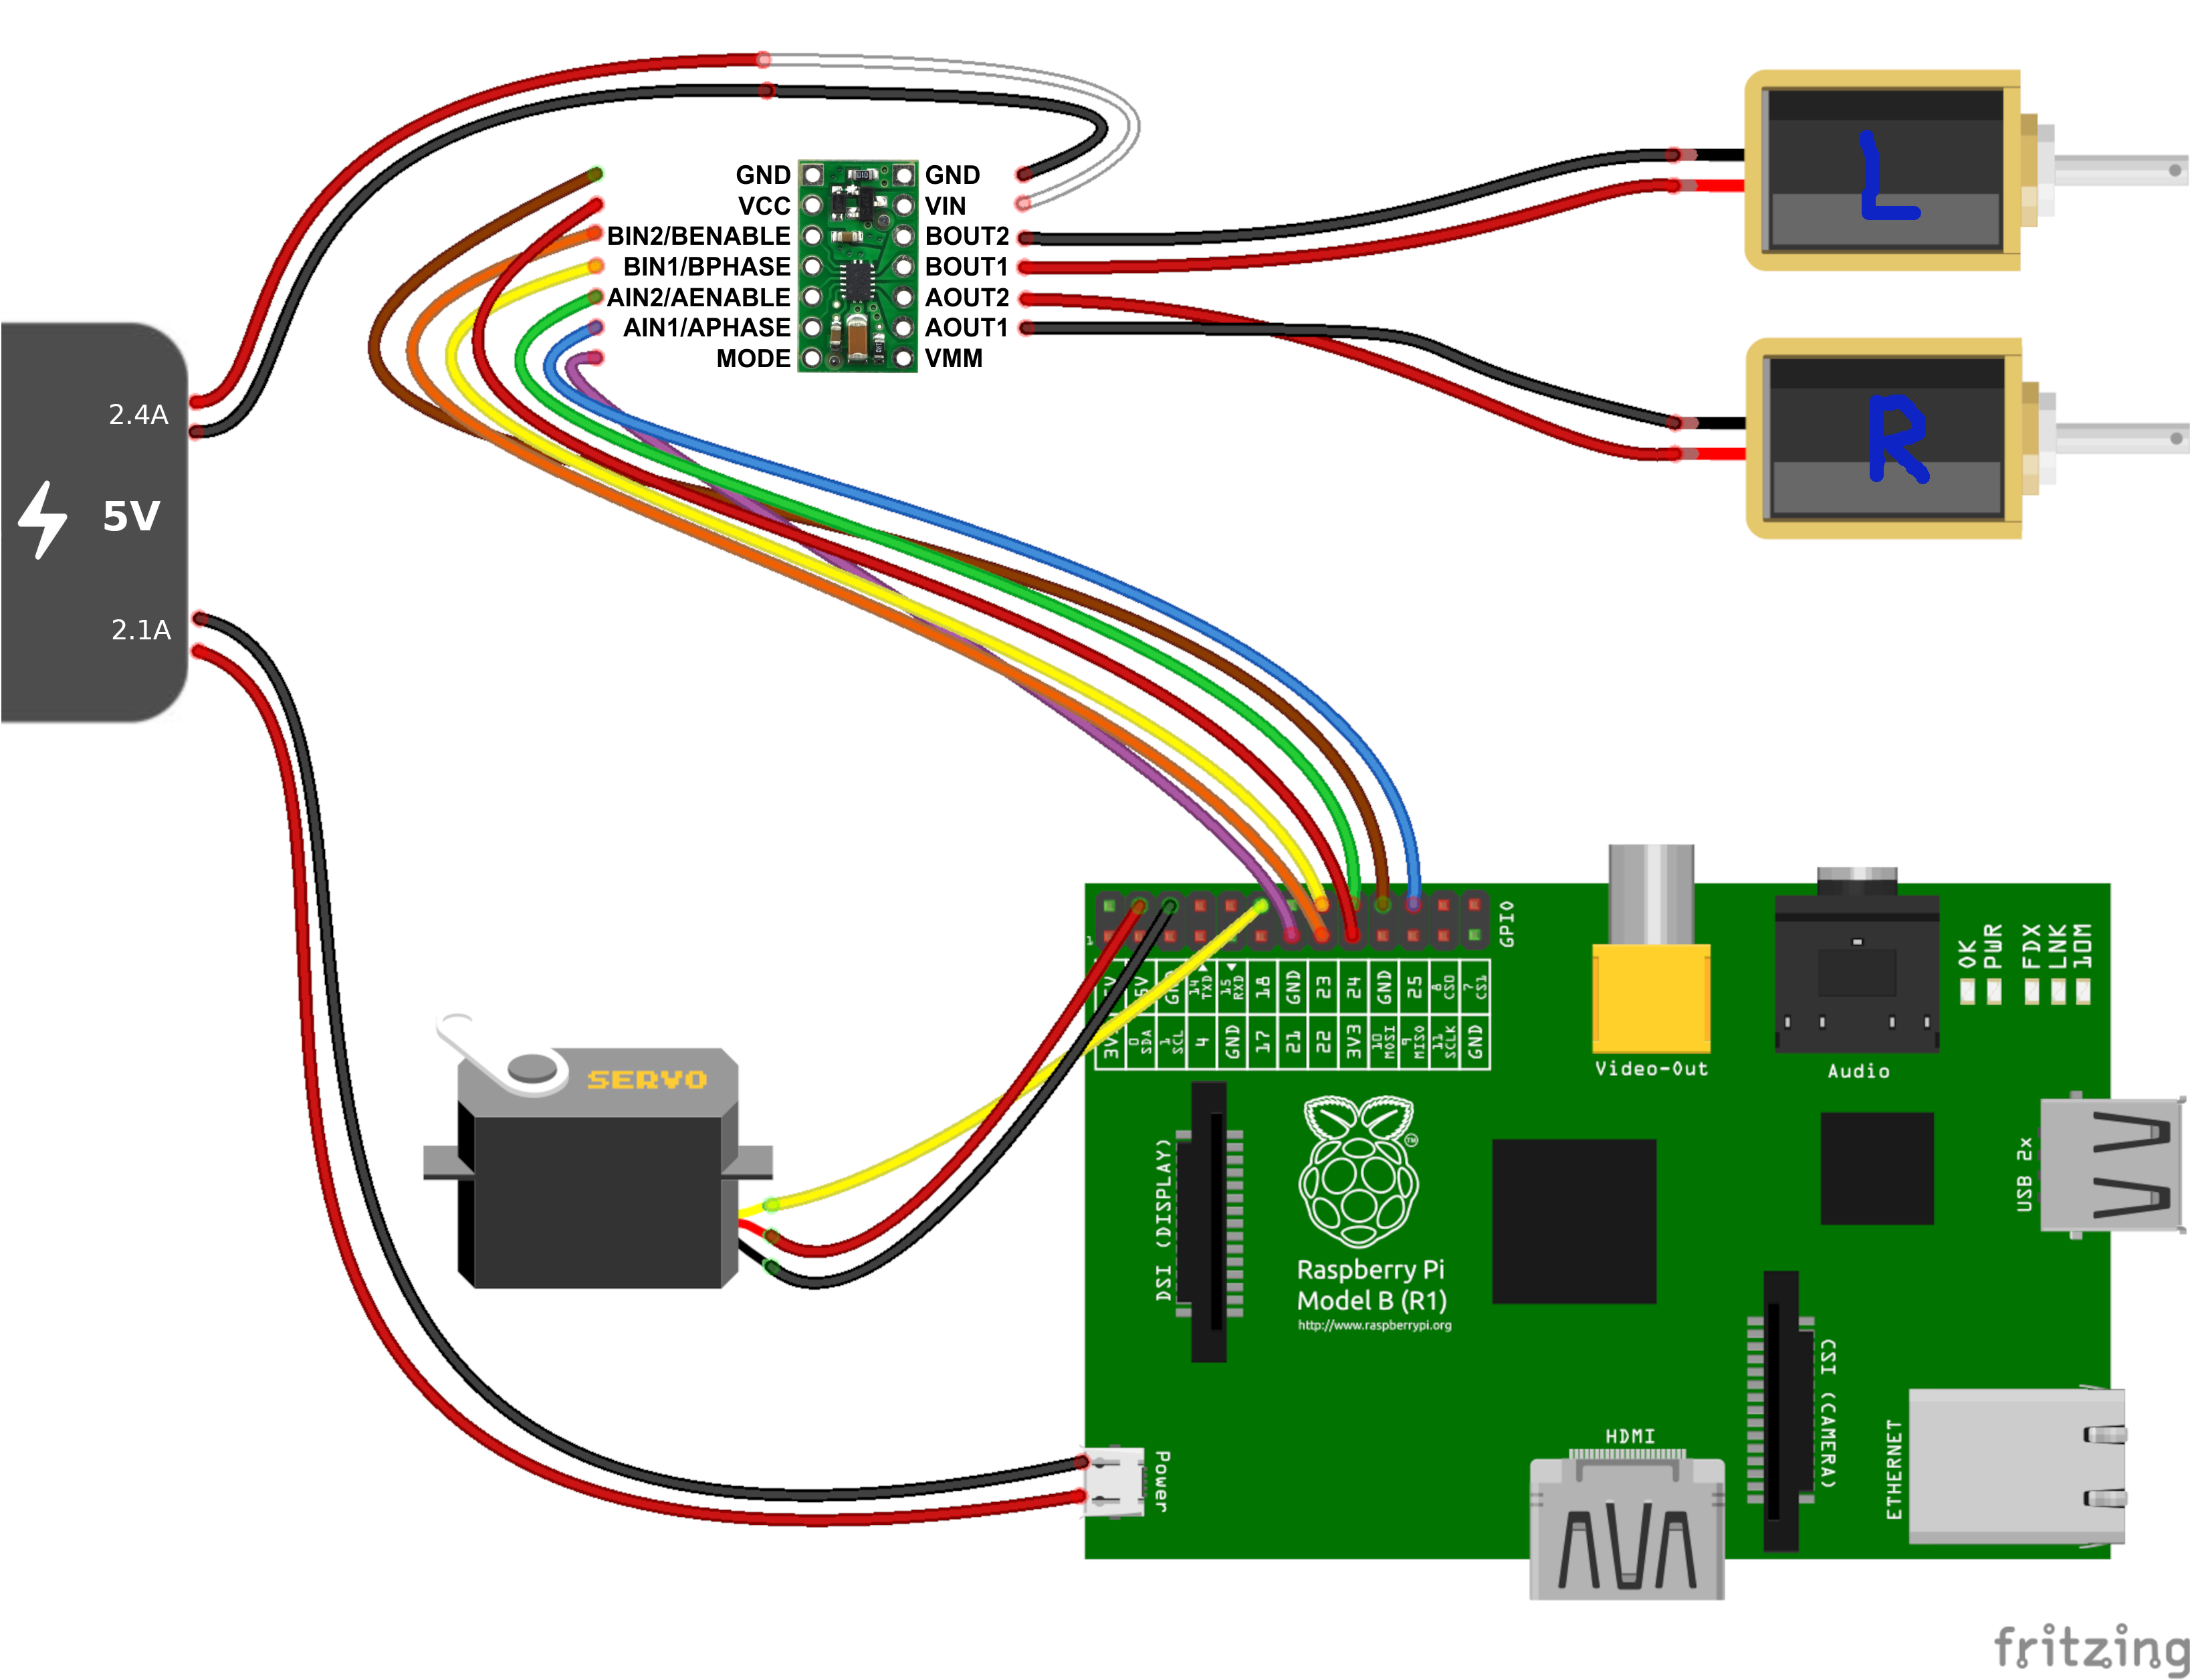
The complete wiring diagram:
And the result in action:
Discussions
Become a Hackaday.io Member
Create an account to leave a comment. Already have an account? Log In.