 Jefferson Bueno
The article is being published in collaboration with JLCPCB. It is one of the most experienced PCB manufacturers with more than a decade in the field of PCB prototype and fabrication, they are committed to meeting the needs of our customers from different industries in terms of quality, delivery, cost-effectiveness and any other demanding requests.
Introduction
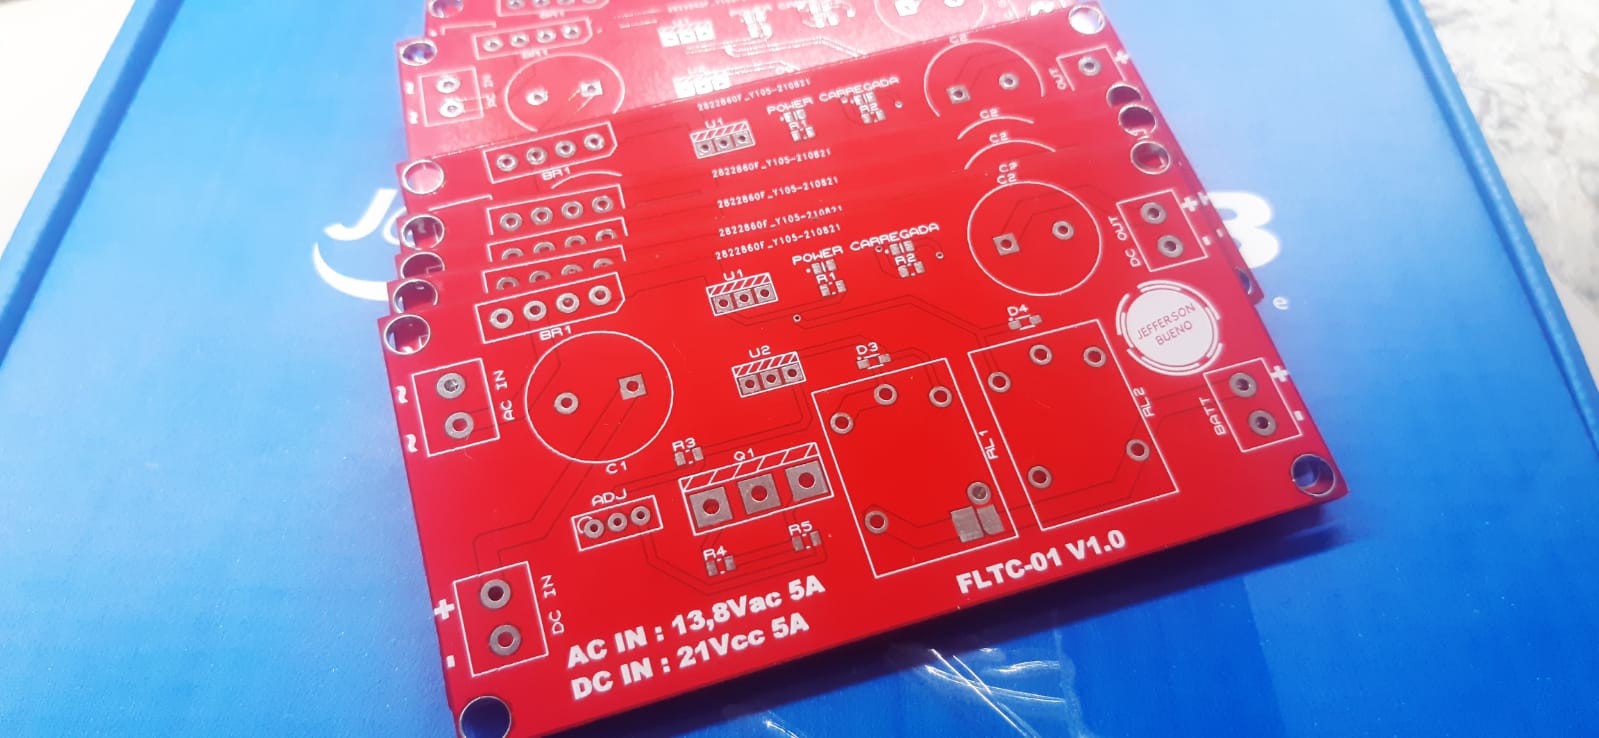
This is a simple circuit for anyone wanting to make a floating charger to charge 12 volt 7 amp batteries. A versatile circuit and very useful for those who need a charger for this purpose.
Floating Charger Function
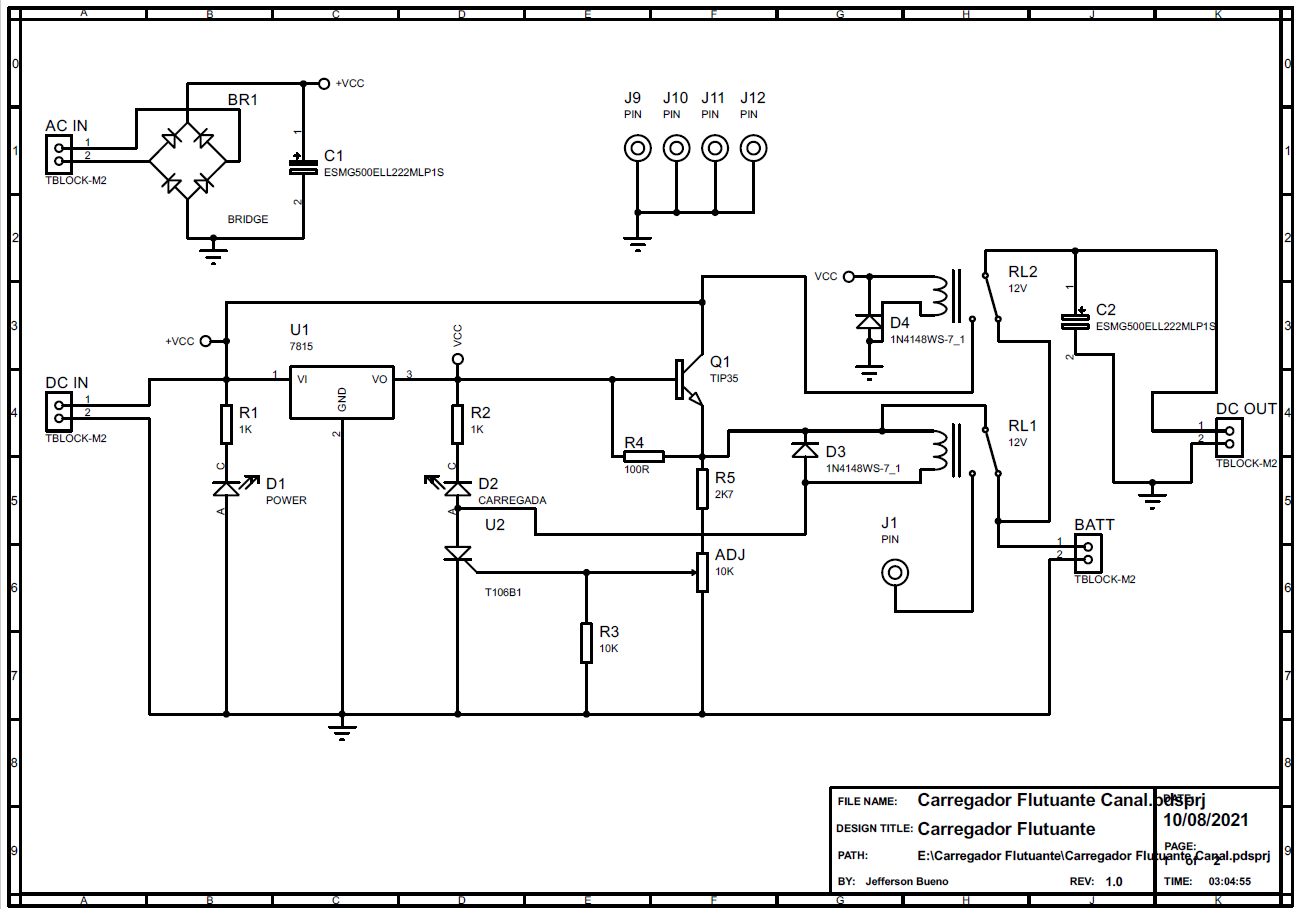
In the floating charger function, when connecting the battery to the circuit, you can use an AC transformer of 13.5 Vac or a source of 21 Vdc, both in the order of 5 amps in their respective connectors.
NOTE: Do not connect both types of power to the circuit, use the one you think is best to use!
The system has two LEDs indicating that it is connected to power and the other indicates that the battery is fully charged.
If the battery is discharged, the charged Led will be off and when it reaches full charge the Led will turn on, turning off the battery charger.
12 Vdc UPS Function
The circuit also has an output connector that is intended to power another 12 Vdc circuit.
While the floating charger is connected to the mains, the output will be receiving power directly from the source.
When this source is disconnected and the output will start to receive energy from the battery where it will be switched by relay 2, keeping the output always powered.
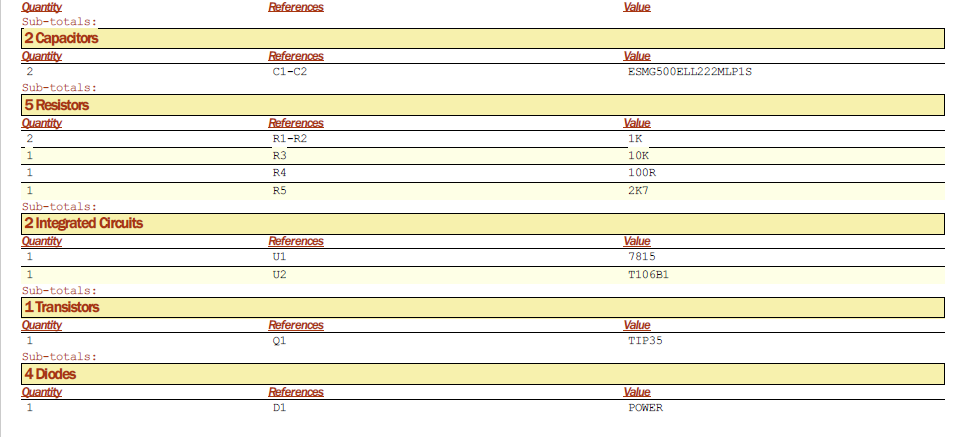
Bill of Materials (BOM)
Schematics
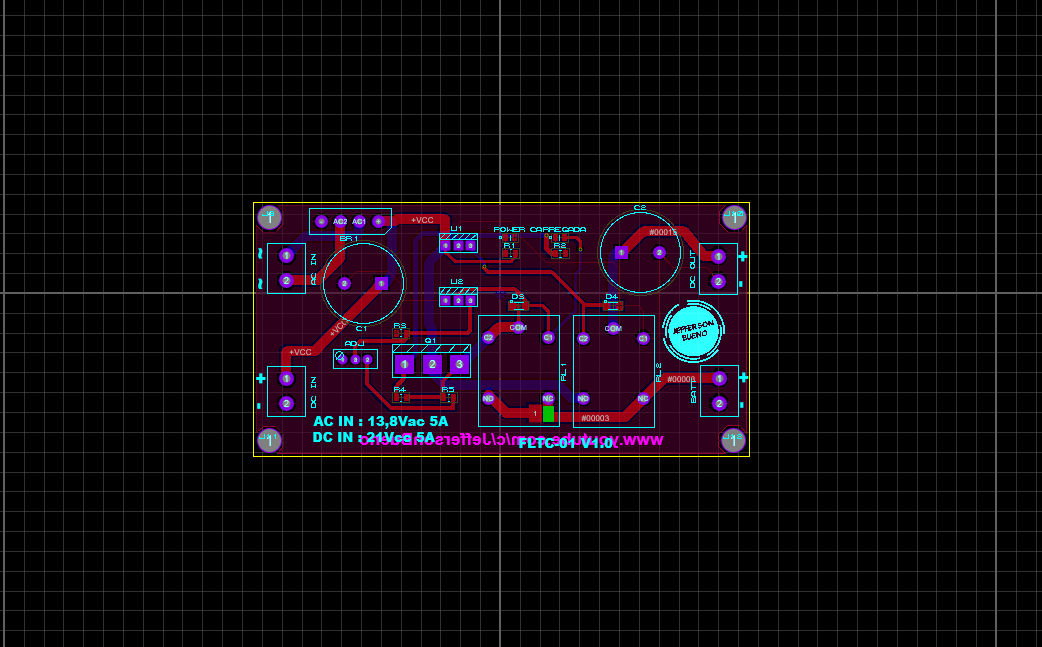
Footprint (PCB Layout)
To download the GERBER File you can access the video link on my YouTube channel or the Google Drive link:
3D Model
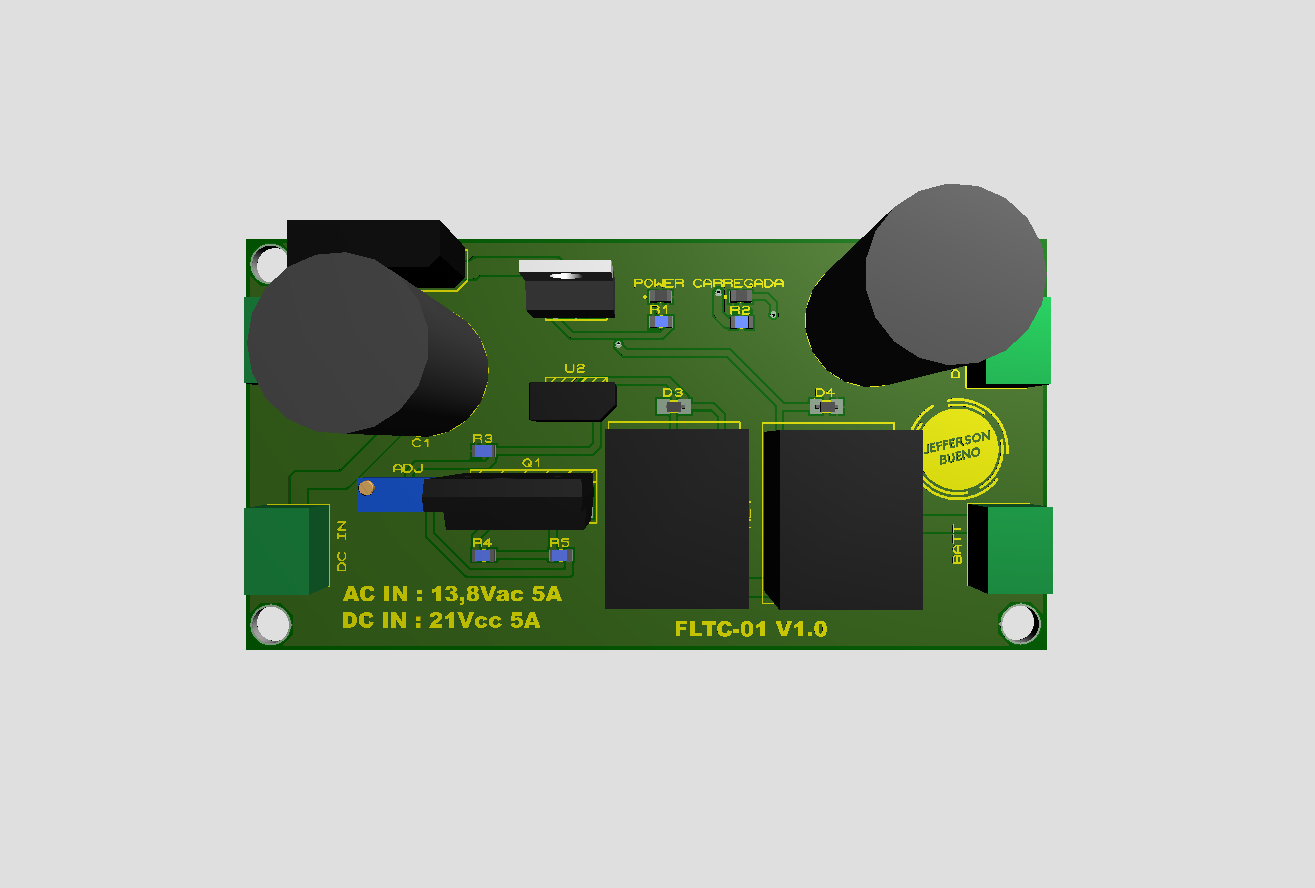
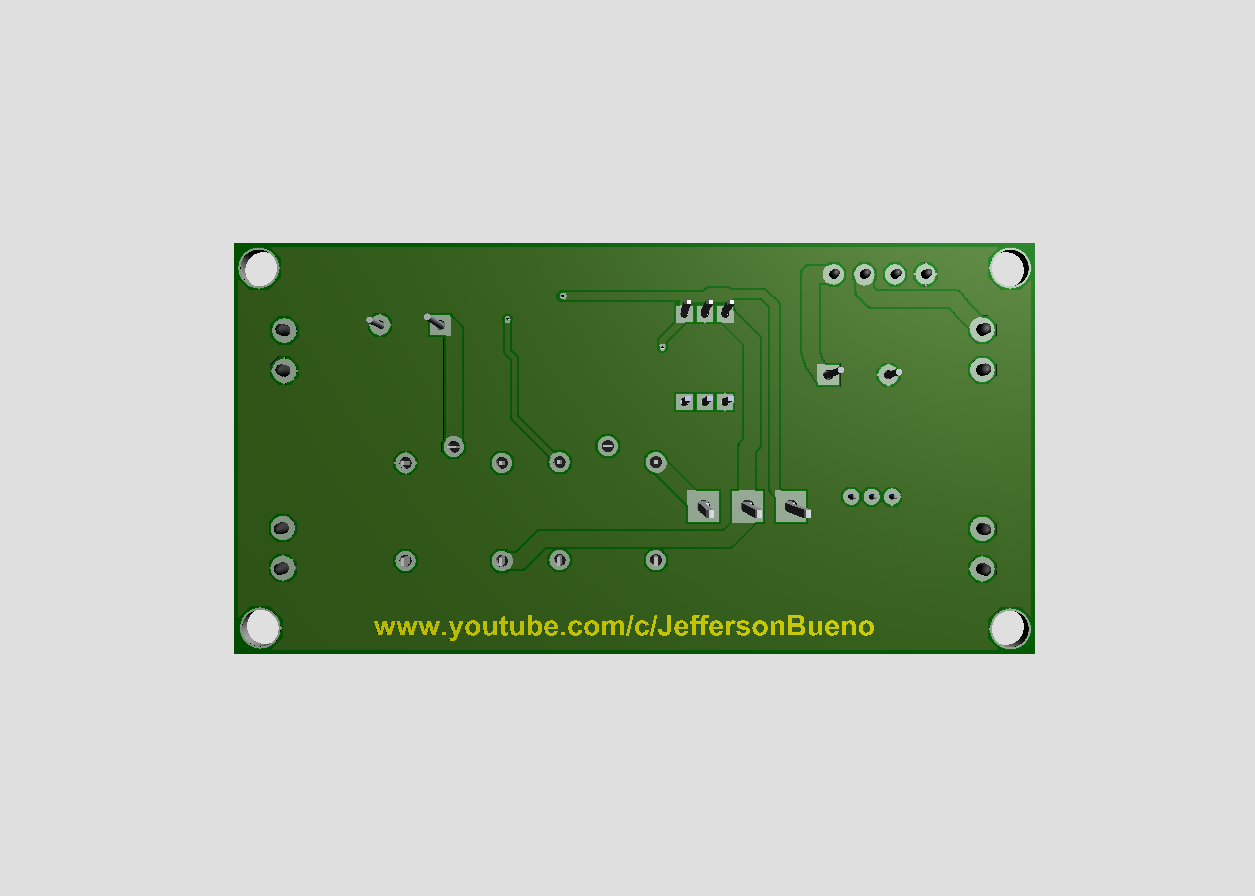
In this footprint we can see how the project looks in the 3D viewer in Proteus.
Step by Step to Order the PCB at JLCPCB

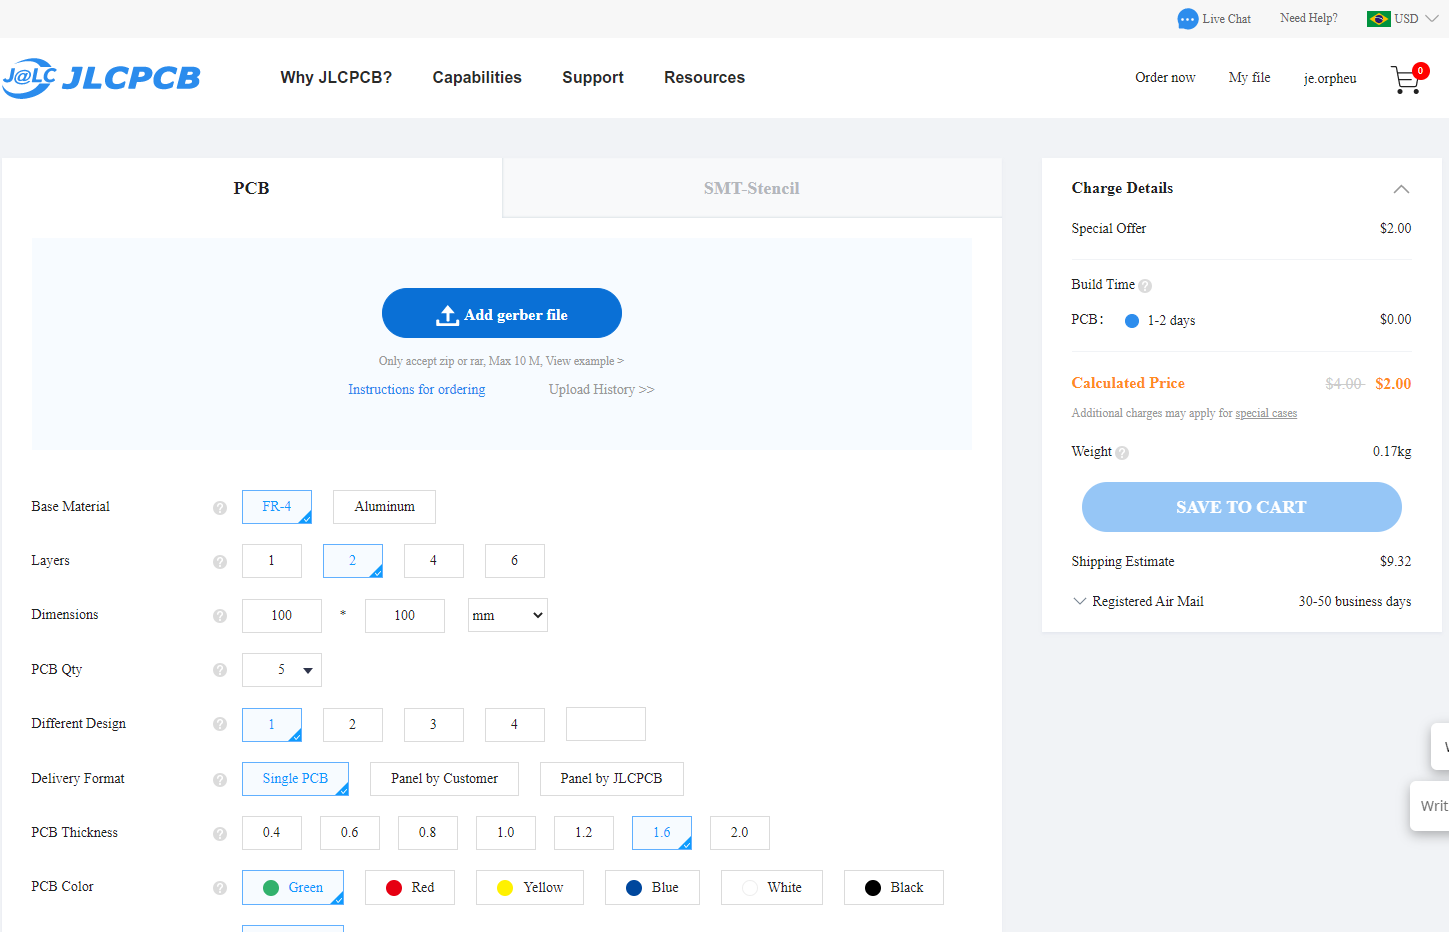

Now we have got the PCB design and it’s time to order the PCB’s. For that, you just have to go to JLCPCB, and click on “QUOTE NOW” button. JLCPCB are also sponsor of this project. JLCPCB (ShenzhenJLC Electronics Co., Ltd.), is the largest PCB prototype enterprise in China and a high-tech manufacturer specializing in quick PCB prototype and small-batch PCB production.
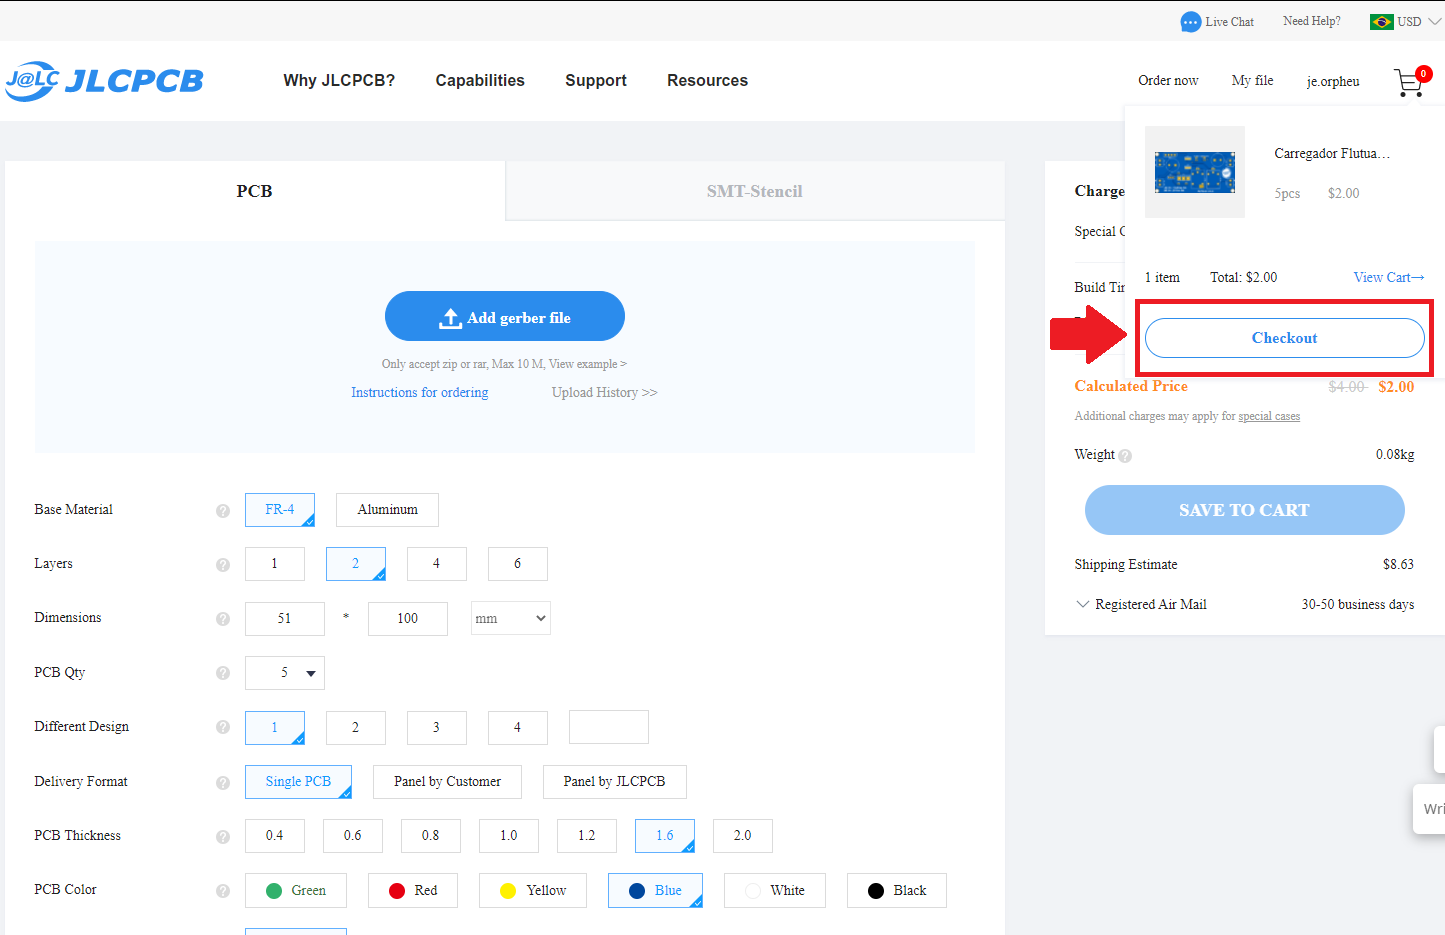
You can order a minimum of 5 PCBs for just $2. To get the PCB manufactured, upload the gerber file you downloaded in the last step.
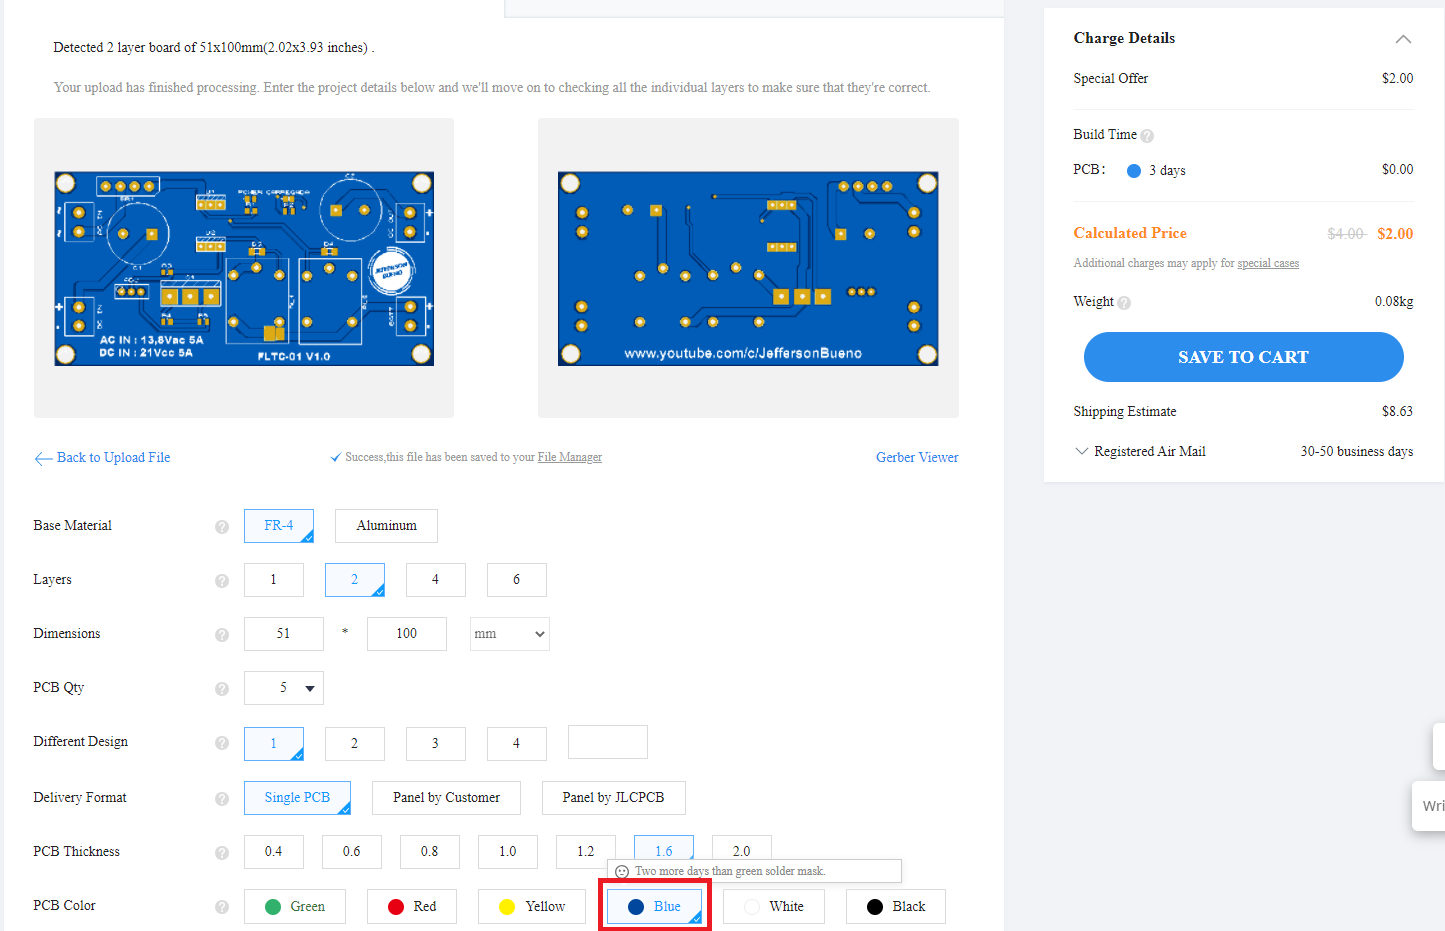
Note that by default on the website your PCB will be green. I chose to do it in blue color but you can choose from other available colors.
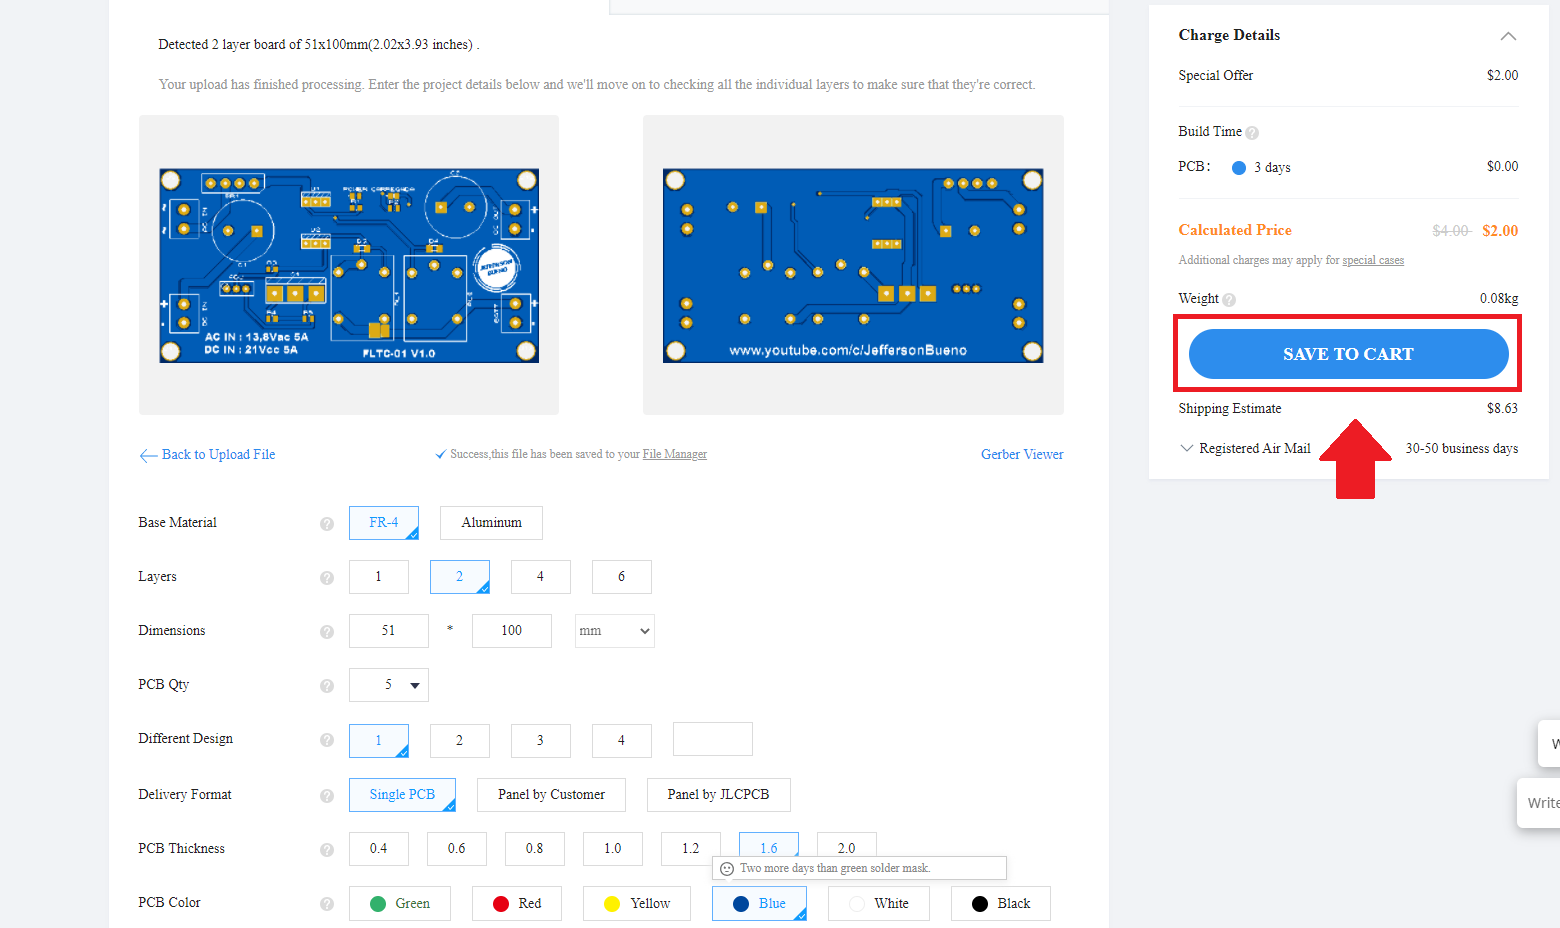
Upload the.zip file or you can also drag and drop the gerber files. After uploading the zip file, you’ll see a success message at the bottom if the file is successfully uploaded. You can review the PCB in the Gerber viewer to make sure everything is good. You can view both top and bottom of the PCB. After making sure our PCB looks good, we can now place the order at a reasonable price. You can order 5 PCBs for just $2 but if it’s your first order then you can get 10 PCBs for $2. To place the order, click on “SAVE TO CART” button.
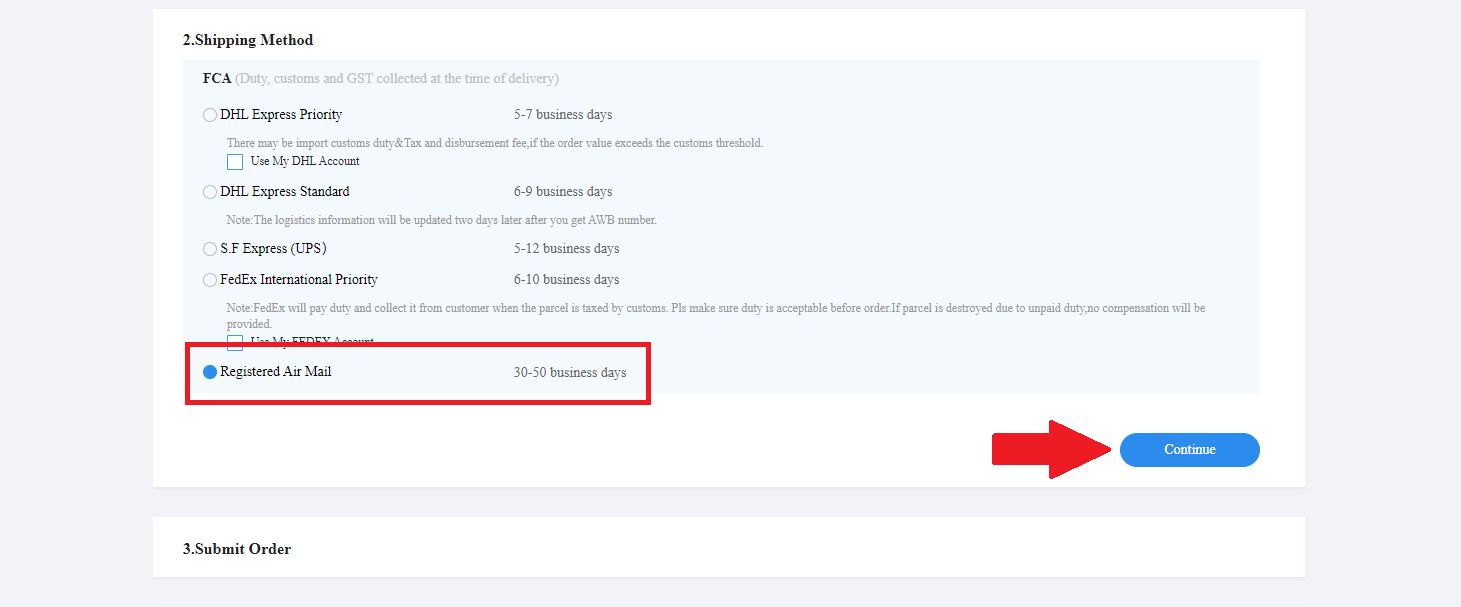
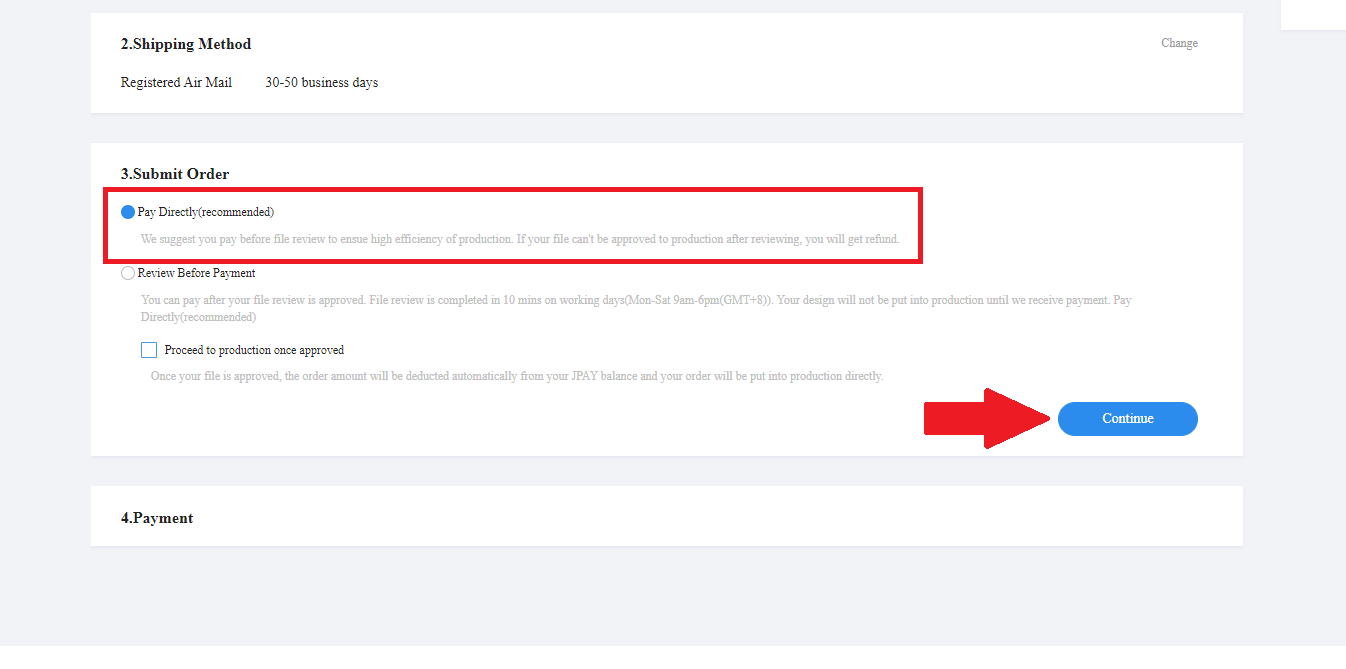
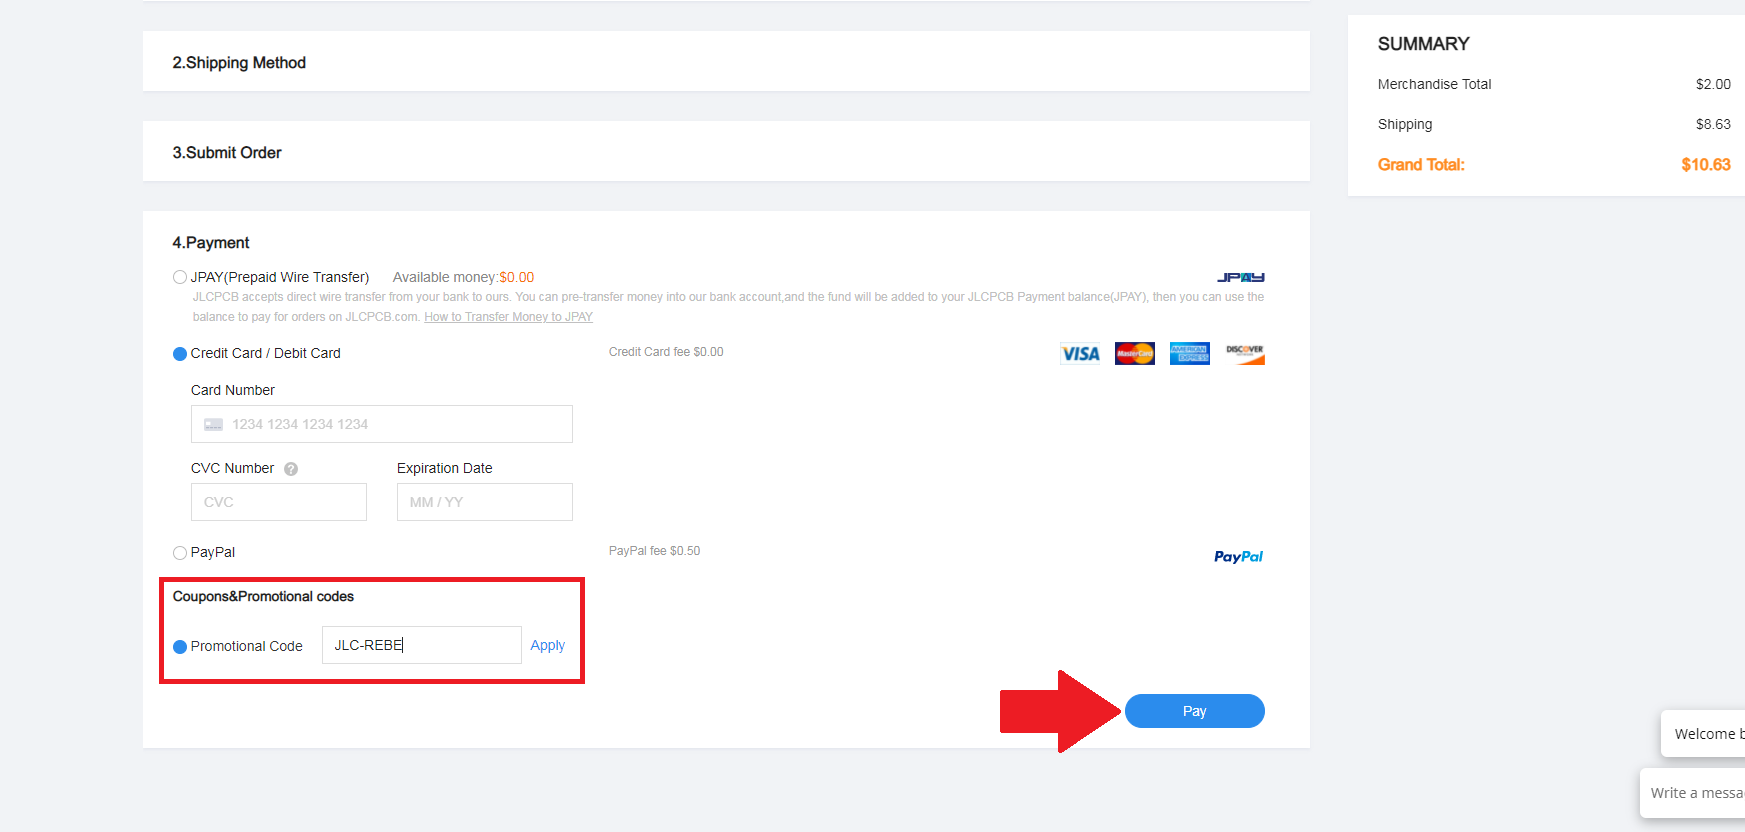
I have chosen to ship by Registered Air Mail to avoid customs fees but you can choose another shipping method. After entering my shipping address I selected Pay Directly but you can ask for Review before Pay if you are unsure if you have any errors in your project. Before finalizing your order you can use the promotional code JLC-REBE to get a discount and then click pay.
Final Considerations
If you want more detailed information you can check my video on my channel. IF you liked the video and the project don't forget to leave your LIKE and leave me a comment.
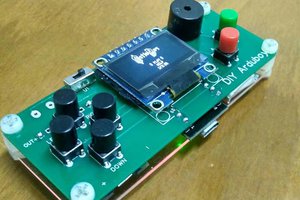
Final Results
After placing the order, the PCBs arrived and this is the final result

 Anas Raza Khan
 mbsg99
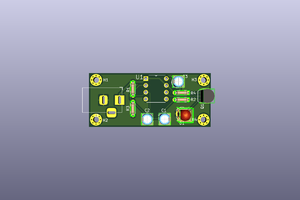
 Hendra Kusumah