Salim Salaues
Setup
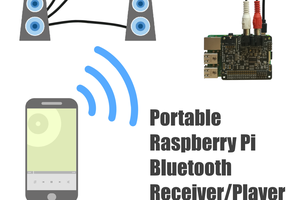
Since one of my goals was to also stream from an analog input, it creates an extra layer of complication. My first iteration was simply multi-room Spotify streaming in anticipation of the upcoming Spotify HiFi service but every tutorial I found seemed unnecessarily complicated and seemed to unnecessarily use extra components like mopidy (this still be added as a source later on if needed). I ended up using Snapcast to setup the multi room aspect since it easily allows any kind of source as an input and has a web control interface/API built in. The first set of instructions is just for digital only streaming over WiFi such as Airplay or Spotify Connect.
Hardware
The Pi Zero does not have an analog audio output, therefore I'm using the Pirate Radio line out hat for the Raspberry Pi from Adafruit. I got this one specifically since it has a screen that I can eventually use to add album art and/or EQ visualization. The added benefit to using this kind of hat is that it has a high quality 24-bit 192Khz digital analog converter (DAC) which allows for extremely high fidelity playback. The super HiFi probably doesn't matter as much to most people and could easily just use a normal sized Raspberry Pi 1/2/3/4 with the built in line-out however I personally still prefer the Pi Zero due to size.
Line-out options for the Pi that I tested:
- DAC shim from Pimoroni
- Least expensive yet still offer the hifi DAC hardware
- Pirate Radio DAC w/ LED Screen
- Has built in LCD screen and buttons for album art additions and playback control
- Pi Zero iPod 30-Pin Adapter
- A bit pricy but powers the Pi Zero, has built in hifi DAC, and handles audio all via the old 30 pin iPod connector. Amazing drop in solution for any iPod dock
Spotify/Airplay
This setup is the most simple. I was even able to run both the snapserver and the snapclient from a Pi Zero W however I wouldn't recommend this if you plan on having more than a couple clients. Having a dedicated Pi 3 or Pi 4 connected to ethernet is the ideal scenario for the server but not critical if you have good WiFi speed and coverage.
- Snapcast Server
- Burn Raspberry Pi OS image to the SD card
- If using a DAC edit the config.txt with the configuration to enable it. For hifiberry compatibile devices, find the line with "dtparam=audio=on" and replace it with with the below
dtparam=audio=off
dtoverlay=hifiberry-dac
gpio=25=op,dh
dtparam=spi=on
- Configure WiFi (Optional, if not using ethernet)
- Take note of the IP address
- Optionally update the file /etc/hostname with a friendly name to easily reference in your network such as "snapserver"
- Reboot
- Download and install snapserver and optionally raspotify if your server is also hooked up to a speaker. These commands can be copy and pasted into the terminal or remotely via SSH. Installing raspotify will also allow the speaker to picked individually from Spotify.
# v0.25.0 is the latest as of this post
# Recommended to install the latest release specific to the OS being used
# This is specific to the 32bit Raspberry Pi OS
wget https://github.com/badaix/snapcast/releases/download/v0.25.0/snapserver_0.25.0-1_armhf.deb
# Install snapserver packages
sudo apt install -y ./snapserver_0.25.0-1_armhf.deb
# Install Raspotify
curl -sL https://dtcooper.github.io/raspotify/install.sh | sh
# Edit the /etc/snapserver.conf file
# Replace "source = pipe:///tmp/snapfifo?name=default" with the below line
# devicename and default volume can be modified
source = spotify:///librespot?name=Spotify&devicename=AllSpeakers&volume=35
Edit /etc/default/raspotify and update the following values. For most raspberry Pis using a DAC and built in audio turned off the device should be "hw:0,0" however USB or other external sounds cards may be registered as different devices. Use the command "aplay -l" to verify.
# Set whatever you want your device to be names
DEVICE_NAME="kicker"
# Verify this is the correct device...
 Max2Play
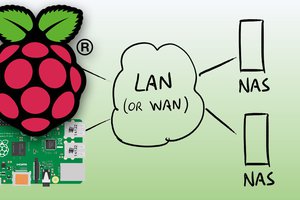
 Dmitry
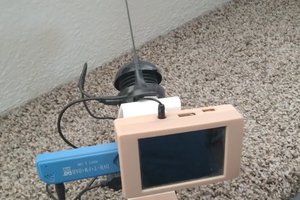
 Brian
Brian