 William
I began developing Retro Modules as a hobby around 2010 after realizing many modern microcontrollers can fit in old-school Null Modem enclosures. I did not have PCB design skills at the time, but I could certainly hand-solder a prototype & close it up. It looked great -- on the outside!

The form factor allowed me to create professional-looking product with just a little hand-soldering & off-the-shelf components. While still very simple, it allowed me to happily demonstrate intermediate electronics skills. I didn't have to apologize for the rat's nest of wires inside each module because it was out of sight. It allowed me to show off the proof of concept with ease. Such a form factor can empower intermediate engineers to easily make modules which can go through the rapid iteration process while looking professional at every stage. When the process is largely complete, prototype PCBs can be designed to fit into the exact same enclosures used early on. The Retro Modules project has progressed, though slowly. It has remained a hobby until now, given other priorities. I hope that changes soon. The PCBs I've designed so far look & work great!
Distracted by a Spec
Last year, I realized I was working more on refining the Retro Modules specification than on actual electronics experimentation. I was also spending lots of time designing custom dock configurations & enclosures. Very little electronics work. That needed to change. A major reason why I was doing little electronics work is due to the early instability of the modular specification. I grew tired of creating modules only to have them become incompatible with a newer version of the specification. As I grew more confident with PCB design I knew there would come a point where PCBs are being manufactured & the spec had to be stable. That time came earlier this year as likely the last of the specification changes were made for the most common connectors. While testing the basic PCBs & preparing for the design of more advanced PCBs, I found I had several modules which needed technical questions answered before PCB design could continue. I needed to do standard-fare tests of components & circuits that would be used.
Getting Back to Real Experimentation
Most "finished" modules will probably be small & simple, which led me to consider a small breadboard dedicated to each module in the current queue. These small breadboards typically have double-sided tape on their back, which led me to consider sticking a blank business card to it. I went further by purchasing dry-erase flash cards & markers. While the dry-erase option is great, the business card & pencil actually work better. The dry-erase ink dries to the flash card & may accidentally get wiped away before it dries. A wired assembly easily fits into a crayon box that costs less than a dollar. Additional notes can be written on additional blank business cards & placed in the crayon box with the breadboard. I designed a few adapter PCBs with consistent pins to effectively make the breadboard a Retro Module. These breadboard-based-modules can be easily daisy-chained together with other breadboard-based-modules, PCB modules & modules in D-Sub enclosures.
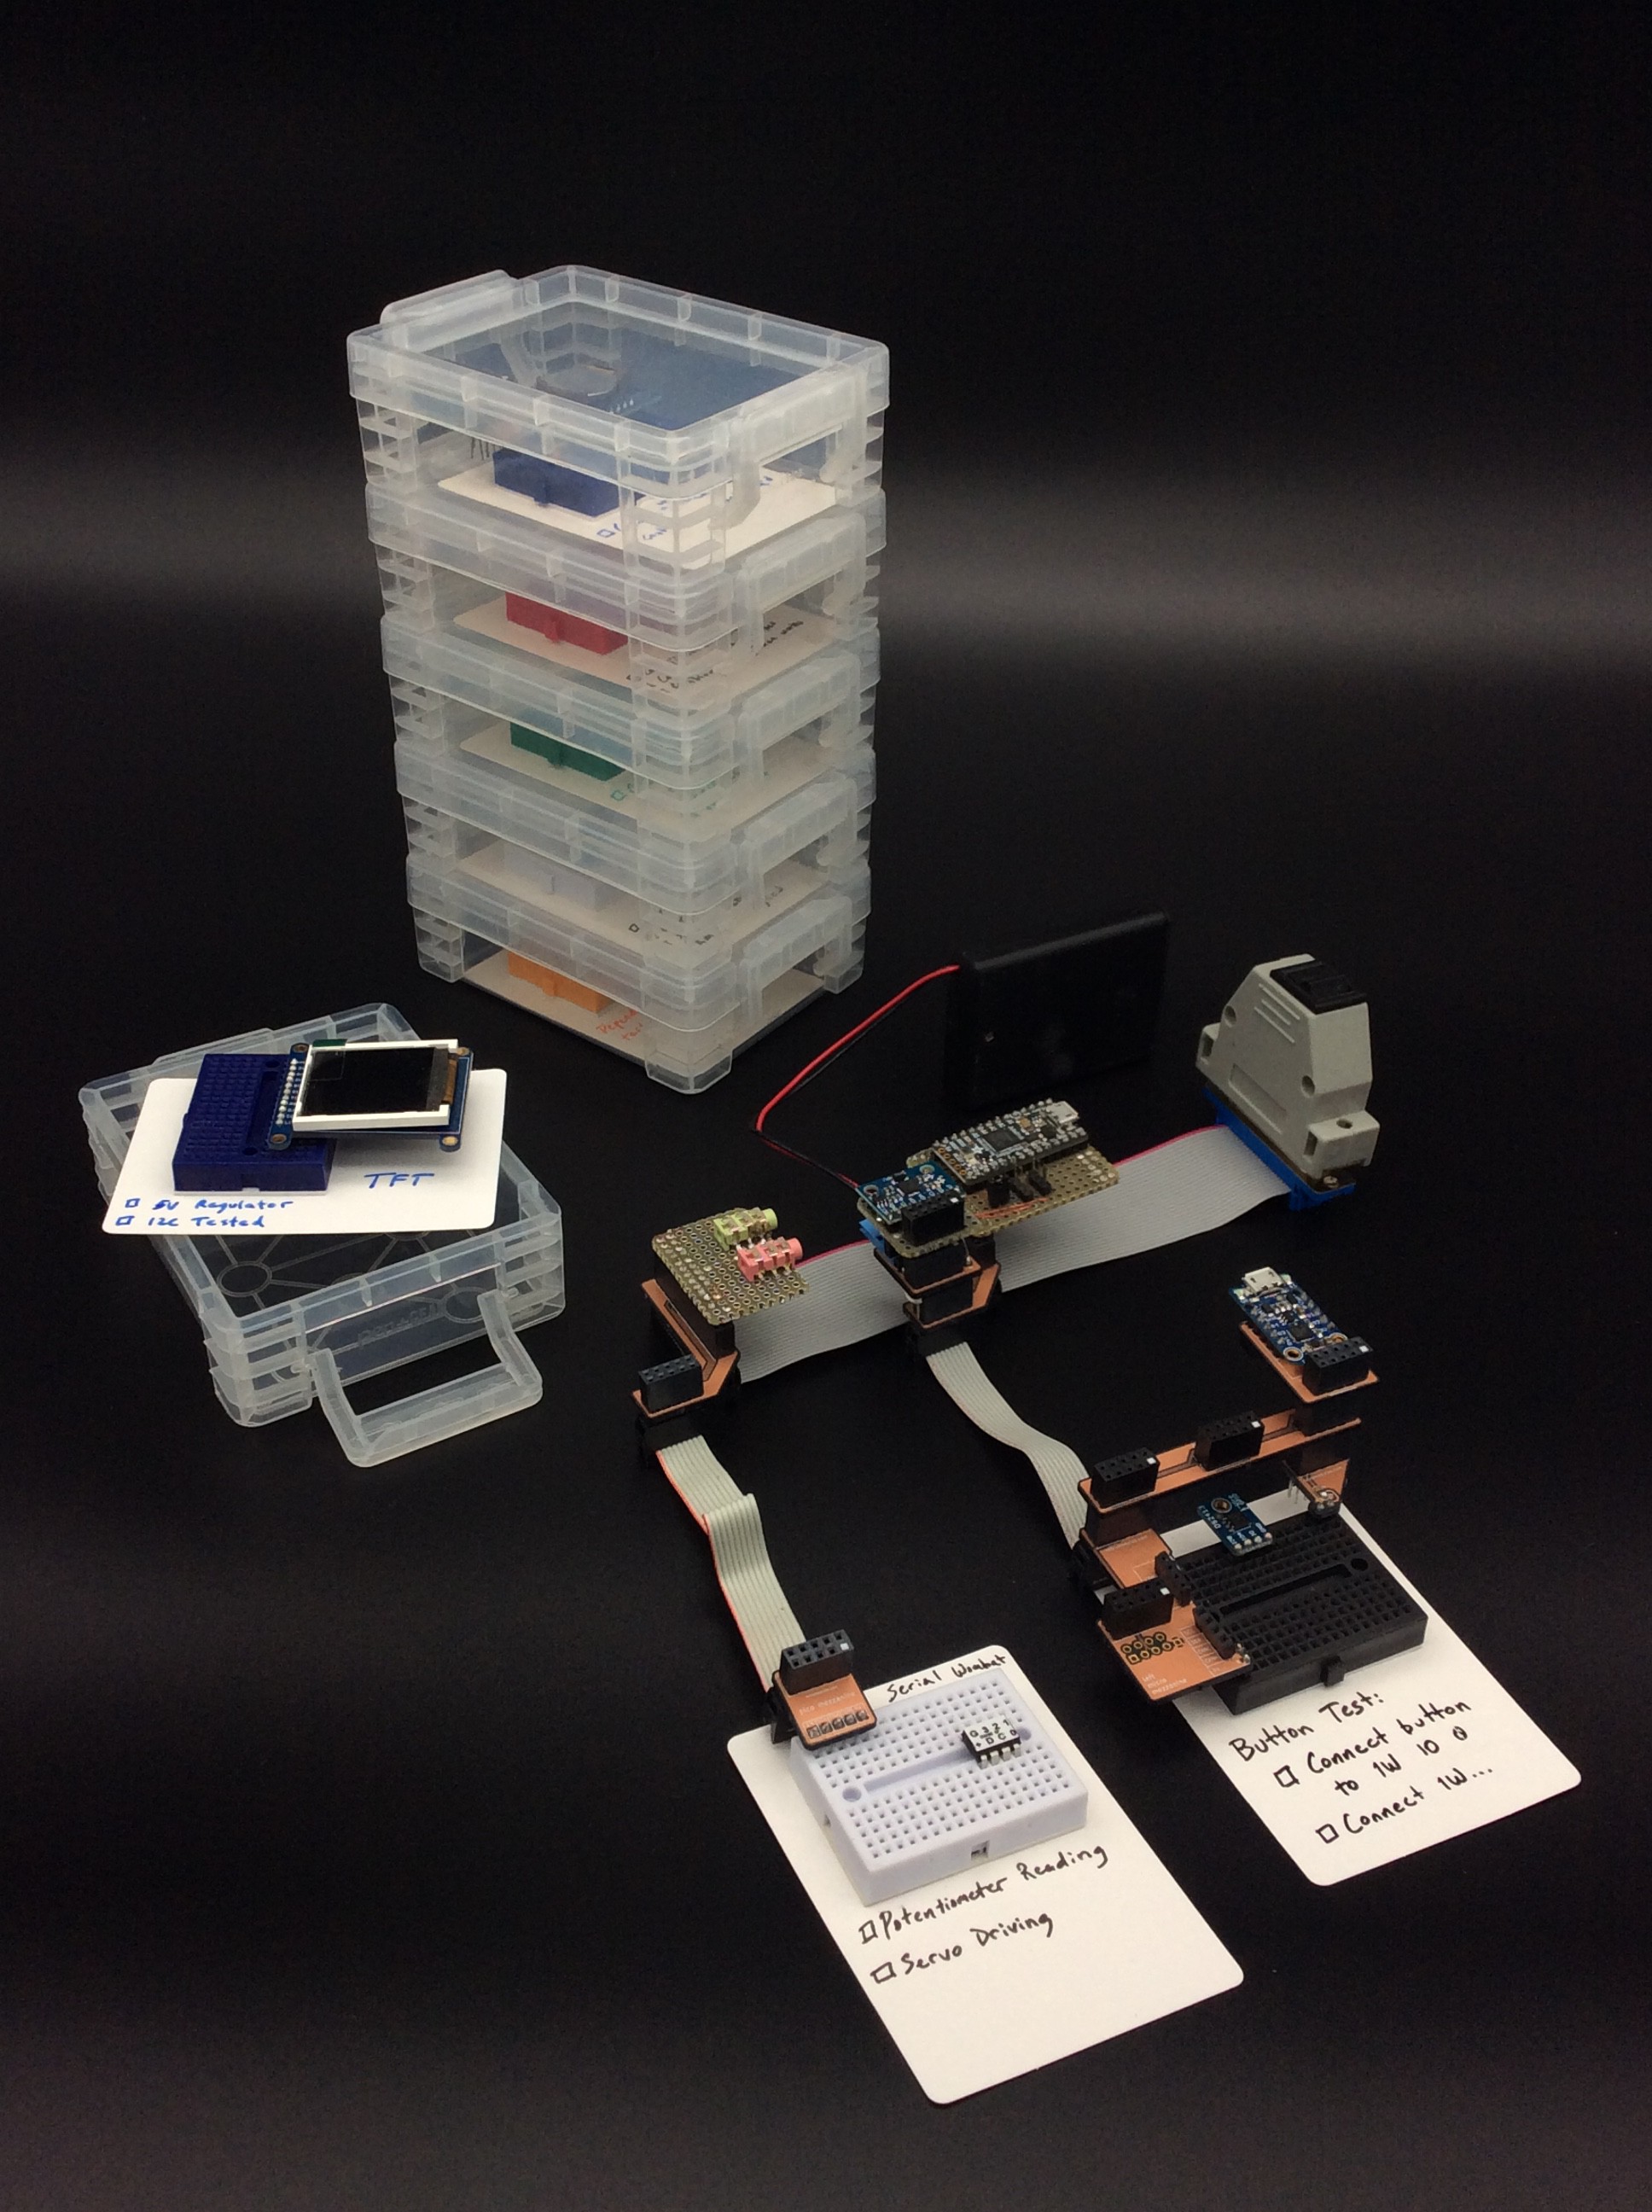
Now, when I have a module idea I can go grab a mini breadboard, a crayon box & an index card. Five minutes later, I have a Retro Module with some documentation in a box. It doesn't do anything yet. There are no wires or components other than the breadboard, but it is already just a few quick steps away from being a working Retro Module.
Facilitating Modular Experimentation in the Classroom
This same process could be used on the first day of an electronics class. Students can be given the necessary supplies & stick the mini breadboard on the index card. The teacher can ask the students to jot down ideas for modules on a separate piece of paper & ask them to pick one. They can write the name of the module idea they chose on the top-right of the index card attached to the breadboard. They can be asked to list a few things they want the module to do & put check boxes at the left of each line item. Finally, they can be asked to put their module in the provided crayon box & take it home. In the following class, they can go through the same exercise with a new set of supplies & be asked to choose another module on their list, etc. The exercise helps students compartmentalize functionality they are interested in & reduce the risk of scope creep. As their collection of crayon boxes grow, they steadily gain the ability to make their experiments work in concert.
Discussions
Become a Hackaday.io Member
Create an account to leave a comment. Already have an account? Log In.