 A.dzhusupov
A quick survey showed that the Braille display is an electromechanical device that can fully replace traditional paper Braille and provides the access to any electronic text. Although there are a great number of speech synthesizers and myriad audiobooks, according to researches the literacy of a person can be developed only by reading. The cool fact is that when a visually impaired person reads Braille, he/she activates the same parts of the brain as a sighted person does.
The heart of the Braille display is a row of several so-called Braille cells, that form a text line. Each Braille cell is a 2×4 matrix of tiny pins moving in and out of the surface forming a Braille character.
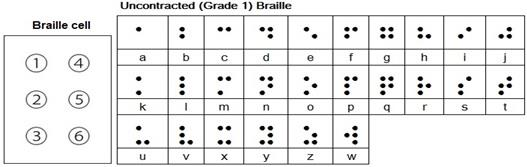
The pins are moved by piezoelectric actuators. Displays have from 10 to 80 cells, and the more cells the better. Hence the frequency of pressing the button decreases making it easier for a reader. 40-cell displays are the most popular. Hence Braille displays have become the only interface for reading nowadays. However, the cost of even 14-cell displays starts from 1000 dollars. In this matter, displays are unaffordable devices for buying for most people.

Another fact is due to the high prices of Braille displays and the lack of updated paper-Braille books the average literacy rate among visually impaired people is lower than 5% even in developed countries. This shocking statistic looks like it describes the Middle ages time.
I love reading. But frankly saying I’m not ready to pay for a Kindle-like device eight or even one thousand dollars. By the way, sliding a reading finger over an 80-character Braille line doesn’t cover an average-length sentence, you will have to press the button to refresh the line and then continue reading.
I decided to work on this issue to make such devices more affordable for visually impaired people and improve their quality of life.
The idea and the first prototype
The first idea in a way to decrease a display price was to define the minimum number of cell in it, and at the same time, this number should be sufficient for comfortable reading (without the constant need to refresh the text line). So I thought it following way:
- The boundary values of cell quantity are zero to infinity.
- If we have zero cells, a display becomes a text-synthesizer, which is not our goal. That’s why the number of cells should be at list one.
- In the case of one cell we get minimal price and minimal comfortability in sliding reading-finger over the Braille-line; in the case of an infinite number of cells, we get maximum comfortability as well as a price.
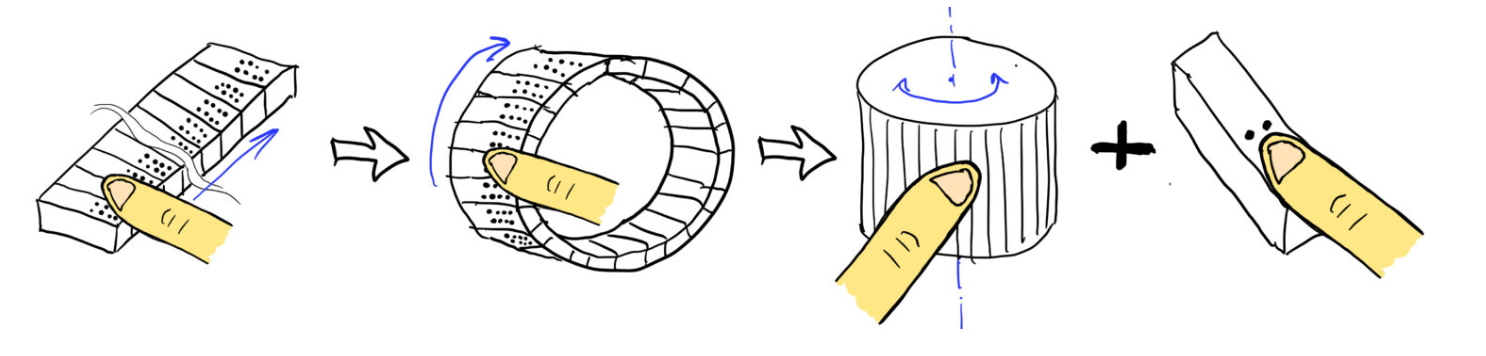
- So the obvious solution is to connect the ends of that long text line to form a circle and let a reader slide his finger around the outer surface of the ring.
- This solution has two problems: sliding a finger around a ring is not comfortable, and it still needs to be refreshed by pressing a button.
- We have one more initial condition: reading-finger can read (feel/recognize) only on character at the time.
- I decided to combine and rearrange these processes, and then divided them between two hands.
- Finally, we get the following: reading-finger lay on a sole Braille-cell, sliding around a ring was replaced by rotating a jog dial with the finger of another hand. Refreshment of the Braille character happens with each step revolution of the jog dial.
- This approach provides full control of the text stream (forward and backward), and the most important – gives the feeling of reading the endless text-line. To be honest, the last statement I perceived long after.
- In addition, the new device needs the following minimal features:
- Braille trainer;
- Saving and reading books from SD-card;
- Voice and Vibro menu;
- Rechargeable battery;
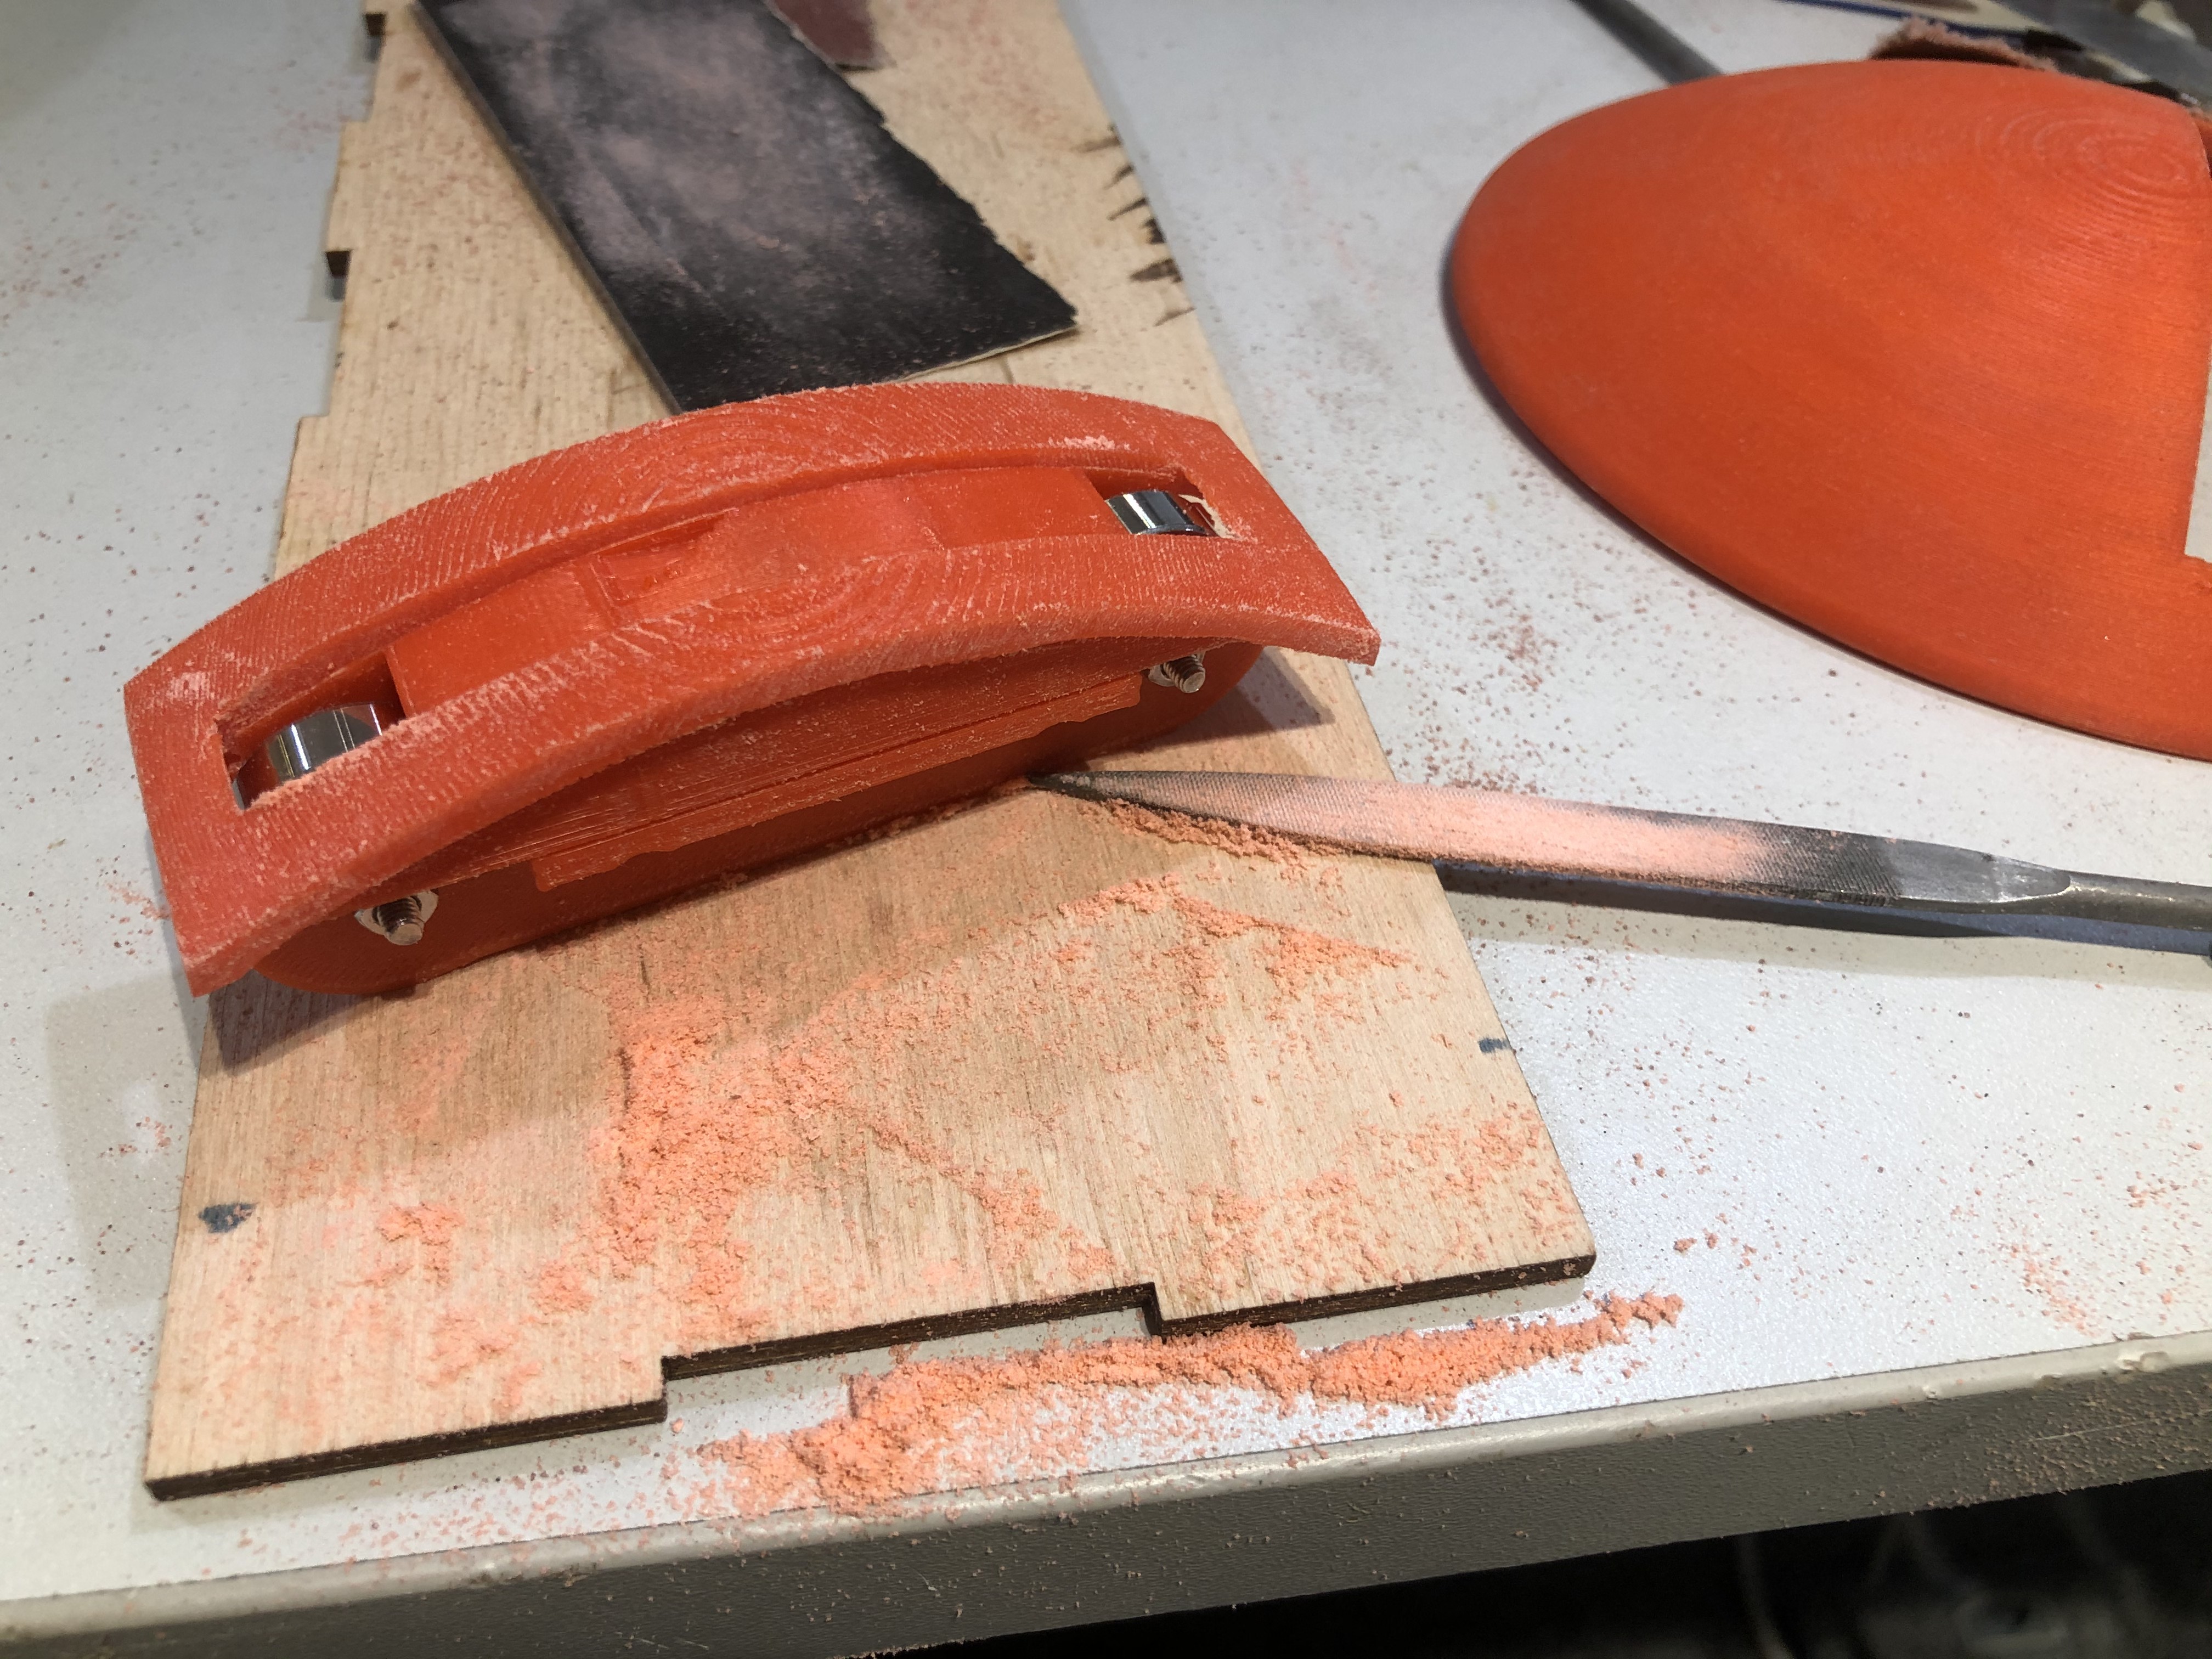
Having this idea I started making a prototype. The next problem I faced was to find the Braille-cell module. Unfortunately, my search for that modules was unsuccessful. So as a temporary solution, I decided to make my own Braille-cell from electromagnetic relays. The cell...
Read more »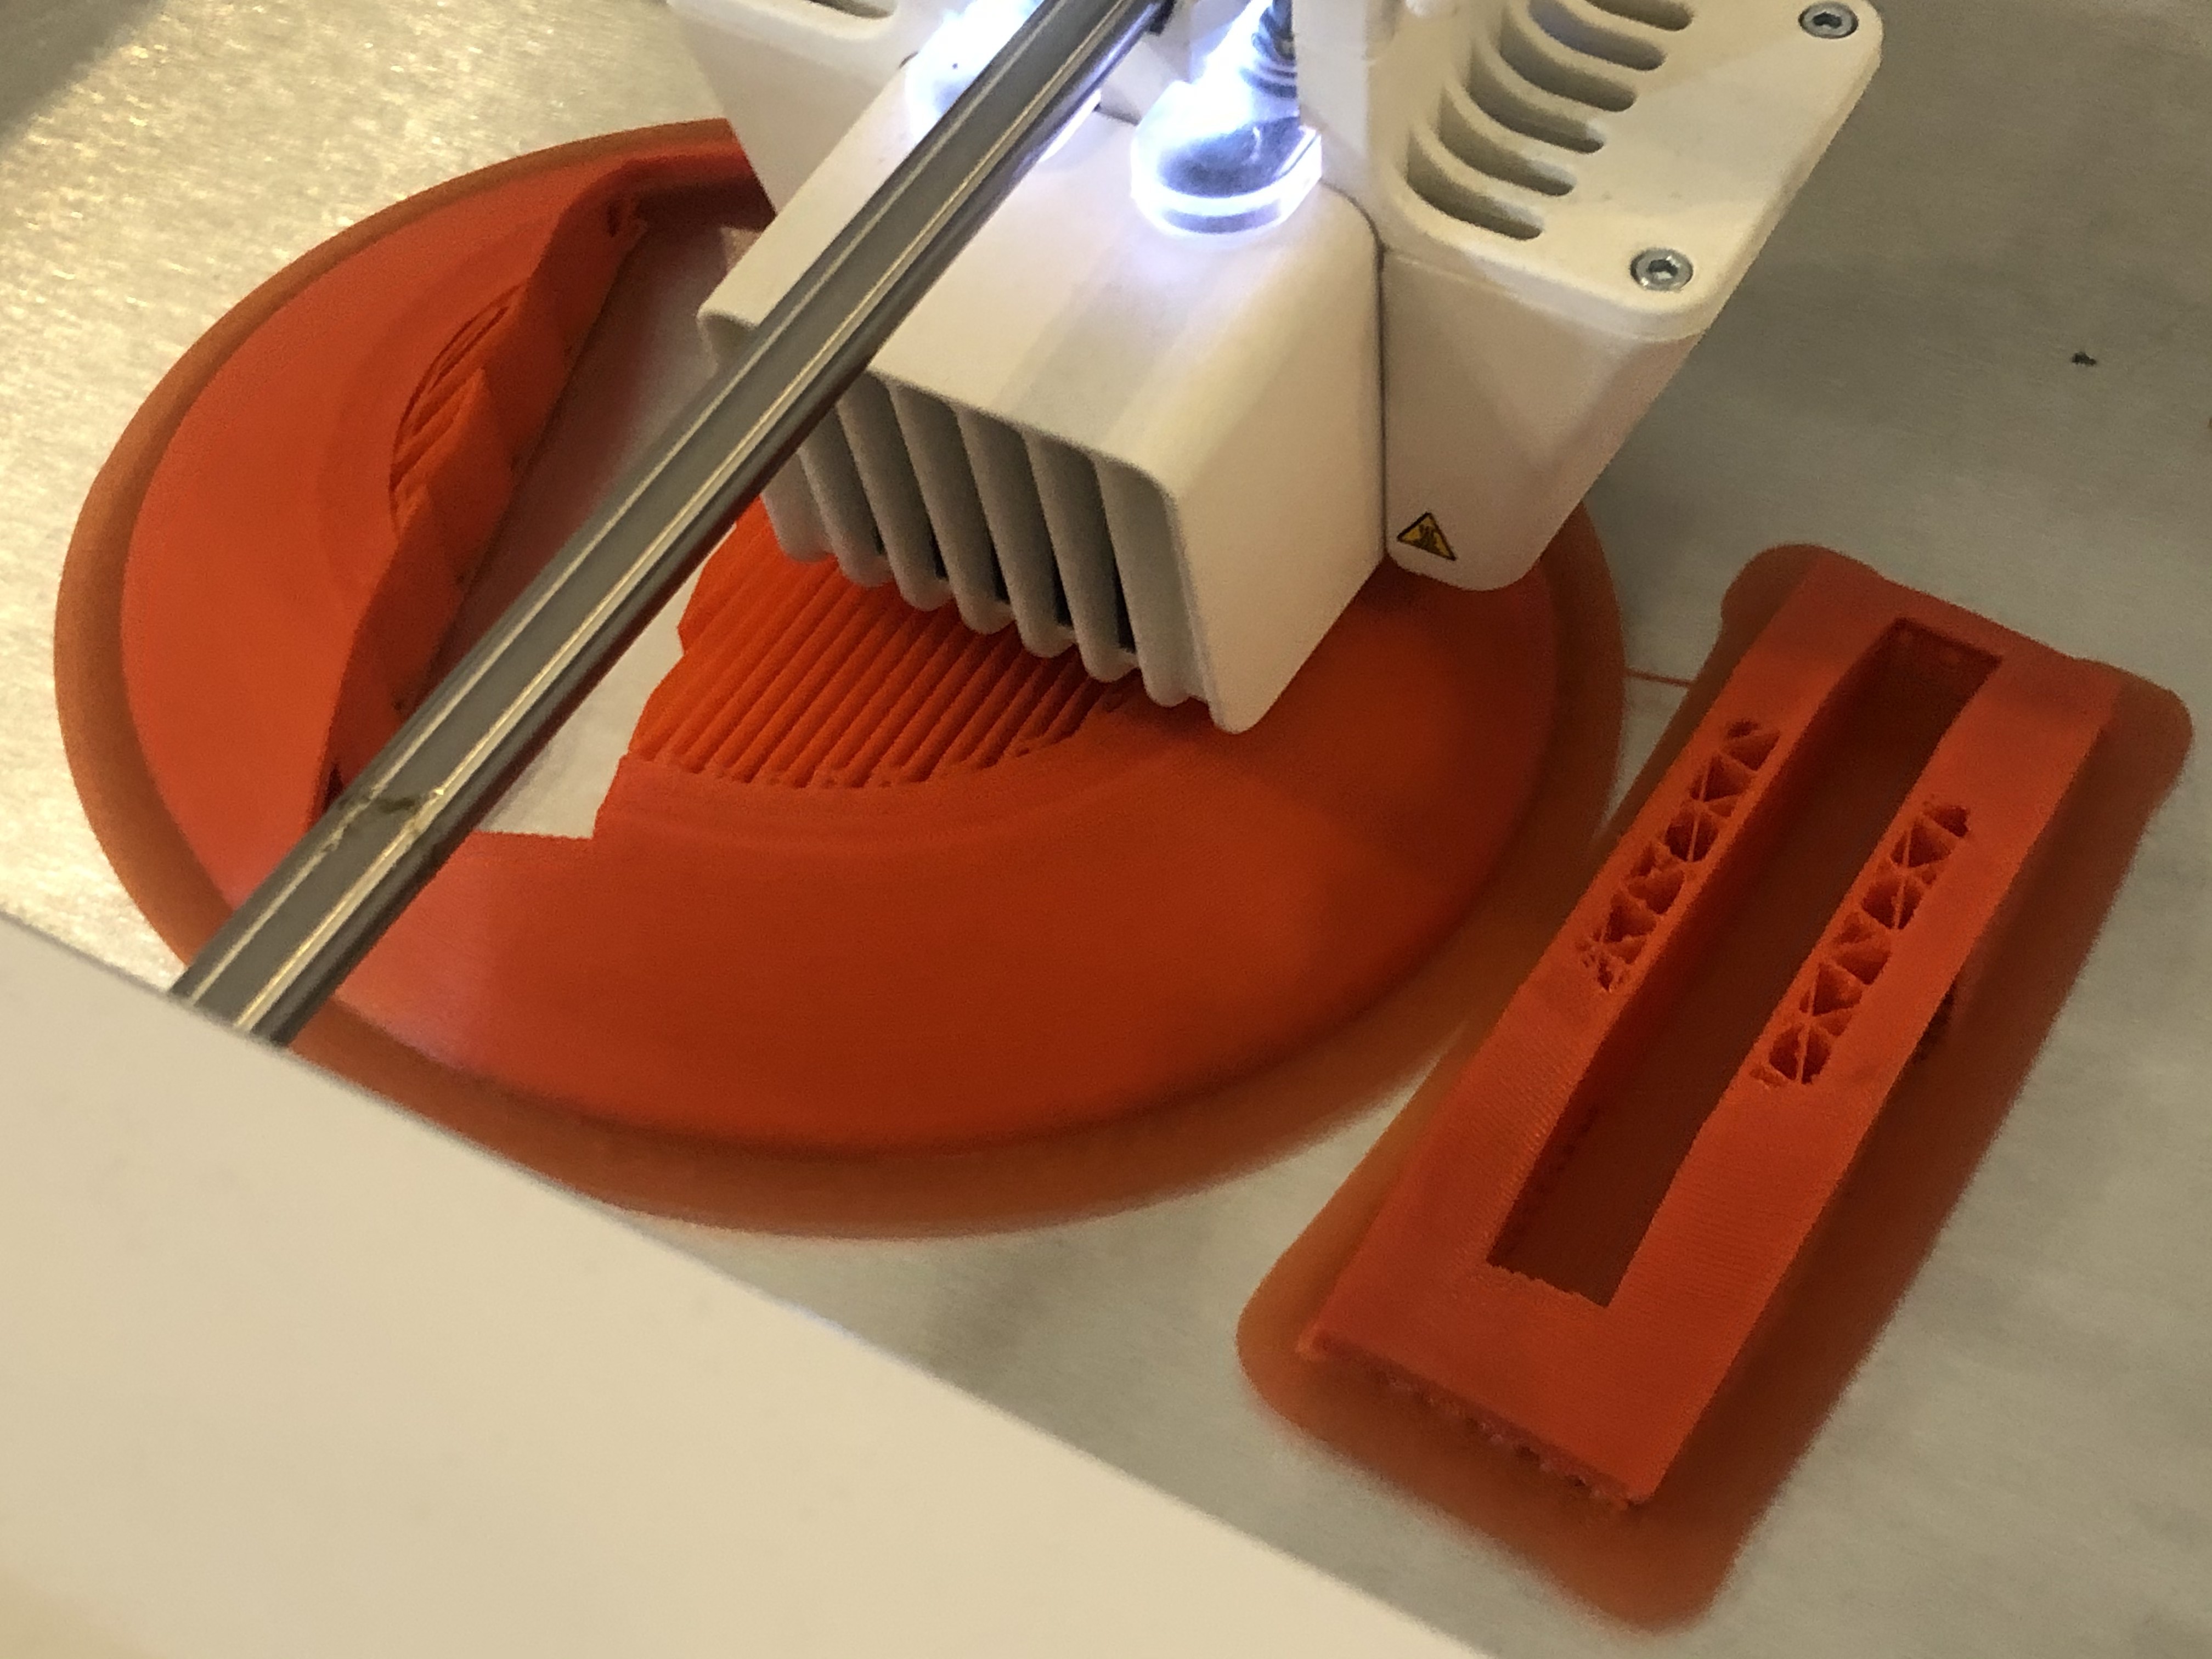


 deʃhipu
 Shu Takahashi
 Alex M Sunny
 Madaeon
A very interesting and much needed project, I would like to check it out to understand how it works. Once I had a similar experience during my studies, I wrote an essay about crime and having found a similar work on https://writingbros.com/essay-examples/crime/ I also tried the text of the adventures and a book on this text Braille. I learned how to read them a long time ago, so there were no problems with it, but after a long time without practice I need to return the skills and maybe I'll take myself a similar device.