 grossofabian
1.Preparing to use the device with the "built-in" Attiny 85
In case of having the device with the micro already installed and to use it with our project we will need the following:
-Download the Arduino IDE: https://www.arduino.cc/en/software
We download the version and desired and then we will need to make an initial configuration.
-Bookstores and cards:
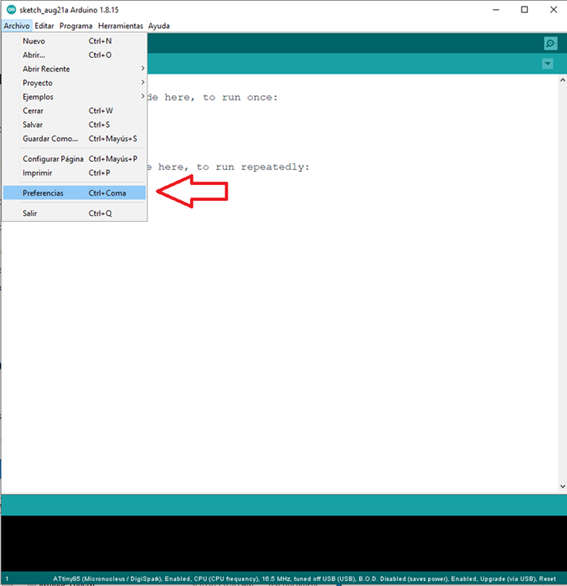
Open the downloaded program and a window will open with a blank project. We proceed to select the preferences option in the files tab.
Once the window is opened, enter the following URL:
https://drazzy.com/package_drazzy.com_index.json
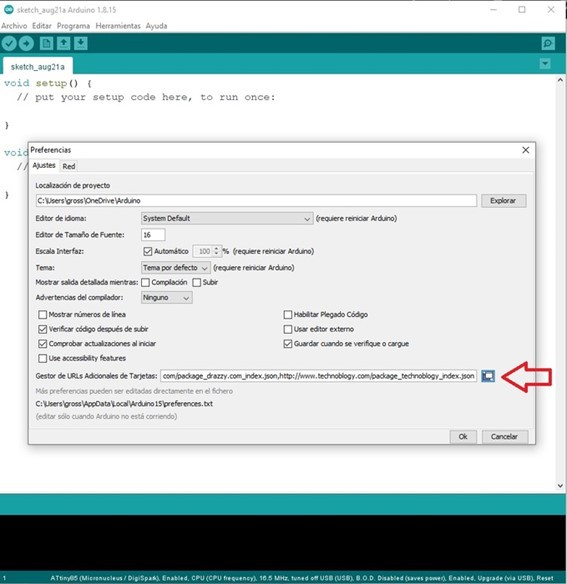
If we have a URL already entered, it is not necessary to delete it, we simply add the new one below. We give OK to all windows to save the changes.
Then we must go to Tools-Board-Card Manager.
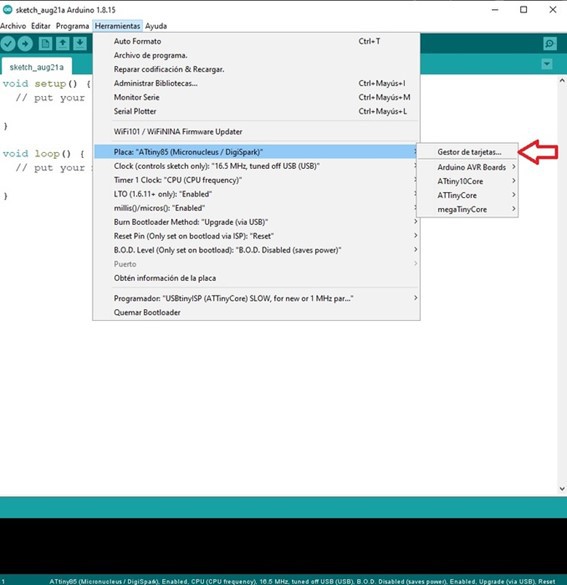
When the card manager opens we will need to look for AttinyCore and install it to have support for our ATTiny85.

Once this is done, we will have support to program the microcontroller integrated into the card.
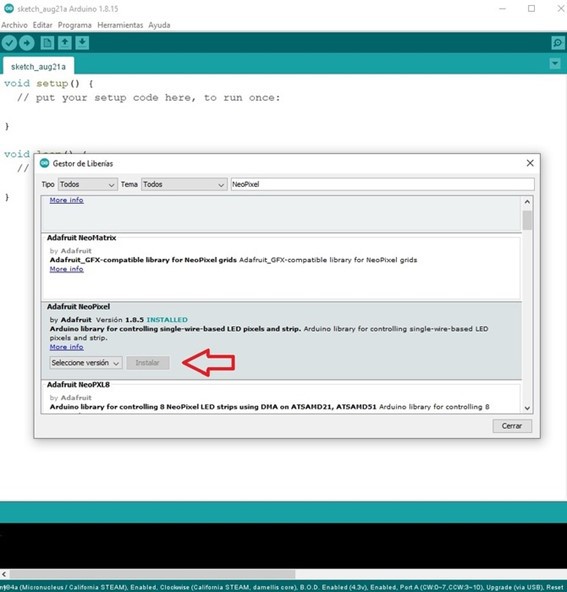
Now we will need to install the library of the NeoPixels to be able to use them easily. This is done from Program-Include Library-Manage Library.
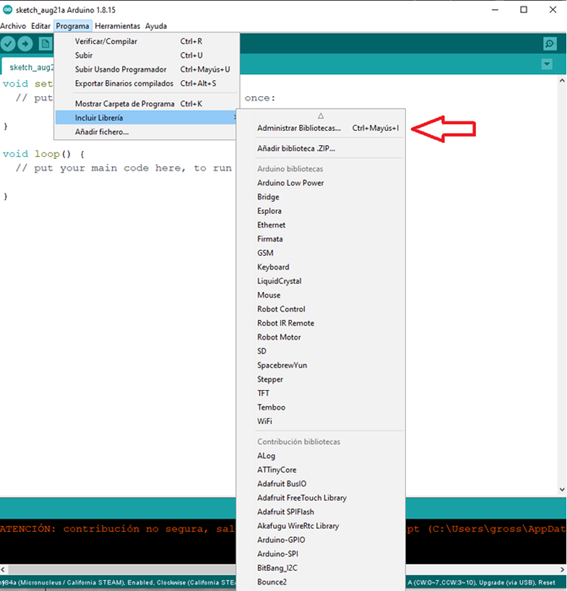
We searched for NeoPixel and installed the library as shown below.
We will also need to install the RTClib library to have real-time clock support that the card has integrated.
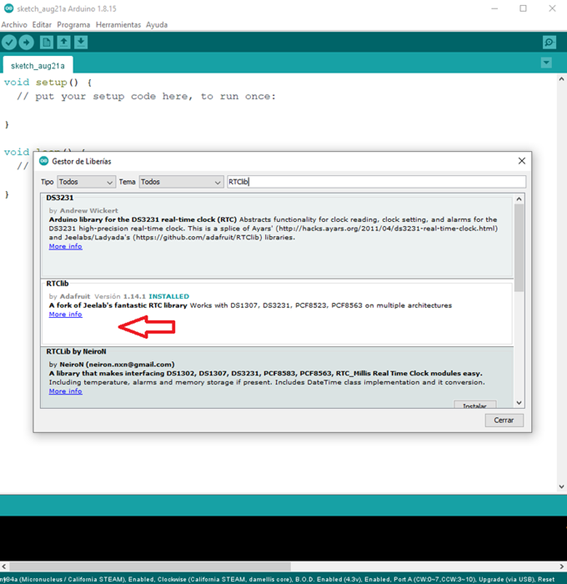
Once this is done we are ready to start programming our card.
The good thing about the Arduino IDE is that there are many libraries available to execute functions or integrate peripherals in a very simple way, you can install as many as you need since these are installed on the PC but when integrating them into the project you must be careful since these consume resources of the microcontroller and we can easily run out of space.
2.Create a program, compile it and upload it to the microcontroller to run it.
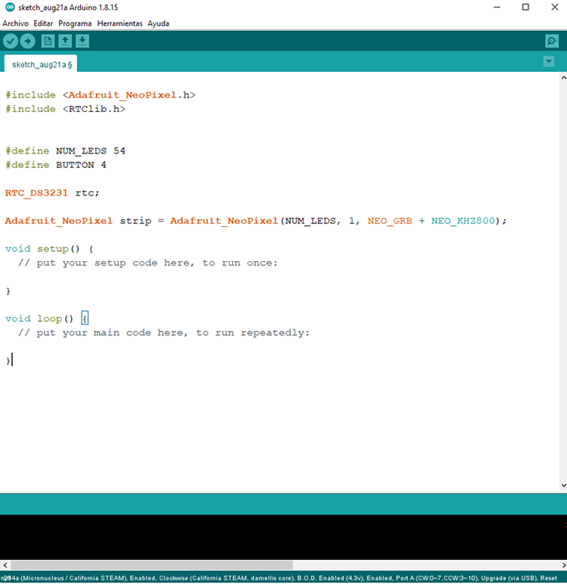
To create an Arduino program we must first of all integrate the libraries that we download for that you can copy the following text at the beginning of the sketch without deleting anything.
#include <Adafruit_NeoPixel.h>
#include <RTClib.h>
#define NUM_LEDS 54
#define BUTTON 4
RTC_DS3231 rtc;
Adafruit_NeoPixel strip = Adafruit_NeoPixel(NUM_LEDS, 1, NEO_GRB + NEO_KHZ800);
Now you are ready to write your programs and make use of all the functions to program the ATtiny 85 microcontroller you can follow this tutorial to use an Arduino one as a programmer.
https://create.arduino.cc/projecthub/arjun/programming-attiny85-with-arduino-uno-afb829
To use as a display from another microcontroller:
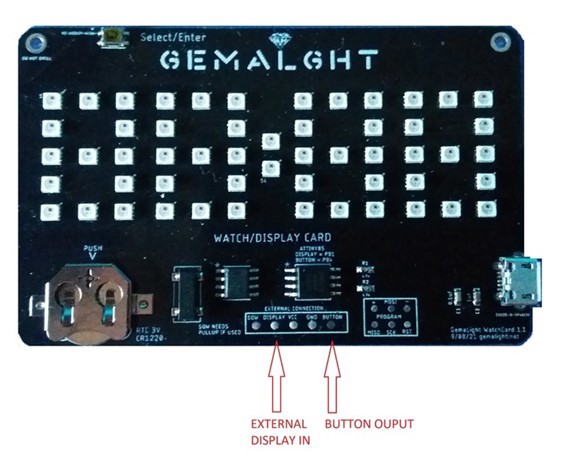
You can use the display from any microcontroller for your project by welding the pin corresponding to the data of the NeoPixels to the pad "Display", you can also take the input of the button present on the card by welding to the button pin.
You can find examples of how to use the display and more information in the code examples.
User manual for the watch function.
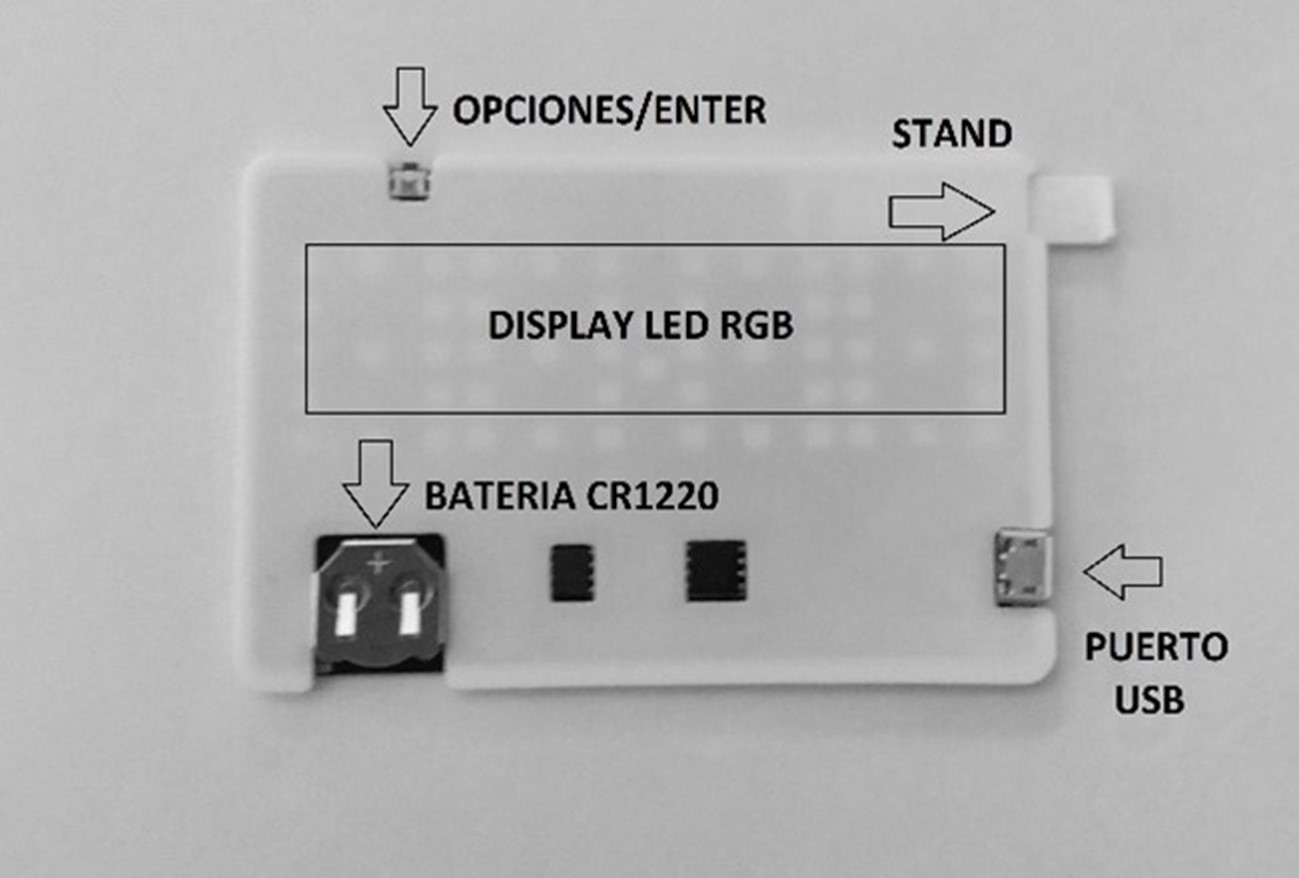
Fig1.

Fig2.
-To turn on the card simply connect the USB cable to the micro USB port of the card and the other end to any available USB port.
-You will be shown the welcome message and then the last hour set with the color and brightness due to defects or saved by the user in the last configuration will be shown.
-To place the card in a vertical position, remove the stand as indicated in fig1. Then with the USB cable connected slide the notch of the stand from the bottom up as indicated in fig2.
-To adjust the time simply press the OPTIONS/ENTER button at the top of the card as shown in fig1. Once you enter the options you can release the button to change the option simply press the button the option will change up to intervals until its maximum option and restart to the initial option again, once you have the desired option selected release the button and then 4sec. It will be advanced to the next option automatically.
-The options are as follows:
"CO 01" Choose the desired color within the available four; red, green, blue, white.
"BR 01" Indicates the intensity of the brightness of the led the option goes from 2 to 25 being the latter the most intense.
"HR 00" option to set the time in 24hs format.
"MI 00" option to set the minutes.
"Say ON" Control whether the time is displayed or not if you choose the option not to show the time press the button to show the time and to re-show the time indefinitely press the button for 5 sec until "DION" is displayed on the screen.
-Once the desired options are selected, they will be saved in the memory of the card, the time is the only variable that depends on the secondary battery of the card.
Once this is over, the hour will be lost every time the card loses the main power supply.
-When the secondary battery is exhausted when connecting the card you will be shown the message: BATT 0% indicating that it is necessary to change the battery, it will also be shown if it is the first time the watch is turned on.
-To change the same slide the battery in the direction of the arrow in fig1. With a plastic or wood element; it can be a pen lid or toothpick.
-To place a new battery this has to be of the CR1220 model and you must make sure that the + of the battery looks up coinciding with the symbol that is on the card.
-To activate the SQW pin of the DS1307 PSTN as of 1hz press the button during the welcome message and the text"SQ 1H" will be displayed on the screen and the SQW pin will emit a pulse every 60 sec approximately, repeat the process to deactivate it.
-DO NOT EXPOSE TO DIRECT SUN OR WATER
-POWER SUPPLY MUST NOT EXCEED 5V