 Colin Maykish
I want to briefly go through the process I've taken to setup a development environment and write software for the Herring computer. Early on in the project I decided I wanted to write most of the software in C. I learned enough 6502 assembly language to get my board working and to aid with debugging, but an assembly deep-dive was not where I wanted to focus my efforts. Obviously assembly code can be much faster than anything written in C, but if I was after speed, I wouldn't be building a 6502 computer in the first place.
C Compiler
The cc65 toolset provides some GNU-like applications for compiling software. There's a compiler, an assembler, and a linker. These tools operate roughly like their bigger brothers with some specific options and settings for the 6502. They also provide a subset of the C standard library which is a huge productivity boost.
I first created a linker config file which is basically a description of the computer's memory map so the linker knows where to put the different pieces of your compiled code. Available here: https://github.com/crmaykish/herring-6502/tree/main/firmware/config (There are actually two linker config files which I'll explain shortly.) After that, it's necessary to create a `crt0.asm` file. This is a small bit of assembly that sets up the stack, initializes memory and then calls `main()`. At that point, C takes over and you're ready to go.
Writing a Monitor/Bootloader
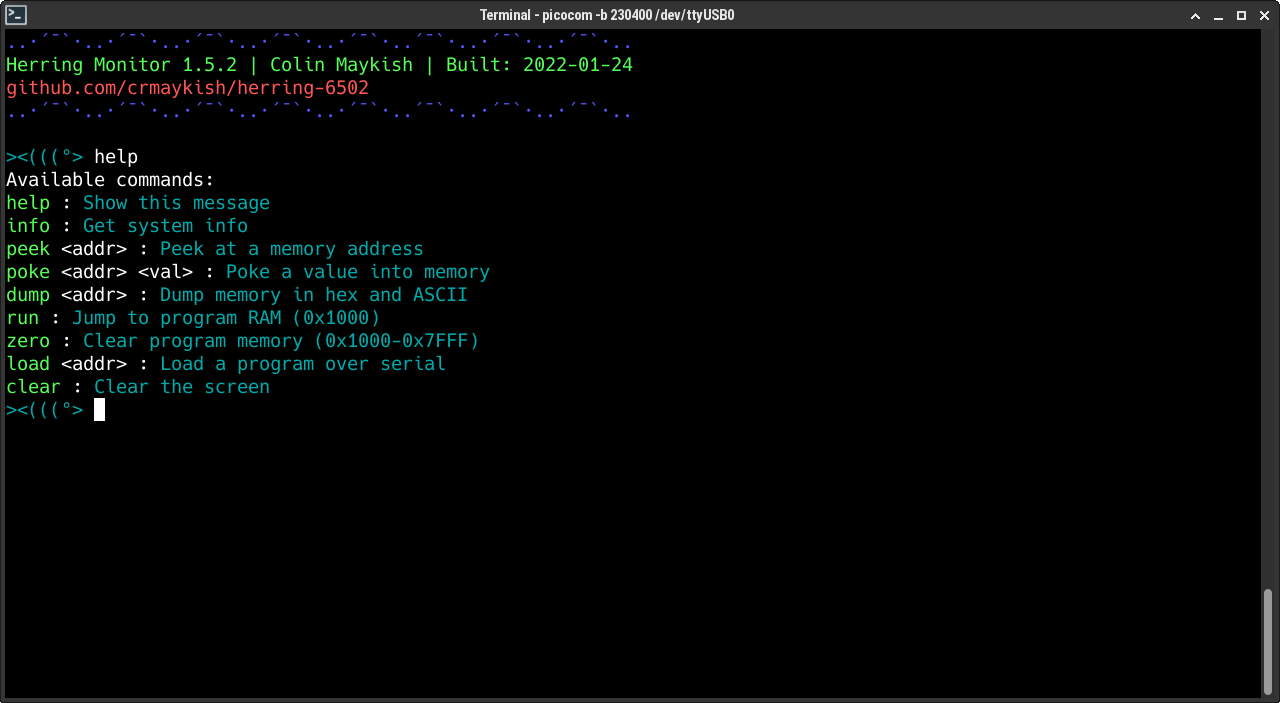
Compiling C is a great start toward more efficient software development, but one bottleneck is constantly having to flash and reinstall ROM chips to test changes. I built a monitor application that runs from the ROM. It functions as a system monitor (peek, poke, memdump, etc) as well as a serial bootloader. Using the `load` command, additional programs can be transferred over the serial port and written directly into an unused portion of RAM. When the transfer is complete, the `run` command tells the 6502 to jump to the entry point of this application. This is why there are two linker configs and crt files defined. One is for the monitor (or any application that runs from ROM) and the other is for programs that are meant to be loaded into RAM and executed from there, i.e. everything else.
In short, the bootloader code rarely changes, but I can constantly load and run new code over the serial port with a few commands.
A Terrible Transfer Protocol
A quick word on the serial transfer details: it's trivially simple, but it has been extremely reliable so far. When the `load` command is given, the monitor goes into a listening mode and it stores every byte it receives over the serial port into increasing locations in RAM starting at $1000 (the monitor application is given the first 4K of RAM, see the linker configs for more detail). When the monitor sees three magic bytes ($DE) in a row, it stops the transfer and returns to the prompt. The application is now in RAM and can be executed with the `run` command. When an application in RAM returns from `main()`, it gives control back to the monitor (assuming it exited cleanly). I wrote a tiny Go application to run on the PC which implements this "protocol" and is responsible for transferring the compiled application files (https://github.com/crmaykish/ctt).
This method of reading every byte directly from the serial port with no handshaking or checksum is a total hack. I had every intention of implementing xmodem or something more robust, but I have not had a good reason to do so. This hack works shockingly well.
Development Workflow with Make
To summarize, my development workflow looks something like this:
1. Flash the monitor to ROM (only necessary if there are changes to the monitor code)
2. Write C code for another application
3. Compile this application against the RAM configuration
4. Use the bootloader to transfer this application into RAM
5. Run the application from RAM
6. Jump to step 2
To make this all a bit cleaner, I wrapped up the compilation steps into a Makefile, see: https://github.com/crmaykish/herring-6502/blob/main/firmware/Makefile
To create a new application, I add another entry into the Makefile and adjust the source files as necessary.
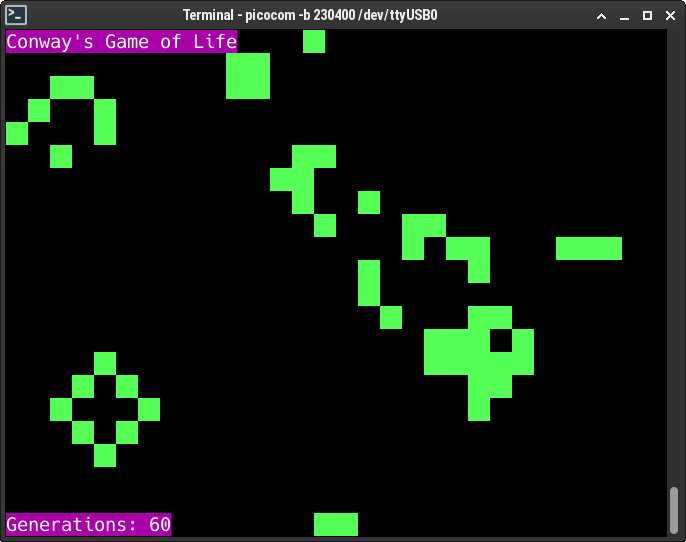
Application Demo
Most of my applications and demos use the serial port as their output, but there's no reason they have to. I'm still experimenting with display hardware and other input devices. The development process for those applications is identical to what I described above.
Discussions
Become a Hackaday.io Member
Create an account to leave a comment. Already have an account? Log In.