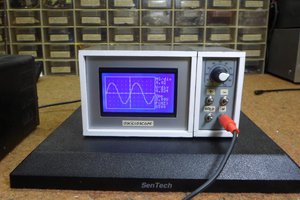
This time I will show you how to make a simple Arduino oscilloscope. The maximum signal frequency that the oscilloscope can display is 20 kHz, and the maximum input voltage is 5 V without a voltage divider.
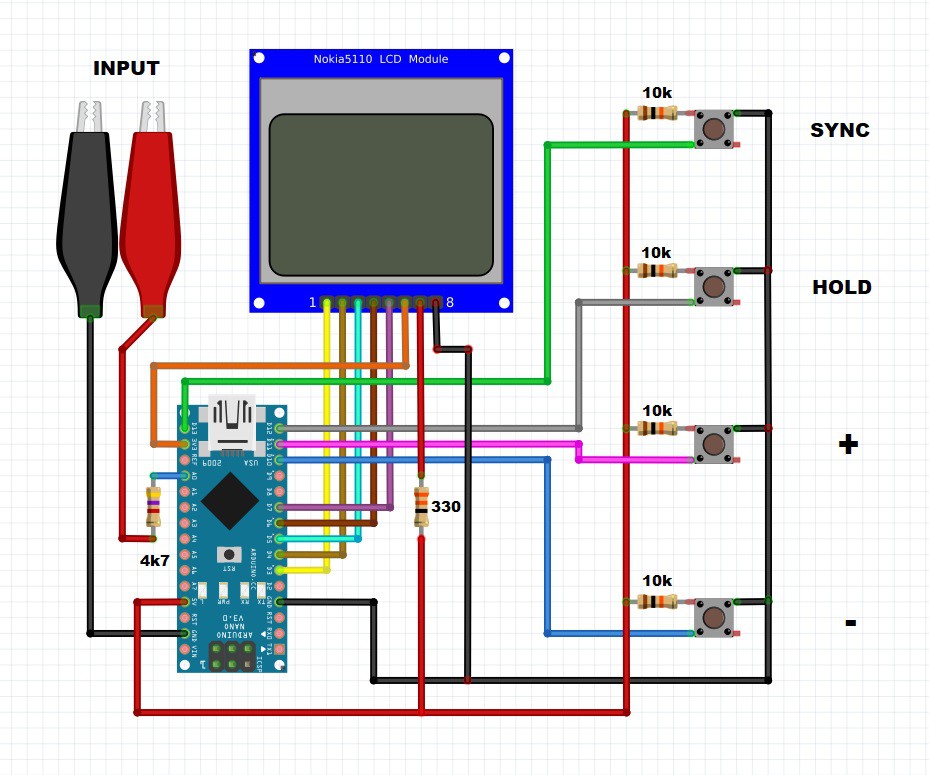
The oscilloscope is controlled by four buttons:
- "HOLD" button - which serves to freeze the current state of the screen
- Synchronization button that allows you to set the synchronization level.
- And Buttons "+" and "-" that control the sweep, sync level, and move the signal image in HOLD mode.
On the Nokia 5110 screen, vertically each cell is 1 V, horizontally one cell is equal to the scan resolution, which has the (following) values from: 0.1, 0.2, 0.5, 1.0, 2.0, 5.0, 10.0, 20.0 and 50.0 ms. The sweep value is changed with the "+" and "-" buttons, which is displayed in the upper left corner. The trigger level is displayed as a small bar on the left side of the screen, and the trigger voltage is displayed in the upper right corner of the screen. This project is published on arduino.ru page where you can read more details.
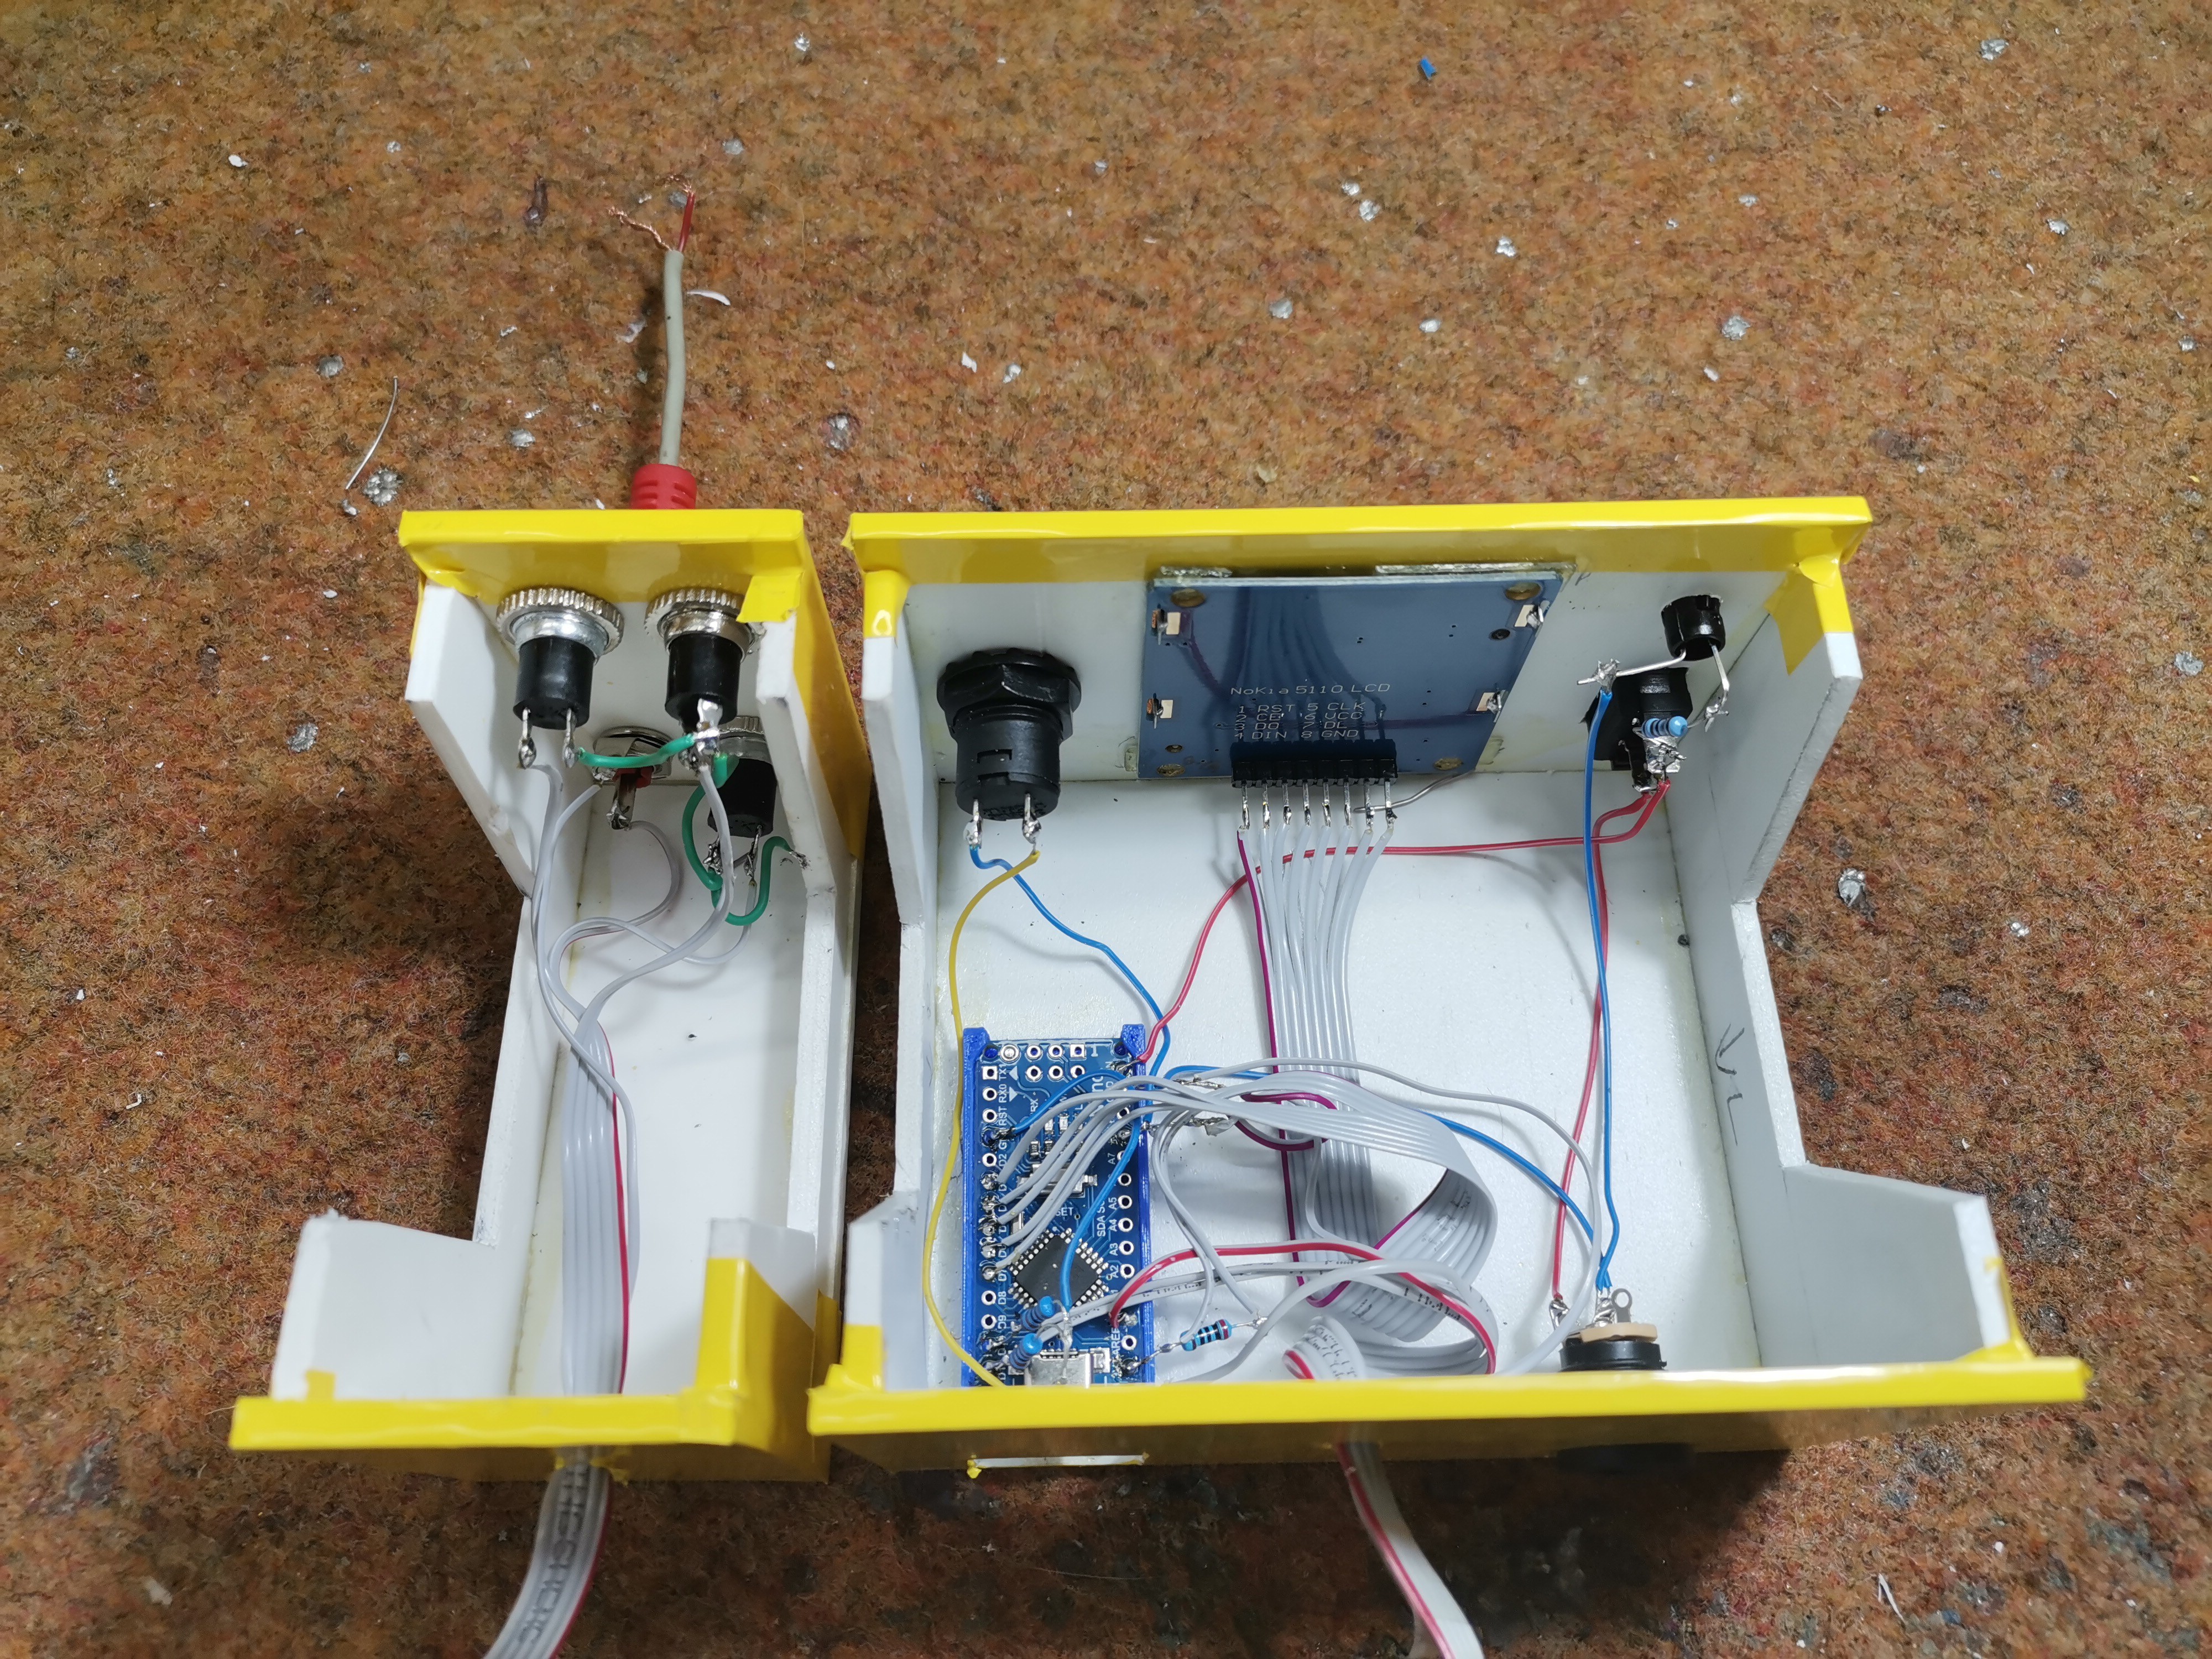
The device is extremely simple to build and consist of only a few components - Arduino Nano microcontroller
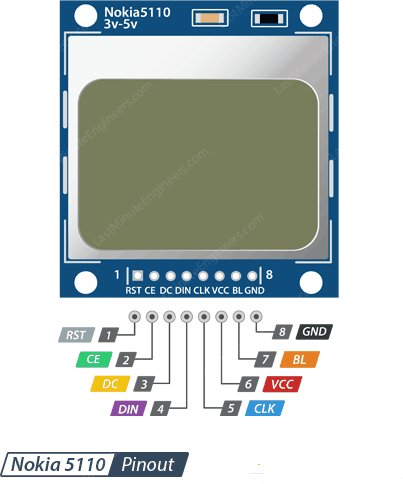
- Nokia N5110 LCD display
- four buttons
- four pull-down resistors
- Input jack
- And Power switch and Led
I tested the oscilloscope with sine and rectangular signal generator. Even though it is not a professional or very usable instrument, it can still be used for educational purposes or in your laboratory, for testing low-frequency signals, especially knowing that the device is very easy to make and extremely cheap.
Finally, the device is placed in a suitable box made of PVC and coated with self-adhesive wallpaper.
 mircemk
 ZaidPirwani