 Xtreme Tech
Basic functioning of this project :
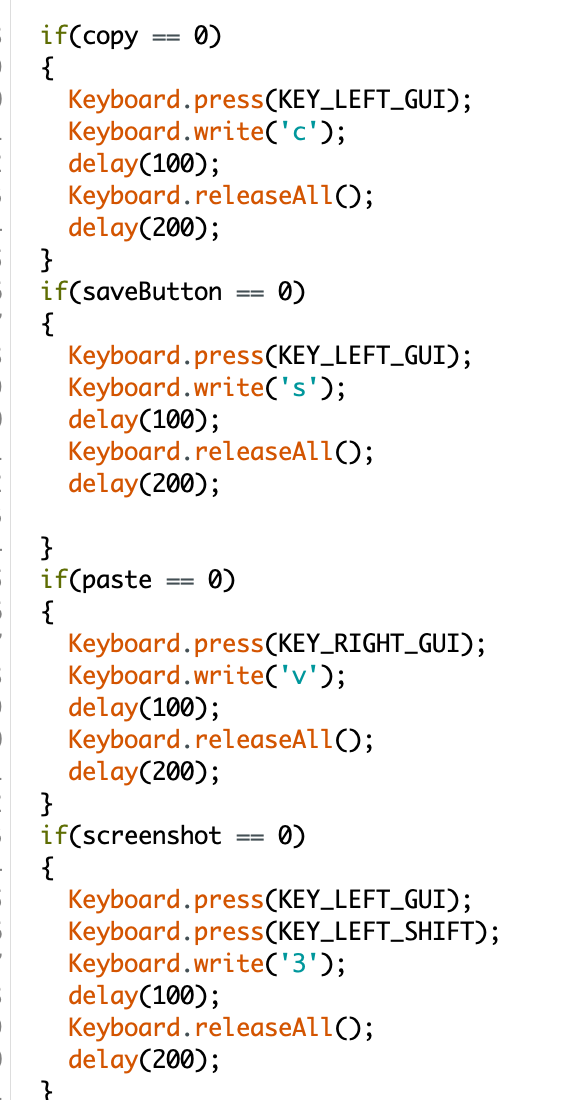
The macro keyboard consists of 6 mechanical switched which can be reprogrammed to execute any task at a click of a button.
More about this project :
The idea for this project first came to me when I was attending online meetings. During all my meetings I tend to take several screenshots and it eventually became extremely tedious to press CTRL + SHIFT + 3 each time I had to take a screenshot. So, I decided to build a macro keyboard which would allow me to take a screenshot with the click of a single button.
I have used the other keys to carry out functions such as copy, paste, select all, save and undo. However, these keys can also be programmed to type "yes" or "no" with the press of a single button and this would be quite handy for online meetings. Furthermore, this could be used by gamers or streamers to increase productivity.
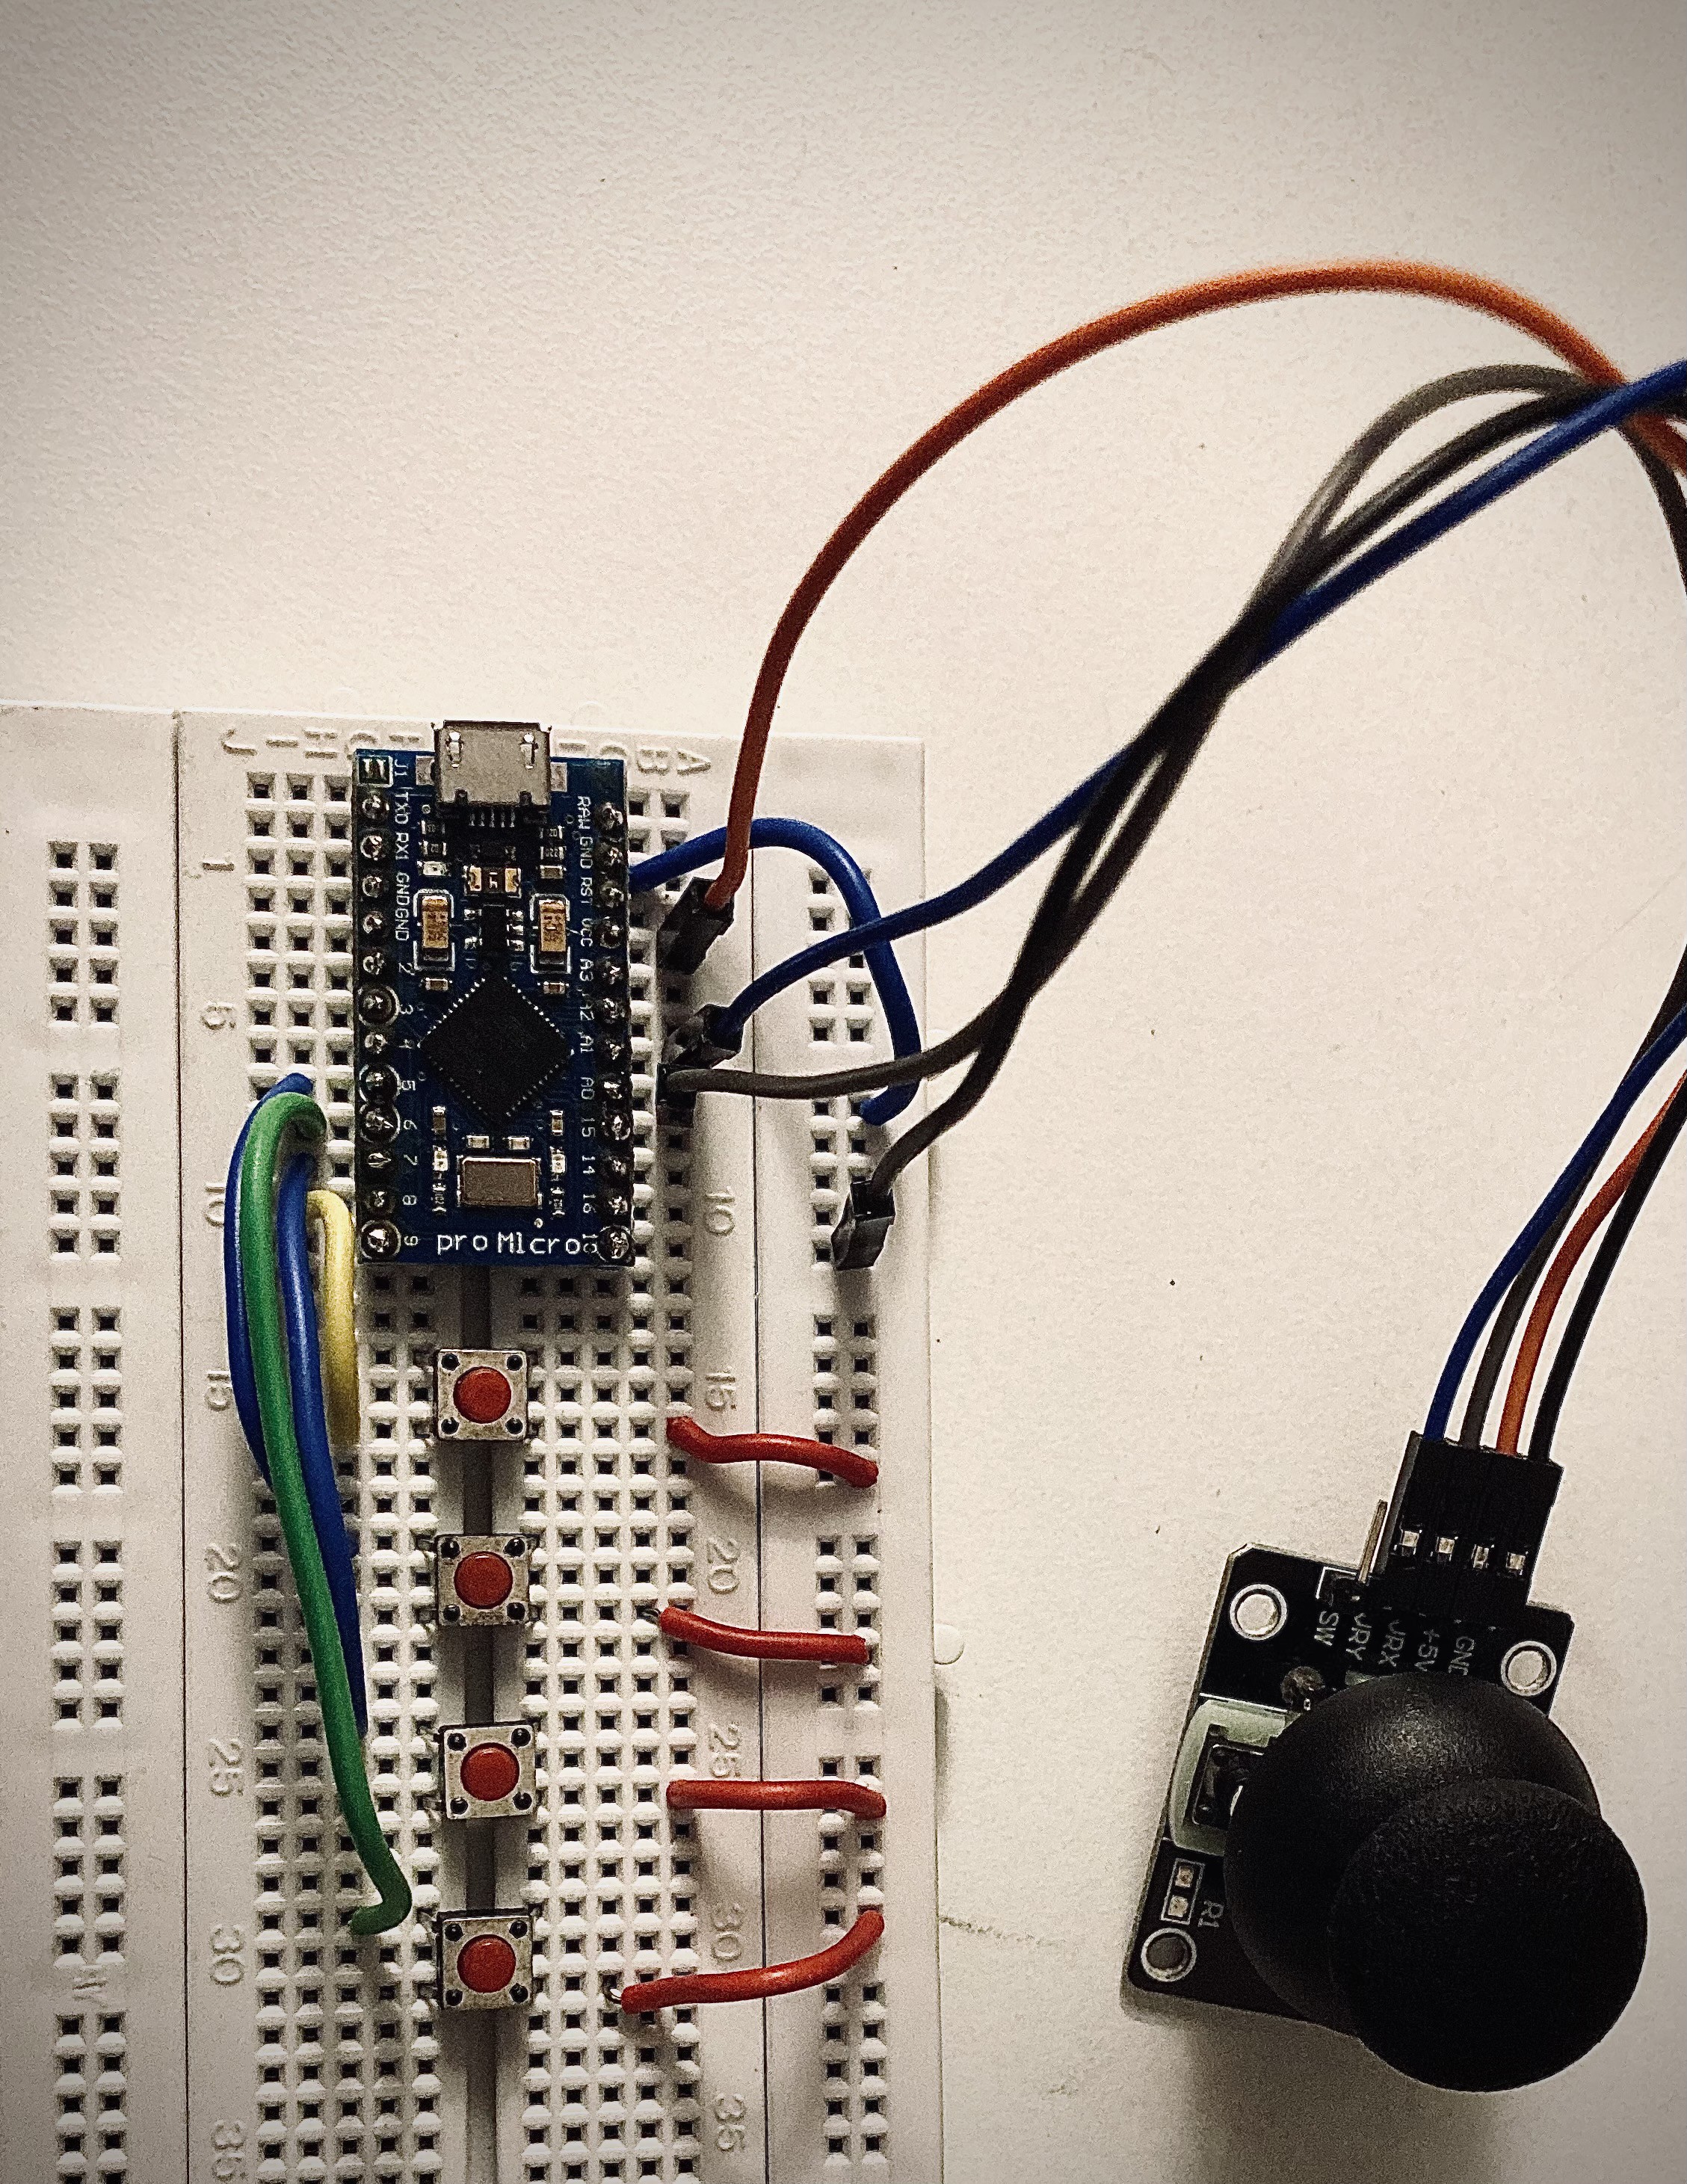
I have used the arduino pro micro board for this project. I decided to use mechanical switches as they feel extremely comfortable and they give a satisfying "click" when they are pressed.


 ptrav
ptrav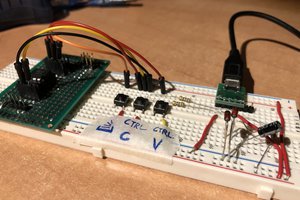
 Albert Gonzalez
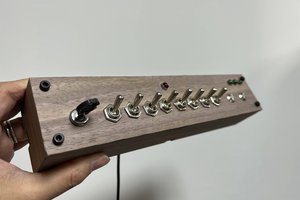
 HIGEDARUMA
 Danny Caudill
Good job. Every hacker should make a custom keyboard. I did #Wrong keyboard