This project was developed in partnership with the company JLCPCB. When performing the reading, you get 5 free units of a printed circuit board for you to assemble your project.
Have you ever thought about developing a project and being able to unite mechanics, electronics, sensors, and programming?
In this article, we will teach you how to create an elevator project with Arduino and how to use the shield board to connect and control all the devices in the project.
The 5 units of this shield were made available for free for you to receive in your home and use in any project with Arduino.
You must follow all these steps below.
- Download the robot control board file
- Enter on this website and make your account.
- Add the control board files to the website
- Add the JLC-REBE discount coupon to the payment section
- Ready, you won 5 free PCB units.
Watch the video below and learn the complete walkthrough.
See below for some images of our project and its parts.


Do you want to know how to create all the structure presented above and develop your own elevator maker? I invite you to travel on this reading, and we can do the complete elevator schedule with Arduino.
Let get started!
Why Develop an Elevator with Arduino?
In many places, elevators are used to allow users of a building to move between different floors.
Elevators are devices that work with a high level of safety through the use of several sensors in their structure.
In addition to being used to transport people, several places use elevators as a platform for cargo handling in construction sites, restaurants, reception of product delivery, and much more.
Learning how to build your own elevator will help you understand:
- How does an elevator work
- What are the sensing elements to use in an elevator?
- The working mechanisms of an elevator.
- Operating principle of sensors;
- Control board for connecting elevator devices
- And much more.
There are many experiences that will help you build your own elevator structure.
In addition, you will develop the programming logic, which is a fundamental point for any electronics and automation professional.
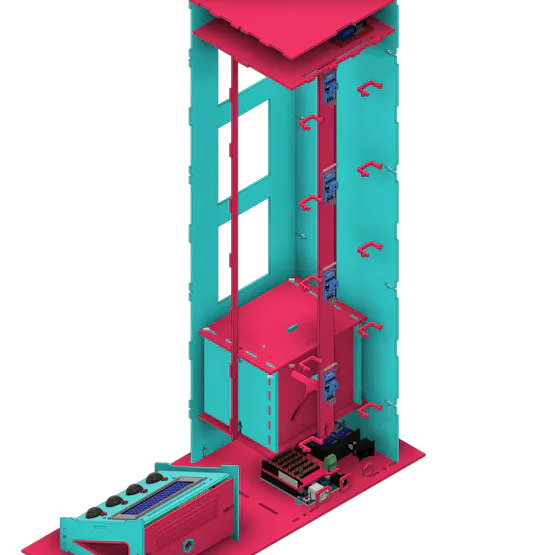
The Arduino Elevator Structure
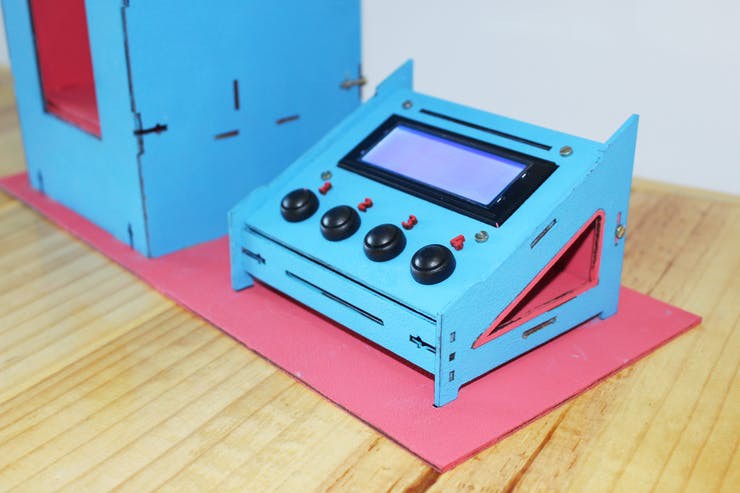
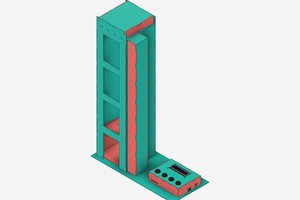
The figure below shows the complete structure of the project. The elevator consists of 4 floors and a control interface
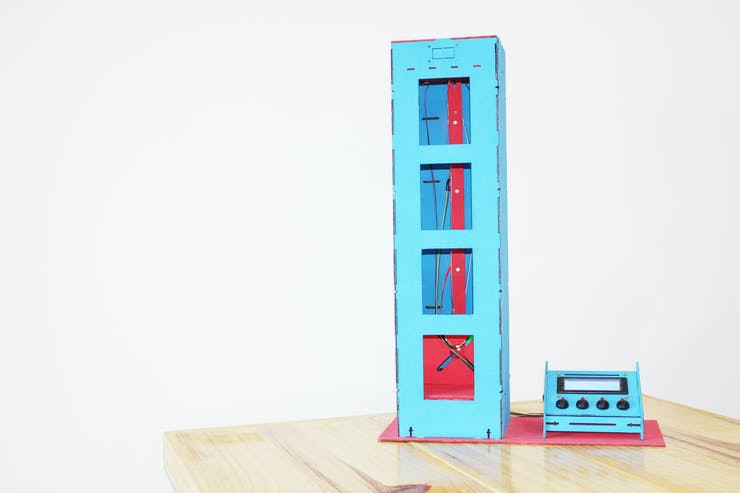

The control interface consists of 4 buttons and a 20x4 LCD. The user will be able to control the elevator positions from each button and will receive system information on the structure's display.
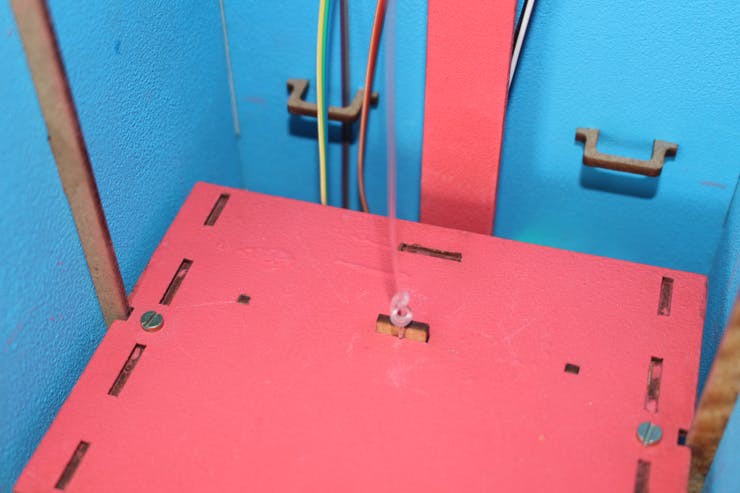
The control box is connected to the rear of the elevator.
The control box is connected to the rear of the elevator. See the figure below.

The wires enter this back region and connect with the Arduino, which is responsible for processing the programming logic.
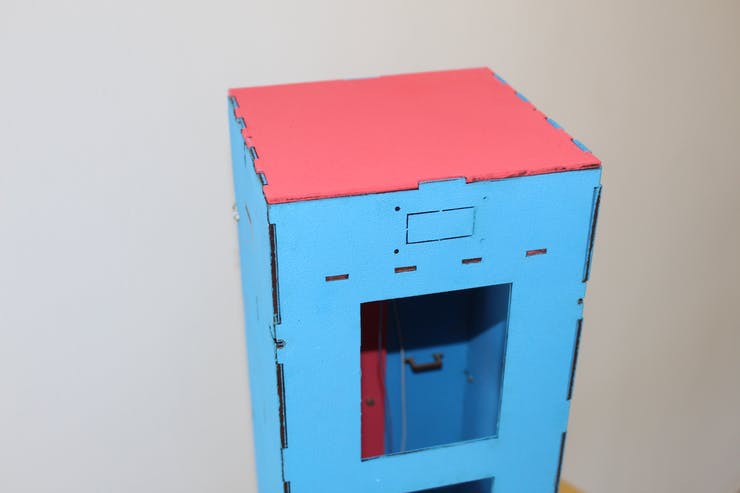
In addition, the elevator structure was created to facilitate its programming and allow the user not to remove the Arduino during the programming process.
Below we have the image of the Arduino in the elevator structure. As you can see, there is an access for the Arduino's USB port and Jack connector for power supply.
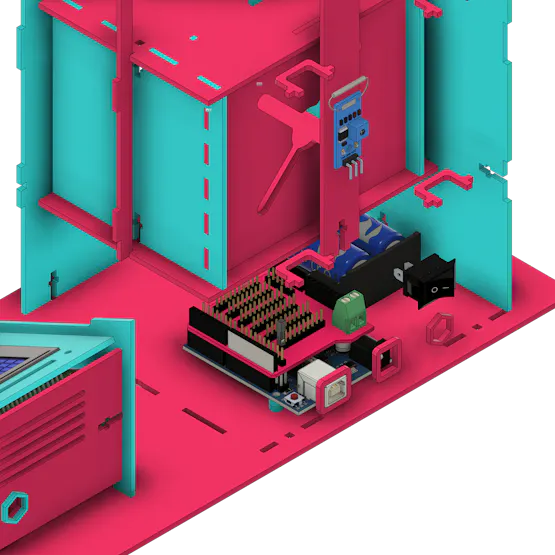
All electronics connect to the Arduino through the use of this shield. The shield is shown in the figure below.
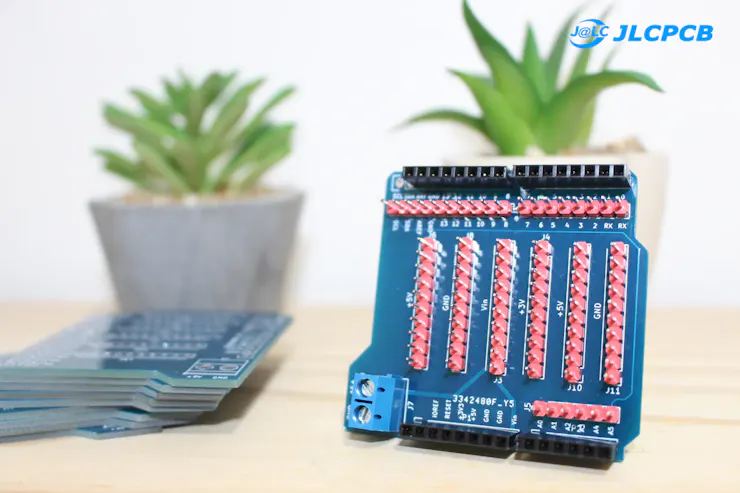
Shield can facilitate the assembly process for your entire project. Find out why!
Why use the Shield on Arduino UNO
There are 2 big problems that will arise if you don't use the shield in your project: faulty connections with solders and the absence of power terminals for sensors and other devices.
Let's understand how to solve these 2 problems?
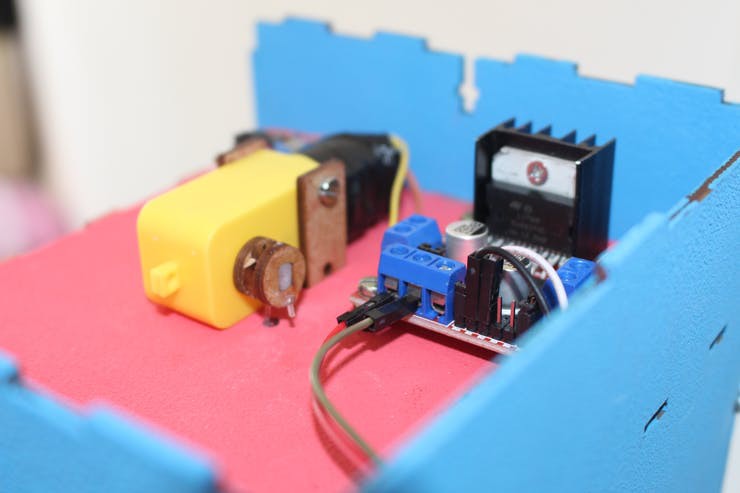
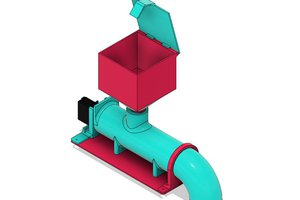
Look, for example, at the project's sensors. We have 4 sensors to detect the elevator's position. See the figure below.
In total, there are 4 GND's and 4 wires for a +5V connection. Unfortunately, we know that Arduino has only 2 GND terminals and 1 connection pin with +5V.
This forces us to solder these wires together and connect to these terminals.
However, in some situations,...
Read more »

 atomkemp