allpartscombined
Idea
**Full build videos at bottom
Every Arduino user wants to build a robotic hand, right? Well, I decided to go for it, and I did it a little differently.
Instead of using potentiometers or a glove with flex sensors, I used a Leap Motion to track my real hand, then send the finger positions via Serial to the Arduino, which sets the PWM signals for servos controlling each finger.
Building the Hand
The hand itself could be any design you want, but in my case I used vinyl tubing and cardboard, which cost me around $10.
The tubing usually comes in a coil, so to get it prepared, stick a dowel rod in it, then heat it up with a heat gun or blow dryer to soften it. Then let it cool over the rod. When you take it back out, the tubing will naturally want to be straight.
After that, cut pieces of tubing about the lengths of your fingers, plus another inch or two for mounting to the hand.
Mark 'V' shaped notches at the joints of the finger-tube, then cut those out with a utility knife.
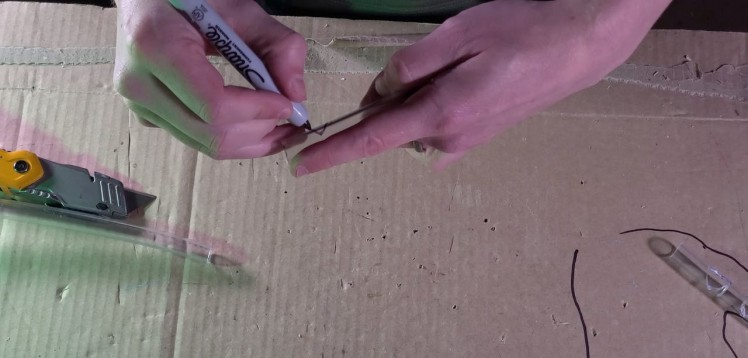
Do this for all 5 fingers and each joint of each finger.
Next, cut out a palm-shaped piece of cardboard to mount your fingers. I glued two pieces of cardboard together to make it a little more rigid.
You can mount the fingers by simply running screws through the base of the tubing into the cardboard hand (wood screws hold pretty well in cardboard).

Next, drill small holes in the front tips of each finger, then tie some thread or fishing line around it. Run the line through the topmost joint in the finger, and fish it out the bottom of the tube. When pulled, the line should make the finger curl.
After that, figure out placement for your servos on the cardboard palm and/or wrist. Make sure they aren't so close together that they will bump each other when turning. Trace their positions onto the carboard, then cut holes to mount them.
Once all servos are mounted, tie the other end of each piece of thread to the corresponding servo attachment so that when the servo is fully rotated, it will curl the finger in as much possible.
Stick a breadboard with an Arduino at the other end, and the physical build is pretty much done.
Wiring
Wire it up according to the Schematic.
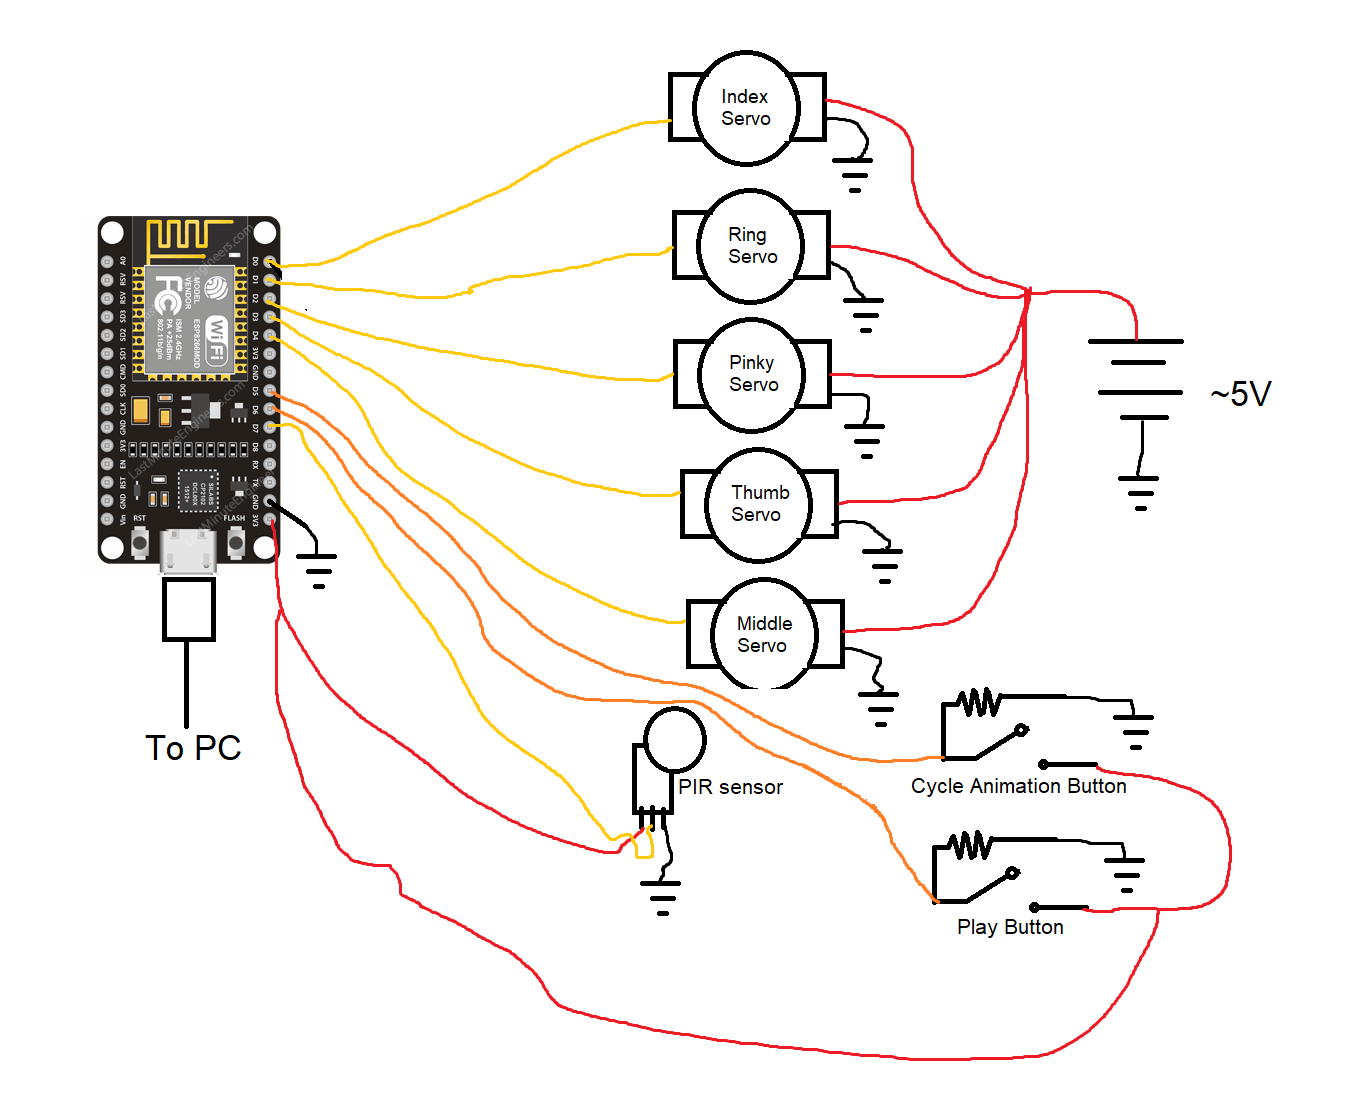
Thumb: GPIO-0
Index: GPIO-16
Middle: GPIO-2
Ring: GPIO-5
Pinky: GPIO-4
Software
There are 2 main pieces of software - the Arduino code and the PC app.
At this stage, you can go ahead and download the LeapHand.ino file from the repository, and the data.zip folder. Place these in the same folder and extract data.zip. **It must be extracted in the same folder as the.ino!
Add the contents of the "libraries" folder to your Arduino libraries folder.
Configure your Arduino IDE to work with the ESP8266, and install the ESP8266 Sketch Data Upload tool in your IDE. This is used to upload data files to the microcontroller.
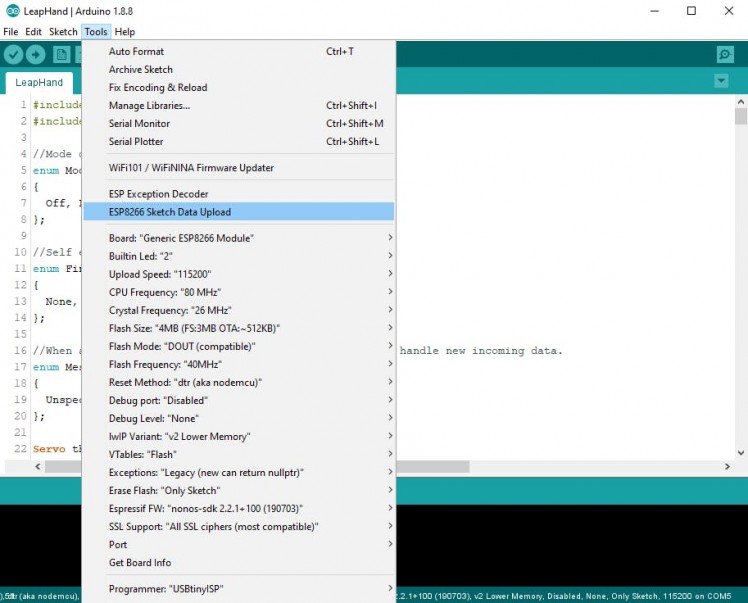
Connect the microcontroller to your PC, then go ahead and run the Sketch Data Upload tool, and then build and upload the code.
That's it for the Arduino.
Next, you'll need to install the Leap Motion SDK by following the instructions on the Leap Motion website. Then download the Unity Packages for it.
Create a new Unity project (make sure to use Unity 2020.1.5 or later). Import the Core package from the Leap Motion download into the project. Then import the LeapAnimatronicHand package from the repository in the same project.
Run the RobotHand scene to make sure your hands are tracking properly. Switch over to the Calibration scene, run it, and follow the on-screen prompts.
Now, see which Port your Arduino is connected to.
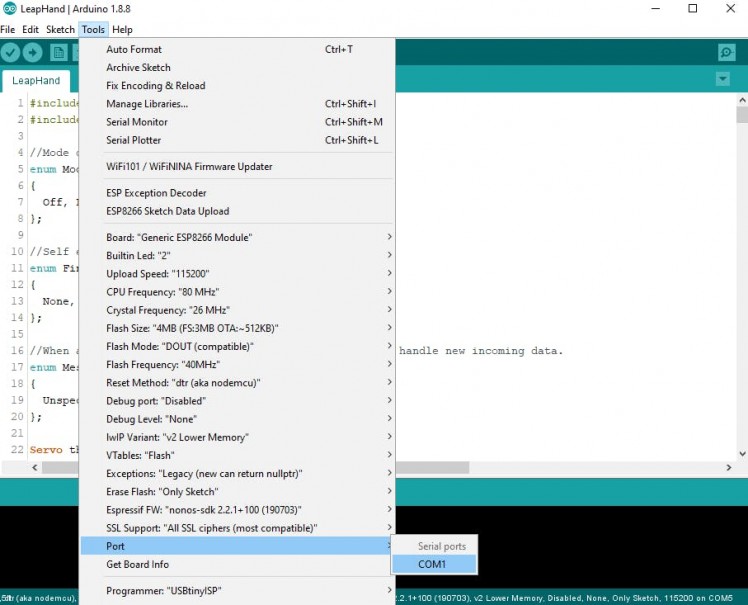
Then find the "Serial" object in the Unity scene and replace the Port Name with the one your Arduino is using.
That should do it. You can now run the whole project.
Start up the Arduino first, then start running the RobotHand scene. If you select Live mode, you should see that the robotic hand now tracks your right hand (note: left hand tracking not supported).
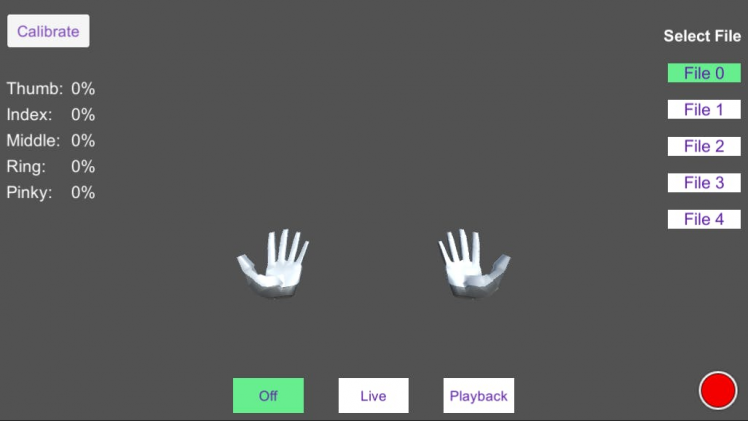
You can record...
Read more »
 Juan M. Casillas
 Adsurb
 Jerry Isdale