Grandeur
Building IoT products is hard because it involves development over a huge technology stack, like you need a hardware, you need an app (because technically that is what it is all about in the end) and a server to sync data between your app and hardware. This becomes much harder when you are doing it at production, like when you are starting a startup (building things to be sold). Then after that there comes scaling and managing your services which is another level of issue.
To make it easier we designed Grandeur which is a backend as a service platform for IoT to help developers and startups in building, scaling and managing their IoT products. It acts as a universal backend so you won't have to build and manage your own server. It comes with SDKs for arduino and web, which literally makes integration a whole lot easier. It is fast and event driven. In short, you can build things similar to Philips Hue right from your couch and make a pretty good business out of them provided that you market and sale like Philips 😛.
This tutorial is for helping you to get started with Grandeur. We will build an app from where we will publish data to a device in real-time. This will be a start and a whole series of tutorials are lined up after that. Before diving in, we urge you to checkout our first article to understand what Grandeur is about. If you have read it already or just want to skip over to real work, follow the steps below.
Step 1: Sign up to Grandeur
Create your account on Grandeur. It's free!

Or if you already have an account, just log in.
Step 2: Create Project
To take a start, create a new project as illustrated below:

Then using the client SDKs, we will build our first application on Grandeur.
Step 3: Get Started on Web
First step is to create an application through which we will publish data to our device.
If you don't feel like building an application, you can use Grandeur Canvas which is a drag-and-drop no-code App builder. You can follow this tutorial and skip the rest of this Step 3 and Step 7.
Now, for the app, we are using the JS SDK. We start with creating two files index.html and main.js, open the index file in our editor and add basic html to it. The page contains just a heading and a paragraph to show status.
<!-- Index.html -->
<!DOCTYPE html>
<html>
<!-- Head block of our page-->
<head>
    <!-- Title of our page-->
    <title>First Grandeur App</title>
</head>
<!-- Body block of our page-->
<body>
    <!-- Heading of the page -->
    <h1>First Grandeur App</h1>
    <p id="status">Starting</p>
</body>
</html>
Then we link JS SDK and the main.js file to the page. Here is the updated code:
<!-- Index.html -->
<!DOCTYPE html>
<html>
<!-- Head block of our page-->
<head>
    <!-- Title of our page-->
    <title>First Grandeur App</title>
    <!-- Link SDK with CDN -->
    <script src="https://unpkg.com/grandeur-js"></script>
</head>
<!-- Body block of our page-->
<body>
    <!-- Heading of the page -->
    <h1>First Grandeur App</h1>
    <p id="status">Starting</p>
    <!-- Link the main script file -->
    <script src="./main.js"></script>
</body>
</html>
Now we open our script file (main.js) in the editor. To access Grandeur, we are required to init the SDK with our project's api key. This gives us a reference to our project to let us send data to our device. Here's how:
/** main.js
** Initialize the SDK and get a reference to the project
*/

var project = grandeur.init("YOUR-API-KEY", "YOUR-ACCESS-KEY", "YOUR-ACCESS-TOKEN");
You can get your api key and access credentials (key and token) by visiting the settings page.👇🏻


While api key works as an identifier for your project, access credentials proves the validity of the request and the requesting party. Grandeur currently follows the HMAC standard. The SDK uses your access key to sign each request before sending it to Grandeur. Your access key is like...
Read more »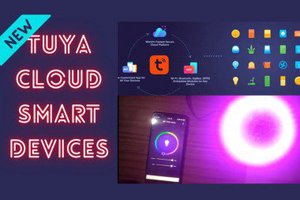
 Sumit
Sumit
 Roman V