Close
0%
0%

Sophie Robot

A next generation home robot with a omni directional drive unit and 6 axis collaborative robot arm

Public Chat
Similar projects worth following
This is a project that I have been designing on and off for about 2 years. I have recently been able to afford starting the build and robotic arms have come down in price enough to bring the project into a more realistic budget.

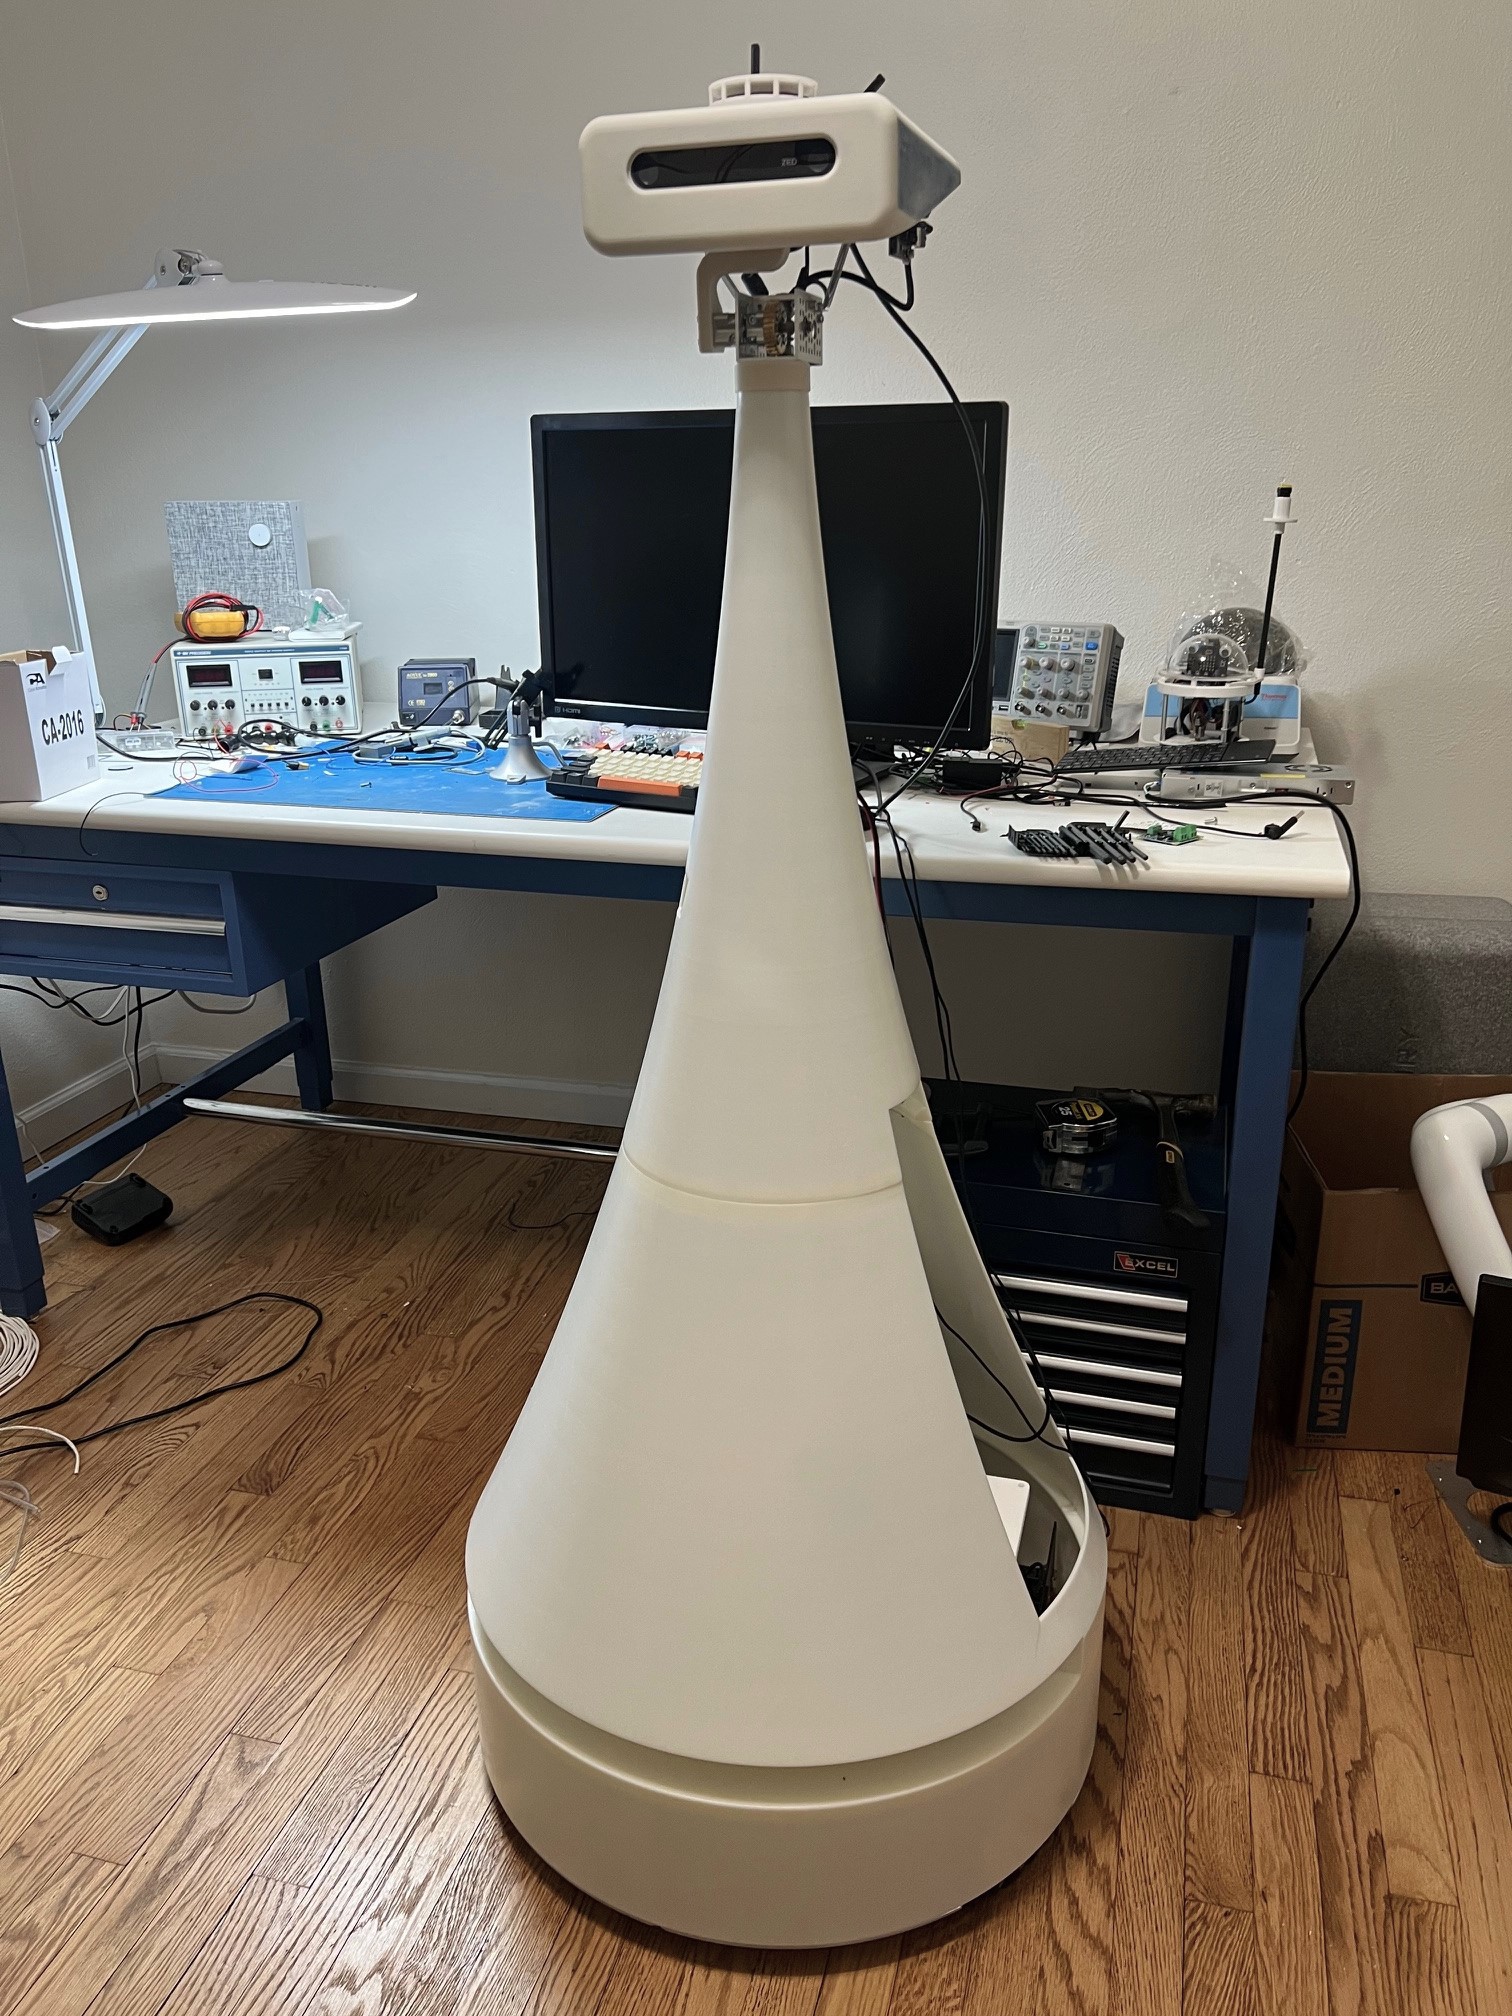
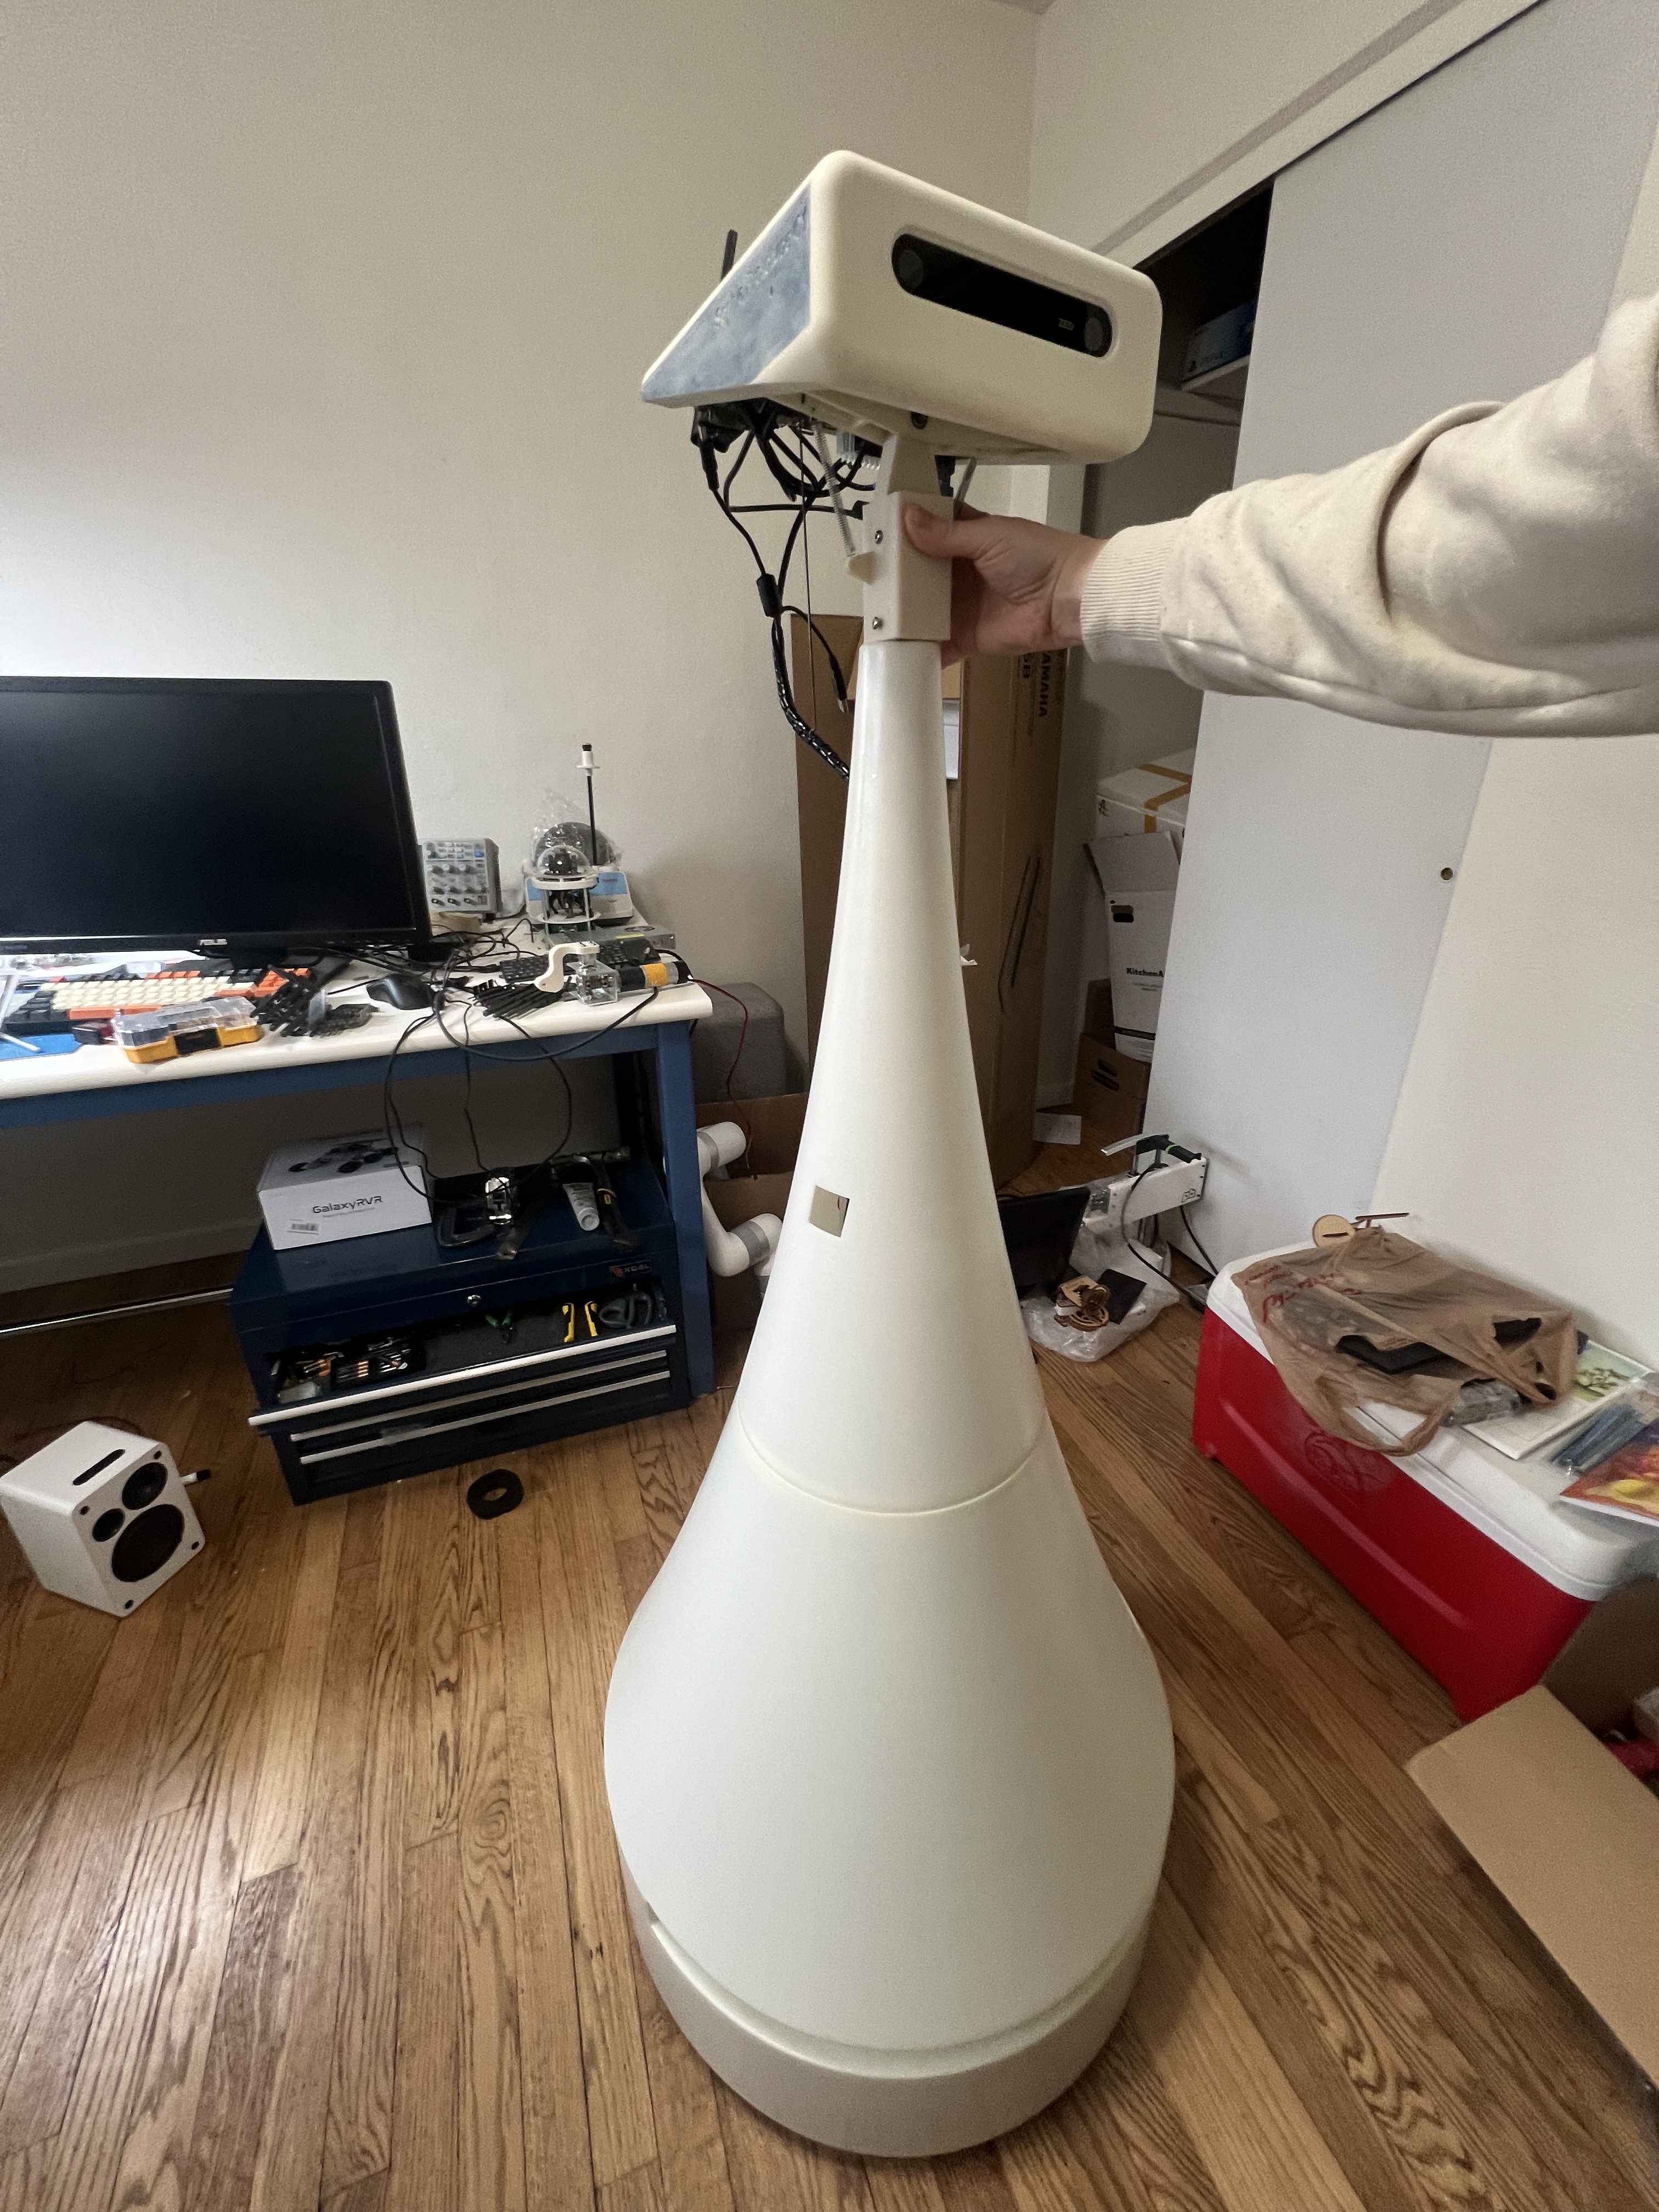
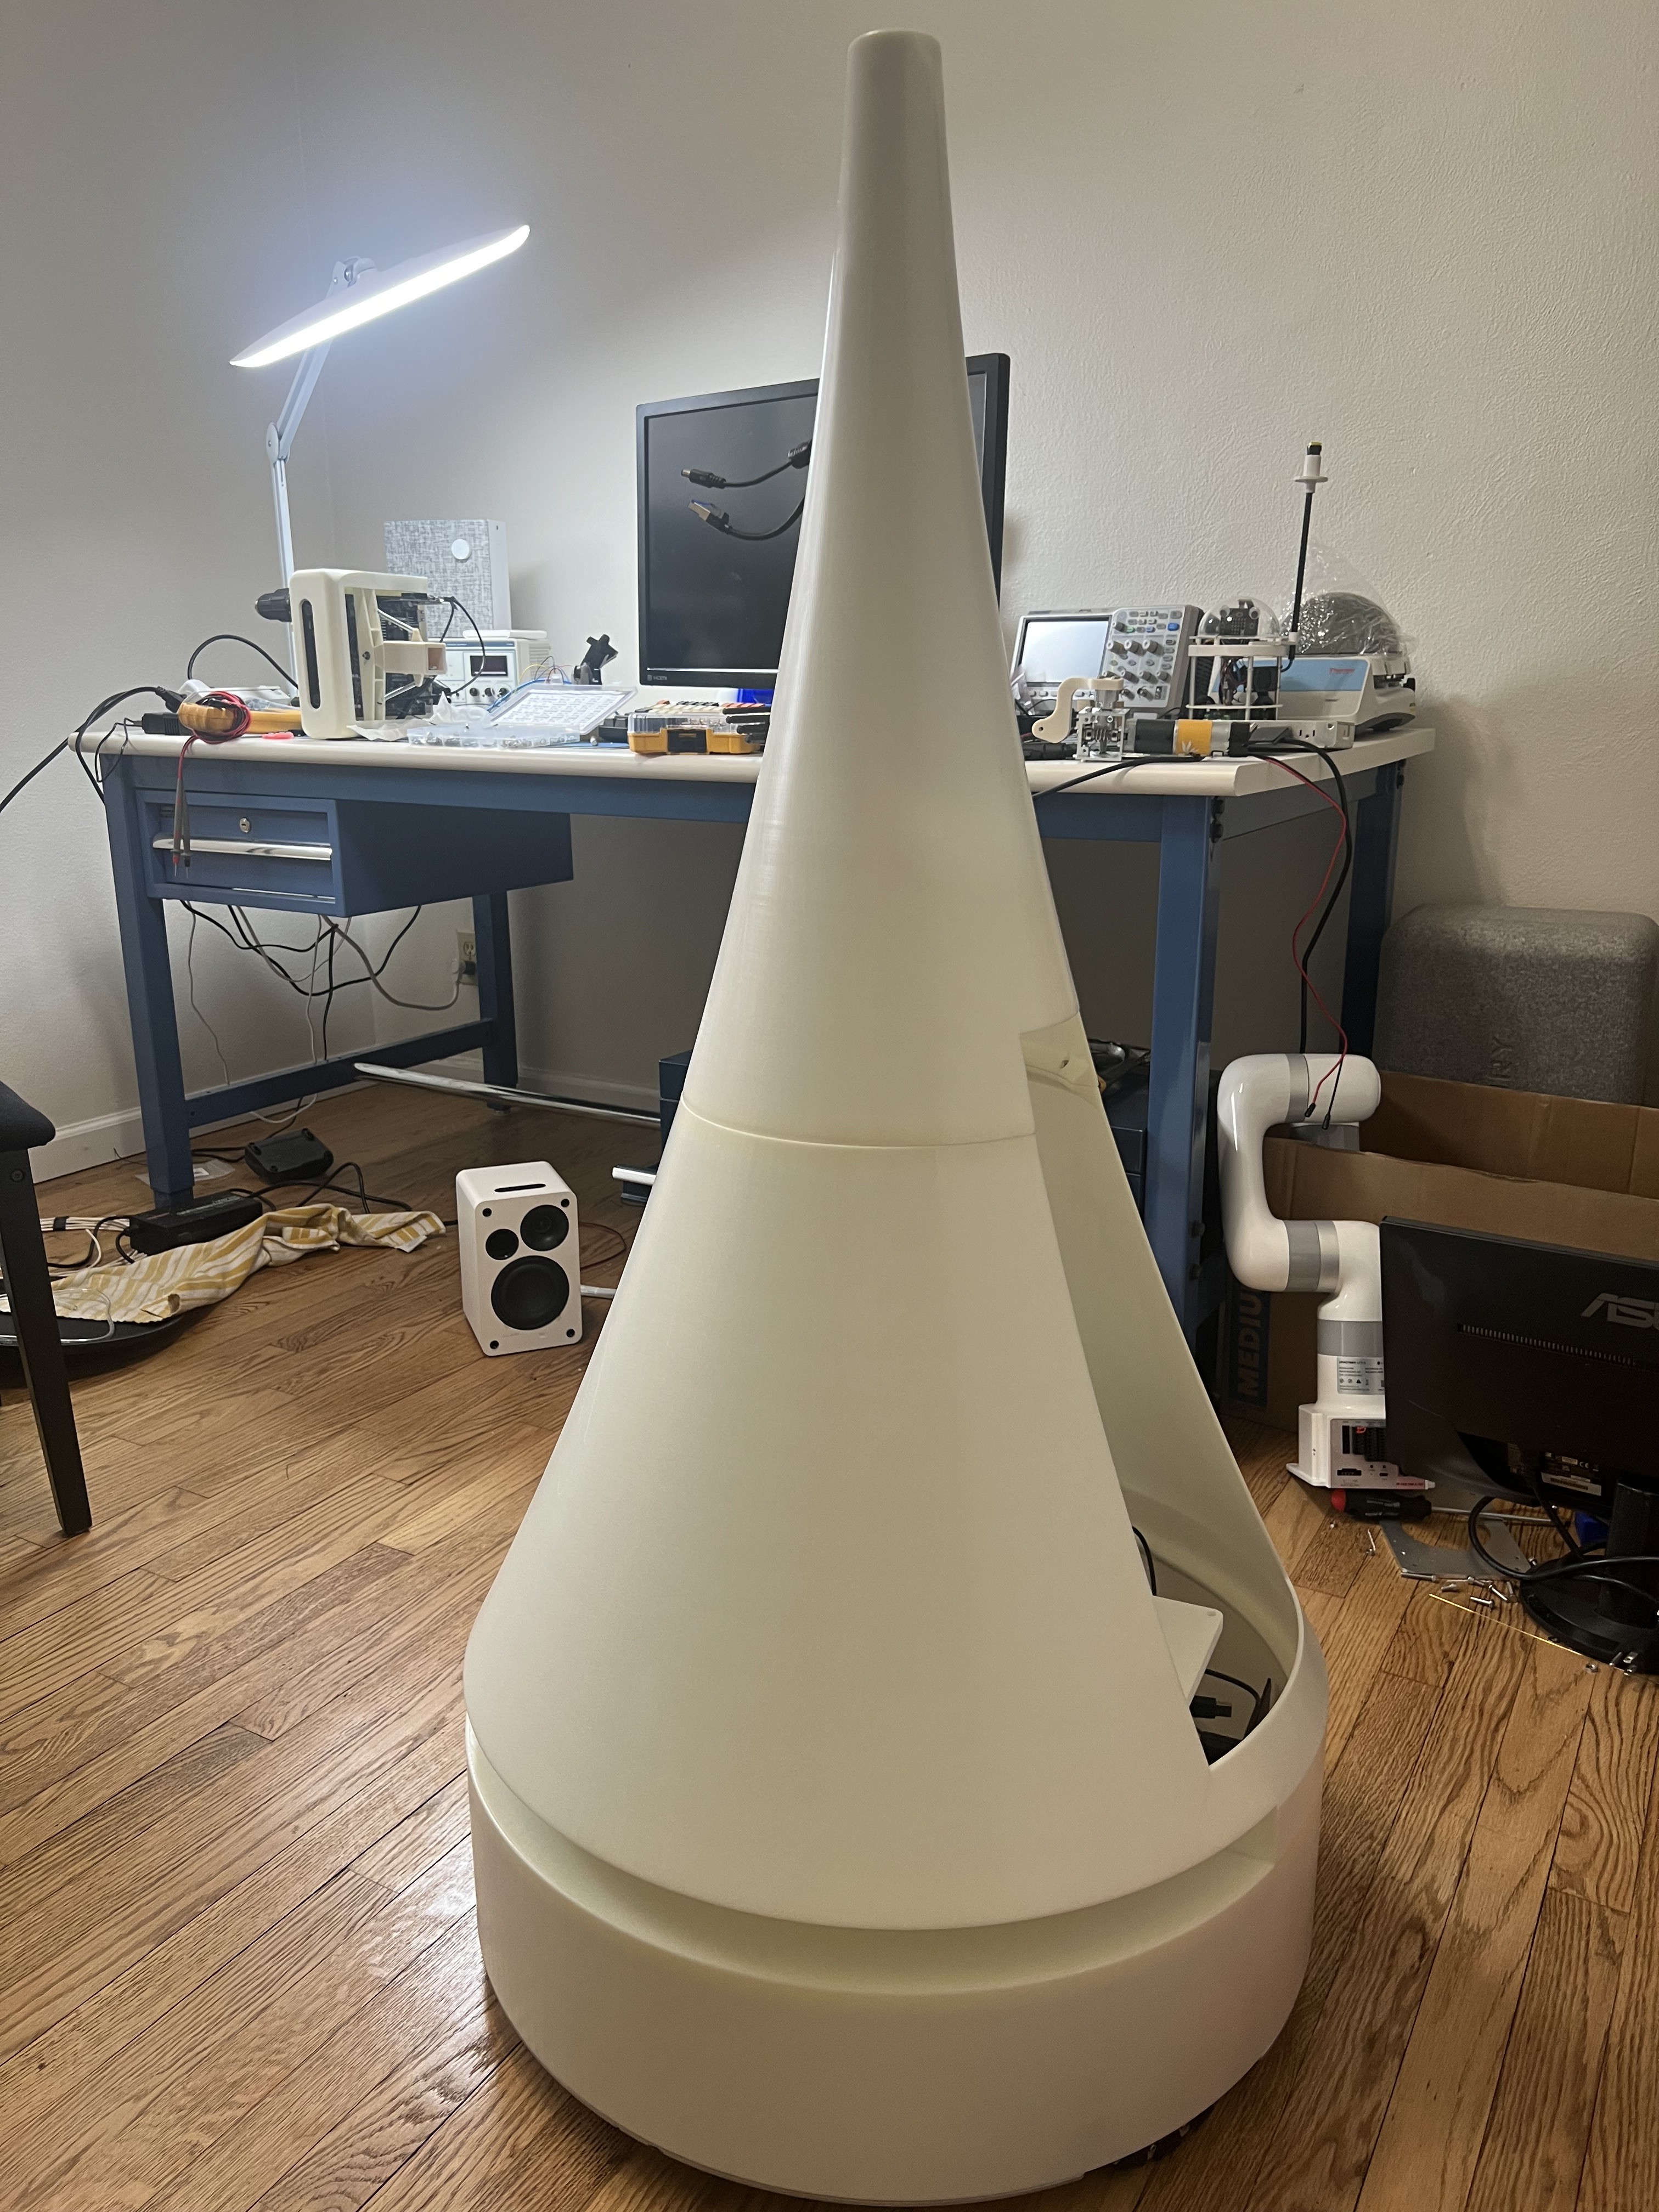
There is a lot to document for this so it will likely be in stages. First off I have always dreamed of having a home robot that could do simple to moderate tasks. The largest problem has been price. To me bringing down the price of robotics should always be the goal, as this will allow more to enjoy the benefits. 

For this build I'm attempting to keep the part list at ~5k USD. It is a lot for most and would make a retail version around ~17k. Robotics is still in fact a expensive hobby and with that in mind this will be a development prototype. I will be however be selecting/designing components based on best value, availability and cost reduction in mind. 

Current envisioned tasks for the robot-

  1. Read a physical book (with my now 7 year old flipping the pages) 
  2. Wipe down a table
  3. Pick up items on the floor and place them in a basket. (requested by the wife...) 
  4. Bring a drink from one location to another 
  5. Serve wine/champagne for a party environment 
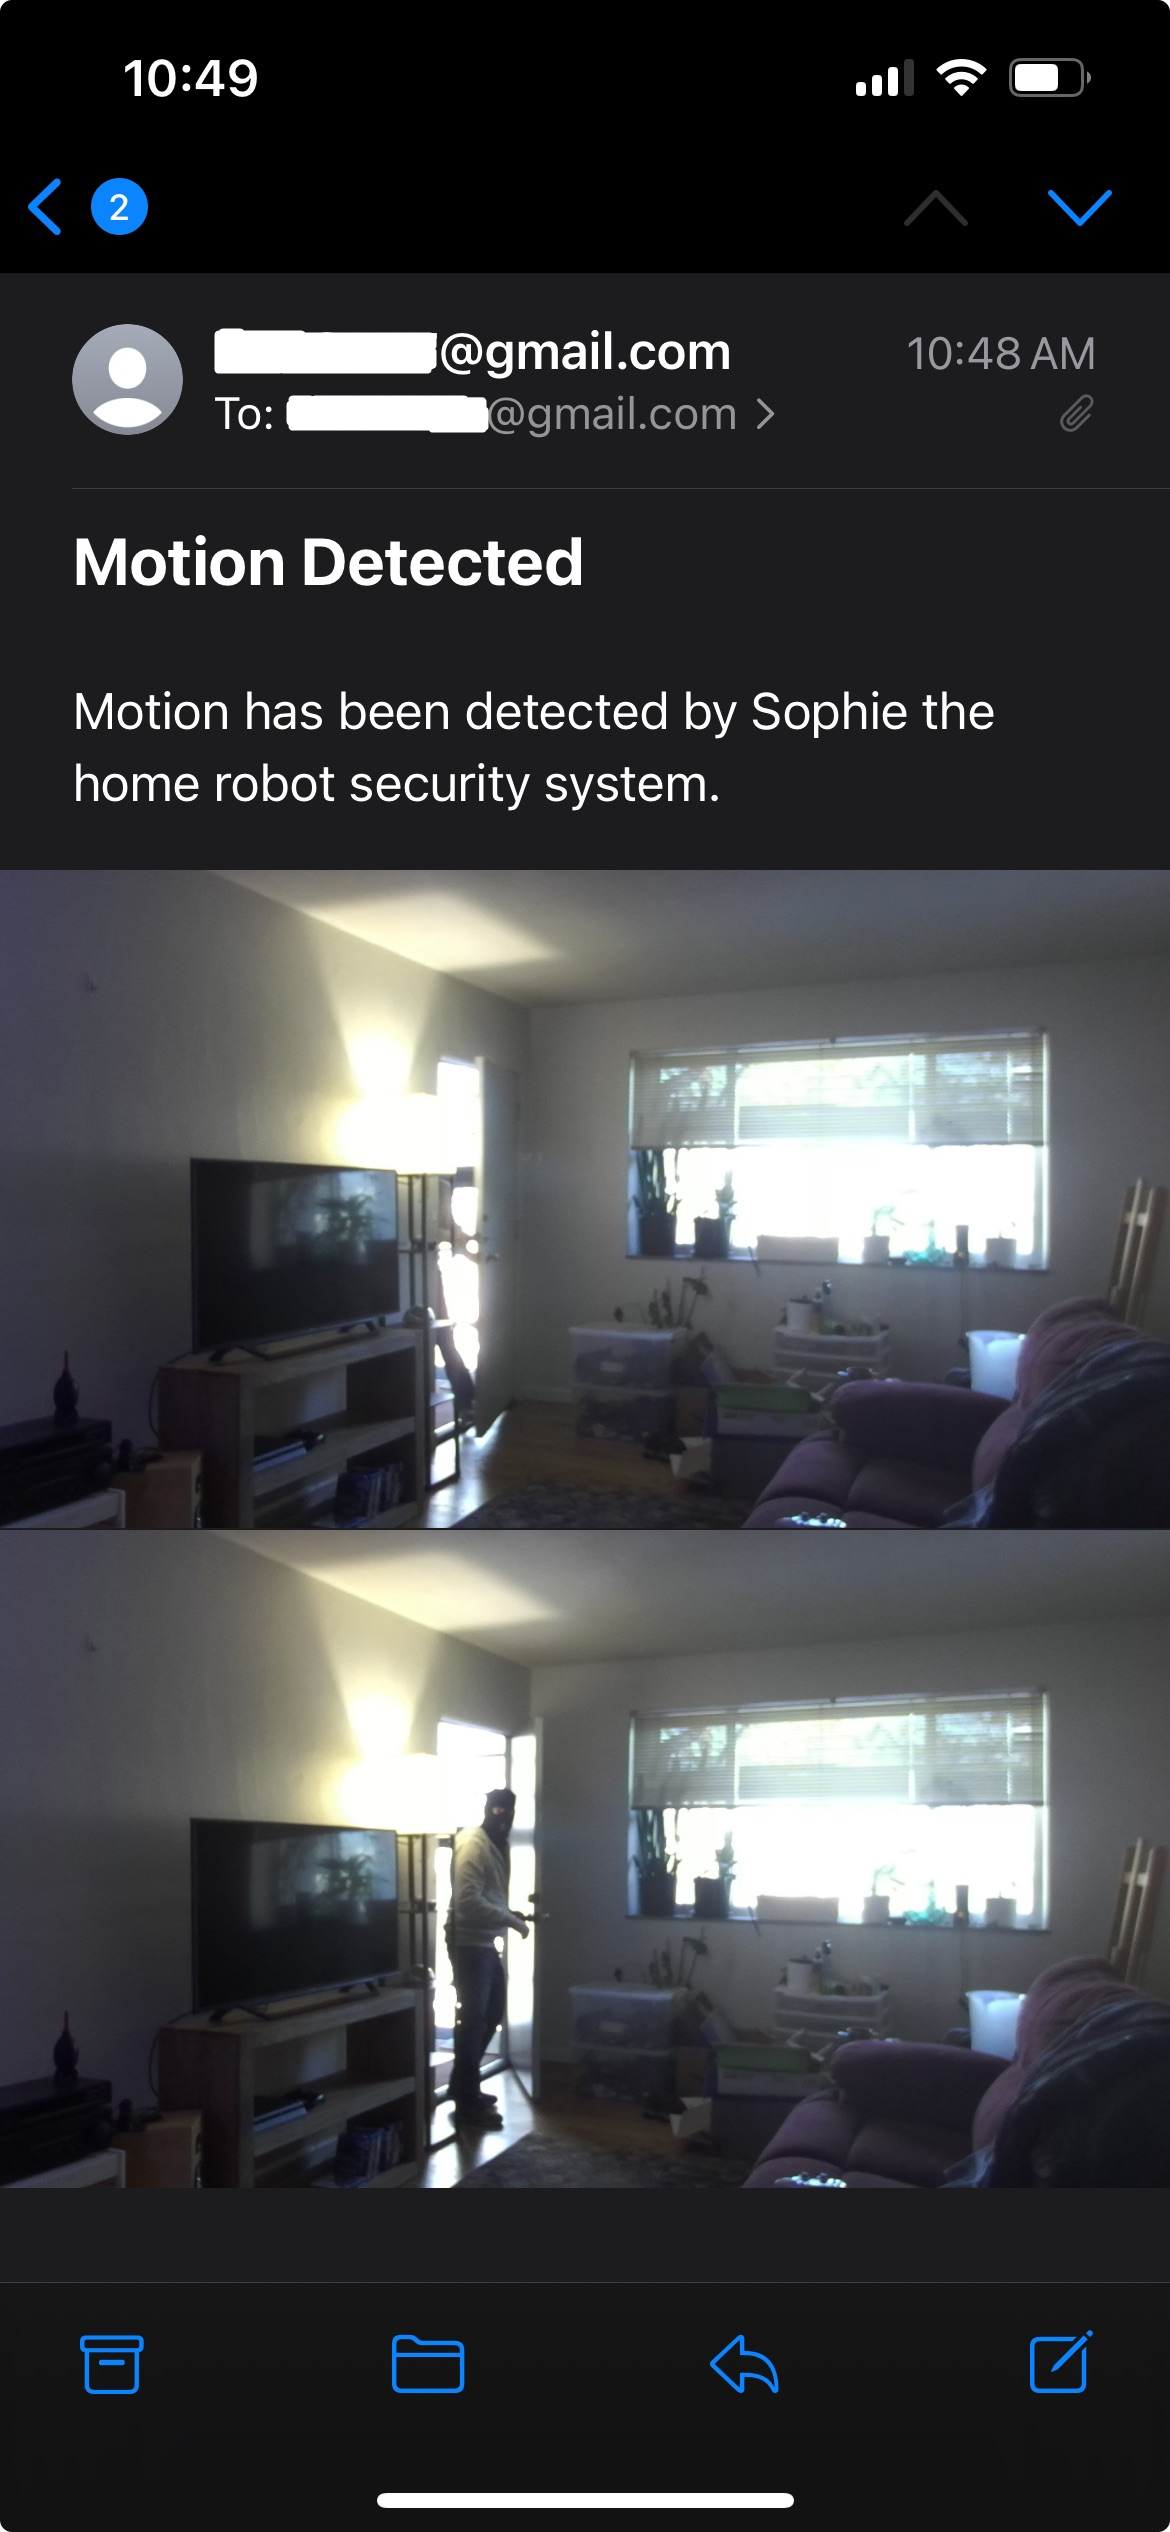
  6. Greet people at the door
Another thought was to start leaning towards elderly and disabled care. The robot design is more then capable to be able to fetch items off the floor or use the arm to feed people that have lost the ability to use their arms. 

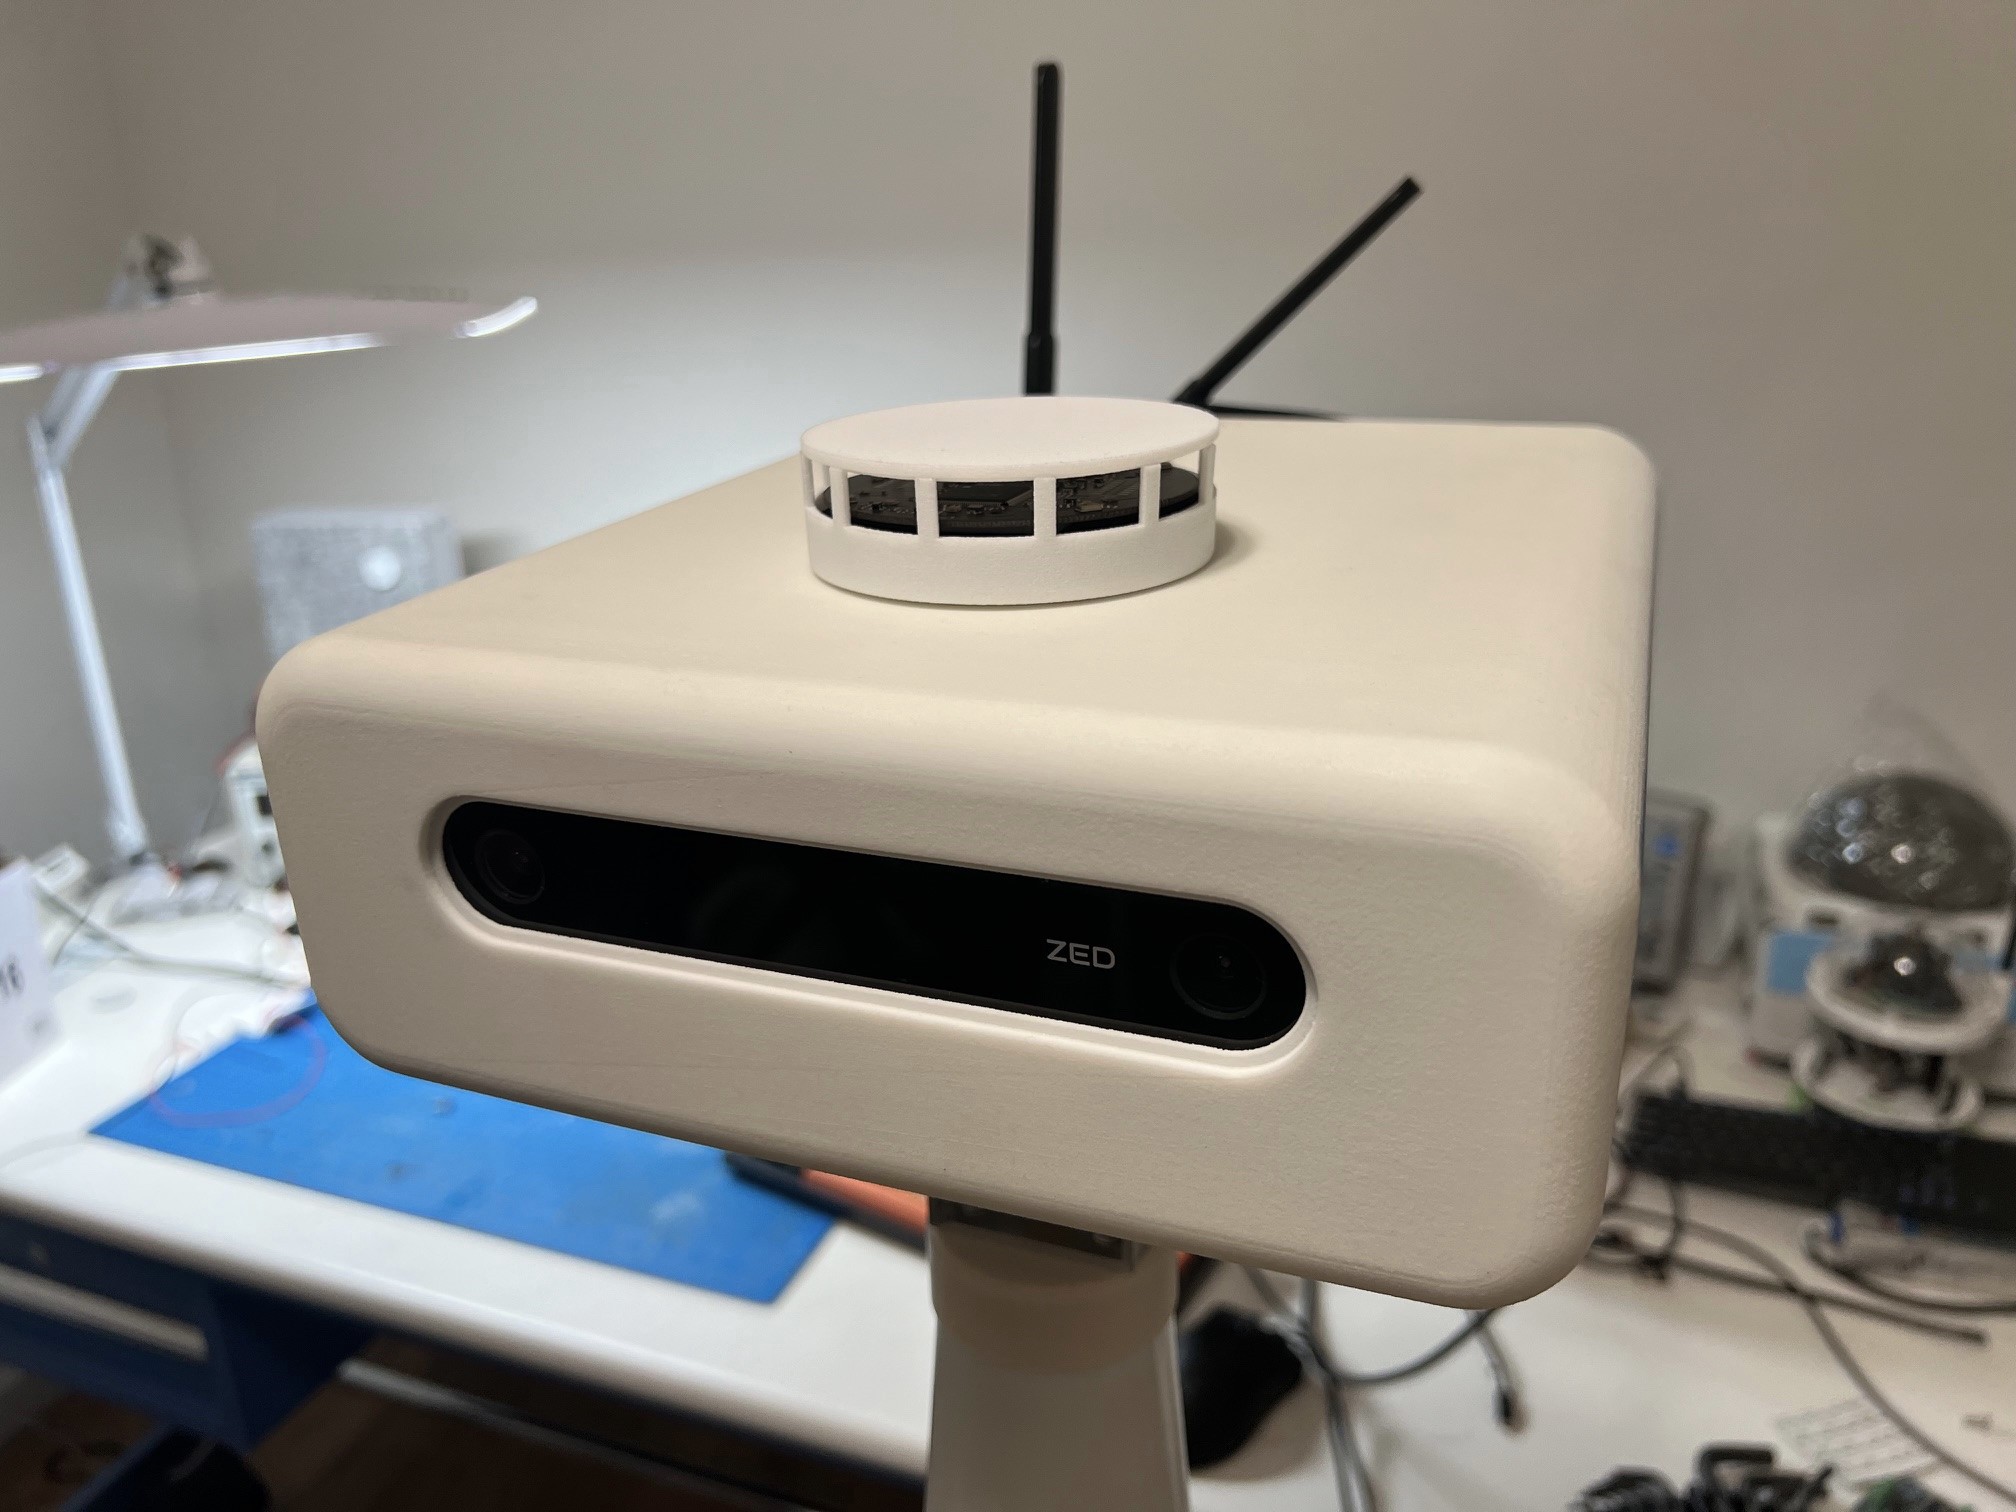
These are rather high level tasks, some more low level (ish) ones would be to use OpenCV to recognize a faces and assign a names to them, find a wall power socket to self charge and be able to report the weather and current temperature in the room.  It looks like I may move up to the newer ZED 2 when I have a chance as I like that they have started to build in sensors to the camera that I should be able to monitor/report with text to speech and also have a better idea of the current head position/localization using the IMU. 

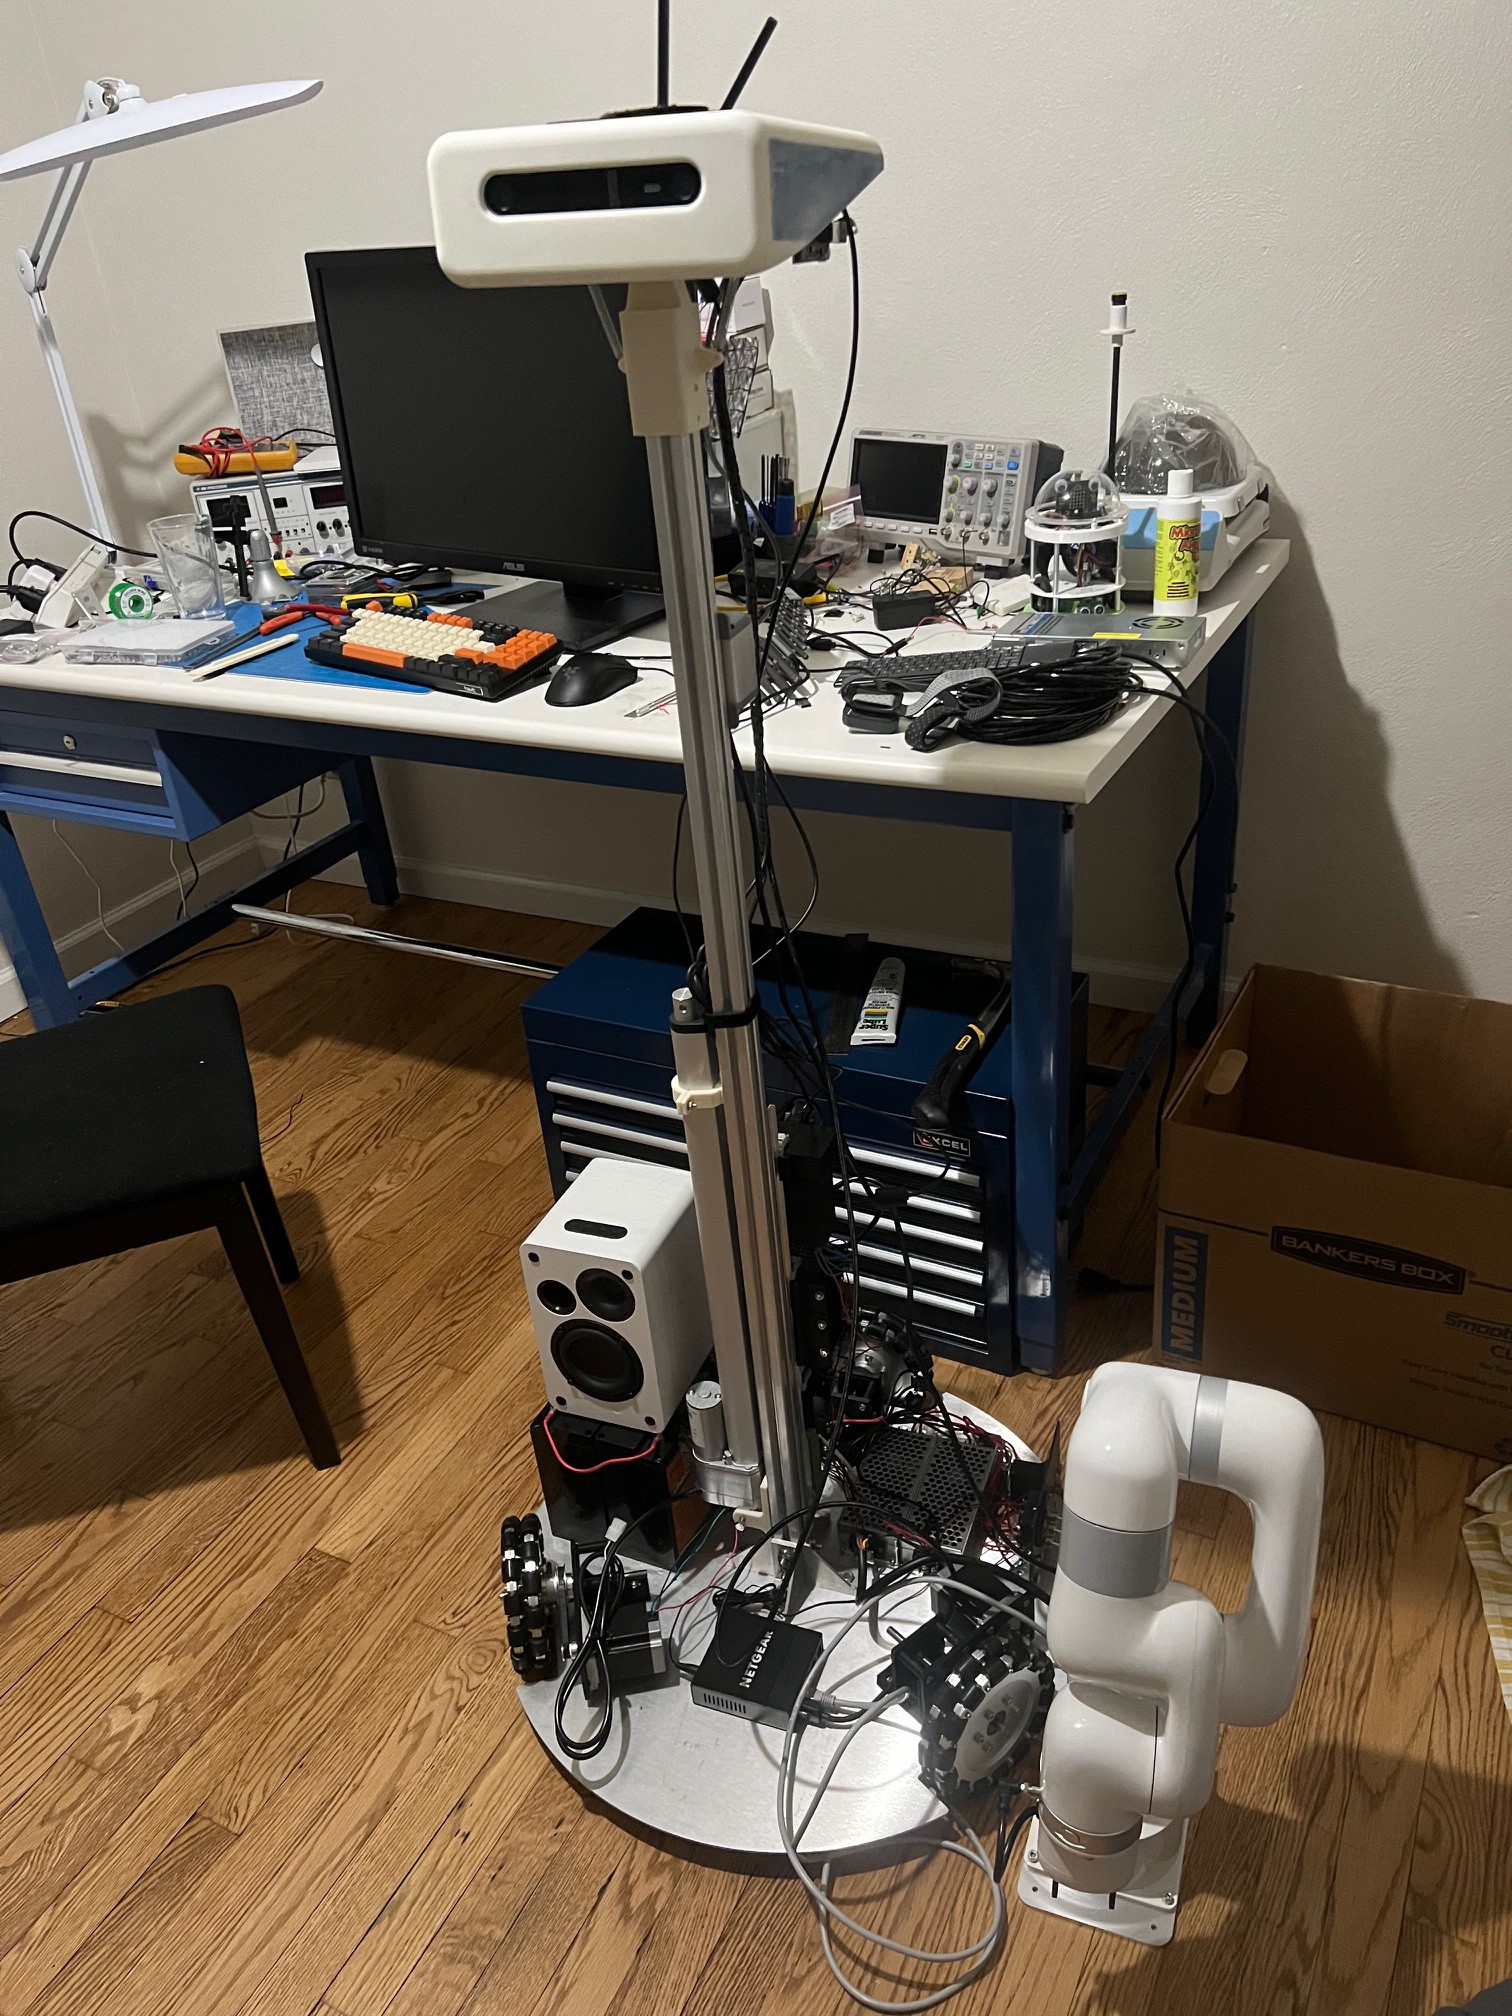
These task will take a lot of engineering and programming to achieve. Though, I have ideas on ways to reduce the programing side with hardware solutions for some. 

The recent cost reduction in high performance robot arms has made the project possible. The following robot arm was selected based on cost, number of axis, collaborative ability (safety), repeatability, and a smaller built in control box. https://www.kickstarter.com/projects/ufactory/ufactory-lite-6-most-affordable-collaborative-robot-arm

  • 1 × Jetson TX2 Dev Kit Main Computer
  • 1 × Zed Stereo vision
  • 1 × Ufactory Lite 6 6 axis robot arm
  • 3 × Nema 23 stepper motors Main drive motors
  • 3 × Stepper controllers To control the steppers

View all 15 components

  • Sophie responding to voice

    Apollo Timbers07/31/2022 at 20:22 0 comments

  • Background work

    Apollo Timbers07/28/2022 at 12:42 0 comments

    I have been pretty busy with the project still, though it has mostly now swapped to power system design and for a little extra fun I made a nicer gripper design. (It also so happens to fit around a standard aluminum can) :)  It will need some tweaking when the arm gets here, though I did discover a nice PA12 nylon infused with Glass Beads on Shapeways. Fusion 360 (*amazing program*) is stating the two fingers and silicon inserts should weigh around 15grams. The CAD may be lying a bit though,  I did set the materials of the gripper, and they are hollow...

    I'm also starting to really flesh out the base design and where everything will be going, I will soon be designing a sheet metal power panel to hold switches, circuit breakers and main battery cutoff. 

    Power requirements are being laid out, I'm sorting with primary and secondary loads. I will likely spec over on the DC-DC converters for inrush current and longevity. Took some internet searching, though I have found some nice (railroad spec'd) power versions from Meanwell. Will likely be a dedicated DC-DC for the arm, computer , and drive units. 

    Primary loads:

    1. Nvidia Jetson TX2   12v @ ~2 amps
    2. 6 axis arm 24v @ ~3 amps
    3. Motor drives 24v @ ~1.5 amps
    4. Liner actuator 24v @ ~unknown 
    5. Medical grade air pump 24v @ ~unknown (for neck tilt soft air muscles, and possibly a gripper down the road)

    Secondary loads:

    1. Powered USB 3.0 hub 24v @ ~2amps
    2. Pi Pico 5v (powered by hub)
    3. Lidar (powered by hub)
    4. Indicator LED's (meh)
    5. Solid state relays for "low power mode" (meh) 

  • What time is it?

    Apollo Timbers07/23/2022 at 21:12 0 comments

    I added a offline voice assistant program to the robot and piped in the Respeaker array, Vosk at first was rather slow, so I switched to a smaller neural network and that sped it up well. It is working quite well now. From there I added if statements on various things like 'what time is it', 'what is the current date' and so on. 

    I have posted both of offline versions of the voice_assist and reading_module on a newly created github. Enjoy!

    https://github.com/thedocdoc/Sophie

  • Offline for the win!

    Apollo Timbers07/23/2022 at 02:17 0 comments

    Well I did it, I converted the code to a half way decent offline text to speech module and even made a demo. Here is the solution so far that will not require a internet connection to function.  This code uses festival TTS with a updated CMU Arctic voice.

    What was fed into the program to read off. It seems to skip the first word so I'm going to need to do a bit more research on that one. It does well at regular book, and children book pages to, but I did not want to get into copy right land by reading them out - 

    I also built more on the robot overall, mainly getting the prototype drive units finished up and the motor/Pi pico/industrial (ish) USB 3.0 hub mounted. Made a nice case for the controller with heli-coils for the lid. Need to wire them all up still. 

    Current full test setup. 

  • Reading a page of a book

    Apollo Timbers07/20/2022 at 12:47 0 comments

    I started getting the TX2 all set up by updating this and that and ensuring OpenCV was wrapped by python3. I chose the reading a book as the first one to take a crack at and made some good progress or at least I know where I need to go from here. I also played a bit with saving images and depth maps from the ZED camera. 

    Improvements that I need to work towards- 

    Switch to a offline text to speech converter that sounds a bit more natural. Google is cool, but I have a nice processor onboard, and would like Sophie to work even when internet is down. You cannot comfort a child in a storm if when the internet goes out, you magically loose the ability to read.

    Speed up the translation time, It seems if I crop the area with just text it significantly drops to like 2 seconds to translate. I will keep working on this, though I have a feeling it will be a whole new ball game when the child is holding the book. I think the robot will need to use a lot of processing power to even stabilize the incoming image first then divide up the image into what is a book page and what is not and then box those sections. Just need to start optimizing as I go, no kid (at least not mine) would wait 12 seconds to hear a robot read the first page I'm afraid lol. 

    Pros-

    1. It works, it can take in a page of a book and translate to speech, it even does well at ignoring images (think kid picture books)
    2. Did I mention that it works?

    Cons-

    1. It is slow (It takes on average about 10-12 seconds to convert a page of text)
    2. It translates twice in this code, though that is more for debugging purposes 
    3. It uses a online converter for text to speech
    4. It sounds a little too unnatural

    Here is the "get it working code" (their is much clean up to go and the debugging of the pipeline is still in place)

    # By Apollo Timbers for Sophie robot project
    # Experimental code, needs work 
    # This reads in a image to OpenCV then does some preprocessing steps to then feeds into pytesseract. Pytesseract then translates the words on the image and prints as a string
    # It then does it again to pipe it to Google text to speech generator, a .mp3 is sent back and is played at the end of the translated text.  
    # import opencv
    import cv2
    #import pytesseract module
    import pytesseract
    # import Google Text to Speech
    import gtts
    from playsound import playsound
     
    # Load the input image
    image = cv2.imread('bookpage4.jpg')
    #cv2.imshow('Original', image)
    #cv2.waitKey(0)
     
    # Use the cvtColor() function to grayscale the image
    gray_image = cv2.cvtColor(image, cv2.COLOR_BGR2GRAY)
    
    # Show grayscale
    # cv2.imshow('Grayscale', gray_image)
    # cv2.waitKey(0)
    
    # Median Blur
    blur_image = cv2.medianBlur(gray_image, 3)
    
    # Show Median Blur
    # cv2.imshow('Median Blur', blur_image)
    # cv2.waitKey(0)
    
    # OpenCV stores images in BGR format and since pytesseract needs RGB format,
    # convert from BGR to RGB format
    img_rgb = cv2.cvtColor(blur_image, cv2.COLOR_BGR2RGB)
    print(pytesseract.image_to_string(img_rgb))
    
    # make request to google to get synthesis
    tts = gtts.gTTS(pytesseract.image_to_string(img_rgb))
    
    # save the audio file
    tts.save("page.mp3")
    
    # play the audio file
    playsound("page.mp3")
     
    # Window shown waits for any key pressing event
    cv2.destroyAllWindows()

  • Sensors

    Apollo Timbers07/19/2022 at 02:22 0 comments

    The head got a bit of a dress up to better match the original CAD design. Added the blue sides and then applied a clear coat to them. 

    The head will contain quite a lot

    Currently the ZED has a stereo camera. When I update to the ZED2 (very cool camera/sensor package) I should then have the following sensors. This should already help with a bunch of to do items like a IMU needed for localization and allow for a indoor environment sensing using the barometer/temp sensors. 

    Built into the ZED 2 -

    1.  IMU
    2. barometer
    3. magnetometer 
    4. temperature sensors

    Additional sensors -

    1. Respeaker Mic Array v2.0 - Far-field (4 mics)
    2. Knock sensor
    3. Mini encoder (will connect direct to neck shaft, and will provide positional feedback for the soft actuators that power the head tilt)

    Long ago I bought a Seed Studio ReSpeaker microphone array that should be able to be intergraded and give the robot the ability to sense and hear far field voices and the originating direction. I played with it on the pi a bit and was pretty easy to get initially set up. This should help the robot be more attentive to the environment and allow the ability for voice control. It could also turn to the direction of sounds initially to better respond or see/record something that happens. 

    I had another thought for a rather fun sensor where a cheap knock sensor (SW-2802 vibration switching element) could be mounted to the head and you could "wake up the robot" by knocking on its head. Not sure what It would do when you wake it up, but you could initially just have it say a random phase from a programmed list. (Hello, Did you need something, I'm awake, I see you...) Start giving it a basic personality.

  • The Lab

    Apollo Timbers07/17/2022 at 15:51 0 comments

    I cleaned a bit of my lab up, well... at least mostly. I have a few projects on-going and finished ones around. Thought I'd post some pictures of it. Though, I was able to get another drive unit going today, and designed out the mounting solution for the stepper controllers and finished out the test bench head mount design. This will provide a way for the head to mounted in the correct orientation and start hooking up the main computer to the control subsystem and start the process of programming. Will need to start making some process on this will likely to get a rudimentary vison pipeline setup and a test to speech program. (Then the robot should be able to respond to external stimuli by reporting information via speech. See Fig 1. 

    Currently, I have the plan of 3D printing the stepper mount then slide them onto a section of din rail.  I also purchased some end stops as well to ensure everything stays in place. The din rail will be populated with stepper controllers, industrial USB 3 hub and Pi Pico that will be mounted to the central extruded aluminum v-rail. I'm keeping a eye out a bit for some nicer copper wire as I will likely make a wire bundle to connect them to the pi.  Nice wire  = expensive... :(

    Lab photos Fig 2. and 3. 

    Fig 1. 

    Fig 2. and 3. 

  • The build continues...

    Apollo Timbers07/16/2022 at 17:21 0 comments

    I have been working on getting the 3 base drive units up and working. More on that soon. Though, I would like to post a bit of a progress update. 

    What has been done-

    1. The 3D printed head is back from the 3rd party printer service
    2. I mounted the Jetson (Main computer) into the head (I placed in metal helicoil's to mount with metal machine screws)
    3. Went to a local hacker space and got the wheel hubs milled down a on a lathe. This just removed weight and allowed them to move in closer to the drive unit. I think they had the version/size I needed so it was accounting for a purchasing mistake and or them being out of stock. 
    4. Finished 1 drive unit prototype with 2 other on the way (The parts, once verified will be made out of metal)
    5. Ordered and received a medical grade vacuum pump for the soft actuators (neck actuators), Will need to do more to build out the soft actuator control circuitry. 
    6. Got the ZED stereo vision system working with the Jetson and created a fresh calibration file for it. 

    Overall the project is now in full swing, I'm currently racing to finish out the prototype base that will contain three drive units, batteries and stepper controllers.  (a rolling chassis so to speak) The 6 axis arm is still being produced though I hope to have it in hand soon. Need to purchase a DC-DC converter for it so that I supply the both clean and the correct voltage/amperage to it. 

    Finishing the base will allow me to start programming the low level controller to handle all three drive units and start having a better plan for mounting certain components.  I'm currently looking for a good source of lithium iron phosphate batteries (LiFePO 4 battery) as I have used them in my robots, in the past and they have held up very well. (plus less risk of fire, bonus!)

    Here are some in progress build photos of different "modules" coming together. 

  • Motor Drive Units

    Apollo Timbers01/22/2022 at 17:10 0 comments

    Completed some work on the design and a prototype of a critical piece needed for the robot. Was able to get the stepper motor running and tested out the design. Currently these are built with 3D printed ABS parts though once the design is nailed down I will get them machined out of metal. Belt is a hacked together one at the moment and the correct ones are on order. The driver is being controlled with a Raspberry pi Pico running a C++ test program. Credit of the test code goes to KushagraK7 with a link to using it here ---> https://www.instructables.com/member/KushagraK7/

  • Flow Charts are fun!

    Apollo Timbers11/22/2021 at 23:41 0 comments

    I made a bit of a goal for today to at least create the flow chart of I/O for the robot. As this is a prototype, please remember this is experimental and use at your own risk. That being said, I have created a Jetson powered robot before and I'm a bit more comfortable with the the architecture. 

    A power flow chart will also need to be created as with any robot it starts to get complicated. Having the charts makes it a bit easier to build and troubleshoot the robot later on.

    For progress I have also printed some test pieces for the main drive units bearings and will post a bit about the drive units in the next project update. 

View all 11 project logs

Enjoy this project?

Share

Discussions

Similar Projects

Does this project spark your interest?

Become a member to follow this project and never miss any updates