selena1995
What Will You Learn During This Project Making
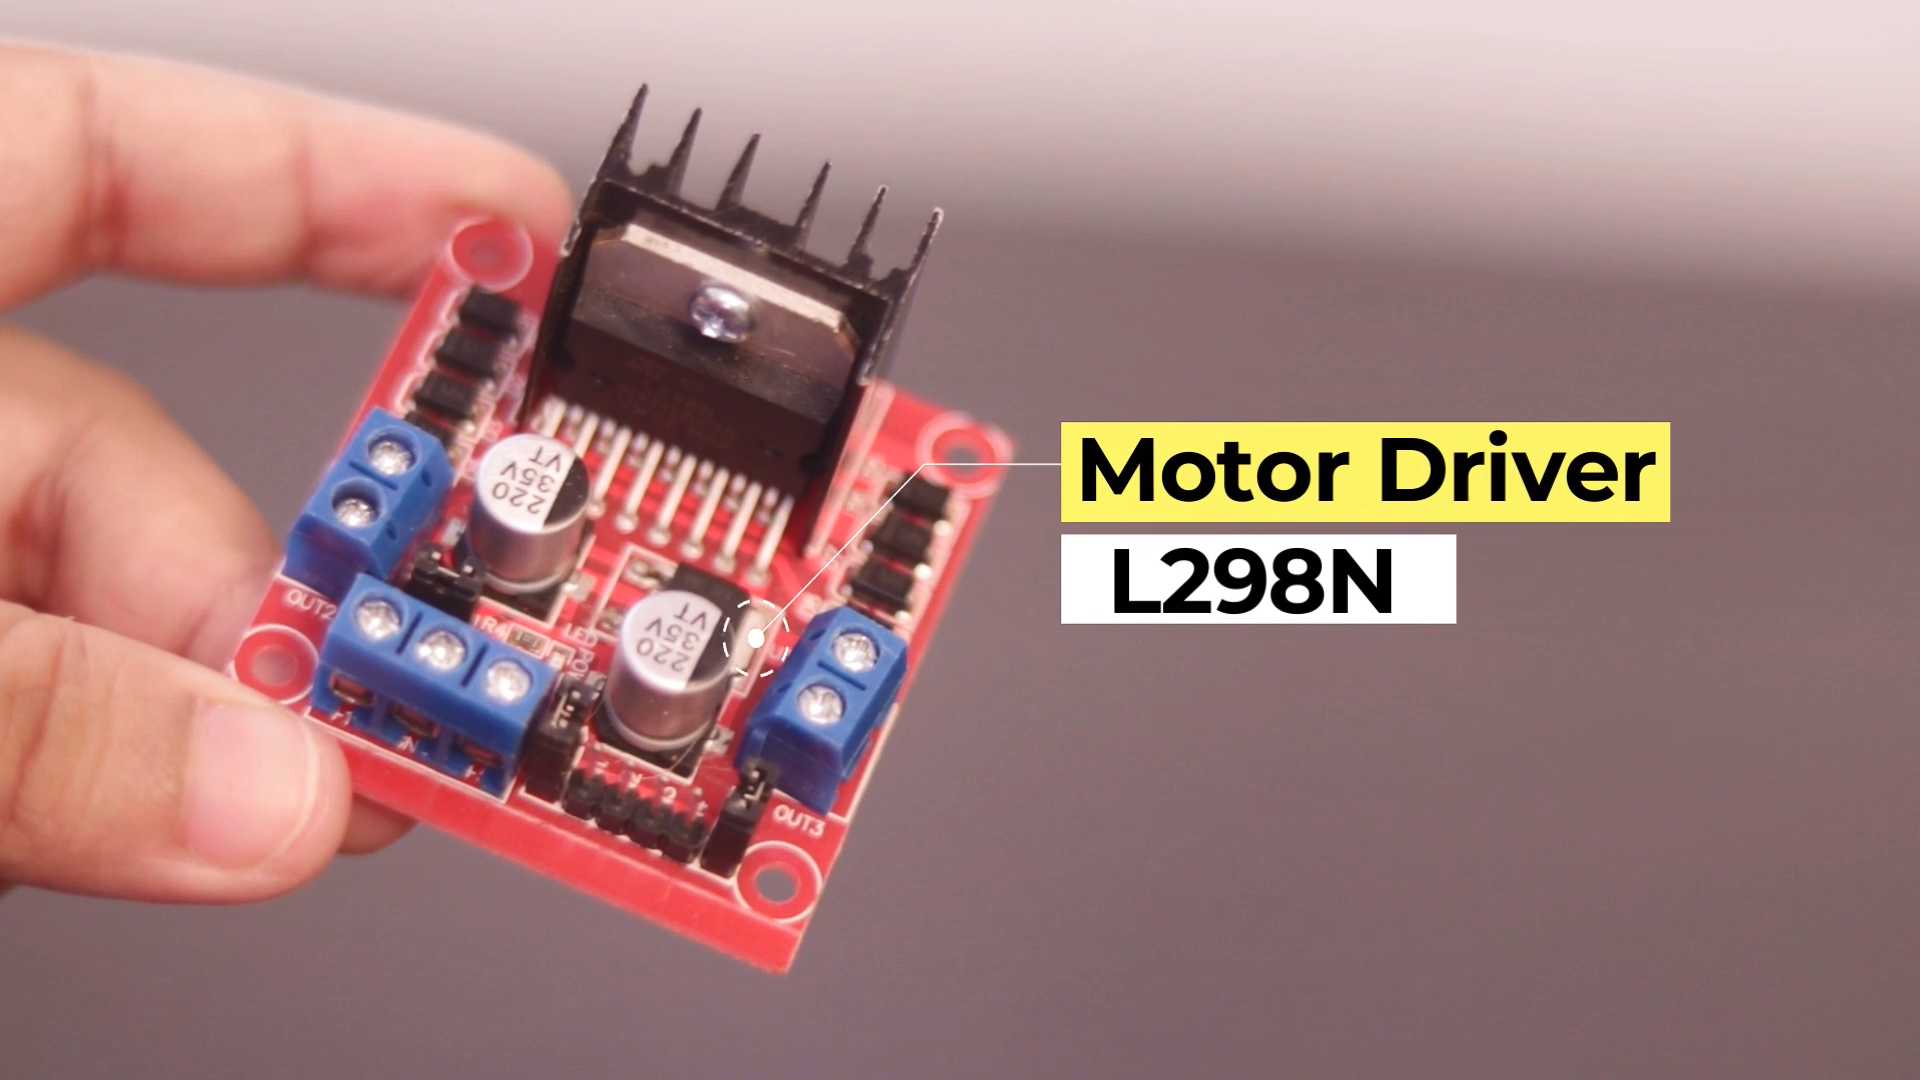
- how to use l298n motor driver
- what is mecanum wheel
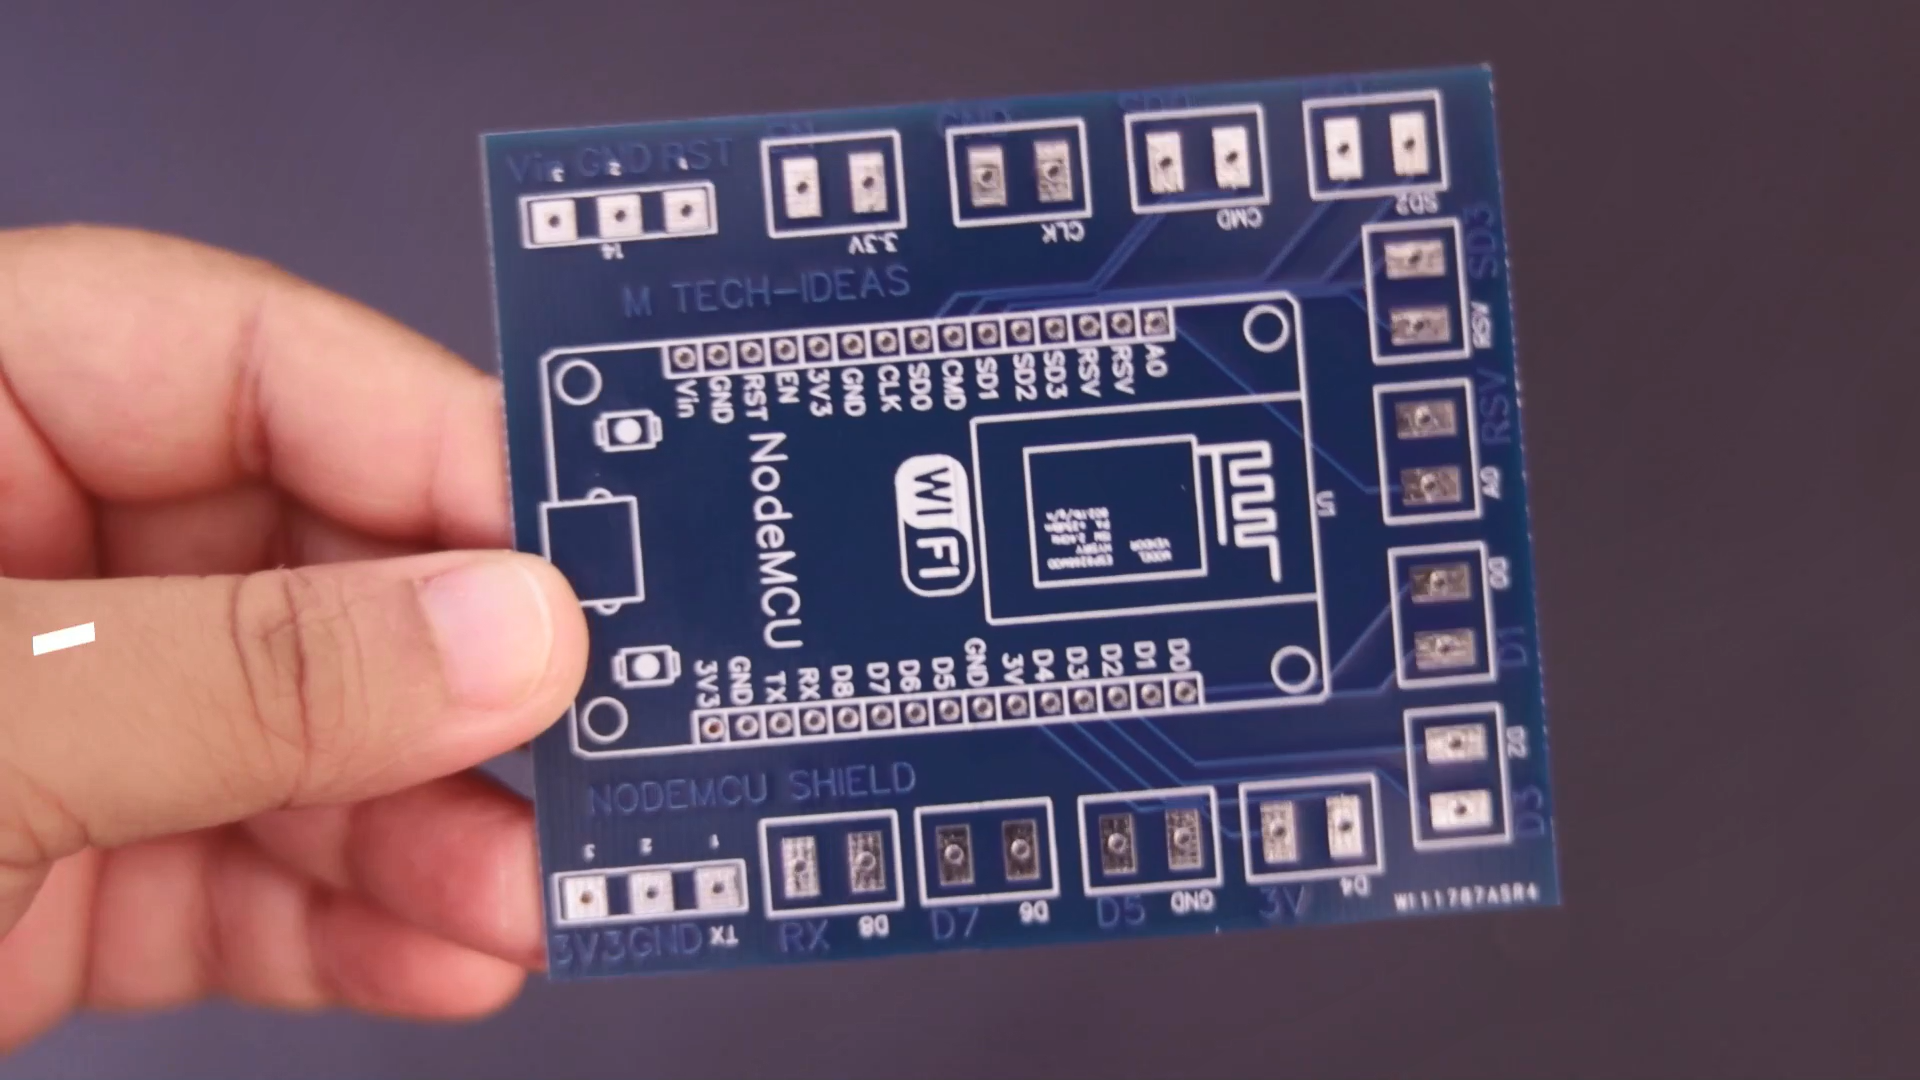
- how to use node MCU
- how to upload code on node MCU
- how to interface the bot with a smartphone
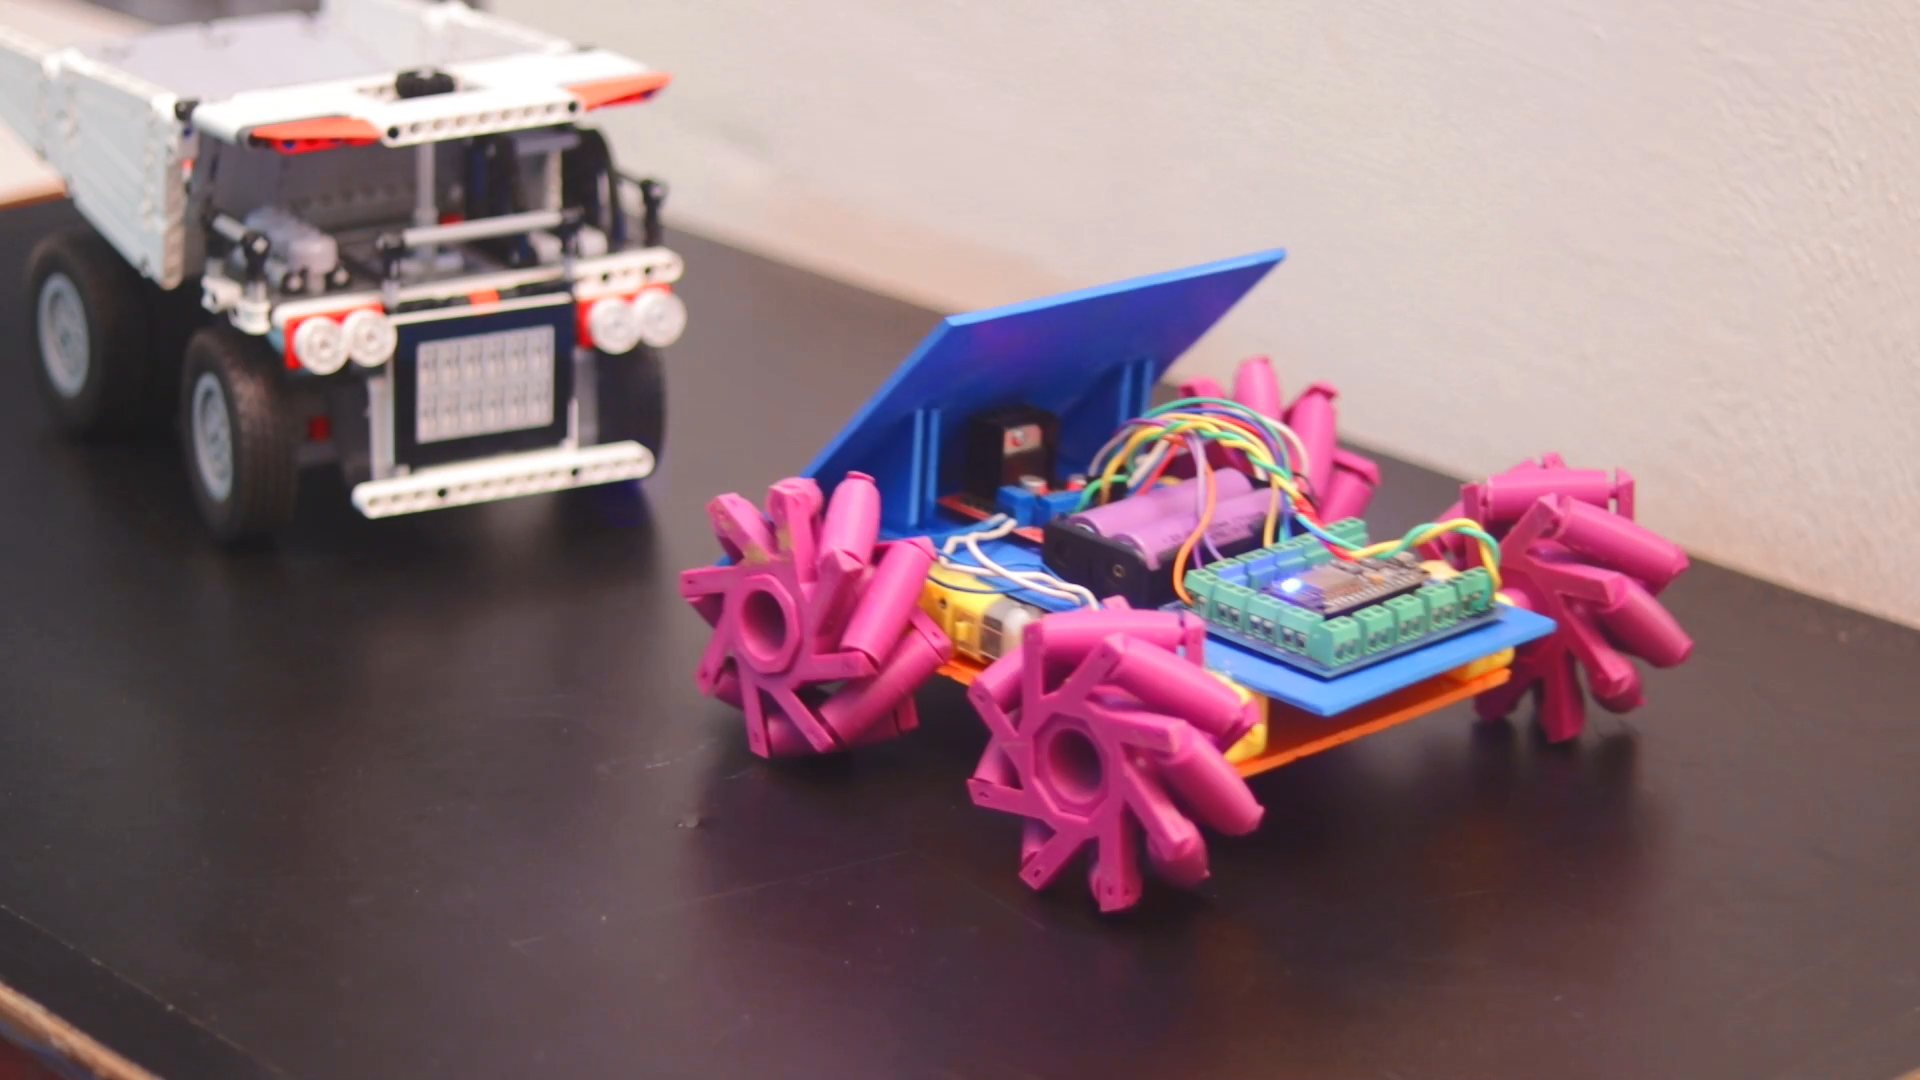
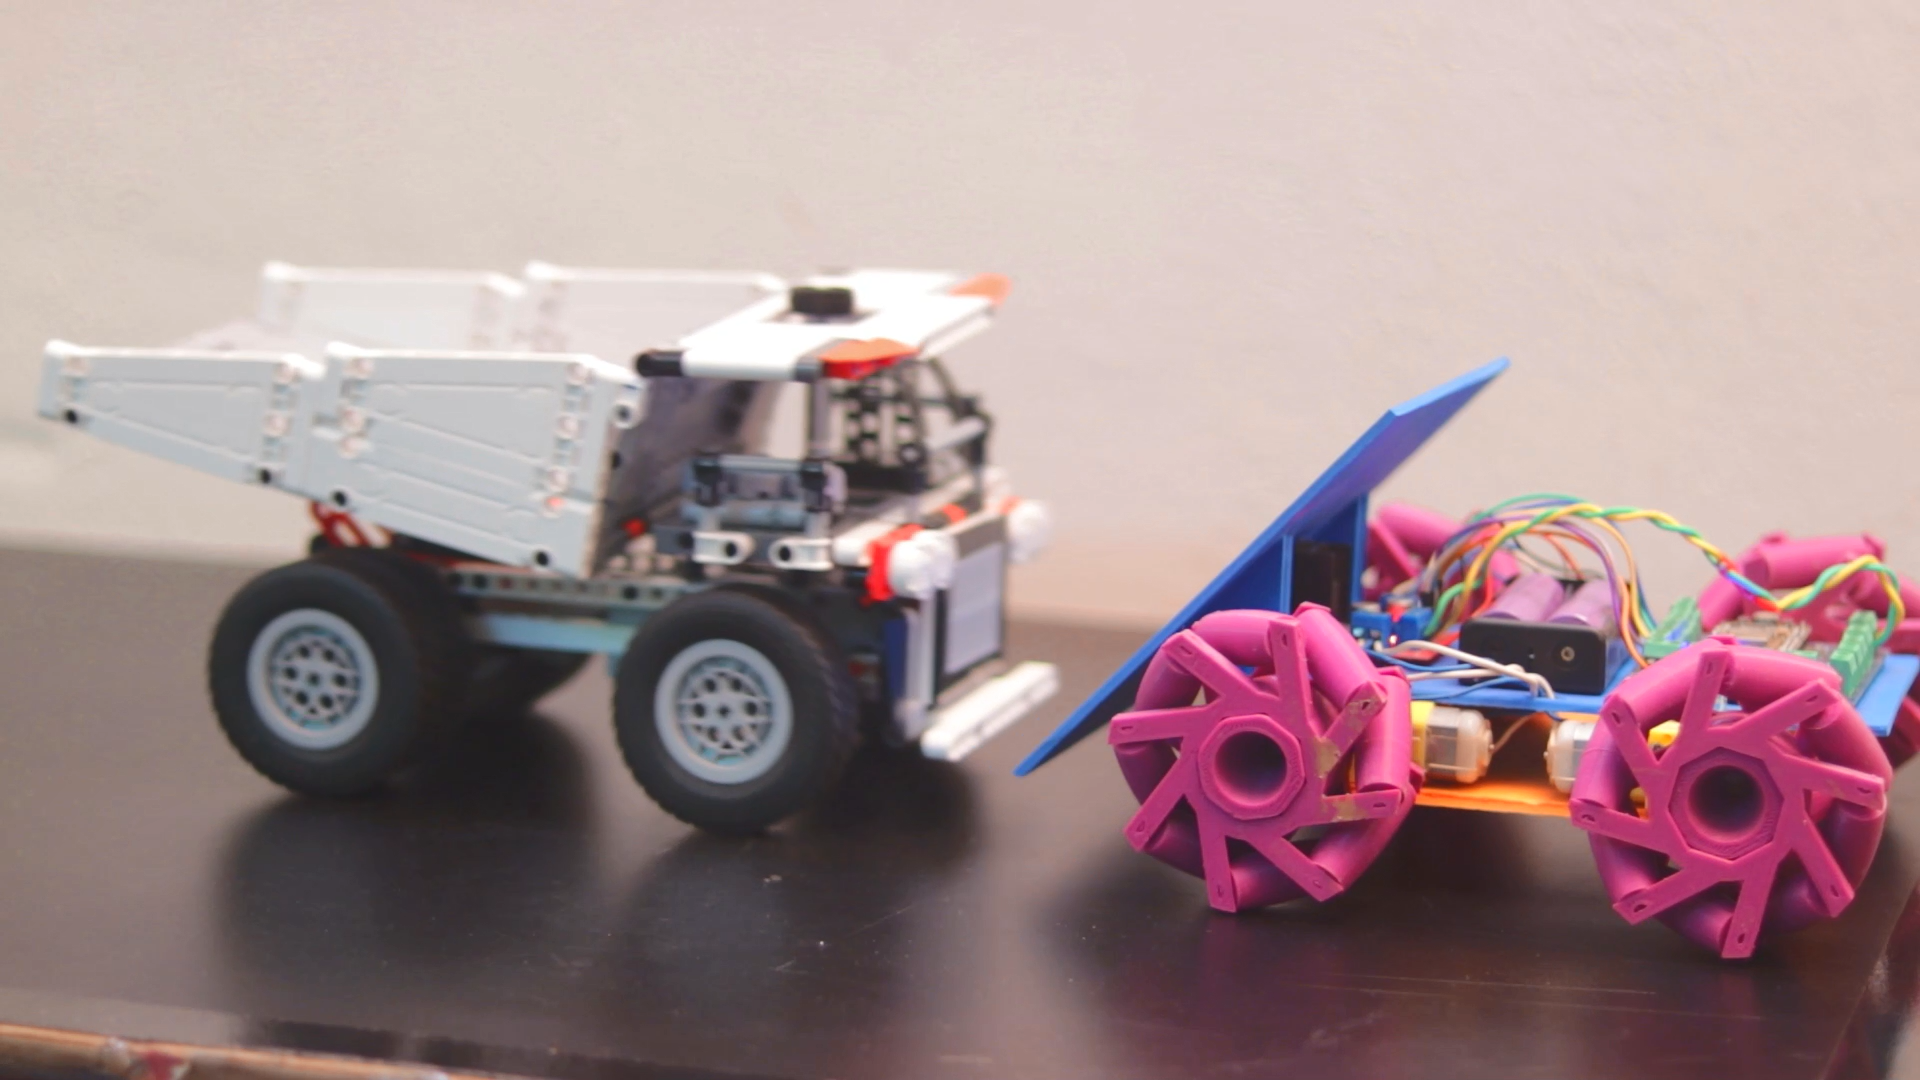
- what is sumo bot
- and finally how to make wifi controlled sumo bot
WHY DID I CHOOSE THESE MATERIALS TO MAKE THIS BOT
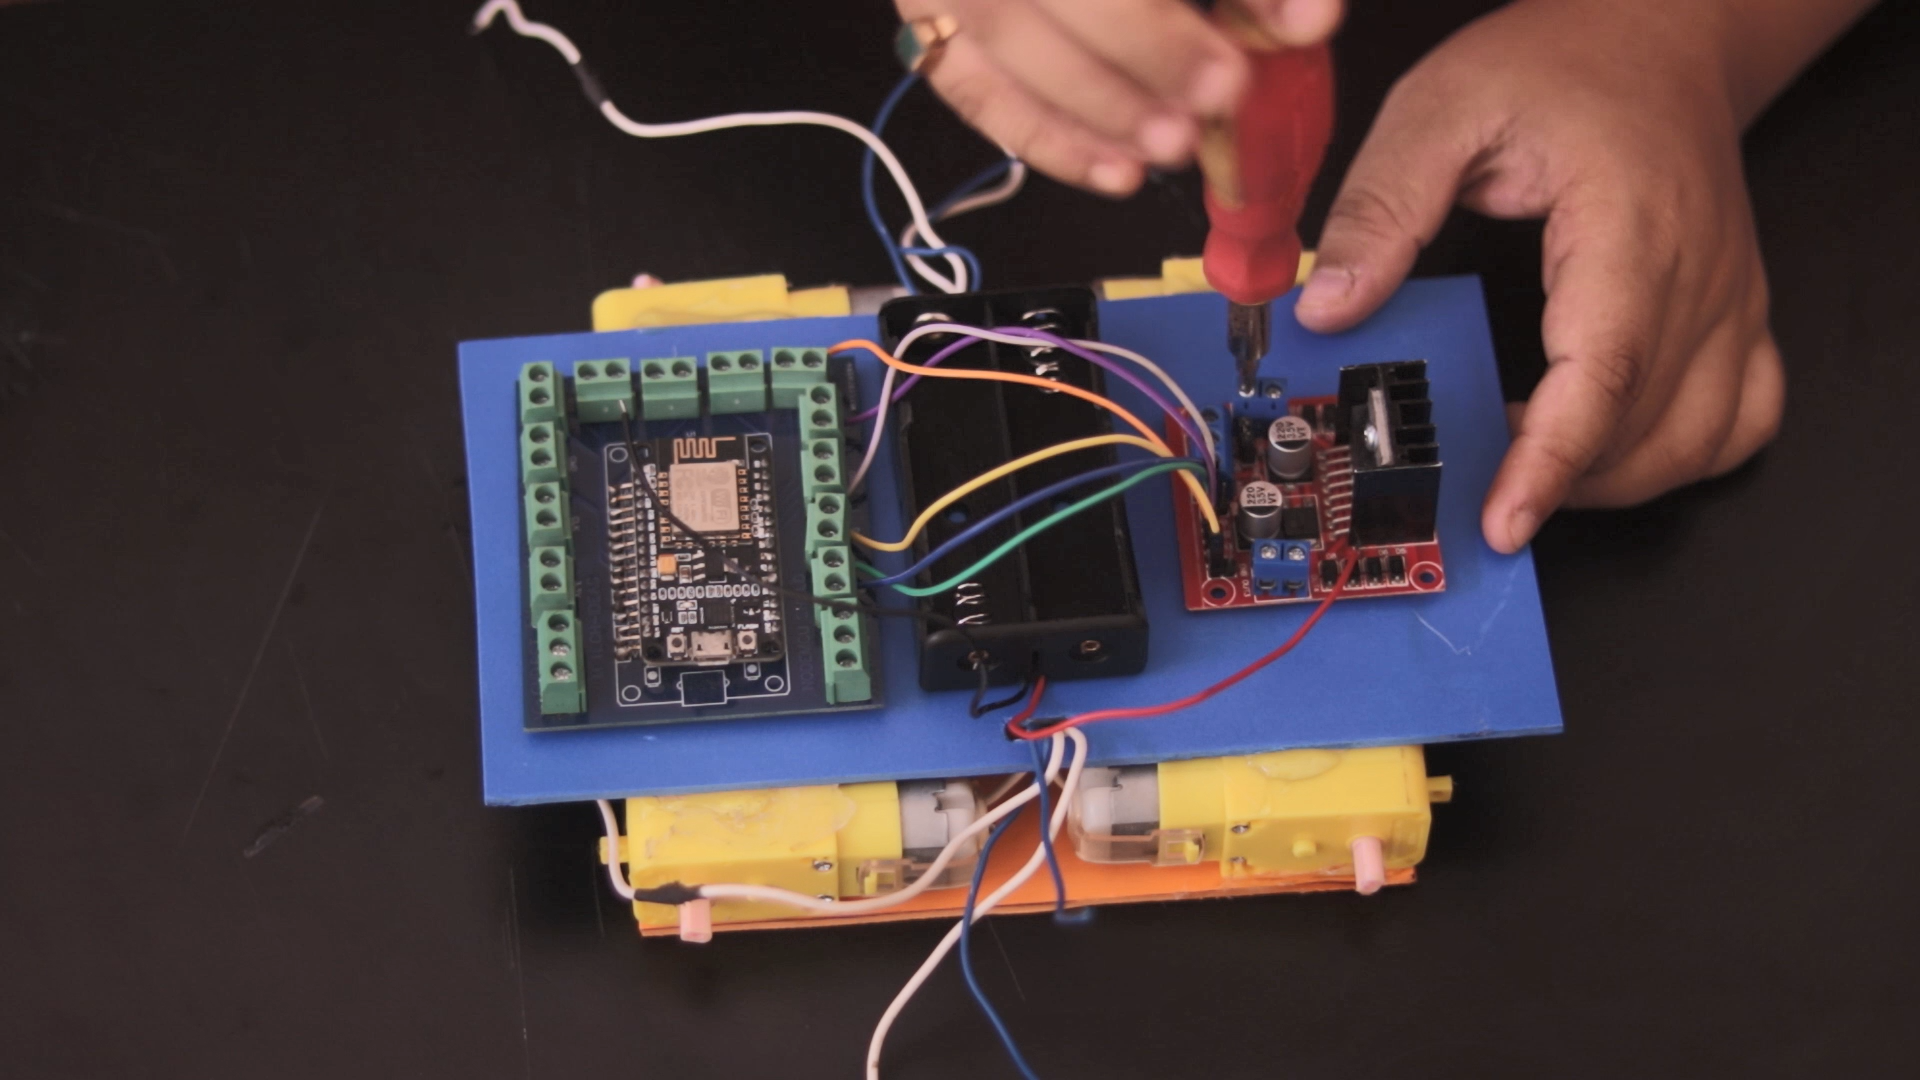
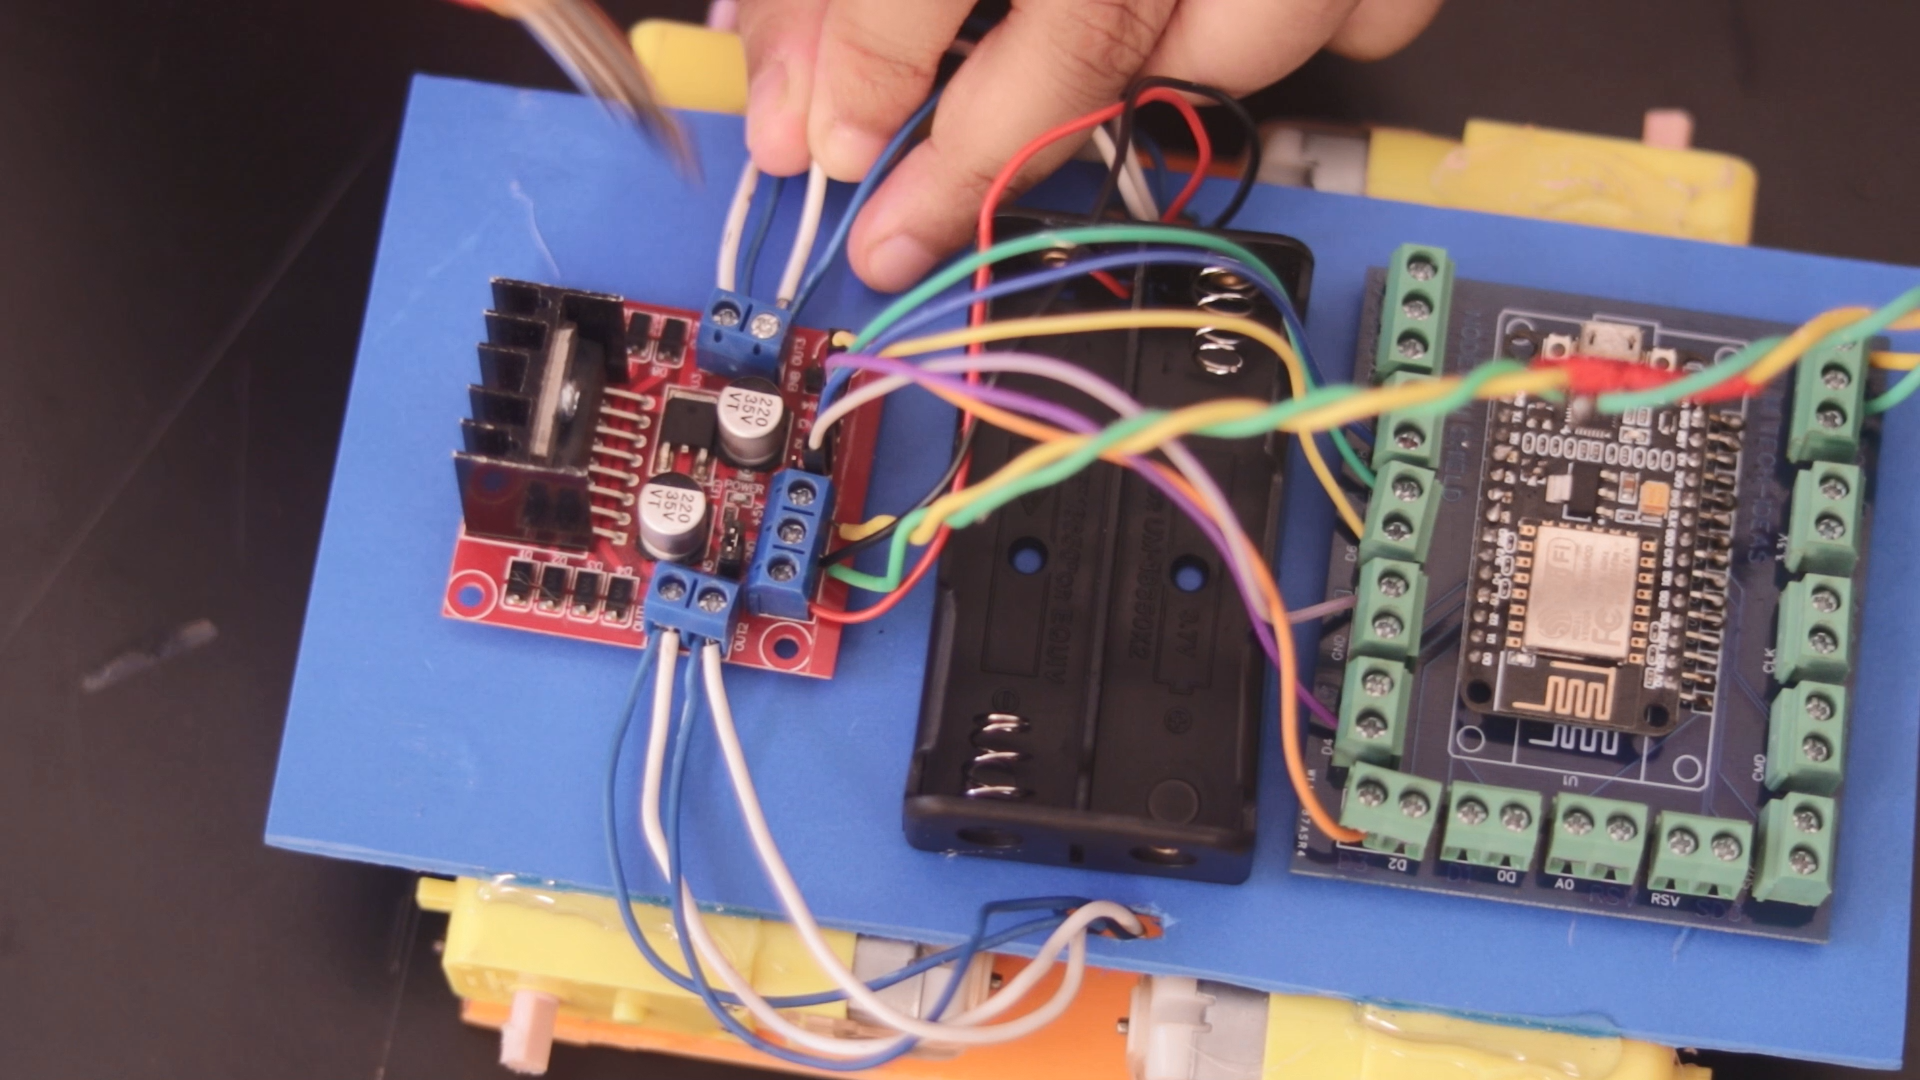
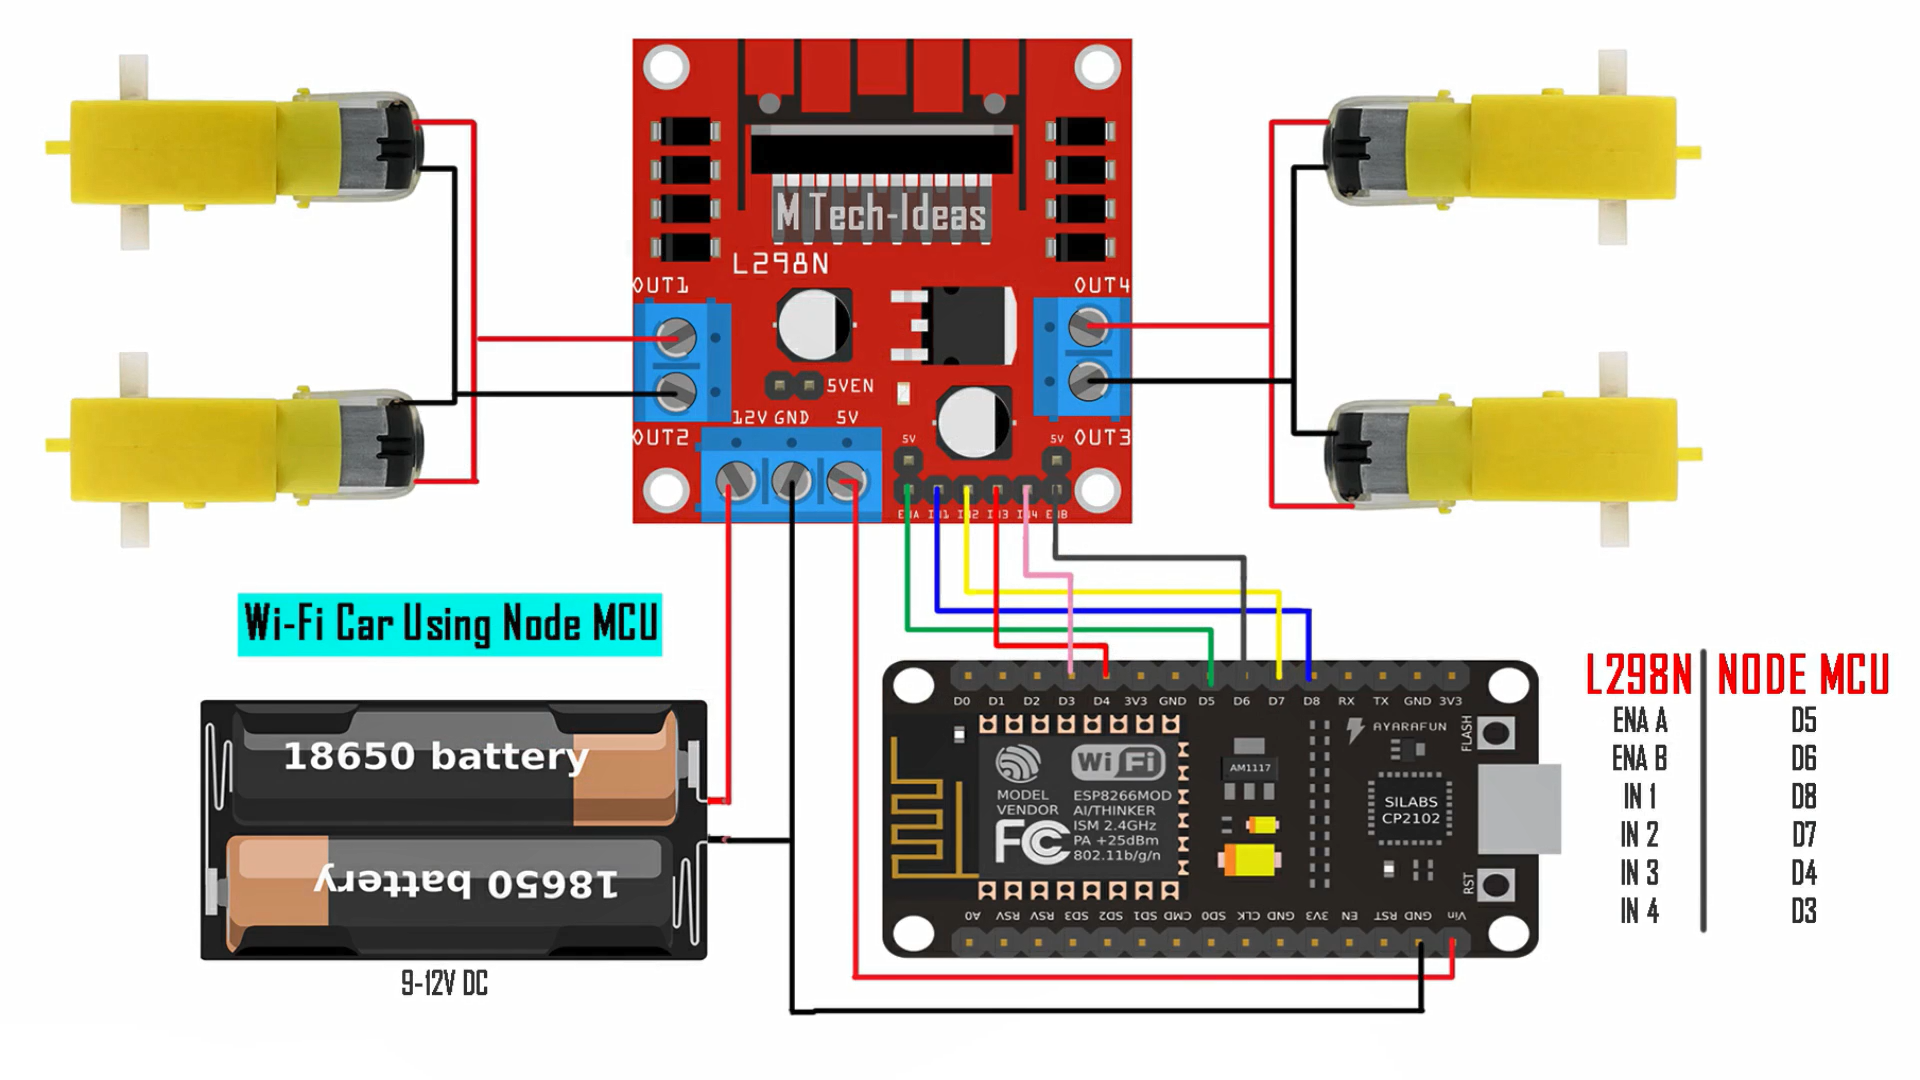
- L298N motor Driver:- To control the speed of the motors, here I have used the L298N motor driver. L298N is a very Low-Cost Motor Driver and you can also use it in various projects in the future. You can also find the library file for this motor driver easily.
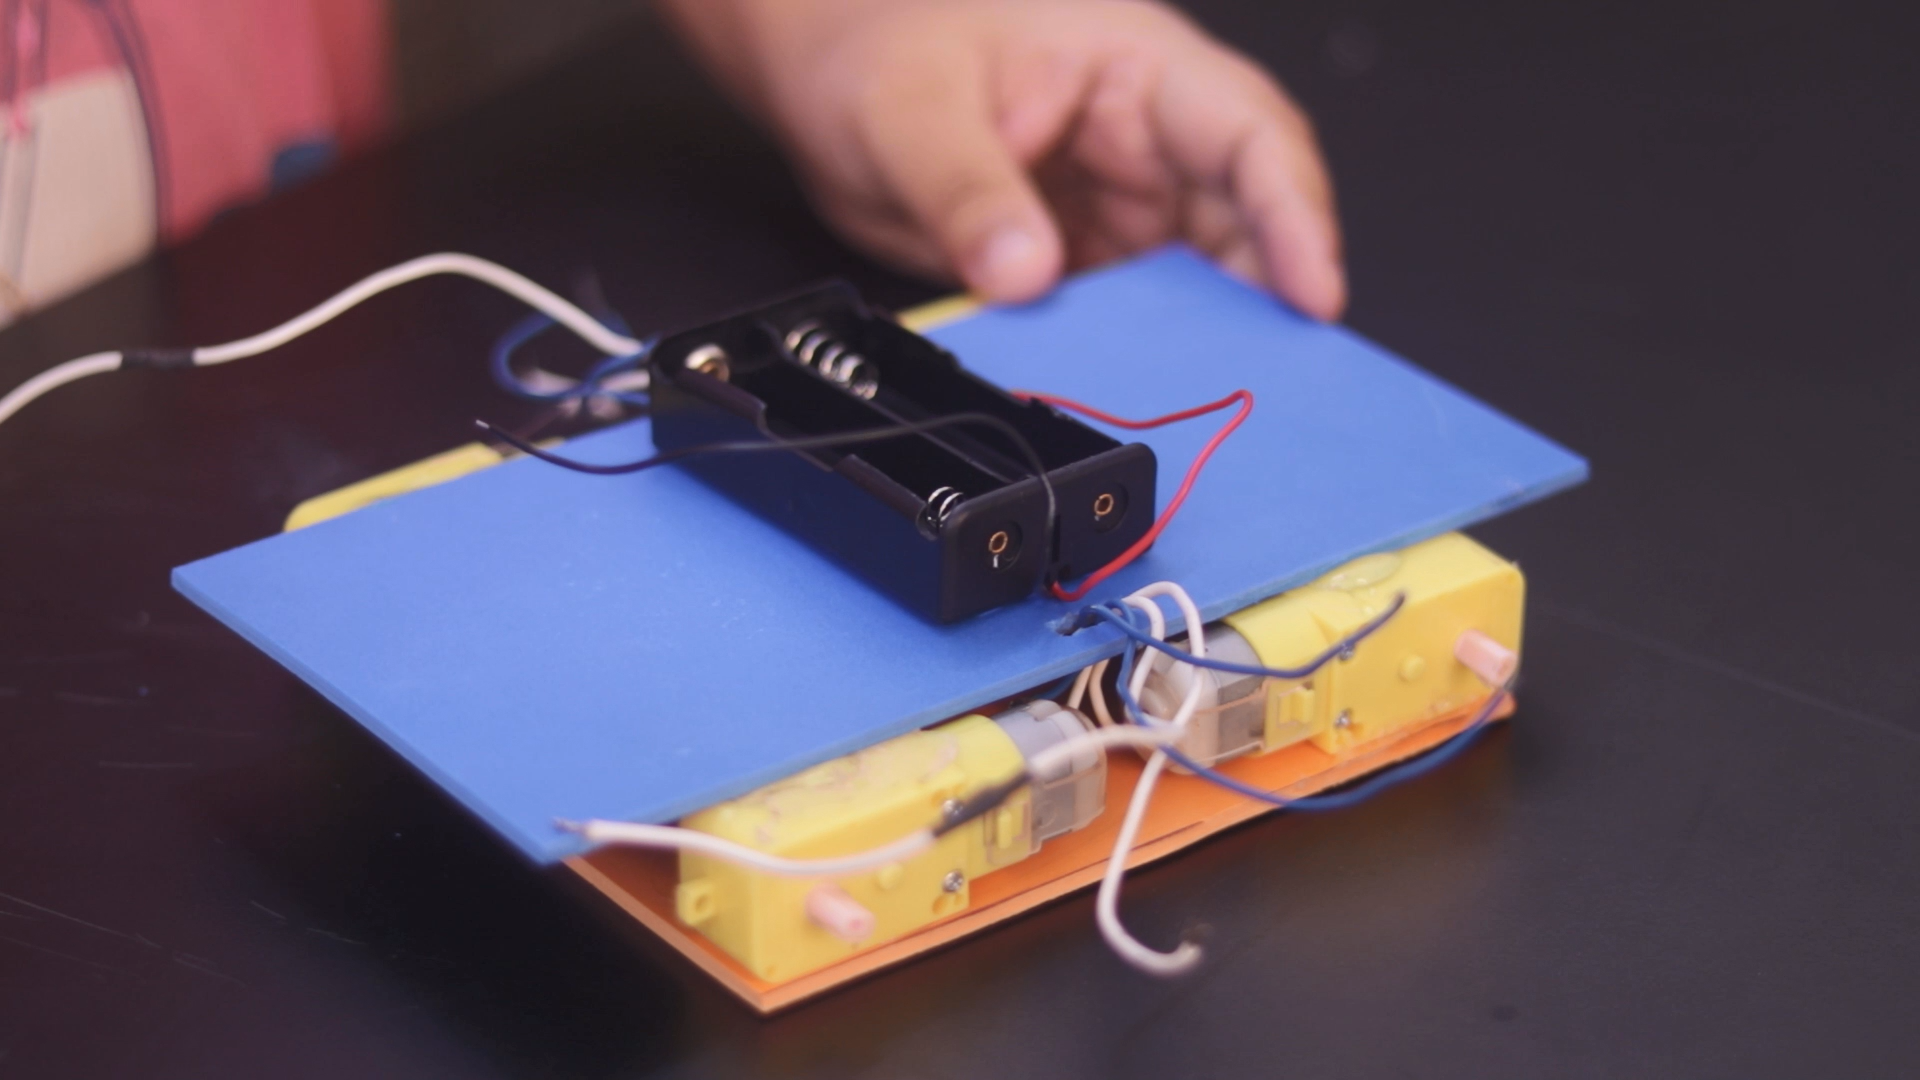
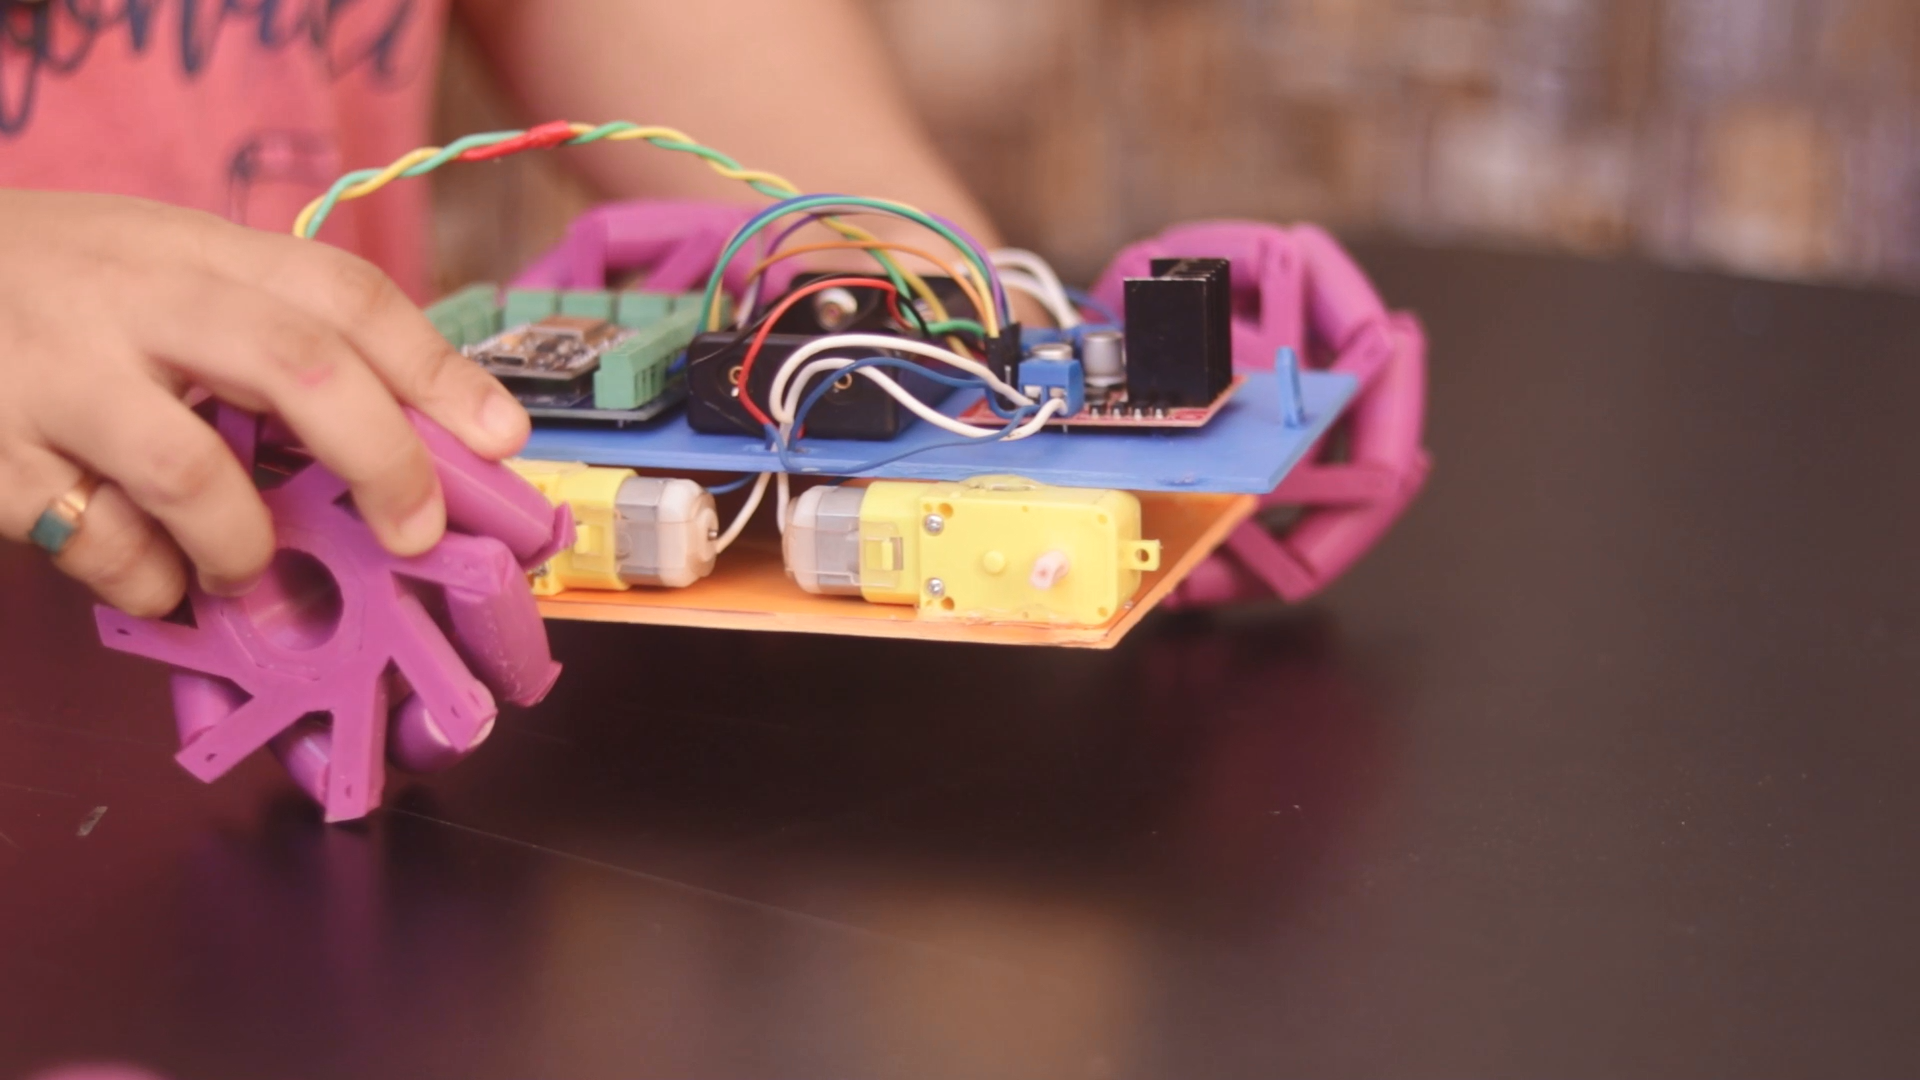
- Chassis
- TT Gear Motor
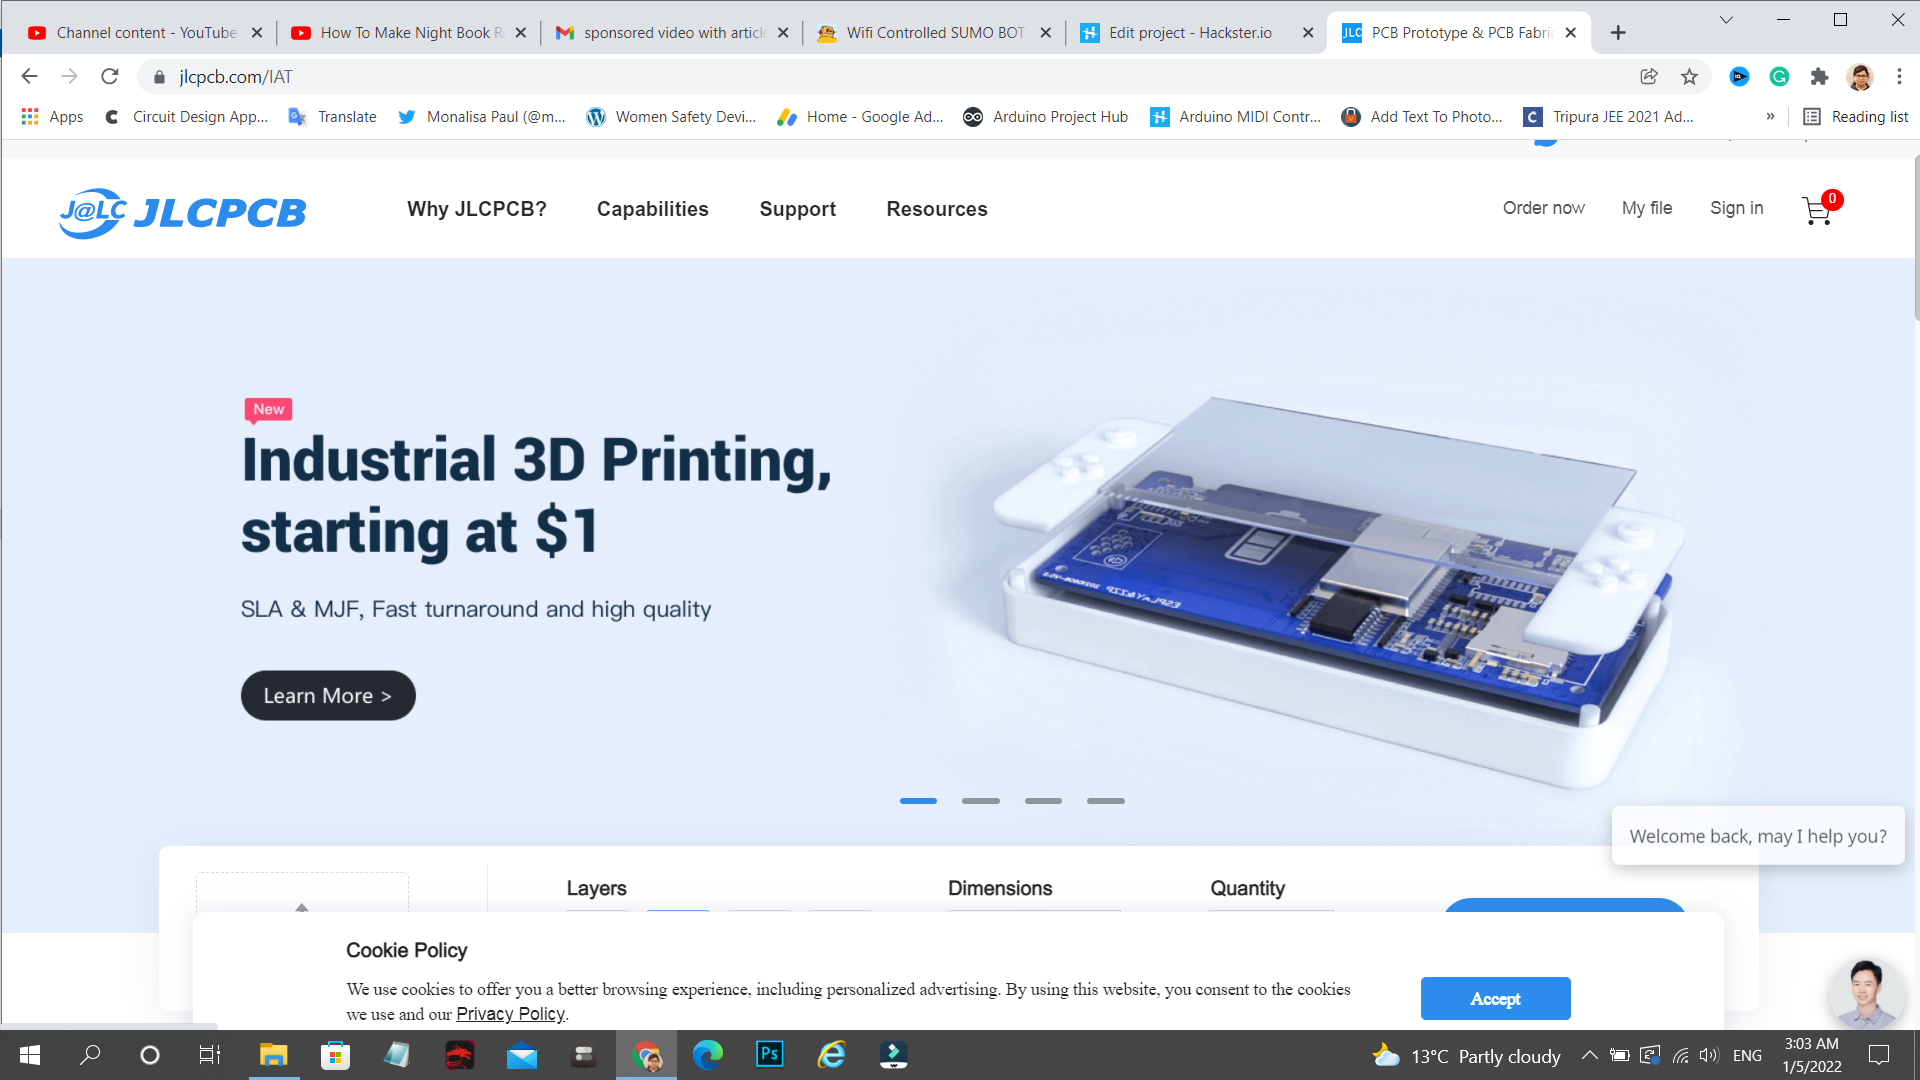
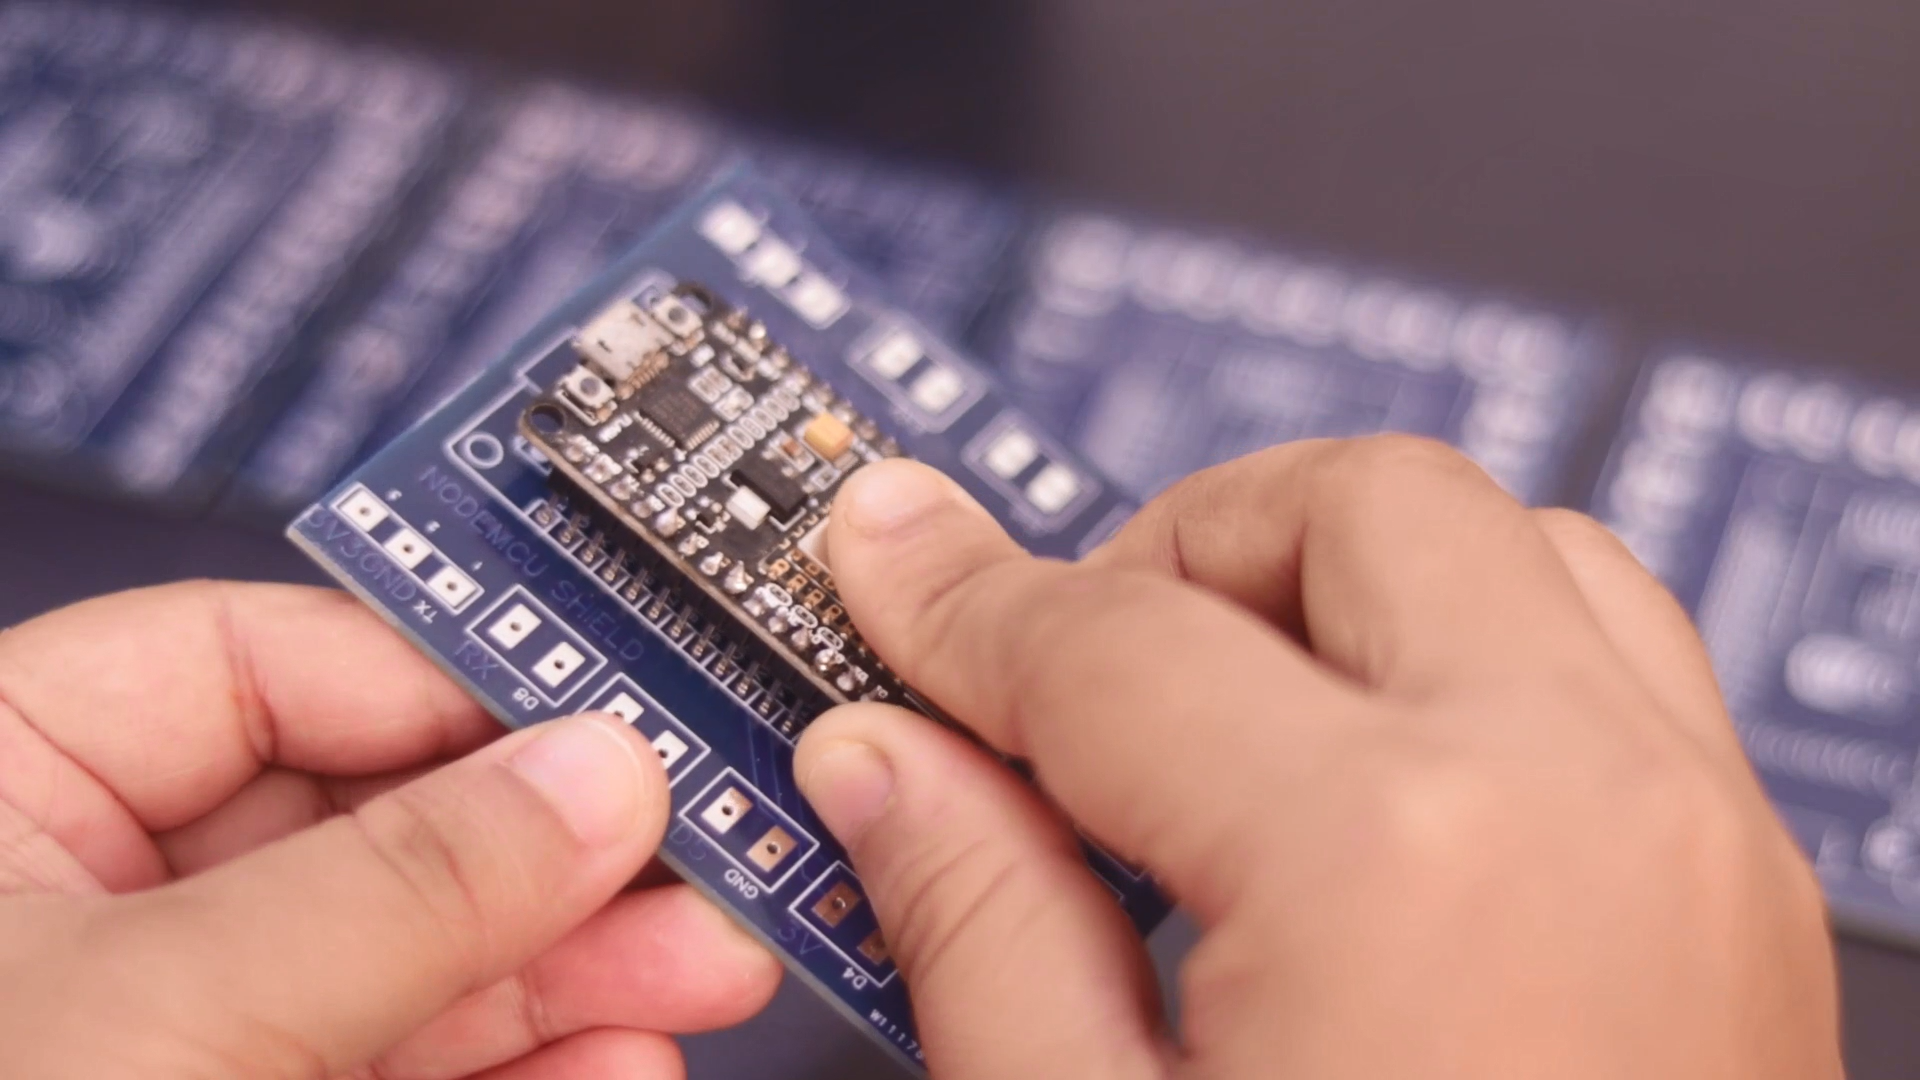
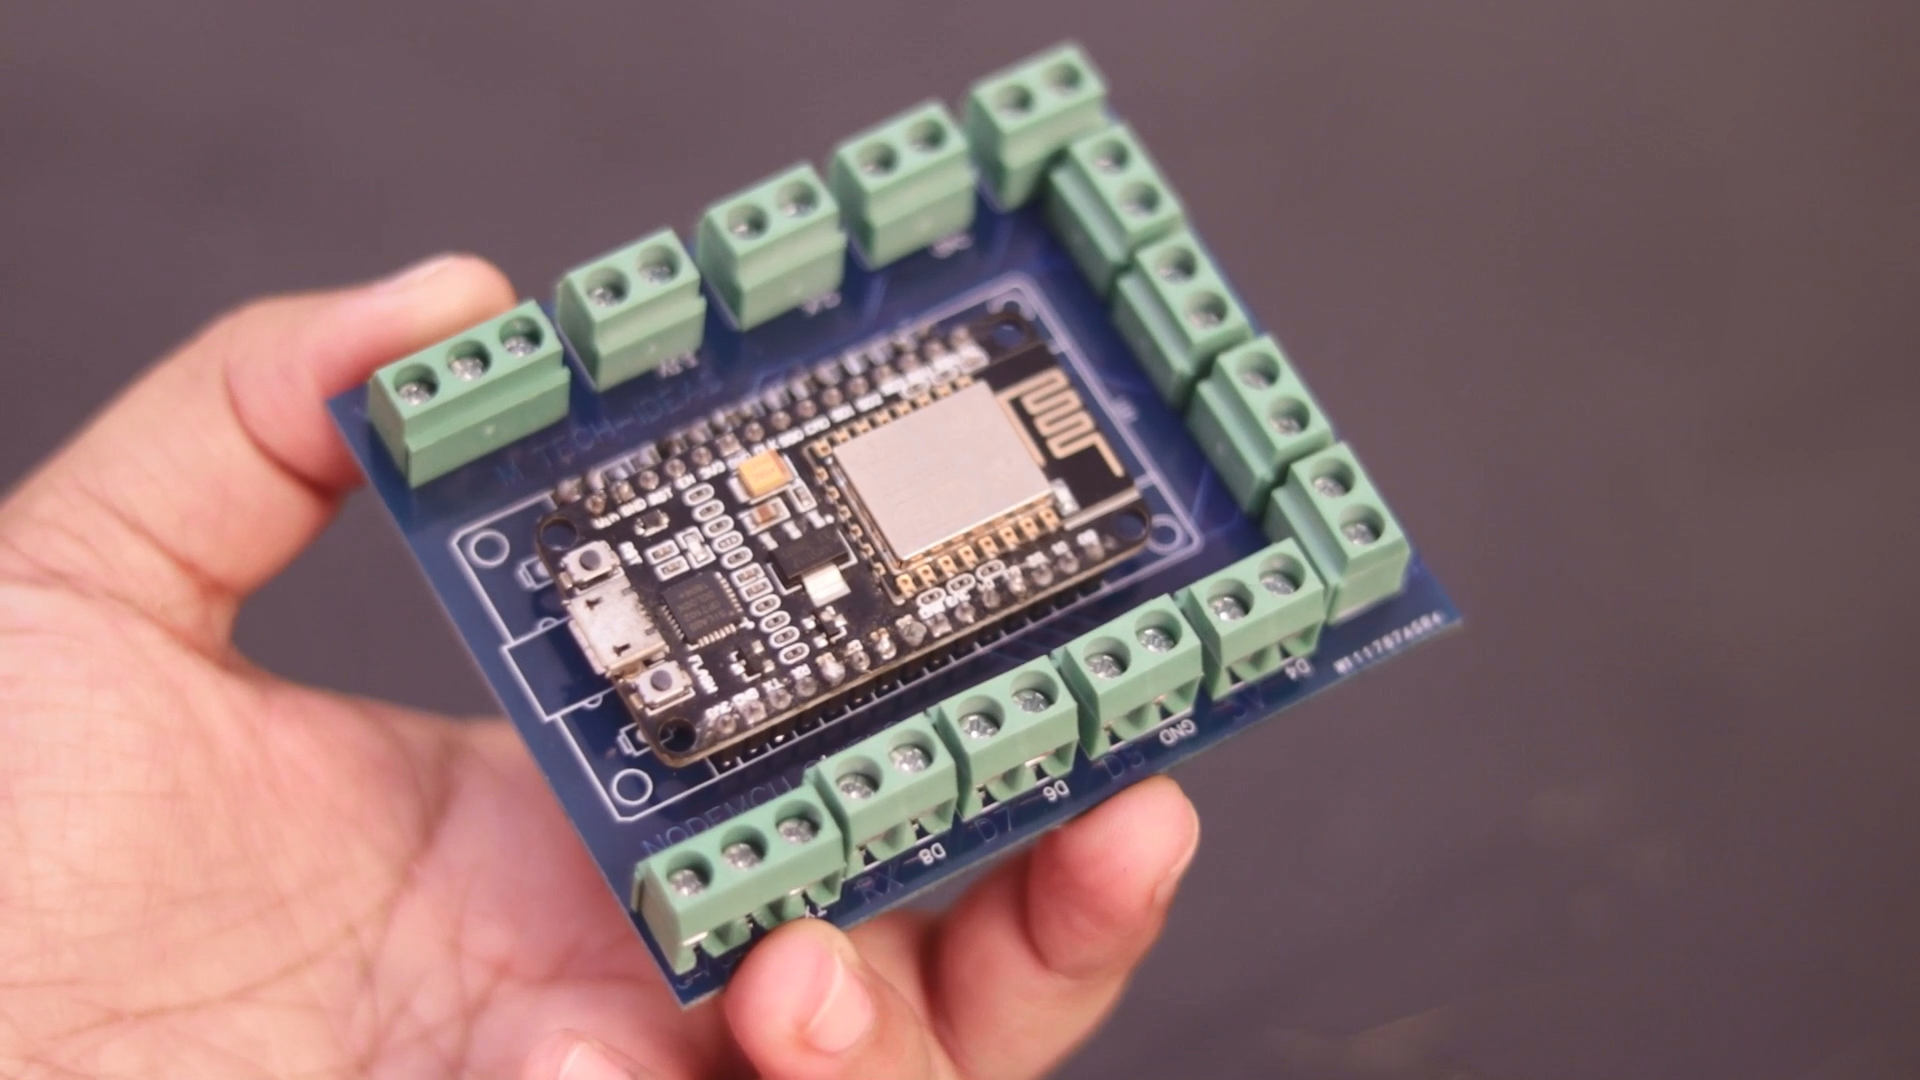
- PCB Boards By JLCPCB:- Then I have designed a PCB for NodeMCU. It will be easier to connect all the parts together with a PCB board.
![]()
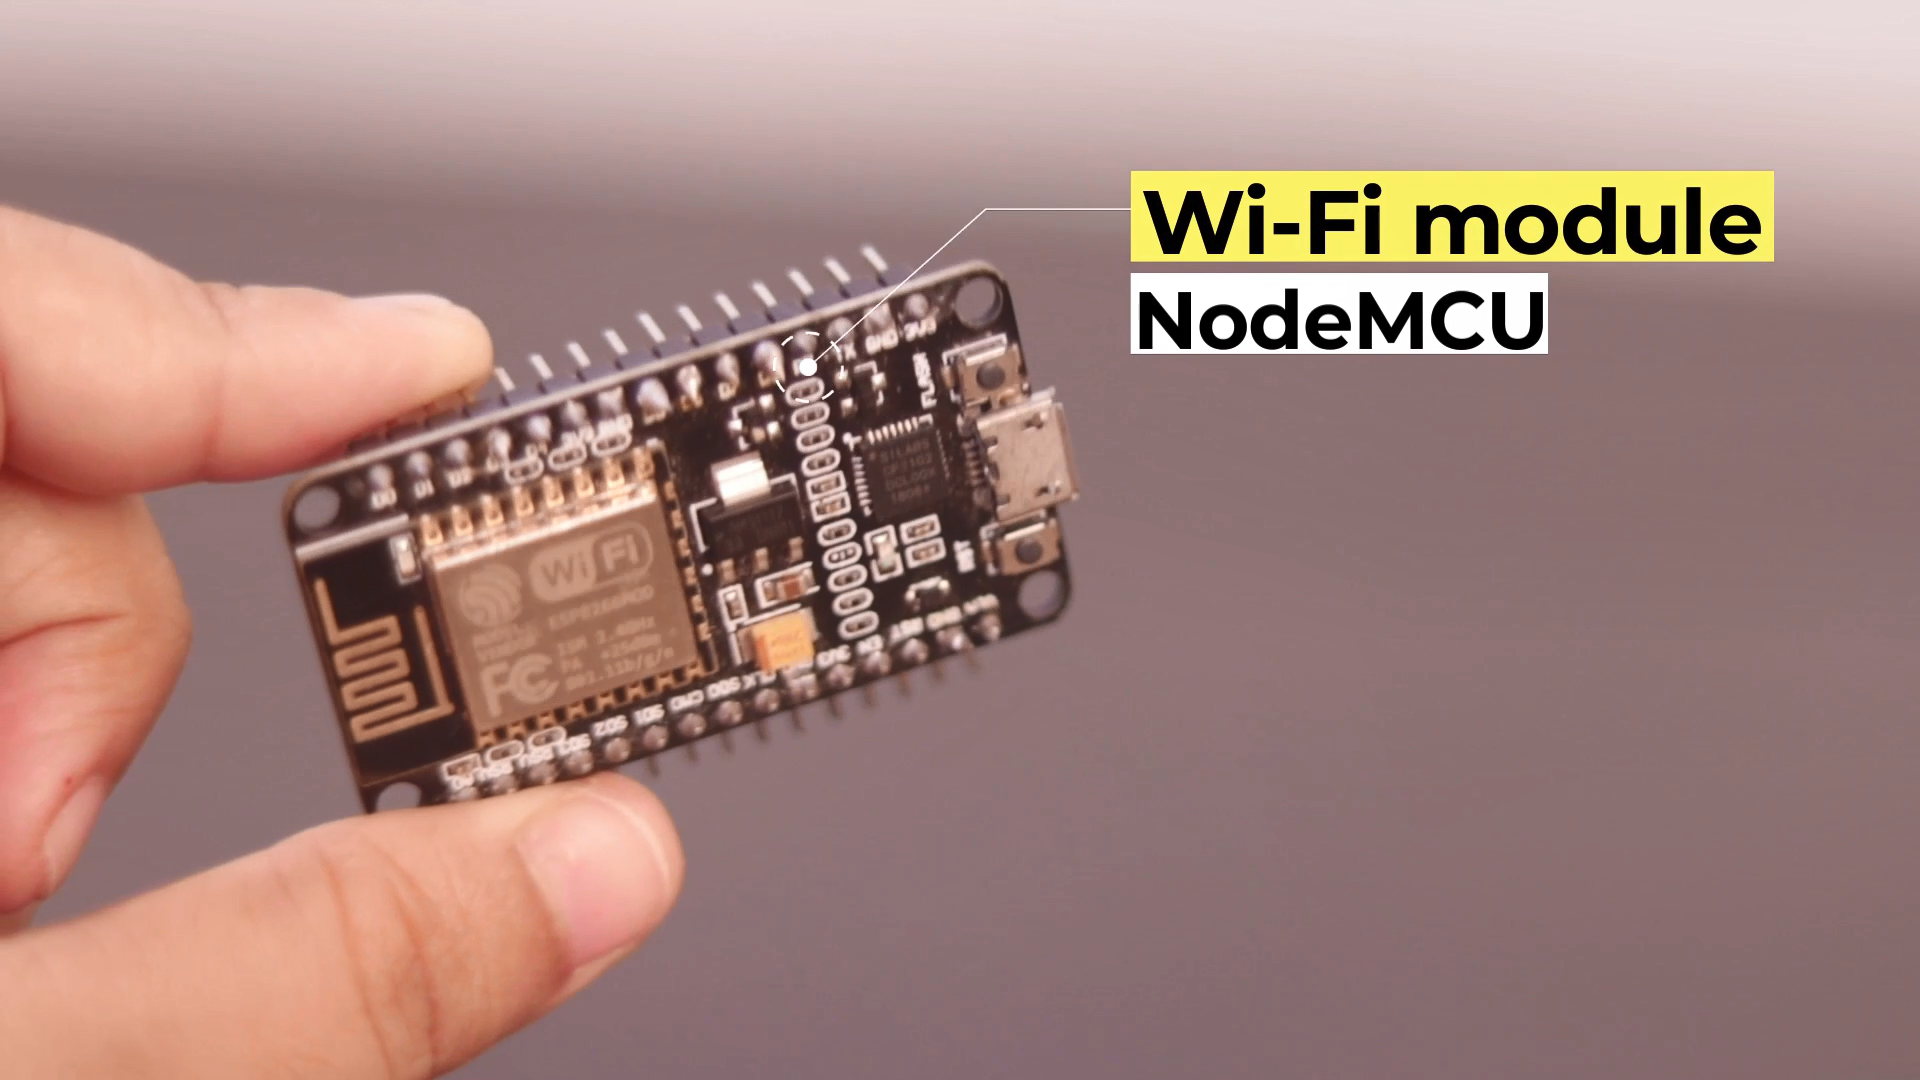
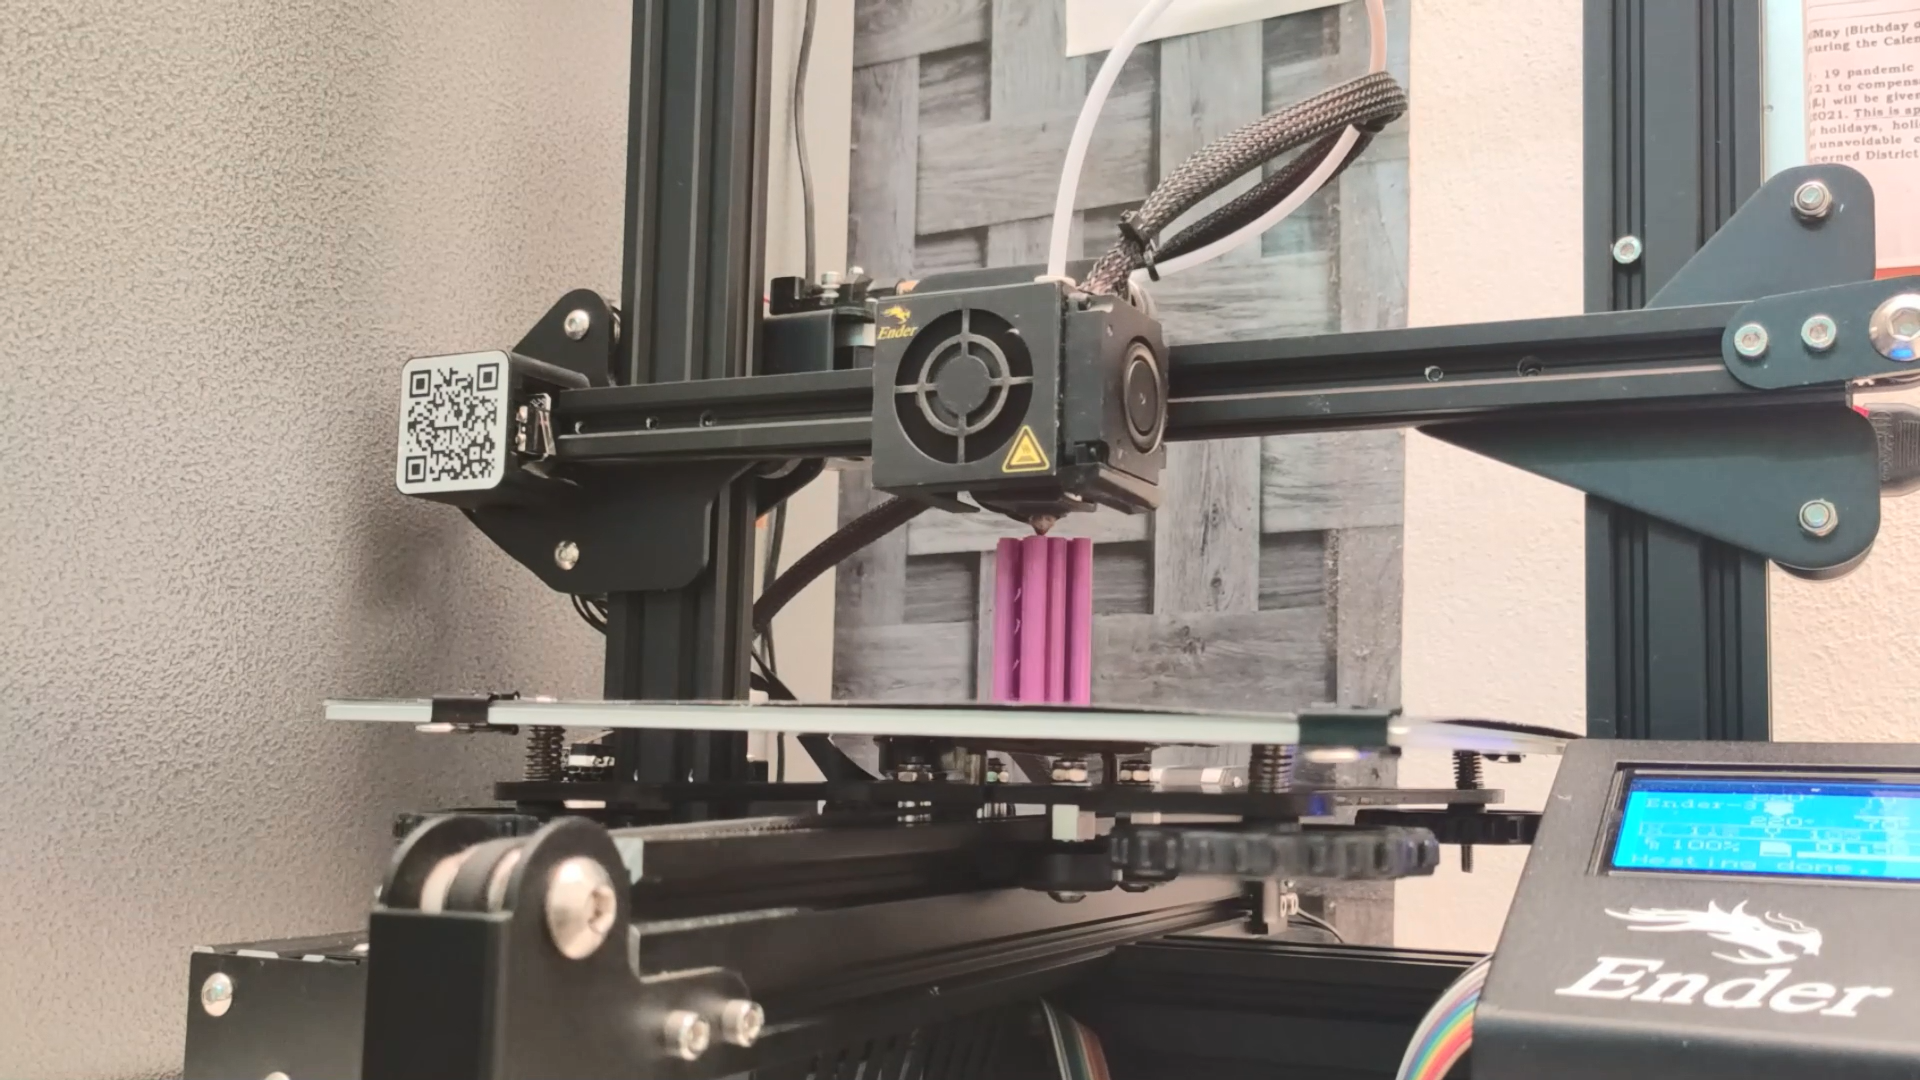
- NodeMCU:- Next, I am going to use NodeMCU to control the robot via WiFi. NodeMCU is a low-cost open-source IoT platform. It initially included firmware that runs on the ESP8266 Wi-Fi SoC from Espressif Systems and hardware that was based on the ESP-12 module. Later, support for the ESP32 32-bit MCU was added.
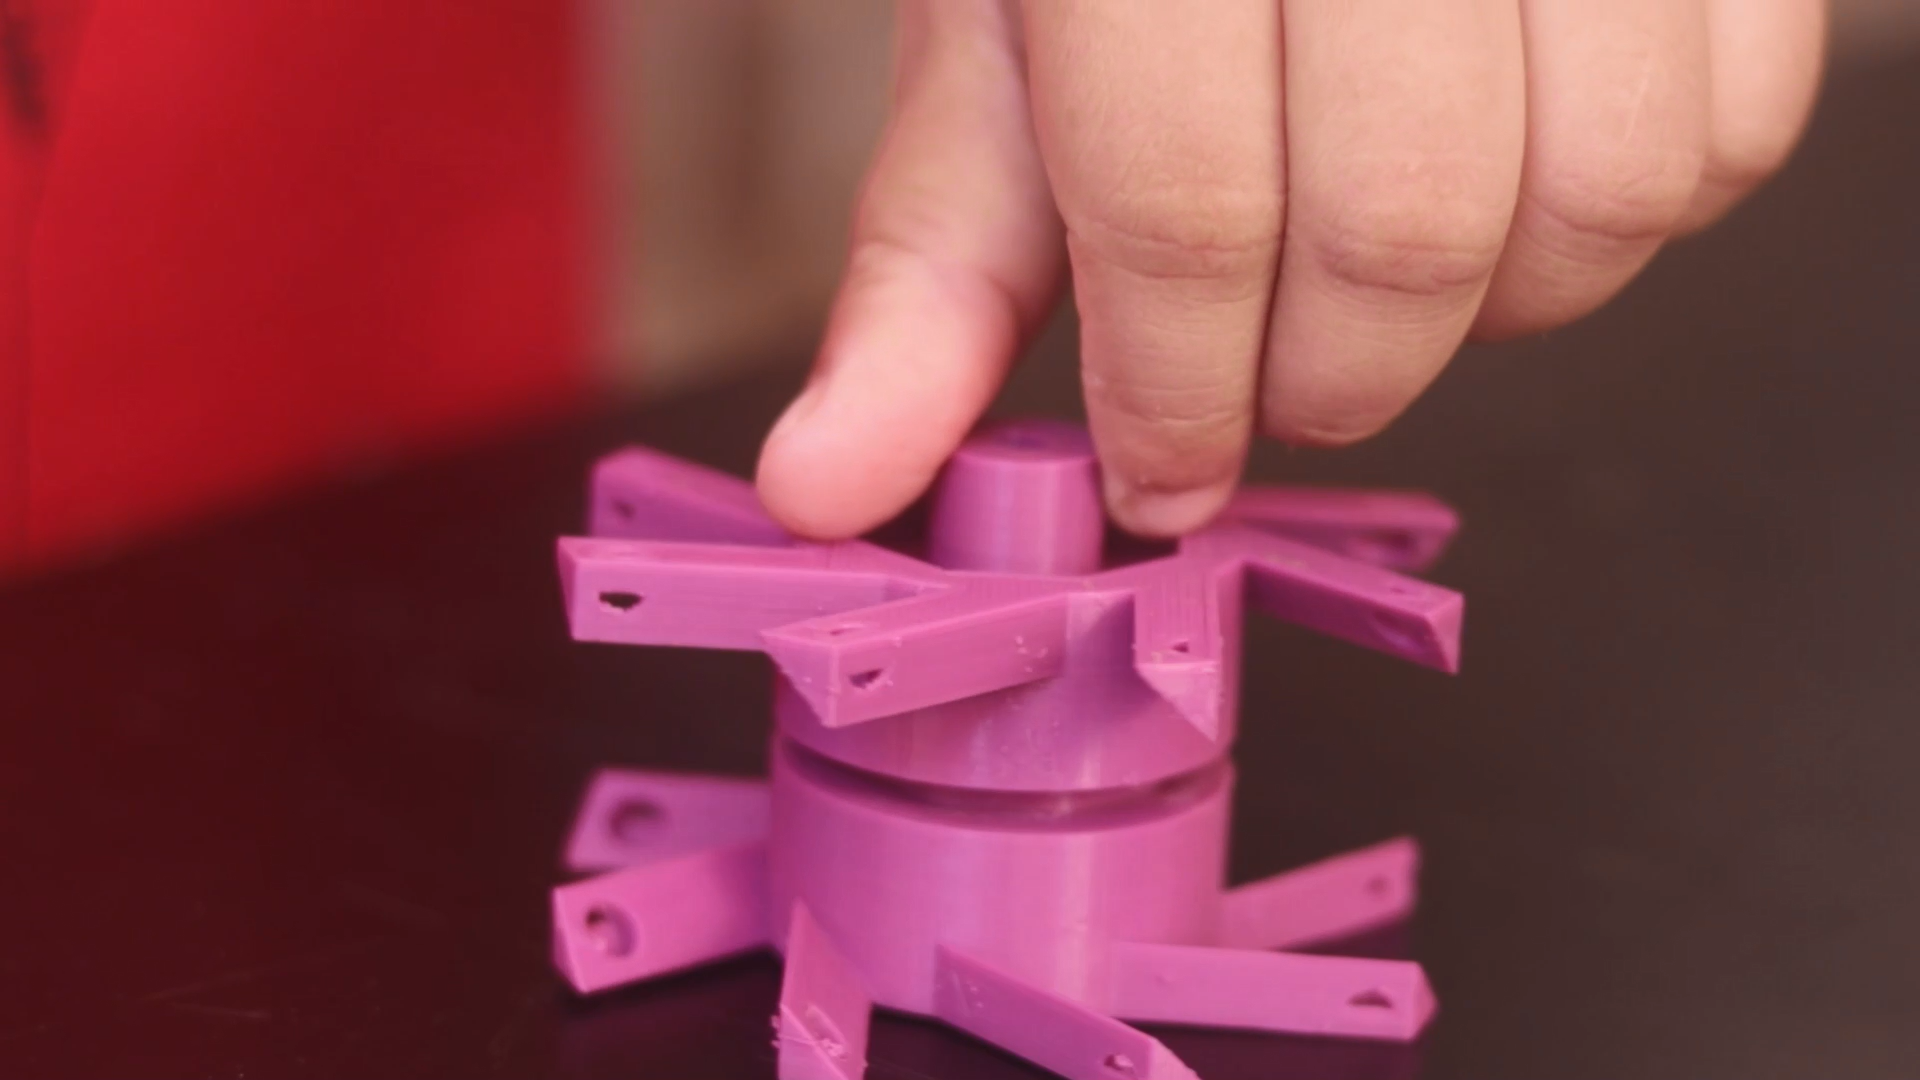
- Here I have used PVC SHEET to make the chassis. To give it a proper shape, you can use a hot airgun to apply heat. Then you can use a Drill machine and Cutting tools to makeover it. Here I have chosen a simple design but you may choose anything else according to your need. Once your Chassis is ready, attach the TT gear motor with it using Hot Glue and anything else you want. Here I have used 60 rpm TT Gear Motor.
How to Upload Code on Node MCU
Please follow the steps below, If you are new and not well familiar with this ESP8266 module, or facing a problem while uploading the code
1.First Download the code from the link below. Now open Arduino and Go to File~New.
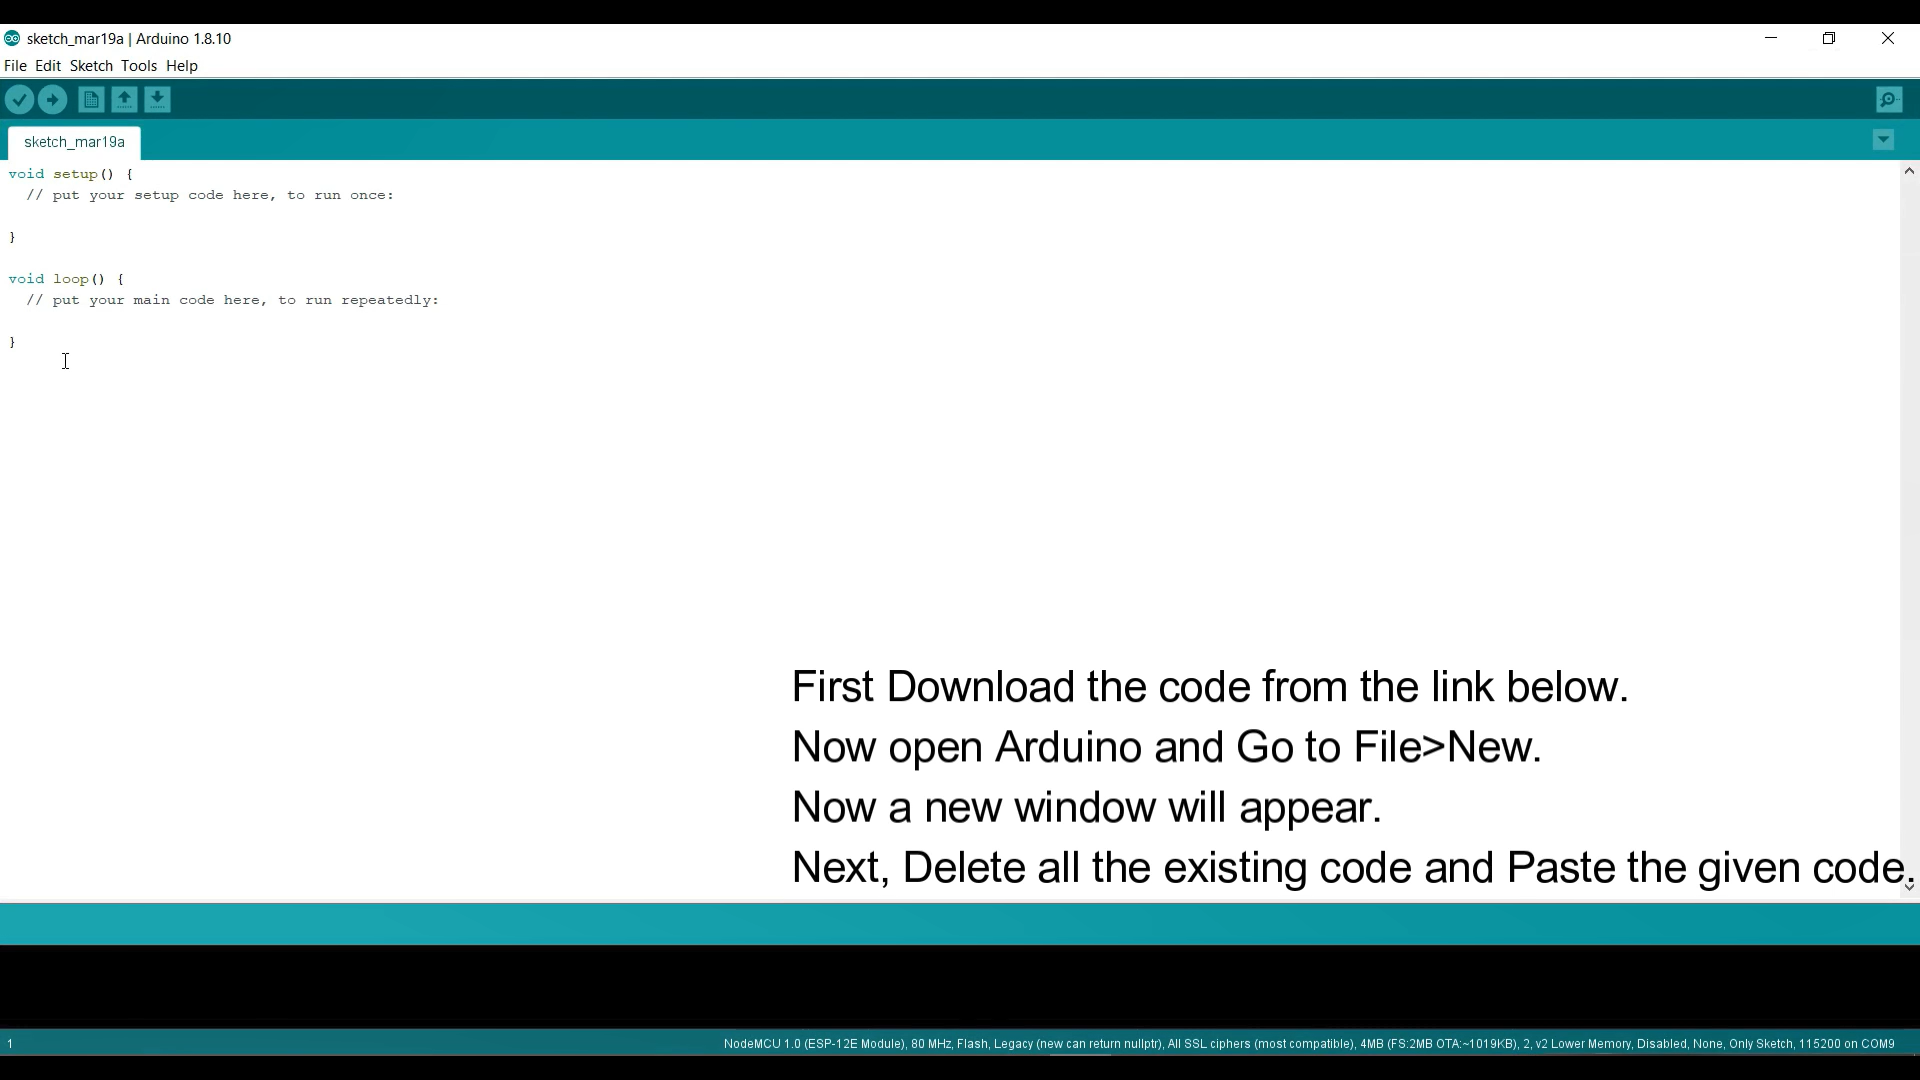
2.Now a new window will appear. Next, Delete all the existing code and Paste the given code.
3.In the code, you will find Additional Board Manager URL now copy the URL and do the next step. For Different OS you have a different option. MAC: Go to Arduino ~ Preferences Windows: Fille ~ Preferences
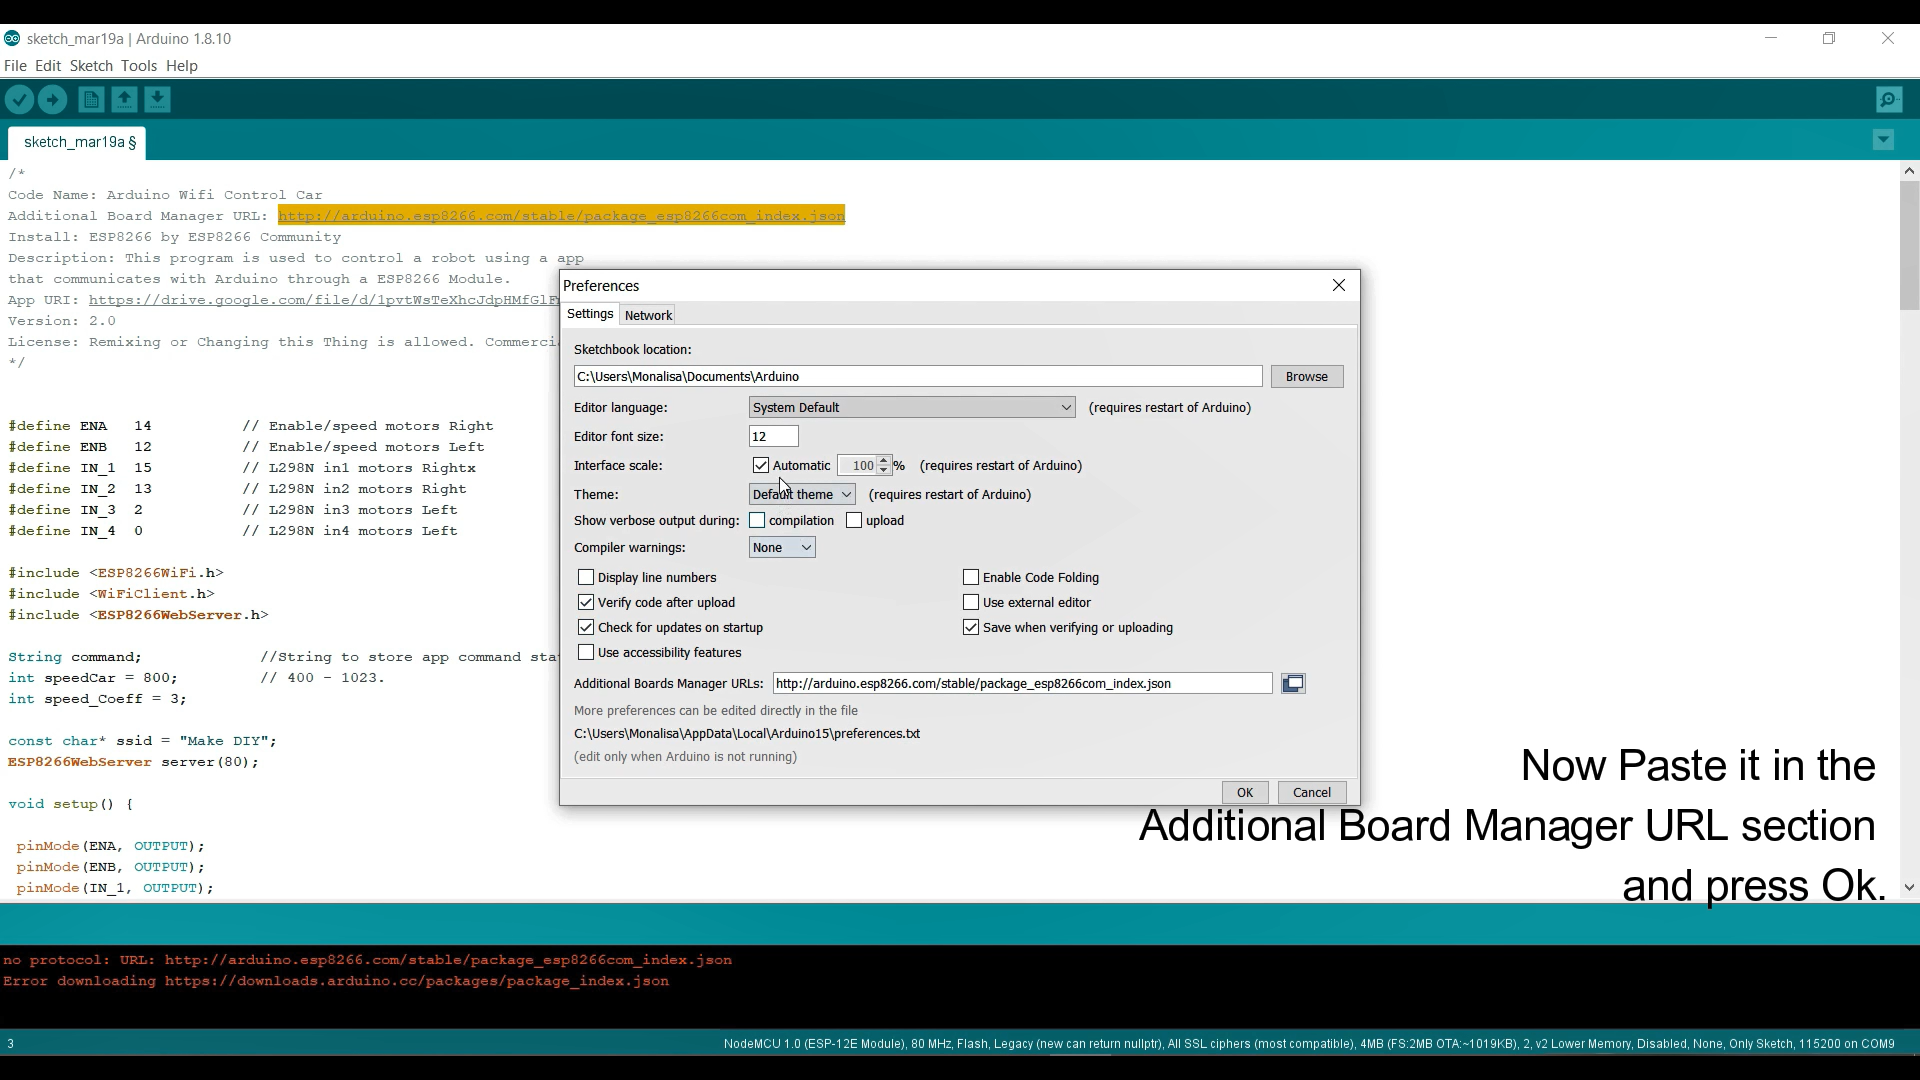
4. Now Paste it in the Additional Board Manager URL section and press Ok. Now go to Tools ~ Board ~ Boards Manager Search for ‘ESP8266‘ and install the latest version.
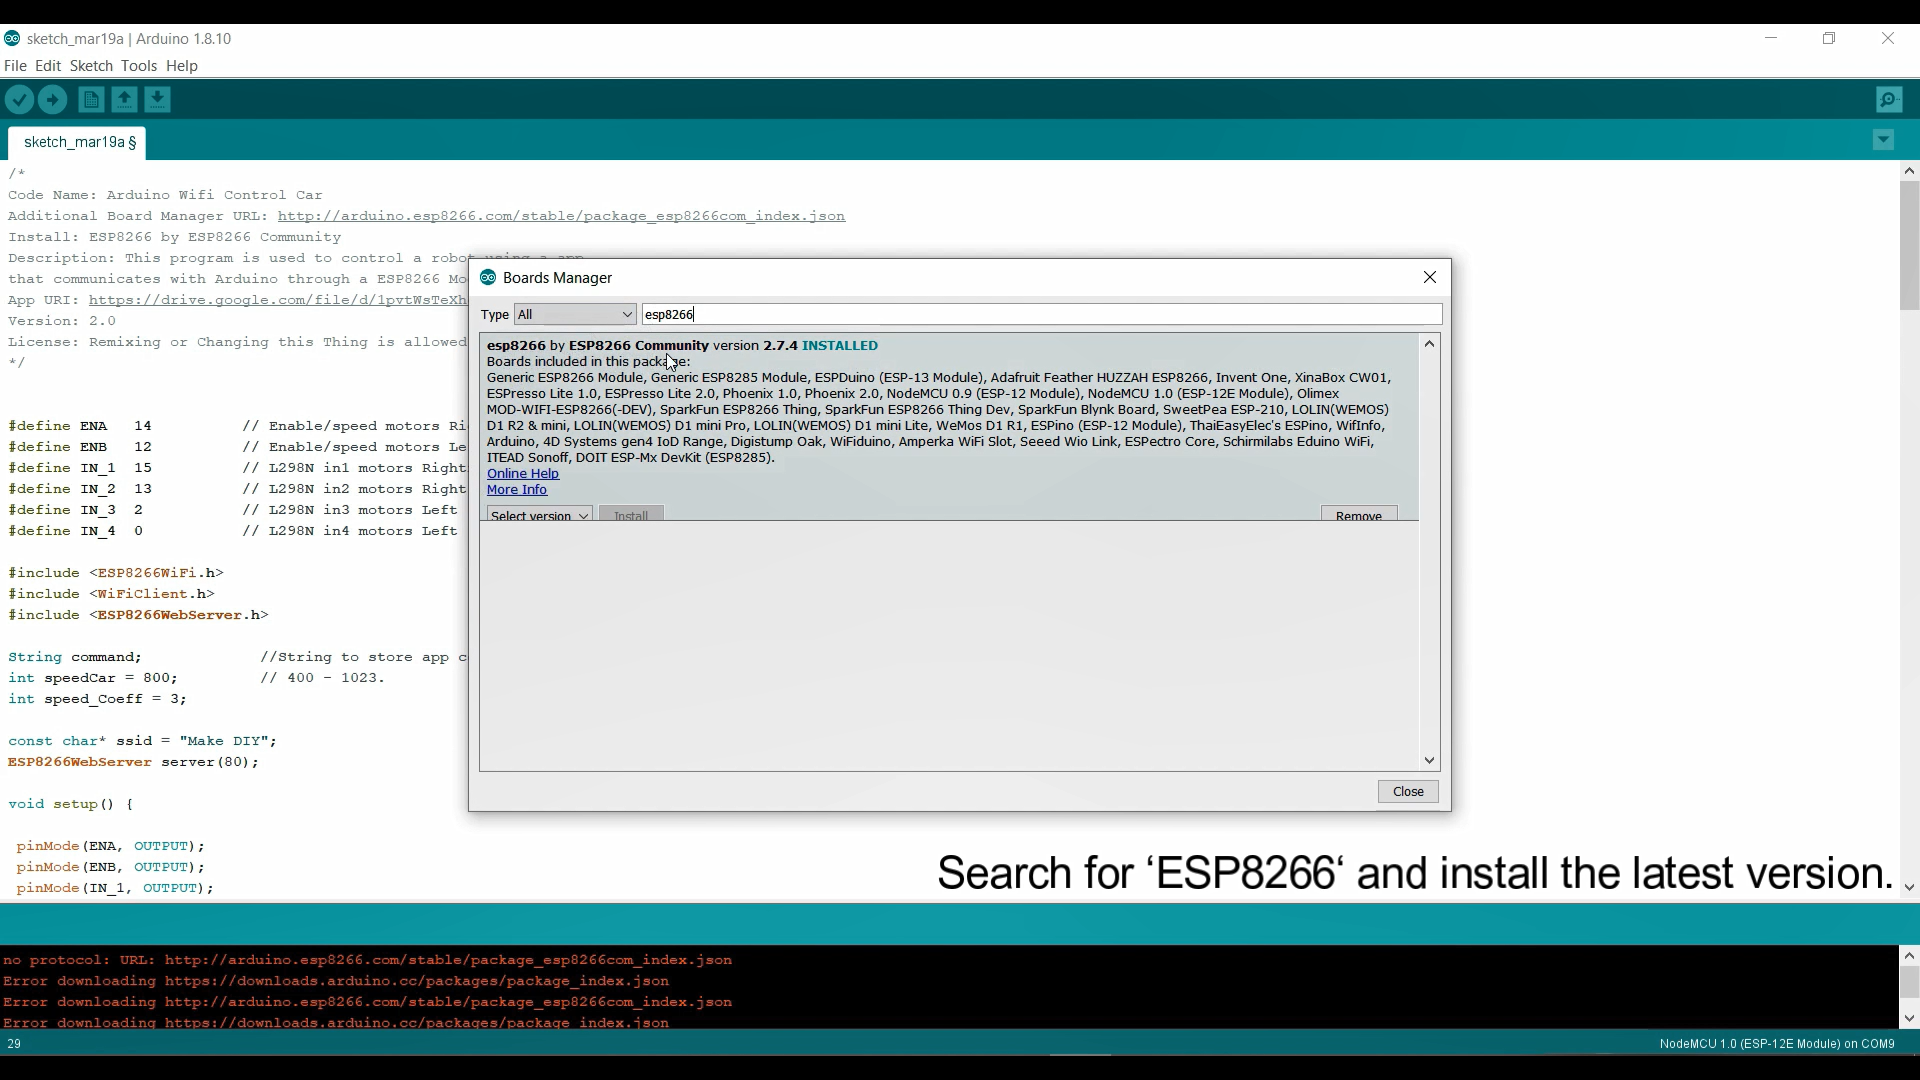
5. After the installation Then go to Tools ~ Board and then select the ESP-12E Module. So, The Board is selected Now.
6. Next, Select the Right COM Port.
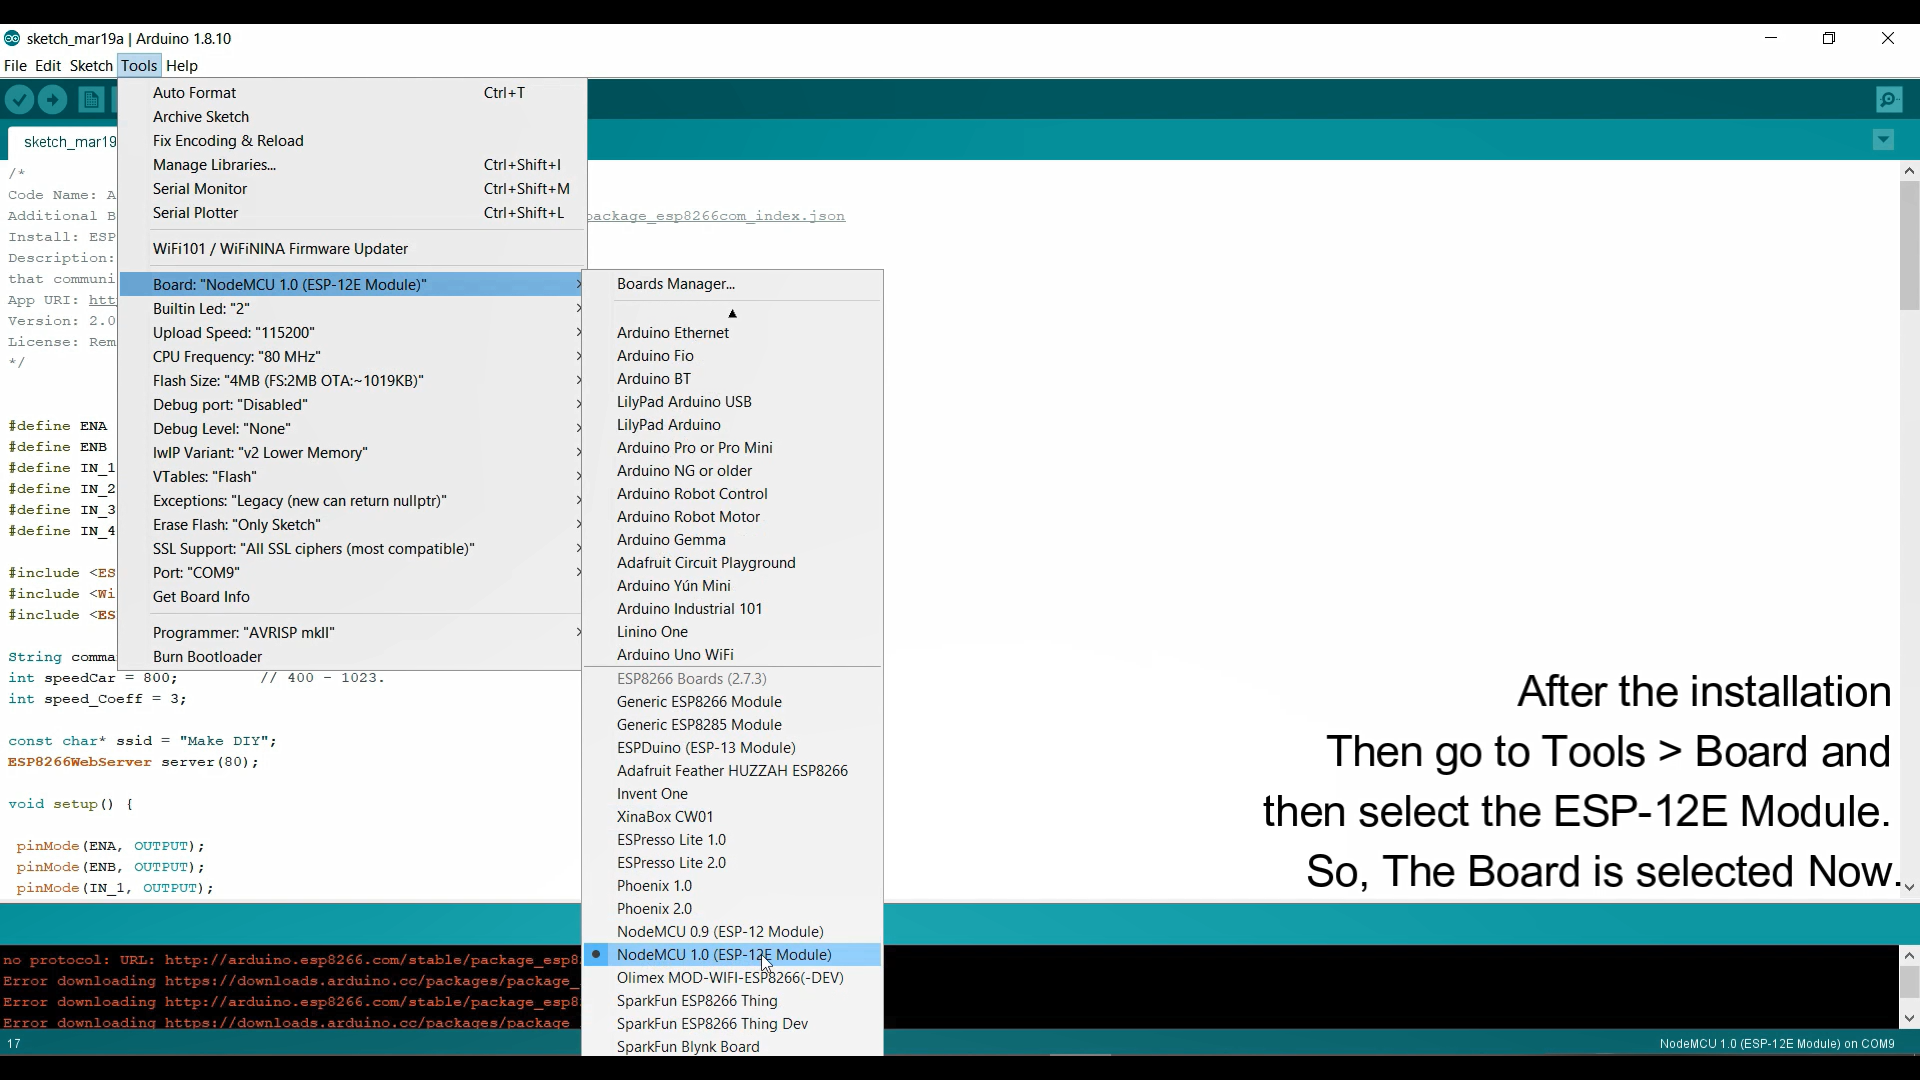
7. Then compile the Programme First and then Upload it to NodeMCU.
After a few seconds, the code will be compiled and then Uploaded to
NodeMCU Car.
The link you have to paste on Arduino IDE Additional Board Manager URL: http://arduino.esp8266.com/stable/package_esp8266...
WHY JLCPCB
JLCPCB (Shenzhen JIALICHUANG Electronic Technology Development Co., Ltd.), is the largest PCB prototype enterprise in China and a high-tech manufacturer specializing in quick PCB prototype and small-batch PCB production. l have already used their PCBs in most of my projects and l must say the quality is awesome. lf you ask my choice, i will suggest JLCPCB.
if you sign up through JLCPCB you can get $27 coupons after registering successfully.
https://jlcpcb.com/IAThttps://jlcpcb.com/IAThttps://jlcpcb.com/IAThttps://jlcpcb.com/IAT
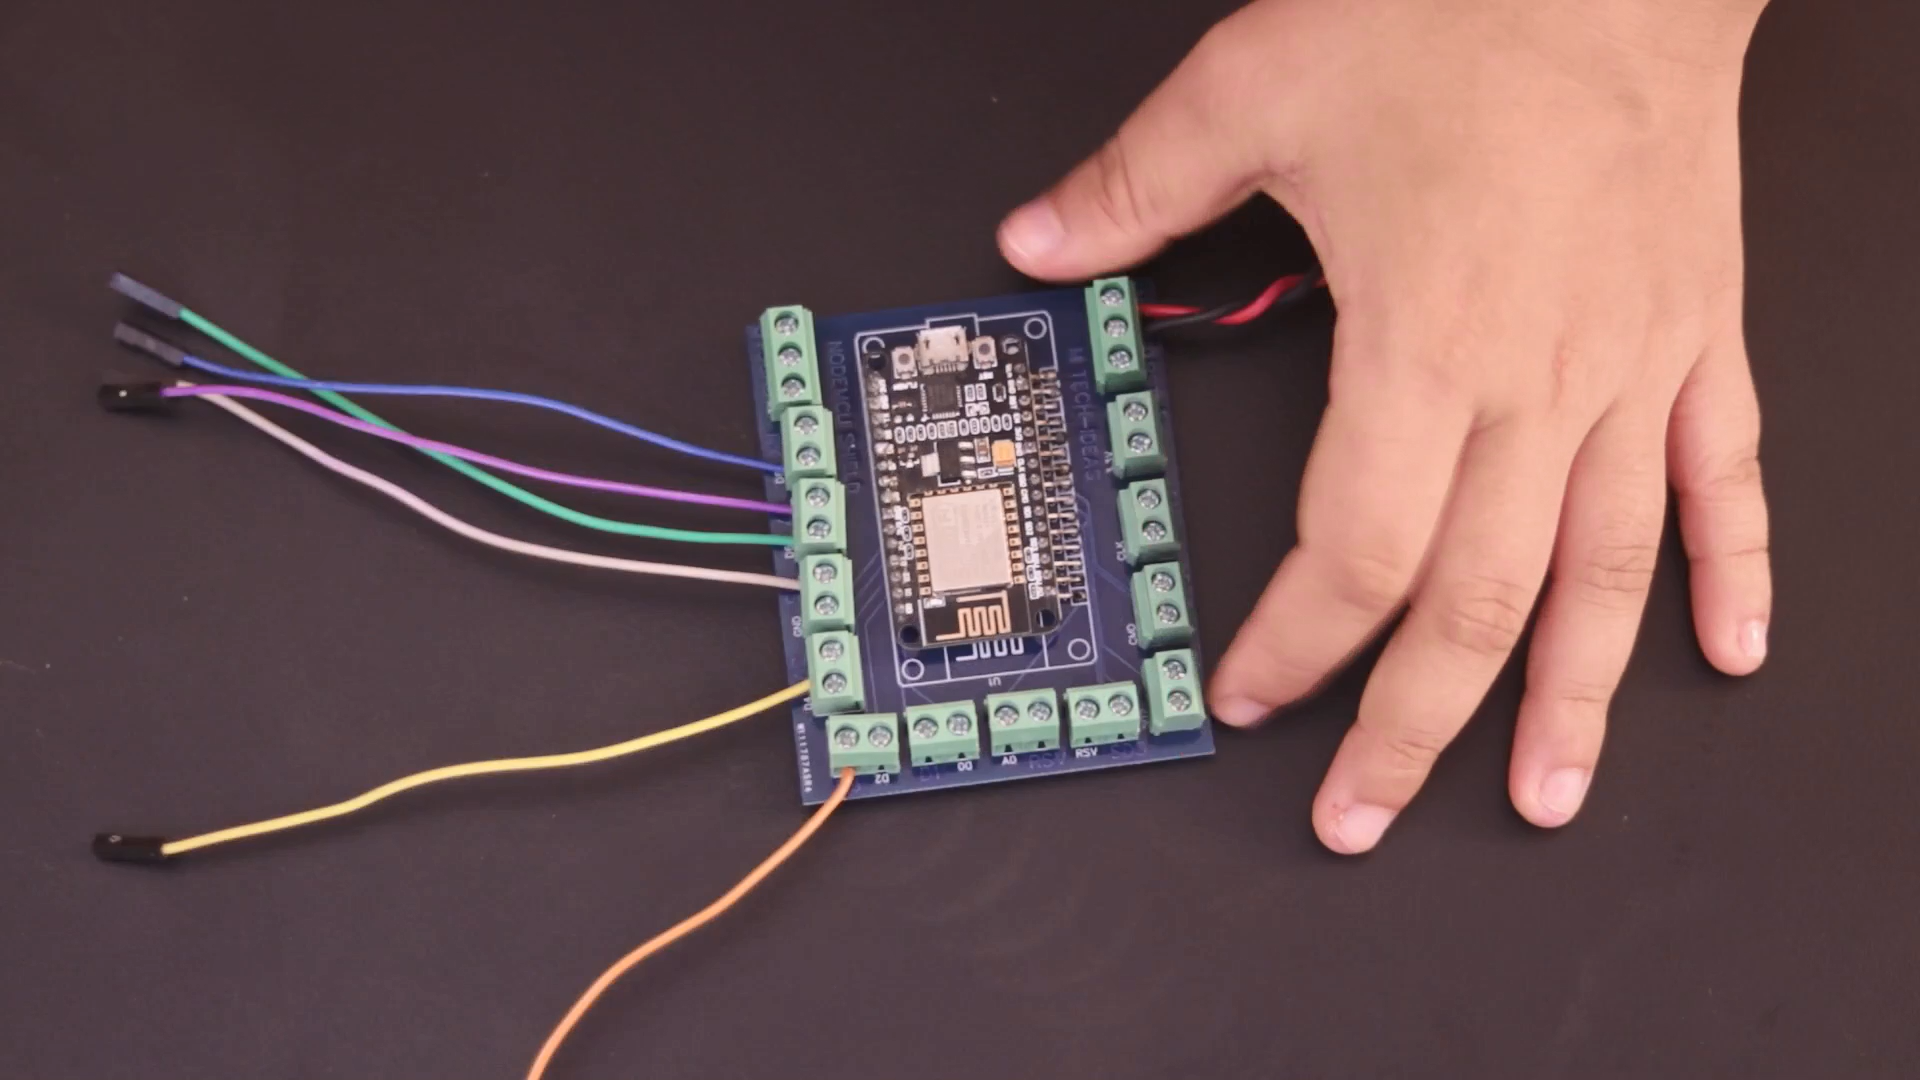
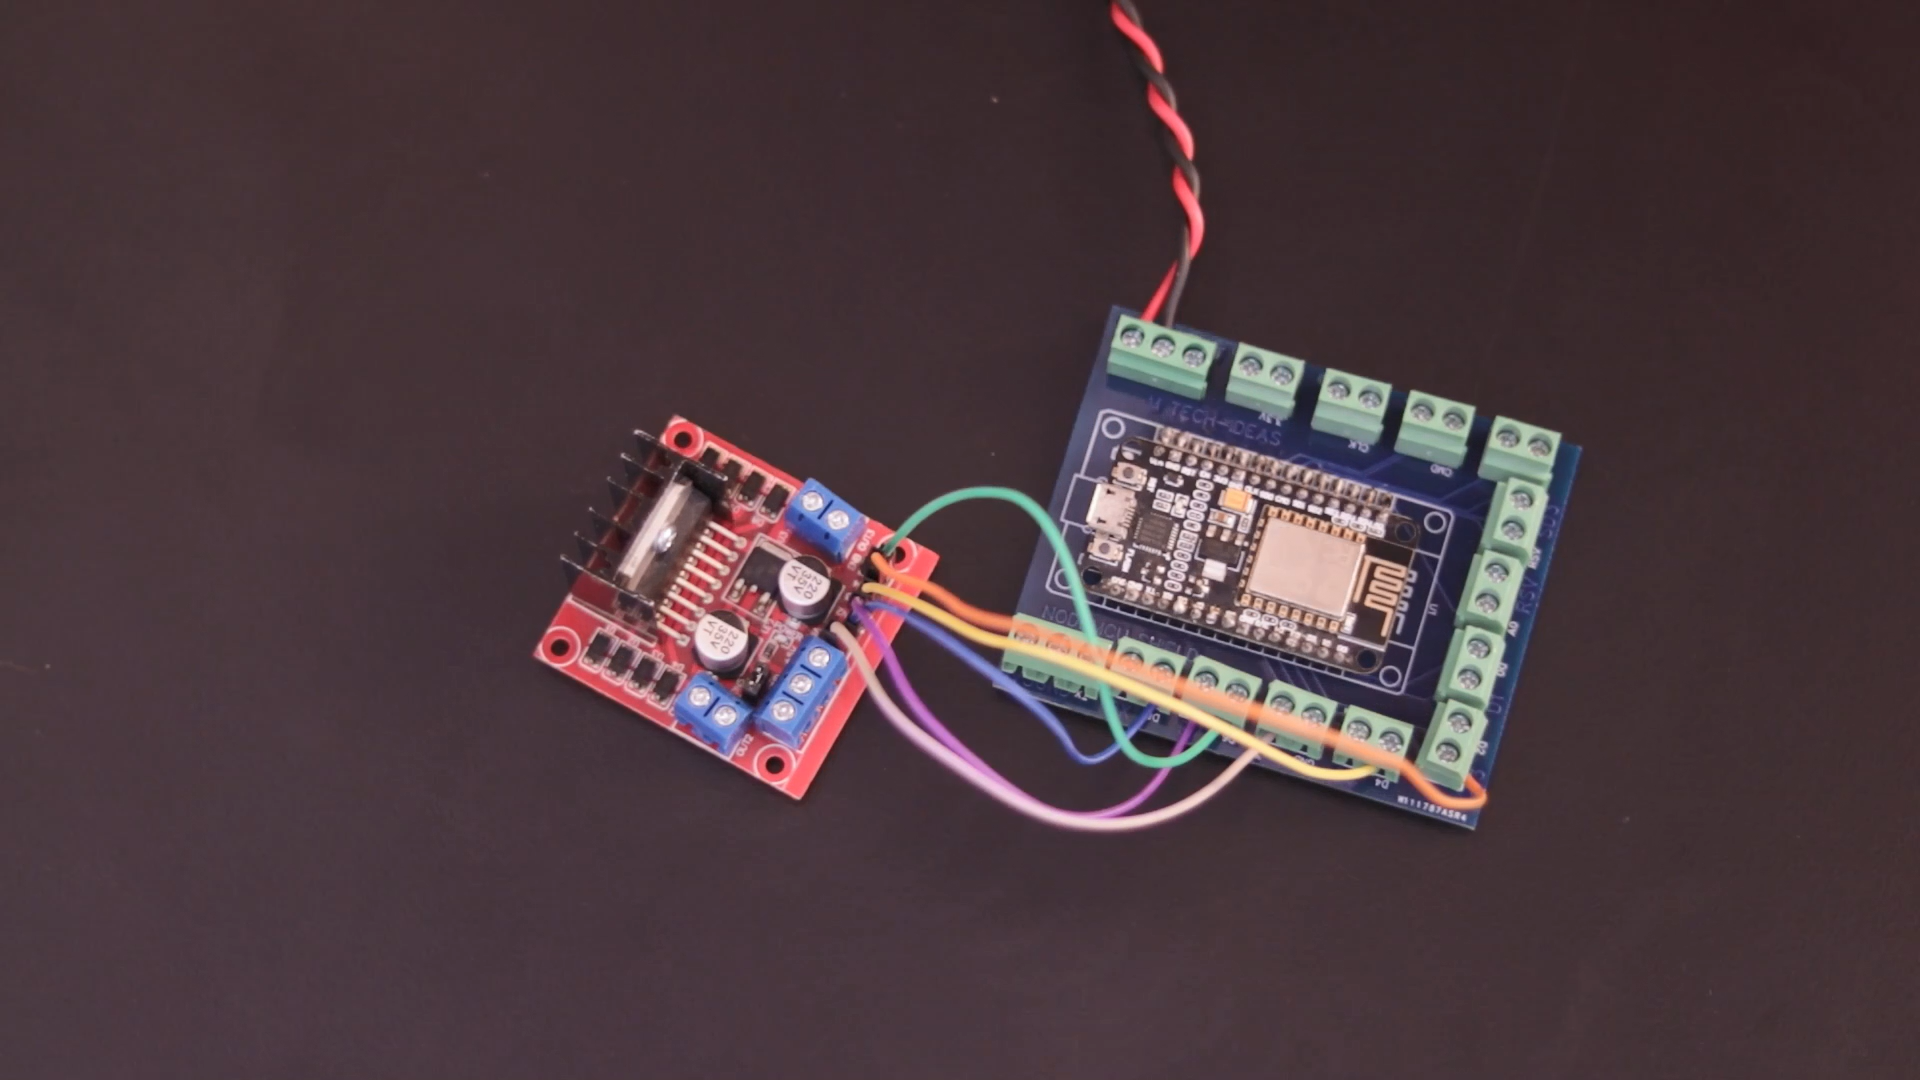
How to Connect All the Components Together?
Here I have already made a connection diagram to make the connection process easier. please follow the connection diagram for easy installation

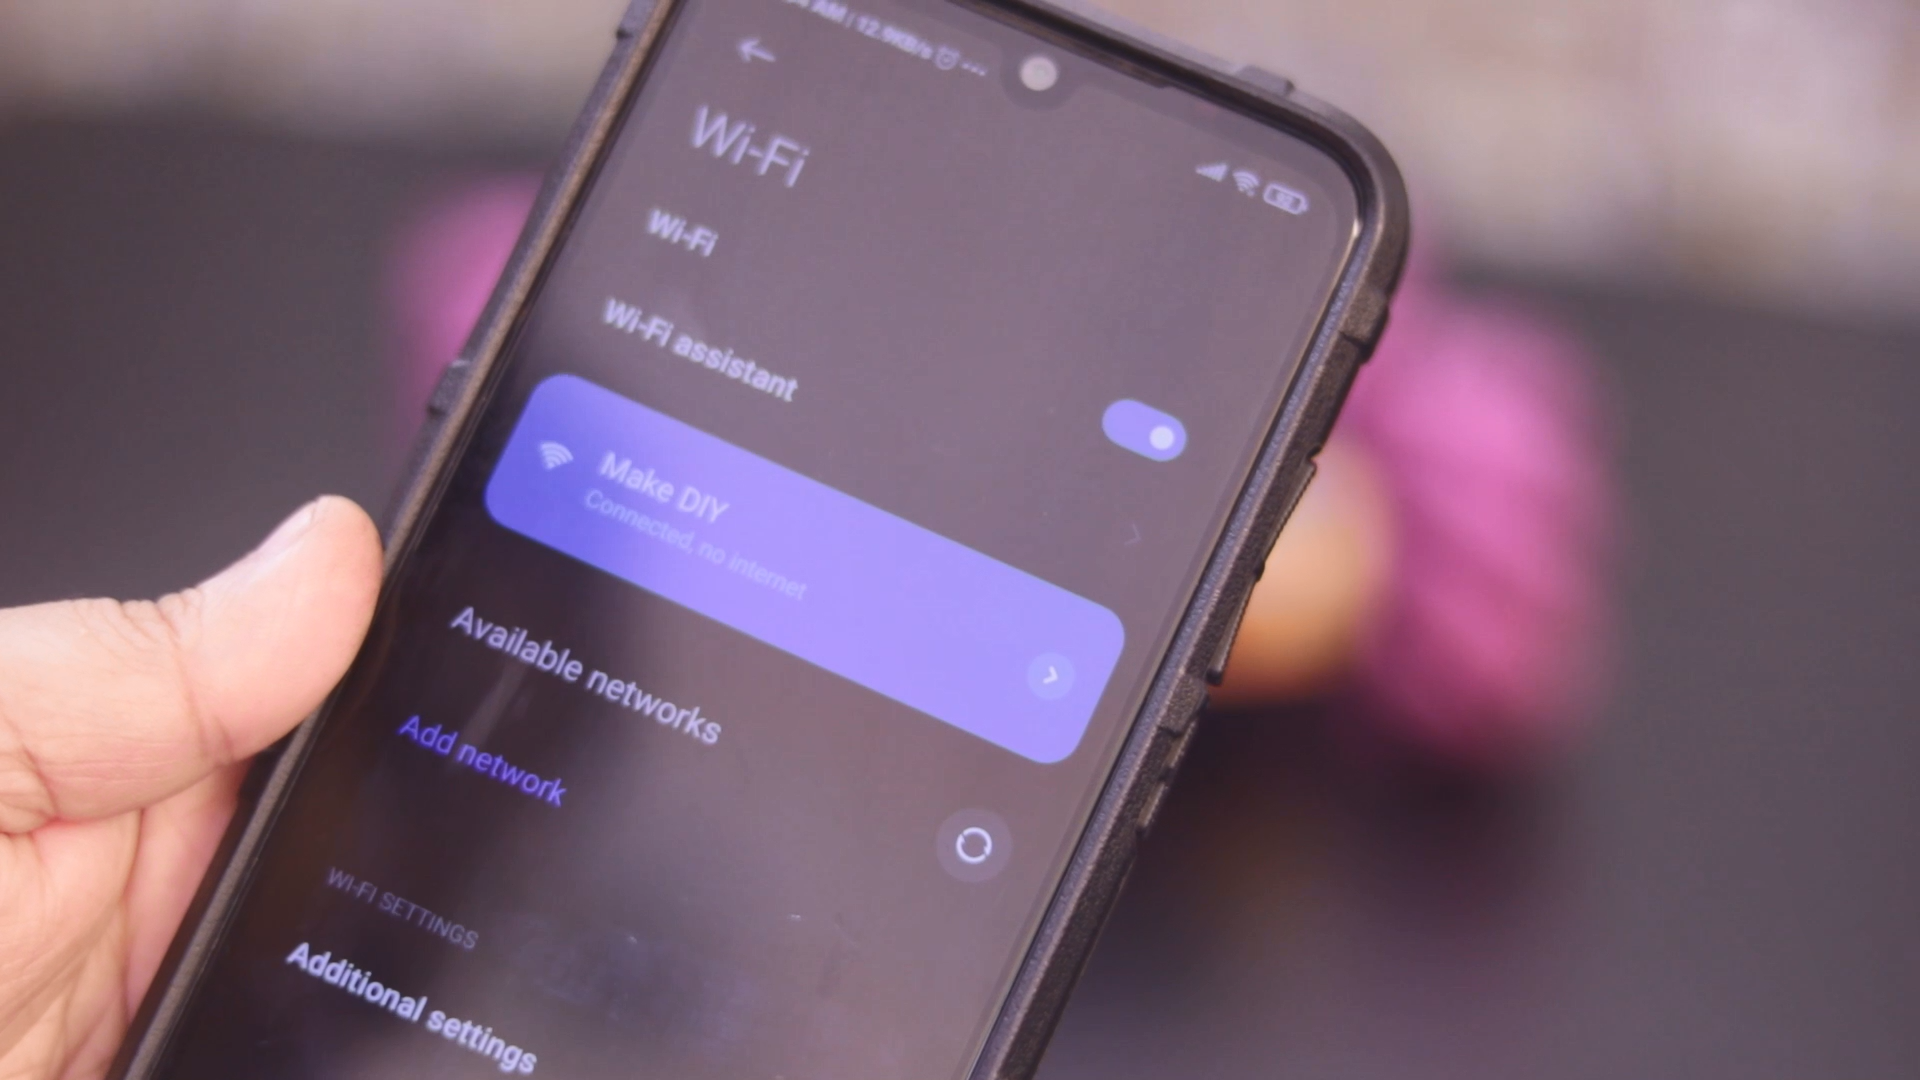
INTERFACE WITH ANDROID MOBILE
Here you will need an android app compatible with node MCU. I have simply downloaded this one from the google play store. you may use another one.

/*
Code Name: Arduino Wifi Control Car
Code URI: https://circuitbest.com/category/arduino-projects/
Additional Board Manager URL: http://arduino.esp8266.com/stable/package_esp8266com_index.json
Install: ESP8266 by ESP8266 Community
Author: M Tech-Ideas
Author URI: https://circuitbest.com/author/admin/
Description: This program is used to control a robot using a app
that communicates with Arduino through a ESP8266 Module.
App URI: https://drive.google.com/file/d/1pvtWsTeXhcJdpHMfGlFmbGDuH7eoLfoP/view?usp=sharing
Version: 2.0
License: Remixing or Changing this Thing is allowed. Commercial use is not allowed.
*/


#define ENA   14          // Enable/speed motors Right        GPIO14(D5)
#define ENB   12          // Enable/speed motors Left         GPIO12(D6)
#define IN_1  15          // L298N in1 motors Rightx          GPIO15(D8)
#define IN_2  13          // L298N in2 motors Right           GPIO13(D7)
#define IN_3  2           // L298N in3 motors Left            GPIO2(D4)
#define IN_4  0           // L298N in4 motors Left            GPIO0(D3)

#include <ESP8266WiFi.h>
#include <WiFiClient.h>
#include <ESP8266WebServer.h>

String command;             //String to store app command state.
int speedCar = 800;         // 400 - 1023.
int speed_Coeff = 3;

const char* ssid = "Wifi Robot by Monalisa";
ESP8266WebServer server(80);

void setup() {

 pinMode(ENA, OUTPUT);
 pinMode(ENB, OUTPUT);
 pinMode(IN_1, OUTPUT);
 pinMode(IN_2, OUTPUT);
 pinMode(IN_3, OUTPUT);
 pinMode(IN_4, OUTPUT);

  Serial.begin(115200);

// Connecting WiFi

  WiFi.mode(WIFI_AP);
  WiFi.softAP(ssid);

  IPAddress myIP = WiFi.softAPIP();
  Serial.print("AP IP address: ");
  Serial.println(myIP);

 // Starting WEB-server
     server.on ( "/", HTTP_handleRoot );
     server.onNotFound ( HTTP_handleRoot );
     server.begin();
}

void goAhead(){

      digitalWrite(IN_1, LOW);
      digitalWrite(IN_2, HIGH);
      analogWrite(ENA, speedCar);

      digitalWrite(IN_3, LOW);
      digitalWrite(IN_4, HIGH);
      analogWrite(ENB, speedCar);
  }

void goBack(){

      digitalWrite(IN_1, HIGH);
      digitalWrite(IN_2, LOW);
      analogWrite(ENA, speedCar);

      digitalWrite(IN_3, HIGH);
      digitalWrite(IN_4, LOW);
      analogWrite(ENB, speedCar);
  }

void goRight(){

      digitalWrite(IN_1, HIGH);
      digitalWrite(IN_2, LOW);
      analogWrite(ENA, speedCar);

      digitalWrite(IN_3, LOW);
      digitalWrite(IN_4, HIGH);
      analogWrite(ENB, speedCar);
  }

void goLeft(){

      digitalWrite(IN_1, LOW);
      digitalWrite(IN_2, HIGH);
      analogWrite(ENA, speedCar);

      digitalWrite(IN_3, HIGH);
      digitalWrite(IN_4, LOW);
      analogWrite(ENB, speedCar);
  }

void goAheadRight(){

      digitalWrite(IN_1, LOW);
      digitalWrite(IN_2, HIGH);
      analogWrite(ENA, speedCar/speed_Coeff);

      digitalWrite(IN_3, LOW);
      digitalWrite(IN_4, HIGH);
      analogWrite(ENB, speedCar);
   }

void goAheadLeft(){

      digitalWrite(IN_1, LOW);
      digitalWrite(IN_2, HIGH);
      analogWrite(ENA, speedCar);

      digitalWrite(IN_3, LOW);
      digitalWrite(IN_4, HIGH);
      analogWrite(ENB, speedCar/speed_Coeff);
  }

void goBackRight(){

      digitalWrite(IN_1, HIGH);
      digitalWrite(IN_2, LOW);
      analogWrite(ENA, speedCar/speed_Coeff);

      digitalWrite(IN_3, HIGH);
      digitalWrite(IN_4, LOW);
      analogWrite(ENB, speedCar);
  }

void goBackLeft(){

      digitalWrite(IN_1, HIGH);
      digitalWrite(IN_2, LOW);
      analogWrite(ENA, speedCar);

      digitalWrite(IN_3, HIGH);
      digitalWrite(IN_4, LOW);
      analogWrite(ENB, speedCar/speed_Coeff);
  }

void stopRobot(){

      digitalWrite(IN_1, LOW);
      digitalWrite(IN_2, LOW);
      analogWrite(ENA, speedCar);

      digitalWrite(IN_3, LOW);
      digitalWrite(IN_4, LOW);
      analogWrite(ENB, speedCar);
 }

void loop() {
    server.handleClient();

      command = server.arg("State");
      if (command == "F") goAhead();
      else if (command == "B") goBack();
      else if (command == "L") goLeft();
      else if (command == "R") goRight();
      else if (command == "I") goAheadRight();
      else if (command == "G") goAheadLeft();
      else if (command == "J") goBackRight();
      else if (command == "H") goBackLeft();
      else if (command == "0") speedCar = 400;
      else if (command == "1") speedCar = 470;
      else if (command == "2") speedCar = 540;
      else if (command == "3") speedCar = 610;
      else if (command == "4") speedCar = 680;
      else if (command == "5") speedCar = 750;
      else if (command == "6") speedCar = 820;
      else if (command == "7") speedCar = 890;
      else if (command == "8") speedCar = 960;
      else if (command == "9") speedCar = 1023;
      else if (command == "S") stopRobot();
}

void HTTP_handleRoot(void) {

if( server.hasArg("State") ){
       Serial.println(server.arg("State"));
  }
  server.send ( 200, "text/html", "" );
  delay(1);
}
What Is Mechanum Wheels and How Does It Work?
Ilon's Mecanum wheel is based on the principle of a central wheel with a number of rollers placed at an angle around the periphery of the wheel. The angled peripheral rollers translate a portion of the force in the rotational direction of the wheel to a force normal to the wheel direction.
FINAL LOOK