 Chris Gervang
I'm very excited to announce I manufactured the six button modules! The module design took many iterations, but after all of that work the button feels just right.
Key design considerations I took into account included:
- Must be replaceable and repairable
- No glue in its construction (except for the button cap)
- Had mounting holes smaller than the hole for the button and LED
There are only four steps to construct one of the modules, as shown below.
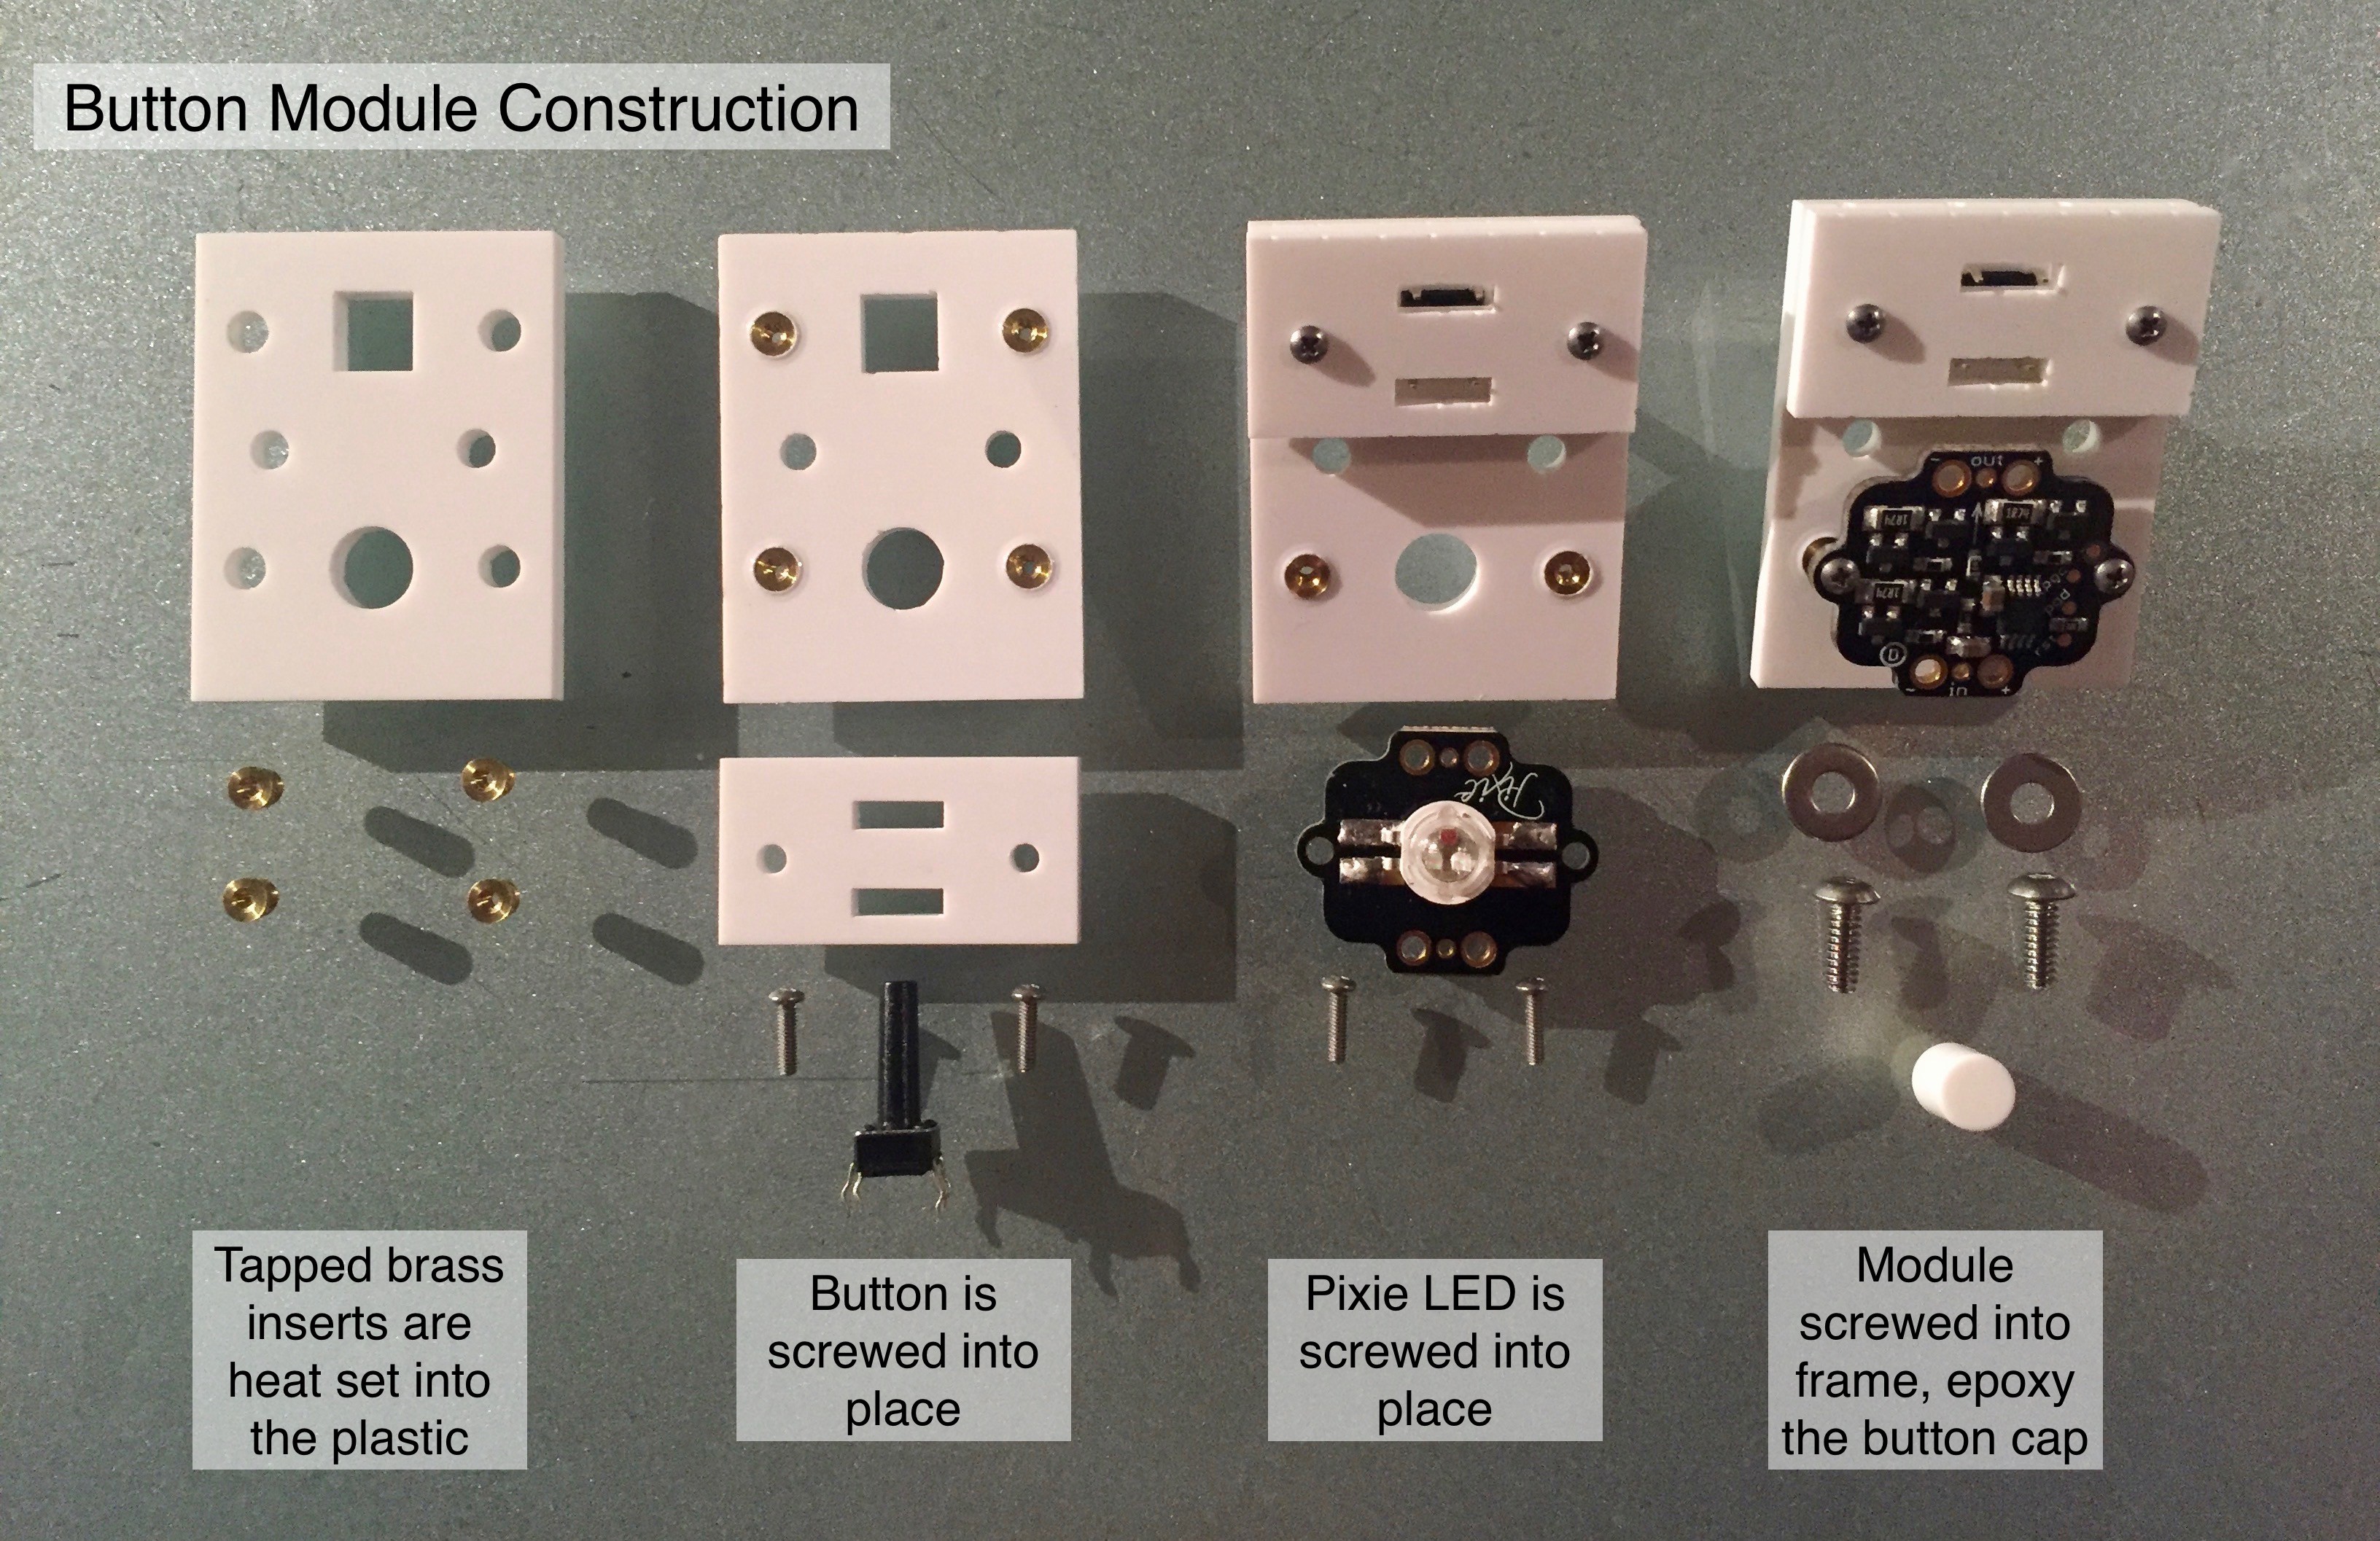
The laser cutting for all 12 pieces of 1/8" acrylic took about a minute to complete (DXF files I used are on github). The buttons are around 13mm tall so that they go all of the way through the frame. The screws are 0-80 for the components and 4-40 for the mounting. The length of the mounting screw can vary, but the components screws are set at ???.
Once mounted into the frame, the button can be pressed on the side and the LED can shine on the wall.
From the inside | From the outside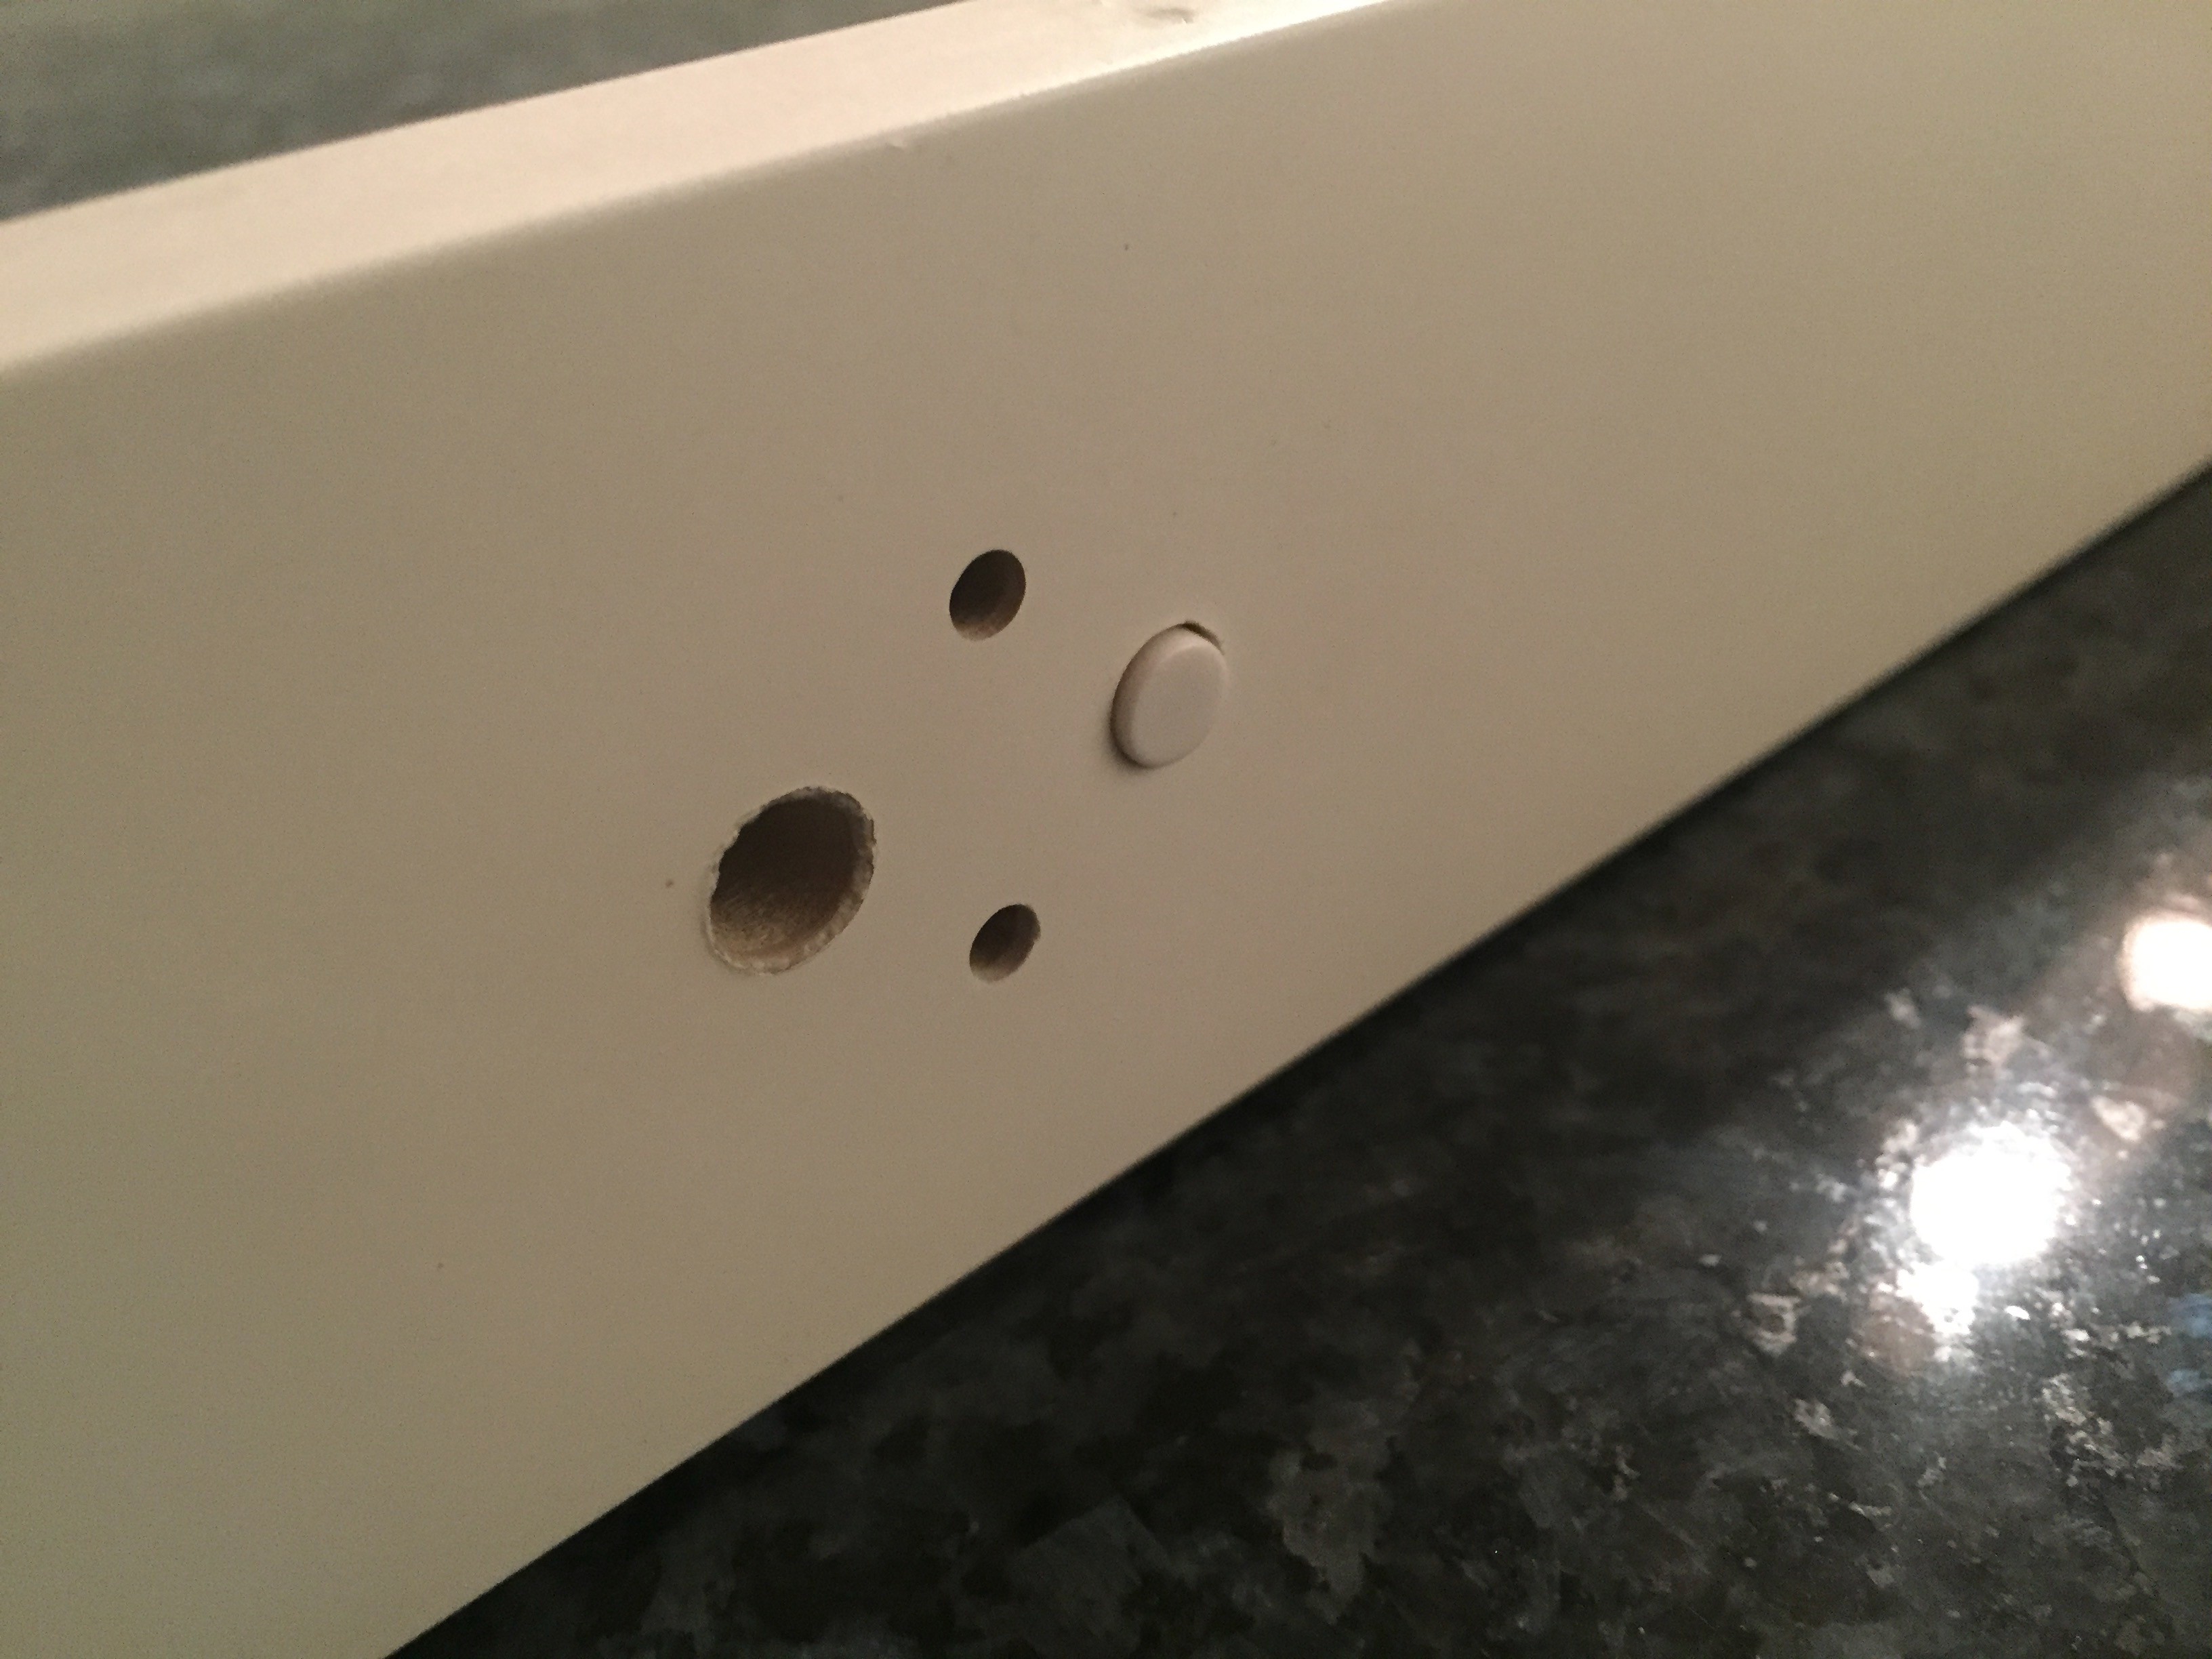 |
What remains to be seen is if there is enough room for the glass, so I'll be calling Blick's frame department to learn more.
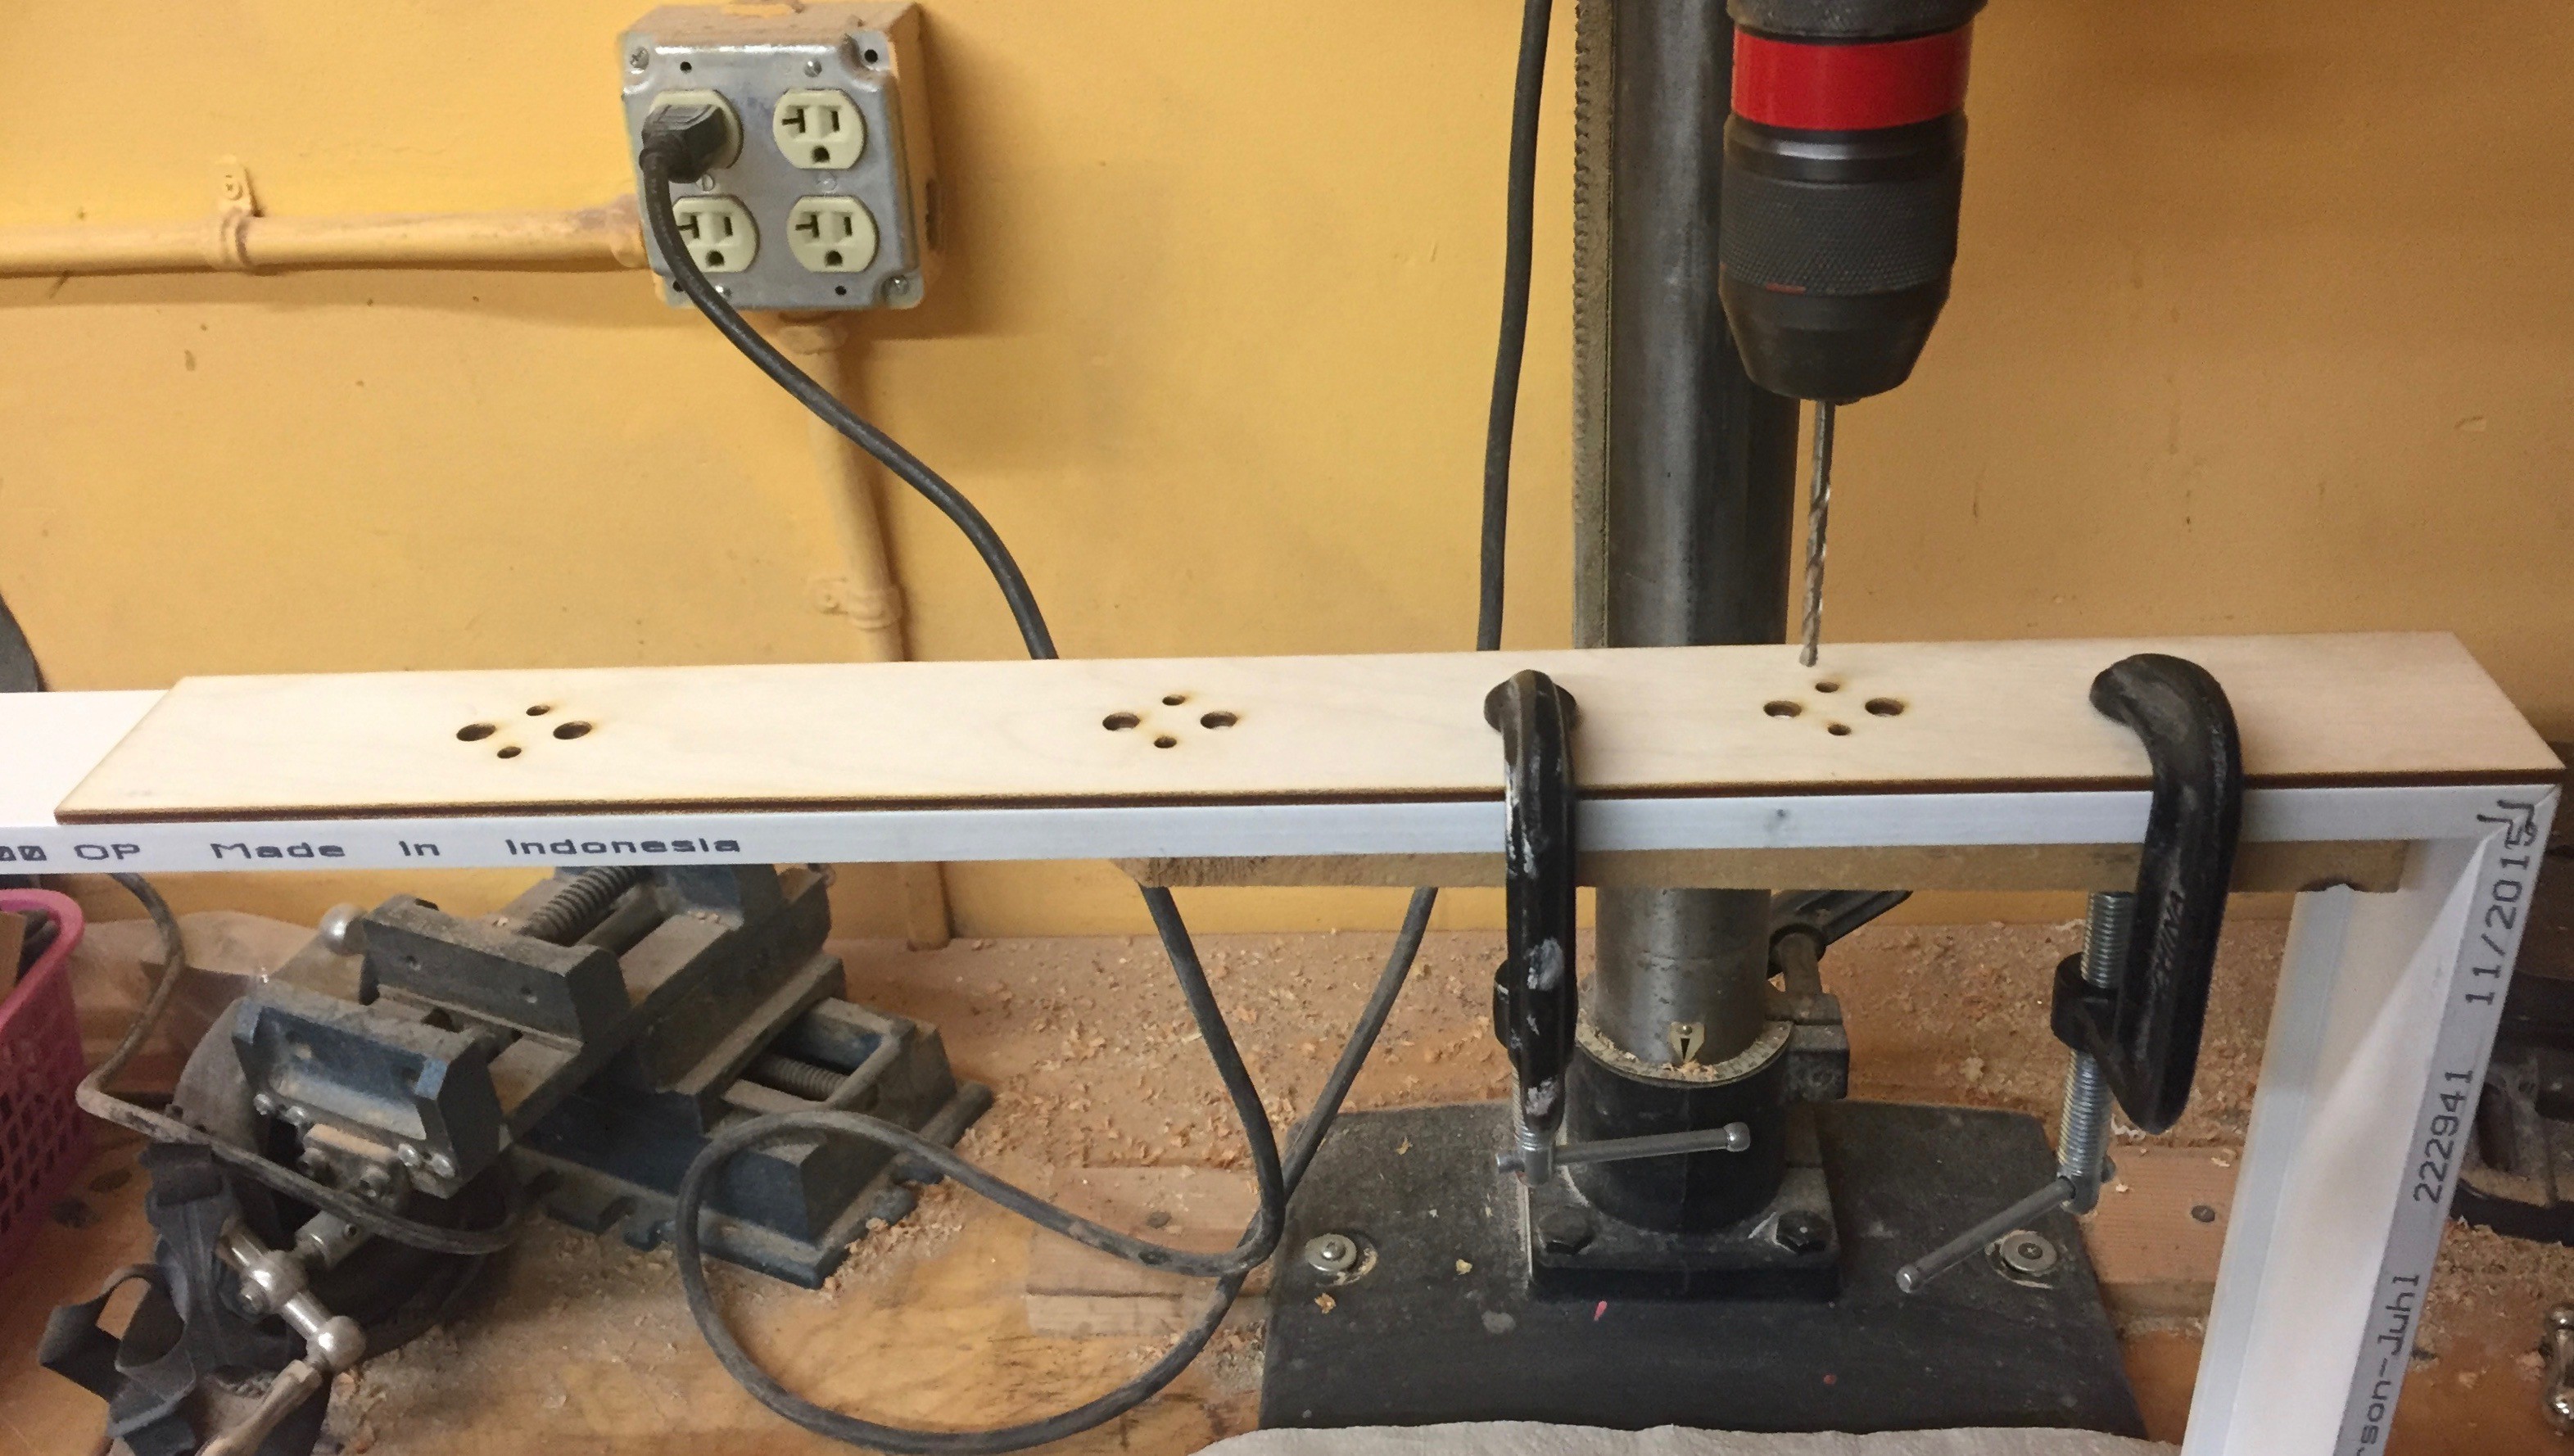
Drilling 24 holes that will be seen from the outside is a bit tricky, so I made a drilling guide to help. I found that the hole comes out best when I get all the way through the wood in one pass, and secured a piece of sacrificial wood where the bit exits the frame.
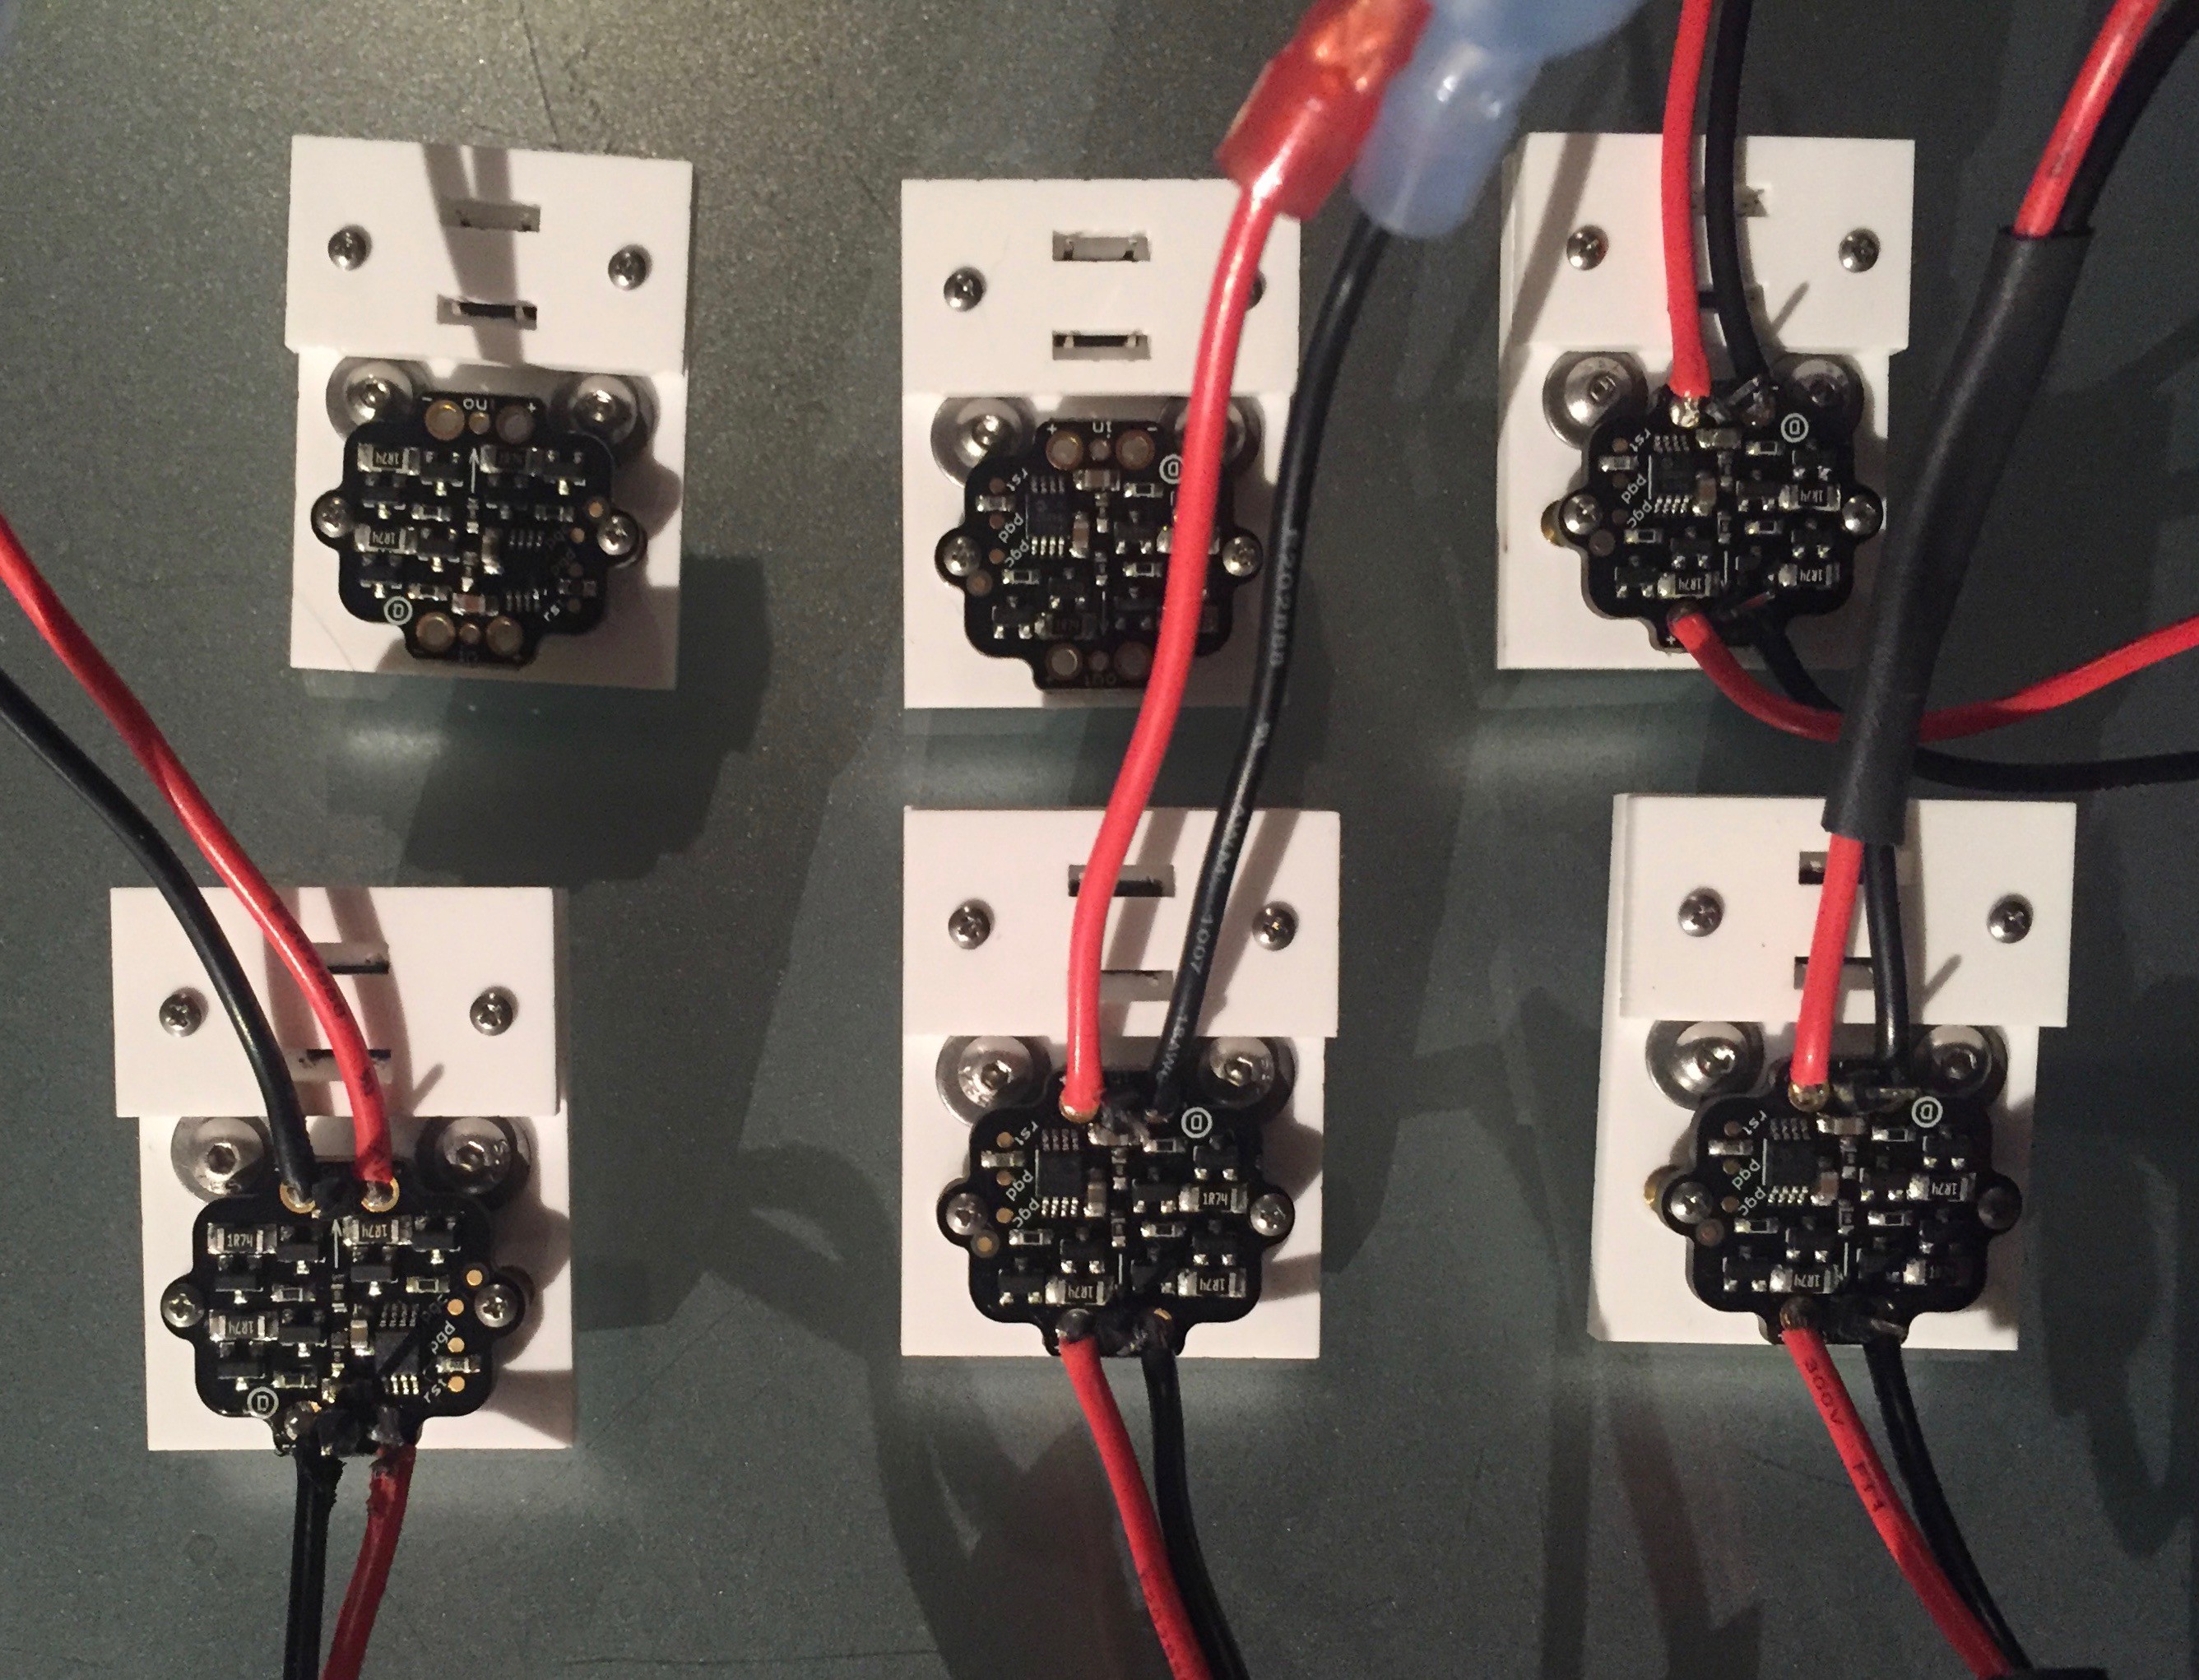
Next I'll find the wire I'll use to connect the electronics to power and the Particle. After the circuit is tested and it is confirmed that the glass will fit, I will cut the foam board to make room for the buttons and wire. The final step is to fill in the two mounting holes with either acrylic disks or Bondo.
Button Modules all put together!
Discussions
Become a Hackaday.io Member
Create an account to leave a comment. Already have an account? Log In.