 Timo Birnschein
Sometimes, stuff just breaks and becomes unreliable. So did my extruder thermocouple. It was already wonky since I installed the Hemera hotend, but recently, I had a print stop on me with hotend temperature implausible error and the consequent printer emergency shutdown. As you can imagine, I didn't like that much.
This specific thermocouple and reader IC that was chosen by Malyan is supposed to be more precise throughout the entire temperature range but also faster in response to temperature changes. Changing it to a simple thermistor (even though an E3D thermistor) would have an impact on the PID loop for the hotend controller.
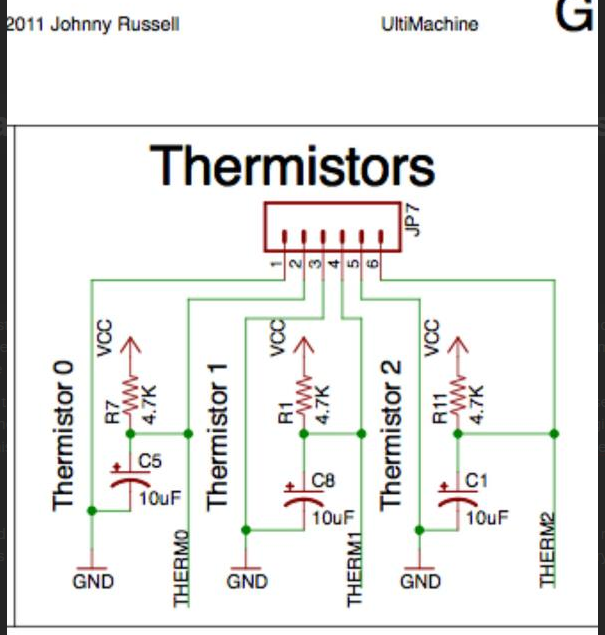
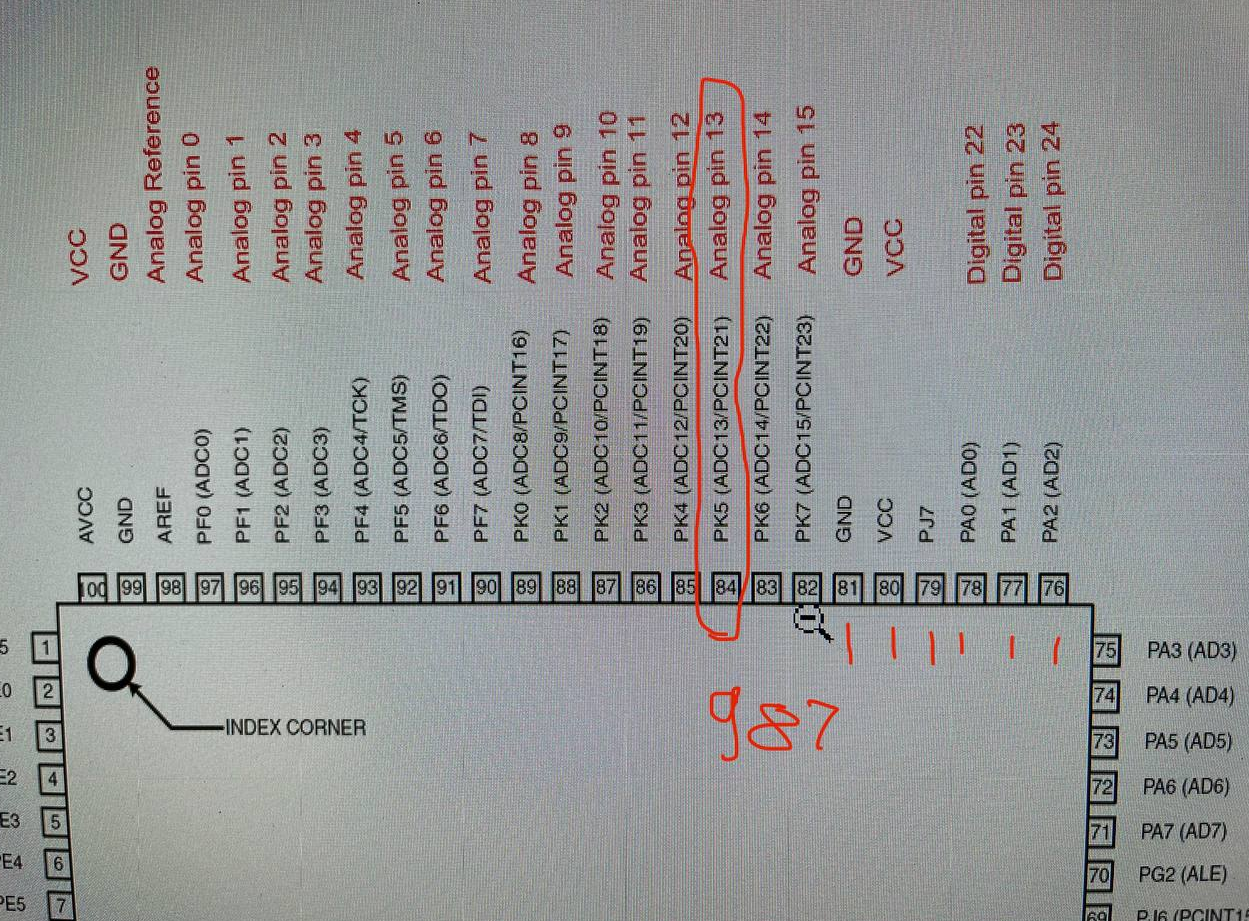
Fist, I needed to find the pin I wanted to use for this. The RAMPS 1.4 board, which is still standard for many printers, uses Ardunino analogue pin A13 to measure the thermistor. It needs some additional circuitry to work, too.
On the Arduino Mega 256 that my controller uses, PK5:
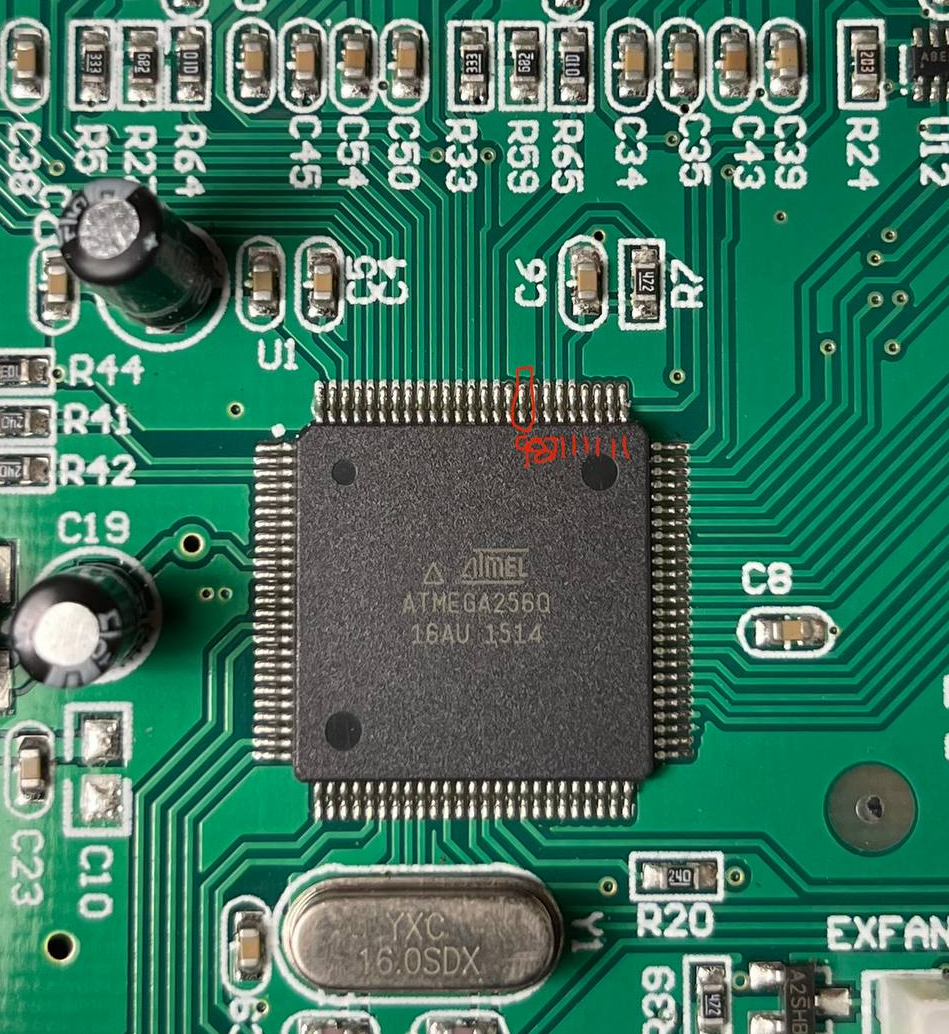
So I needed to solder a wire to it. No a trivial task without a proper stereo microscope and a pin pitch of 0.5mm but manageable. Be sure to desoldering wig on hand because pins will be soldered together by accident.
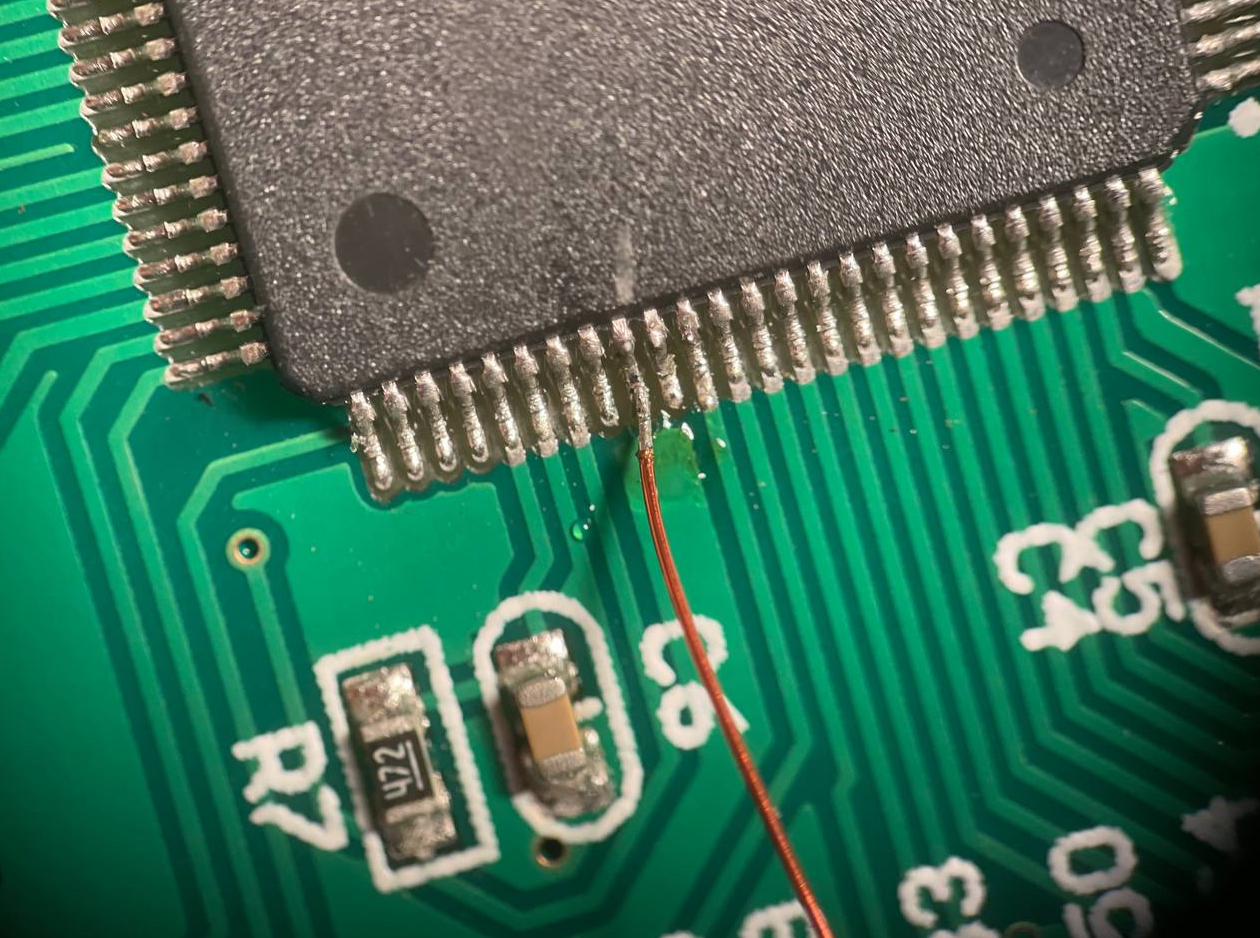
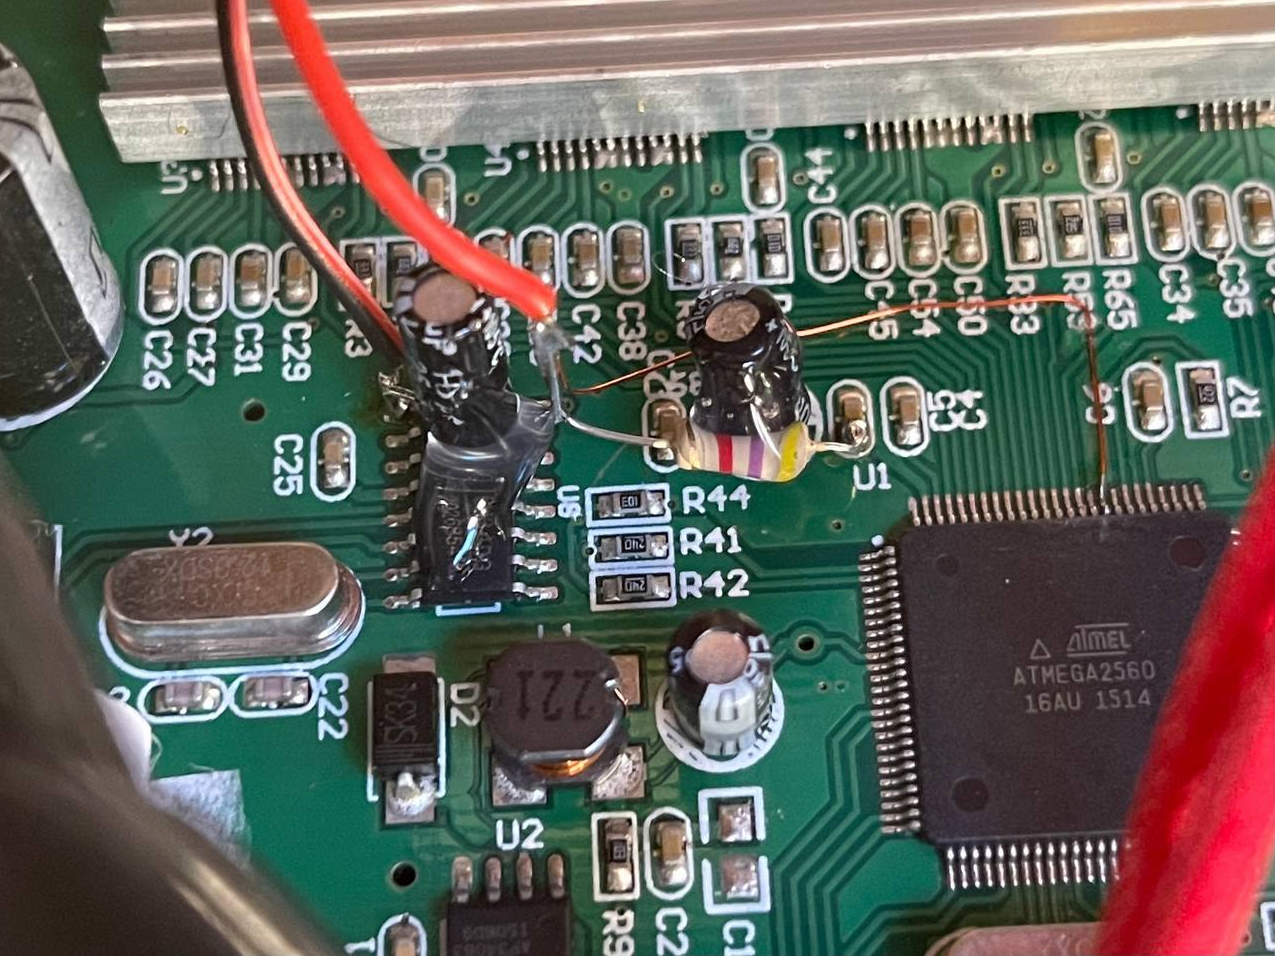
The circuitry needed was build Manhattan-style directly floating over the board. All I needed was a reasonably clean ground (not sure I accomplished that part) and a clean VCC (also no sure how clean this is).
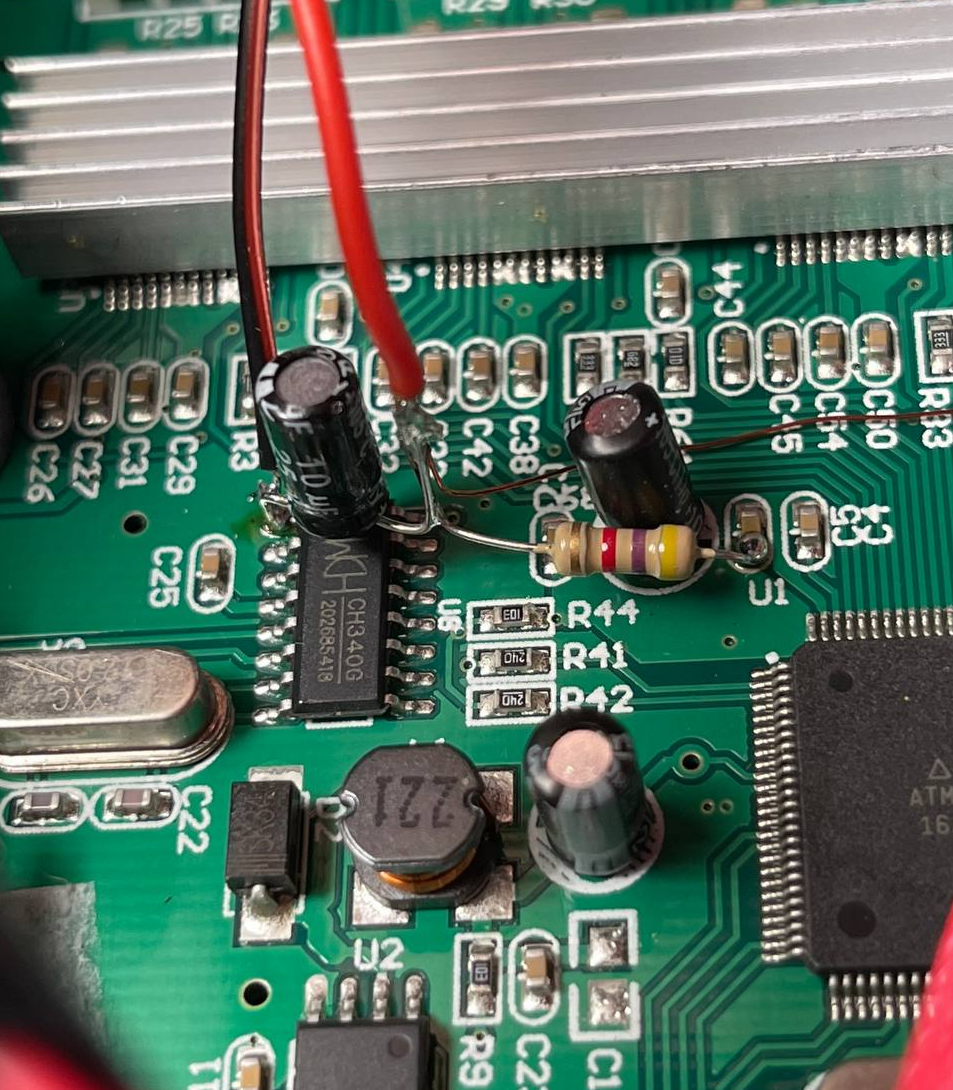
The issue is, I wasn't able to measure the quality of these power lines prior to soldering it as the printer was sitting on its side, disassembled. It's fair to mention that I see some noise in my thermal signal and needed to filter it more that I was expecting.
Everything left to be done was to secure the parts using a few drops of hotglue.
Next, I needed to change the Klipper printer configuration. This, thankfully, is extremely easy since the entire configuration is transferred to the microcontroller on boot and can simply be reloaded using the
restart
command in the fluidd console.
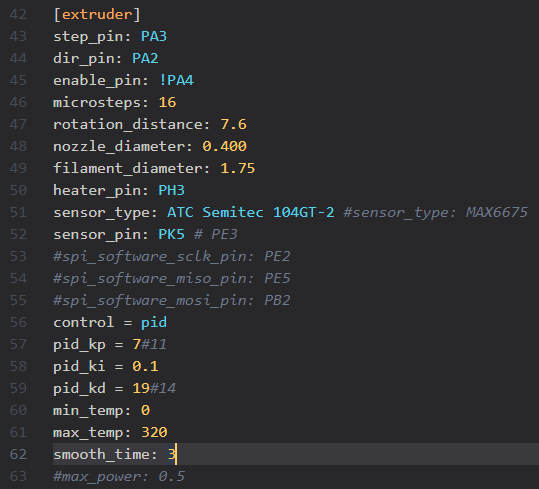
The changes were to the configuration file were very simple. All that needed to be done was change the pin, the thermistor type and deactivate the SPI pins for the thermocouple IC.

However, three more things were needed to make this work:
- Filter the output some more as the default smooth_time resulted in an unstable PID loop with the temperature never settling and consequently the print never actually starting the job
- Tune the PID loop with much smaller values to get it to converge on a stable temperature
- (optional) Lower the maximum power for the heater cartridge to 50% as I realized I'm running a 12V cartridge on a 24V system and the PID loop just freaked out with the new thermistor due to its much slower response time.
The issue, especially with point two was that the the power of the heater was too much to with very quick rise times combined with a slow thermistor response. Simply using the PID auto_tune values didn't work. So I opted for an eyeballed trial and error tuning to make PID work. I settled on very small values for P, I, and D that would give me a reasonably quick response with a short time to be stable.
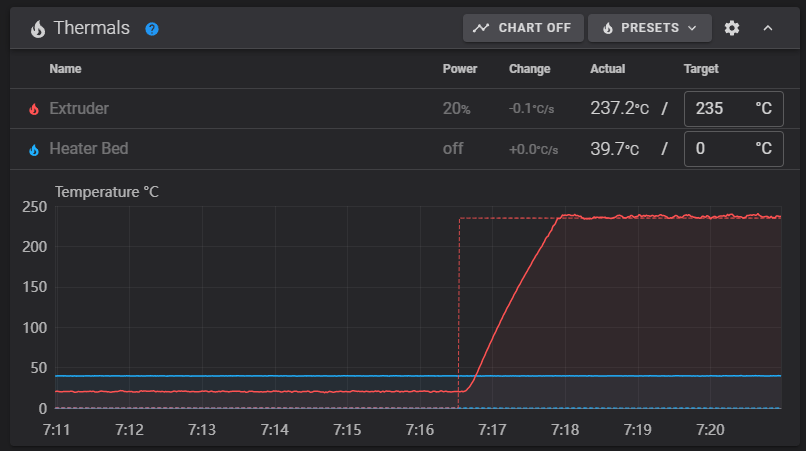
I just ran a quick test for this graph and must say that I'm not yet happy with this. I fired a M109 S235 command to heat the extruder to 235C and WAIT until the PID loop has stabilized and then execure M106 S255 to turn the fan on (to emulate what would happen when the print starts) but it took too long for the fan to come on. Almost four minutes. This might be acceptable but but in reality, it my part only needs 5 minutes to print, I really don't want to wait 5 minutes for the print to even start. More tuning required.
However, the conversion works overall and I'm very happy with this. Also, as a side note, the original circuitry still exists should I ever want to go back to a thermocouple to improve performance.
EDIT:
Some more tuning later (with a much better understanding from yesterdays long tuning session), I was able to get back to 100% power and a tuning that converges reasonably quickly. It's important not to increase D too much as it will lead to thermal runaways. Increasing P too much will result in sort of an ON_OFF only behavior which also results in very unstable temperature.
With this, I'm much more happy:

Discussions
Become a Hackaday.io Member
Create an account to leave a comment. Already have an account? Log In.