Close
0%
0%

This is not a neopixel library, its a walktrough

STM32, baremetal DMA+PWM

Similar projects worth following

An Arduinoless, No specific use, No specific stm32 chip, No weird-ass library abstractions C HAL based DUMB guide to:

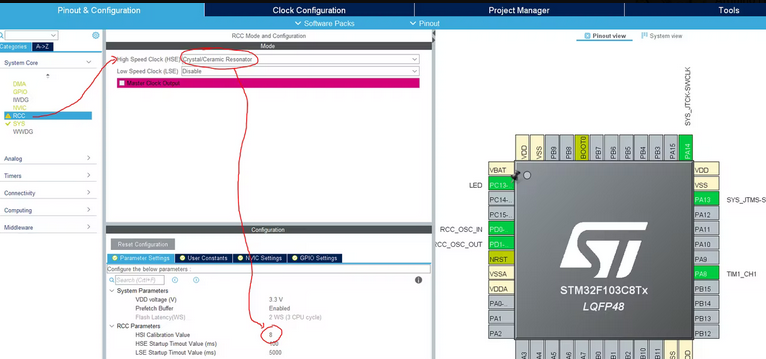
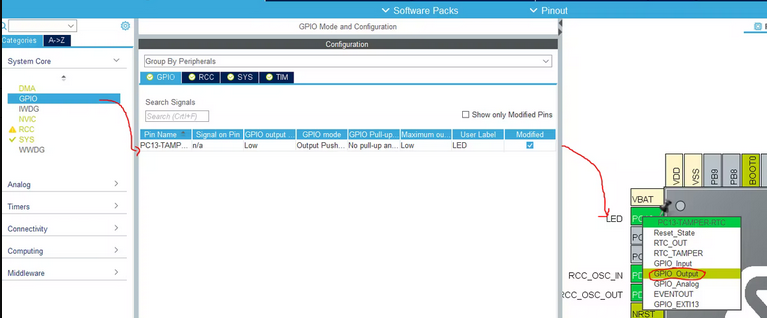
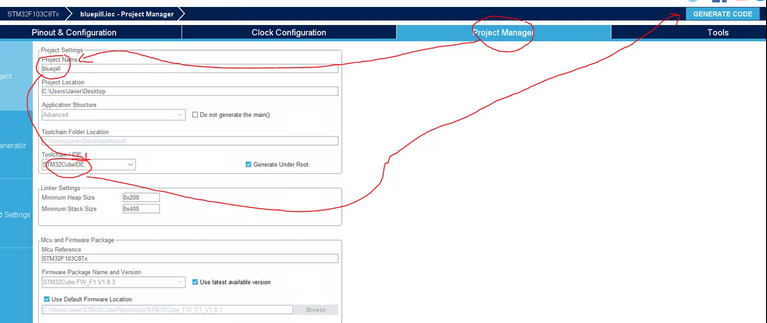
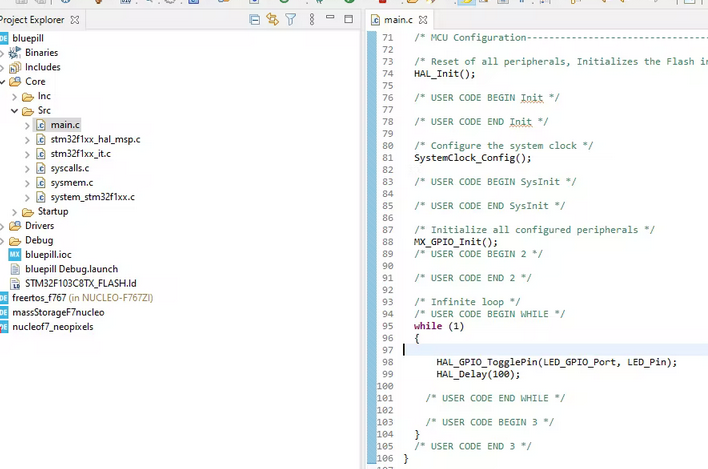
Set the number of pixels, load the RGB array, shoot the data out the pwm.

Its just you, me, any stm32 chip with DMA + PWM, and a cup of lemon ginger tea.


  • first working version

    Javier12/21/2021 at 20:36 0 comments

    Had it working, tested in stm32f7/f4 and bluepill,

    BUT new release of cubeMx fucks up the DMA initialization so untill they fix that MX_DMA_Init() should be called BEFORE MX_TIMx_Init()

View project log

  • 1
    Programming: hijacking a stlink

    If we remove those two jumpers, our embedded stlink's SWclock and SWDIO lines are available for us to programm standalone boards like the bluepill, no extra bootloader needed except the one from ST.

  • 2
    Testing functionalities, led blink

    Blinky minimum system test: Lets setup the bluepill board, im going to use the SerialWire port, the external 8Mhz cristal and the PC13 LED for now.


    setting up the SW port

    setting up the external XTAL

    setting up the pwm output

    With this minimal setup I generate the code and proceed to do a simple PC13 blinky program.

    //you can find User defined pin names in main.h
    HAL_GPIO_TogglePin(LED_GPIO_Port, LED_Pin);
    HAL_Delay(100);
    

    generating with cubeMX

    voilá, our pc13 led is blinking
  • 3
    Testing functionalities, pwm

    okay the bluepill is alive now we need to start calculating clocks and shit.

    First we need to choose the PWM timer, I chose TIM1.Now we figure out which clock is feeding TIM1, sadly we need to read the family specific reference manual

    CubeMX link to latest reference manual.

    RM0008 ref manual.

    It turns out TIM1 is fed with APB2 clock, so I set the clock source to be taken from the external 8Mhz xtal trough the PLL (more stable and precise than the internal HSI RC) and adjust the APB2 timer clock source as i need.

    I am choosing 72Mhz because is the maximum clock speed ,this way we will get less granularity errors.

    if we have a 72Mhz pwm and we want a 0, 8Mhz pwm we need a 72/0, 8=90 preescaler

    90=90-1 (register stuff)

    ini tim1 channel and set duty to 30%

    result

    /* USER CODE BEGIN 2 */
    HAL_TIM_PWM_Start(&htim1, TIM_CHANNEL_1);
    TIM1->CCR1=27;//27/90= 30% duty cycle
    /* USER CODE END 2 */

View all 5 instructions

Enjoy this project?

Share

Discussions

Similar Projects

Does this project spark your interest?

Become a member to follow this project and never miss any updates