 strange.rand
Features
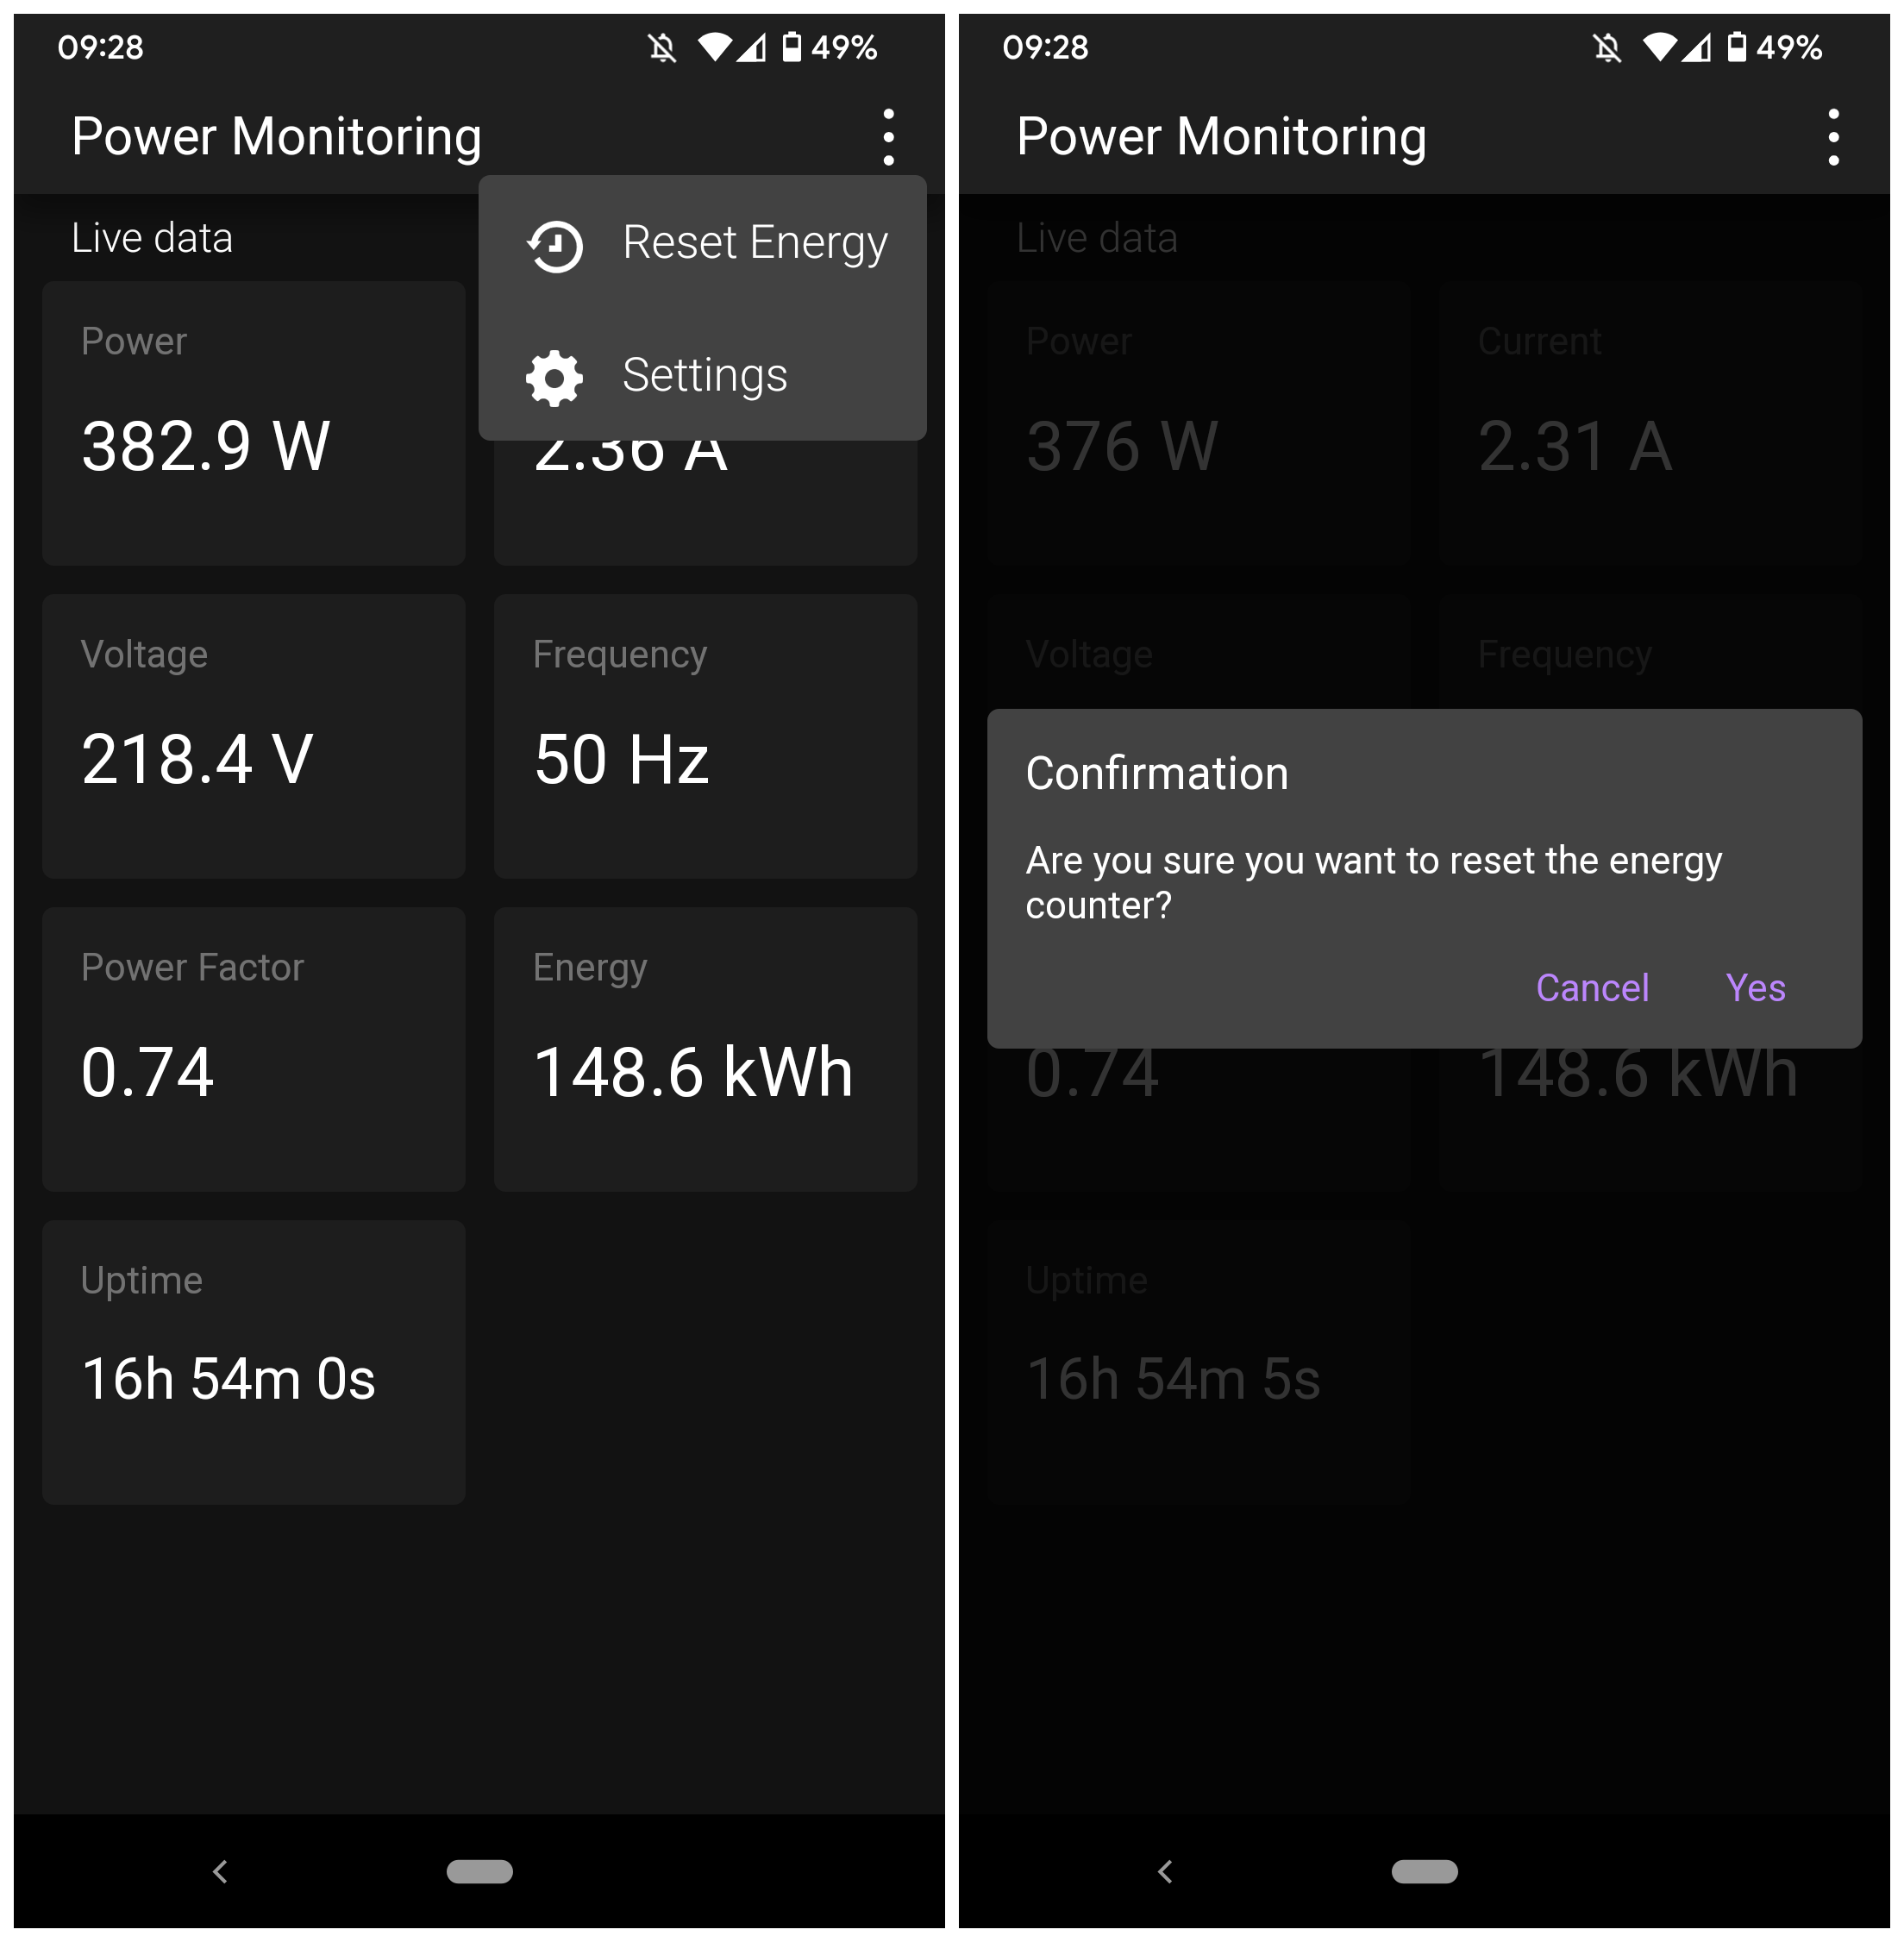
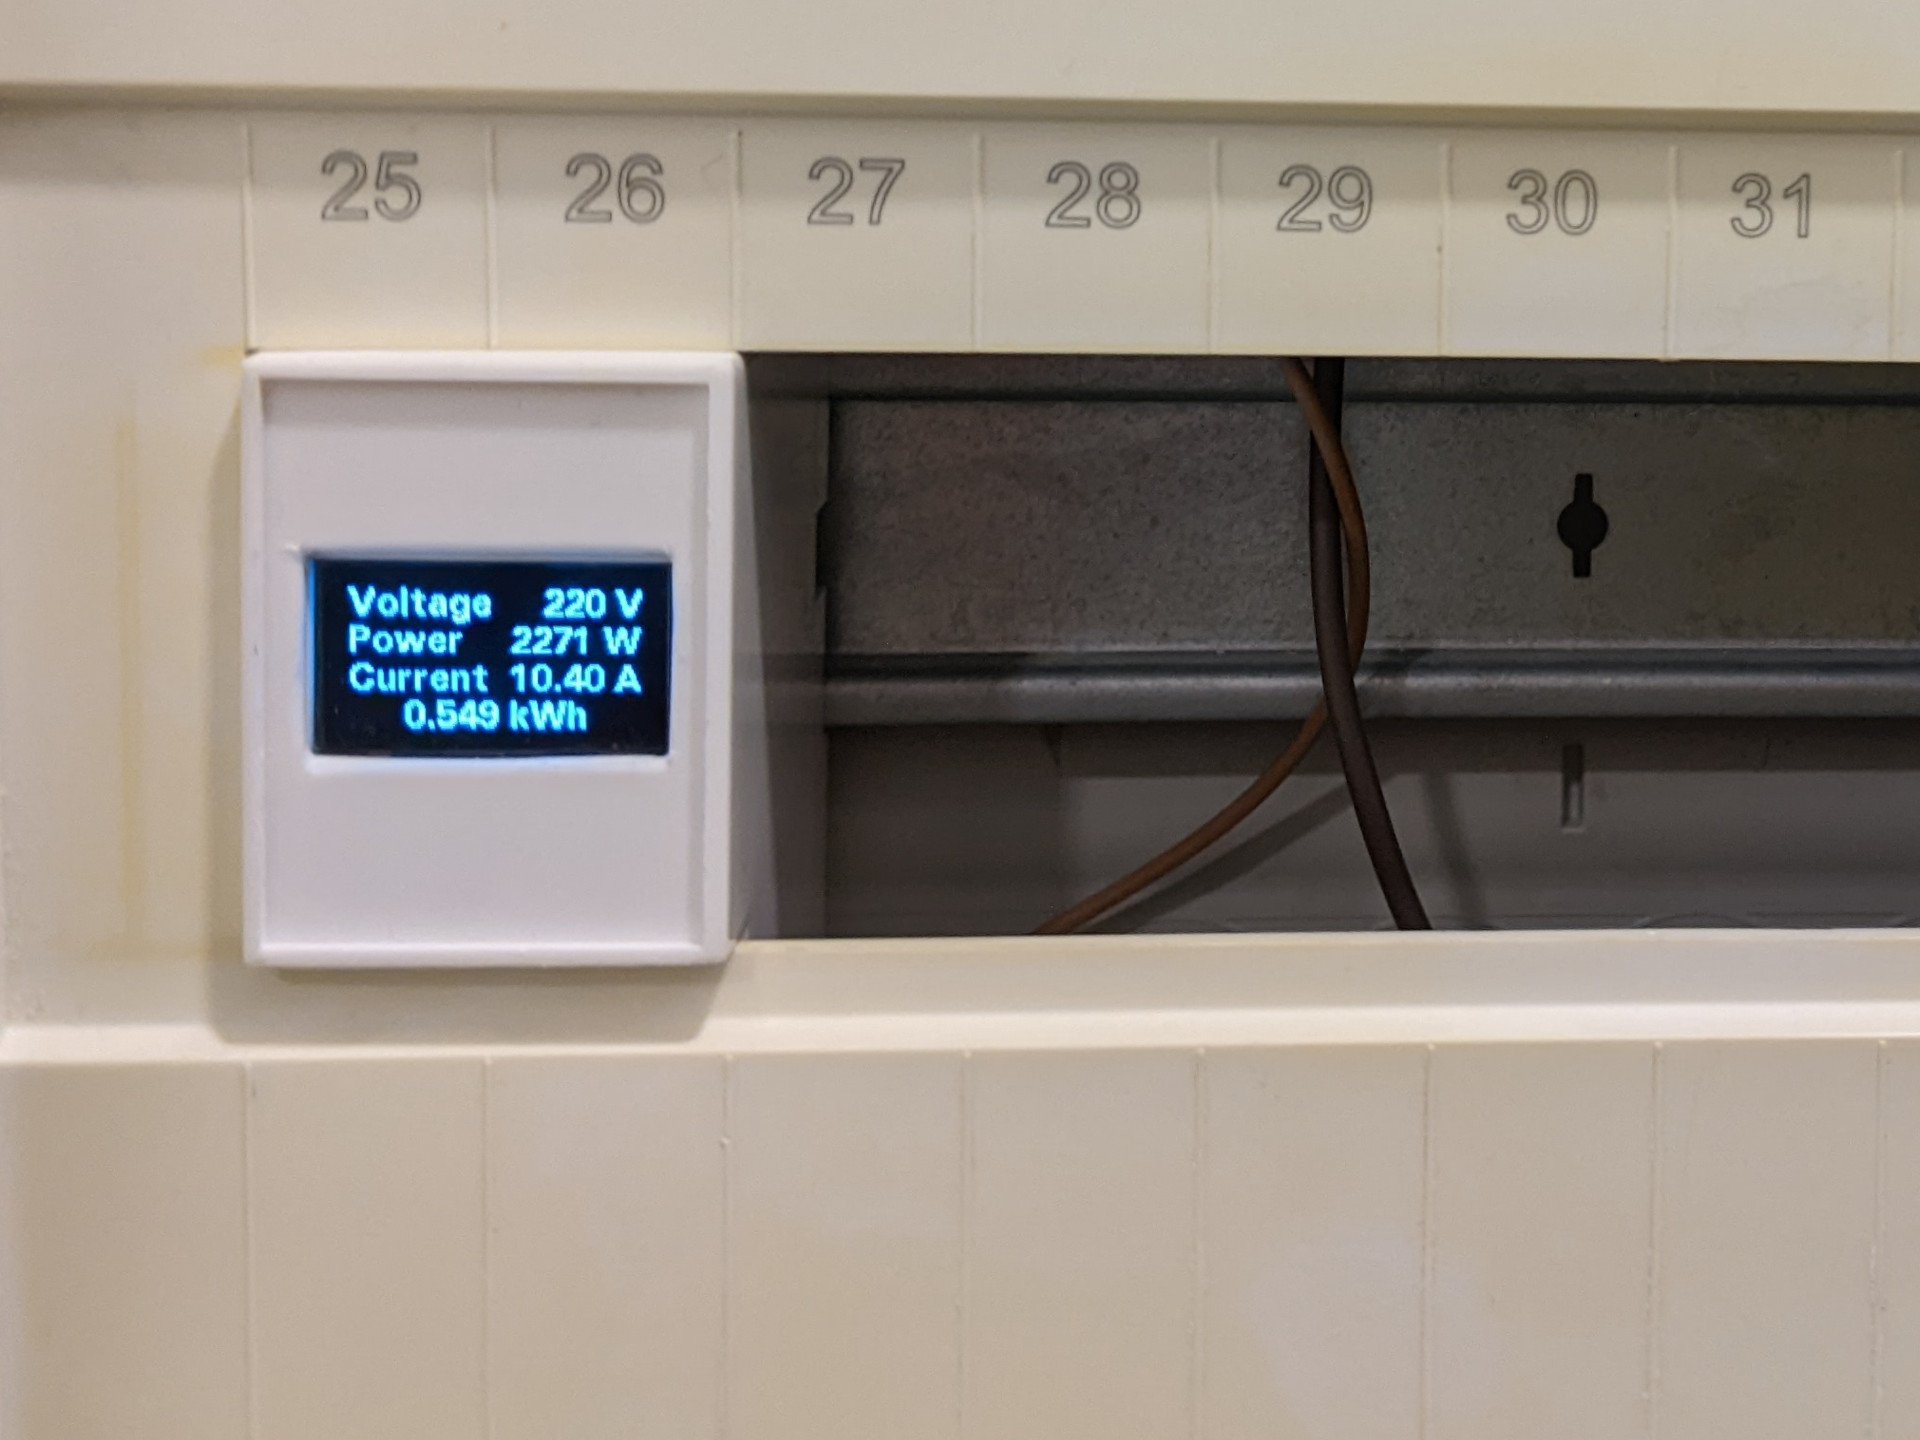
- Shows predefined metrics on the screen
- Sends values to the MQTT broker
- Auto-resets energy metric at the beginning of the month
- Shows the previous month's energy value on the UI
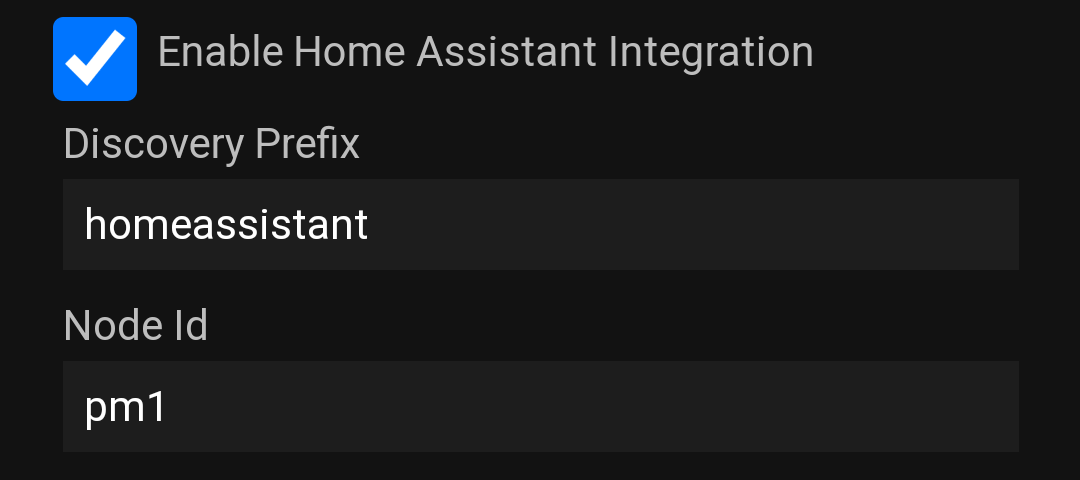
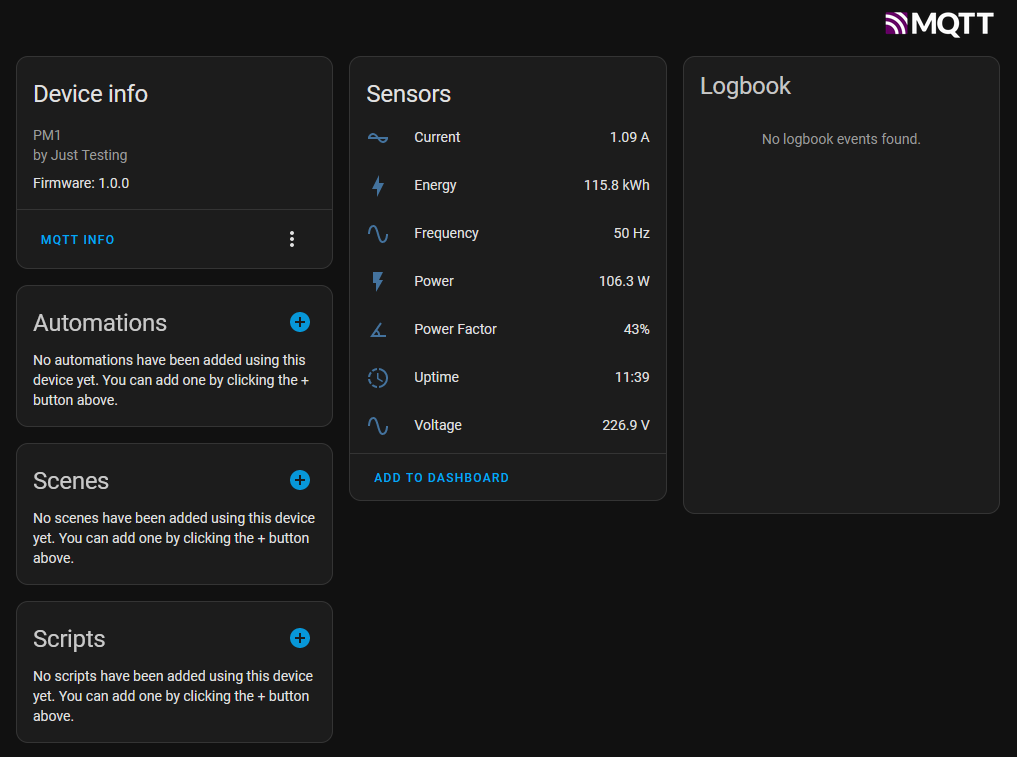
- Supports Home Assistant auto-discovery
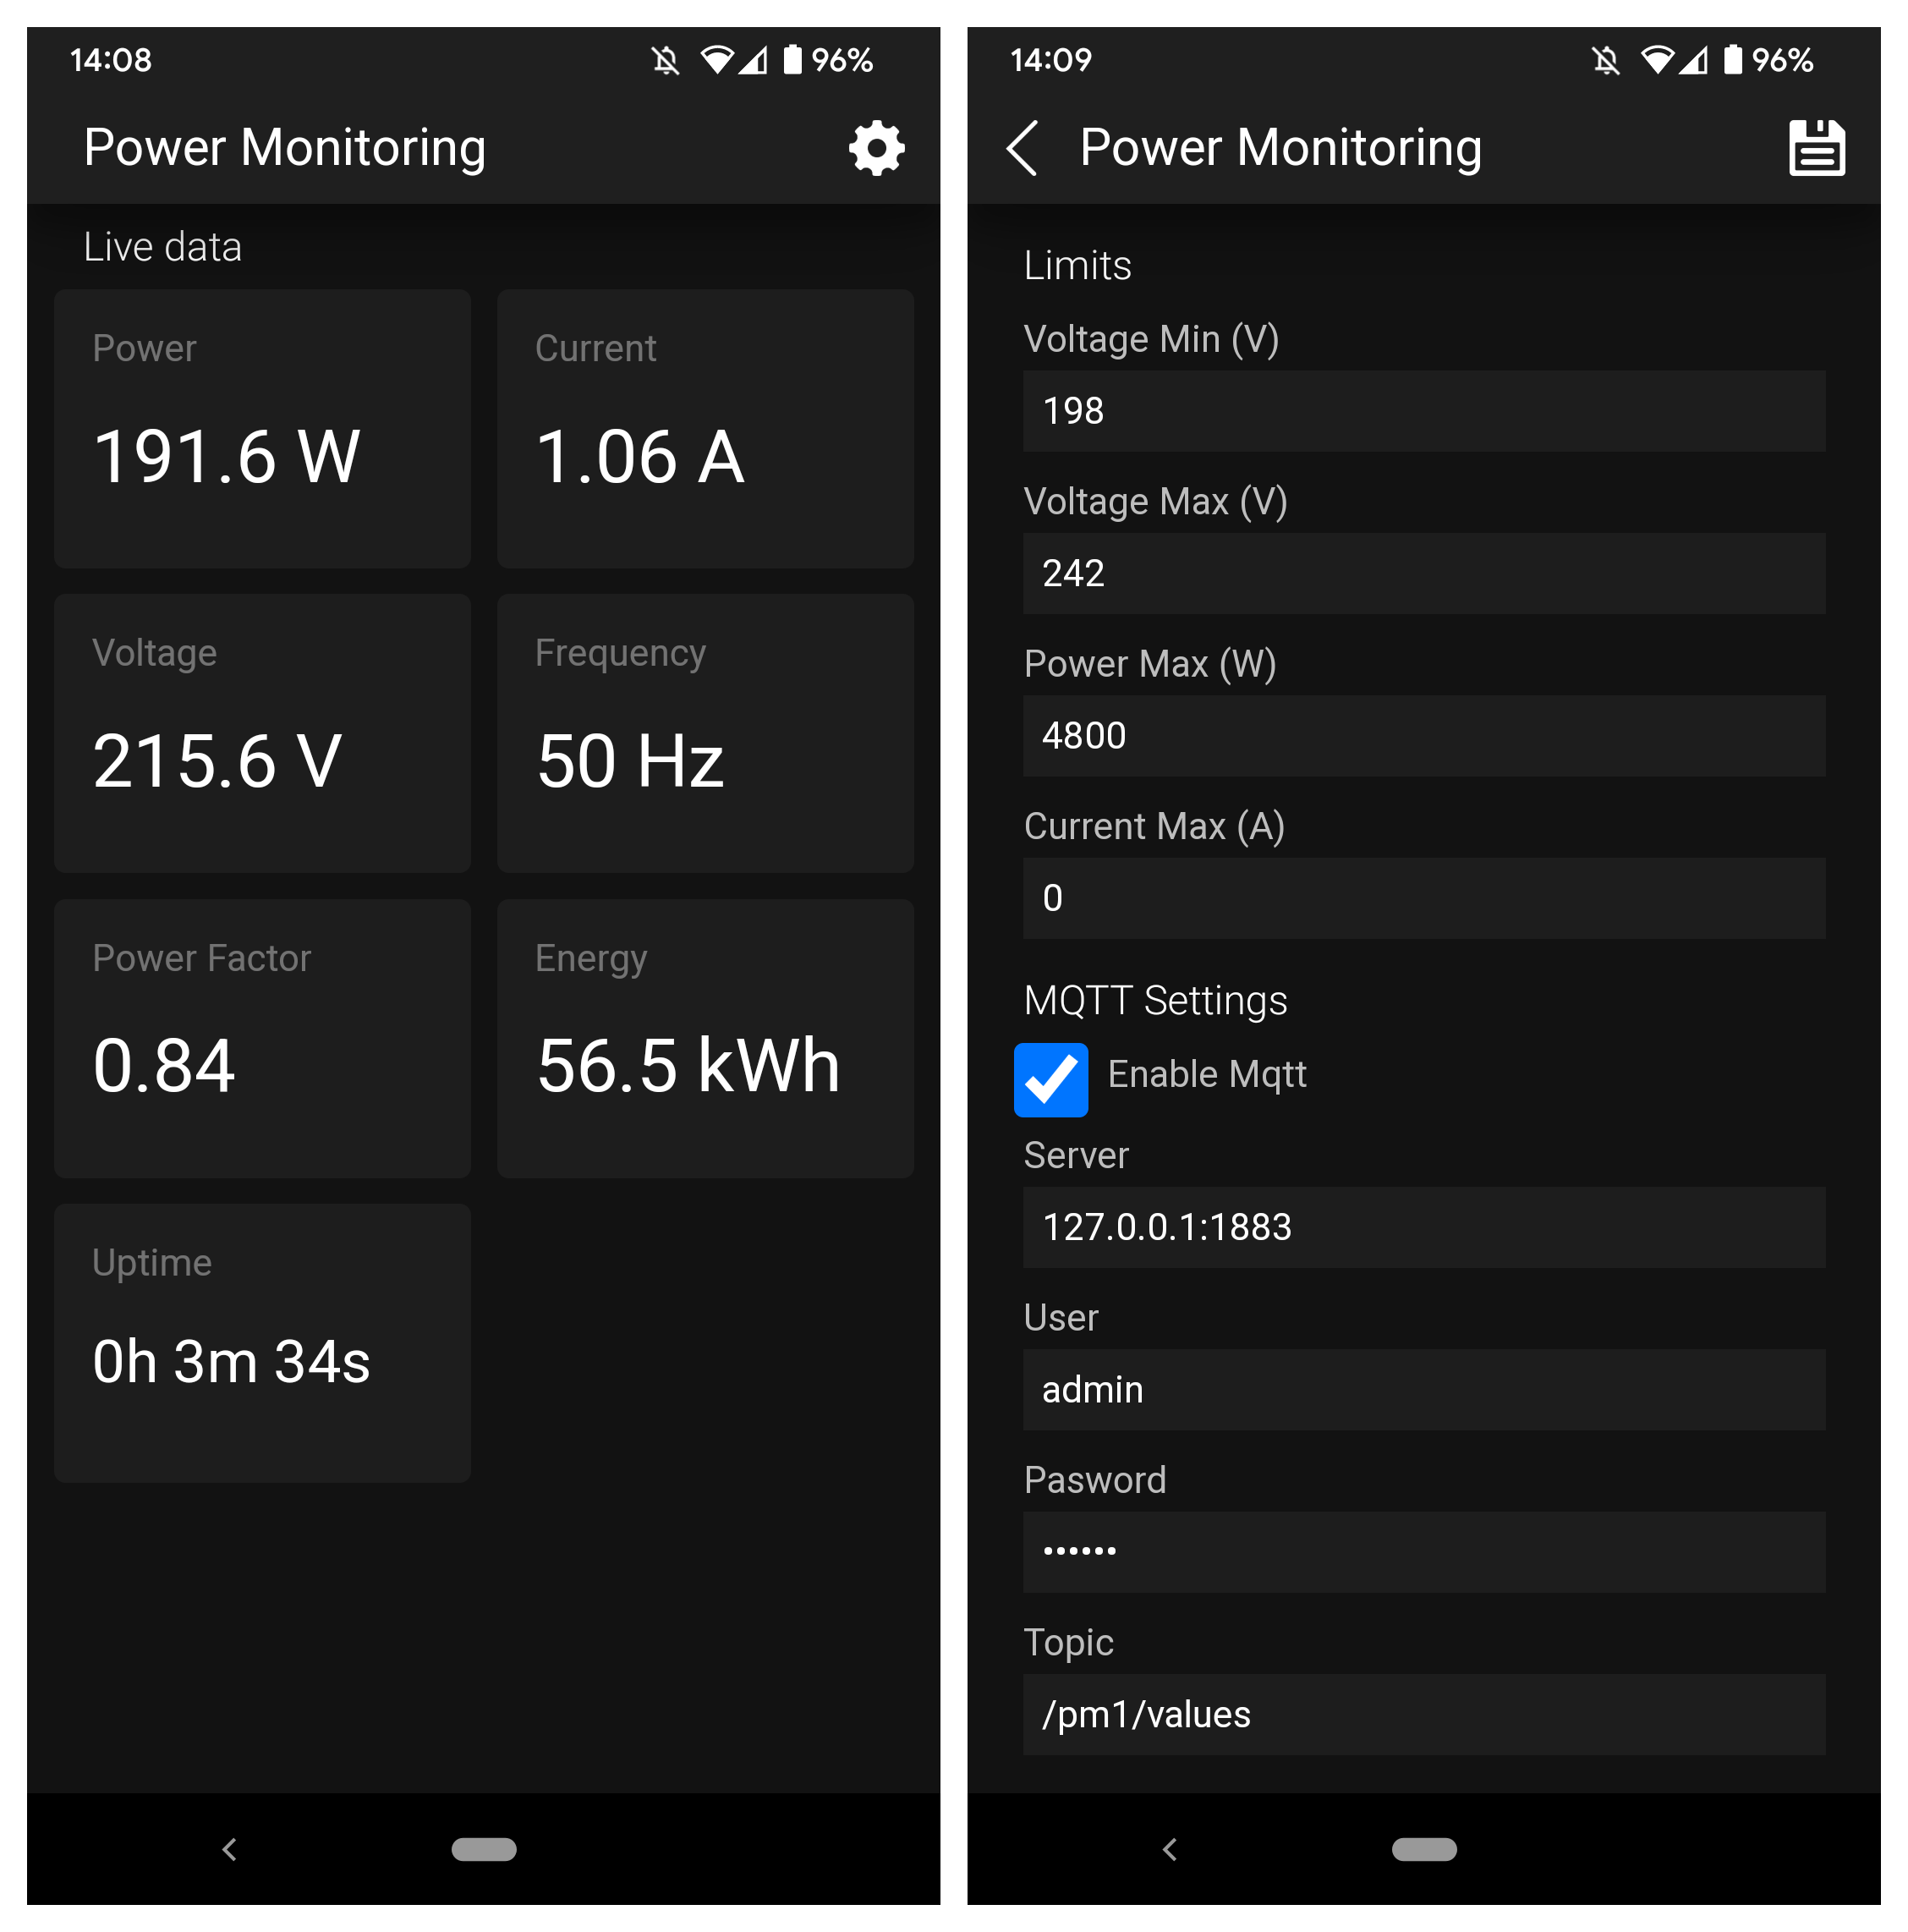
- Web app
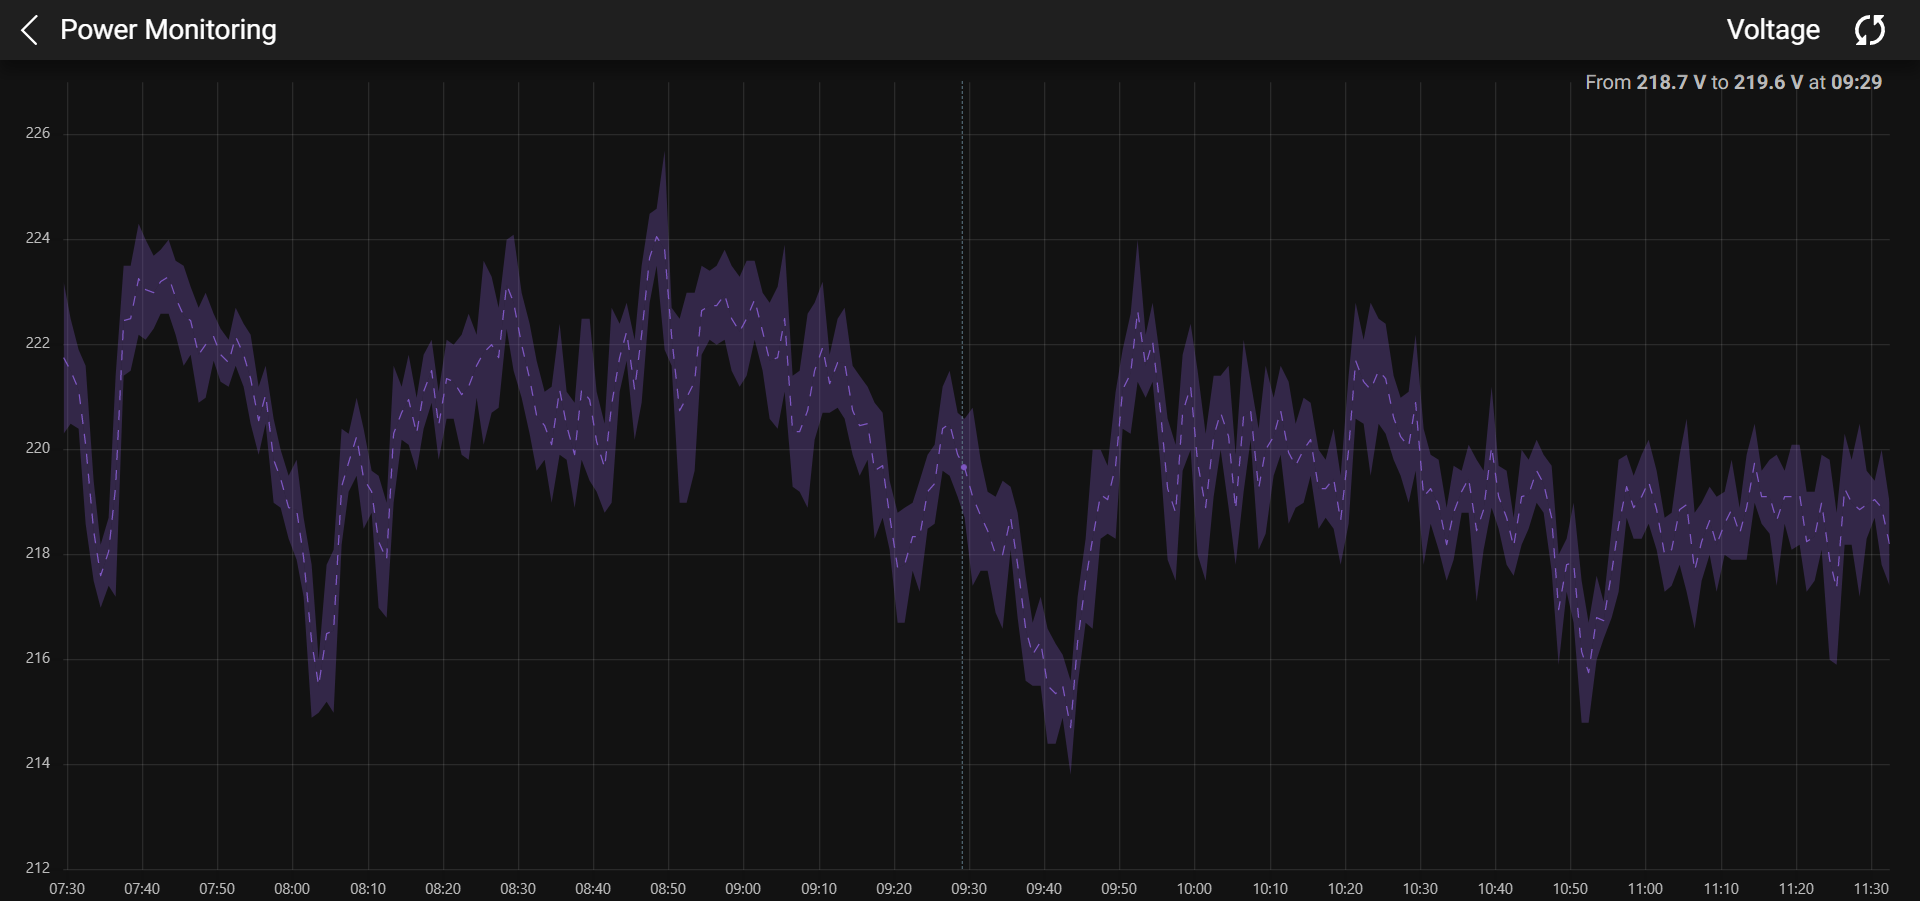
- Simple web app that updates metrics via WebSockets
- Shows warning when value not in a range
- Stores ranges in EEPROM and allows configuring them on the UI
- Stores MQTT configuration in EEPROM and allows configuring it on the UI
- Progressive web app (PWAs), so the user can install it


 John Grant
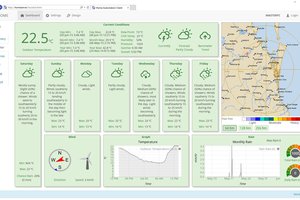

 Pratyush-Mallick
Thank you so much. I will give it a try and will give you update!!!