Because it's always easier when it says "auto"
Home Assistant has an option to discover MQTT-entities with their capabilities and features. The device needs tot send it's information in a proper format to a specific topic. The MQTT-autodiscovery service will see this and configure the corresponding devices and features.
https://www.home-assistant.io/docs/mqtt/discovery/
This way of configuring Home Assistant is necessary for using device triggers for example (the way I want to use events)
Now, there is an entity "vacuum" that should be perfect. I'm still missing some things though. It doesn't have event triggers the way I want to use them. Also, I'm missing a way to log positions for mapping and I want a bit more flexibility. Of course the way I set up the autoconfig messages here can be easily adapted to configure a "vacuum" entity.
All this means choosing my own "schema" and setting up a bunch of entities/attributes for a new device.
The device (roomba) will output a bunch of formatted messages to a config topic for each entity on startup. Entities are for instance:
- Event "done cleaning" (device trigger);
- Action "Clean" (button);
- Sensor with numeric value, temperature, battery voltage (sensor);
- Binary value for docked state (binary sensor);
These entities have their own topics for configuration, state, command etc. They can be given the same device information and are therefore seen as attributes of said device.
My schema will broadly look like this:
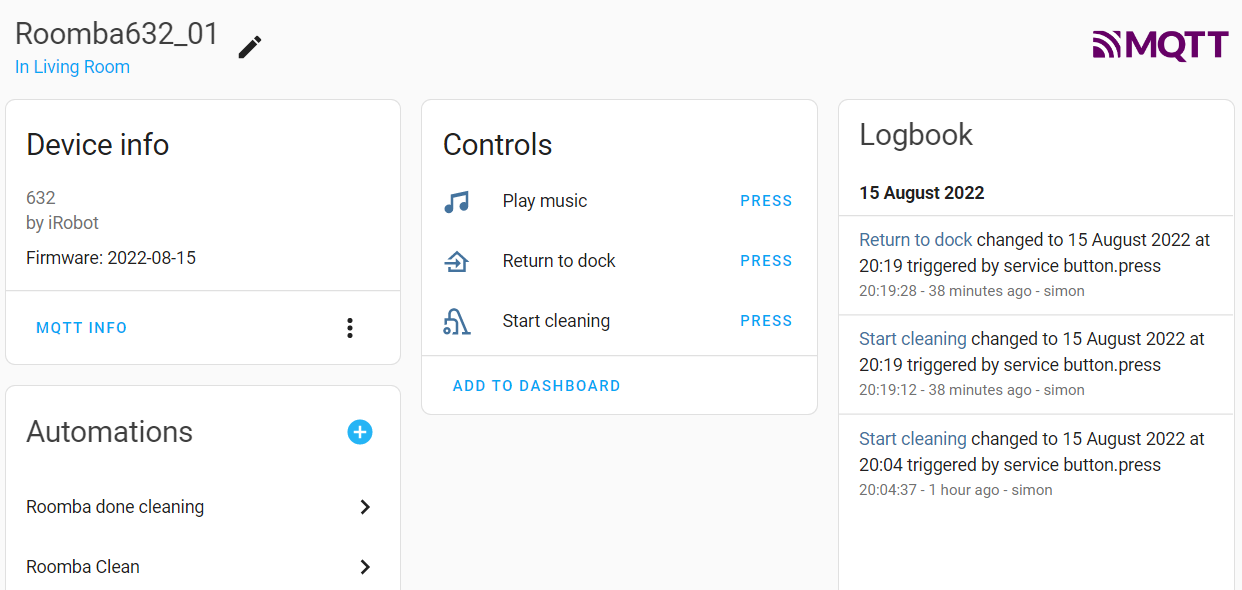
Device:
Name: Roomba632_01
Model: 632
Manufacturer: iRobot
Done cleaning event [trigger] (device_automation)
Start cleaning command [button] (action)
Return to dock command [button] (action)
Play music command [button] (action)
State info [sensor] (states)
Sensor vallues [sensor]
I'm still trying to follow the "official" vacuum-entity and for now have the actions and event trigger configured.
I put everything in a single Autoconfigure function that runs when (re-) connecting to MQTT.
void MQTTAutoConfig() {
  //Event triggers
  mqttClient.publish(
    HANAME "/device_automation/" DEVICENAME "_" DEVICEID "/event_DoneCleaning/config",
    0, true,
    "{"
    "\"automation_type\": \"trigger\", "
    "\"payload\": \"done cleaning\", "
    "\"unique_id\": \"" DEVICENAME "_" DEVICEID "\", "
    "\"topic\": \"" HANAME "/device_automation/" DEVICENAME "_" DEVICEID "/event_DoneCleaning" "\", "
    "\"type\": \"action\", "
    "\"subtype\": \"button_short_press\", "
    "\"icon\": \"mdi:vacuum\", "
    "\"device\": {"
        "\"identifiers\": [\"" DEVICENAME "_" DEVICEID "\"], "
        "\"name\": \"" DEVICENAME "_" DEVICEID "\", "
        "\"manufacturer\": \"" MANUFACTURER "\", "
        "\"sw_version\": \"" VERSION "\", "
        "\"model\": \"" MODEL "\""
        "}"
    "}"
    );
  //Actions
  //Start cleaning
  mqttClient.publish(
    HANAME "/button/" DEVICENAME "_" DEVICEID "/clean_button/config",
    0, true,
    "{"
    "\"name\": \"Start cleaning\", "
    "\"command_topic\": \"" HANAME "/button/" DEVICENAME "_" DEVICEID "/set" "\", "
    "\"payload_press\": \"Clean\", "
    "\"unique_id\": \"" DEVICENAME "_" DEVICEID "_Clean\", "
    "\"icon\": \"mdi:vacuum-outline\", "
    "\"device\": {"
        "\"identifiers\": [\"" DEVICENAME "_" DEVICEID "\"], "
        "\"name\": \"" DEVICENAME "_" DEVICEID "\", "
        "\"manufacturer\": \"" MANUFACTURER "\", "
        "\"sw_version\": \"" VERSION "\", "
        "\"model\": \"" MODEL "\""
        "}"
    "}"
    );
  //Return to dock
  mqttClient.publish(
    HANAME "/button/" DEVICENAME "_" DEVICEID "/dock_button/config",
    0, true,
    "{"
    "\"name\": \"Return to dock\", "
    "\"command_topic\": \"" HANAME "/button/" DEVICENAME "_" DEVICEID "/set" "\", "
    "\"payload_press\": \"Dock\", "
    "\"unique_id\": \"" DEVICENAME "_" DEVICEID "_Dock\", "
    "\"icon\": \"mdi:home-import-outline\", "
    "\"device\": {"
        "\"identifiers\": [\"" DEVICENAME "_" DEVICEID "\"], "
        "\"name\": \"" DEVICENAME "_" DEVICEID "\", "
        "\"manufacturer\": \"" MANUFACTURER "\", "
        "\"sw_version\": \"" VERSION "\", "
        "\"model\": \"" MODEL "\""
        "}"
    "}"
    );
  //Locate
  mqttClient.publish(
    HANAME "/button/" DEVICENAME "_" DEVICEID "/locate_button/config",
    0, true,
    "{"
    "\"name\": \"Play music\", "
    "\"command_topic\": \"" HANAME "/button/" DEVICENAME "_" DEVICEID "/set" "\", "
    "\"payload_press\": \"Music\", "
    "\"unique_id\": \"" DEVICENAME "_" DEVICEID "_Locate\", "
    "\"icon\": \"mdi:music\", "
    "\"device\": {"
        "\"identifiers\": [\"" DEVICENAME "_" DEVICEID "\"], "
        "\"name\": \"" DEVICENAME "_" DEVICEID "\", "
        "\"manufacturer\": \"" MANUFACTURER "\", "
        "\"sw_version\": \"" VERSION "\", "
        "\"model\": \"" MODEL "\""
        "}"
    "}"
    );
}
I'ts a bit ugly with all the defines, but I didn't want to mess around with character arrays and this works:
Now I don't need separate scripts and it feels much neater. I will add the sensordata and maybe more. The cool thing with this is you can add feedback and syncing. See my doorbell project for an example of this feedback: https://hackaday.io/project/183525-smart-classic-ac-doorbell
Switching the state in Home Assistant sends a command and updates a remote value to give feedback on success.
Discussions
Become a Hackaday.io Member
Create an account to leave a comment. Already have an account? Log In.