 Roman Romanchuk
I'm slowly moving forward. Trying to debug the ROM connection I achieved partial success. Still don't understand why my program didn't run like expected, suspect that bread board becoming "a bit" noisy running on 4 mHz speed, but slowing things down actually proved that connections are correct.
So as I don't got expected results after adding ROM, I decided that I need a debug possibility during the build. As 68000 according to data sheet have minimum clock requirement of 4mHz (my CPU is expected to run on 8mHz at full speed), I can't simple step clock.
There's hardware debug possibility via HALT line, but halting CPU will put address and datelines in high impedance state, so not really helping for debug. I actually don't understand how to use HALT for debug purposes, as I can not peak inside lines when CPU halted.
Other way is to switch DTACK from always grounded mode, emulating slow memory. This exactly what I need for debug, CPU will do nothing while DTACK become grounded keeping address and data bus active, giving me time to examine them.
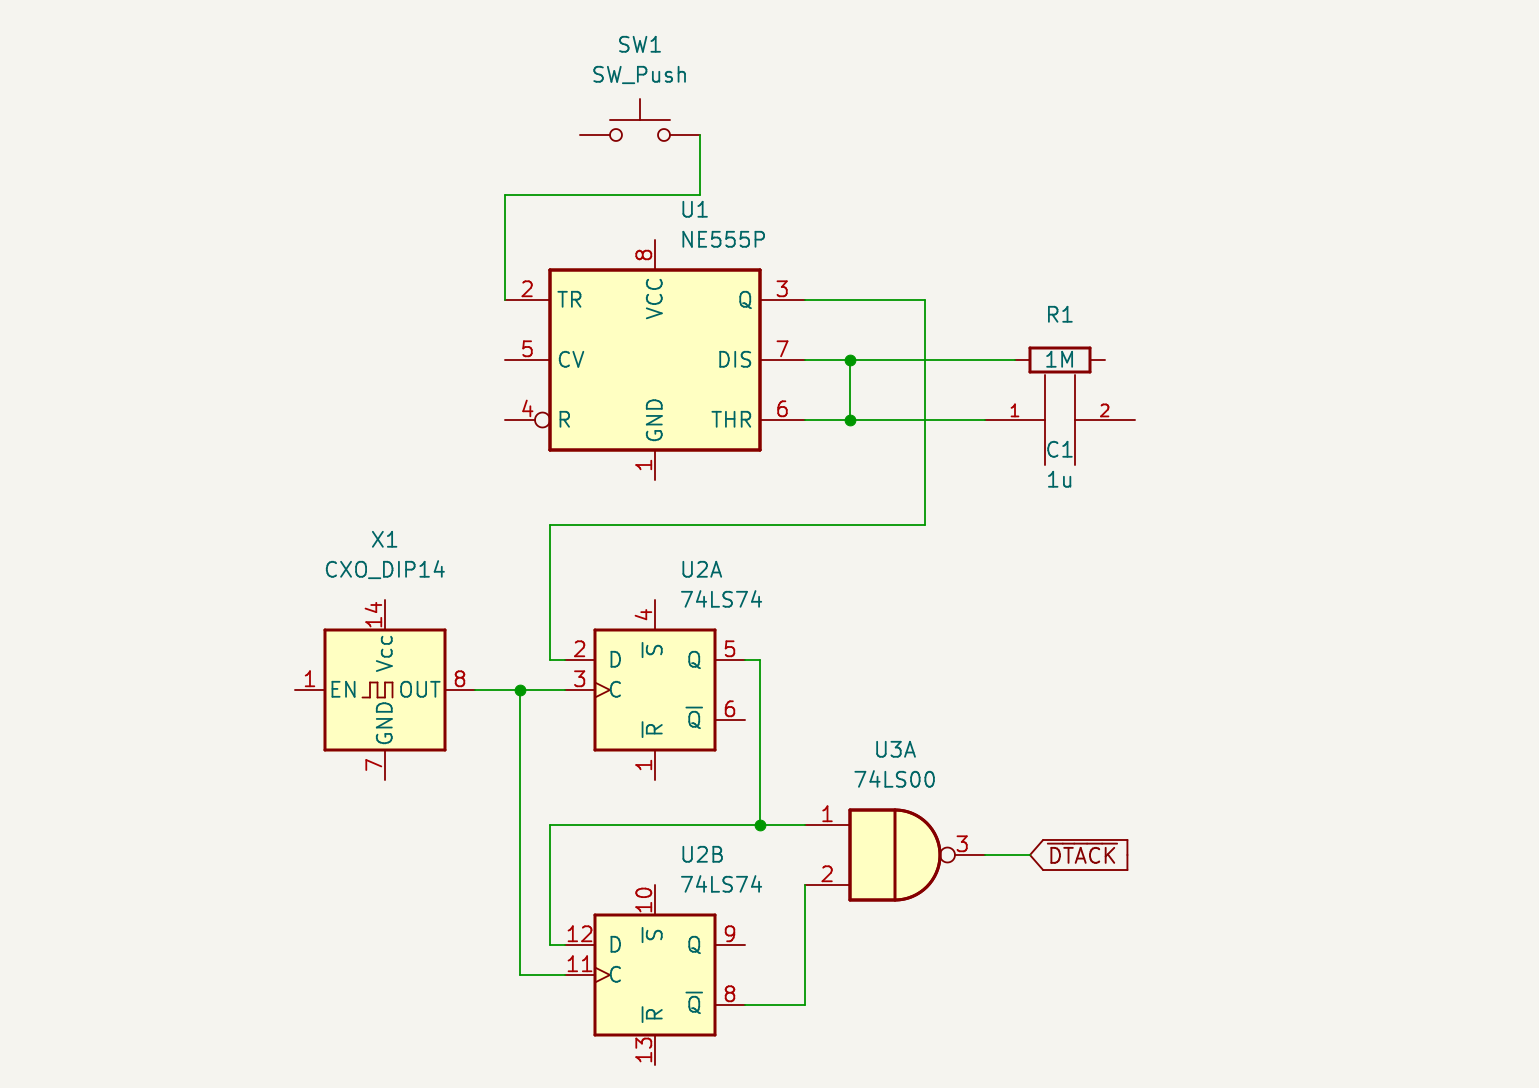
I build step scheme from two parts:
- Debounced button. Debouncing circuit is based on 555 monostable timer. Nice example of this circuit is provided by Ben Eater. See reference [1]
- Double D-latch (74LS74) circuit to provide short DTACK signal. Details of the circuit explained by John Tsiombikas in reference [2]
As clock source I'm using oscillator connected to CPU clock input.
Overall schematics looks like this:
This scheme allowed me to proof that my simple loop program is executed correctly. I'm thinking a bit about extending scheme to be able to switch between manual mode and automatic (will try to find the speed on which my bread boards still able to execute correctly program), but that would be next step.
References:
[1]
[2]
Discussions
Become a Hackaday.io Member
Create an account to leave a comment. Already have an account? Log In.