 Michael Graham
Over the last year, I have been developing a complex project and I am excited to finally share it!
I created a brand new type of tool that I believe can make a significant contribution toward serving the creators in the cup customization space. Especially those looking to find a competitive edge and bring something new to this market.
This is the CylinDraw, it lets you easily create incredible art on any kind of cup!
CylinDraw essentially does 2 things: It can engrave & it can draw. And it is highly adjustable so it can do those 2 things on any kind of cup. (tumblers, wine glasses, mason jars, shot glasses, mugs with handles, or any cylindrical object tapered or not under 3” diameter & 10” tall).
As a painting tool, we have experimented and perfected techniques for drawing on multiple types of materials and coating the end result to make it dishwasher safe. (Though there is a wide world of markers and coatings out there to choose from to continue experimenting with!)
As an engraver, CylinDraw is an order of magnitude less expensive in terms of upfront/operating/& maintenance costs when compared to a rotary laser engraver, while offering better ease of use and equivalent drawing resolution. (CylinDraw operates at 0.2mm wide stroke, lasers are 0.1-0.5mm.) Engraving is also a safer cleaner process than laser etching since fumes and fire are not a factor. Lasers must be vented to the outside because of chemical byproducts (smoke), while mechanical engravers only create physical byproducts (microparticles) which can be contained with a water pump or a shop vac.
But of equal importance to what CylinDraw does, is how it does it.
Cool hardware is still a useless brick without software, and if the software sucks then its an irritating brick. But get both things right and using the tool becomes such an effective process that you can start taking it for granted. That’s when you know something has improved your life. That was the design intent. Every aspect of this tool is designed to make the user experience painless, because I think computers should just work so you can focus on the art!
CylinDraw software is free and all-inclusive. It can convert any bitmap image like a photo or screenshot into a vector graphic (SVG) and then into a drawing-in-progress in minutes. Almost all drawings & engravings are doable in under an hour.
The system automatically makes assumptions on your behalf to streamline the process. A few examples:
- Multicolor jobs self sort the colors by brightness so you don’t smear light colors with dark ones.
- Drawing paths are optimized using a honed greedy algorithm.
- SW automatically updates the motor speeds to account for cup diameter & taper.
- Automatic connection to the tool when the USB cable is plugged in. A happy beep tells you all is well.
- Separate user interfaces for separate functions so that all the information on screen is relevant, and the only controls you have are the ones you need.
- No internet-of-things planned obsolescence security nightmare nonsense. CylinDraw operates entirely without internet access.
- Custom ‘JOB’ files (machine readable g-code files) use an .svg extension so they can be viewed as thumbnails or in a browser, or they can be parsed with a viewer program that is part of the package.
..
Overall I think CylinDraw represents a high value proposition for what it does and I am excited to see what creative works people will come up with. I am preparing to offer kits in my store that will appeal to do-it-yourselfers as well as folks who prefer a turnkey experience.
Kit Option 1: You 3D Print + You Assemble it: You get the 3d printable files & make them yourself. We send you all the tools, electronics & mechanical hardware. You build it using instructions online.
Kit Option 2: We 3D Print + You Assemble it: We send you all the 3d printed parts, tools, electronics...
Read more »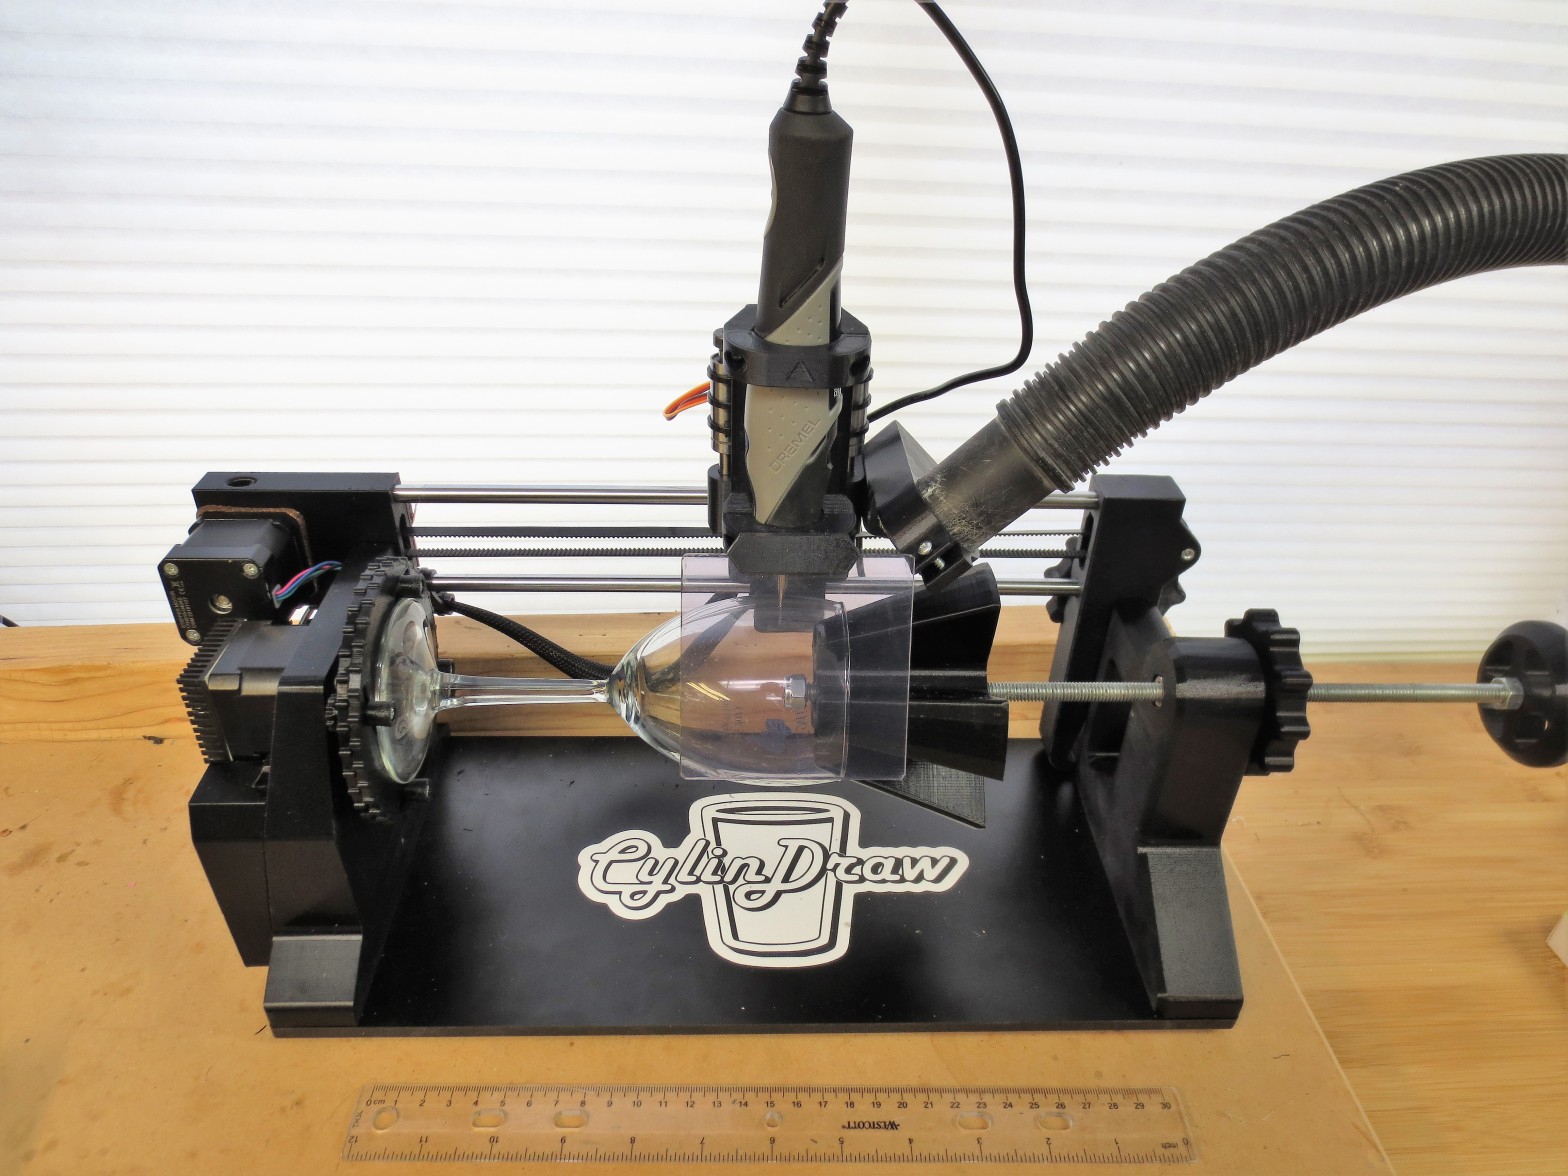


 Jesús Tamez-Duque
 Joshua Brewster
 Peter Walsh
 Supplyframe DesignLab
Cool!