 Ben Brooks
For a number of years, I’ve considered making this project, but I’ve never found a super-easy way to integrate my home-made device with my off-the-shelf ‘smart’ outlet. I’ve used SmartThings as my main hub for a few years and unfortunately, they took away the ability to ‘easily’ include one’s own creations right about the time I purchased it. Fast-forward to now and I recently stumbled upon Home Assistant (How I’d never heard of it until almost a year ago is beyond me. It’s the absolute ideal centerpiece for a connected-home and a tinkerer’s dream.). I’ve since fully-switched all of my ‘smart’ devices over to HA and am slowly adding the necessary code to my homemade devices so they can play together.
Oddly enough, I’d also never used an ESP device either. While I’ve used Arduino microcontrollers before, I’ve almost exclusively used Particle Photons for my projects (It was the first device I used when I got re-introduced to microcontrollers years ago and the added cost never really mattered since I just tinker for fun). Home Assistant actually has a really great integration with ESP devices specifically (ESPHome), which makes using them for simple projects an absolute breeze with almost no code-writing even required. I figured this would make the perfect first project both with a new microcontroller and a new streamlined way for incorporating homemade devices into Home Assistant.
Initially I had planned on designing and 3D printing my own knife switch, but as I considered it, I decided a large metal one would be way more satisfying to use. I found this on Amazon which fit the bill perfectly and was quite reasonably priced.
I selected an ESP8266 which is still complete overkill for my use-case and decided to power it with 3-AA batteries as well as include a toggle switch to turn it on and off. Initially I set it all up on a breadboard and used ESPHome to flash the necessary code to it. Unfortunately, this process took me WAY longer than it should have; the ESPHome add-on for Home Assistant just didn’t seem able to connect to my device. After literally hours of troubleshooting by swapping out devices and cables, using Arduino IDE to flash some simple code to make sure it all ‘should work’ I still couldn’t get it working. Finally, I decided to try it manually by compiling and then downloading the code from Home Assistant and then manually installing it. THEN the Pi that it runs on kept crashing during the process. After some googling I finally realized it was a common issue that most Pis don’t actually have enough RAM to compile the necessary code and frequently lock-up as a result. Ultimately my work-around was to ‘setup’ the devices in my Home Assistant instance of ESPHome and then do all of the actual code writing and flashing on my laptop. I won’t go into the details of the entire process as they cover it well on the official website (esphome.io), albeit without any notices or warnings of “THIS LIKELY WON’T WORK ON A RASPBERRY PI!!!”. Here’s the ‘code’ that I used with ESPHome; it takes this and creates and then compiles the actual code that goes on the ESP device:
esphome:
  name: knife-switch

esp8266:
  board: nodemcuv2

# Enable logging
logger:

# Enable Home Assistant API
api:

ota:
  password: "6325cb0bade68f8d7bb319d094ca4c98"

wifi:
  ssid: !secret wifi_ssid
  password: !secret wifi_password

  # Enable fallback hotspot (captive portal) in case wifi connection fails
  ap:
    ssid: "Knife-Switch Fallback Hotspot"
    password: "3MVD5jyOvWlV"

captive_portal:

binary_sensor:
  - platform: gpio
    pin:
      number: D4
      inverted: true
      mode:
        input: true
        pullup: true
    name: "Knife Switch"

status_led:
  pin: D0
About half of this was generated by ESPHome during the setup wizard and the other half is just where I added the 'code' for the sensor and status LED.
A few wires and some soldering and I had a functioning device. I also designed and printed (with lots of help and input from my son) a control box with a transparent...
Read more »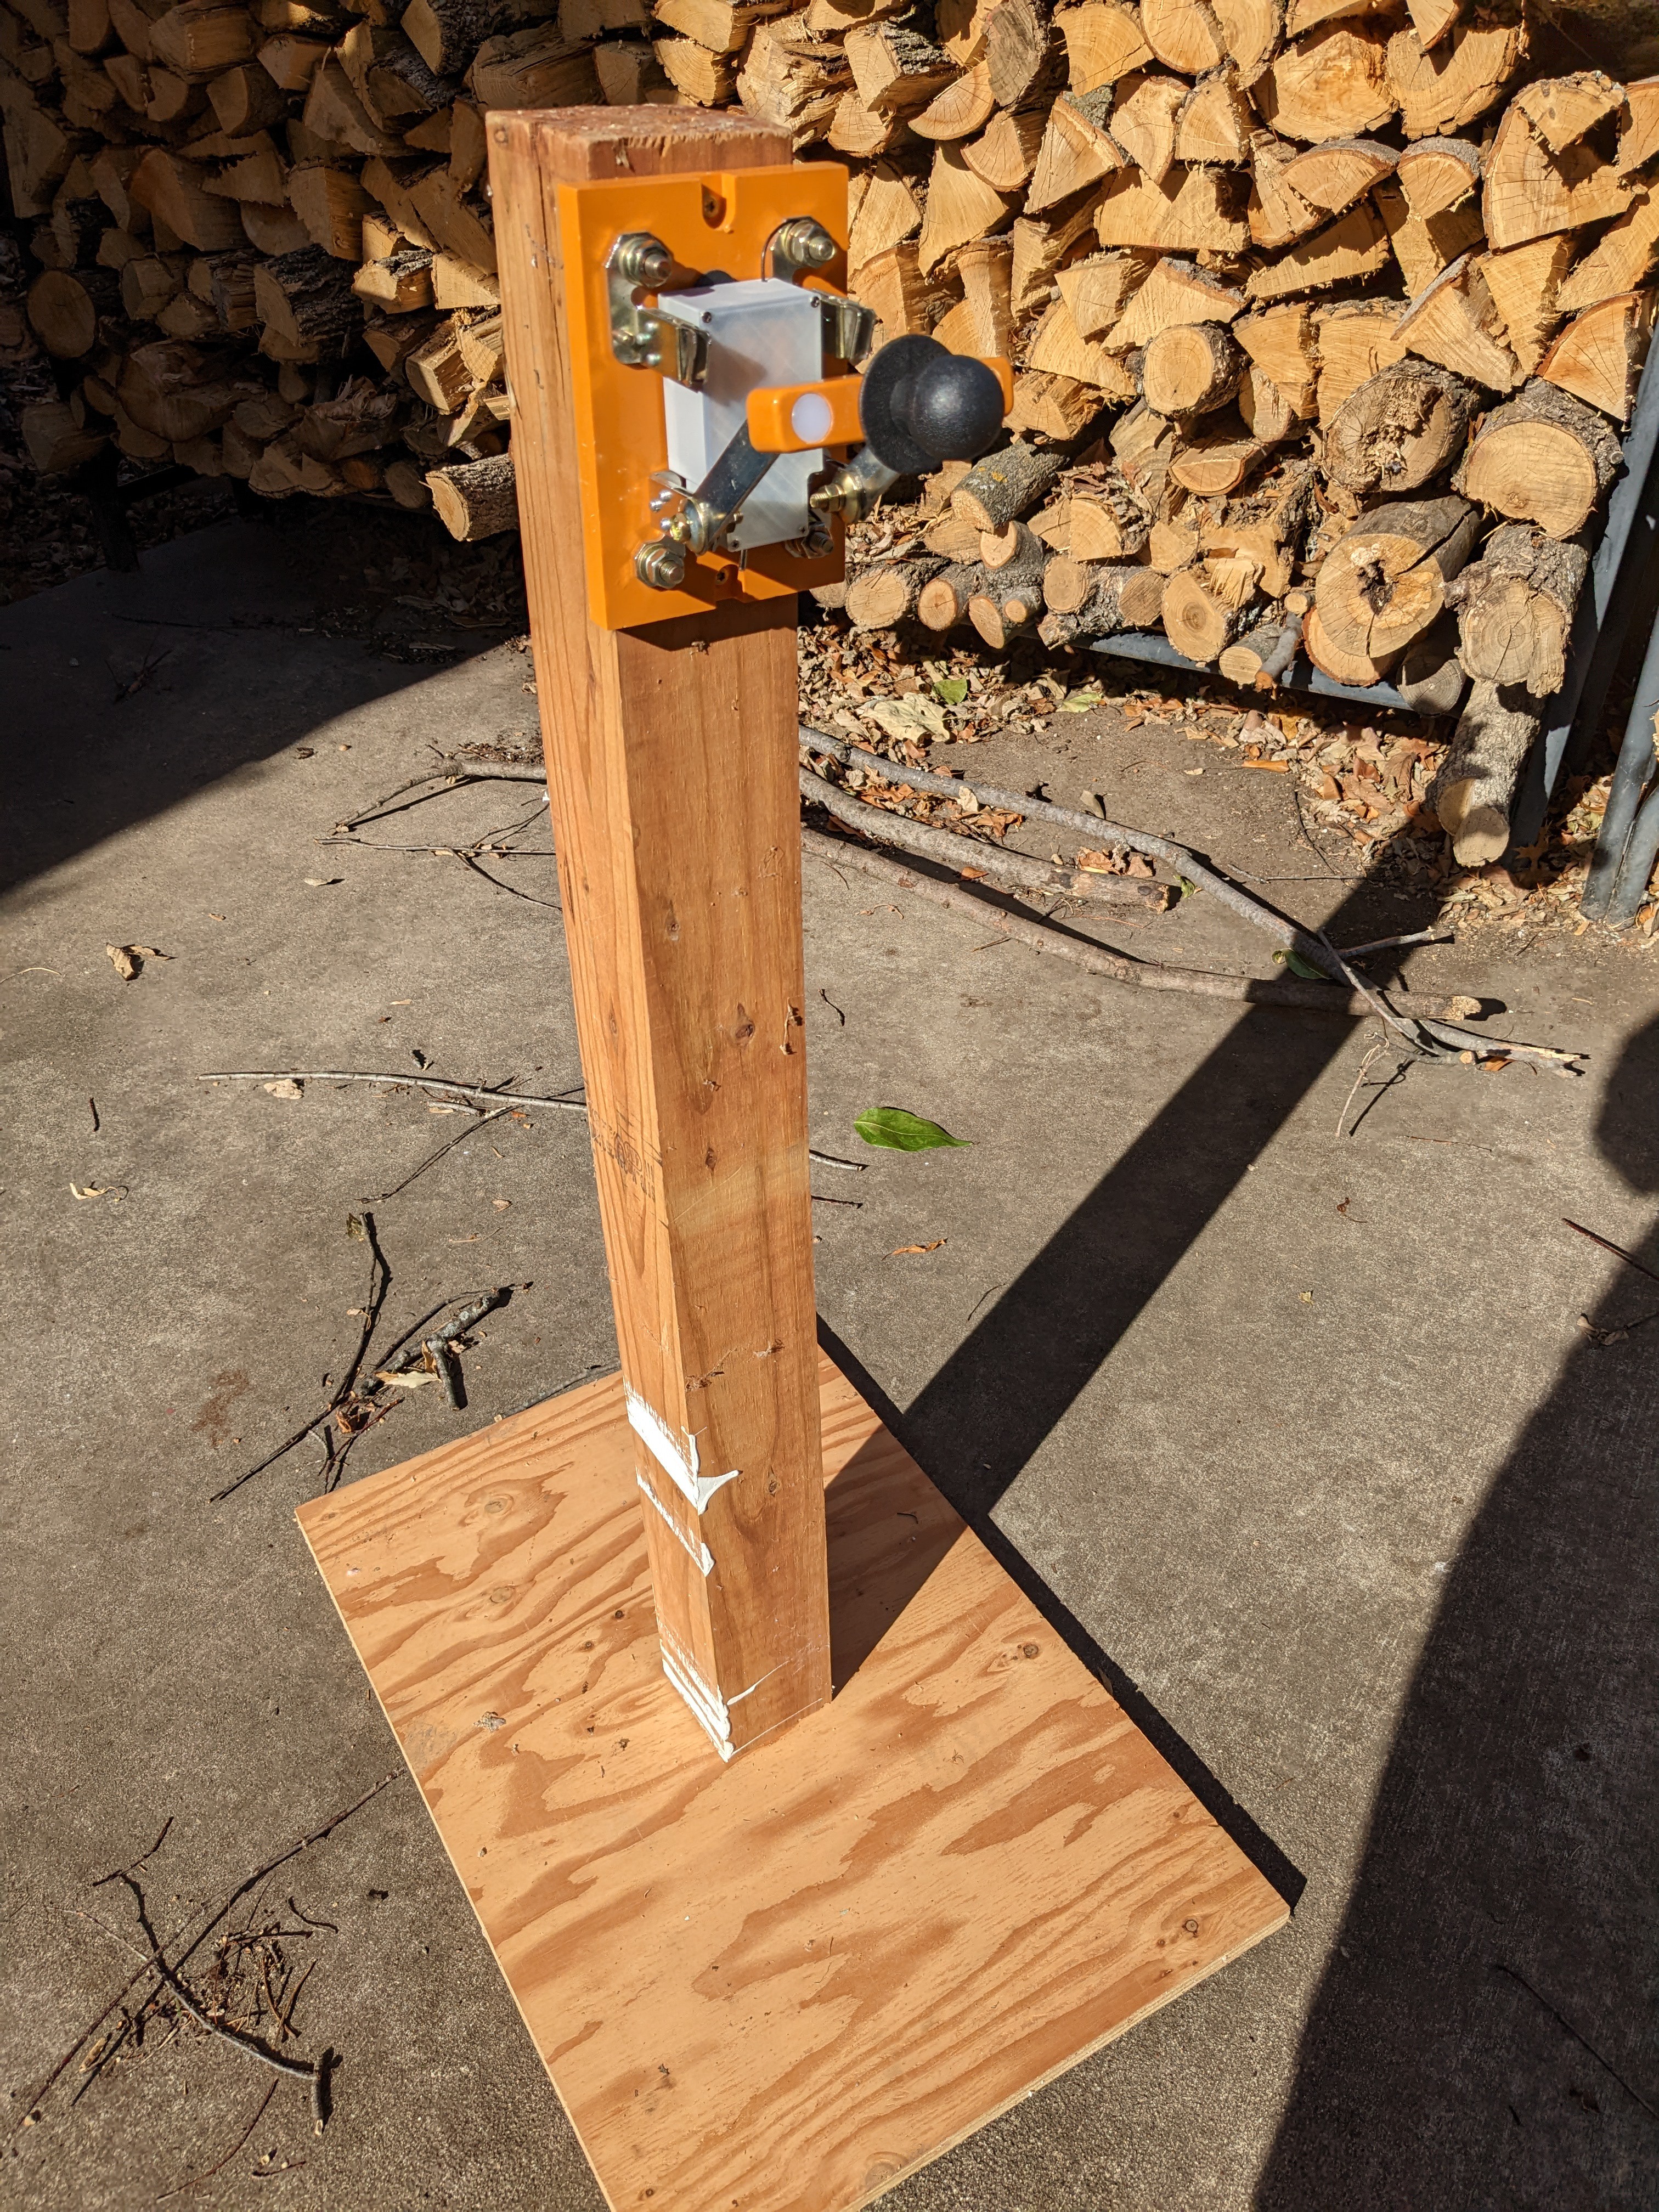

 Amine Mehdi Mansouri
+ points for knife switch!