mircemk
A Nixie tube is an electronic device used for displaying numerals or other information using glow discharge. The glass tube contains a wire-mesh anode and multiple cathodes, shaped like numerals or other symbols. Applying power to one cathode surrounds it with an orange glow discharge.
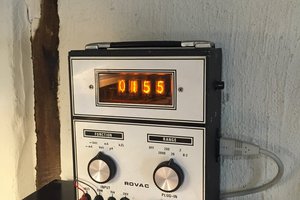
This time I will show you how to make a nice retro look clock with the help of 6 such tubes. This is another one of the many unusual clocks you can see in some of my previous videos. I decided to make this device with IN-1 nixie tubes for reasons that can easily be find on eBay, and are relatively inexpensive - 6 pieces cost around $ 30 total.
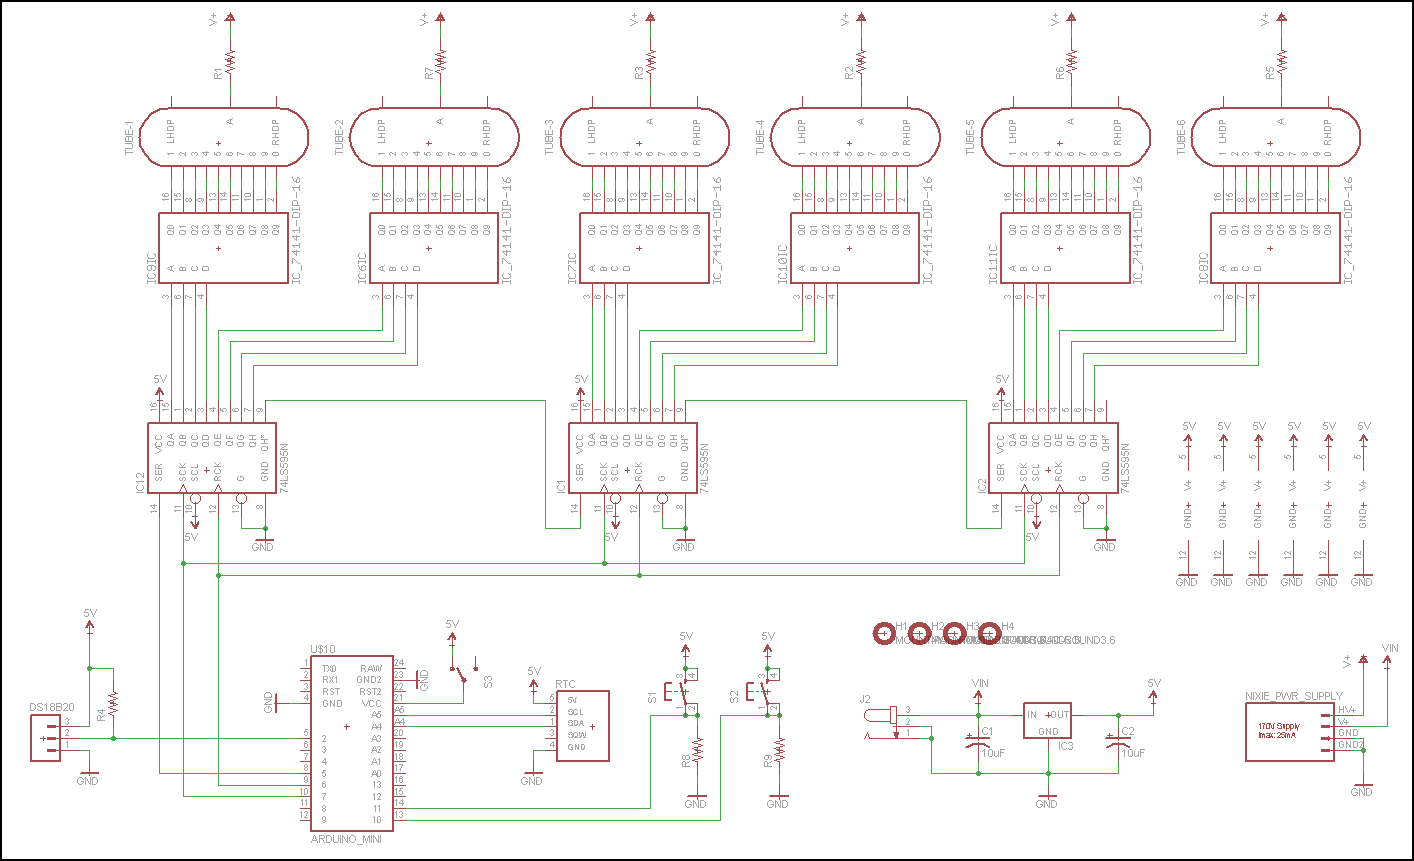
The device is relatively simple to build due to the use of the Arduino microcontroller, given that such clocks are dominated by discrete electronic elements and are complex for self-construction. It consists of the following components:
- 6pcs. Nixie tubes IN-1
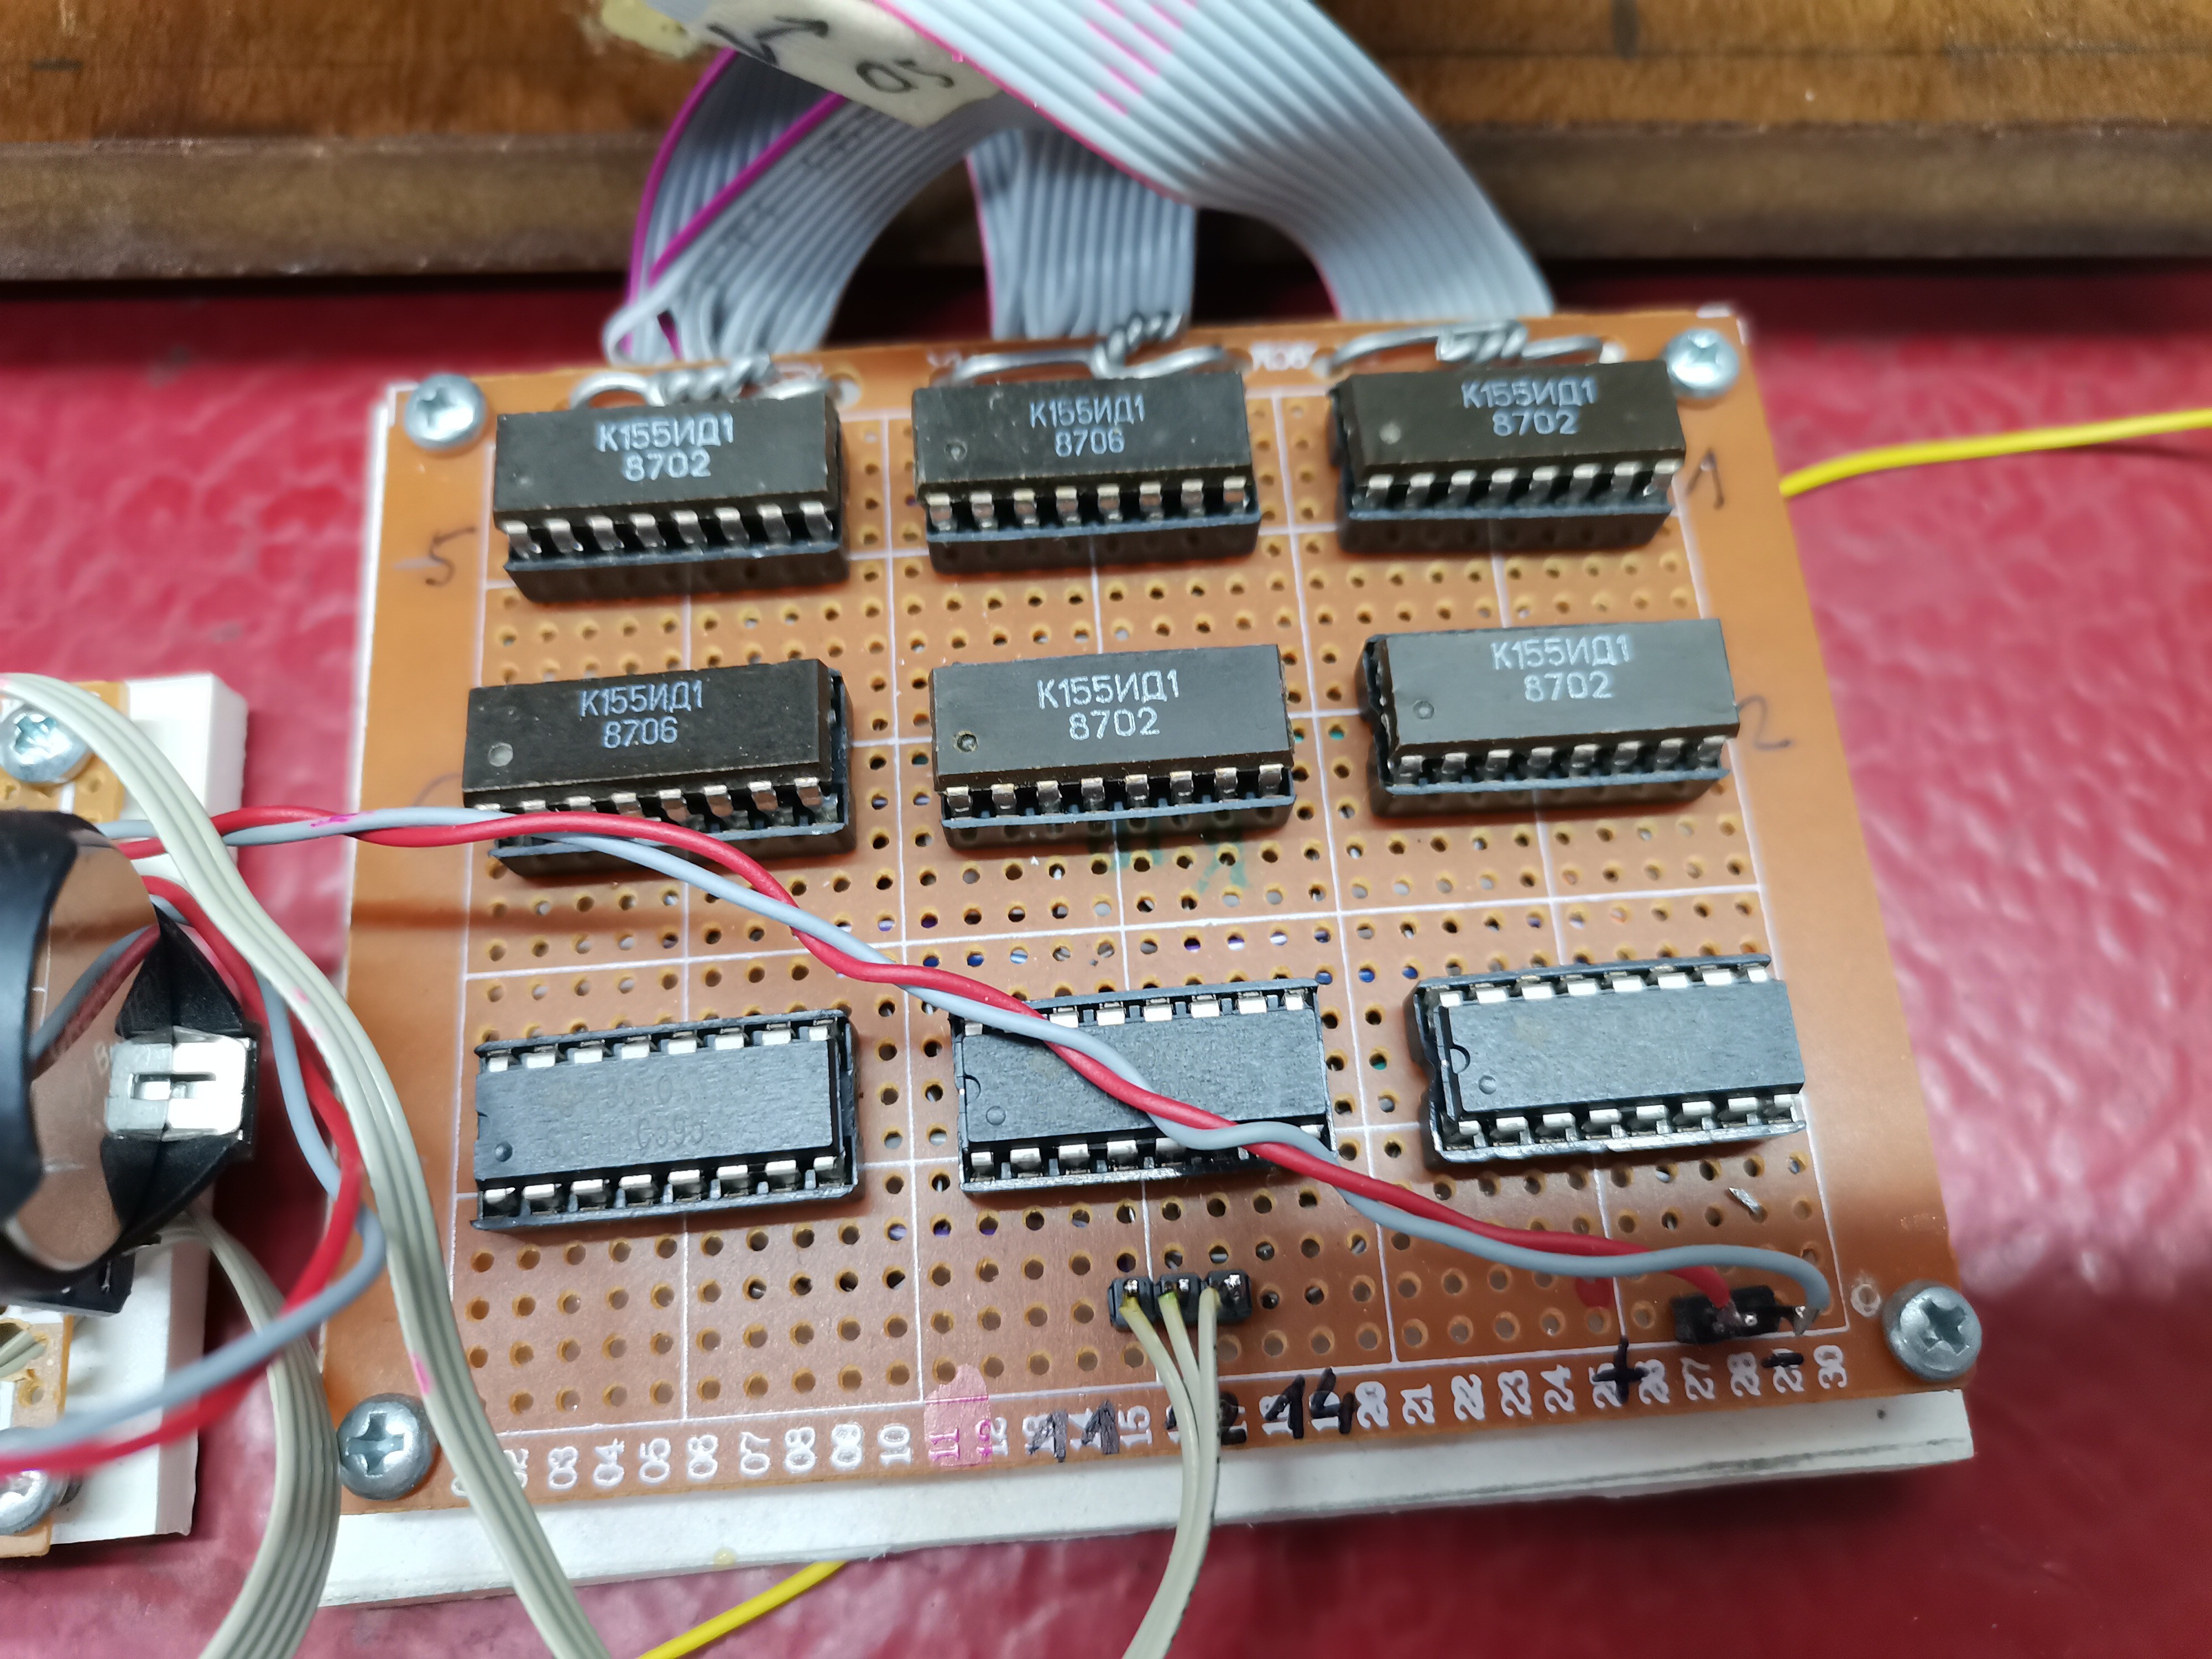
- Six IC drivers for nixie tubes type: K155 or SN74141
- Three SN74HC595 shift registers
- Arduino Nano microcontroller
- DS3231 realtame clock module
- DS18B20 temperature sensor
- switches and buttons,
- And at the end the Powerrr supply
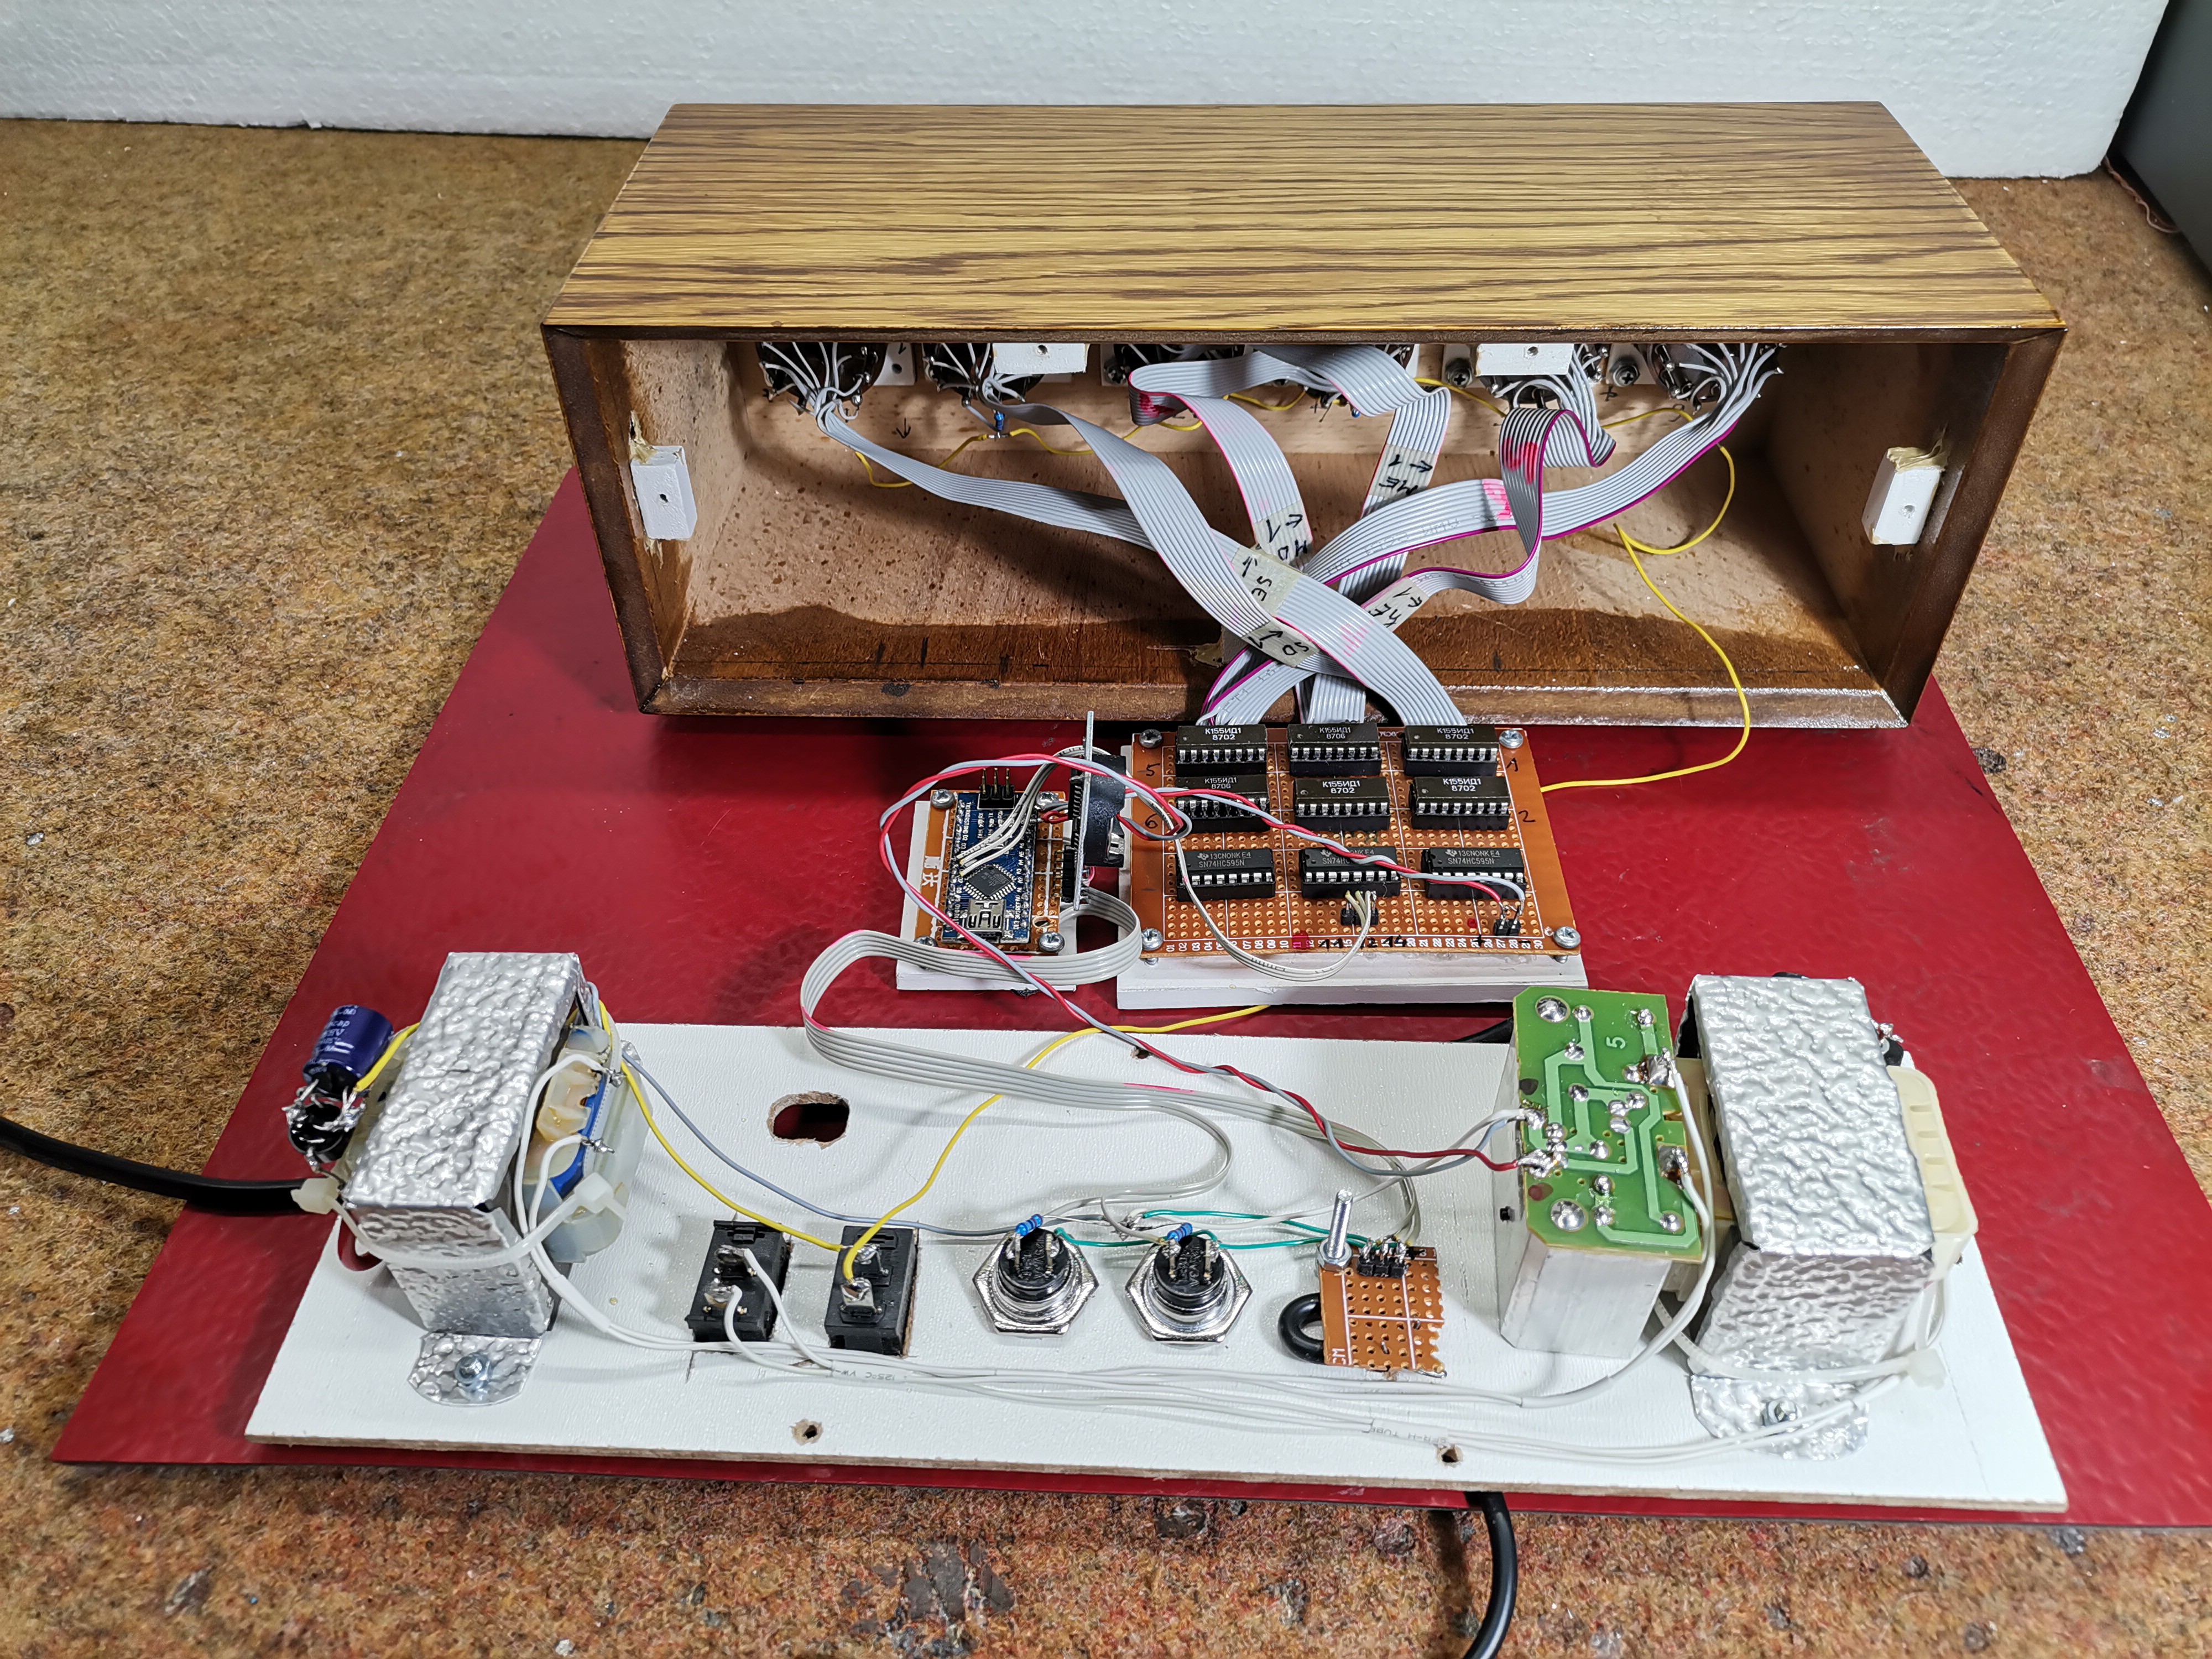
The power supply unit is performed in a slightly unusual way to get 5 volts for the Arduino and 200V anode voltage. We have two identical transformers 220V to 6V. We connect the secondary from the first to the secondary winding on the second transformer. So now at the primary output winding on the second transformer we get 180-200 Volts, taking into account the losses that occur in the transformation. We use this voltage as the anode voltage for the tubes. From the place where the two secondary windings are interconnected, we take a voltage of 6 volts which we then carry to the Arduino through a rectifier with a stabilizer.
As it is known, the lifespan of these tubes is relatively short, especially if a single digit is activated for a long time. For this reason the code is made so that every minute all digits scroll from 0 to 9, and it lasts a few seconds. Also at a certain time interval is displayed the temperature obtained from the ds18B20 temperature sensor which is located outside the housing due to temperature independence.
As we can see, we have two buttons on the back of the watch. One scrolls all the digits, and the other button is used to display the current temperature. Finally, the clock is placed in a convenient wooden box that is well processed and varnished, so the watch got a complete retro look.