 Dimitar
Hello everyone,
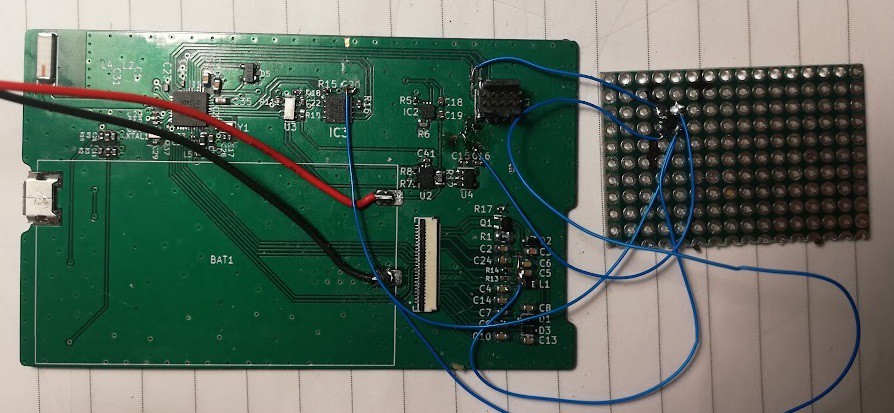
For this log we are going to work on the second version of the PCB. The bring up was fairly easy. Everything was working. But there were still issues. The first type were regarding assembly. The second type is regarding performance.
The show stopper is that the current consumption is too high. From the datasheet of the MCU, RTC, Flash and the e-paper display I assumed that the current draw would be in the neighborhood of 15-20 uA. That would have been great. In reality it was 240 uA (when the display was refreshing 8mA) I wrote a program to initialize all the peripheral chips and issue sleep commands. I would measure the progression after each shut down. The only subsystem that did not made any significant difference was the e-paper.
One final experiment was in order. I connected everything. Went through the shut down procedures and then physically disconnected the screen from the board. And like that the current dropped to the needed 23uA. I agree, not 15 but my multimeter is not so great and we do have losses when using an LDO (now I changed that for a second time).
I decided to add a high side power switch to the circuit. It will remove power from the e-paper display and the flash. If we do not have display we don't need the flash to read graphics from.
Again I put my soldering skills to use. I wired a small board with the switch on it. Also cut the traces for 3.3v for the flash and display. The problem was that I did not had any free pins. I decided to use the RST pin on the MCU for power control. It is a pin that can be used as a GPIO. I tested with the debugger if I can still program everything and if can toggle the power. All good!
Now the assembly issues
- The buttons were not oriented correctly on the footprint, so it was not easy to solder them.
- I bought a few batteries all the same model. I just got one and measured the space between its terminals and assumed that they are all the same. But I was wrong, so I changed the footprint to accommodate the variations.
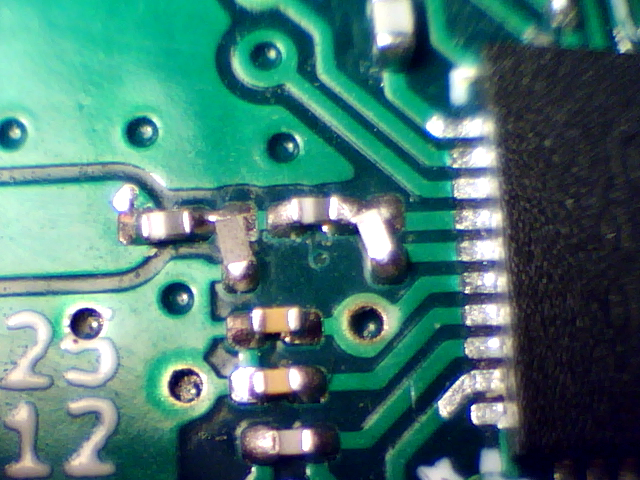
- There were a number of caps and resistors, that were too hard to place because they are too close to each other and are very small. Sometimes they stuck together. See picture.
- The R/C network for debouncing the buttons was not correct.
The improvements for the next revision.
- I added a overcurrent / under voltage and shortcut protection for the next revision. The battery does not have one. It was shown on the datasheet, but in reality there is none.
- Add BME680 a Bosch environment sensor.
- Put more spaces between resistors and caps.
- Fixed the buttons and battery footprints
- Added protections and high side power switch
Thank you for your interest!
Cheers,
Mitko!
Discussions
Become a Hackaday.io Member
Create an account to leave a comment. Already have an account? Log In.