 Bram
BramUsed tools
3D Resin printer
Laser cutter
Hand tools
Chemicals for patina
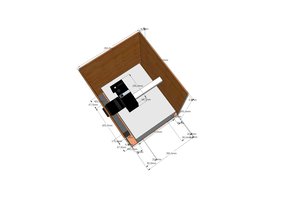
I used TinkerCAD to design the model. It took a few iterations until everything was correct. After that the model was painted to give it a patina look
Already have an account? Log in.
To make the experience fit your profile, pick a username and tell us what interests you.
Used tools
3D Resin printer
Laser cutter
Hand tools
Chemicals for patina
I used TinkerCAD to design the model. It took a few iterations until everything was correct. After that the model was painted to give it a patina look
|
MPEG-4 Video - 6.66 MB - 03/11/2022 at 17:11 |
|
About build instructions.
Take the USB fan apart. Write down where each wire is connected too. Next disconnect the controle PCB from the motor. Remove the shinny cap from the fan and remove the plastic fan. Cut off one side with a scissor and put it back. Add some extra weight in the cap to balance the fan again. It should not vibrate much when running. Put the cap back on
3D print the frame and other parts and paint it in the colors you want . (stl's available on request)
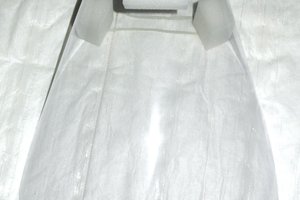
I wanted to have a brass/patina look. Although i also made one from copper i wanted to get a patina look on a 3D printed object. For this i made my own paint by mixing very fine copper powder in some clear acrylic paint. I painted the frame with it and after drying i applied a natural patina to it with vinager/salt and ammonia vapor. The result can be seen on one of the images. The frame looks like it have been submersed in seawater for quiet some time. That frame is used a prop for an other time era.
Cut a few wires to the right length so that they can be soldered to the motor and to the control pcb . Solder the wires to the motor, next insert the motor into the frame. Be aware of the right orientation. Feed the wires through the holes and into the space at the front side.
Solder the extended wires to the controle pcb. Close the compartment wih the cover.
Make 6 battery contacts from M3 brass screws and nuts. Solder to 3 of them a cut off balpoint spring to give the battery a little pressure and to keep it in place. Wire the batteries in serie to get 4.5V. While this is a bit on the low side the timepiece will start from about 4.2V. An alternative solution would be to use 2 3.7V lithium bateries in serie and place a DC-DC converter in the third compartment (7.2v to 5V)
Next attach the transparent covers by pressing the pin in to lock these in place.
The leather bracelet is cut and engraved on a laser cutter.

Well, i can be short on this. I used a "USB fan clock" and took it apart. Nothing more then that. No added driver, arduino, code or schematics needed.
Sorry, I thought you had built the "USB fan clock". Didn't realize it was a product I could purchase. Looks cool though, very Steam Punk.
Great project! Looks beautiful. One suggestion, the displayed standard clock hands looks somewhat normal for such a great piece.
Seems like it should have a futuristic minority-report UI instead (or whatever's feasible in such a small resolution).
Yeah, i know the display looks rather old fashion but that is how technology was back in 2021

Awesome stuff! Where is the diagram and assembly details?
P.s. can he lift a person into the air ? ))
I've added some assembly instructions.
To answer your other question.
Well yes, it depends. Lately i visited the astroid 12DG23-X and indeed i could be lifted by the watch but only a few centimeters since the atmosfer there is very thin.
 John Griffiths
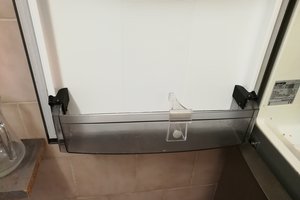
 Michał
Very cool looking display.
It would be nice to know what you used for the display, the driver(arduino?), a schematic, code, etc. The assembly instructions are a bit brief.