 Sumit
SumitObjective:
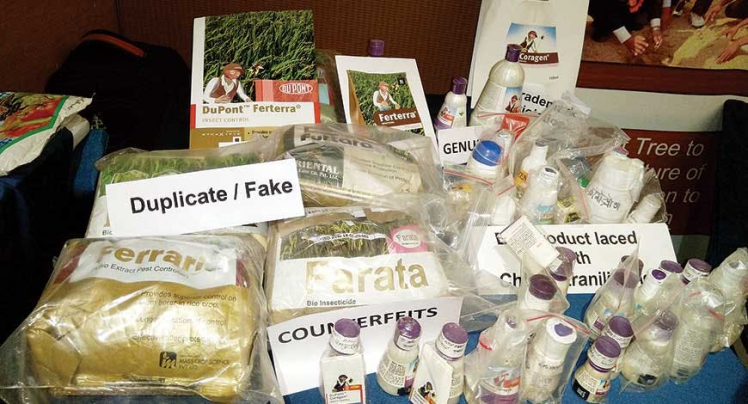
- One of the biggest reasons behind the growth of fake products in the agrochemical industry is the lack of knowledge about genuine products among consumers. Illiterate farmers usually do not check the product authentication features and just go for the cheap price.
- Rare adoption of anti-counterfeiting solutions by companies: Many agrochemical manufacturers do not implement anti-counterfeiting solutions in their products. This makes their products highly susceptible to duplication, tampering and even diversion.
- Lack of stringent regulatory measures: Lack of strict regulatory measures against counterfeit products and poor laws against counterfeiters has led to the rapid rise of counterfeit agro-chemical products.
Image courtesy: http://www.businessworld.in/article/Agriculture-Some-Pest-Killers-Have-Stings/17-04-2019-169465/

Image courtesy: http://www.businessworld.in/article/Agriculture-Some-Pest-Killers-Have-Stings/17-04-2019-169465/
“Unmonitored use of these toxic chemicals has led to soil degradation, ground and surface water contamination, endangering export of grain and horticulture products from India.” A study by the Union Ministry of Consumer Affairs shows that about 58 per cent of agricultural inputs in use are fake. “I am afraid counterfeit and illegal agrochemical products in the Indian market is increasing year by year, ”
Challenge: Develop an easily accessible solution for farmers that can provide detailed product-specific information, their usage, and the delivery details, and help them increase productivity and profitability.
Implementation and Application:
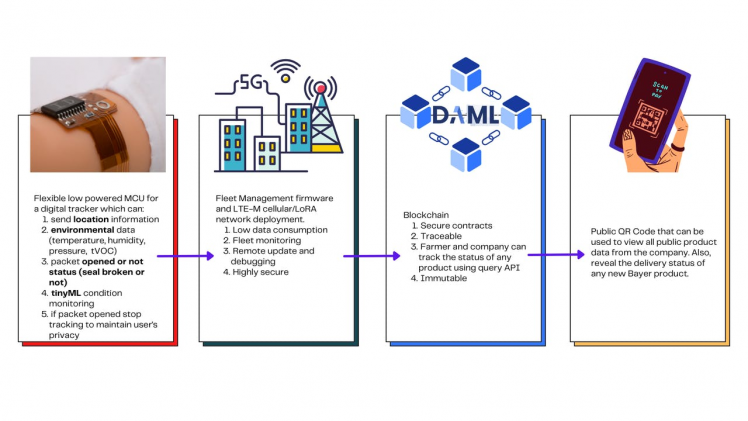
Our idea is to bring a secure de-centralized, tamperproof unified blockchain ledger with a secure authentication device protocol to streamline all manufacturers and logistics data. The device sends and updates the following data to the ledger:
- location
- temp&humidity
- seal/packet opened or not
- tinyML based condition status (For instance, if there is a sudden change in temperature that would damage the goods - abnormal environmental conditions during transit of agrochemicals like pesticides can result in separation of active ingredients, a notification is sent that triggers an action to resolve the situation.)
- Using the device ID barcode, the farmer can scan and get to know all details, in fact, it would be one time process to onboard the farmer to the Blockchain ledger, the product ID barcode would serve as farmer login and it would allow him to trace and lodge complain in case of any unsatisfactory results.
“Being illiterate, farmers are usually unable to differentiate between original and spurious products and are often duped. This is not only affecting our sales but is also posing a challenge to the farmers’ trust in genuine products that have gained popularity and recognition over the years.”
Problems to be solved by our implementation:
- Used on a variety of products - Information will be presented on the packaging. (Taking into account a variety of products (crop protection and seeds) and packaging (eg bags, 250ml, 20L, etc).
- Customers can scan/read and interact with the Digital Label
- Provides simple and actionable information about seeds, traits, and crop protection products
- Uses scannable resources like QR codes to provide information about the product (nutrients and pesticides) like geography, dosage, applicability, authenticity, usage, and disposal guidelines
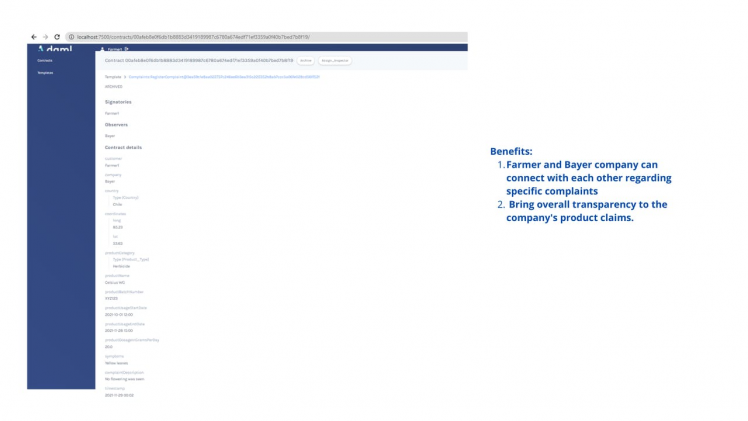
- Supports customer feedback, and complaints - Customers can communicate with the company regarding a specific product
- Can create a dynamic label that can be adjusted to cover important legal requirements like safety statements and product identification information
- Product traceability (localization and expected delivery date- information flow from farmer to customers)
- Provides product security, or anti-counterfeiting – Making sure that the product is not forged/Copied and is an original company product.
- Has flexible Data Model to support the different data inputs and maintenance, since we need to keep legal requirements data, label artwork models, product usage data, product data, security data, delivery data, etc.
- To build flexible and extensible data/information models that can handle vast and diverse information related to individual products.
Technology Overview:
MCU choice: Our application requires robust performance over a long time more than 6 months with minimum power consumption (here, focused on driving down cost, power consumption and size so 8bit MCU would be a great option too).
tinyML framework choice: Recently, explored the Neuton.ai platform and was blown away by the flexibility it provides for embedding huge ML models with lower memory footprints even on an 8bit MCU. The training is easy with greatly optimized C codes for MCUs.
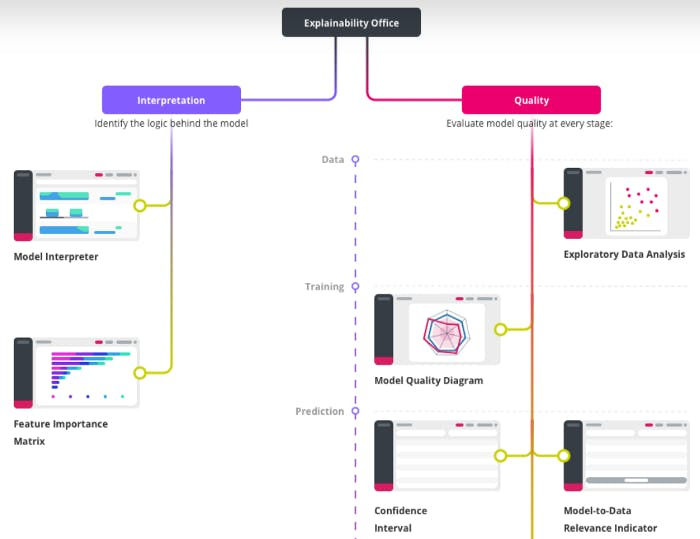
Neuton.ai offers various model explainability tools that allow users to evaluate the trained model quality and understand the cause of prediction for the inference data.
Blockchain framework choice: Daml.com idea is to abstract the key concepts of blockchains that allow them to provide consistency guarantees on distributed systems of record. Daml, a virtual shared ledger, governed by smart contracts, takes the place of a concrete blockchain. Adding this layer of abstraction allows Daml to realize a whole range of capabilities and advantages that are sorely lacking in individual blockchain and distributed ledger technologies.
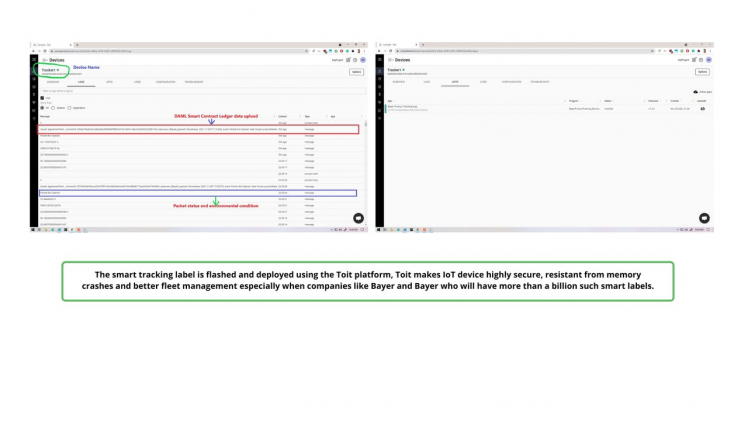
Fleet Monitoring: There are several reasons to consider this to allow better regulation of tracking devices. I have tried Golioth.io and Toit.io and both seem to be fantastic in terms of security and visibility but I will lean more towards C/C++ support. (I will work on this in future)
Let's start building:
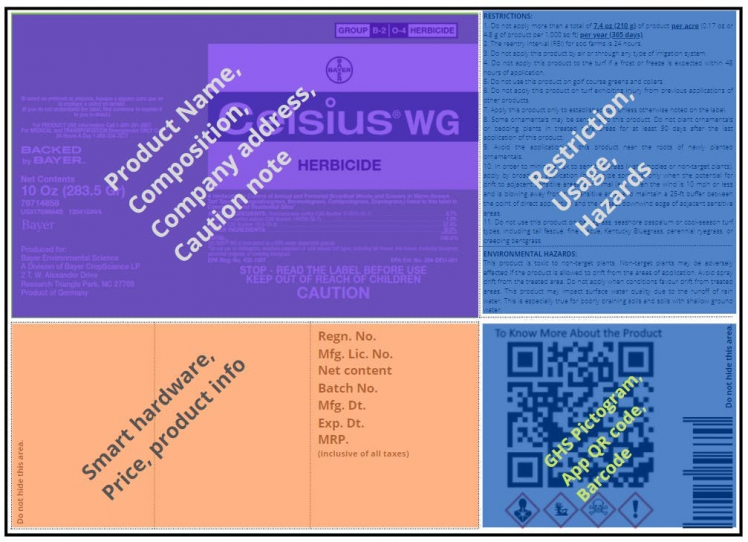
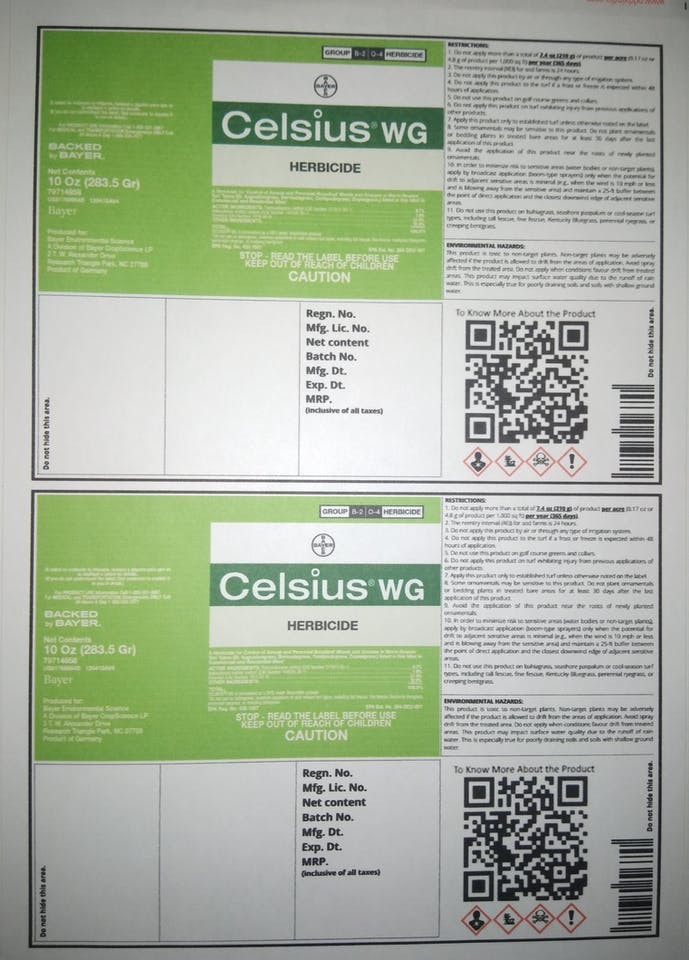
Below is what our label would look like and the essential data printed on it. It would only contain a battery, microprocessor, SIM, modem and antenna under its unassuming surface.
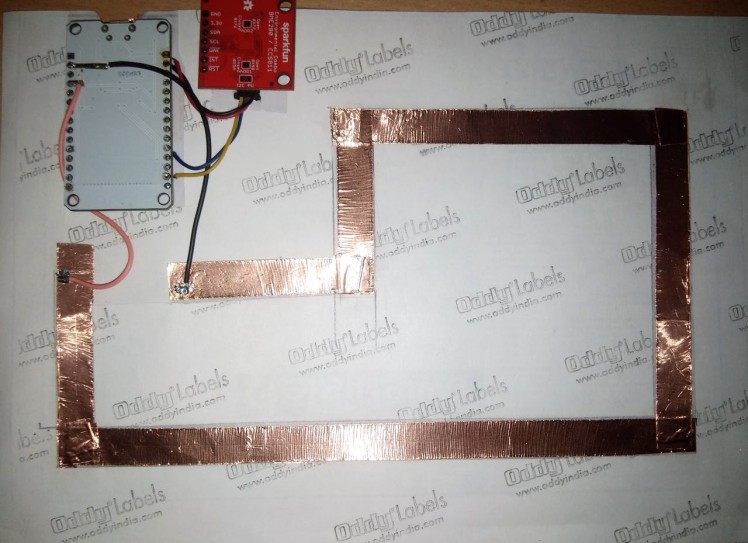
Here is the circuitry for the smart label, check all images below
1 / 5
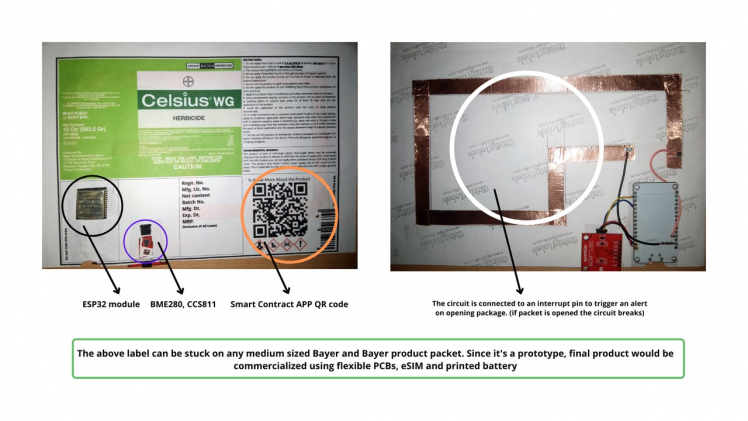

Required hardware: 250mAh battery which is thinnest which I could get around (although for idea usecase would require

Copper circuit which would break if packet is opened
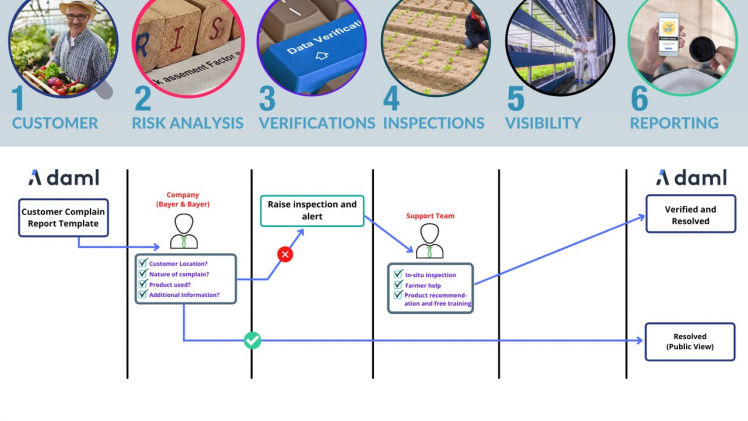
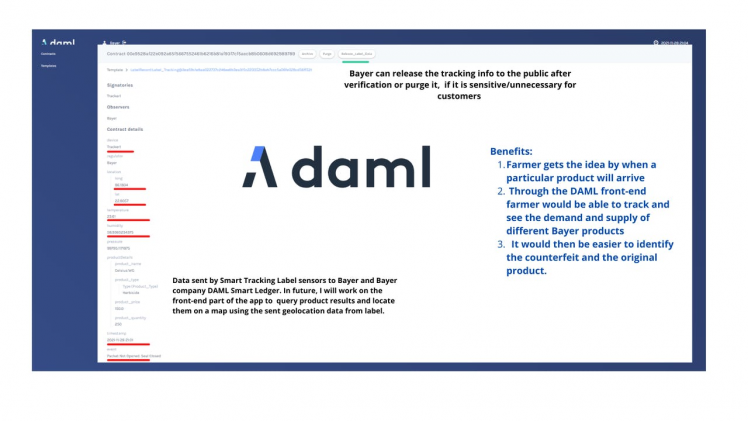
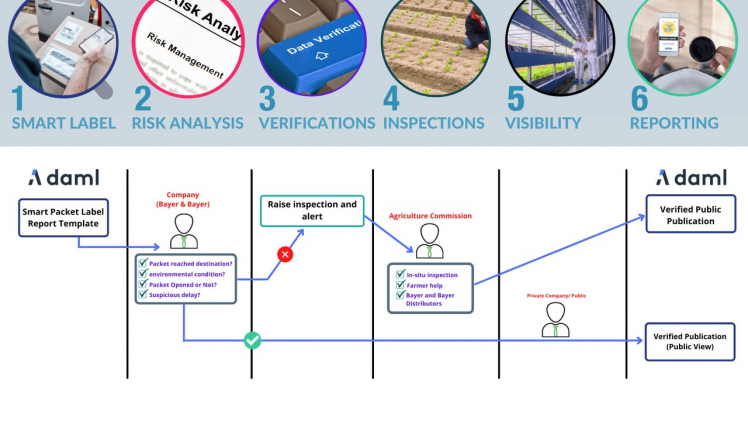
Testing DAML blockchain with our product (I used toit.io to test a use case for fleet monitoring and remote logging), check the below images for understanding our Blockchain ledger pipeline. With blockchain, we have selected visibility of immutable data which can be accessed under specific roles by scanning a QR code on the label. For DAML SDK installation details visit here, https://docs.daml.com/getting-started/installation.html
1 / 5
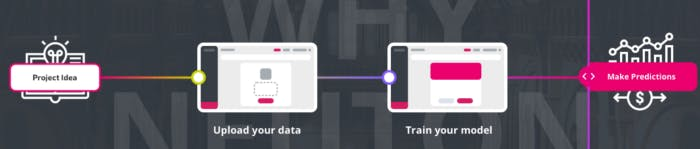
Building TinyML model for our smart labels in 3 steps:
Agro-based chemicals and products are always at risk to environmental conditions, our model should be able to classify normal and abnormal temperature conditions. Neuton.ai platform is very simple but powerful to build tinML models without any knowledge of AI and ML. Sign up for a free Gravity account and enjoy the benefits of the platform as mentioned on the website,

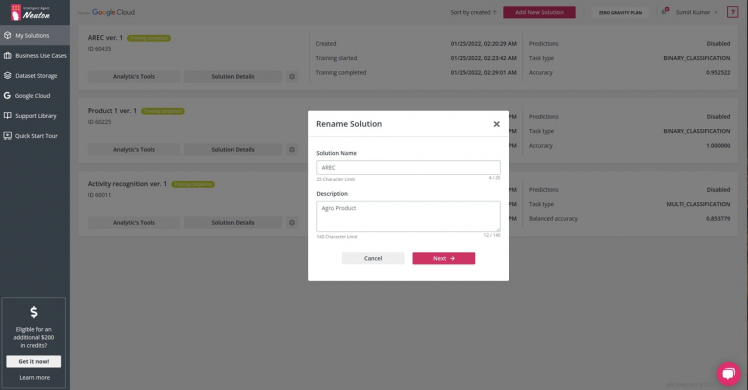
Step 1: Creating Solution and Adding Dataset:
Once you are on the Neuton labs page, click on Add New Solution button and give the name of your product, as I did here in the name field.
You will now be headed to the data uploading page (keep in mind only CSV format is accepted).
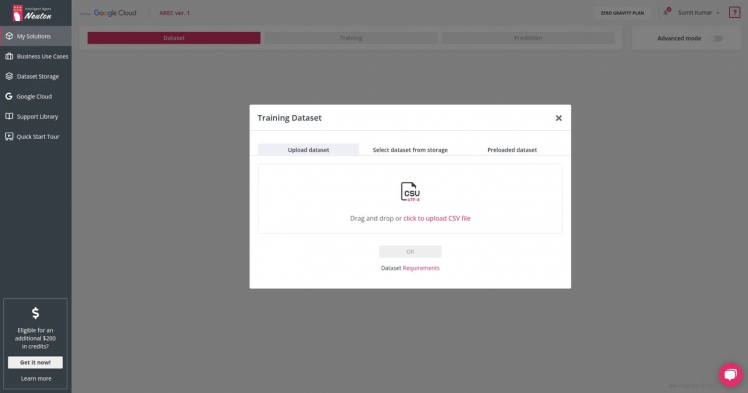
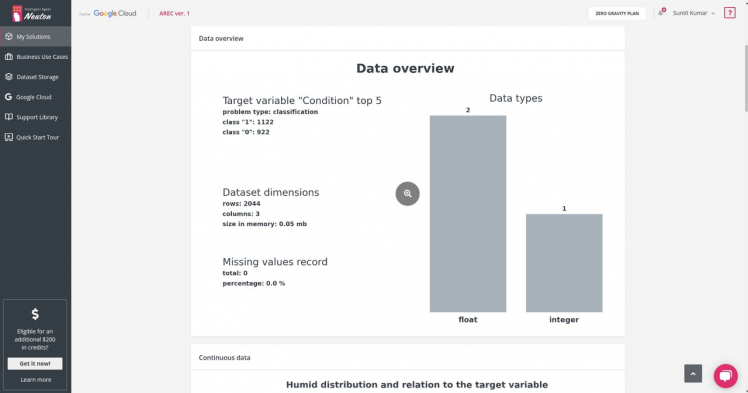
Once your data is uploaded you should be able to preview it,
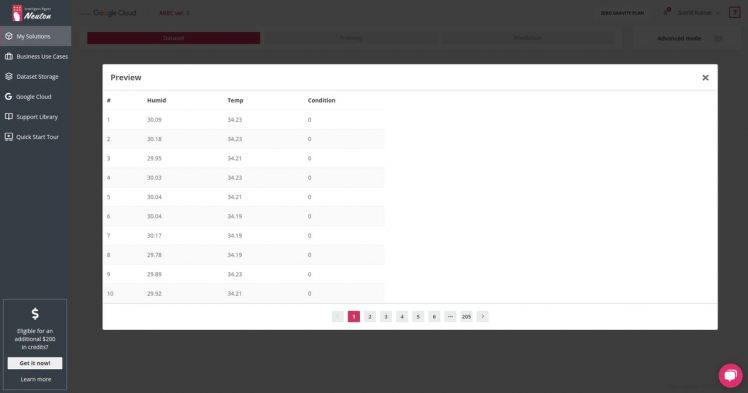
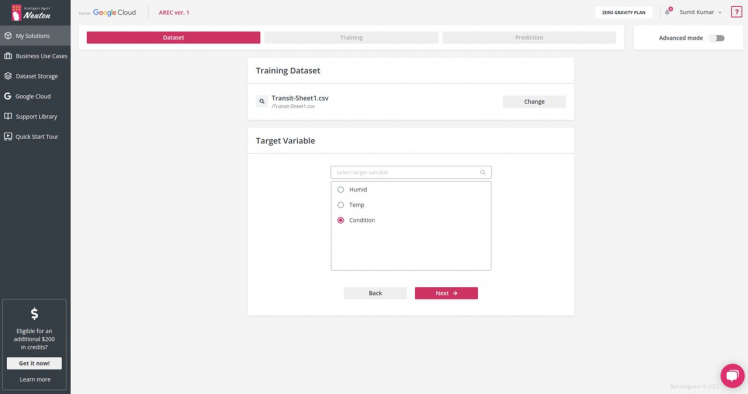
Select a target variable (The variable whose values are to be modelled and predicted by other variables. It is analogous to the dependent variable (i.e., the variable on the left of the equal sign). For our case, we have Condition as target variable - 0: Normal Condition 1: Abnormal Condition
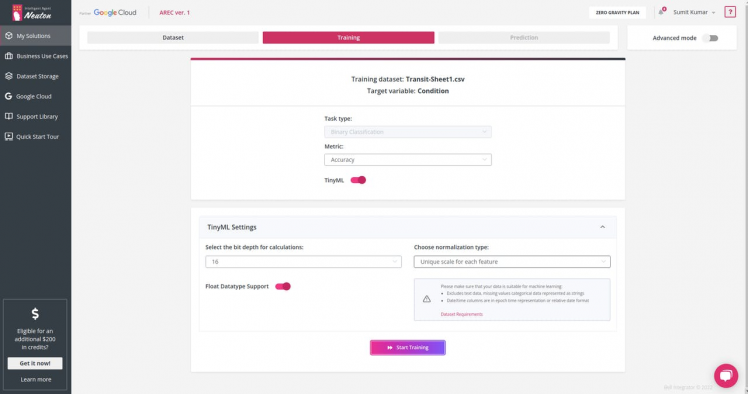
Step 2: TinyML model setting and Training
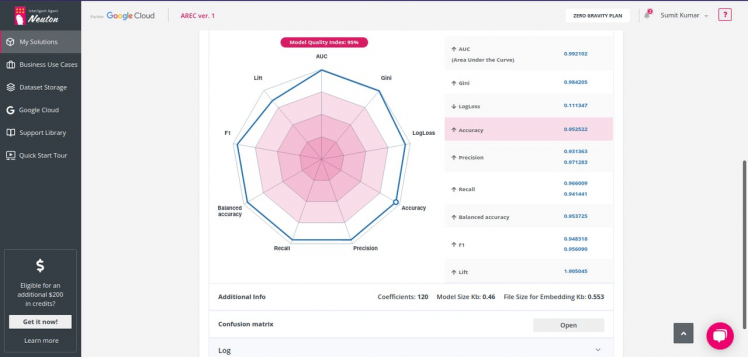
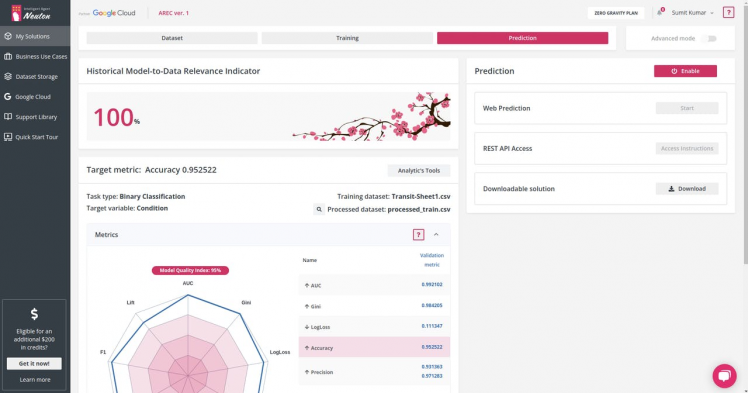
Choosing the Accuracy as a metric for our Binary Classification, and bit depth to 16 (lower bit depth would make your models smaller with minimum or no loss in accuracy). Click on Start Training Button
Training would take some time, but I like the feature added by the Neuton AI team to notify you when the training gets completed, through mobile SMS. Once the training is complete, we can explore our model behaviour,
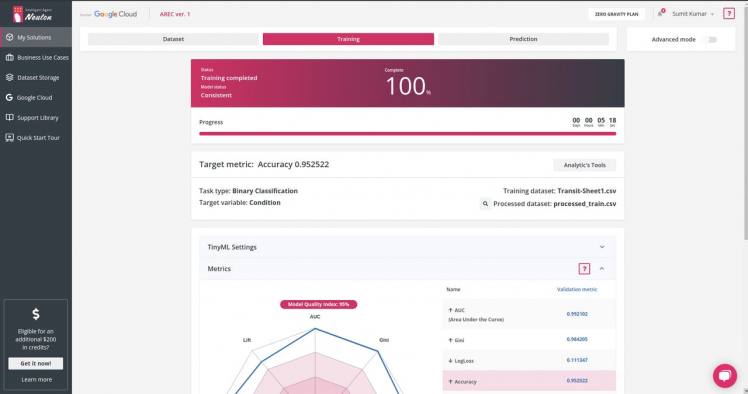
Our model has an accuracy of 0.952522 which is awesome at first Go! Click on Analytics Tools to get more info about our model. There are lots of Analytics and it depends upon the type of dataset and model you are building. Neuton team have provided excellent documentation for those new to all Metrics and Training visualization here: https://lab.neuton.ai/#/support_library/metrics
1 / 3
Our model has Coefficients: 120 Model Size Kb: 0.46 File Size for Embedding Kb: 0.553, pretty tiny and smart :)
Step 3: Make Predictions on MCUs
On Prediction Tab you would see Enable button, it is for Web prediction and prediction through REST API. For Embedded devices, click on the Download button.
Once downloaded, arrange the files into a structure like this
/Product
├── Product.ino
└── src    └── calculator        ├── model        │   └── model.c        ├── neuton        │   ├── calculator.c        │   ├── calculator.h        │   ├── neuton.c        │   └── neuton.h        ├── protocol.h        ├── user_app.c        └── user_app.h

4 directories, 9 files
The only modification we are going to do is in user_app and Product.ino files,
The Neuton calculator files have all necessary callbacks for data processing and inference, we will add our functions to refer to those callbacks. Add the below functions to user_app.c and their declarations in user_app.h files, rest of parts you can leave untouched.
uint8_t app_init()
{
    return (ERR_NO_ERROR != CalculatorInit(&neuralNet, NULL));
}

// call this to release NeuralNets
inline void app_nn_free()
{

    CalculatorFree(&neuralNet);
}

// test whether your model was loaded correctly on not
inline uint32_t app_model_size()
{
    return model_bin_len;
}

// test for model input size, it should be exact same as used while training // (except extra BIAS value)
inline uint32_t app_inputs_size()
{
    return neuralNet.inputsDim;
}

// test for output dimensions and task type- Binary or Regression
inline ModelInfo app_model_info()
{
    ModelInfo info;

    info.rowsCount = neuralNet.outputsDim;
    info.taskType = neuralNet.taskType;

    return info;
}

// call this functiom to run inference on sample data
inline float* app_run_inference(float* sample)
{
    return CalculatorRunInference(&neuralNet, sample);
}
Let's see our Arduino code file, firstly include all files which we are going to need to make callbacks to our own functions in files modified above,
#include <string.h>
#include "src/calculator/user_app.h"
#include "src/calculator/protocol.h"
#include "src/calculator/neuton/neuton.h"
#include <Wire.h>
#include "SparkFunBME280.h"

BME280 mySensor;
Let's initialize the structs declared in the protocol.h file,
static bool initialised = 0;

PerformanceReport report;
ModelInfo info;
To check whether our model loaded correctly into the flash memory or not,
initialised = app_init();  //call CalculatorInit function to laod Neural net
info = app_model_info();
Serial.print("Input size: ");
Serial.println(app_inputs_size());
report.ramUsage = NBytesAllocatedTotal();
report.flashUsage = app_model_size();
Serial.print("Flash usage: ");
Serial.print(report.flashUsage);
Serial.println(" bytes");  Serial.print("Ram usage: ");
Serial.print(report.ramUsage);  Serial.println(" bytes");  Serial.println("---------------------------------------------------");
delay(200);
Serial.println(info.rowsCount);
Serial.println(info.taskType);
Serial.println("---------------------------------------------------");
delay(500);
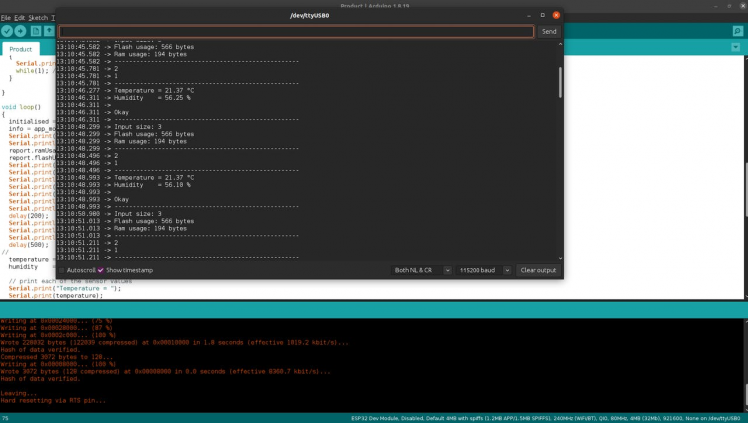
See columns are three: so our input size is three for the trained dataset

See columns are three: so our input size is three for the trained dataset
If you were successful in loading the model on flashing (flashed to ESP32) you should see model details like shown below, input size = 3, model size = 566bytes
Adding logic based upon tinyML model inference:
temperature = mySensor.readTempC();  humidity    = mySensor.readFloatHumidity();
  // print each of the sensor values  Serial.print("Temperature = ");  Serial.print(temperature);  Serial.println(" °C");
  Serial.print("Humidity    = ");  Serial.print(humidity);  Serial.println(" %");
  // print an empty line  Serial.println();
  float sample[3] = {    humidity,                //humid    temperature,             //temp    1.0,                     //bias  };
  //  float* result = app_run_inference(sample);
  float* value = result[0] >= result[1] ? &result[0] : &result[1];  if (*value > 0.5)  {    if (value == &result[0])    {      // 0 Normal      Serial.println("Okay");
    }    else    {      // 1 Abnormal      Serial.println("Bad Condition");    }  }  else  {    // unknown    Serial.println("Unknown");  }

  app_nn_free(); // call to free Neural nets
After placing my sensors near the room heater (simulating real-life scenario, agrochemicals exposed to high temperatures are very dangerous), see the result -
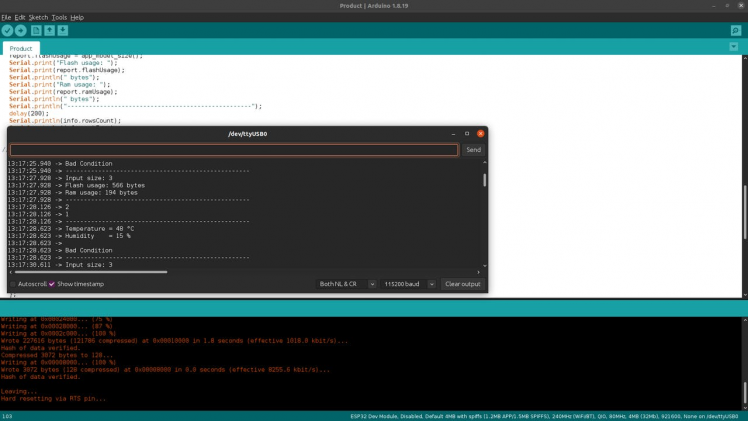
Tada! 🎉🎉 See I told you, it's easy and great to add TinyML behaviours to any innovative project and approach.
Check the code section for full source codes.
What cool and implementable can you try out with the Neuton.ai Platform?
- Using TinyML to predict freezing of gait (FoG) during walking tasks using gyro, acceleration sensors at the hip and leg of Parkinson's disease patients during walking tasks.
- Using TinyML for force and torque measurements on a robot for failure detection.
- Using TinyML to create regression models of appliances energy use in a low energy building.
- Using TinyML on Accelerometer and transdermal alcohol content data to predict heavy drinking episodes.
- and many more like this... (Keep this list growing in the comment box)
Source codes:
- Tested and working on ESP32 - https://github.com/vilaksh01/AREC-NeutonAI-ESP32
- Tested on Arduino Nano BLE 33 Sense Dev board - https://github.com/vilaksh01/AREC-NeutonAI-ArduinoNanoBLE33Sense
- DAML smart contract repo - https://github.com/vilaksh01/AREC