 Sagar 001
Hello guys, as you know I don’t have any 3d printer till now. So, I made my projects and 3d styled cases using PVC pipes. The cutting and molding of PVC can be done using heated knife or hot cutter. Heating a knife on gas stove or by electric nichrome wire is not recommended in this case.
That’s why induction technique come into play. An induction heater consists of an electromagnet and an electronic oscillator that passes a high-frequency alternating current (AC) through the electromagnet. The rapidly alternating magnetic field penetrates the object, generating electric currents inside the conductor, called eddy currents.
My idea:
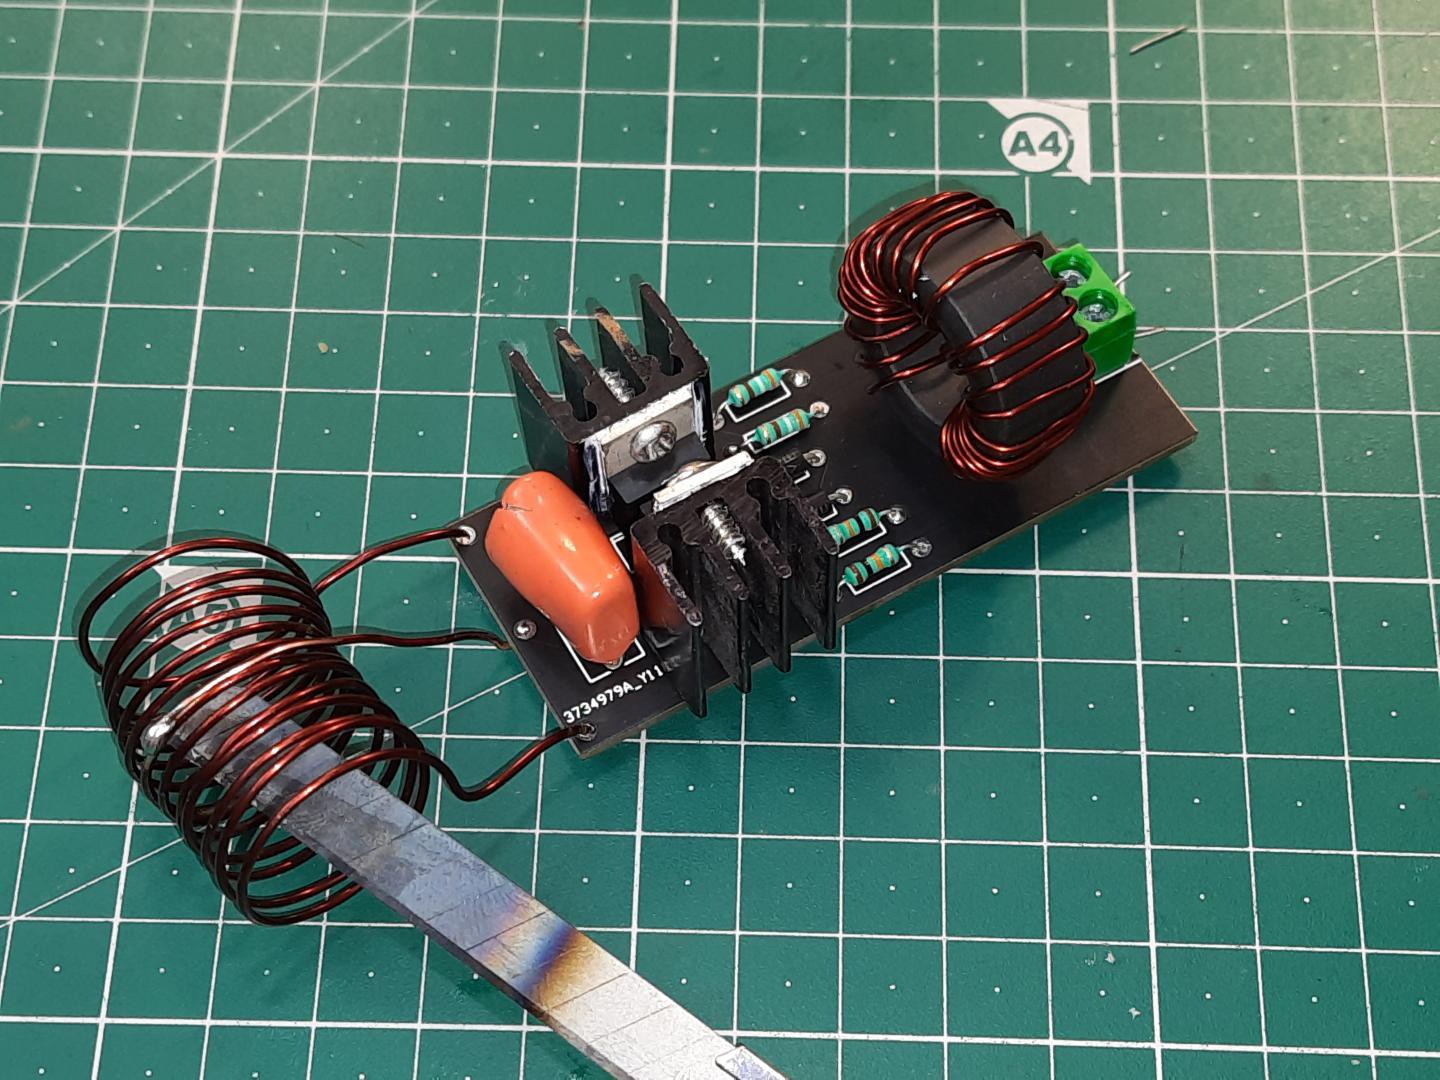
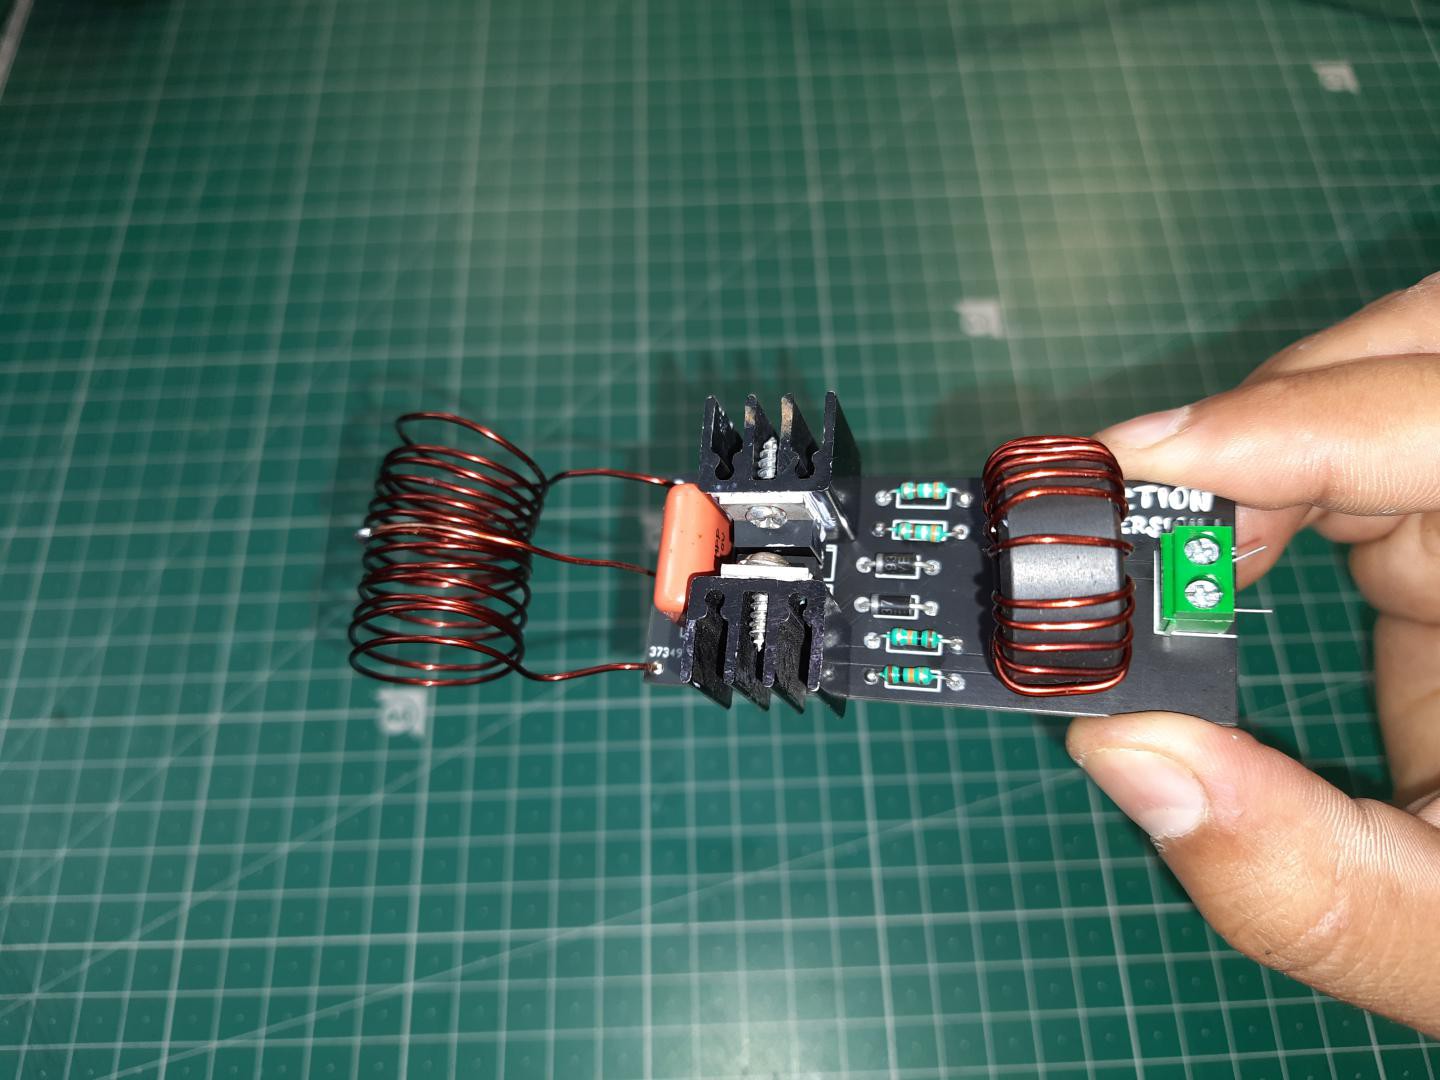
I want to build my own mini-induction heater for hot knife PVC cutting. You can see the commercial samples available on amazon and eBay. I will put my knife inside the coil and this will work fine for cutting plastic or PVC pipes. The main advantage is that it reduce the time of heating because induction can almost heat properly a small conductor (iron/steel) in 2 seconds @250degrees.
Then we will make a proper PCB prototype for this project and order that from our sponsor JLCPCB.
Components required:
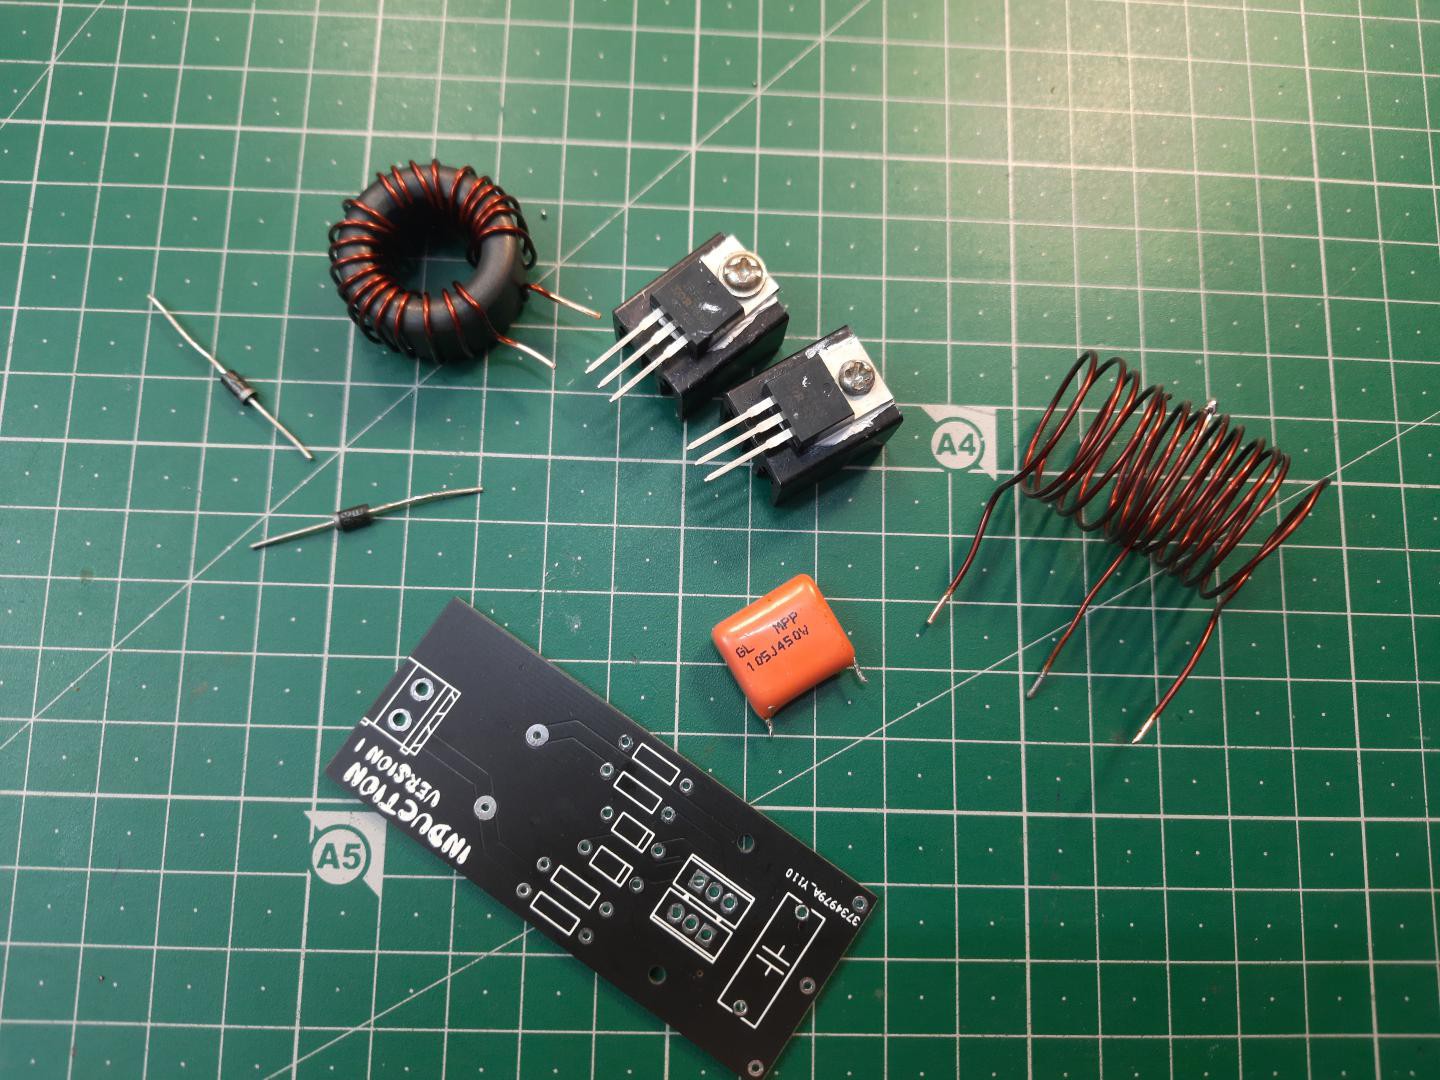
1) IRFZ44N
2) 10K resistor
3) 390ohms resistor
4) 105k capacitor
5) Toroidal Coil
6) Induction coil
7) Diodes fast switching
8) Screw terminals
9) 12v @10A power supply
10) Custom PCB( JLCPCB)
Circuit diagram:
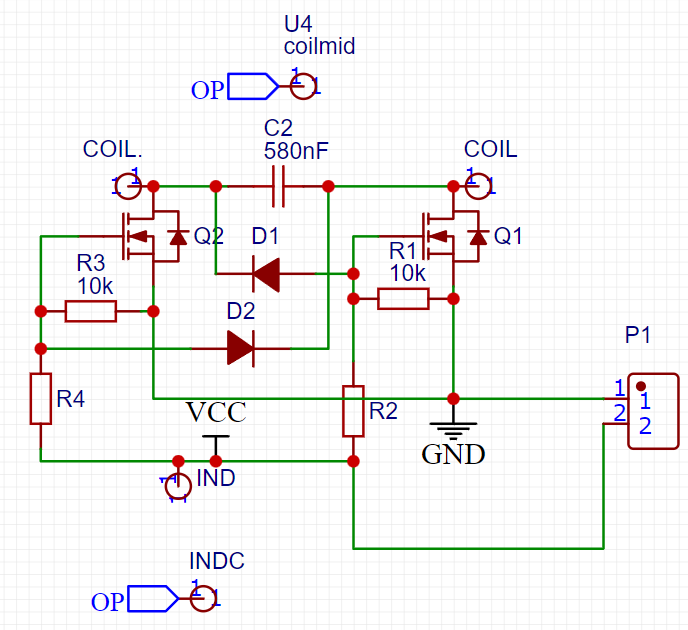
Circuit description:
This circuit consist of 2 Mosfet named as IRFZ44N, 10k resistor between the source and gate terminals of both Mosfets. Two fast switching diodes (by399 or anyone with same capabilities like 1N4937 ).Two 390 ohms resistor from positive terminal. And a big toroidal coil & 1uf polyester film capacitor as an oscillating circuit.
Making of Coils:
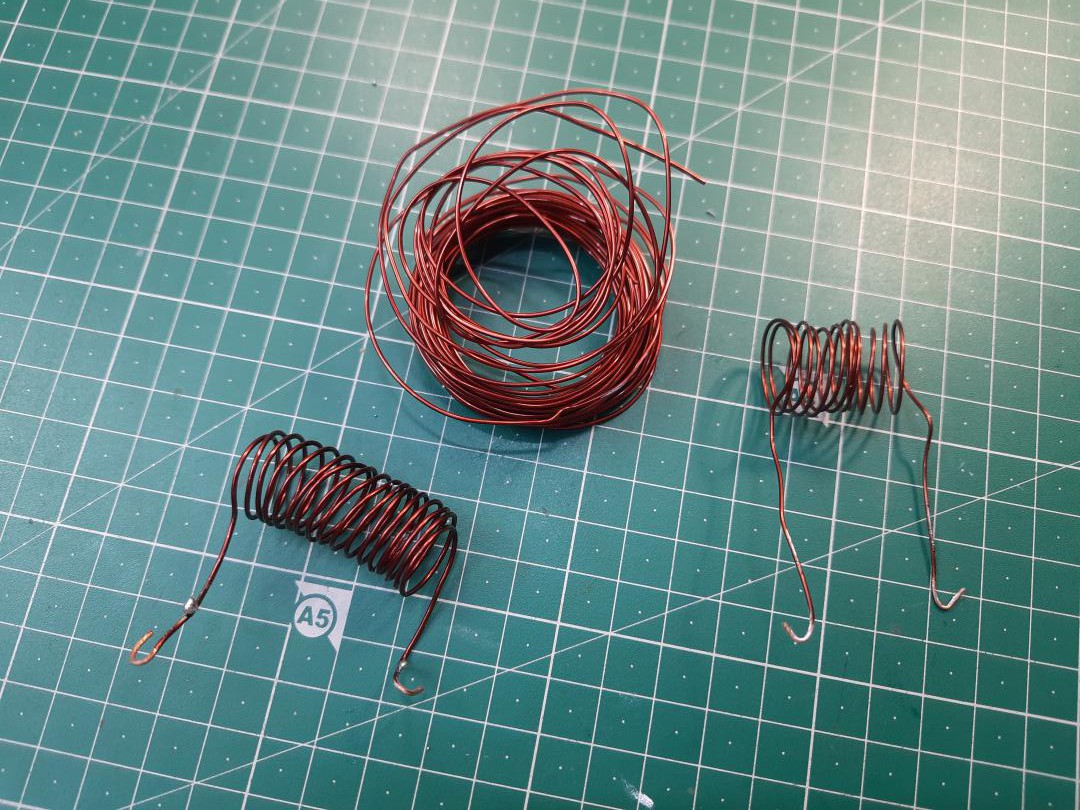
There are two types of coil used in this circuit, one is toroidal coil which is used with capacitor to produce oscillations. And other one is round hollow coil for induction. I tried with different coils with different number of turns and thickness. For making both the coils you can use 19SWG copper enameled wire. When going to the thin wire circuit will take less amount of current and produce less heat.
Torroidal coil making:
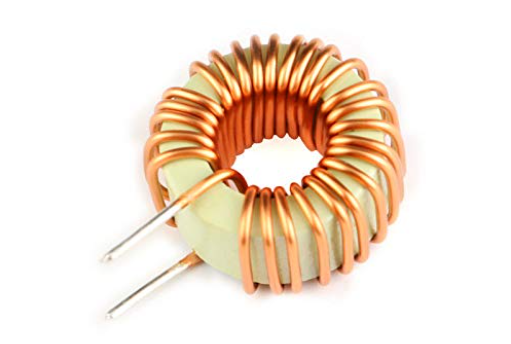
Just take a big ferrite core and round it up in clockwise 12-13 turns. I am using here 19 SWG wire with this ferrite core and which is giving me the inductance value of 12 milli-henry. Make sure to use copper enameled wire, instead of simple wire. You can rub the ends of coil with sandpaper so that it can be soldered easily in the circuit.
Making of Induction coil:
This is the same wire as used in toroidal coil, this time we are using 14 turns with a diameter of 2cm. As per rule of induction, we need two windings here. So the middle one is taken from the 7th turn of the coil.
Pcb layouts:
Download all the files regarding this project from here.
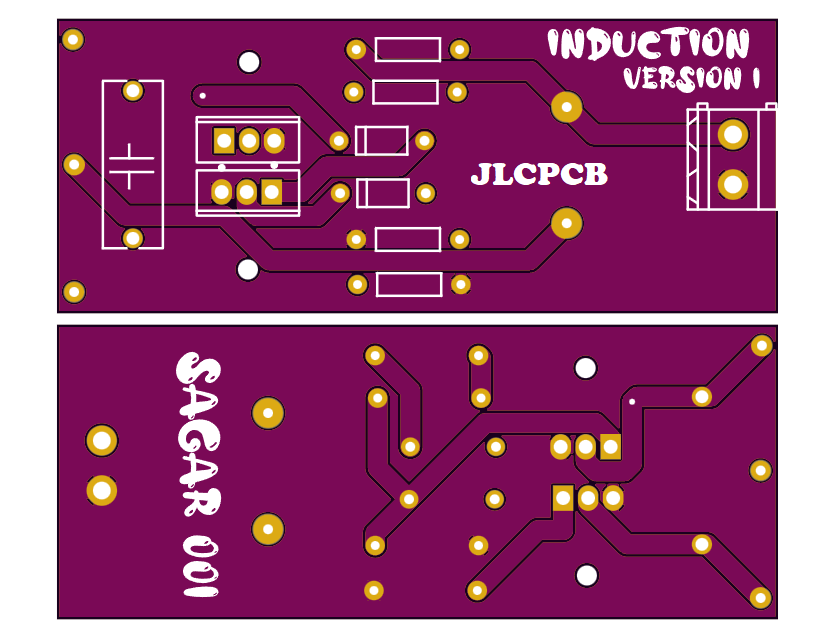
To make this design possible JLCPCB is the only PCB manufacturer providing greatest service in $2 for 5pcs of incredible multi color PCBs. So, I designed my circuit in EasyEDA and Ordered the PCBs from JLCPCB.

If you sign up using my link, you will get coupons of $27 for the next orders of PCB prototypes and assembly. And if you want to use my designs then Get them from my GITHUBpage here.
Video:
Some notes and components assembly, you can found in this video with proper working explained.
JLCPCB Ordering process:
Download all the files, then go to https://jlcpcb.com/SSRF using my link for extra rewards.

Upload the Gerber files, select color, thickness and finishing.
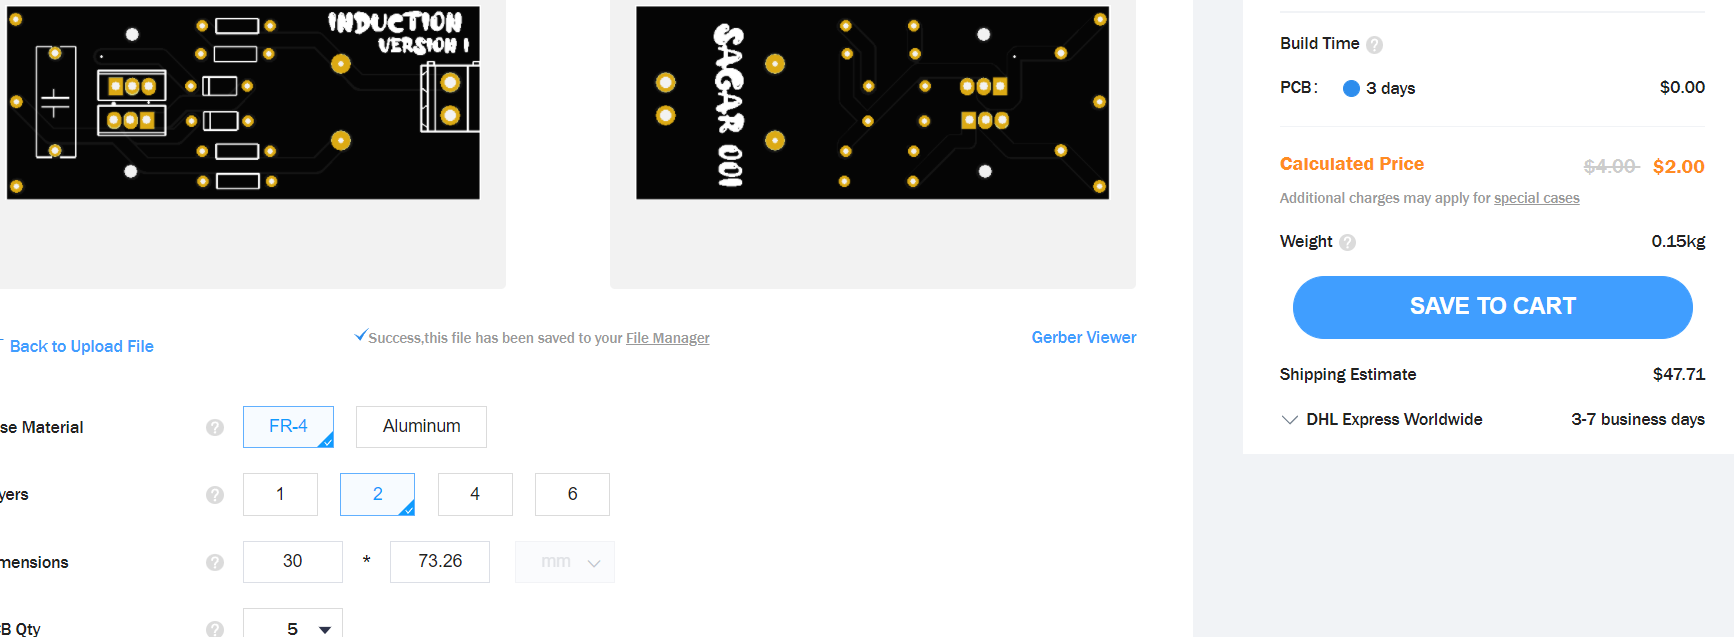
Add into cart and proceed with the order, use the applicable coupons.

Get your PCBs at home just in 7 days.
Working:

My design is working well on 12v @8ampere and generating a high frequency AC in output of electromagnet coil. If you want to know more about the Induction circuits the here is the Wikipedia link for you.
This circuit needs a constant power supply of 8 ampere so a 12v 10amp SMPS is compulsory for that. If you are using linear power supply then use big filter capacitor and 10ampere rectifier as per demands.
Conclusion:
This project is practical stable and can go for commercial purpose after some changes in the circuitry. For this now you have to use a high voltage capacitor between the ends. And please avoid any low value because this may explode or cause burning of capacitor. For now it is enough to do some low-end tasks like PVC cutting but not made for cooking or anything similar for long time usage.