 cafelizardo
2014 - Birth Of A Game Cabinet
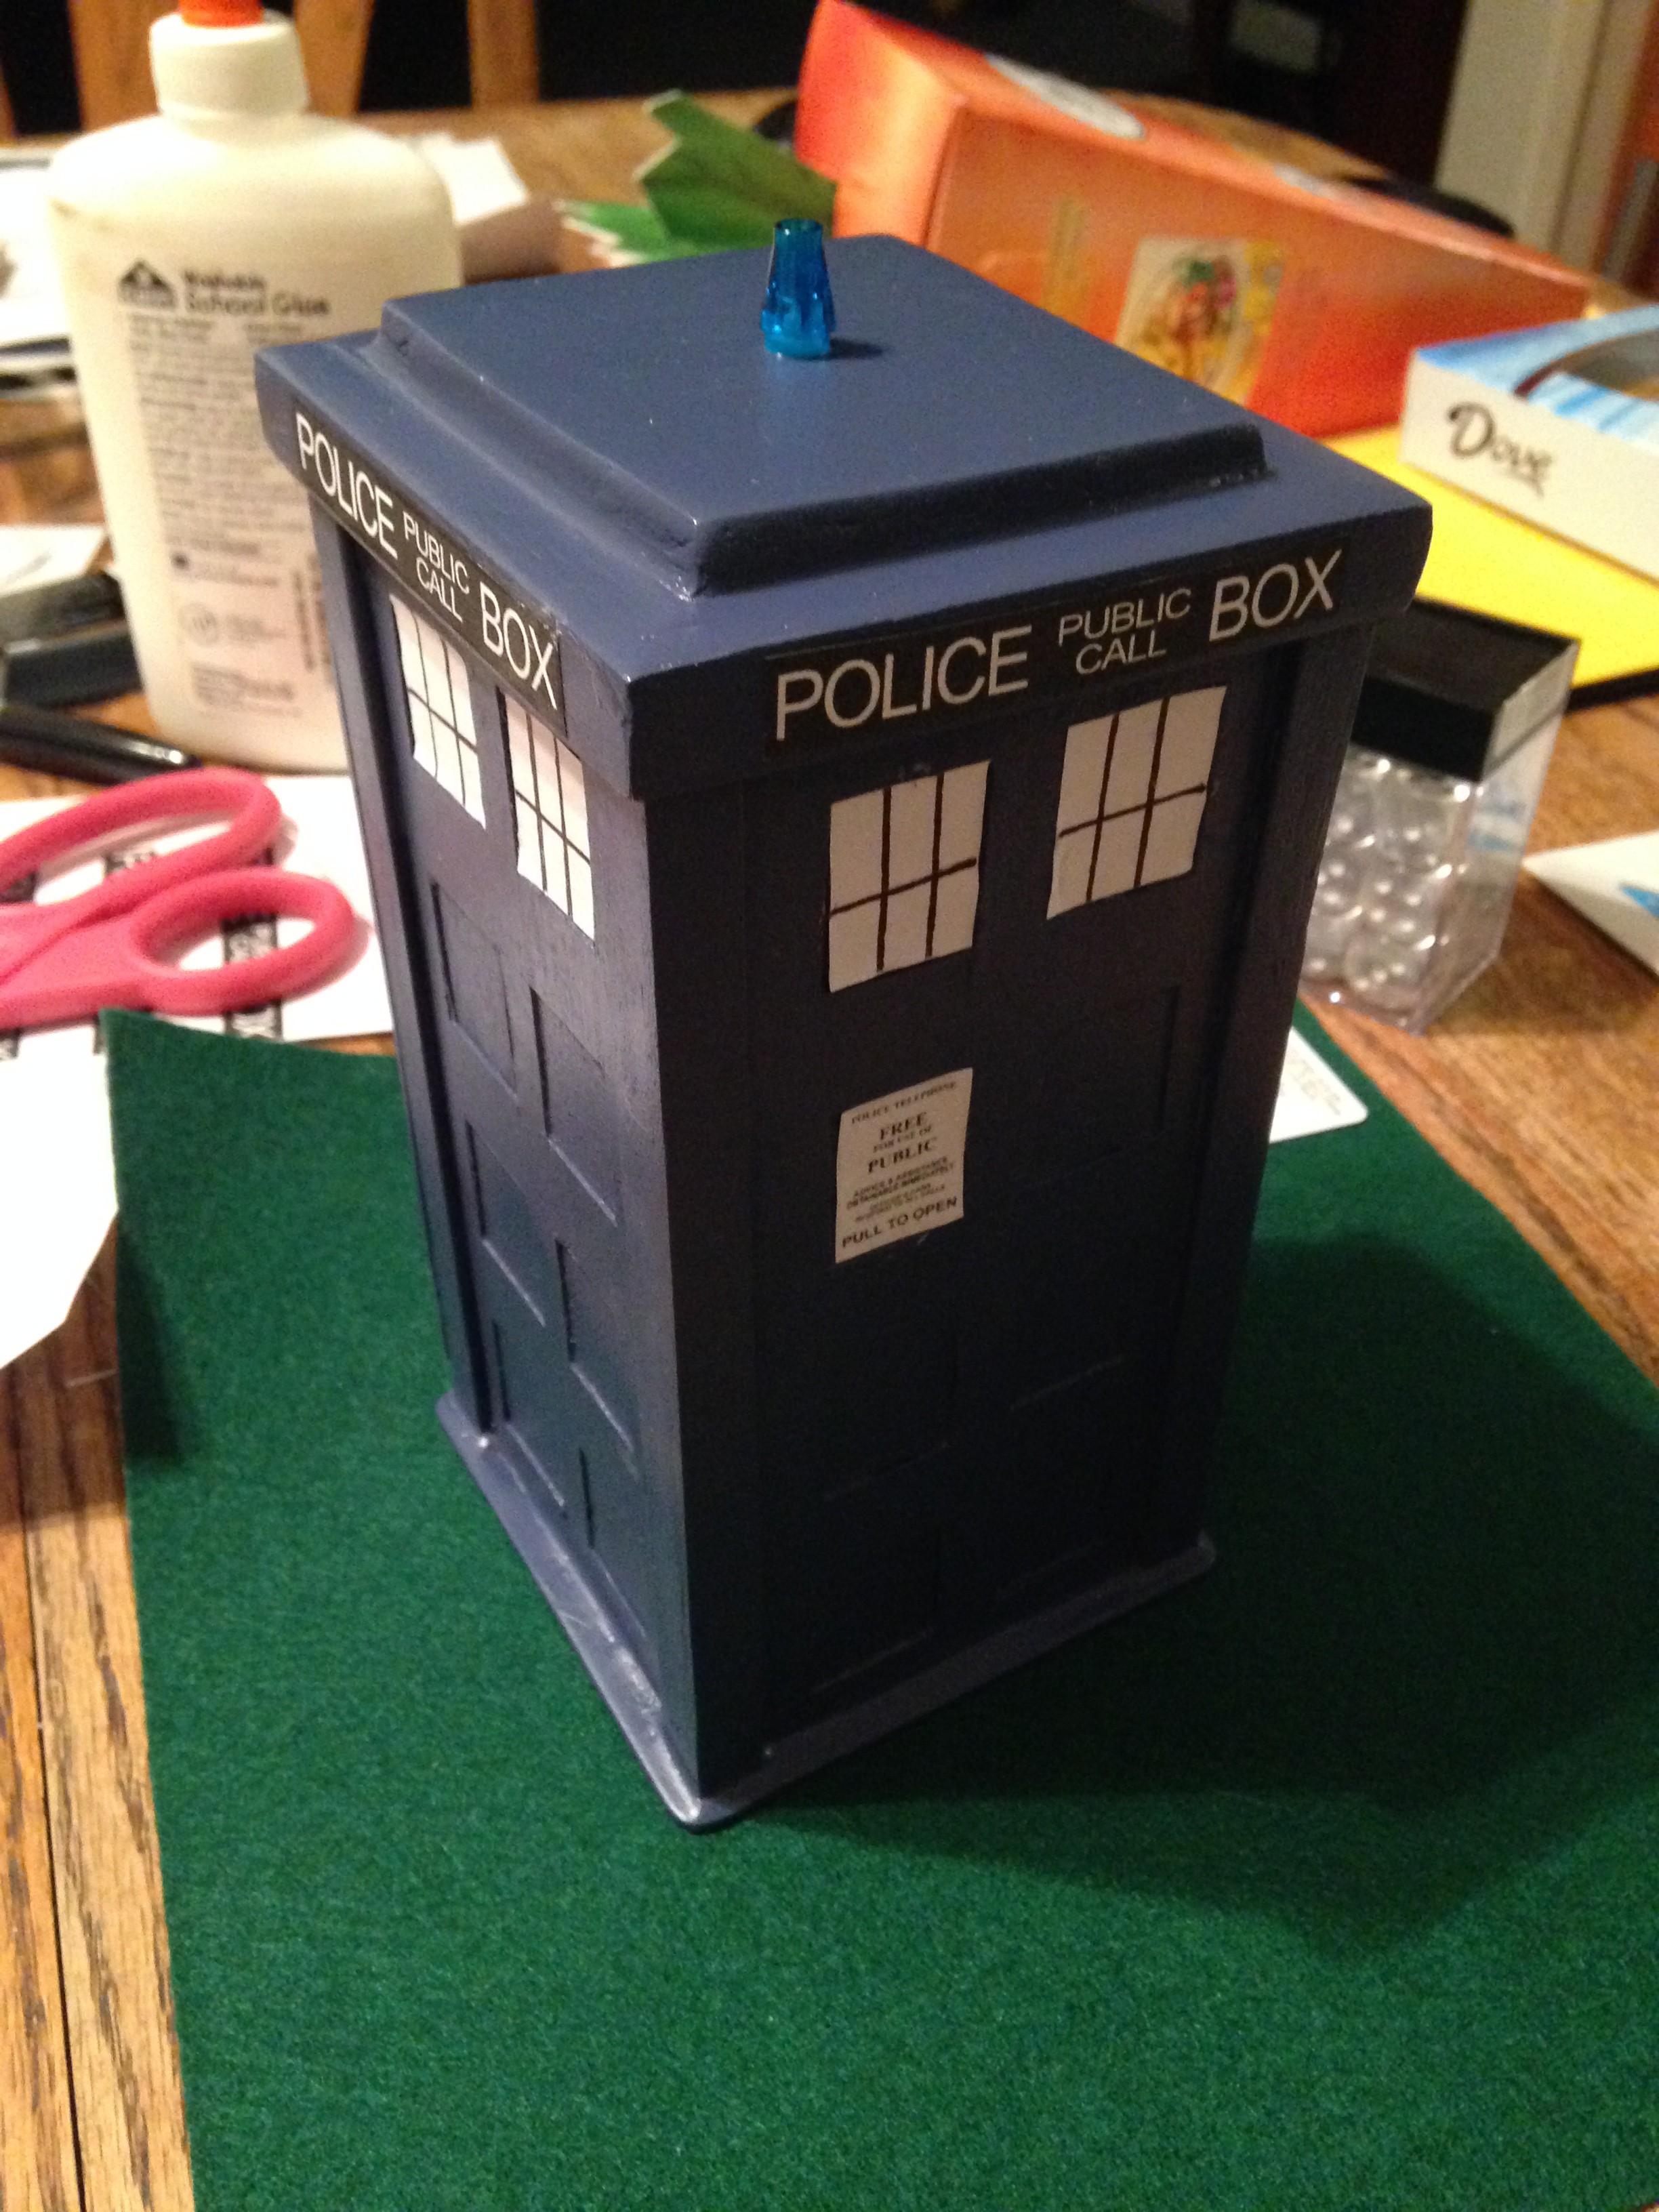
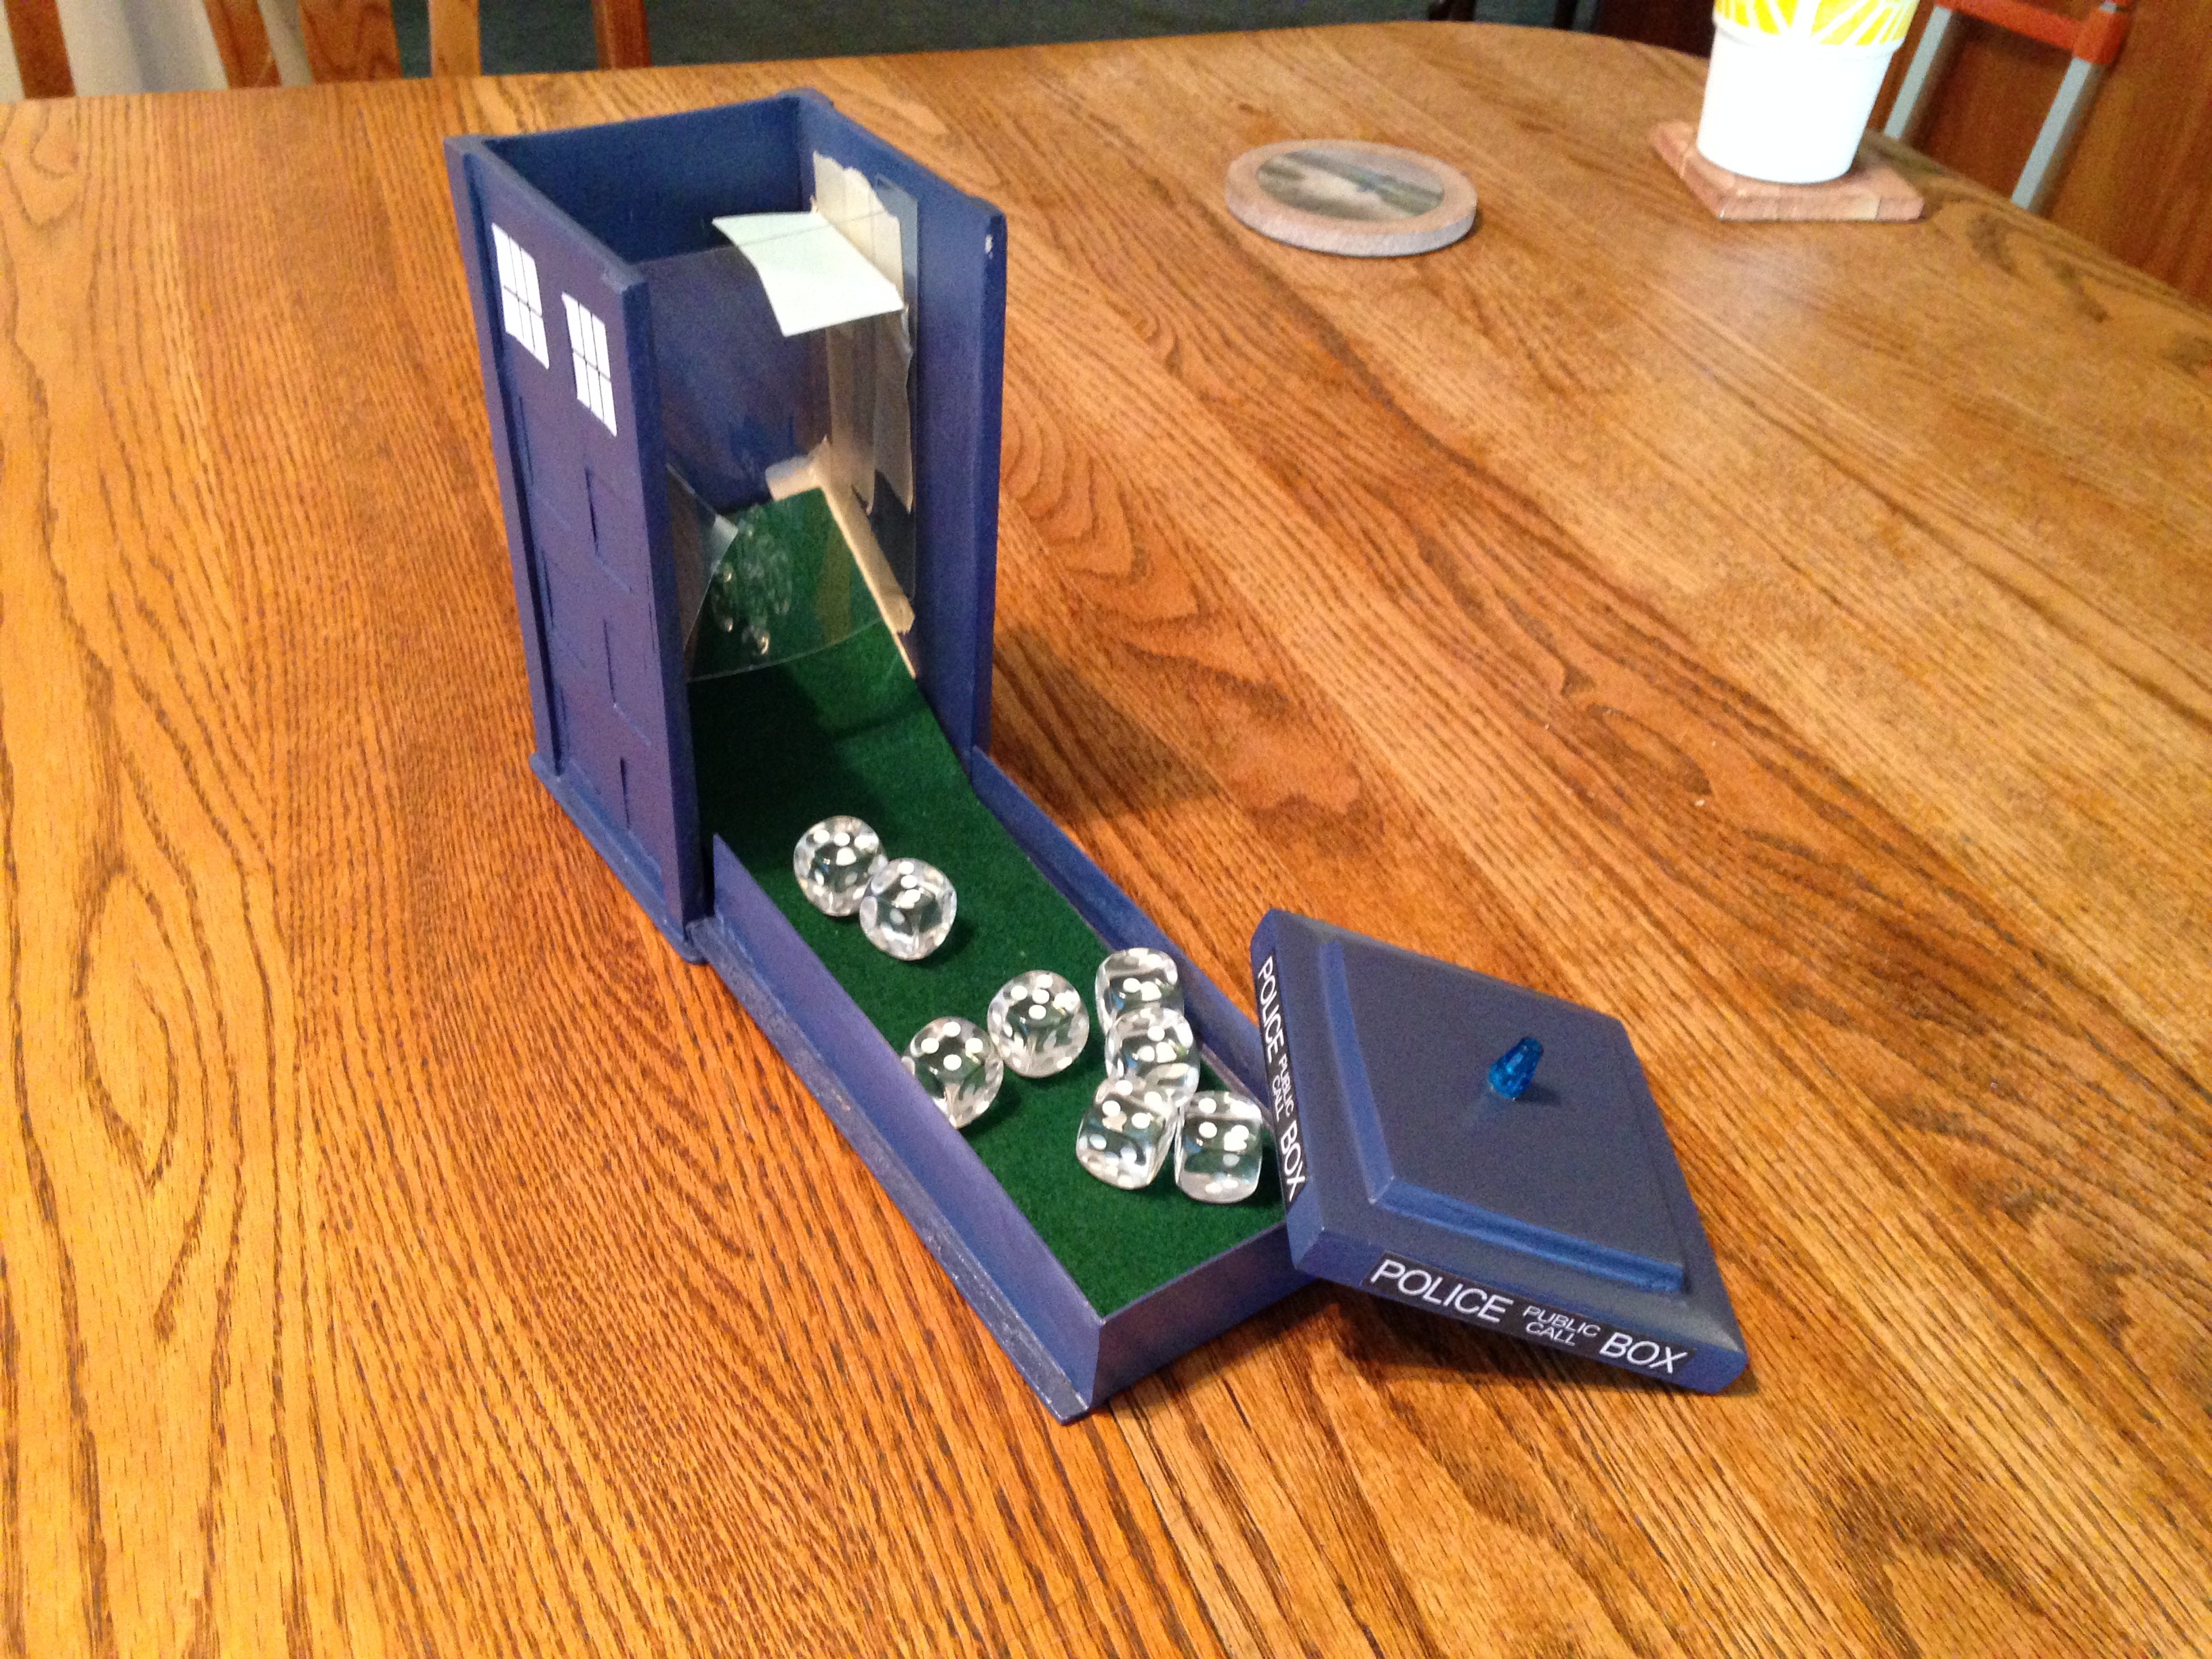
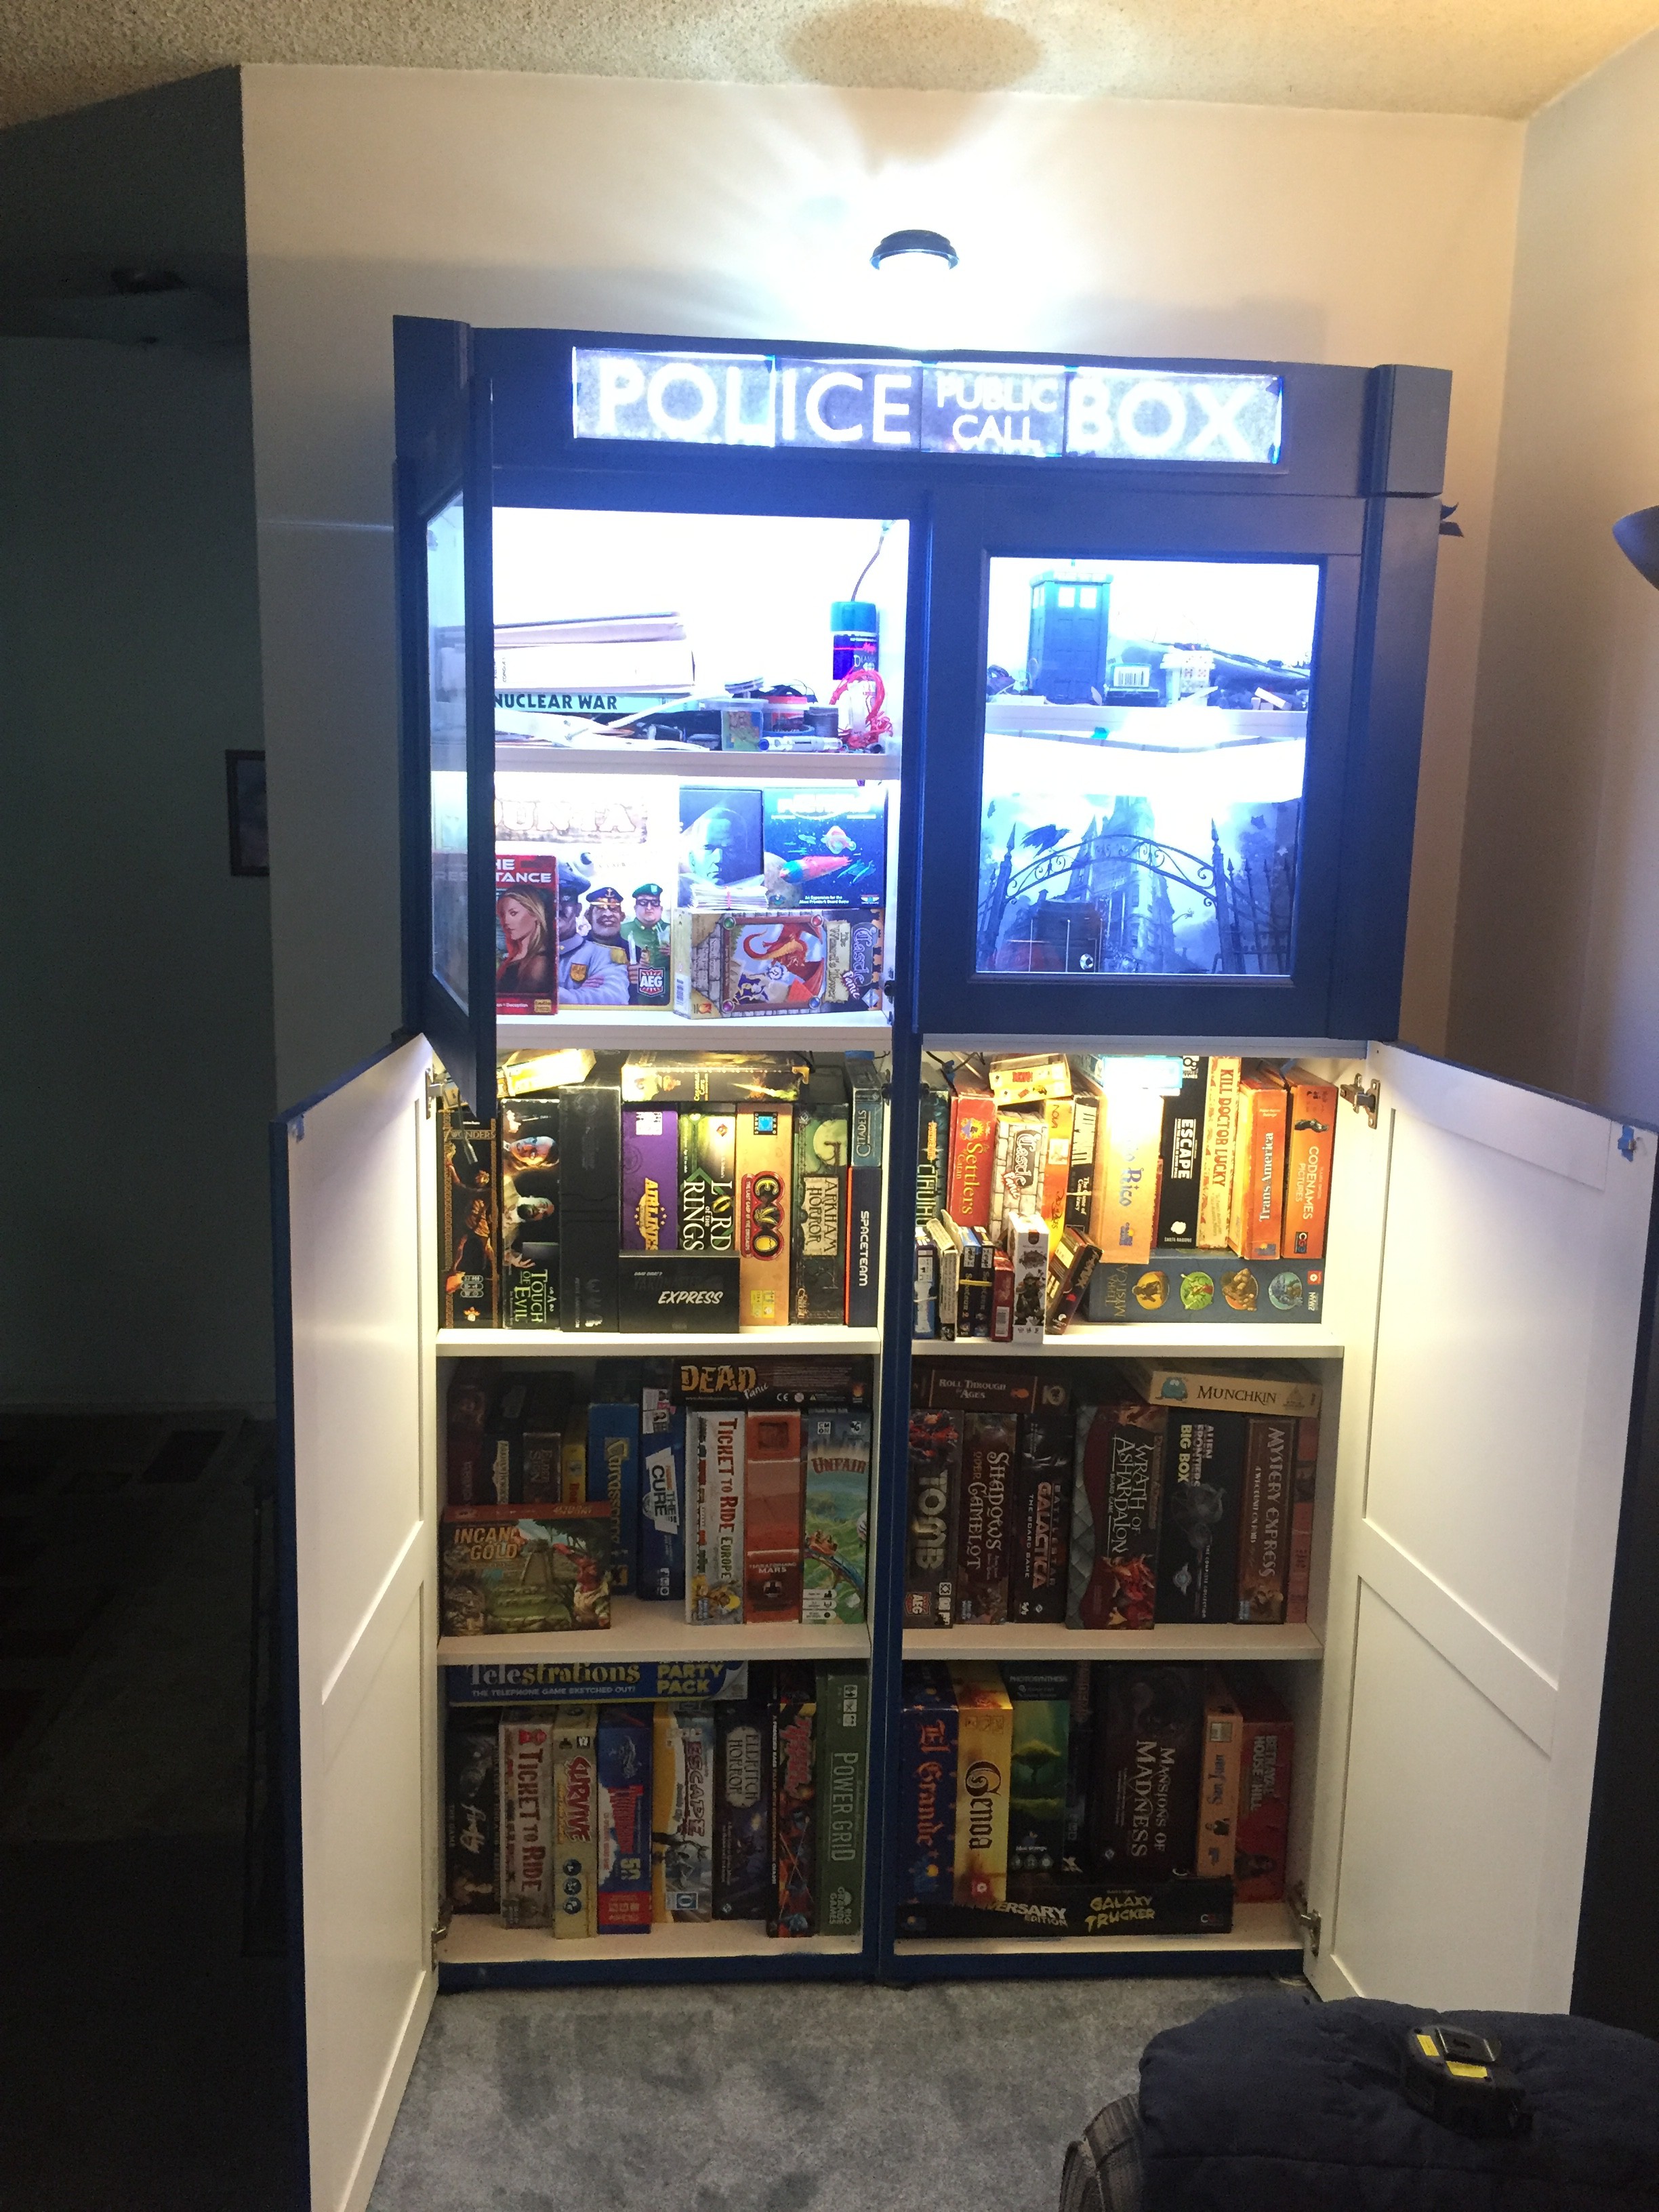
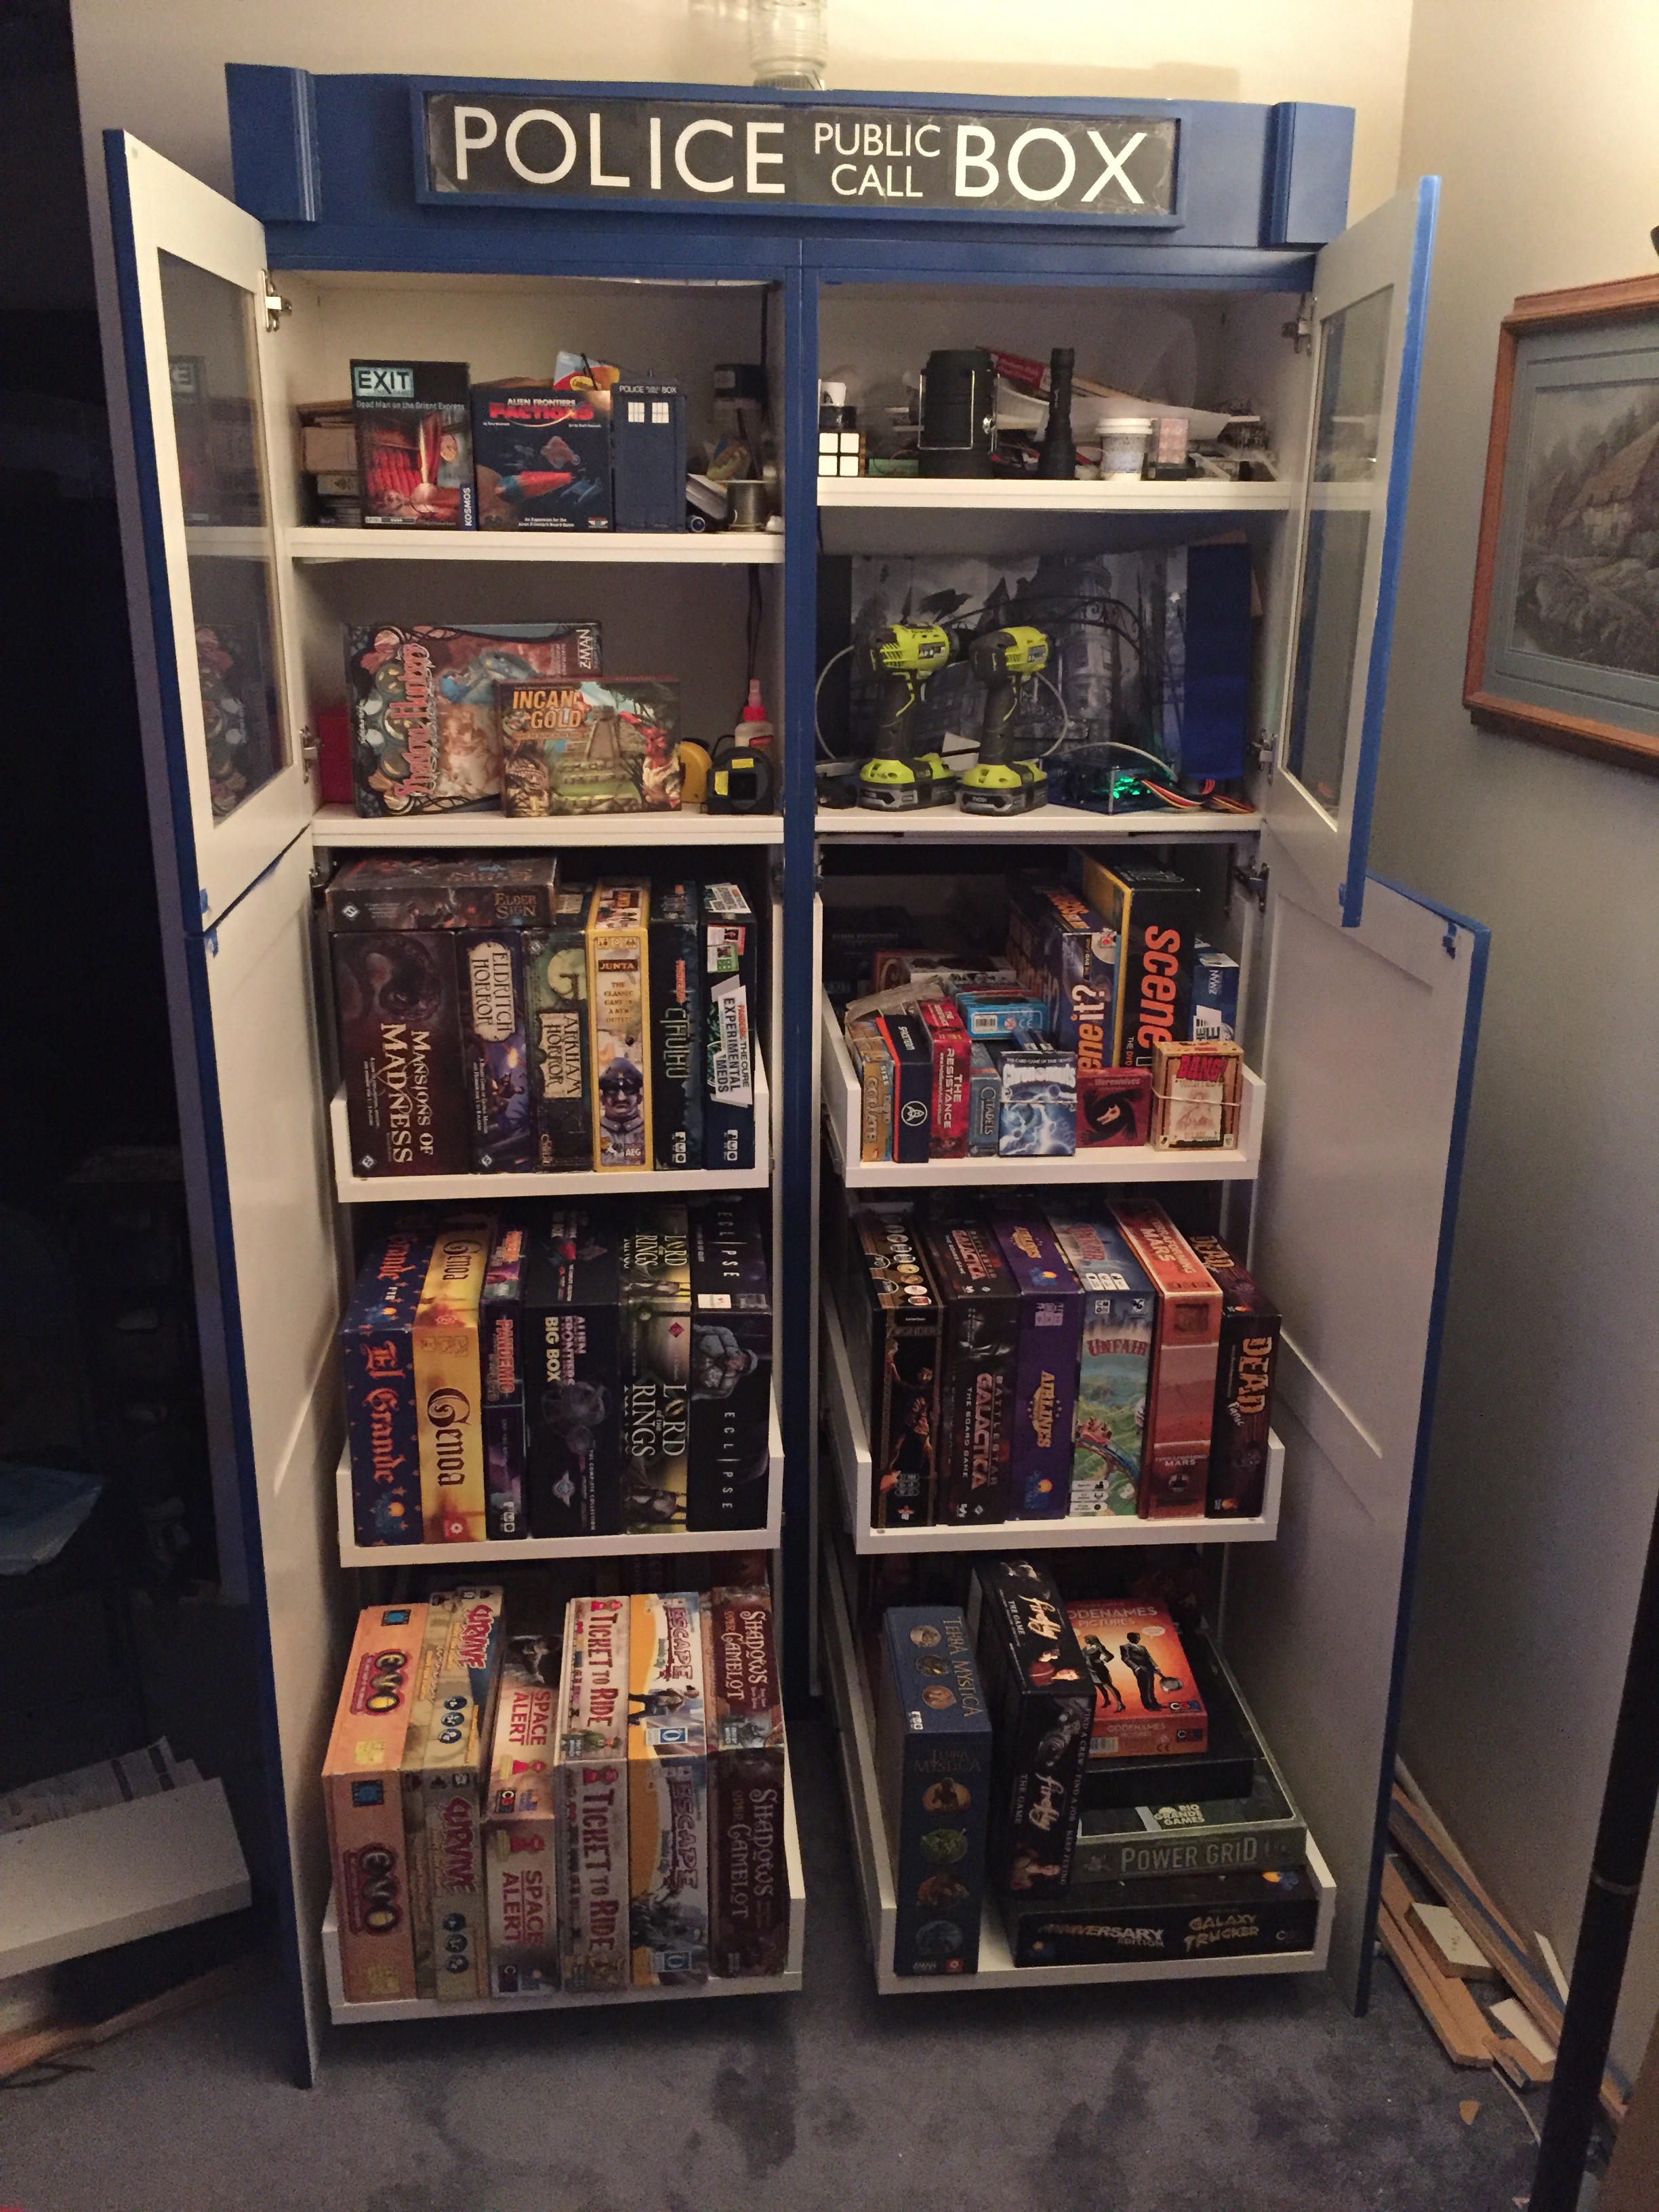
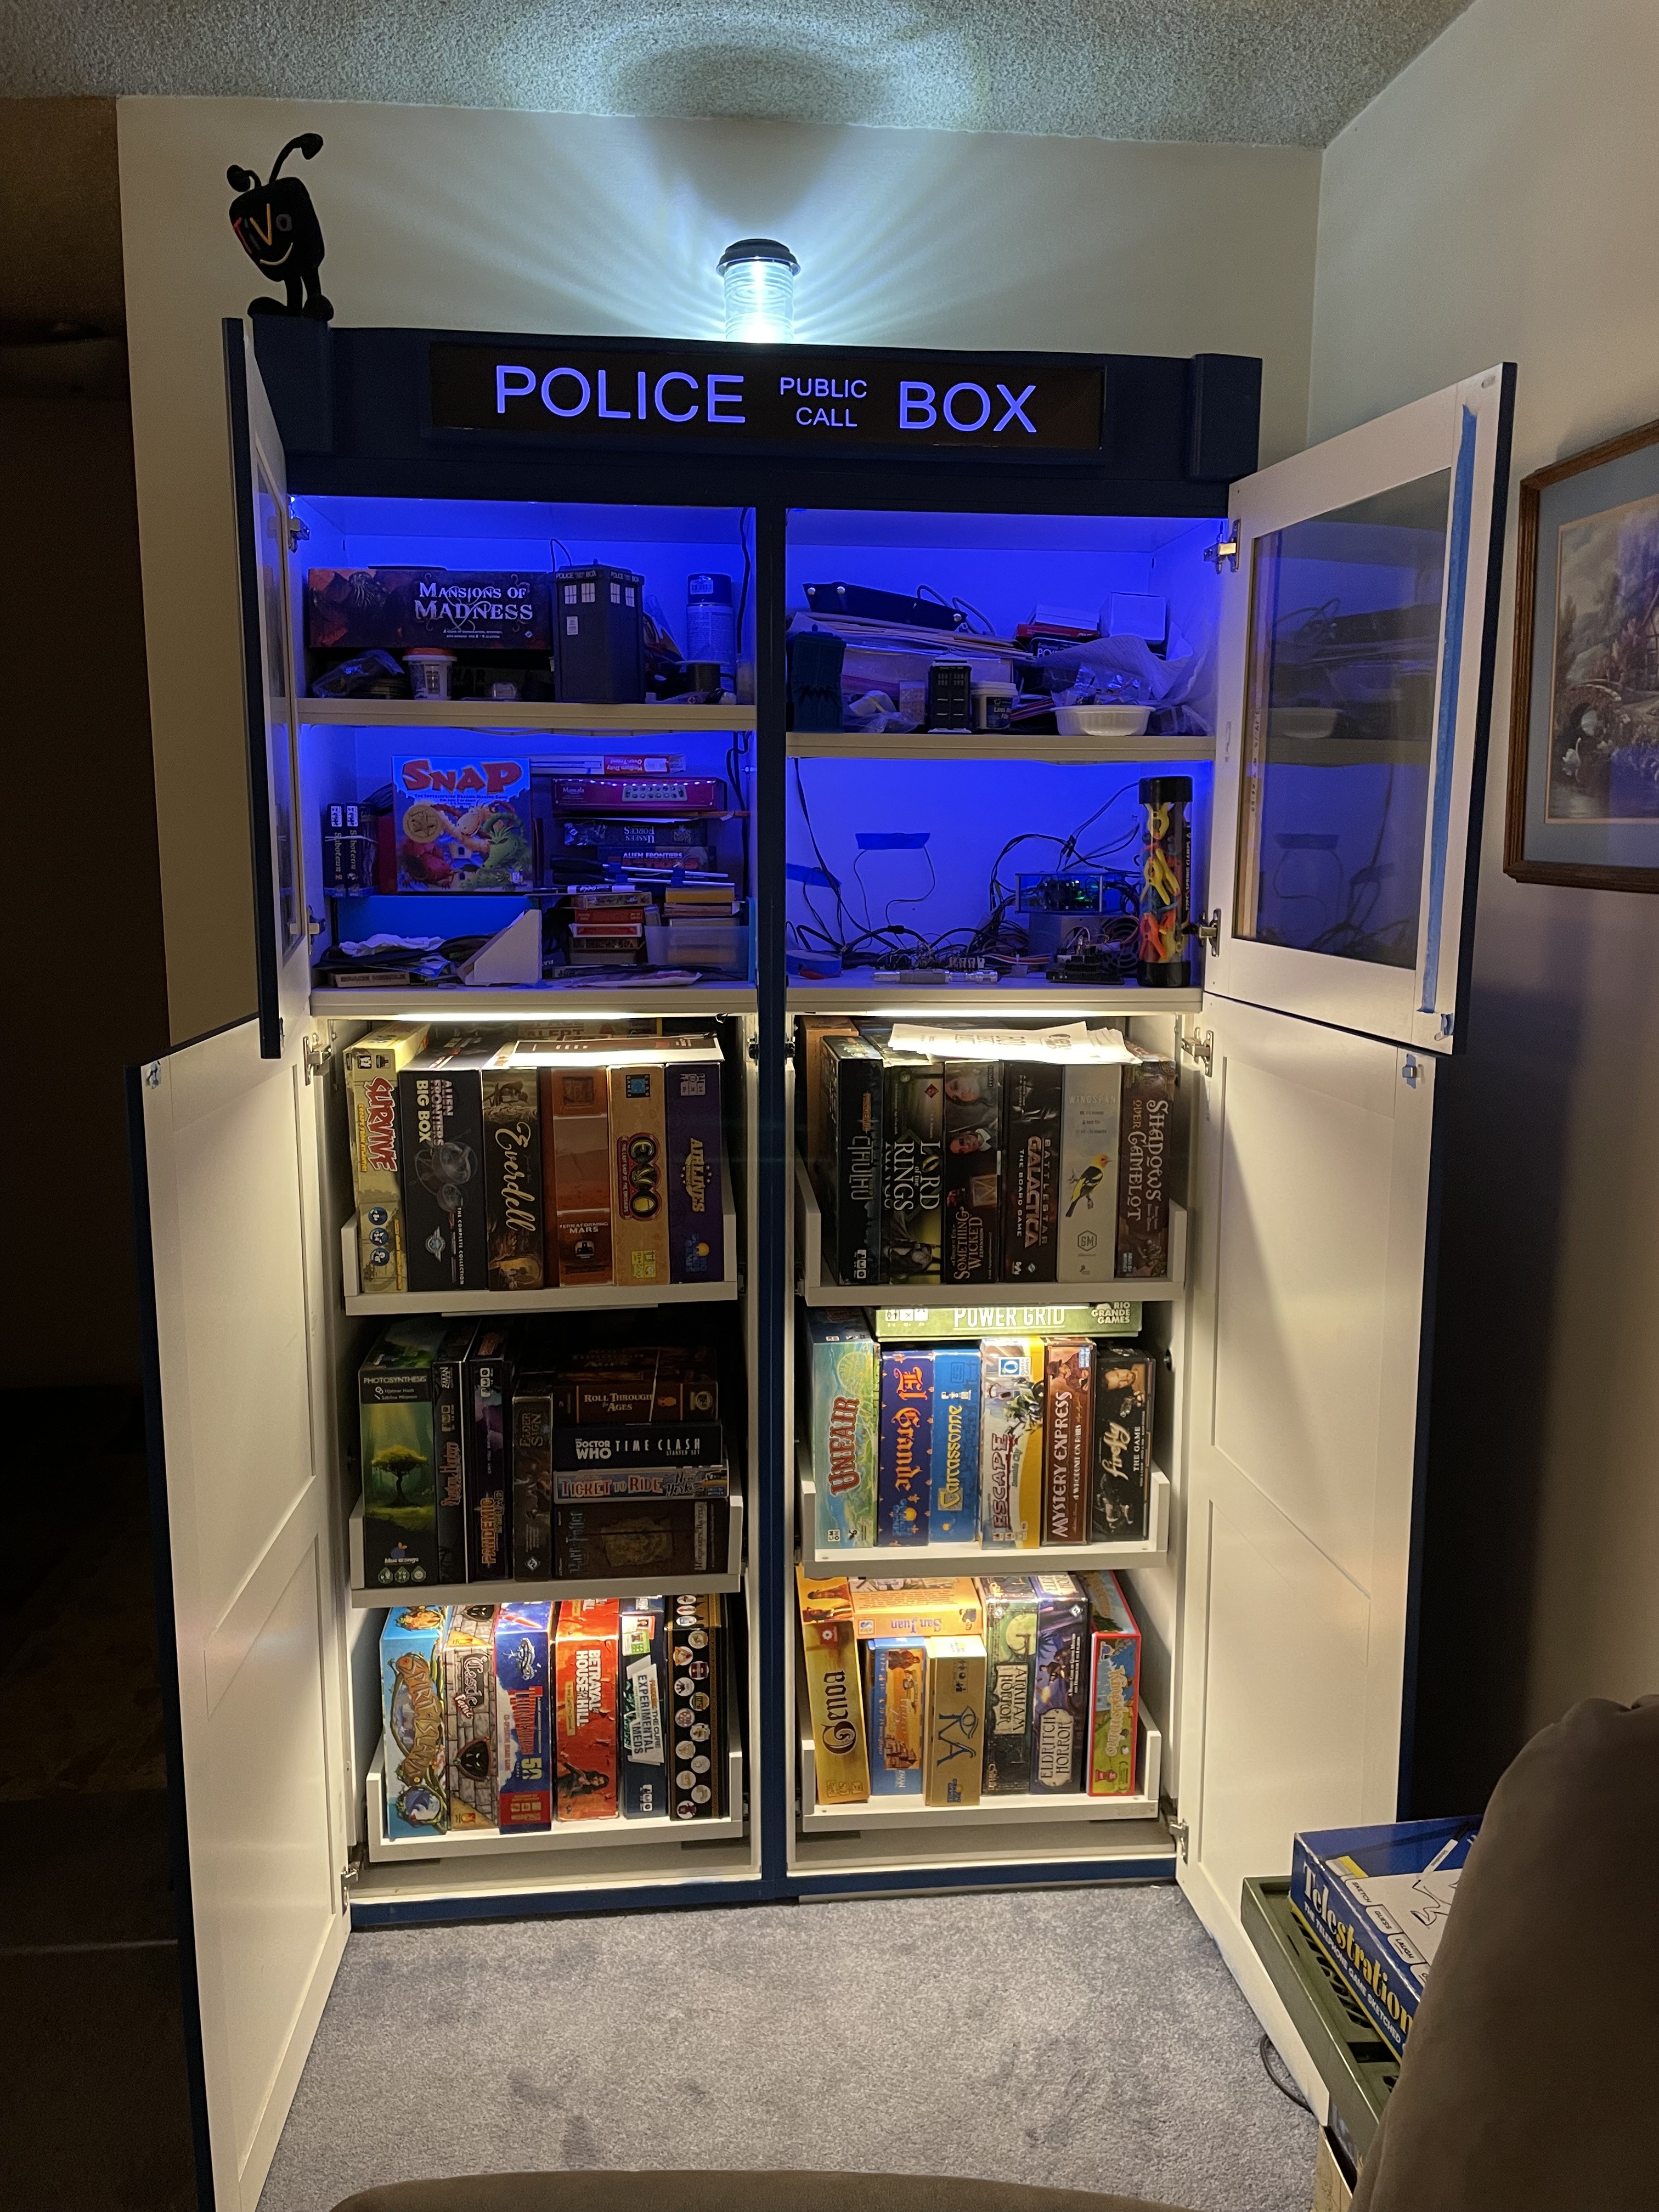
Our game collection was stored in various milk crates and other storage chests throughout the house. My wife suggested shopping around for a tall cabinet and after looking around I started to get an idea. I had made a TARDIS themed dice tower and thought we could do something similar.
 |  |
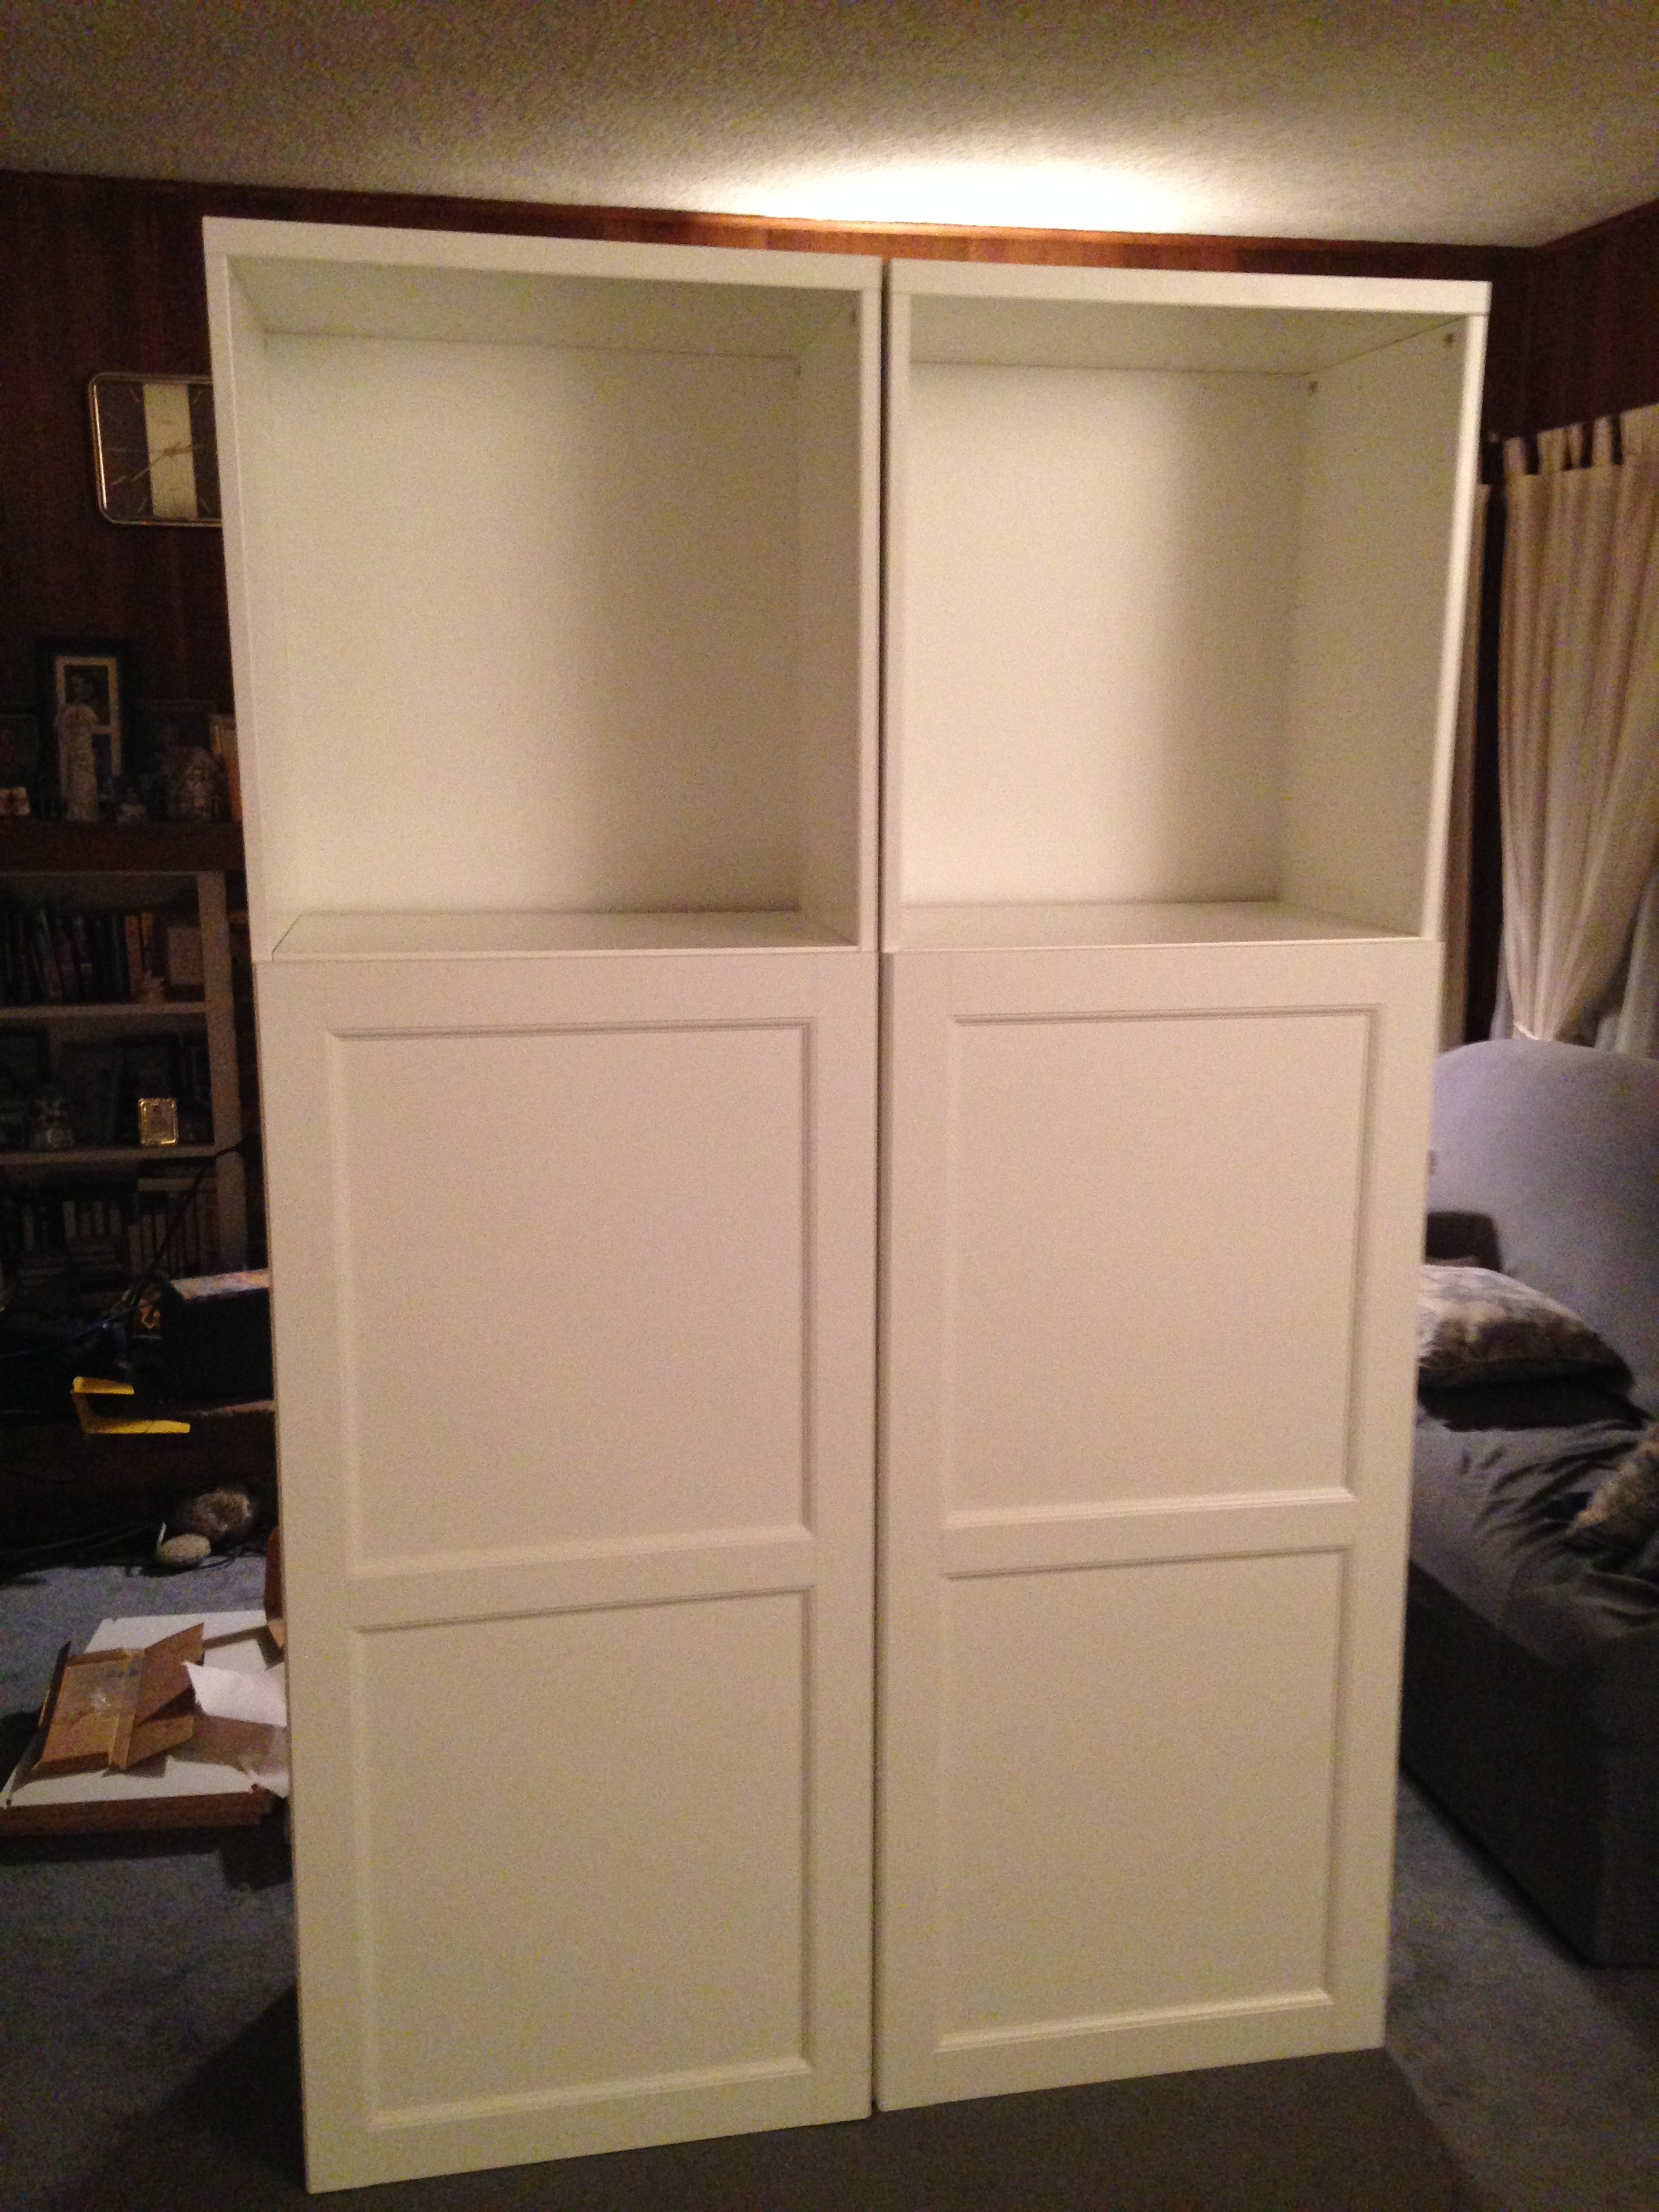
Some of the cabinets we looked at looked very nice but we didn't want to spend a lot if we were going to repaint it. Found some cabinets with doors at IKEA that looked like they might work. Measuring approximately 24" wide by 16" deep by 76" tall we picked up a pair so we could put everything in a single place.
 |  |
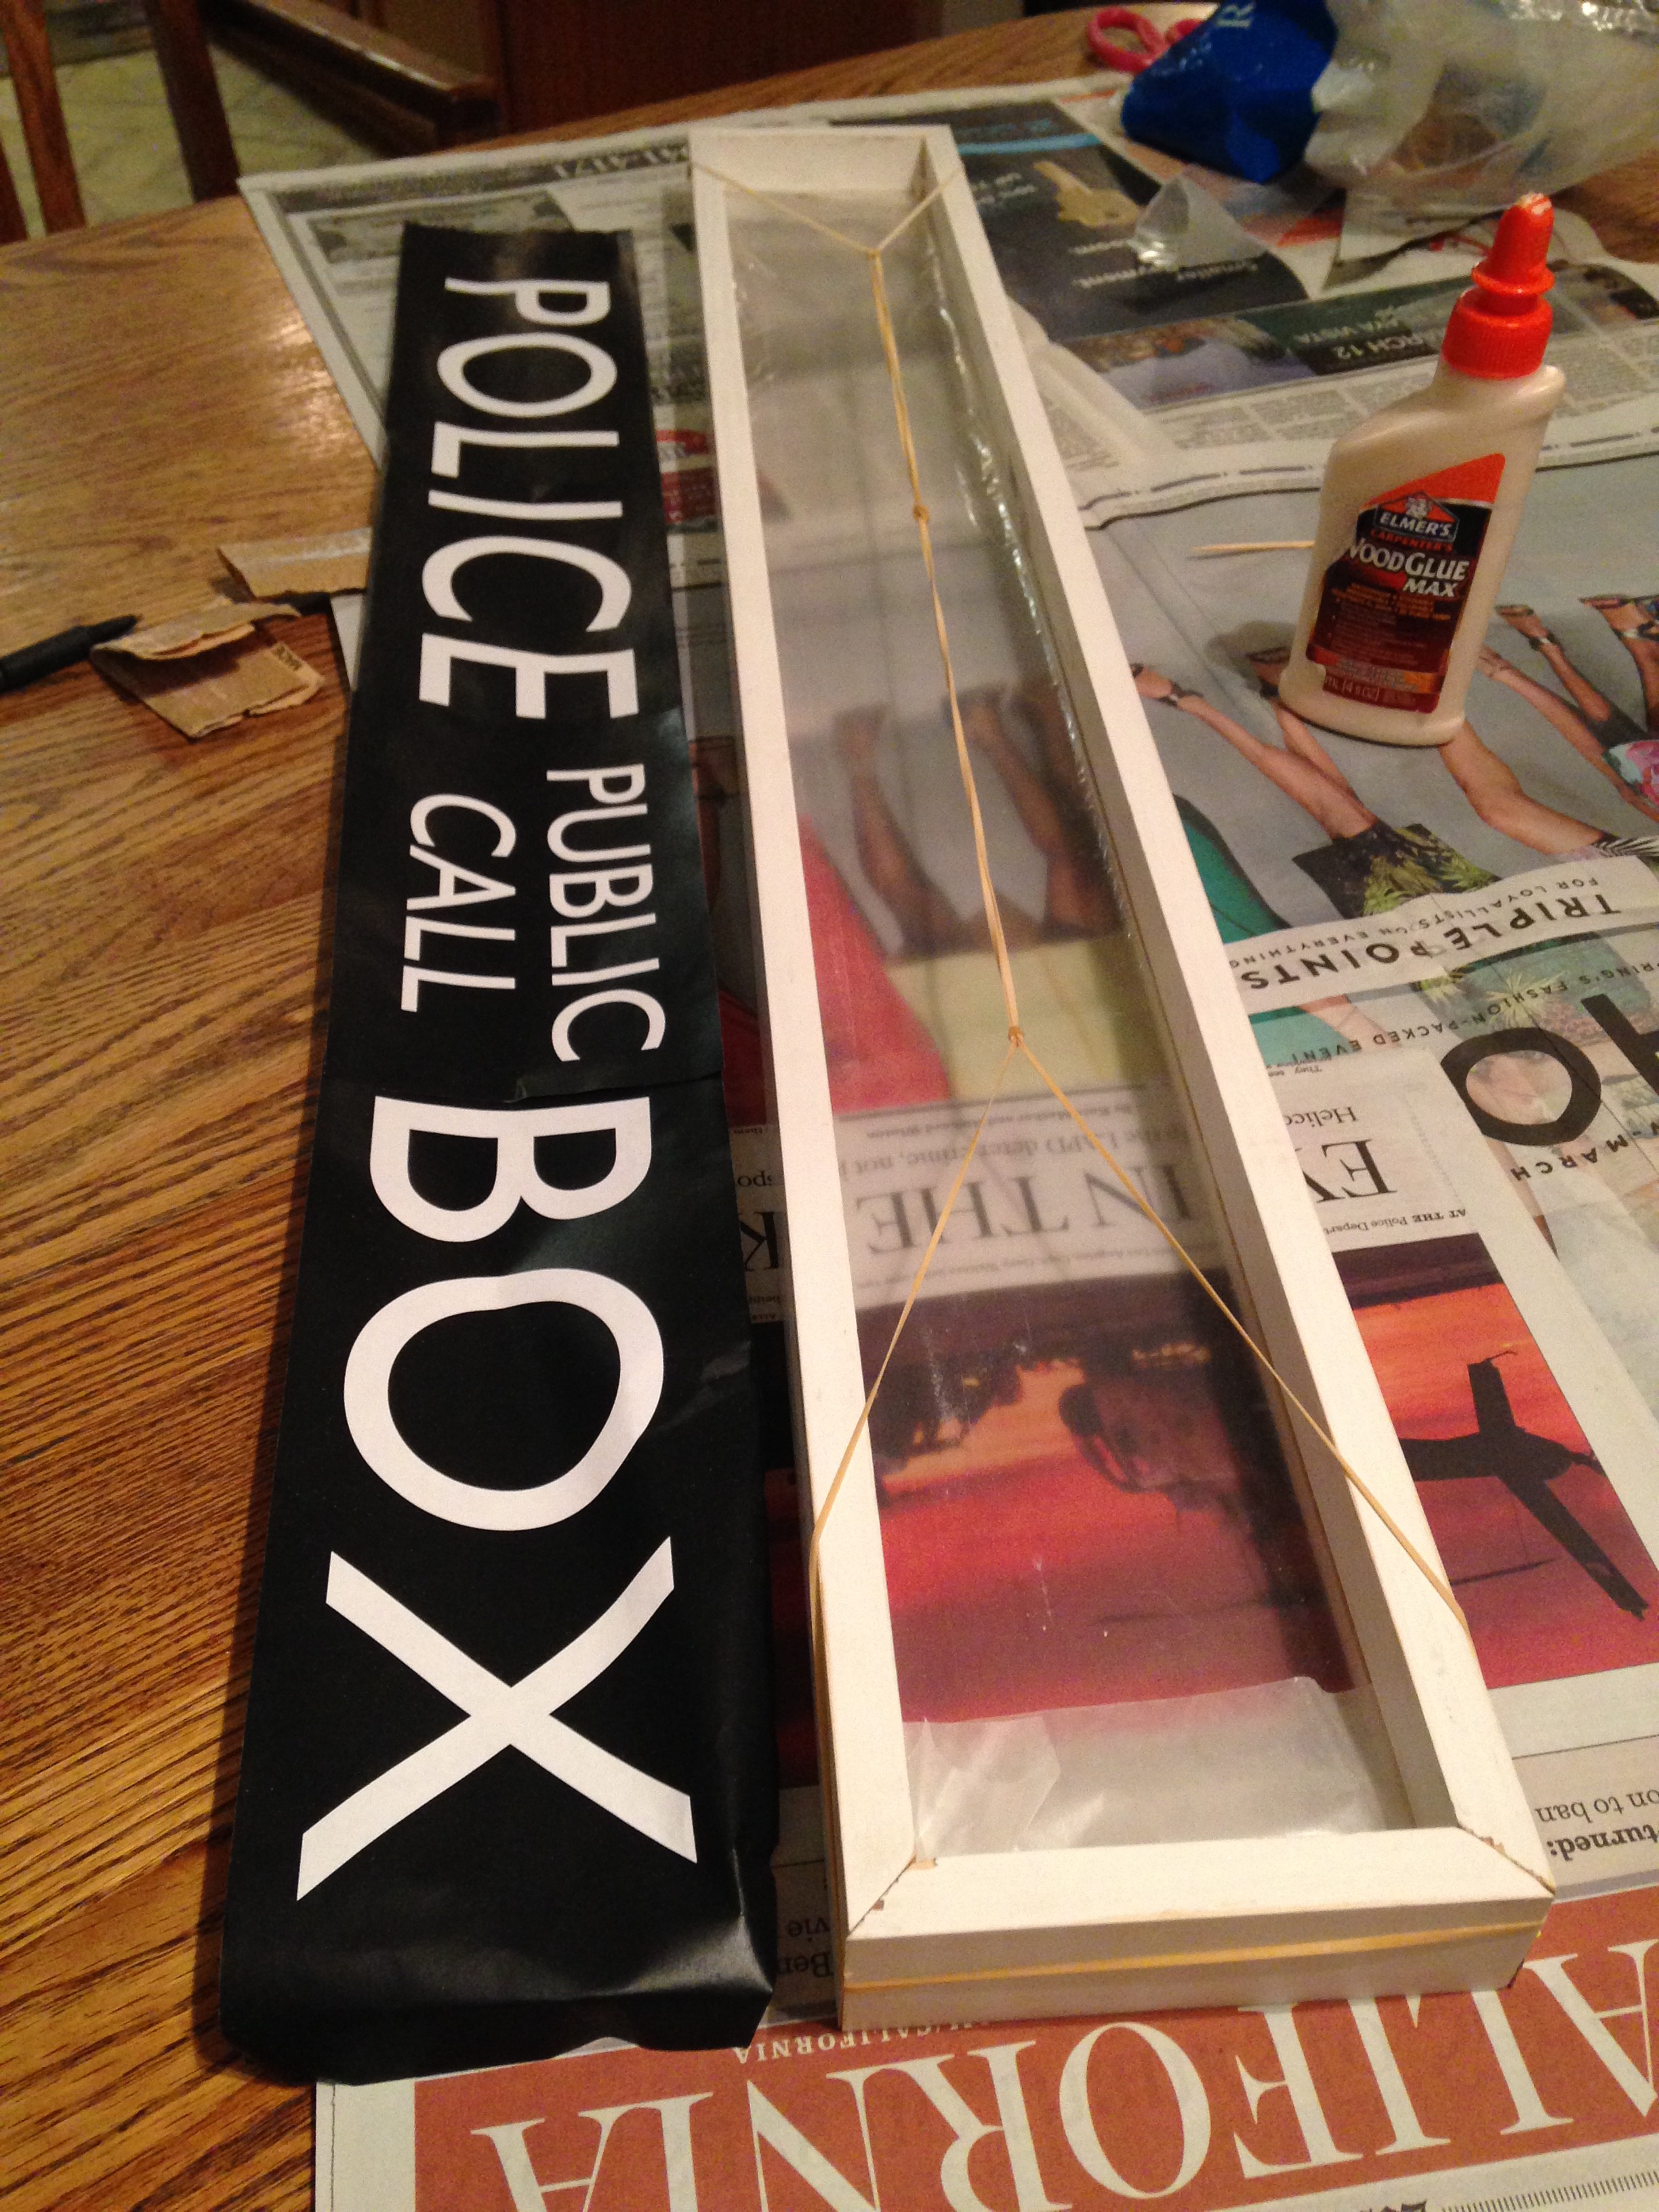
I made a box frame for the "Police Public Call Box" sign with a slot for the plexiglass. The print itself is just a couple of pages from a laser printer taped together. I also added some extra trim on the doors to make it look like corner posts and added a facade on top to hang the sign. Royal blue seems close enough. My wife found the plaque online somewhere.
 |
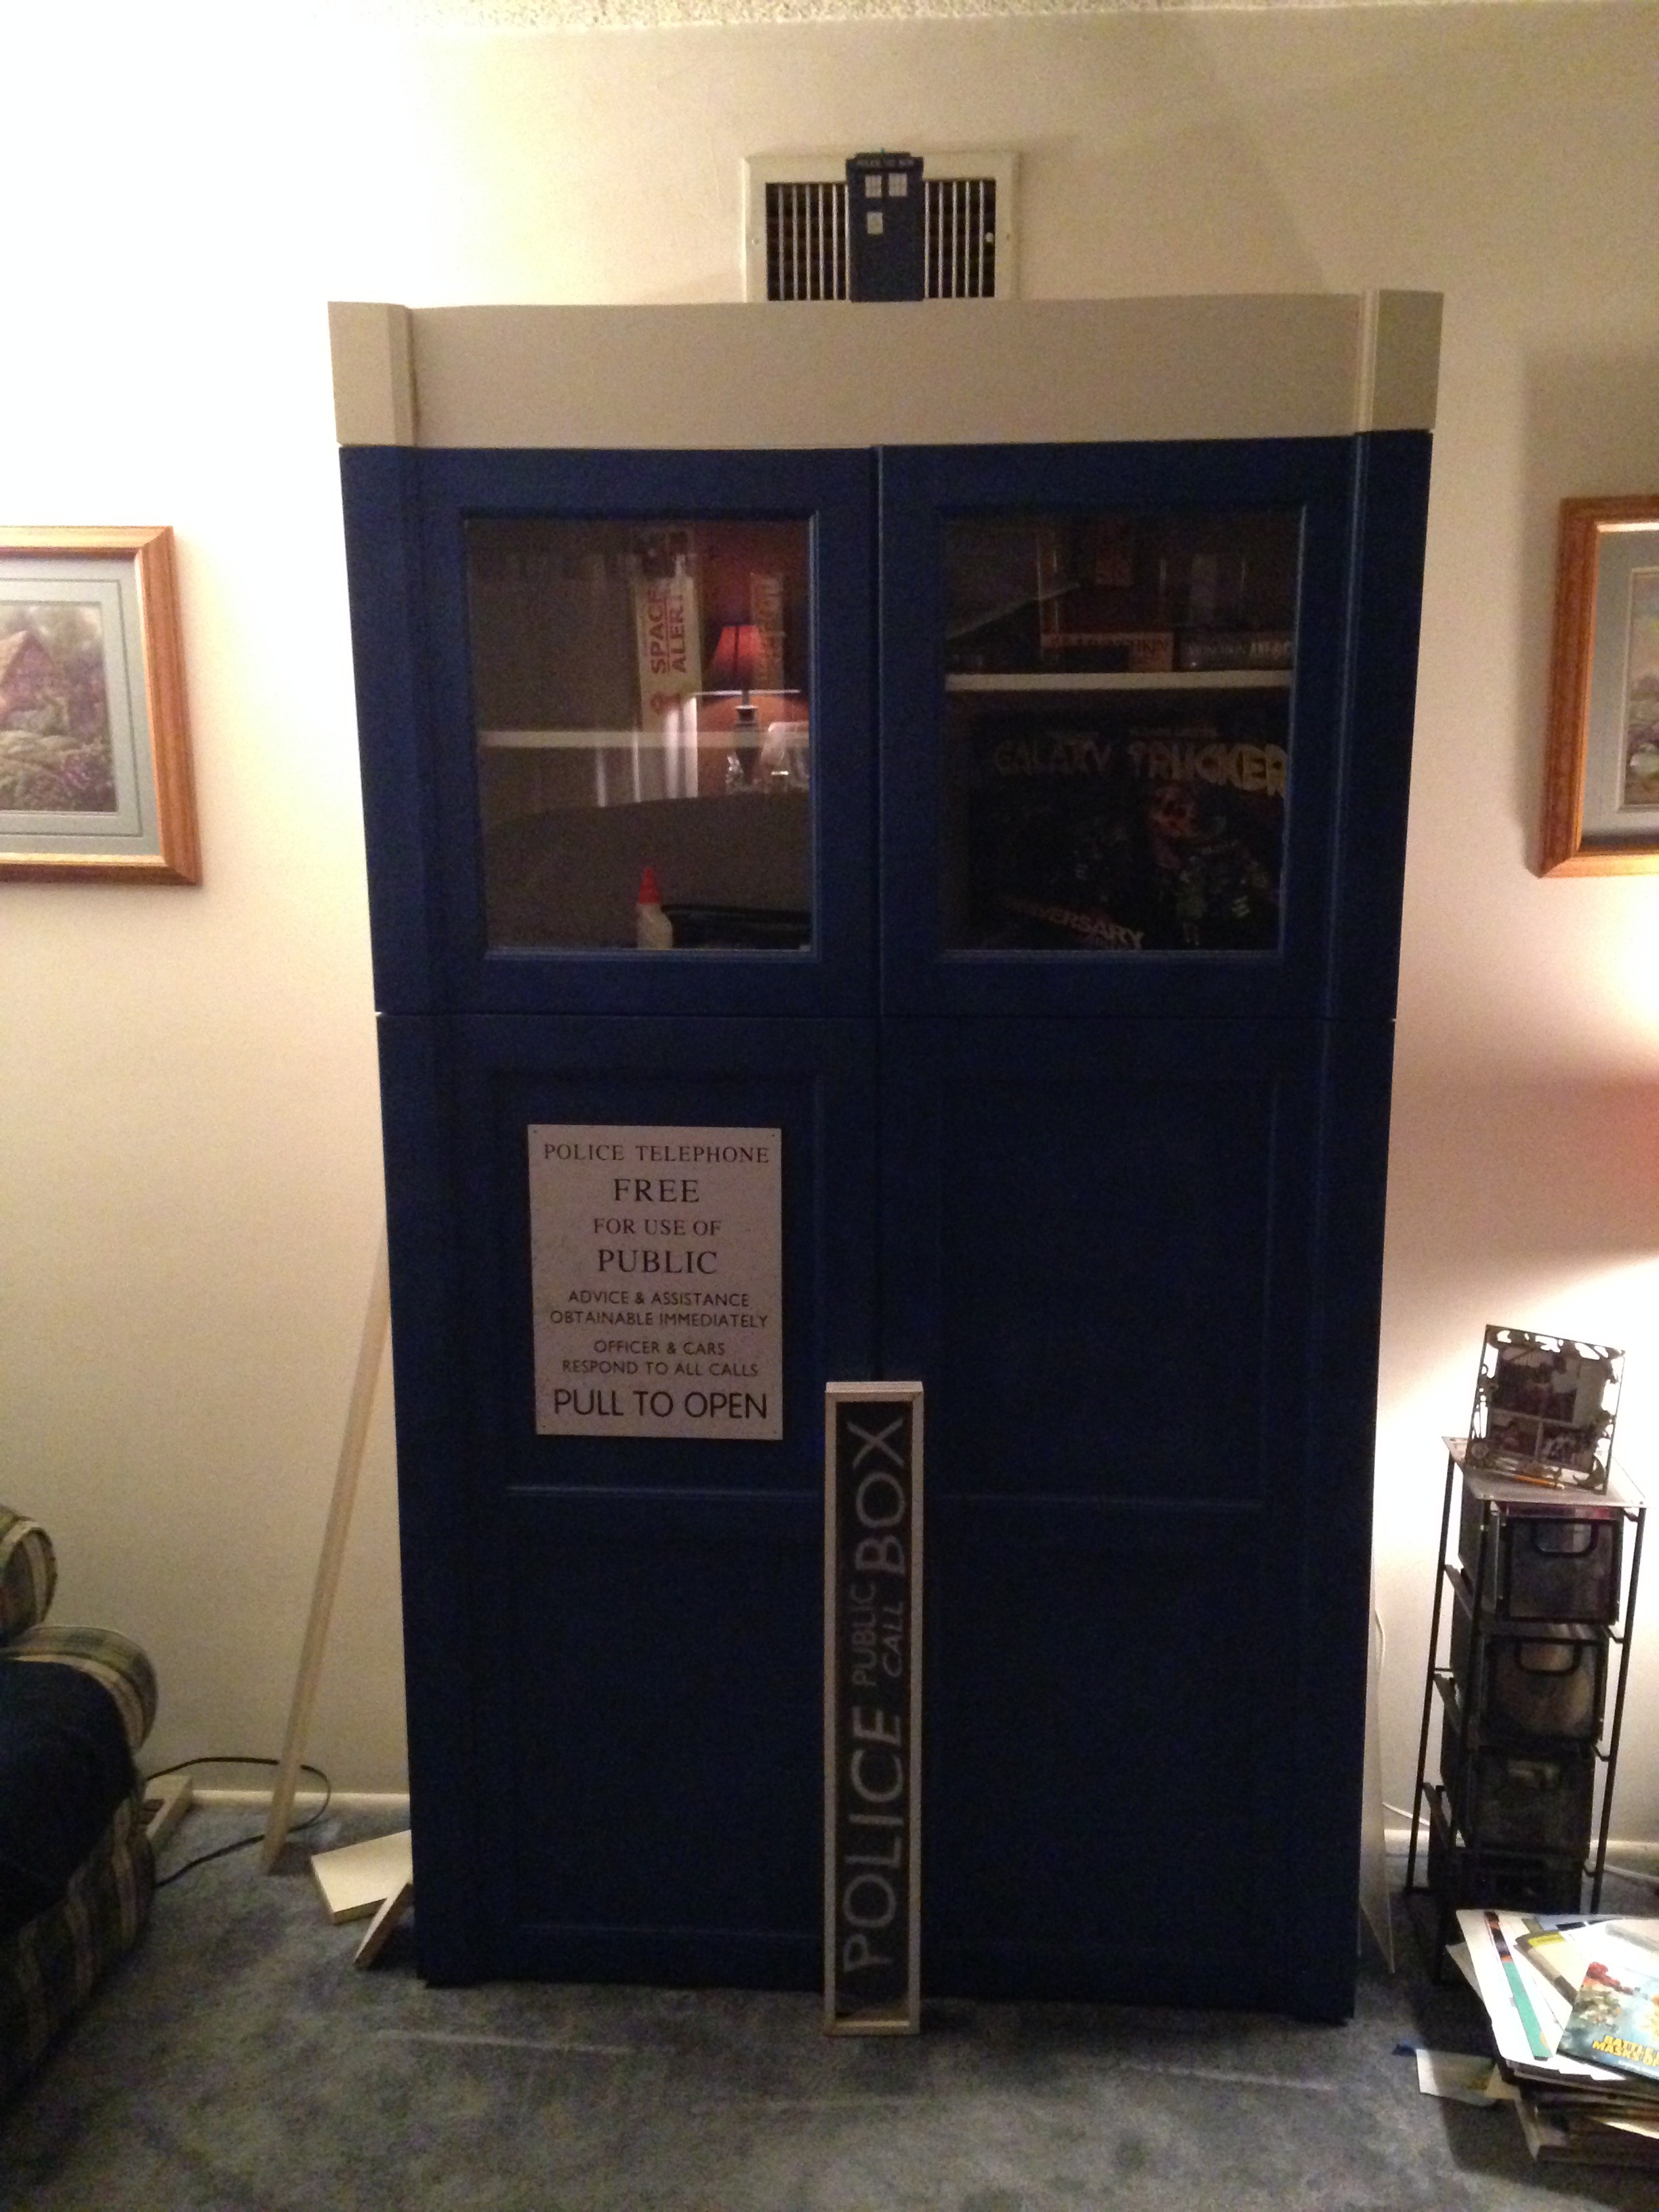 |
From the side it looks like a TARDIS has materialized partially into the wall.
2015 - Adding Lights And Sound
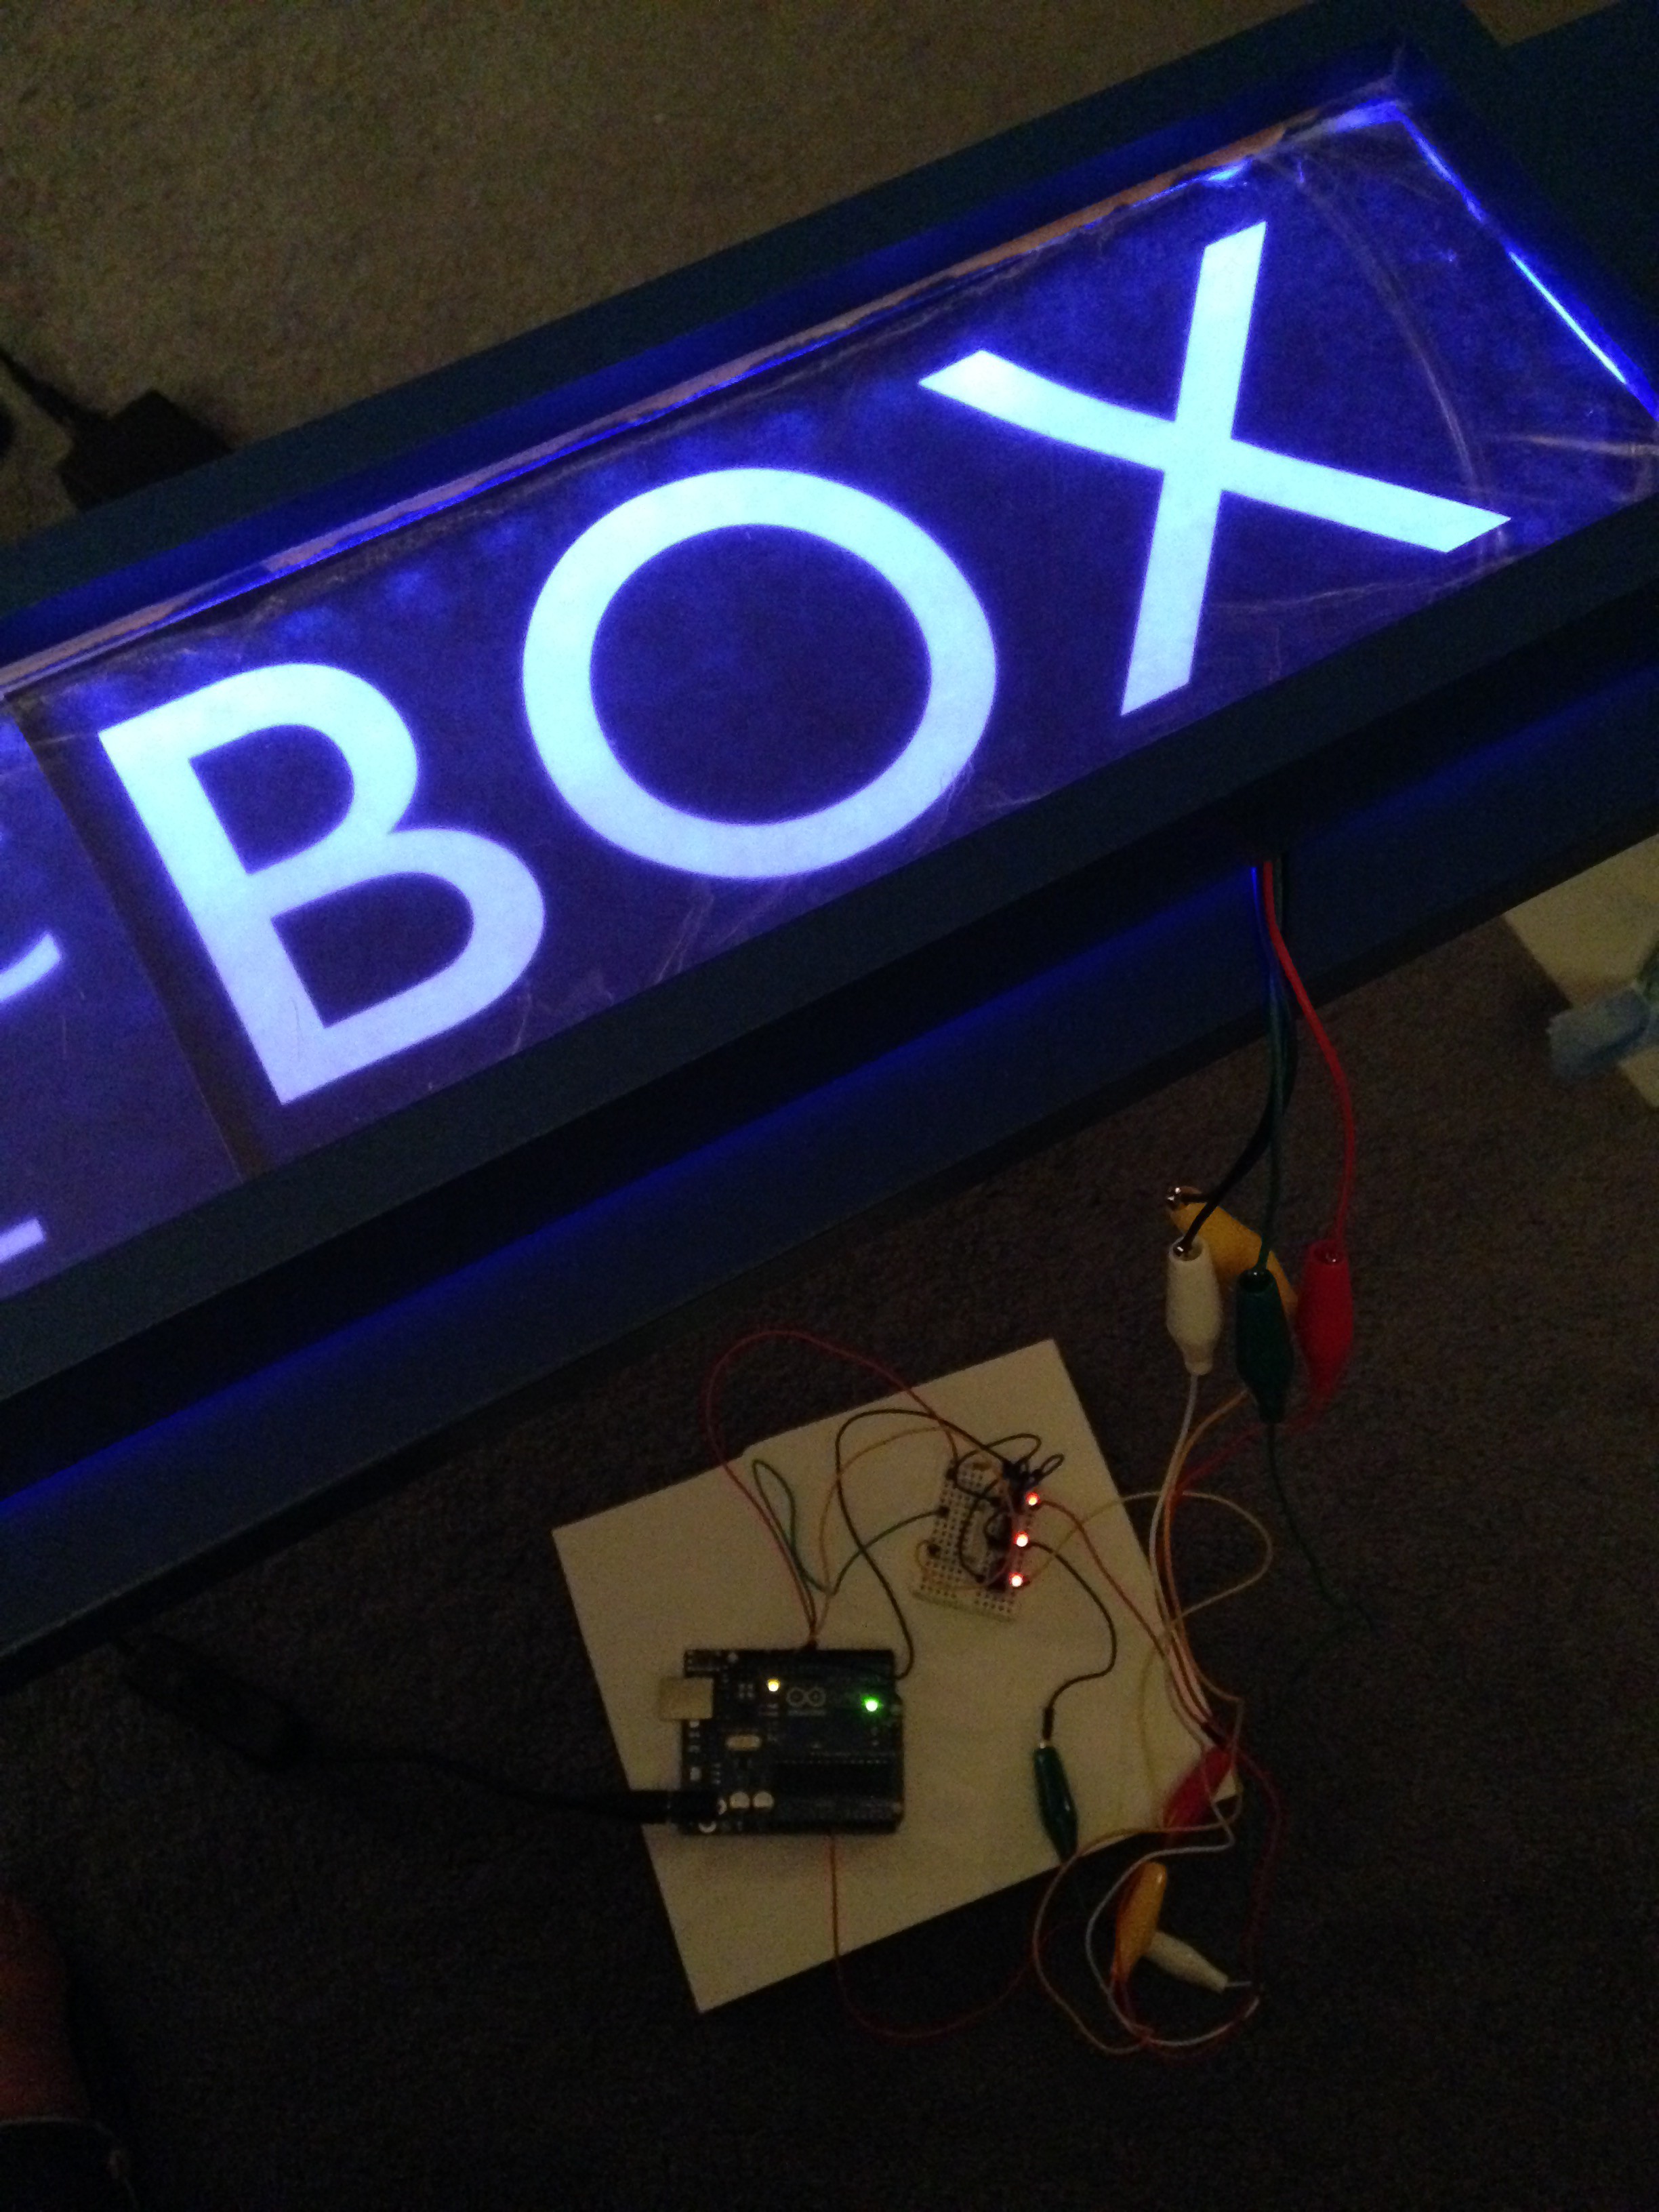
Started experimenting with different ways of lighting the sign. Tried an electrolumenscent light strip but it wasn't bright enough so starting looking at RGB LED light strips using MOSFETs controlled by an Arduino Uno. I used a 1 meter long non-addressable LED strip as the addressable strips were still pricey at the time and I wasn't sure how it would look. The strip is driven by 3 MOSFETs which are controlled by 3 PWM output pins from the Arduino. I started writing some code to fade the colors on and off giving it a pulsing look. I was pretty happy with how it looked. See below for some videos and the logs for some code snippets.
N-Channel MOSFET 60V 30A from Sparkfun
 | 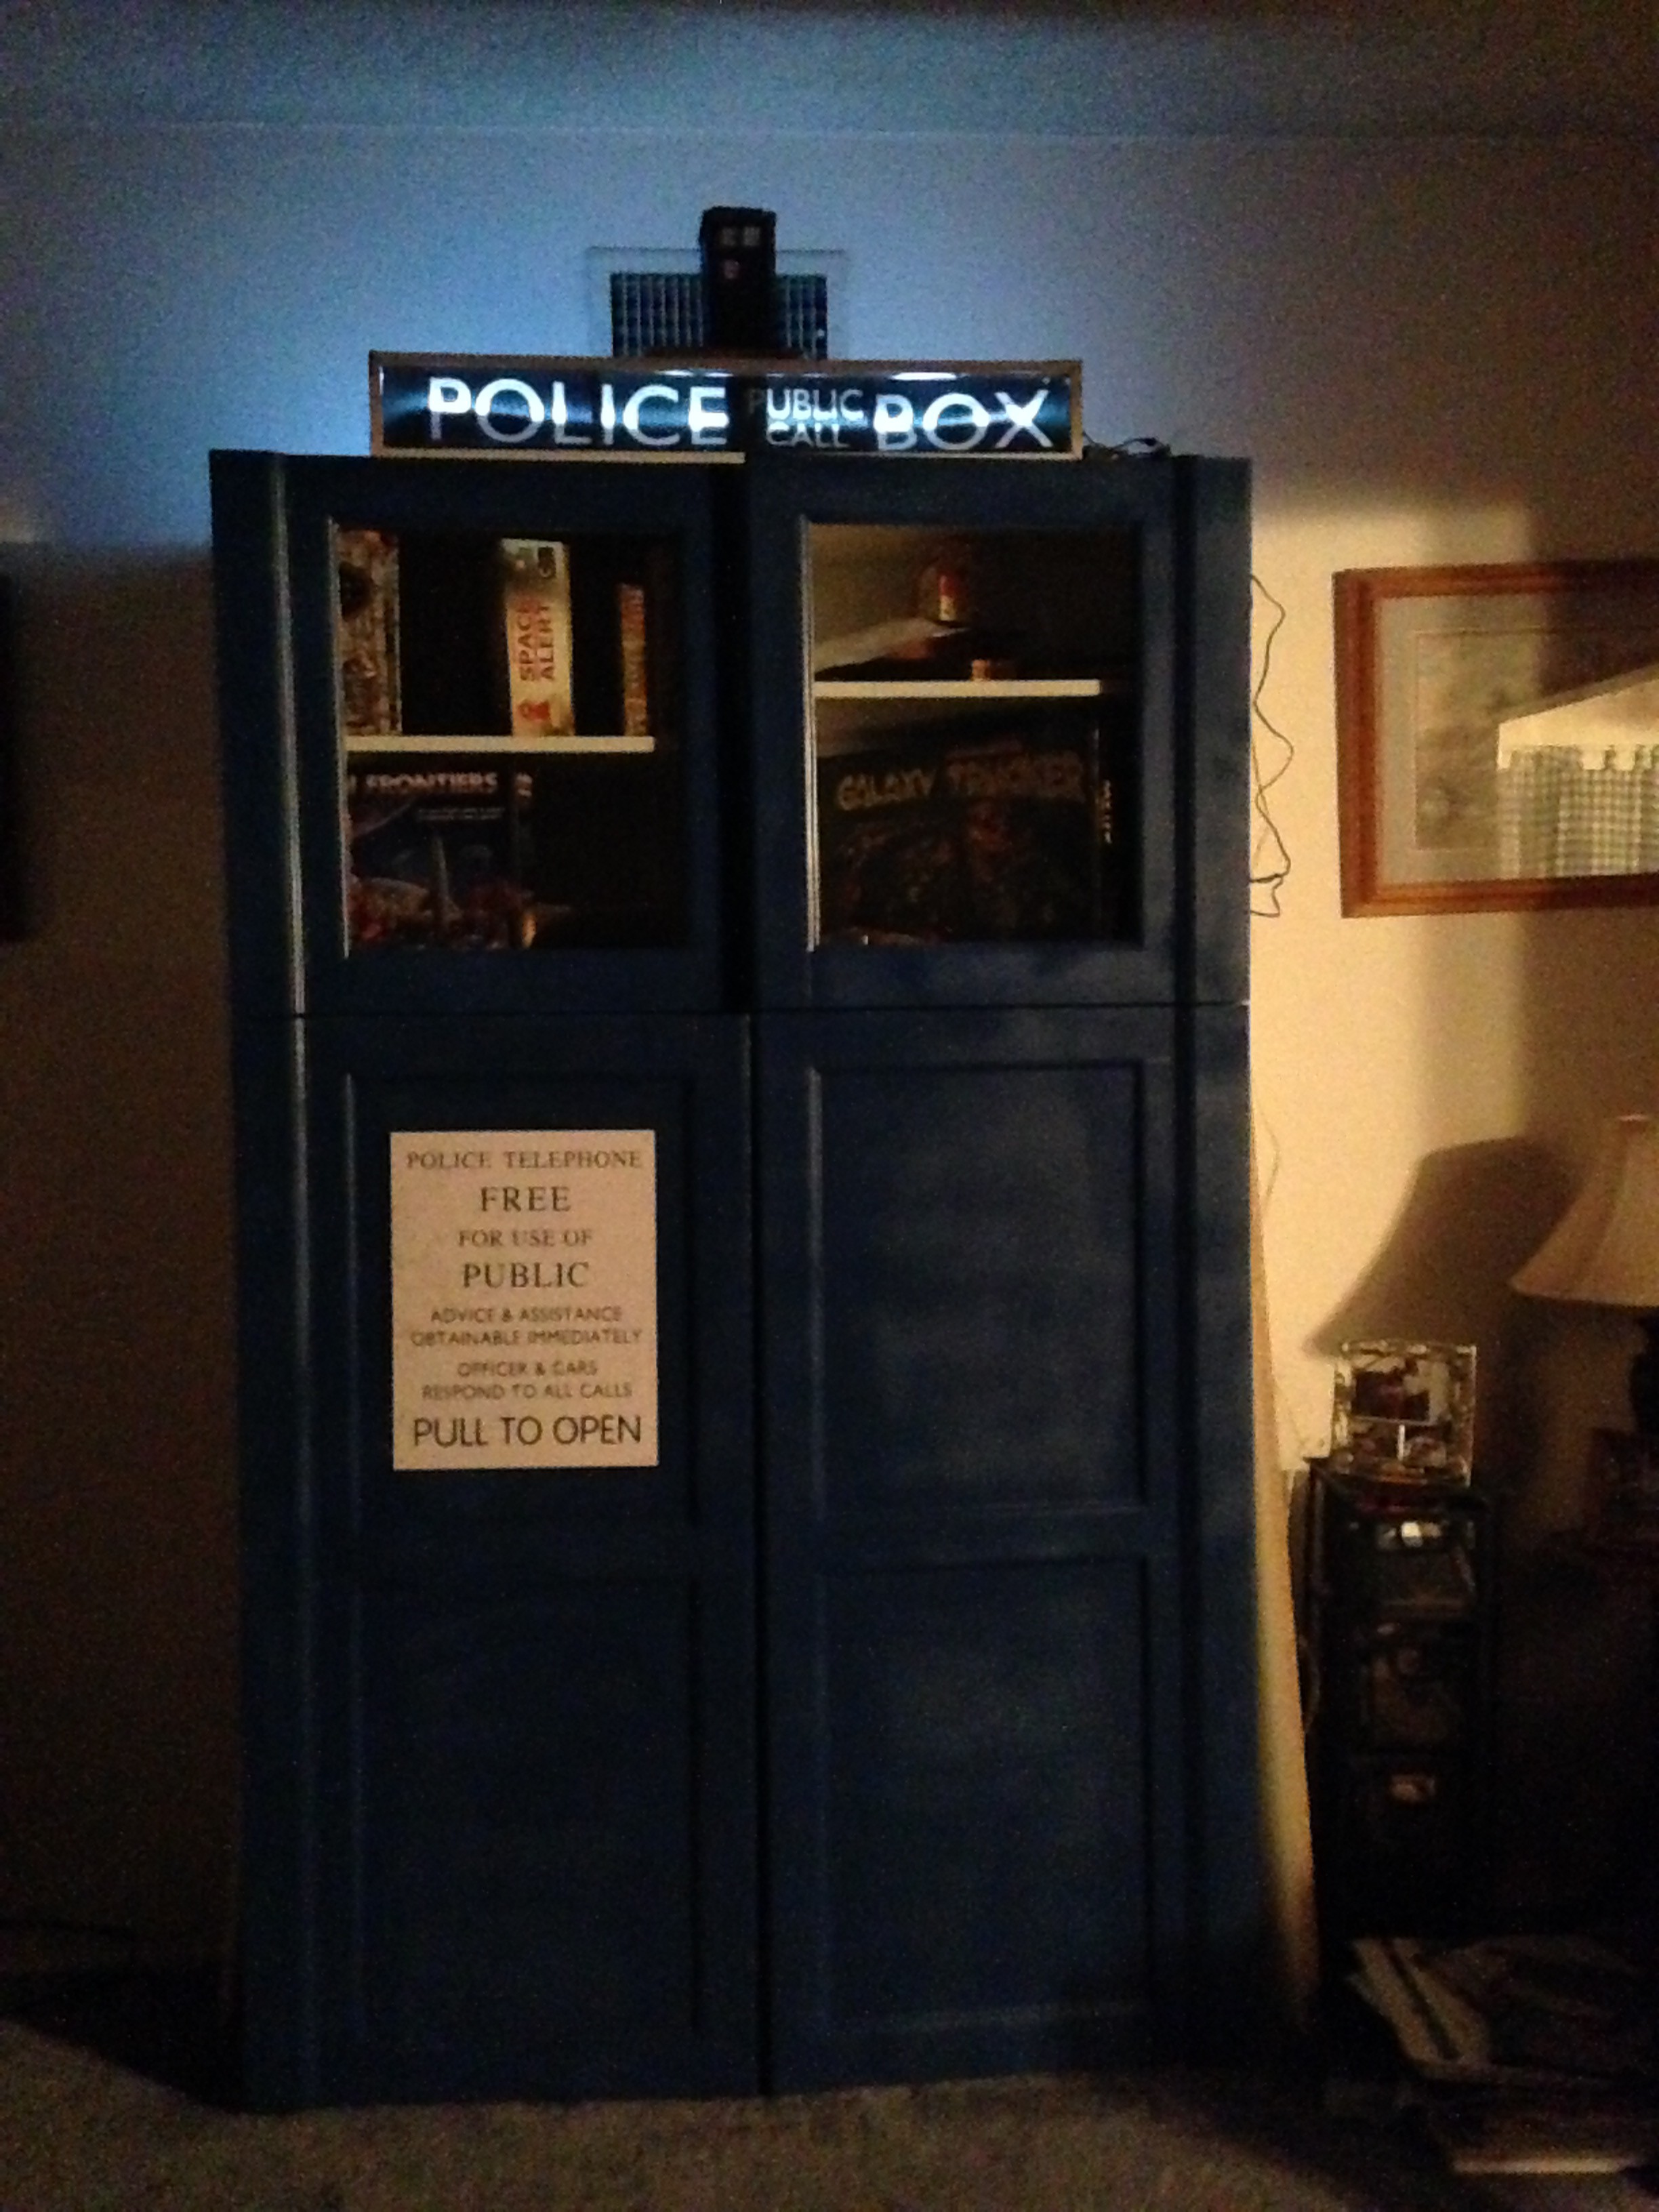 |
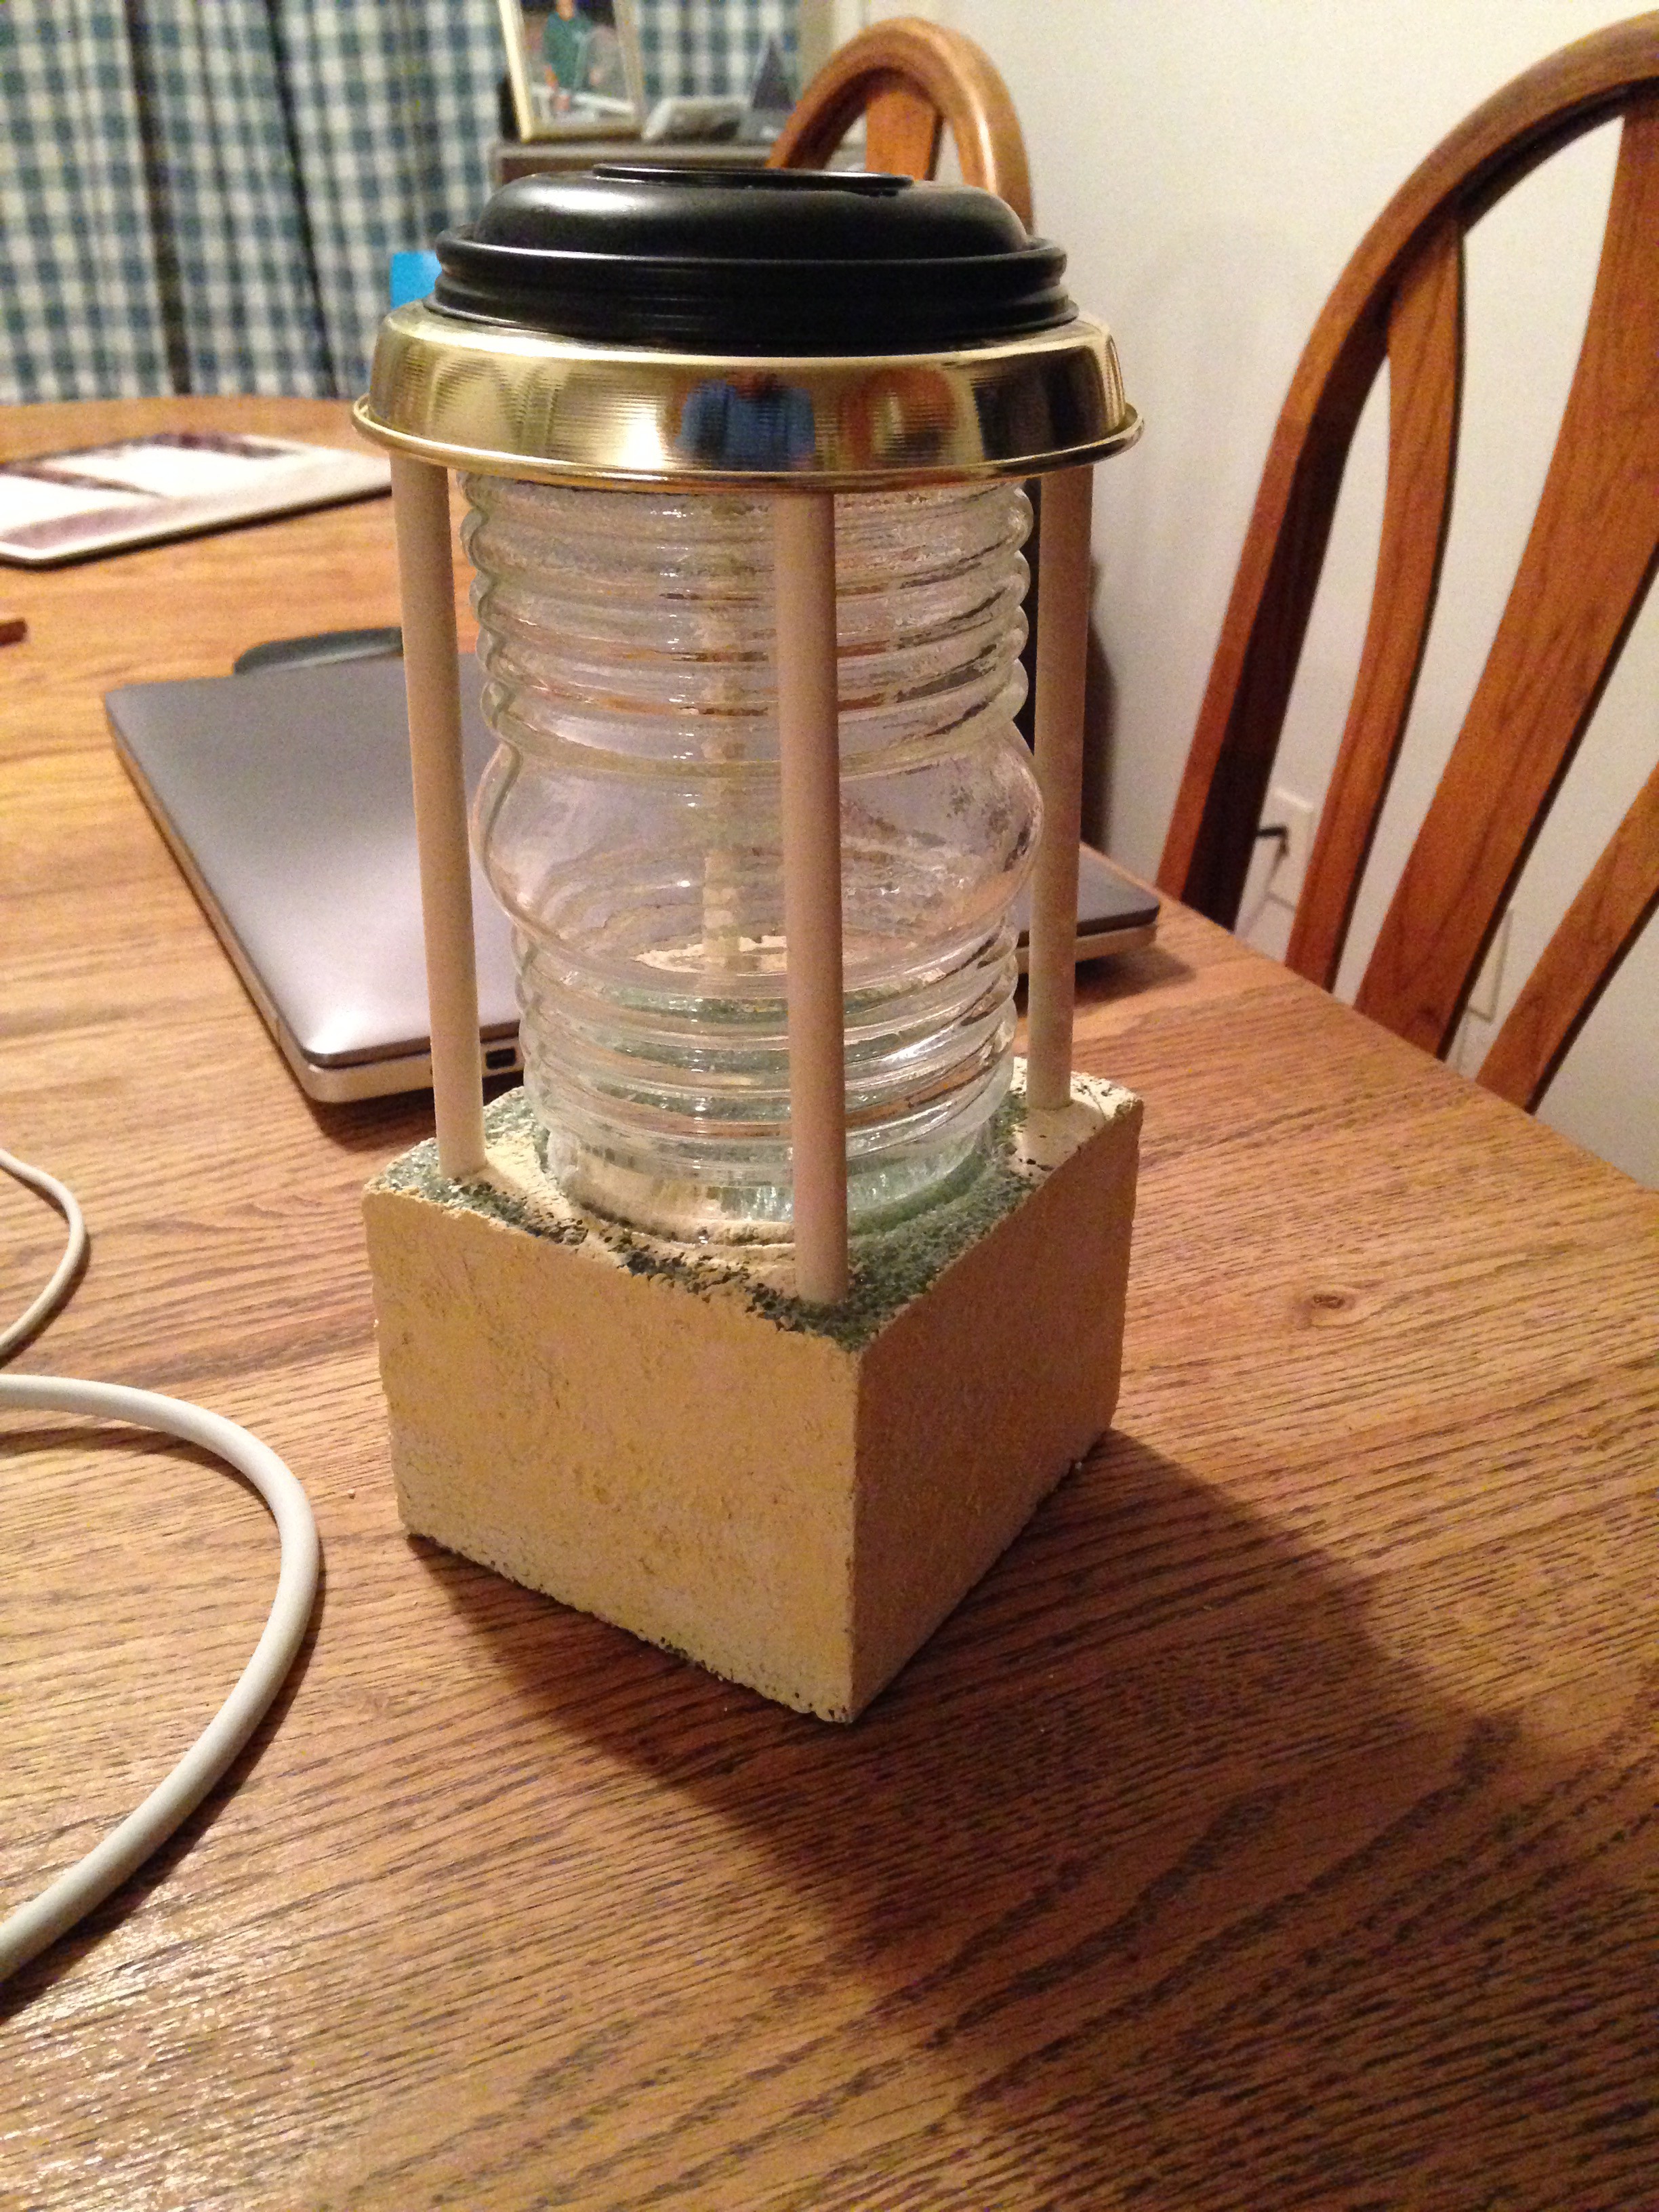
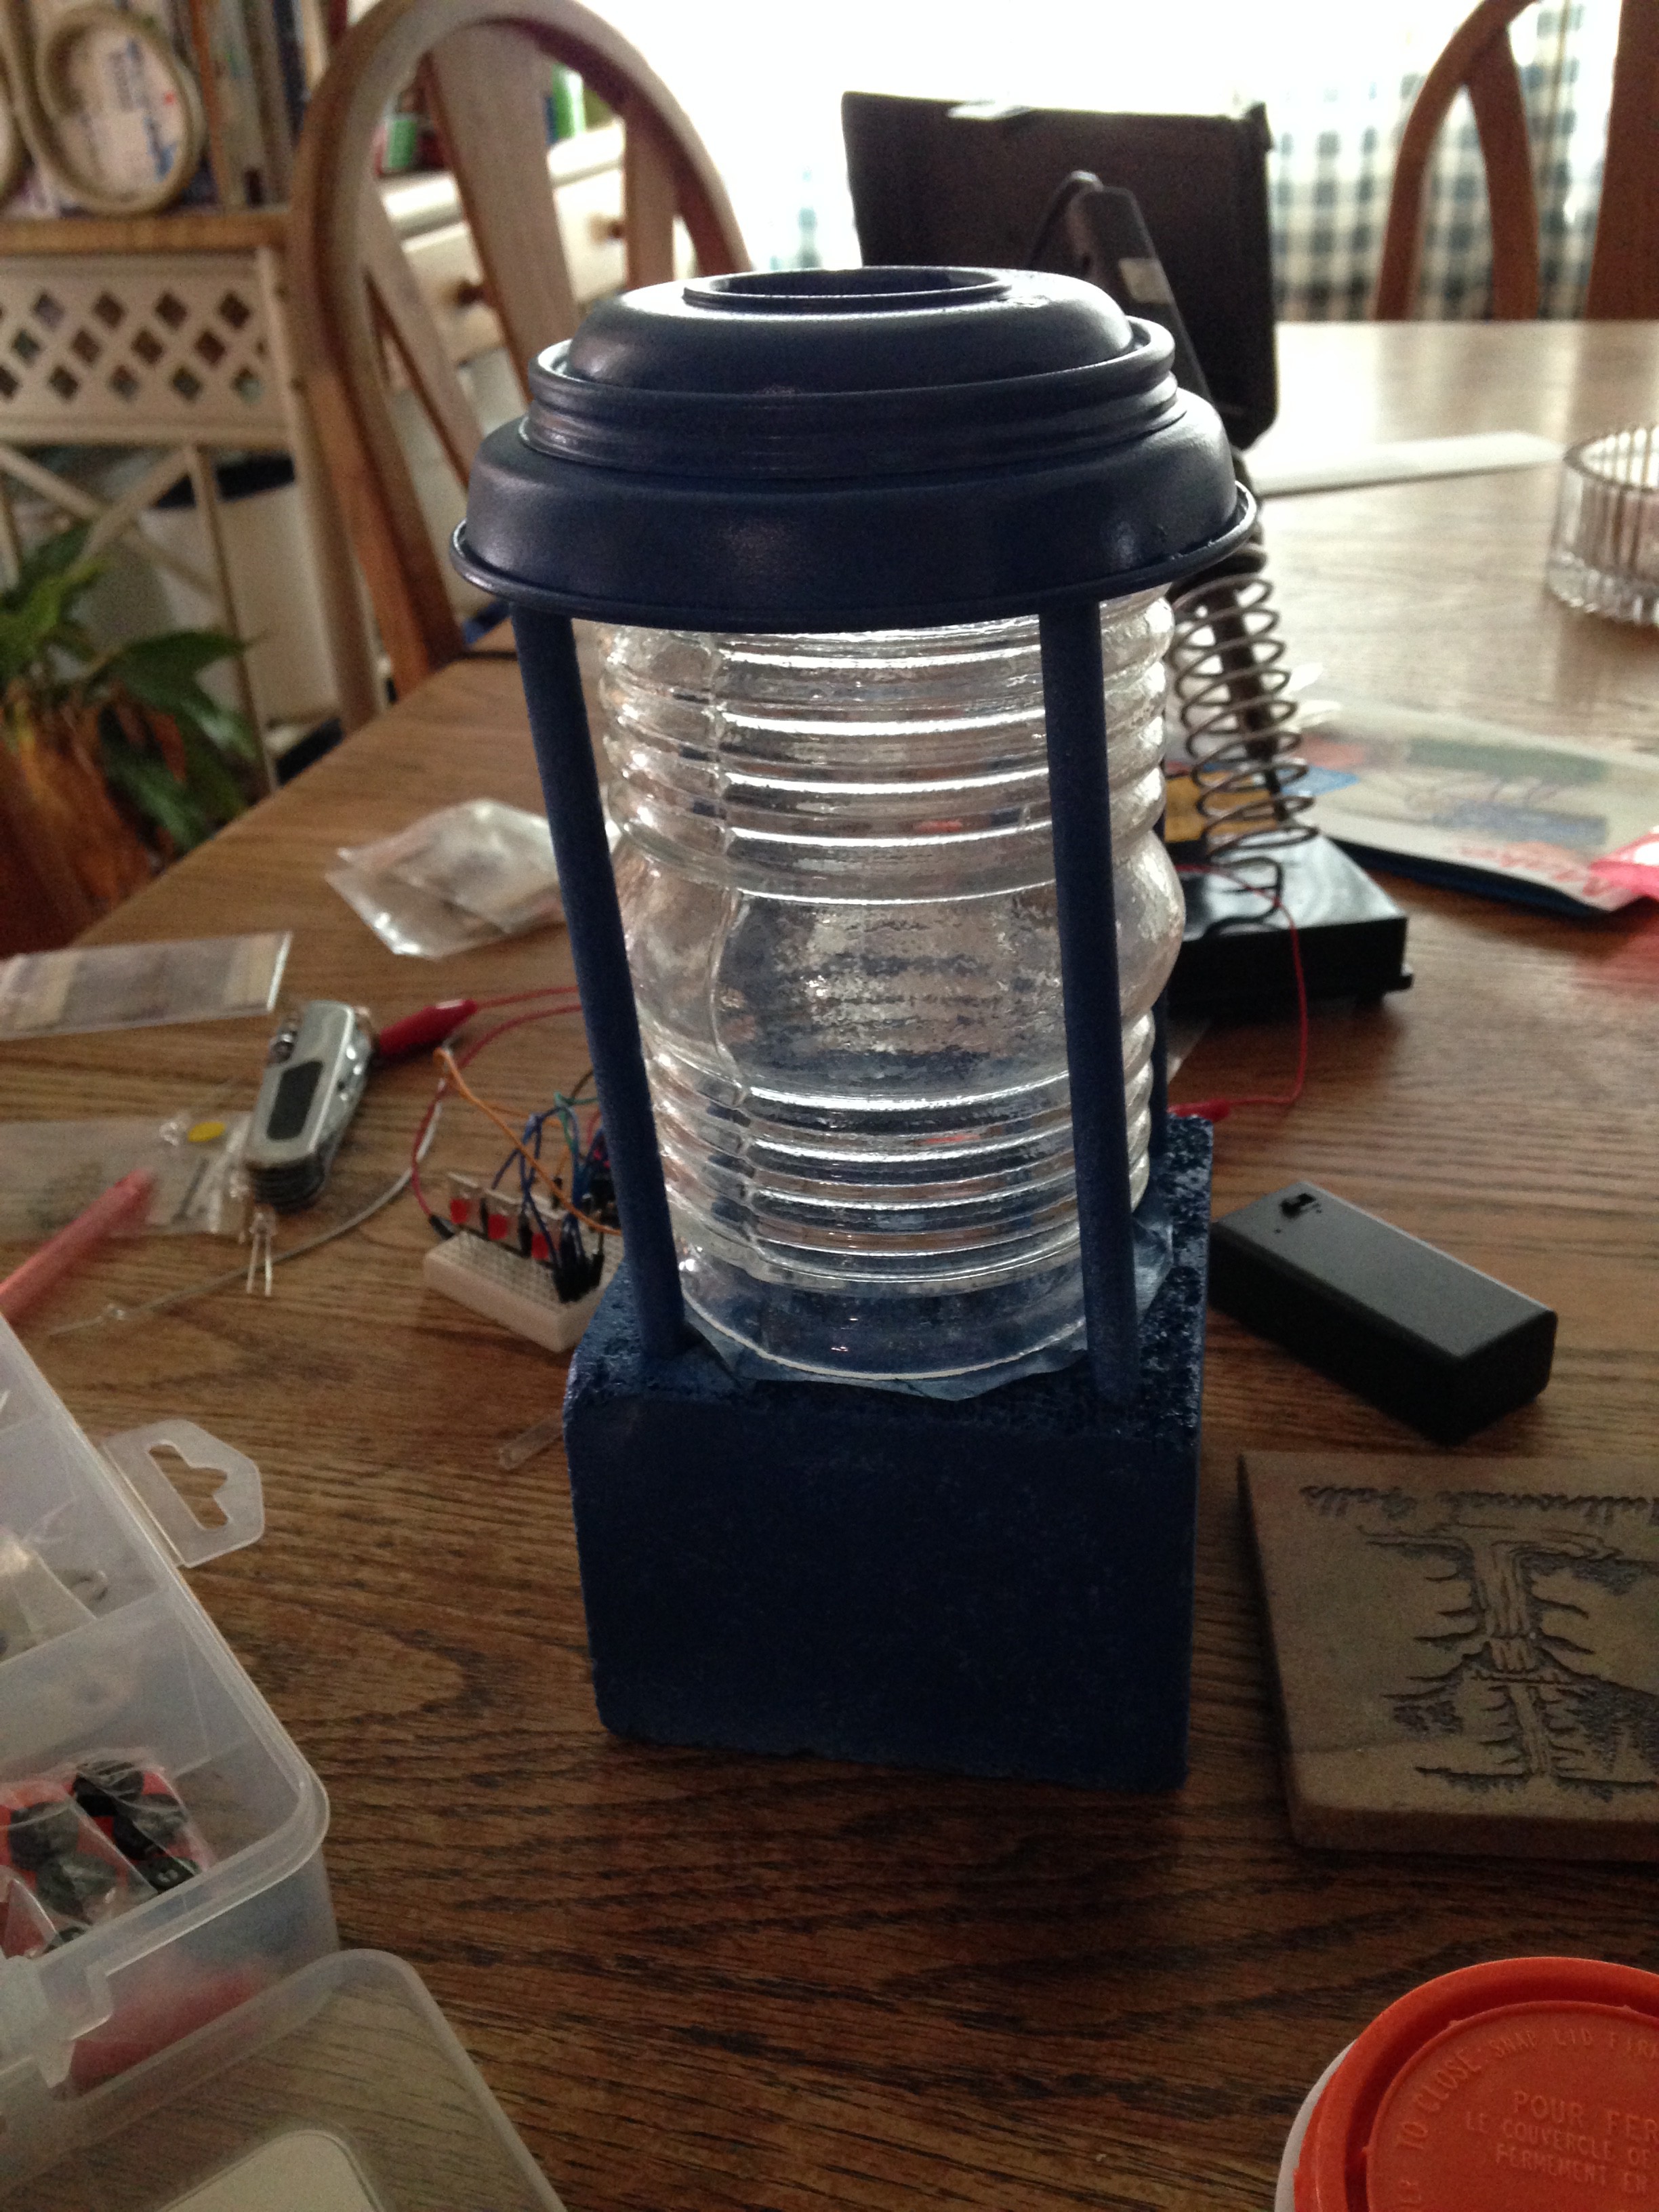
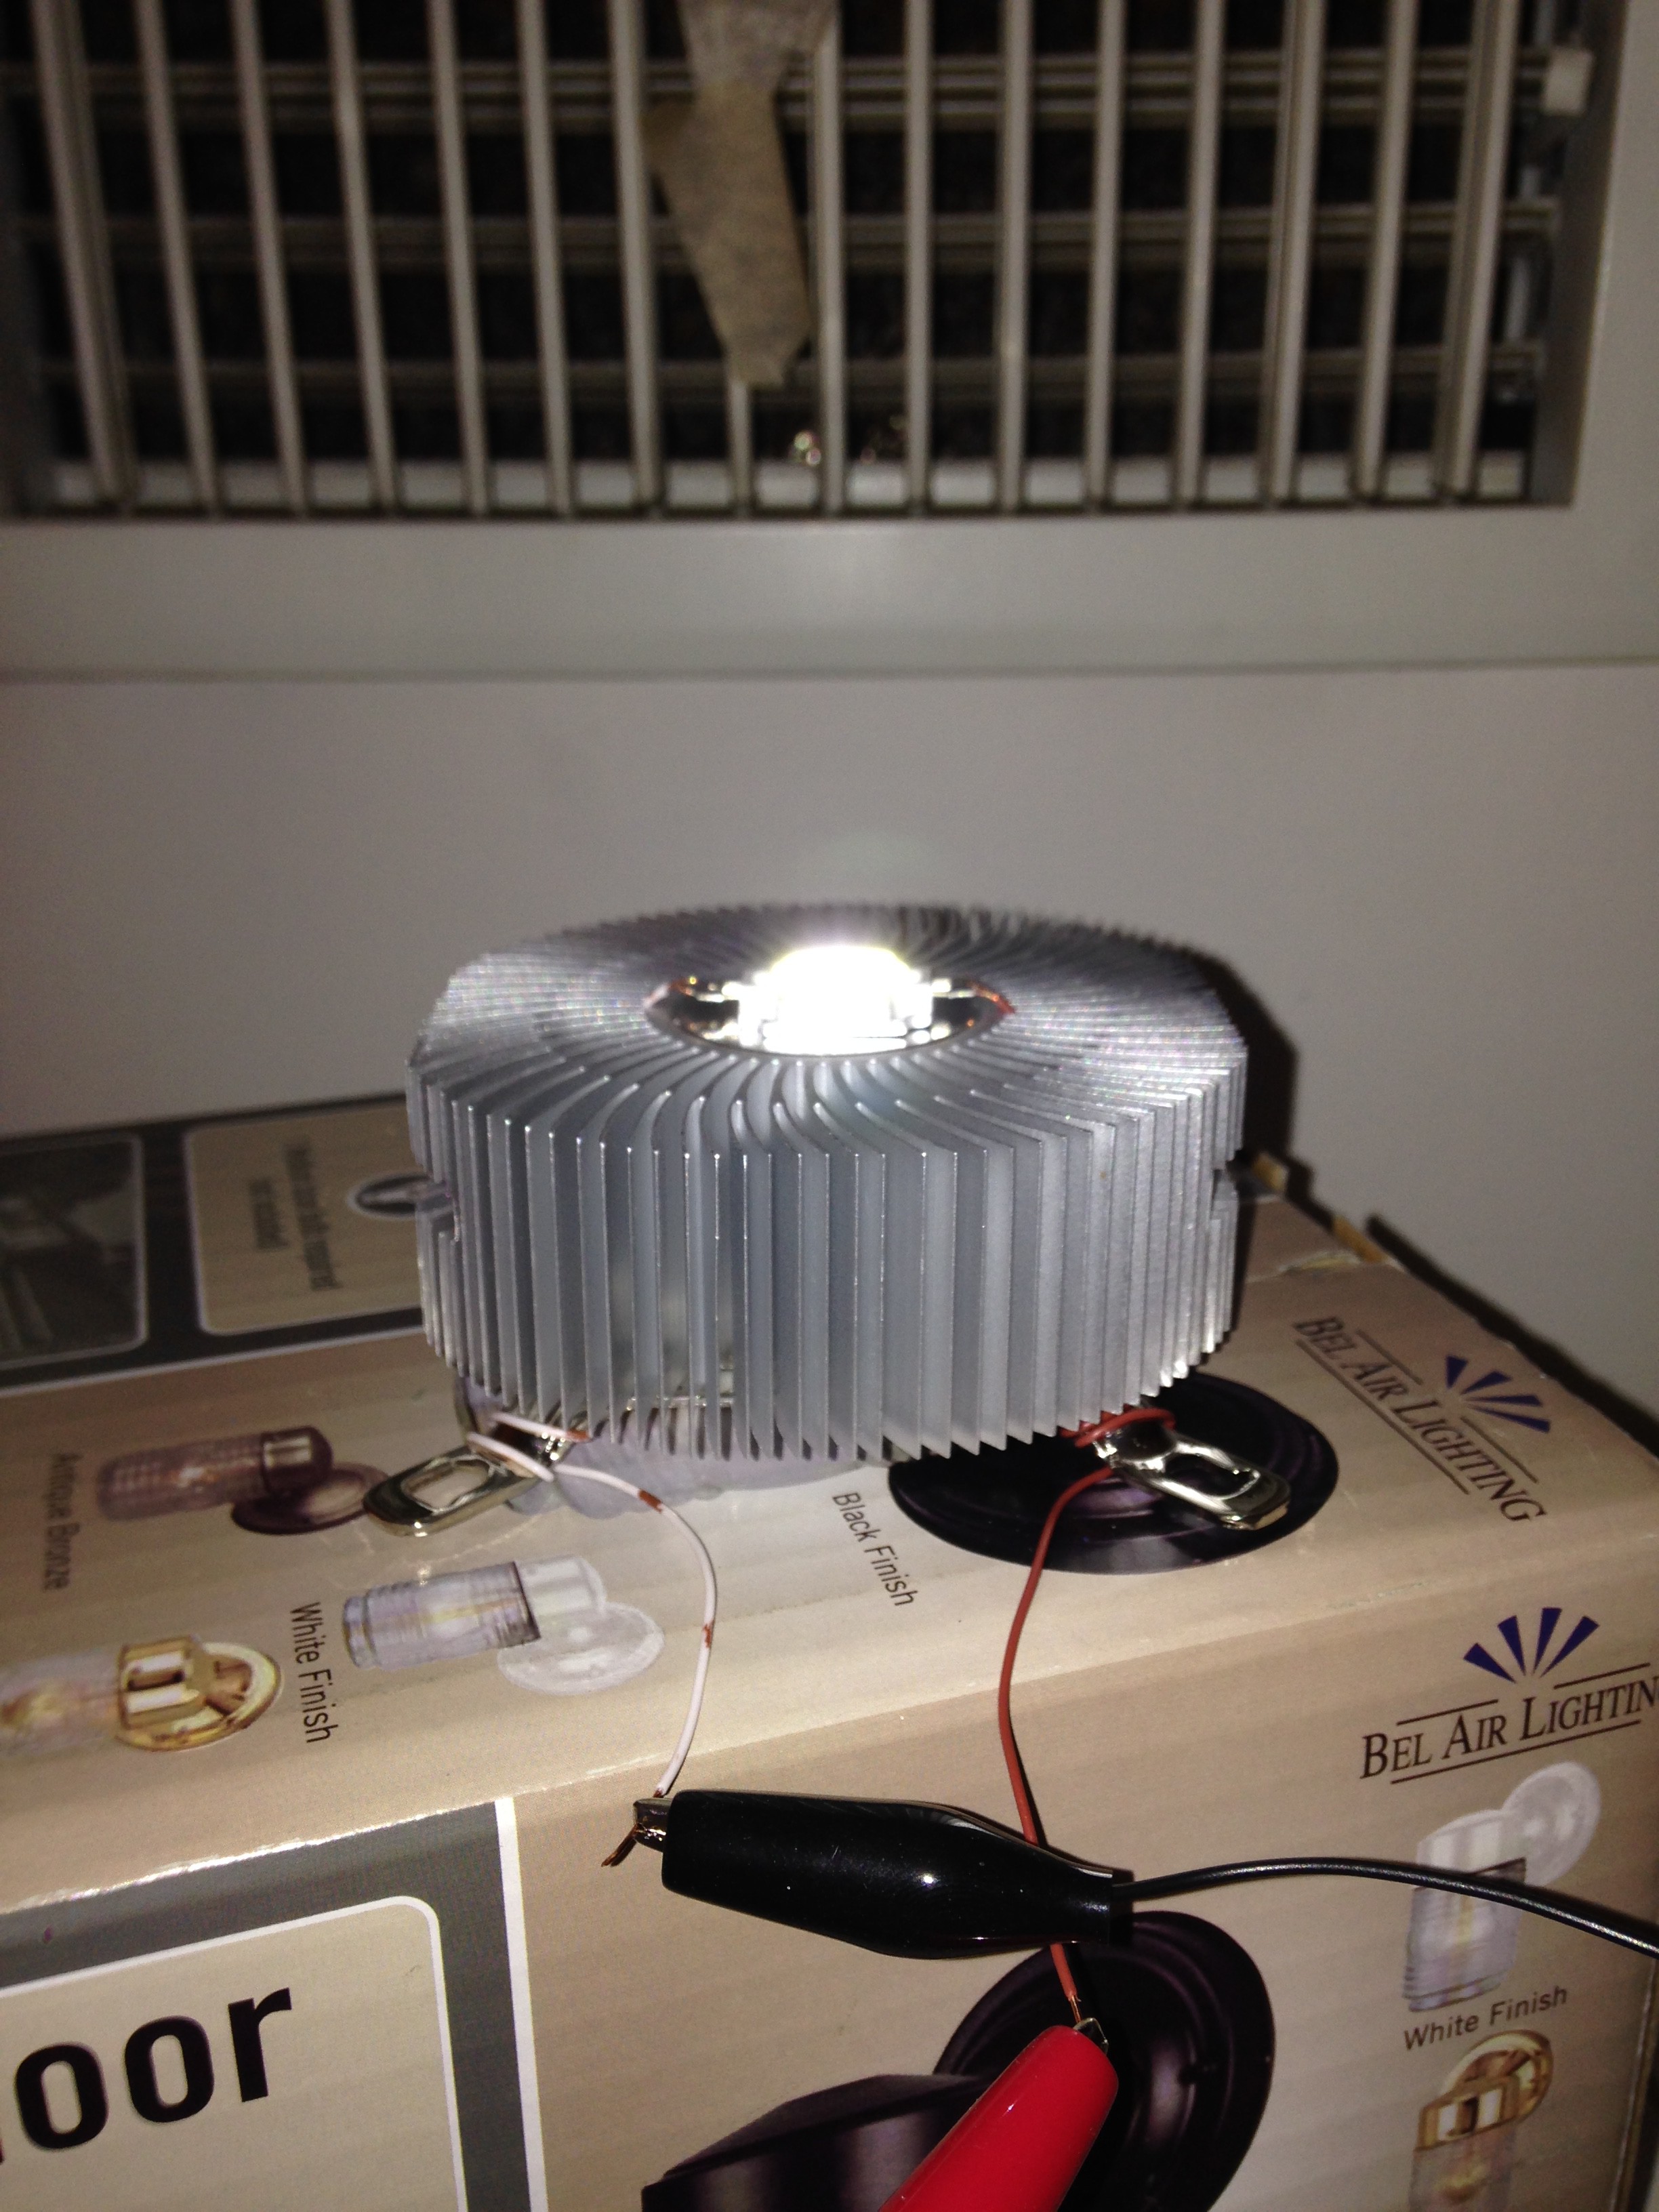
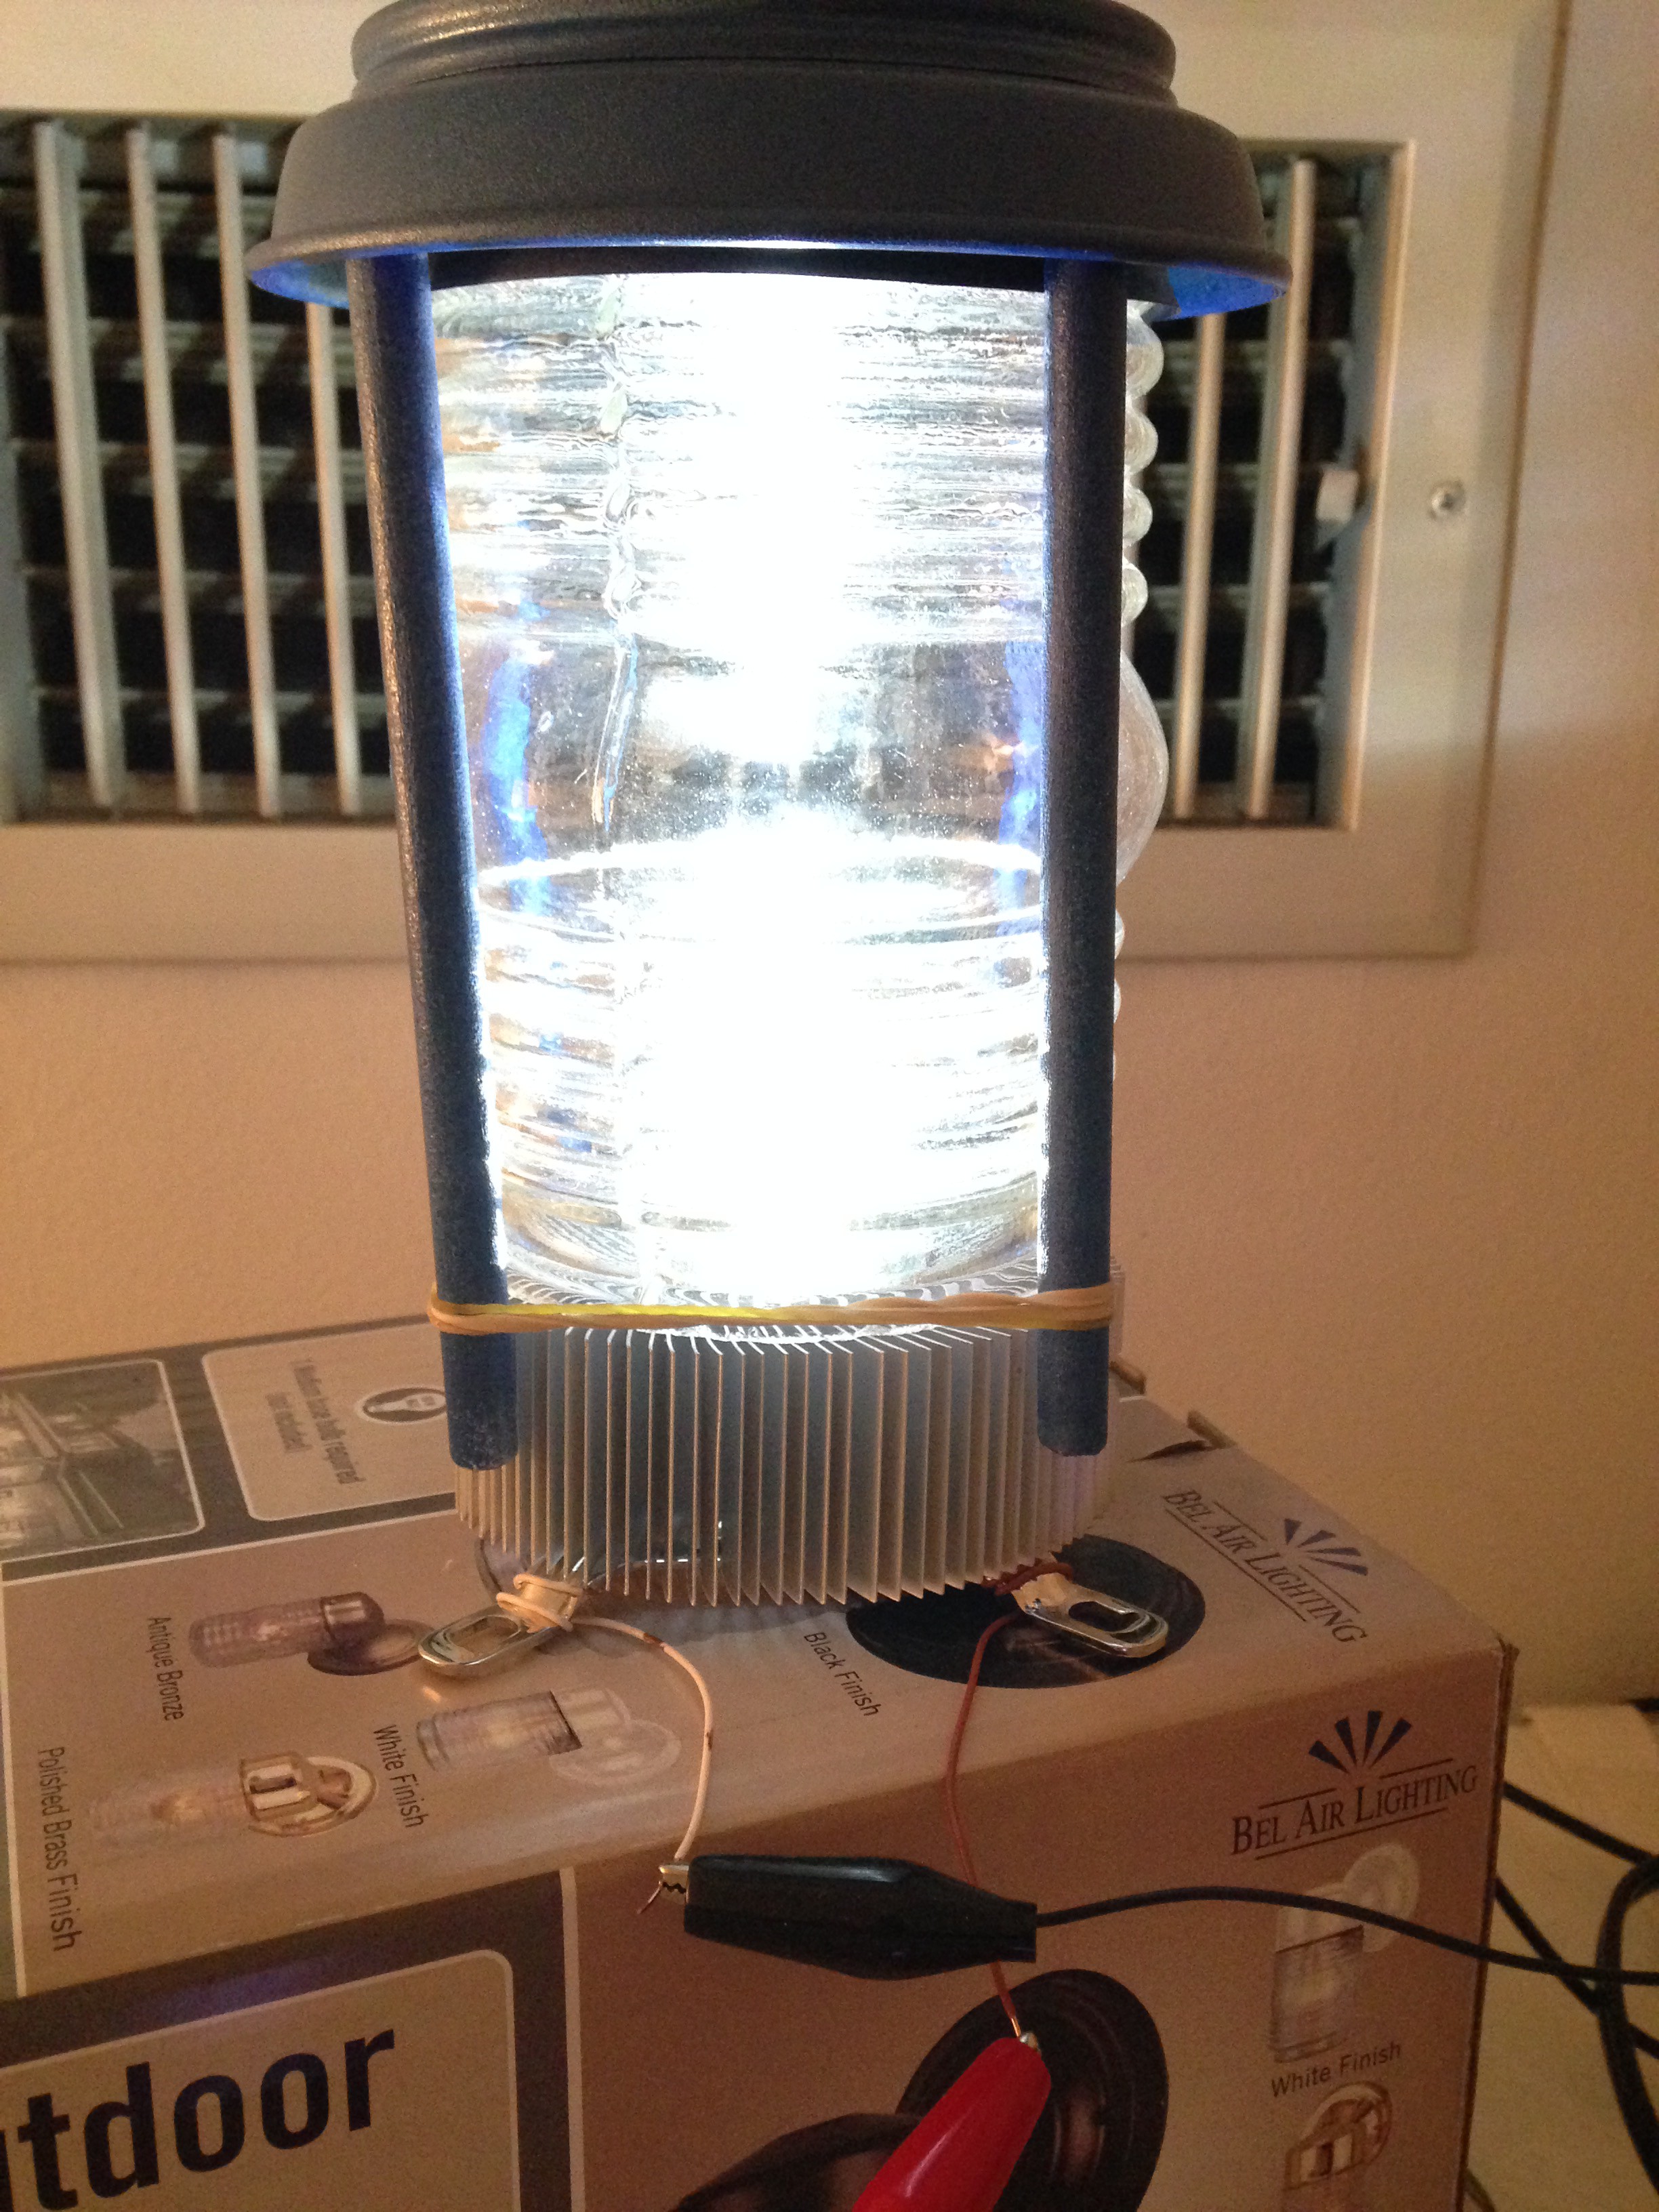
Also started working on the roof mounted beacon lamp and tried various ways to light it. I first tried stringing a bunch of LEDs but didn't like the way it looked so I found a high intensity LED array that worked quite nicely but it need quite a bit of power which meant heat. Yes, that's a cpu fan assembly with large fins that I found in my parts cabinet. No active cooling.
 |  |
 |  |
 |  |
I then found this really cool WAV audio shield from SparkFun that has polyphonic sound and can be triggered either by grounding an input line or via MIDI.
Sparkfun WAV Trigger WIG-13660
See Logs for code snippets for controlling lights and audio board.
2016 - More Lights And Door Sensors
The top door on each side has a glass window so I added more RGB LED strips at the top and under the adjustable shelf behind a strip of wood to hide the LED strips. I connected these 4 LED strips to the existing strip for the sign. I also wanted a separate channel for the white LED in the roof lam so that driven by another MOSFET and controlled by another PWM output.
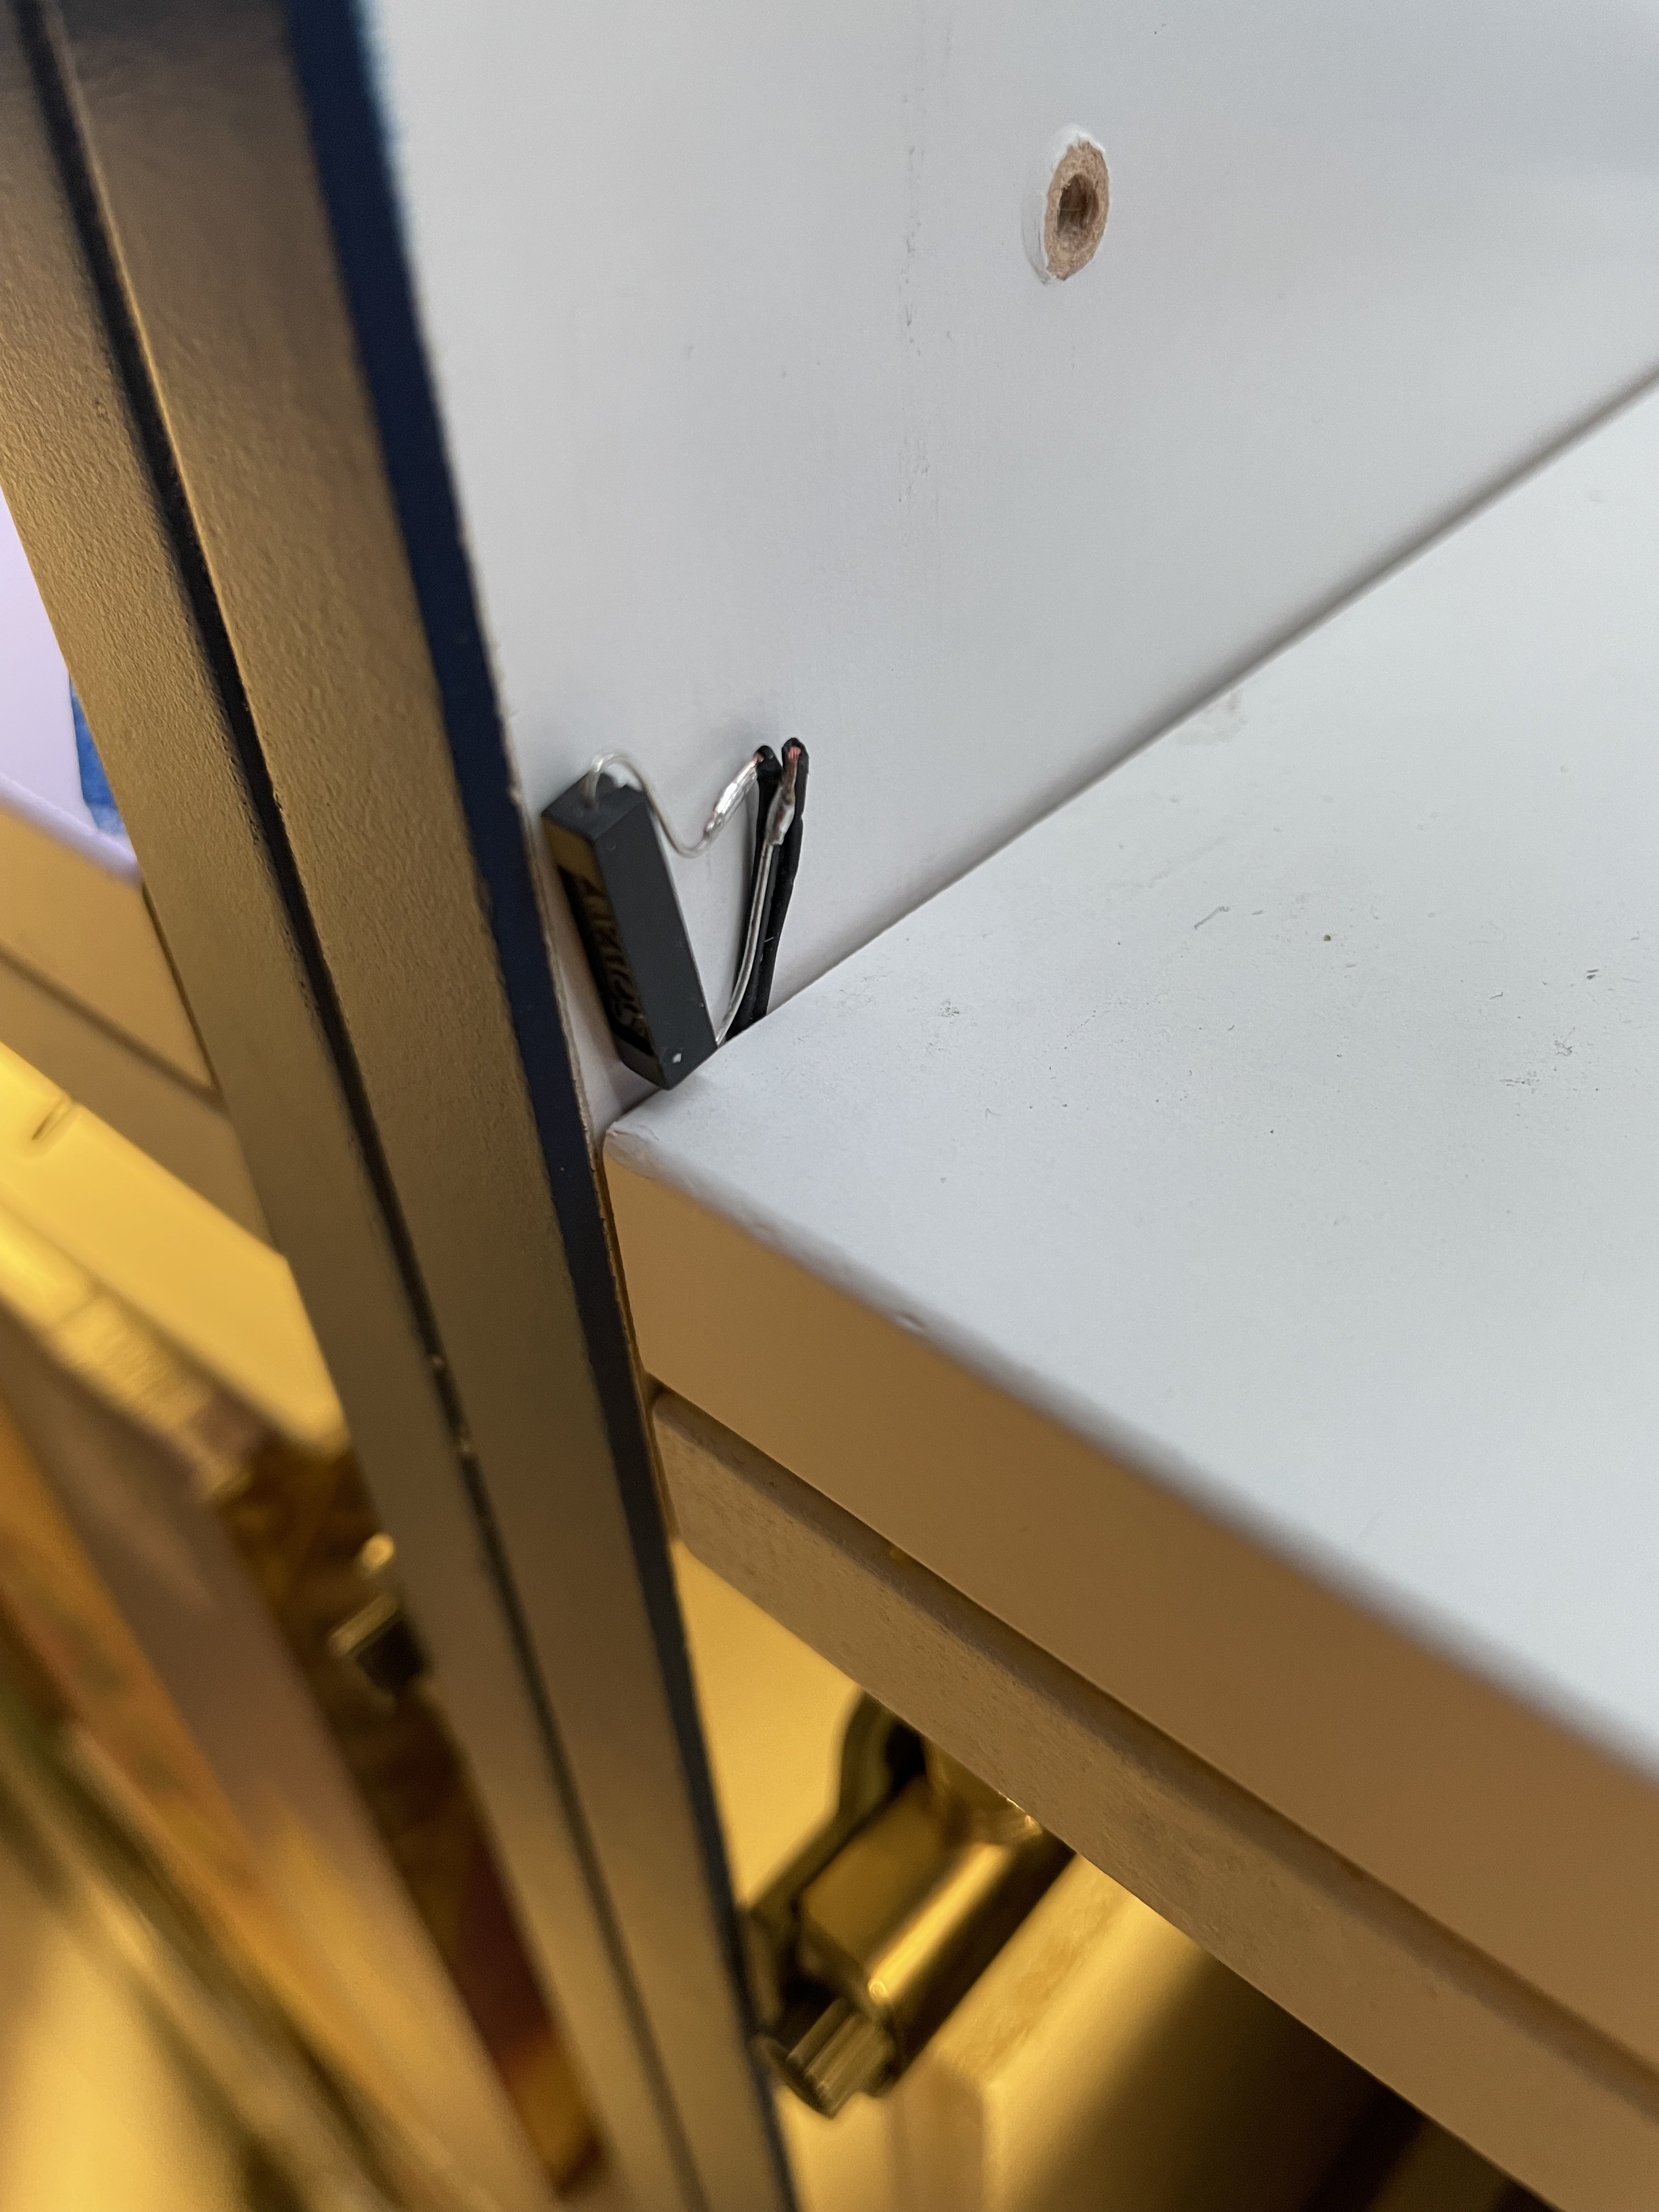
There are actually four doors and I wanted to add a sensor to each door. The idea was to detect the angle of each door so I could play a creaking door sound effect which would require 4 analog input lines.
At that point I was using 4 PWM output lines, several digital lines to trigger the various wave files and was looking at adding an IR sensor so I could use my Sonic Screwdriver TV remote to control the TARDIS which would be really cool but I was afraid of running out of I/O lines on the basic UNO. I could have switched to a Raspberry PI but that seemed like overkill and I thought I had read that there was a problem with driving PWM Chanels so I opted for an Arduino Mega which has plenty of I/O. However I couldn't figure out a way to reliably detect the door angles and adjust the squeak in real-time so I opted for magnetic door sensors using Hall effect sensors.
Magnetic Reed Switch - Insulated
At this point the main loop of the program monitored the position of the doors and did the following:
- When a door is first opened, turn sign and cabinet light on and play one of the Doctor Who theme songs.
- If all doors closed, start colorful pulsing light pattern and play the TARDIS sound effect.
 |  |
Here's a couple of videos demonstrating the detection of the doors opening and closing and playing either one of the Doctor Theme songs when the doors is open or the sound effect of the TARDIS materializing. The lights go white when when the doors are open and cycle through colors when the doors are closed.
| Original audio visual test | Christmas themed music |
See Logs for code snippets for detecting door. See main source code for the actual logic.
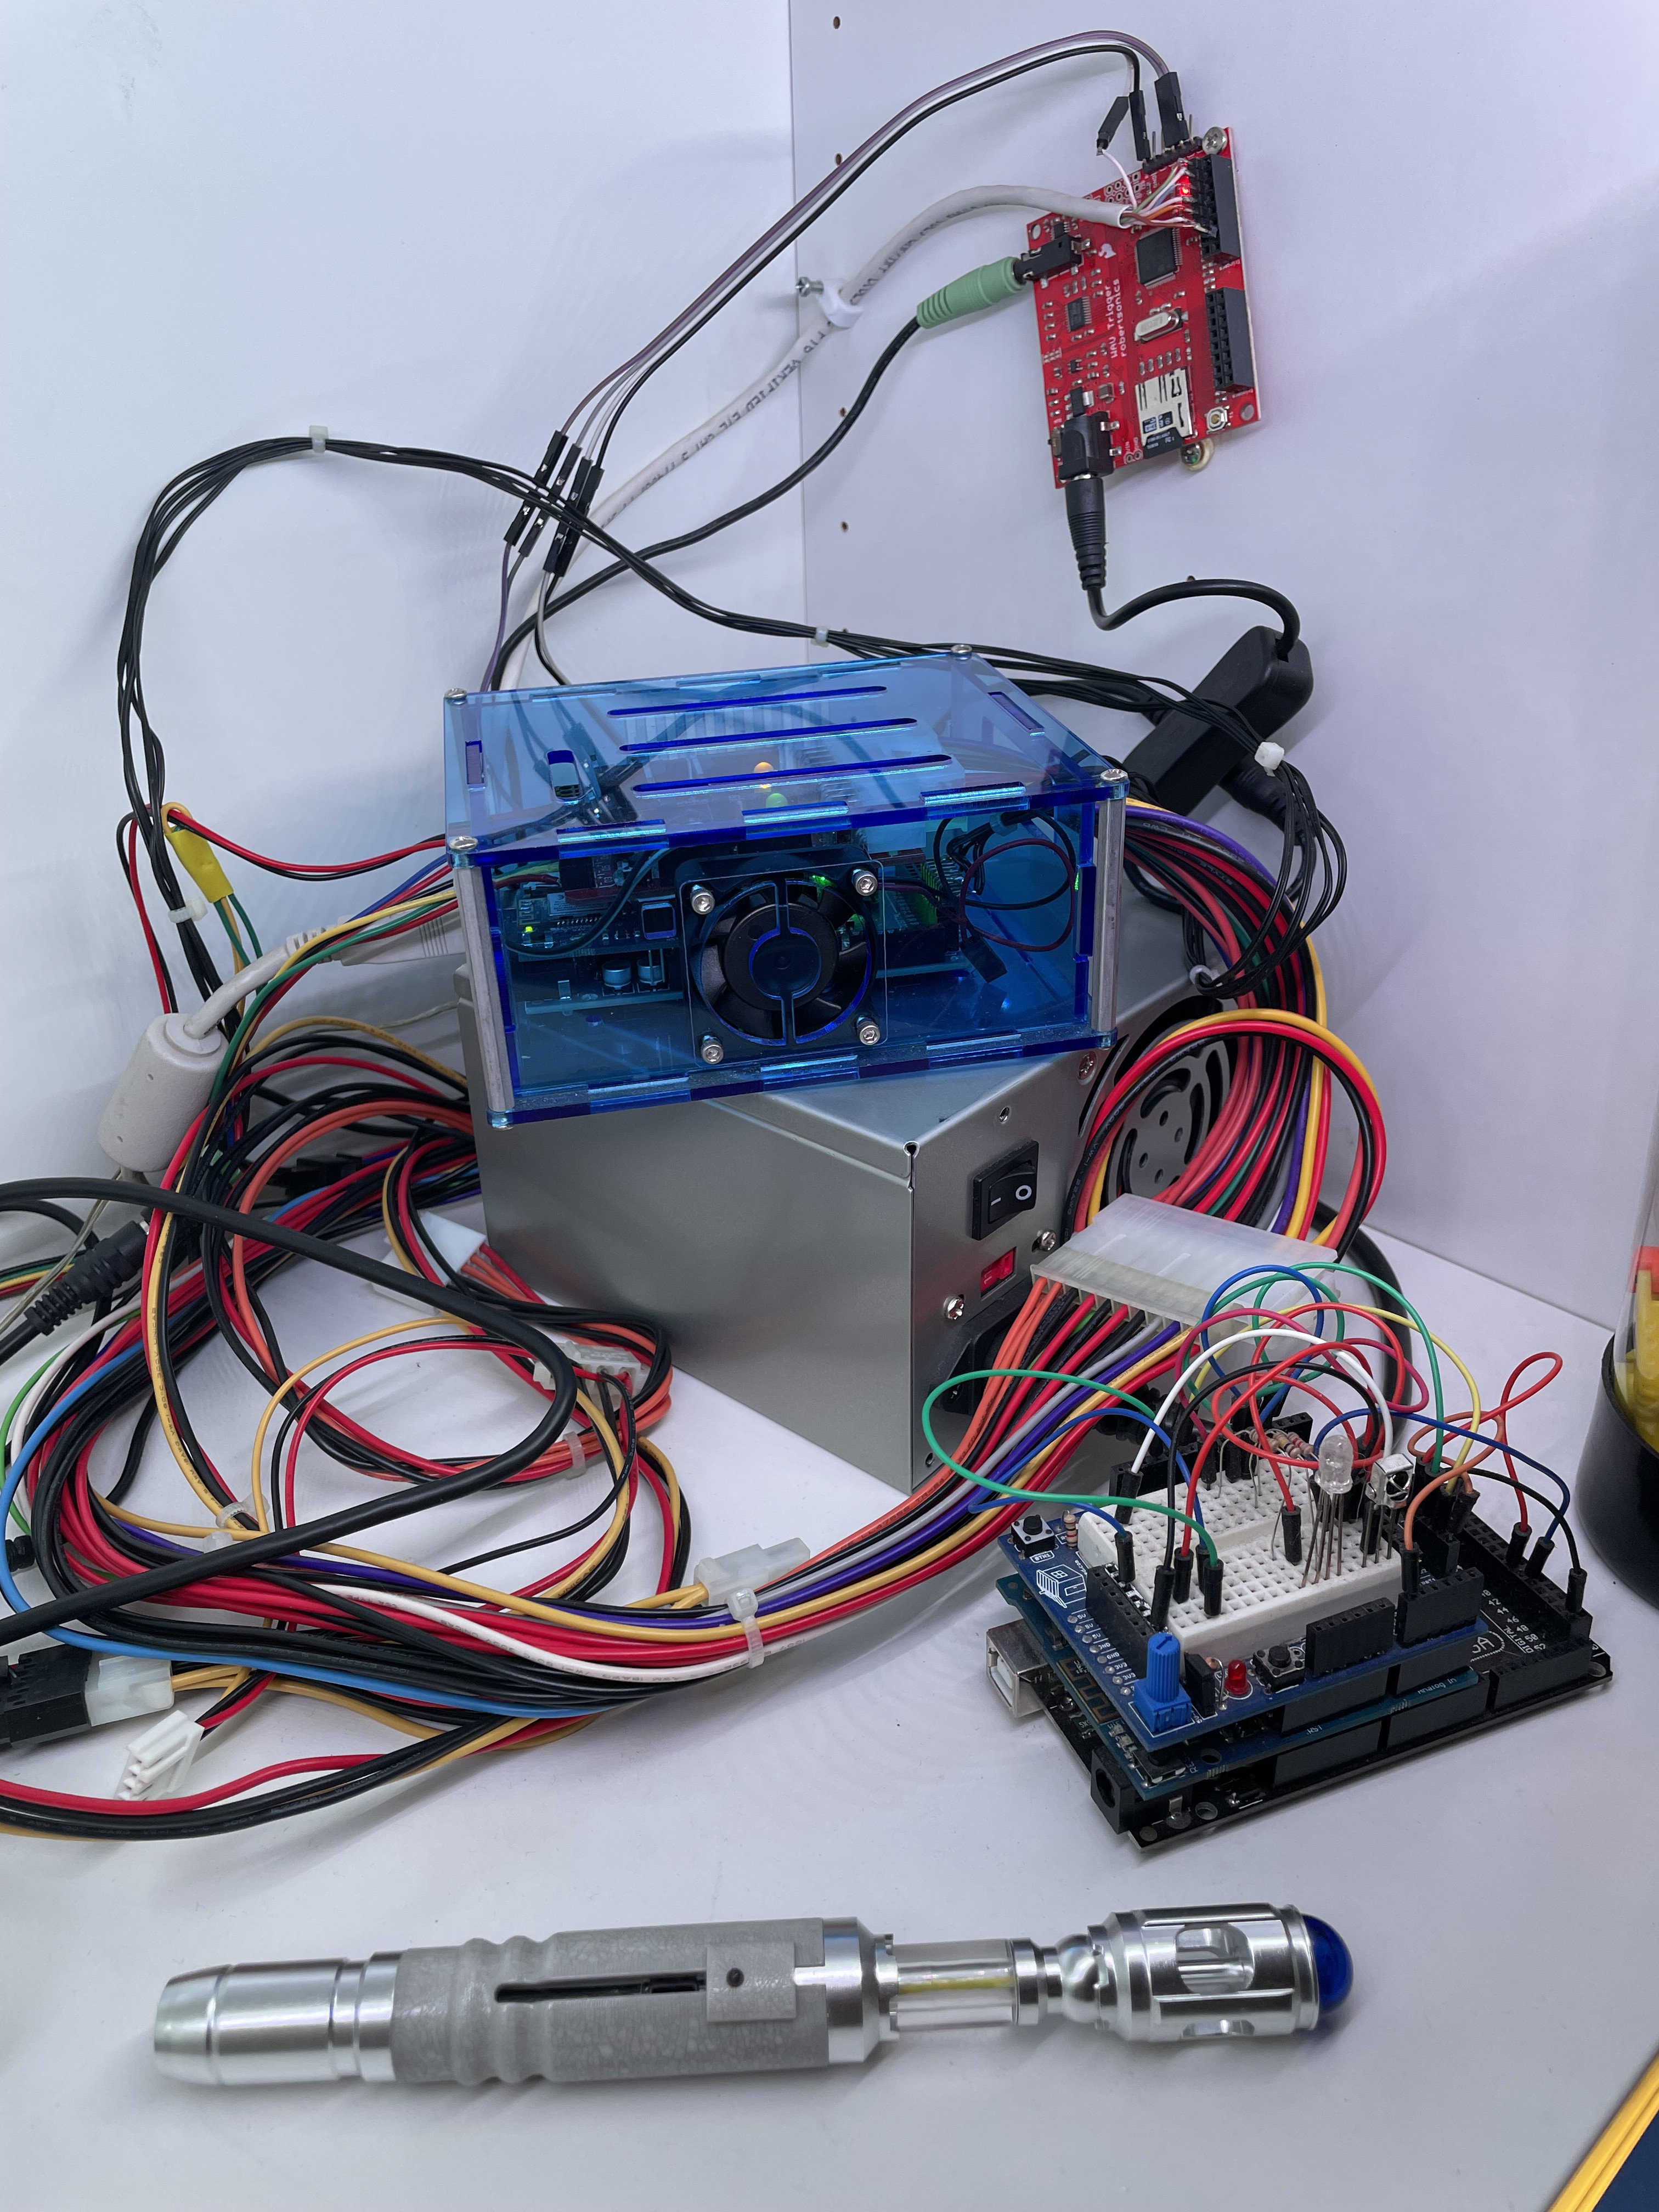
2017 - Need More Power
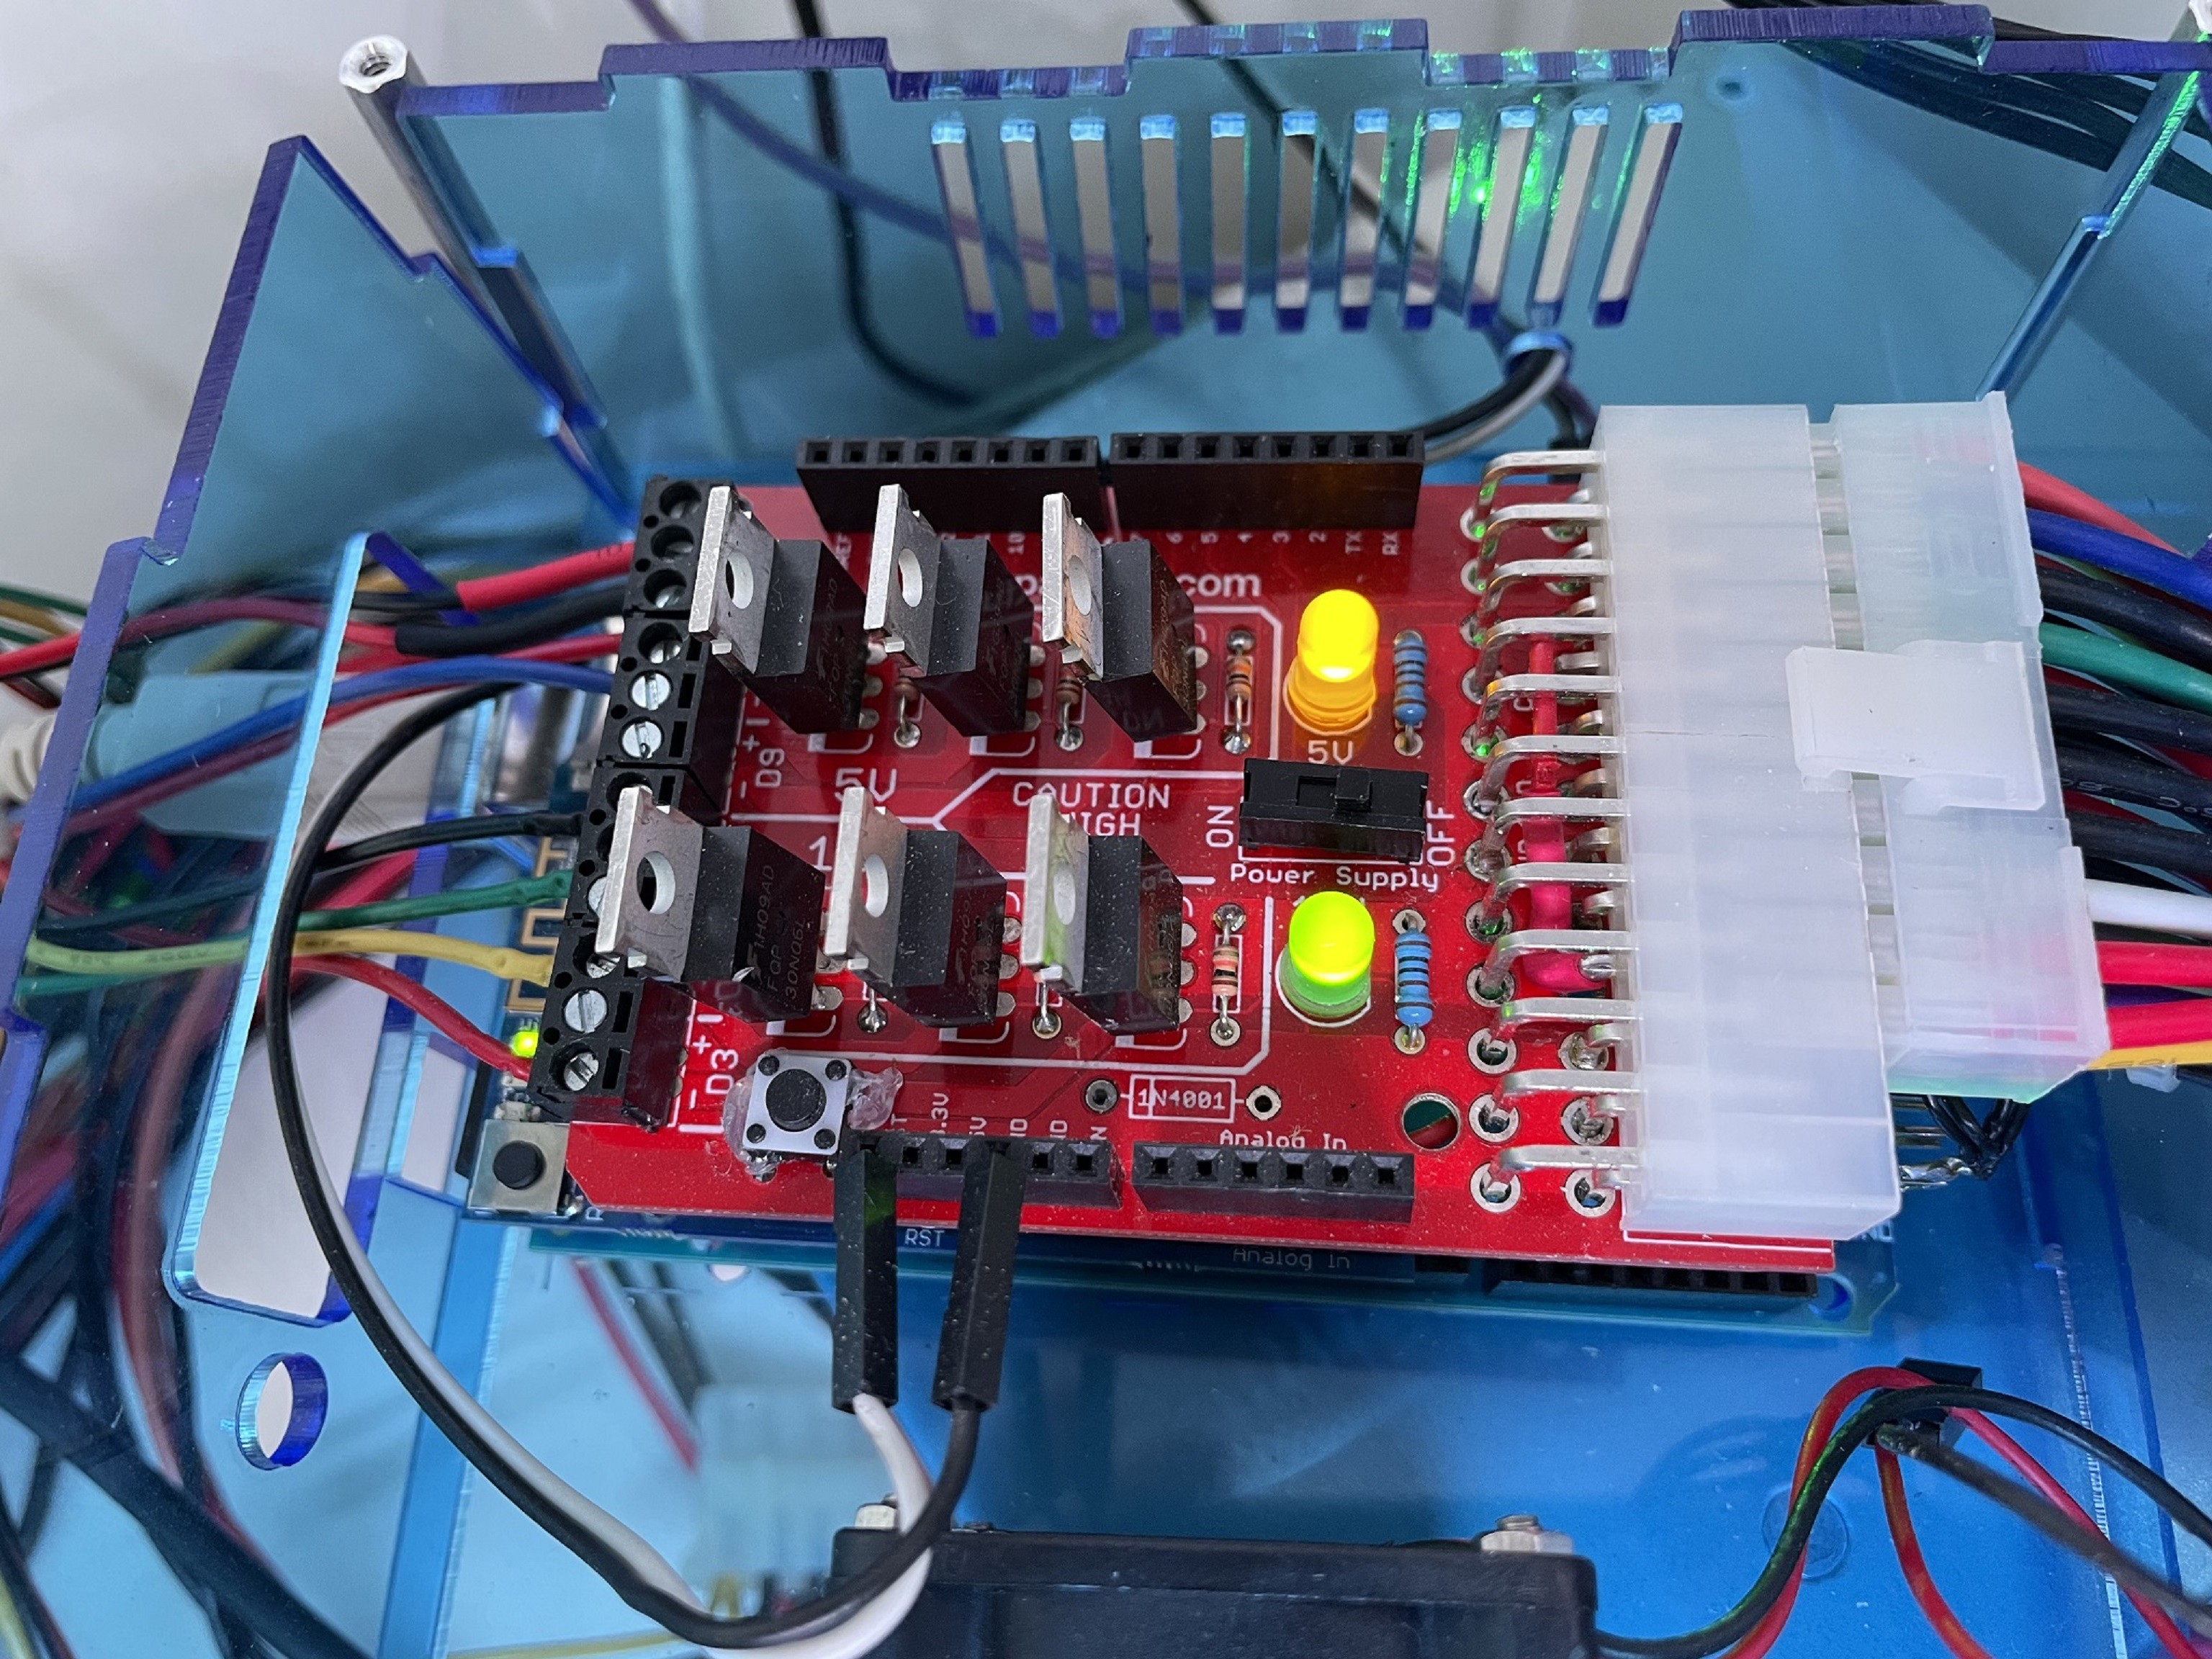
I wanted to add additional LED lights to the lower section of the cabinet and was having issues supplying enough current to the LED array for the roof beacon lamp and now 5 LED strips and potentially 4 more for the additional shelves below, as well as the Arduino and the WAV board. While I usually don't run the LEDs at full power for any length of time I was concerned about having enough power. I had a spare ATX power supply so I ordered a 6 channel PWM driver board from SparkFun. This board allows me to power the Arduino using the 5 volt stand-by power yet allow the Arduino to fully turn on the ATX power supply. Normally the board supplies 12V to three of the channels with the other three only 5V but I hacked the board to allow me to drive 6 channels at the full 12 volts.

SparkFun Power Driver Shield Kit
See Logs for code snippet for controller the ATX shield.
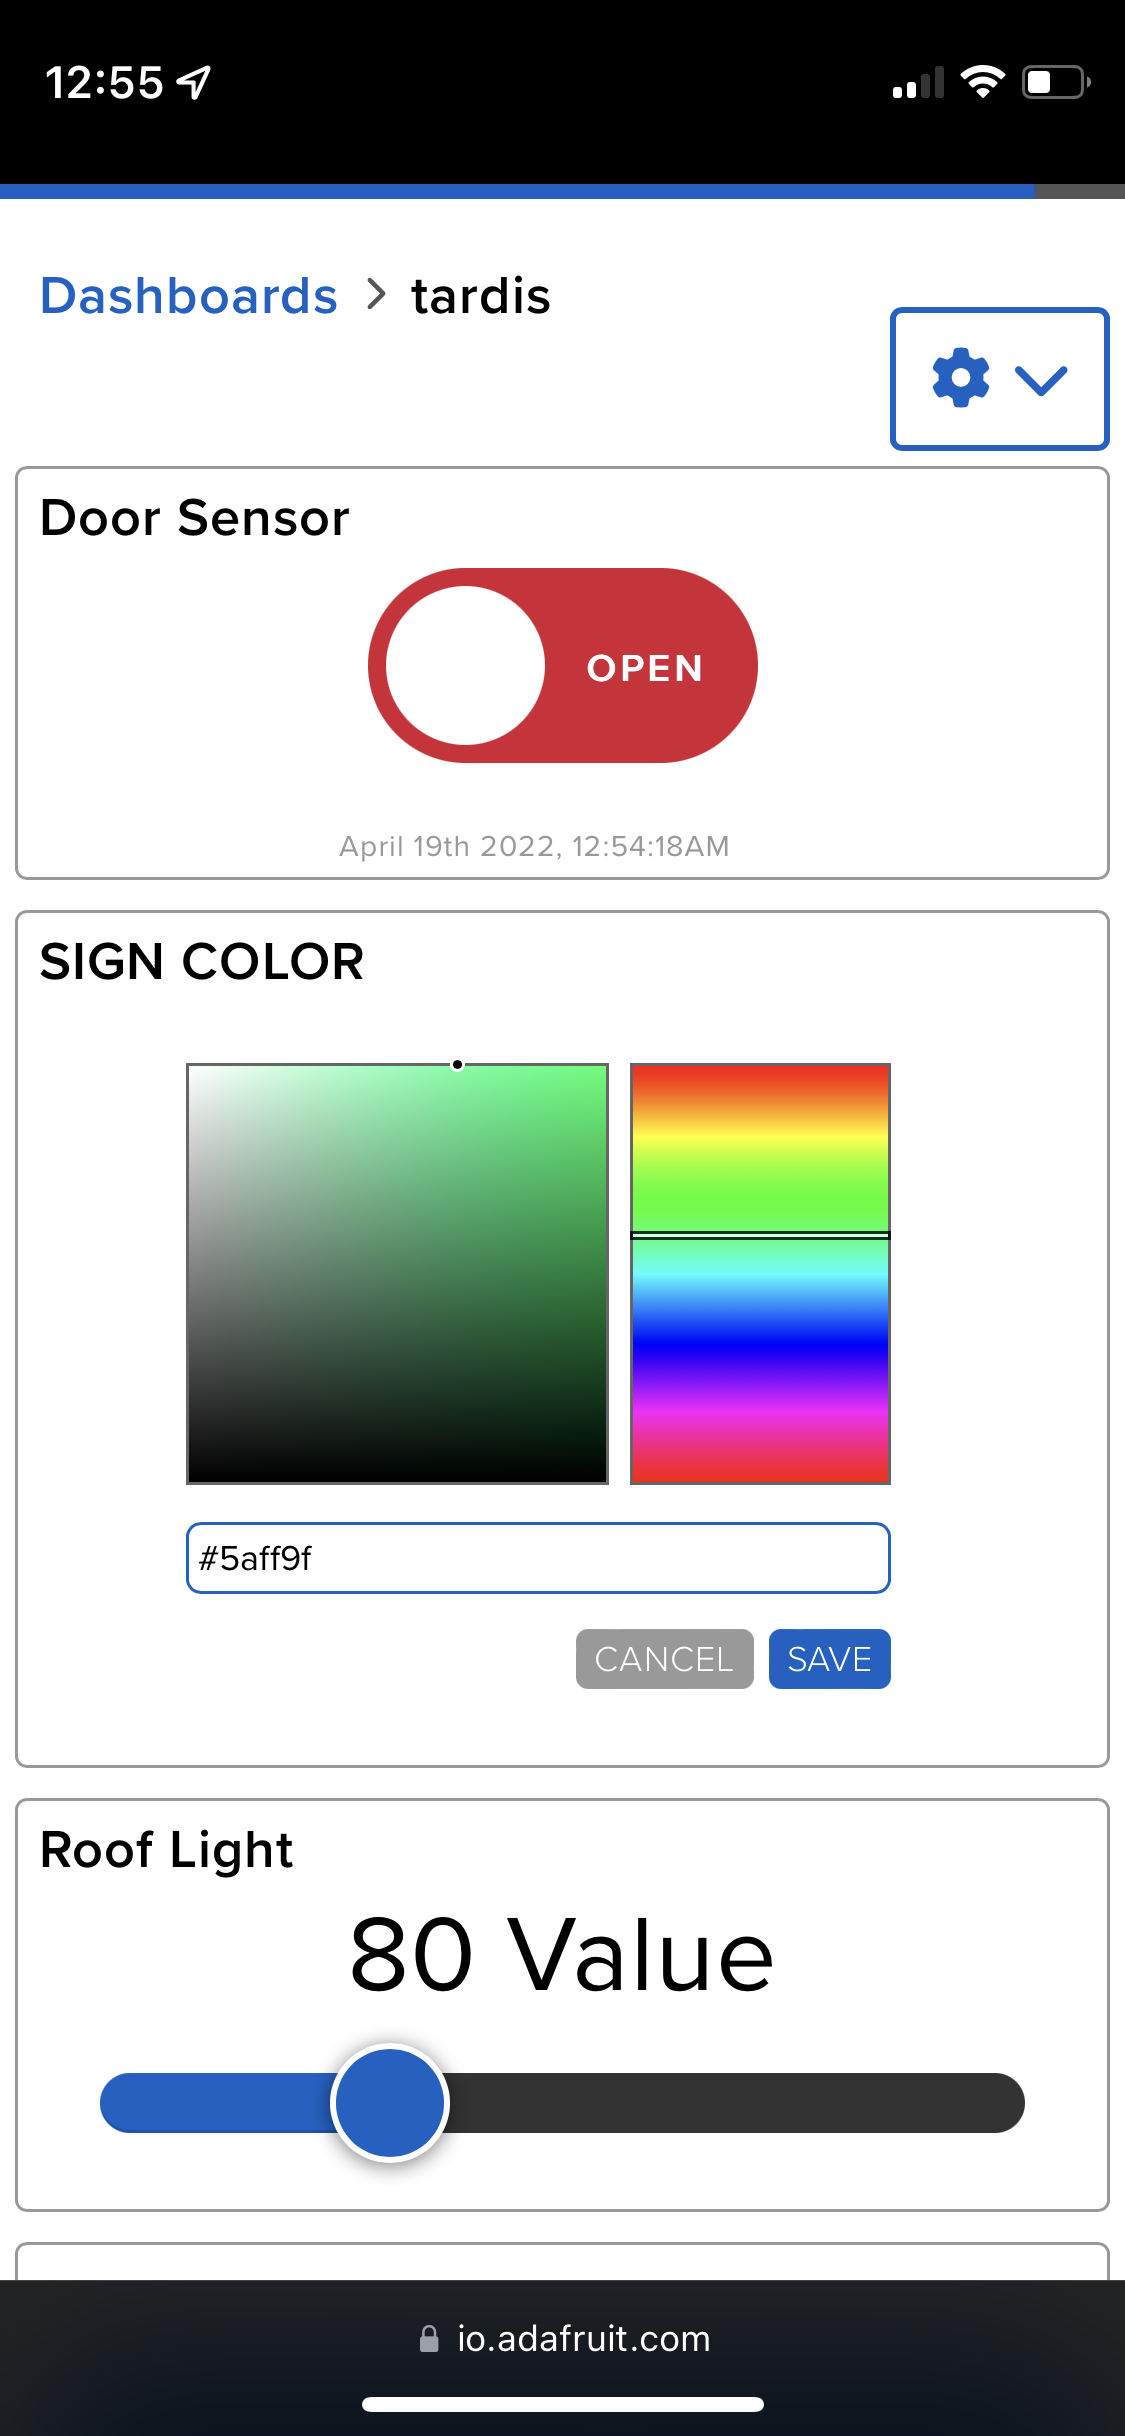
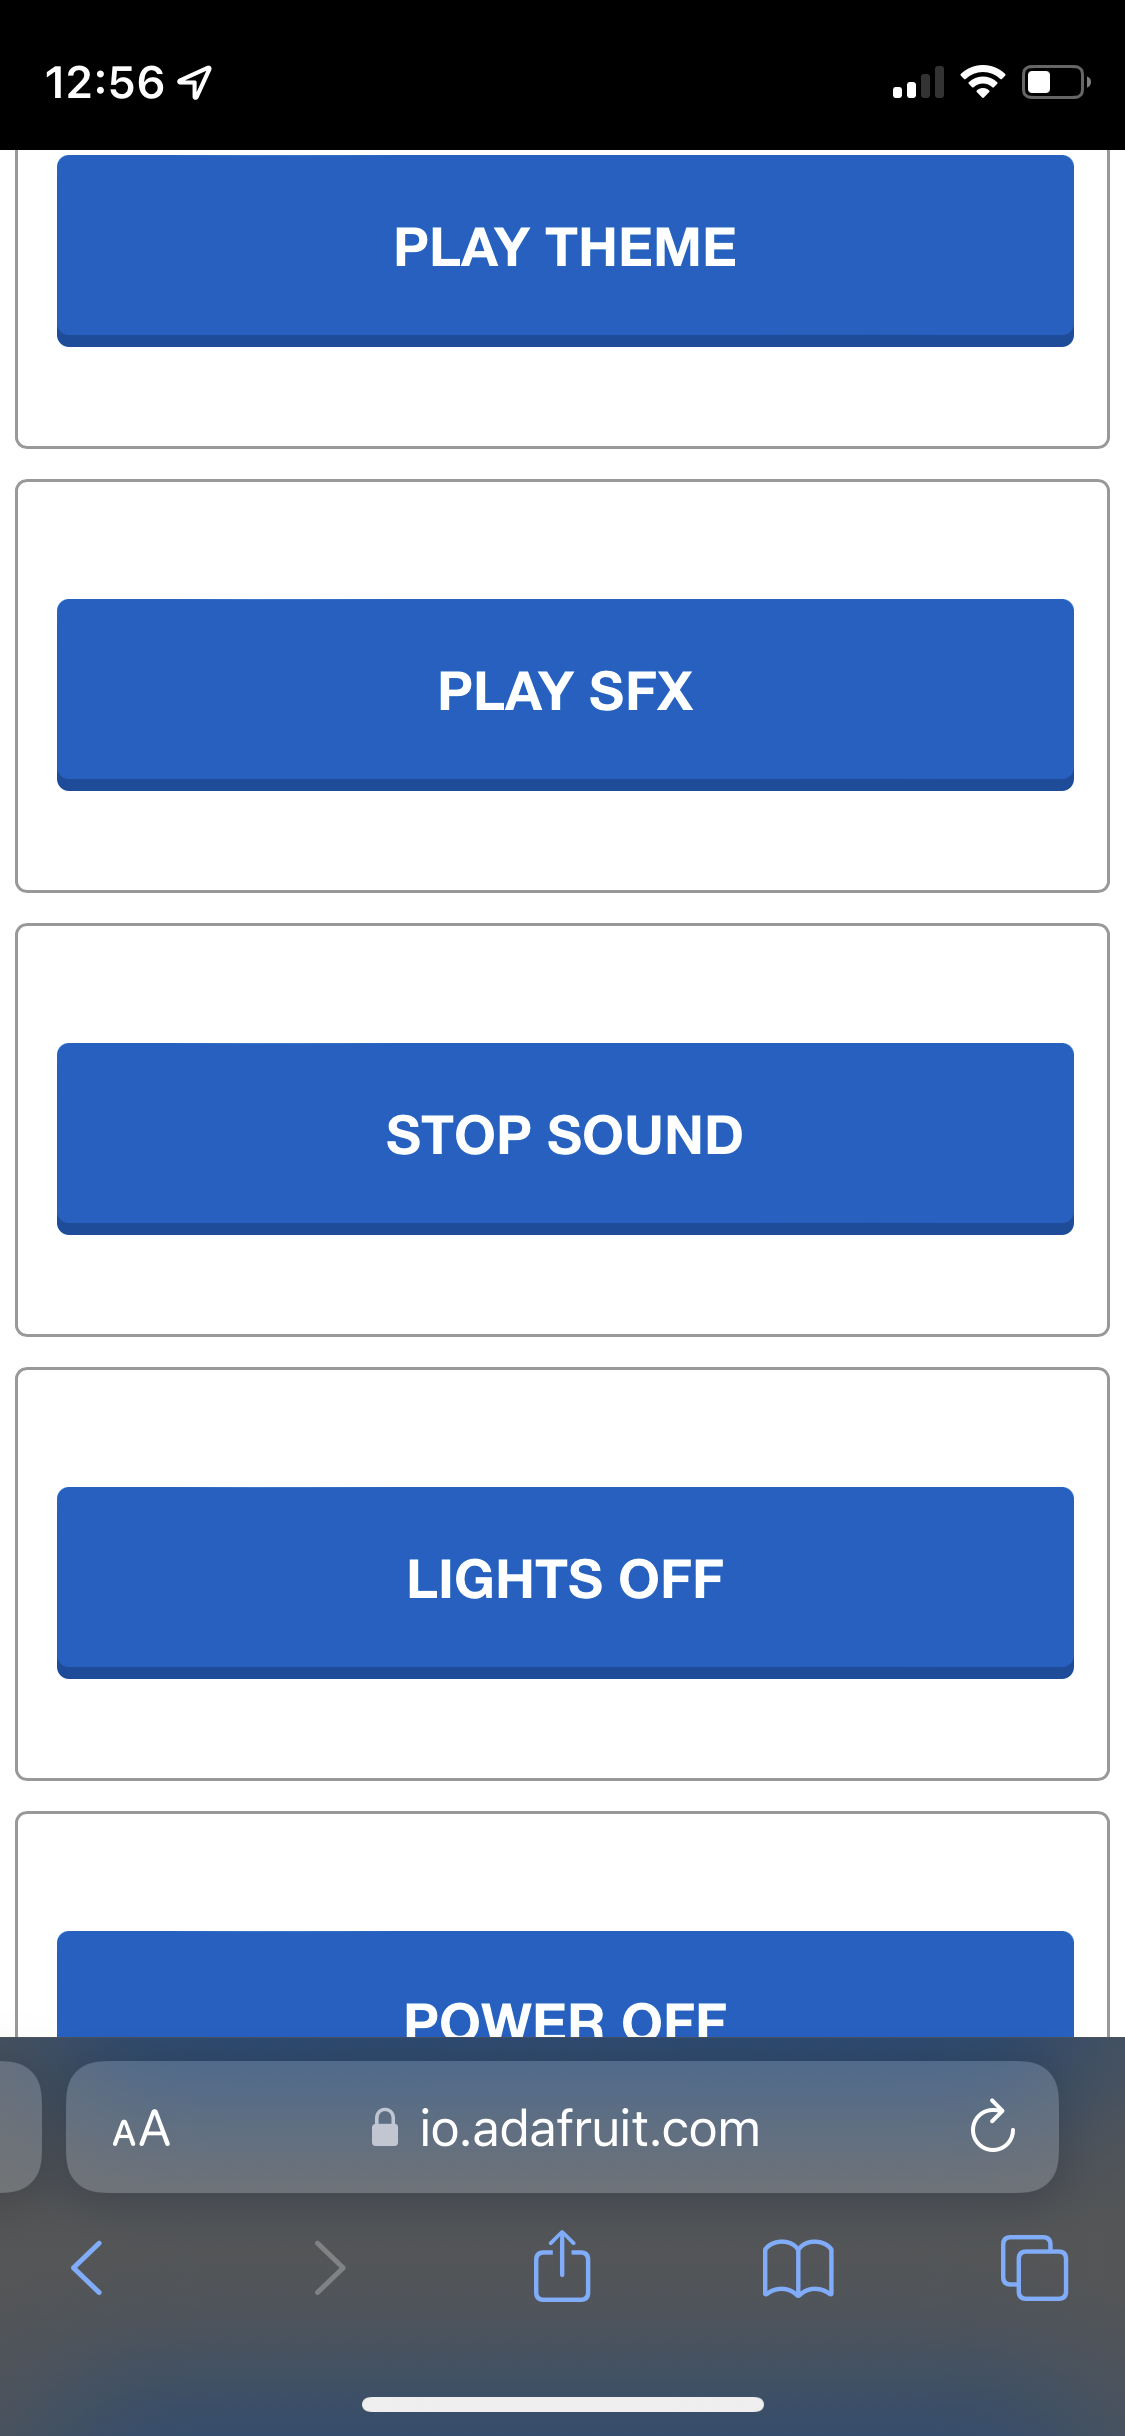
2018 - WiFi Control
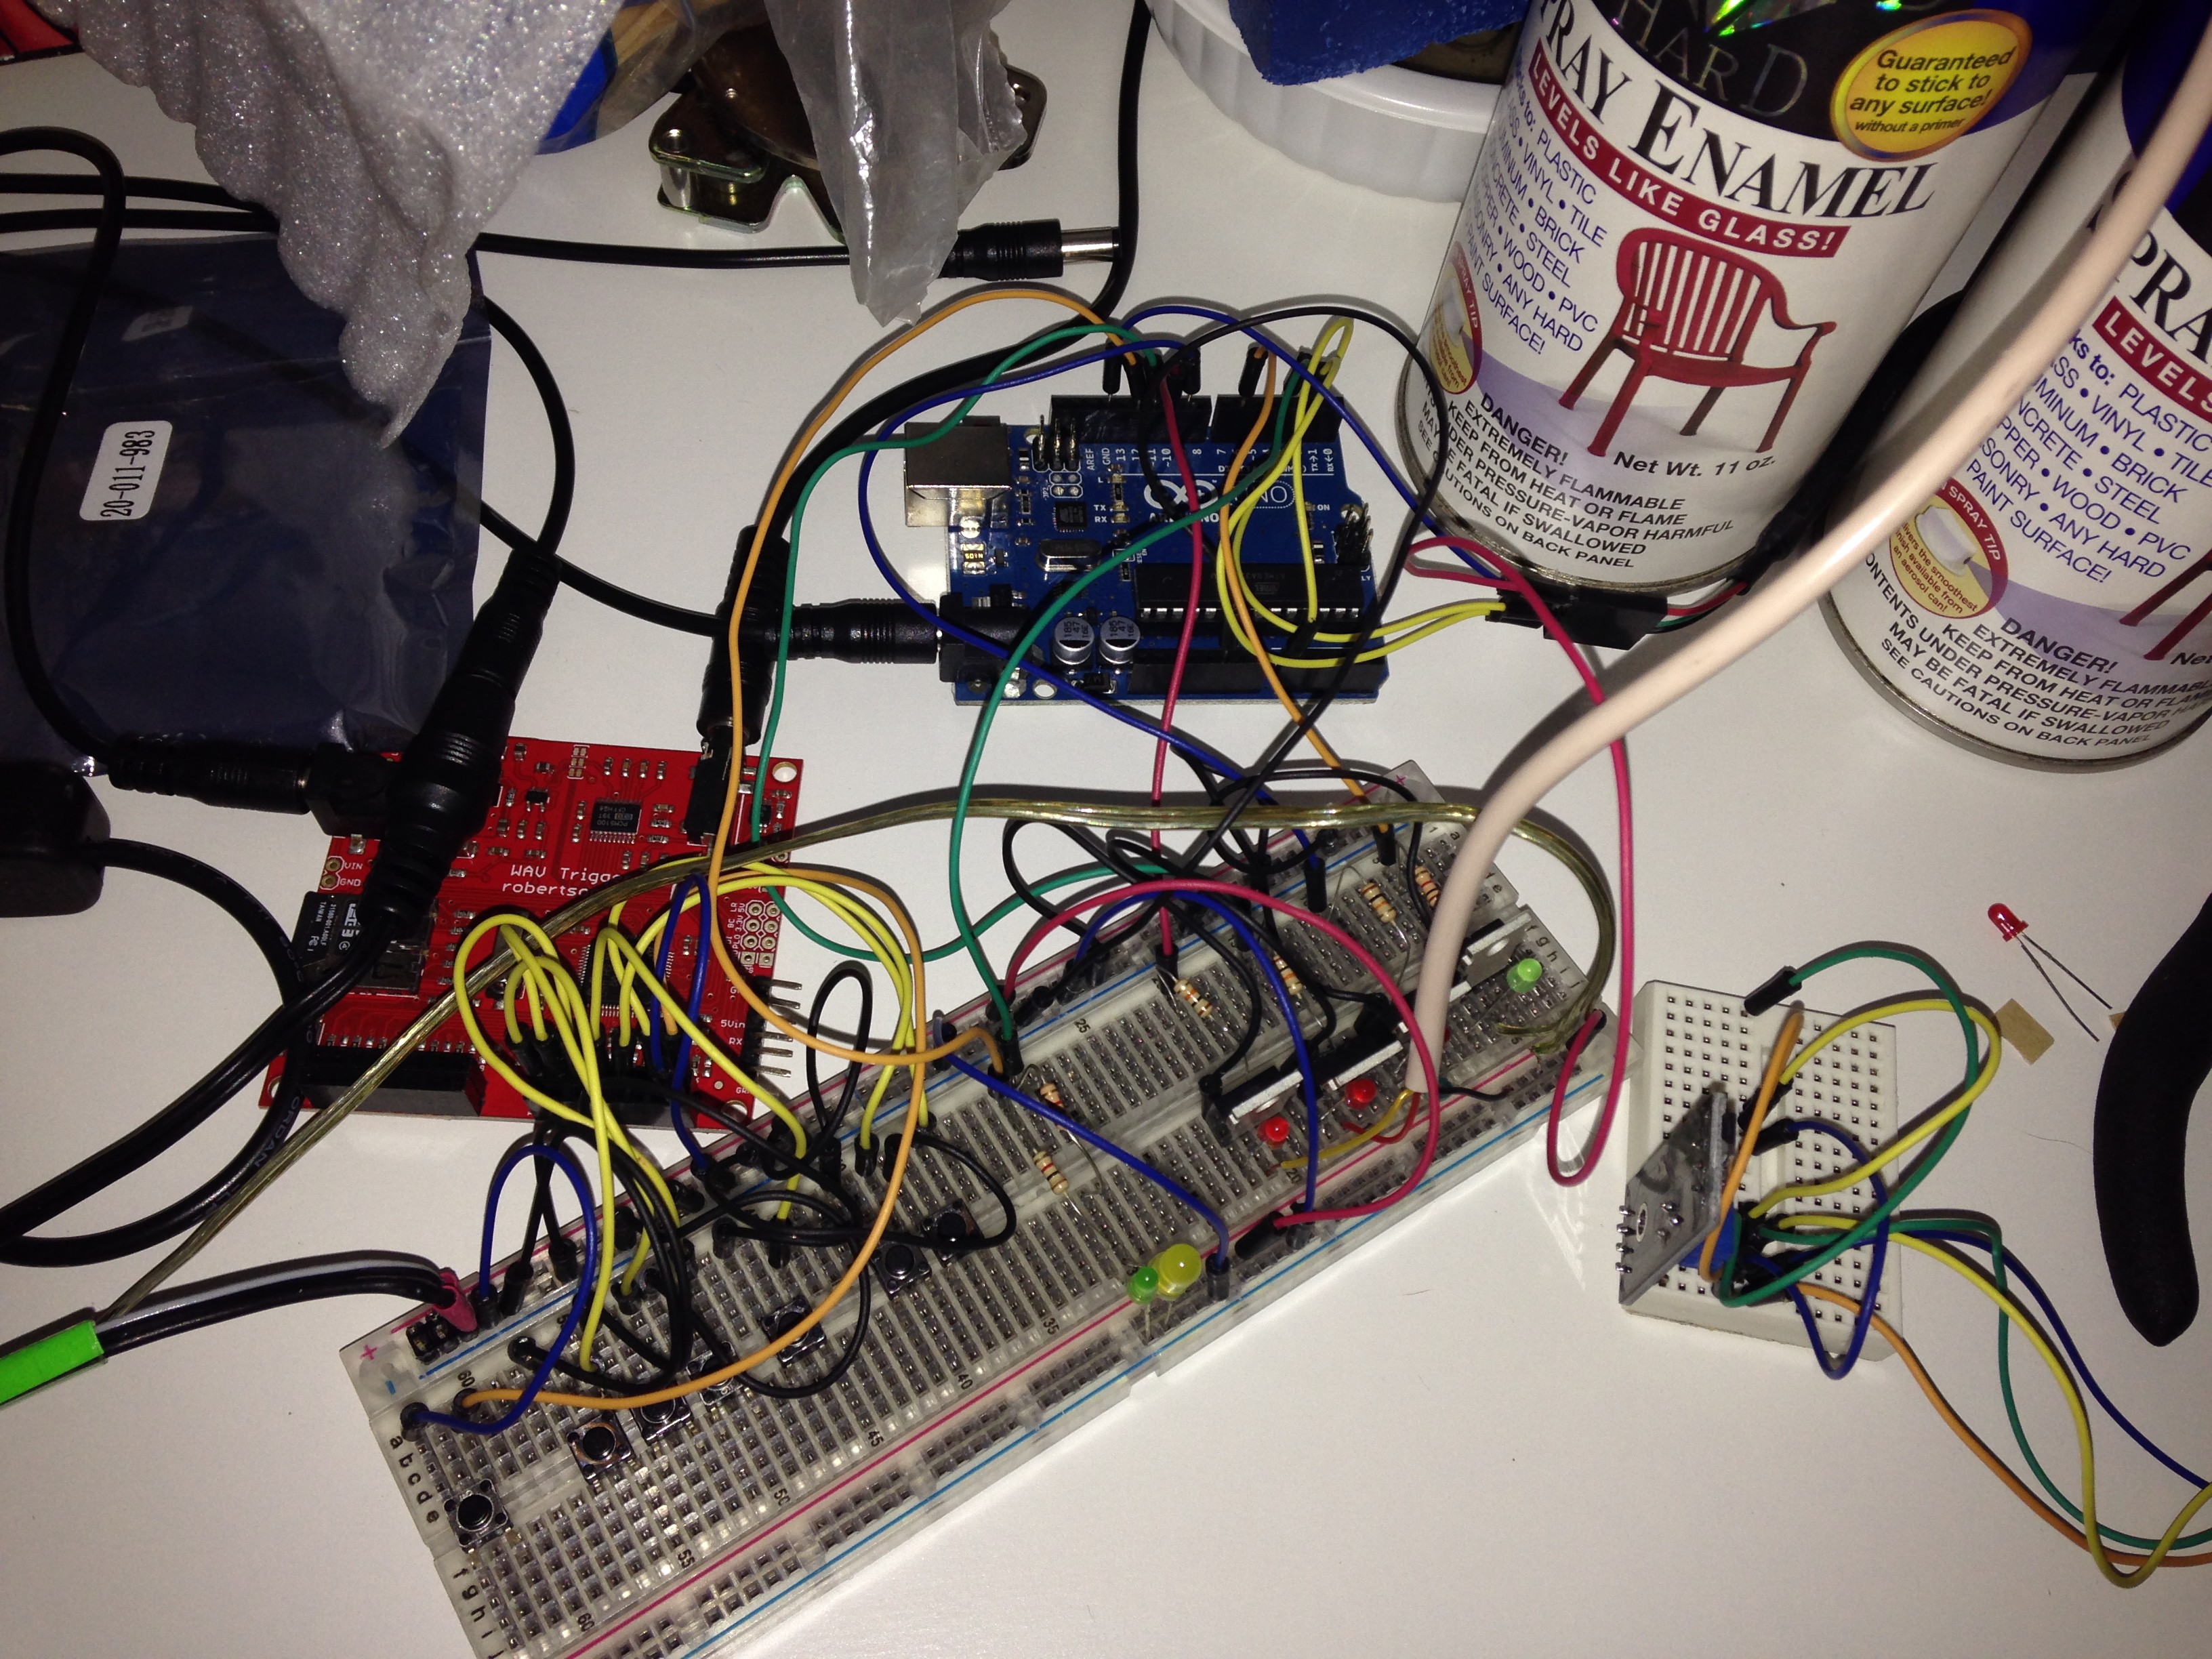
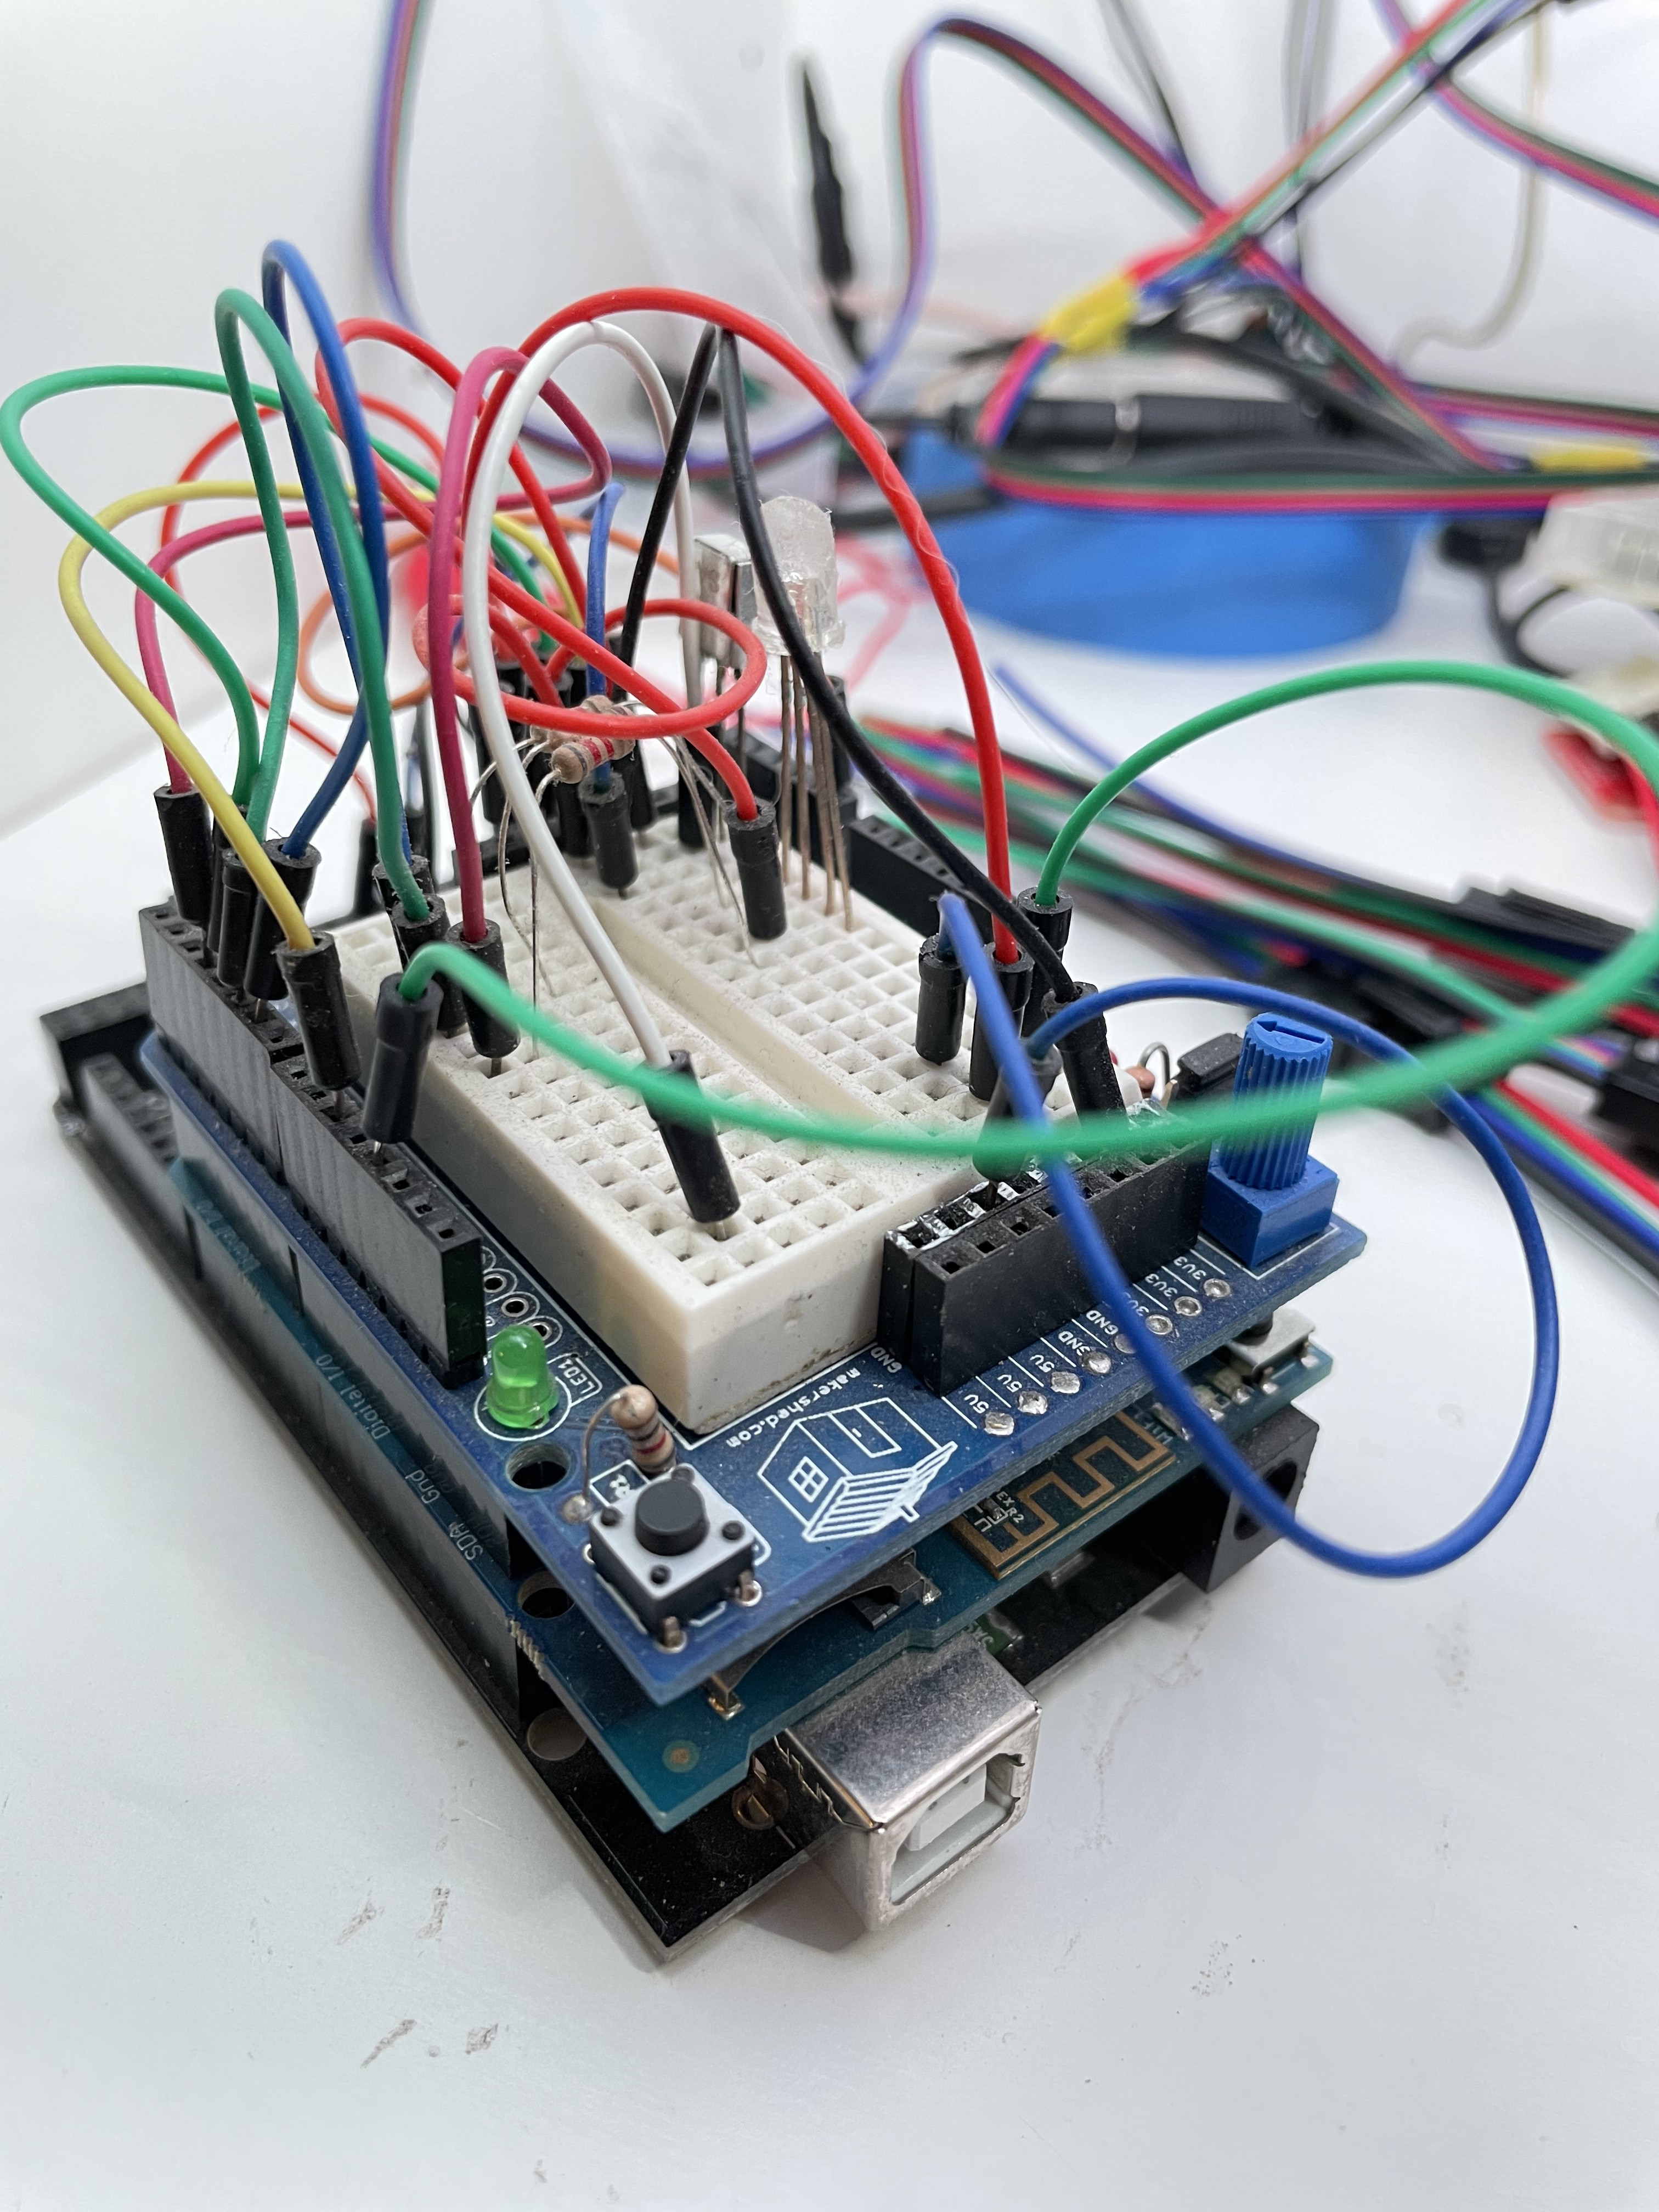
Added WiFi shield from Adafruit which allows me to control my TARDIS cabinet using a web app on my phone. It worked so well I eventually picked up a 2nd to go with a spare Arduino Uno with a prototype shield so I can easily experiment with software or hardware changes from the comfort of the couch reducing the risk of breaking the "production" build in the cabinet.
In the picture below you can see the WiFi shield between the Arduino and the breadboard shield on top - it's the one with the antenna printed on the PC board.
Adafruit WINC1500 WiFi Shield with PCB Antenna
Adafruit WINC1500 WiFi Shield for Arduino - How To
 |
|
 |
 |
See Logs for code snipped for triggering actions based on messages via WiFi
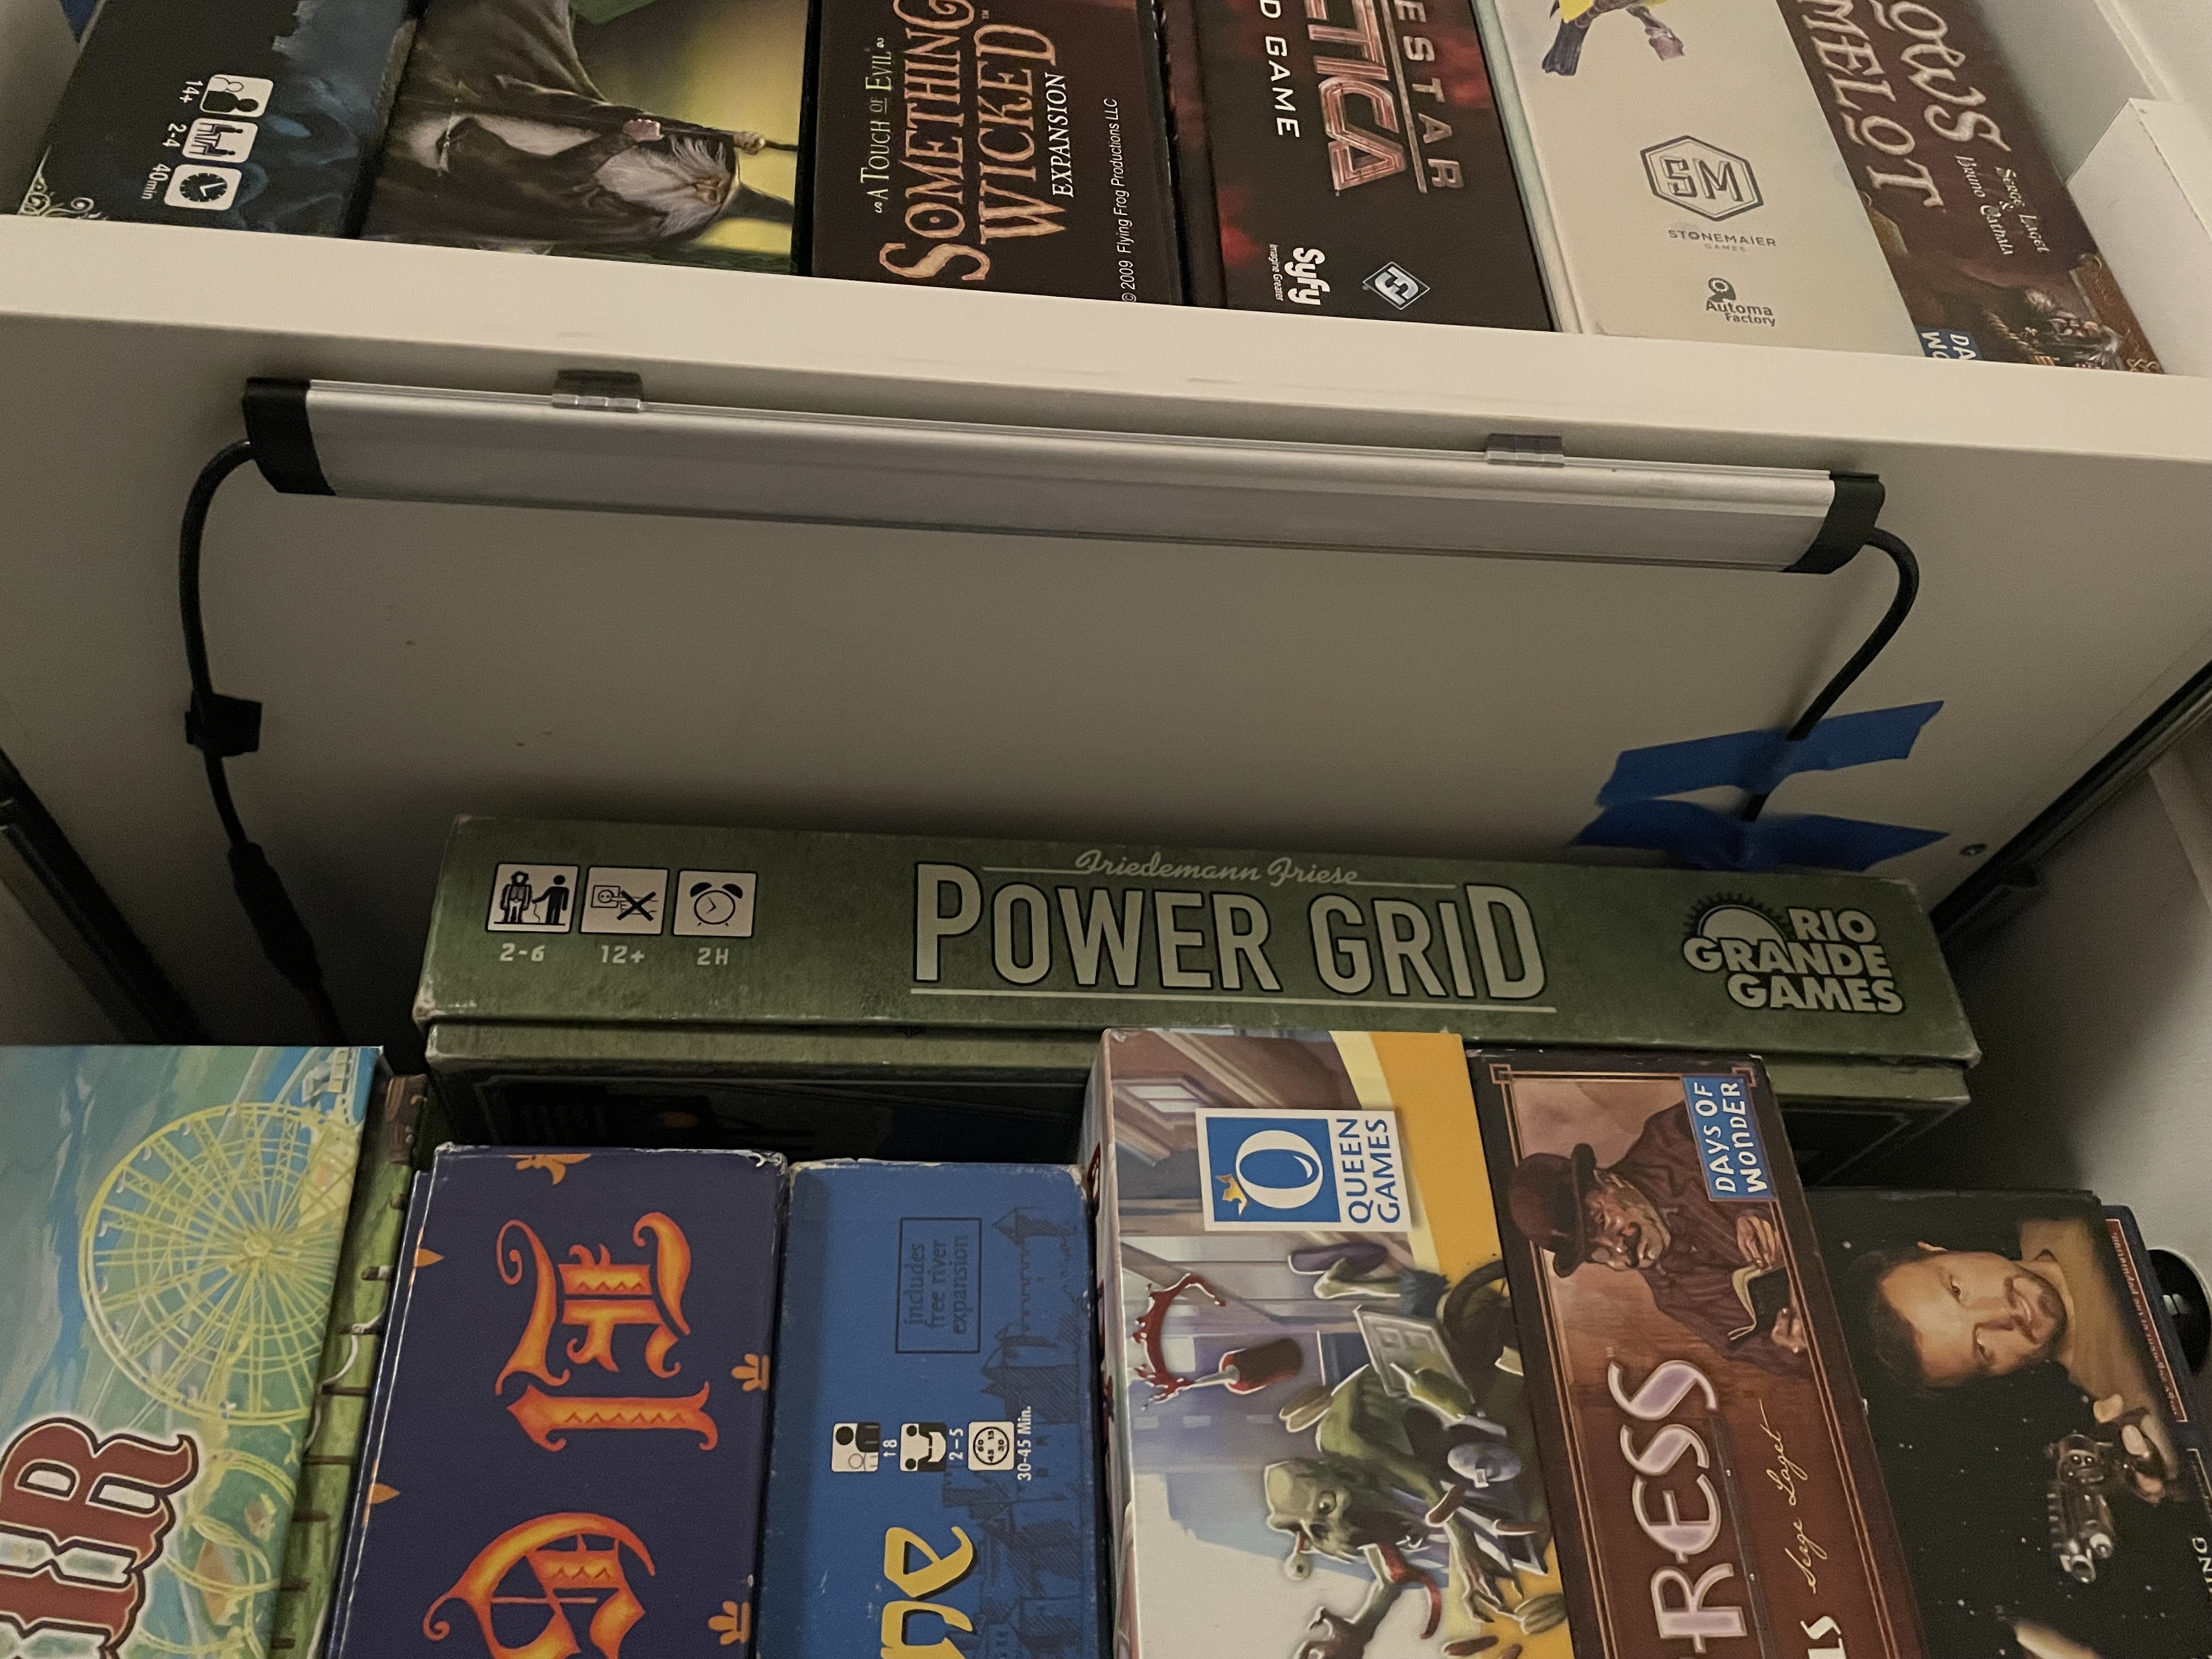
2019 - Bigger On The Inside
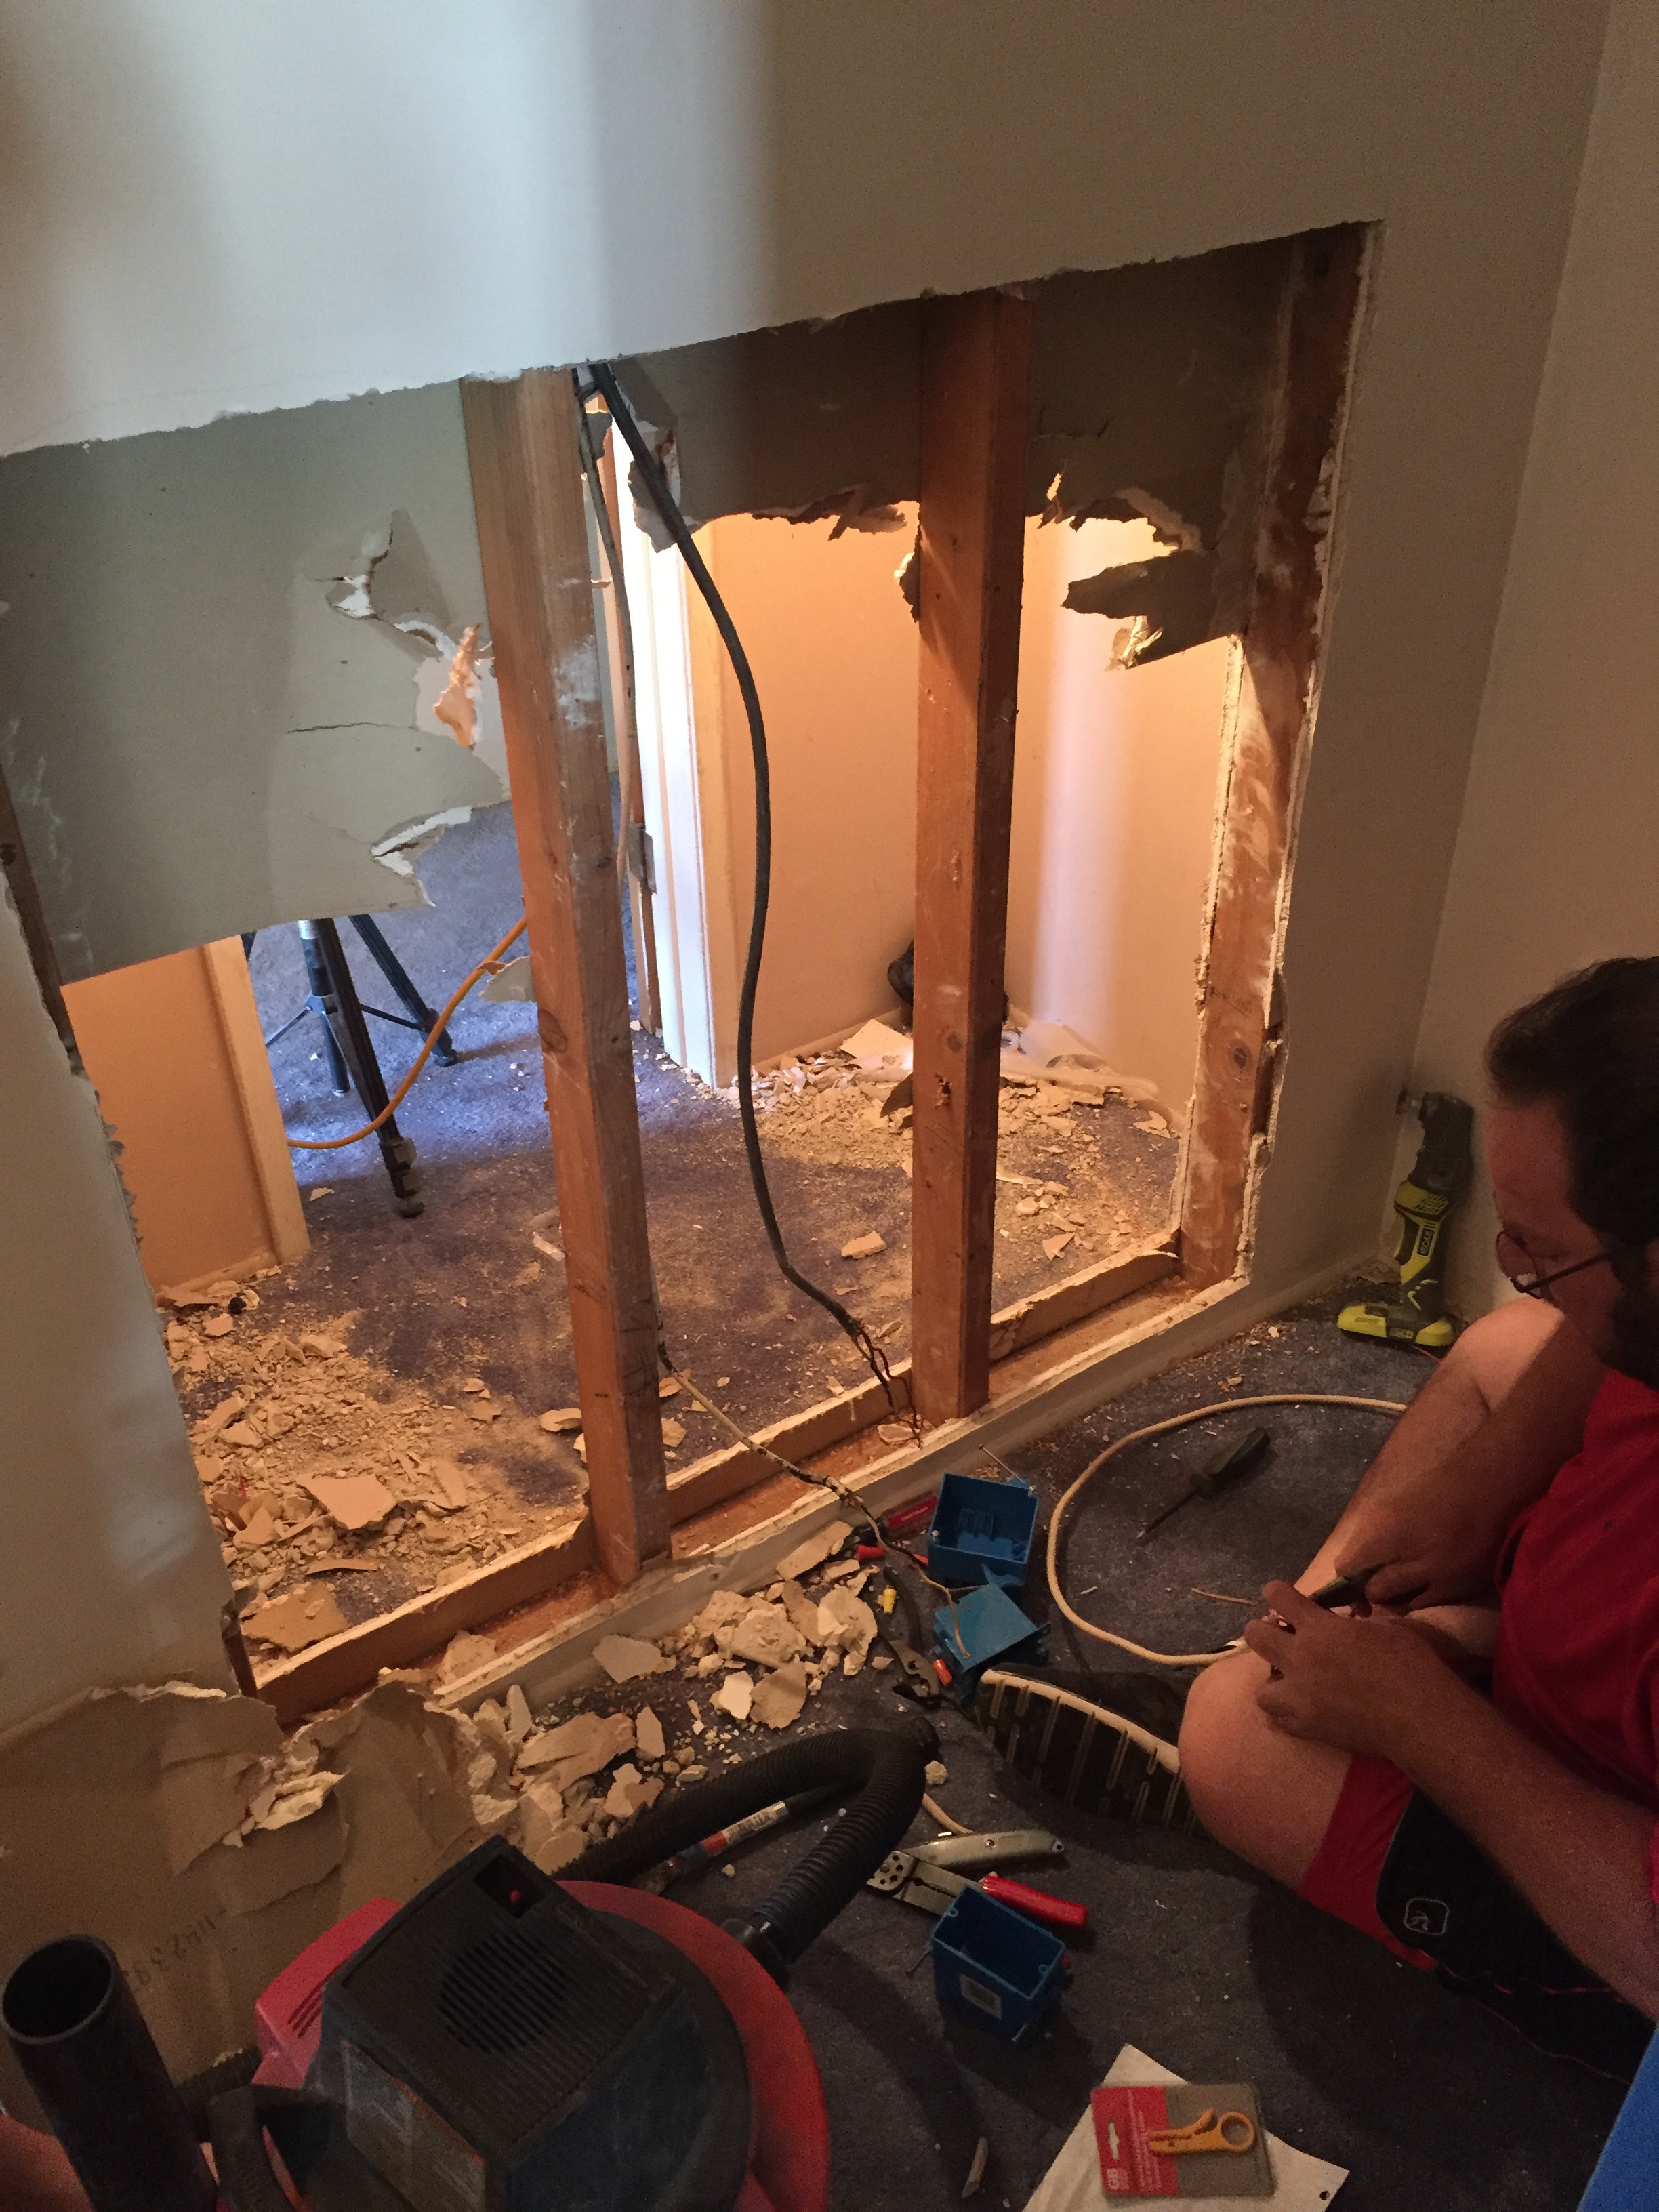
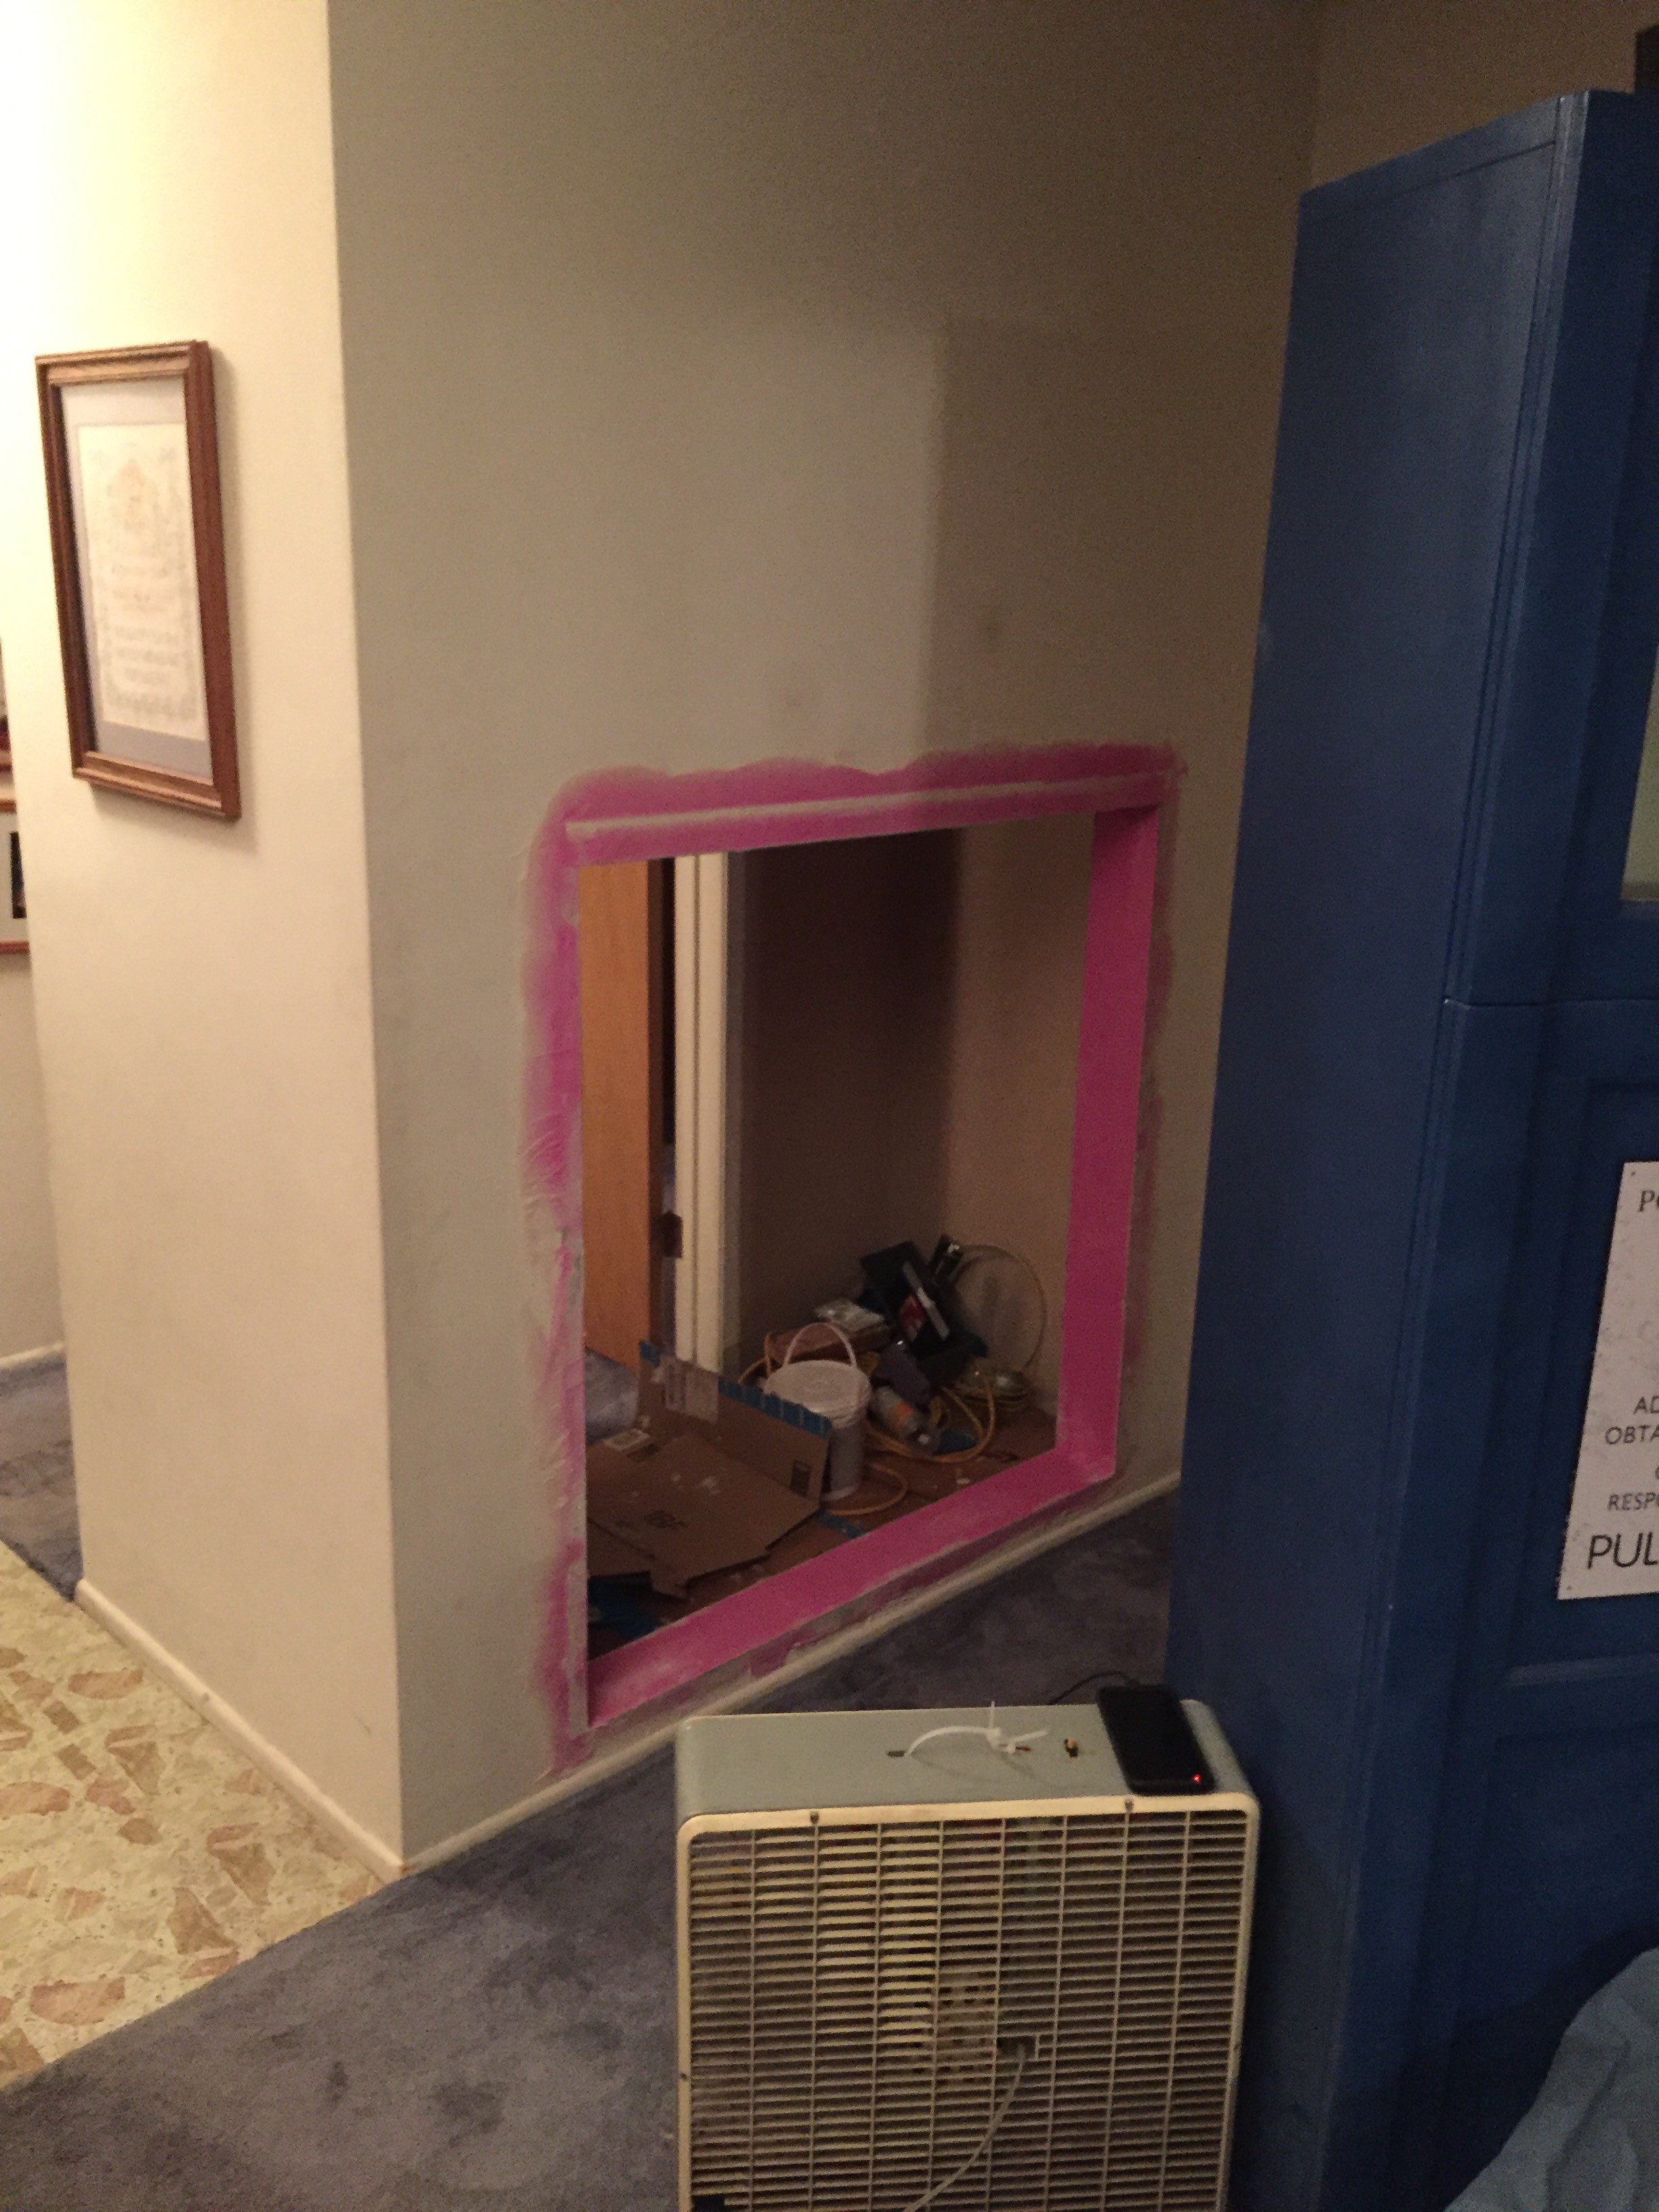
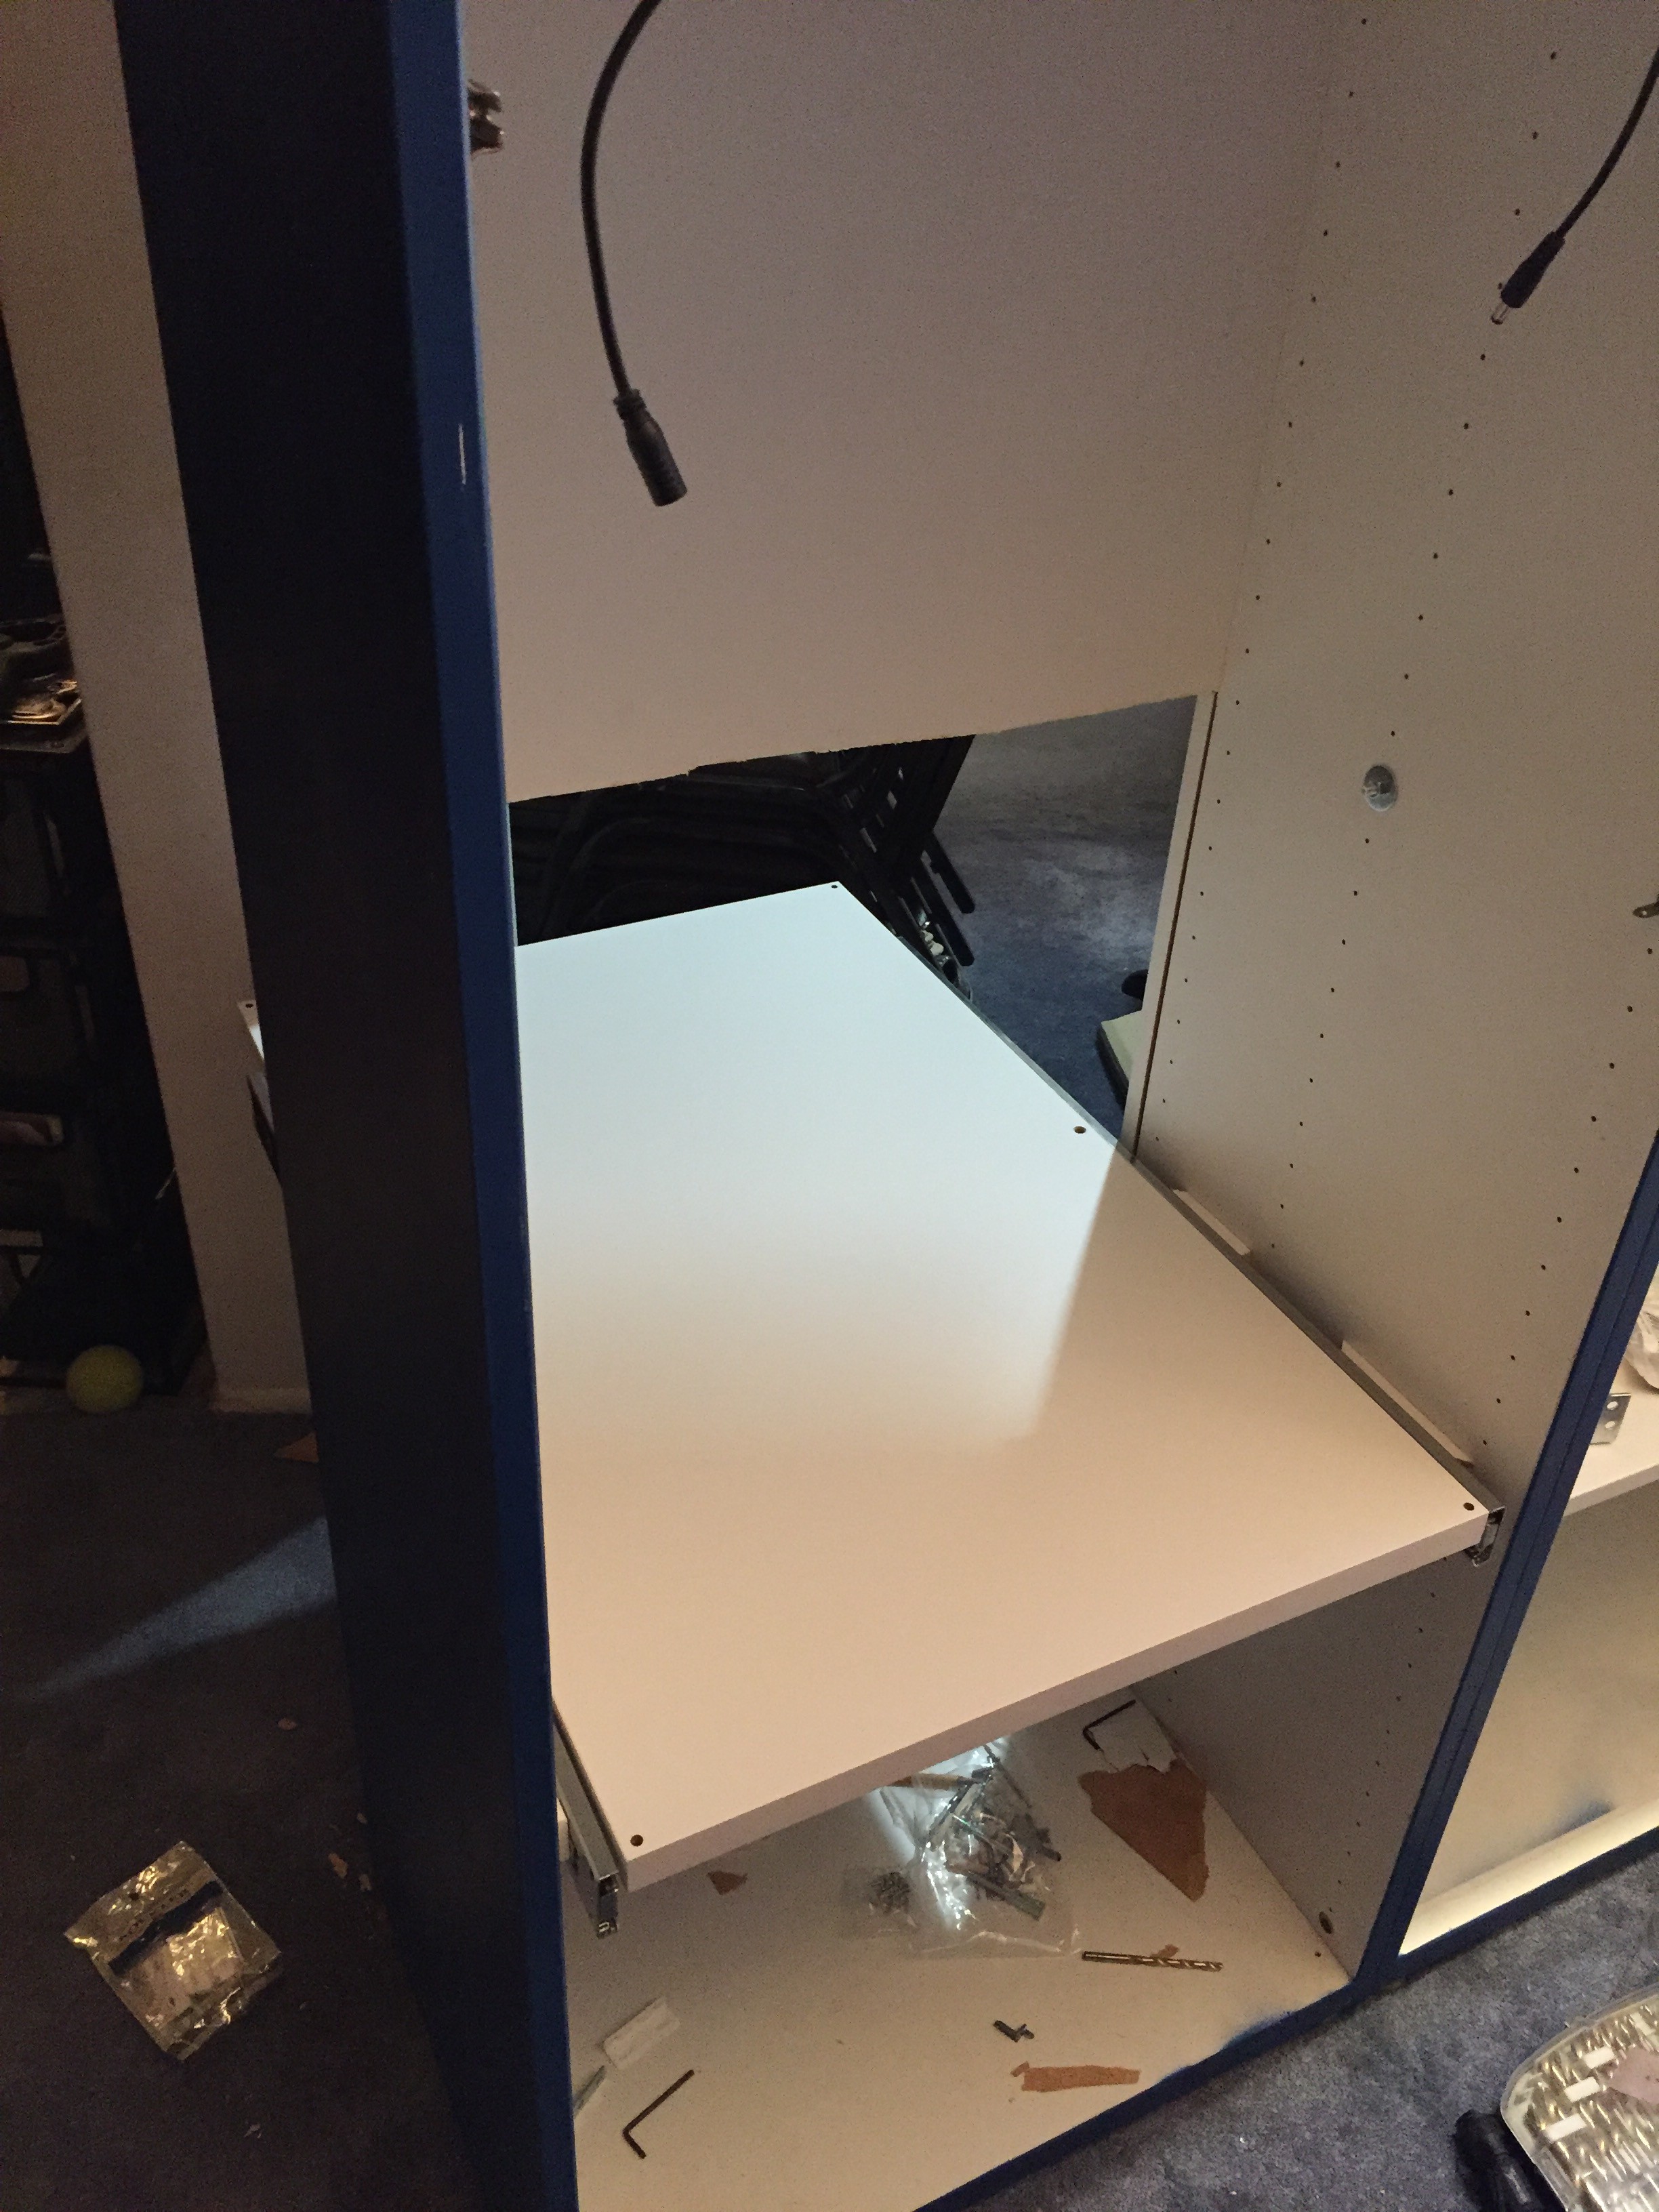
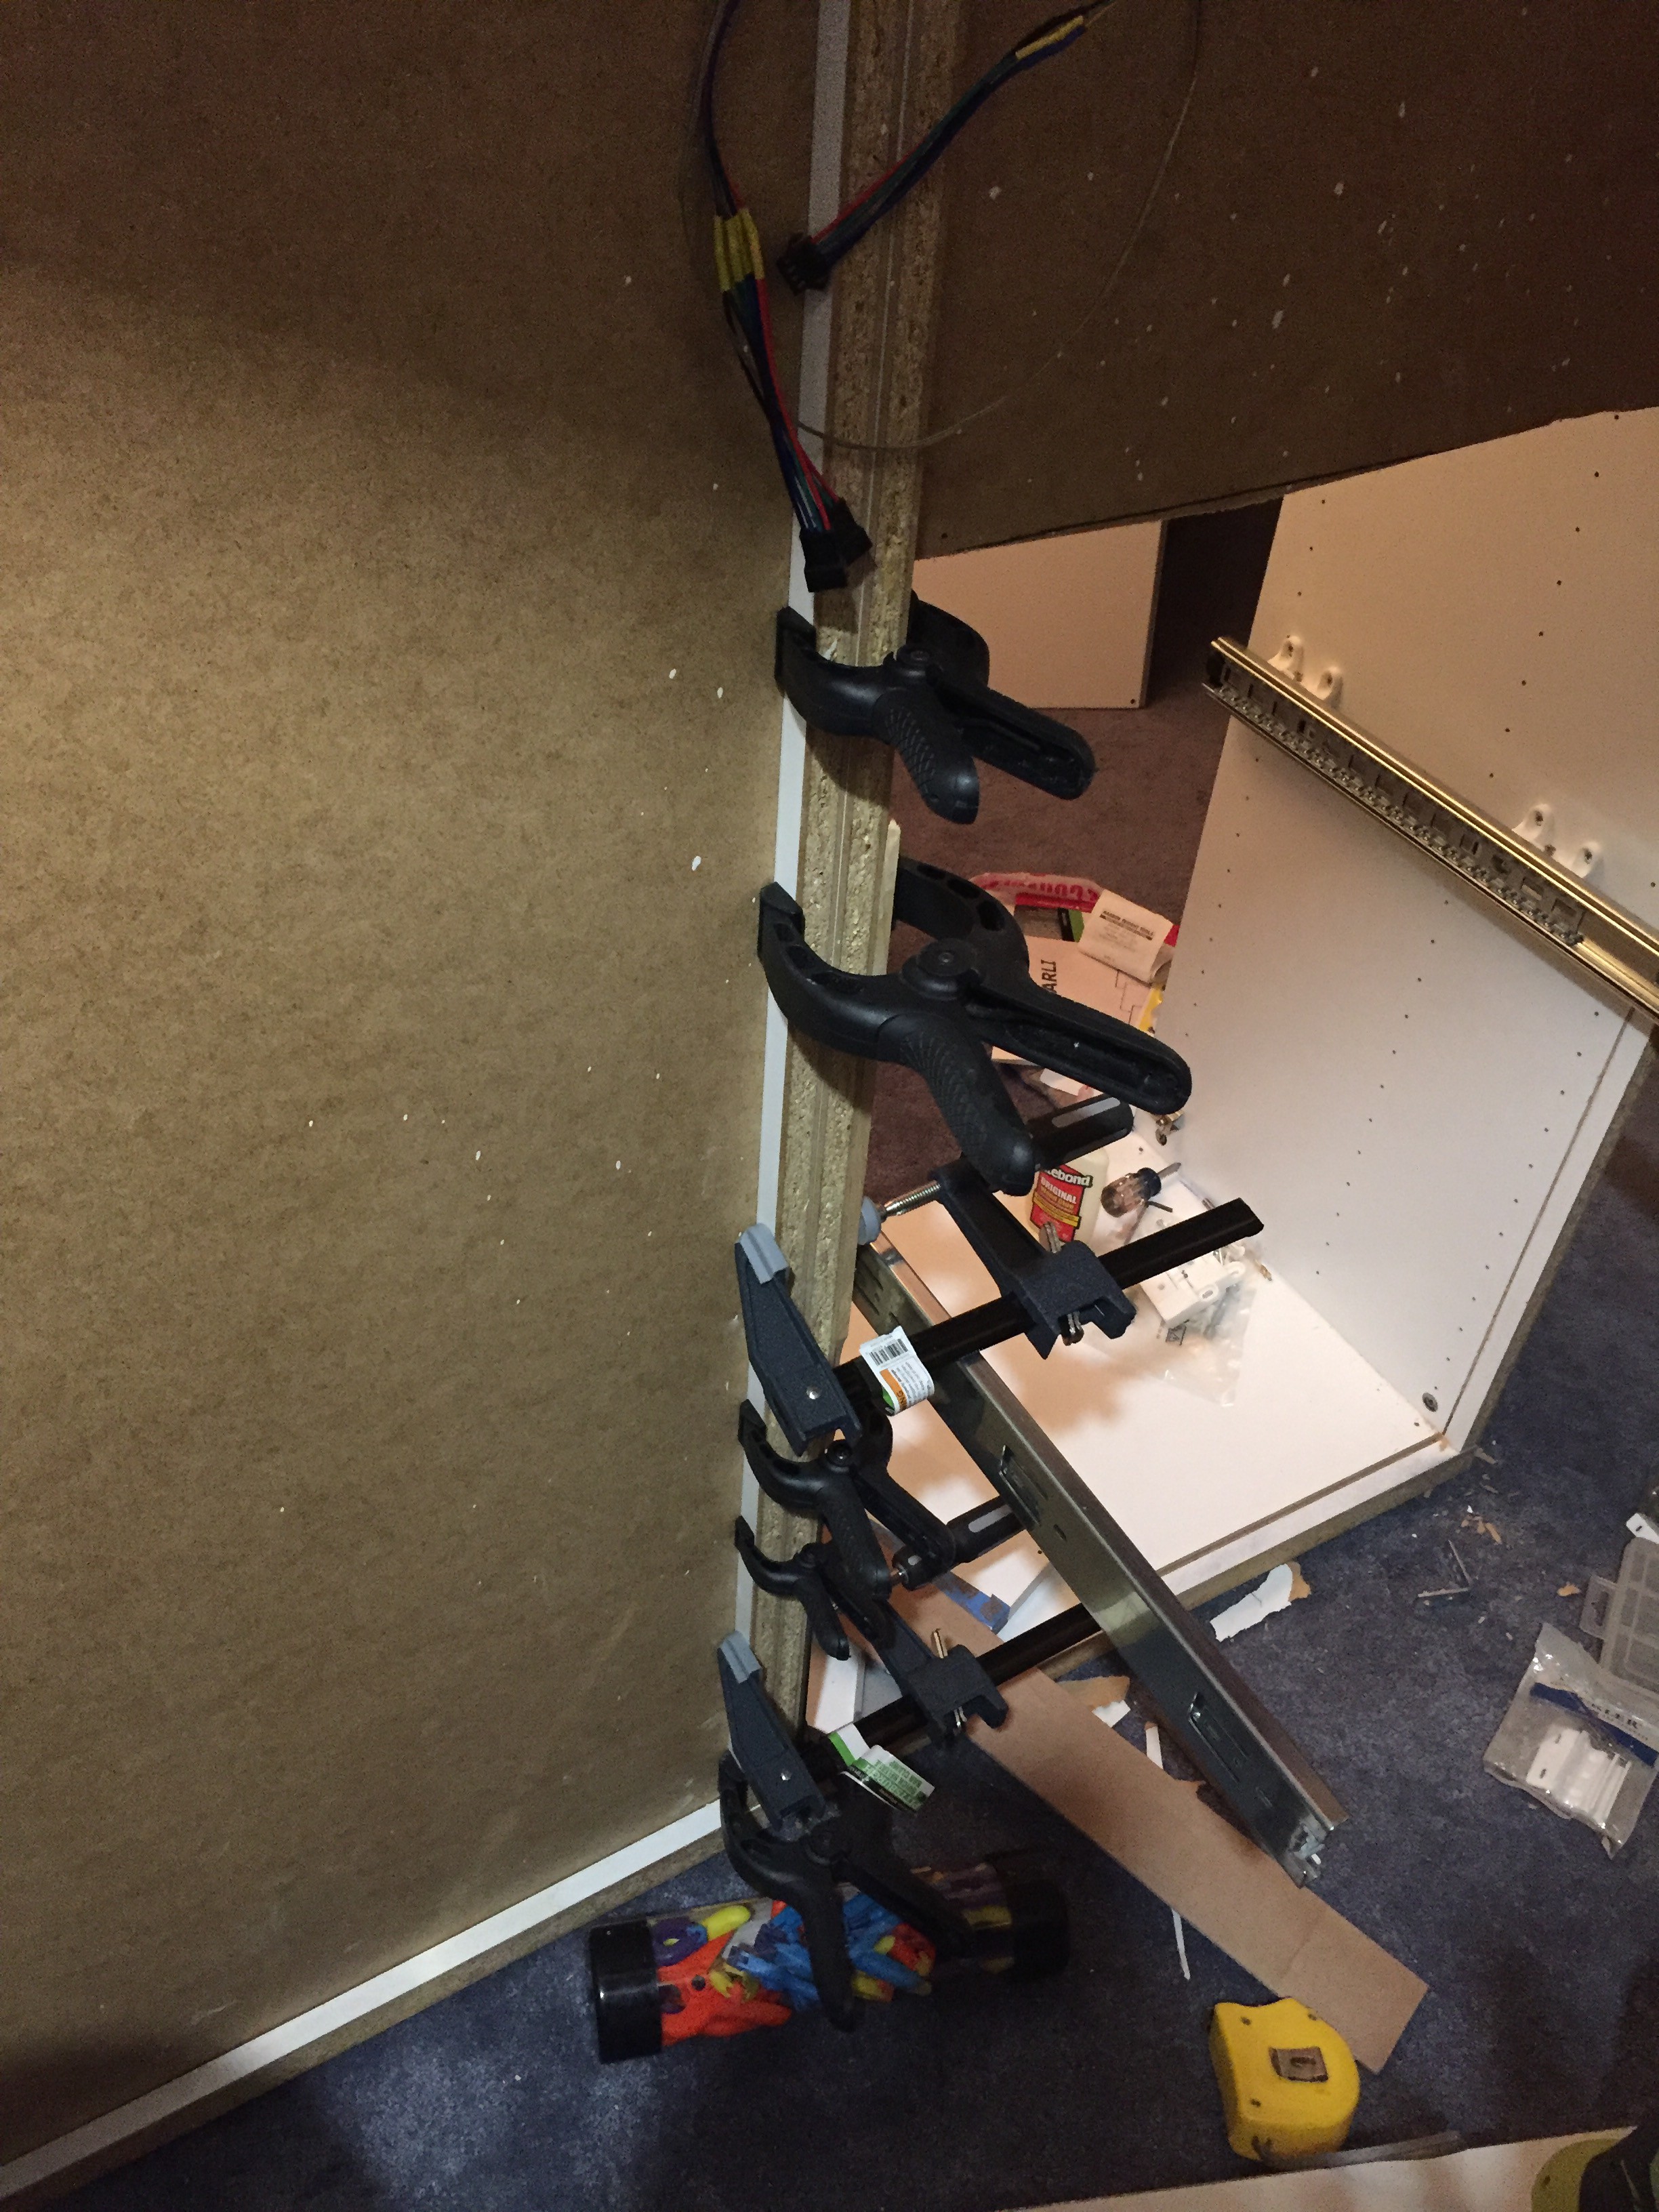
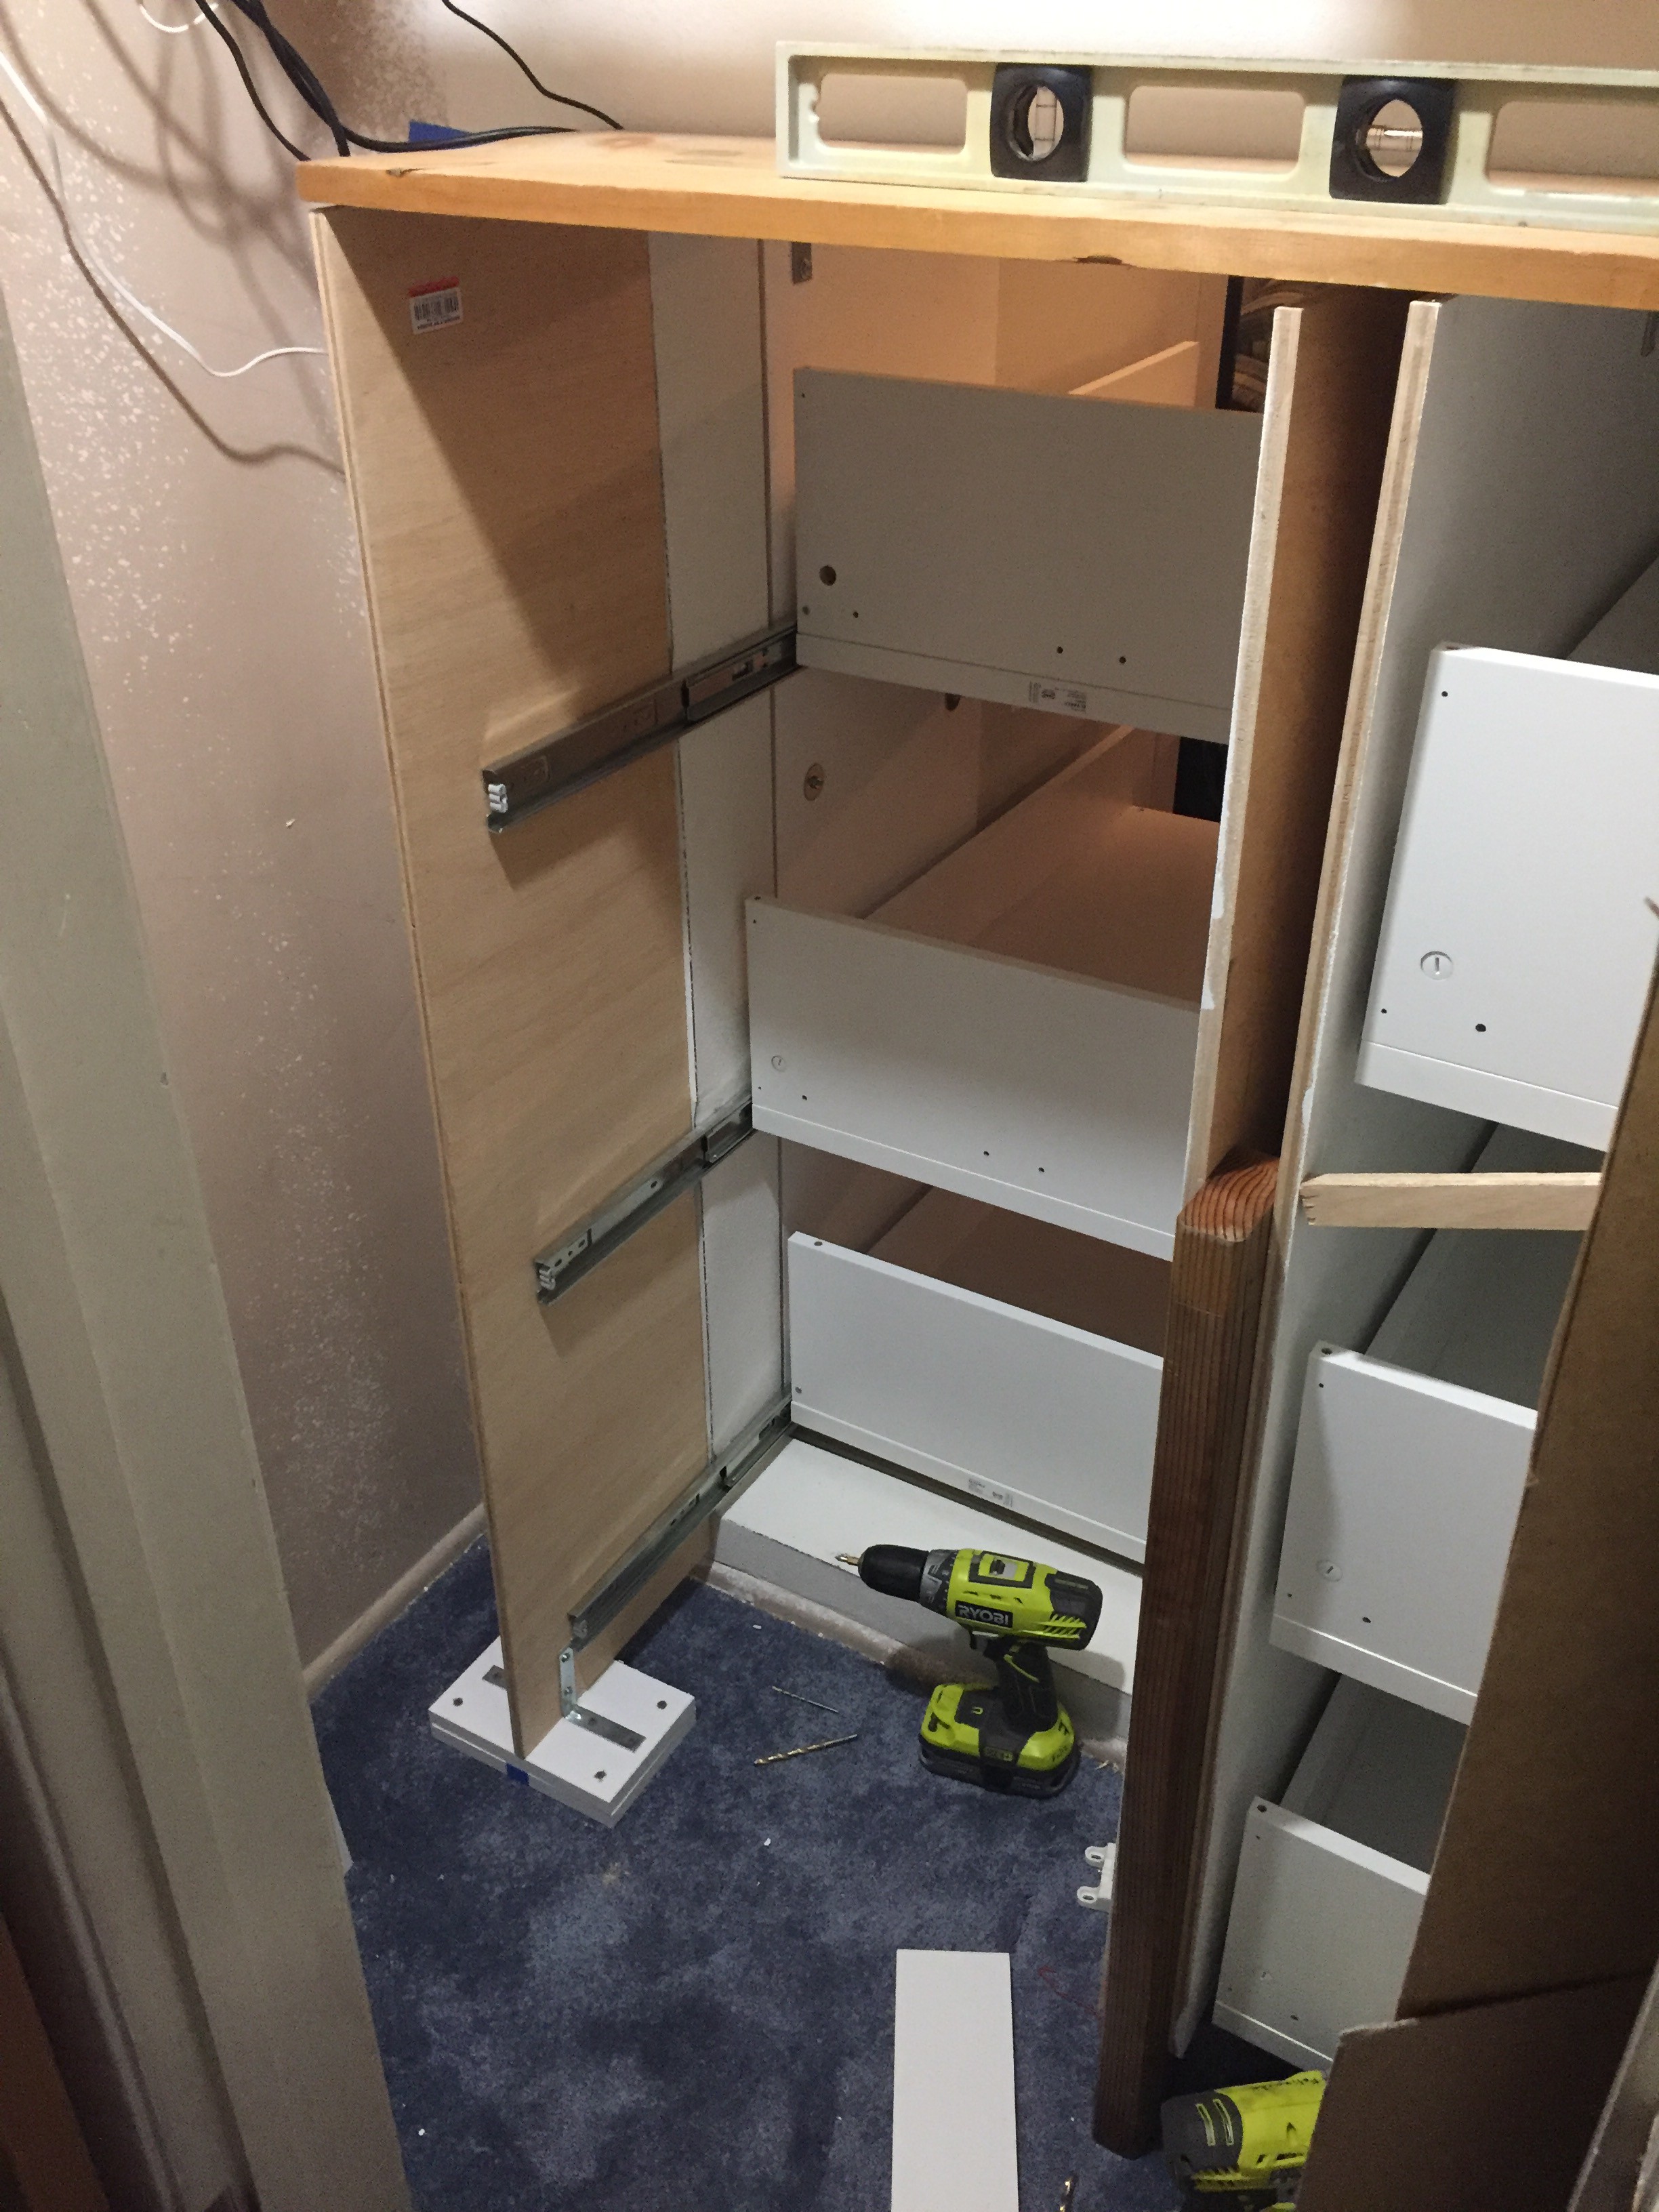
Our board game collection had been growing over the years and it was getting harder to fit everything in the cabinet. We talked about adding another pair of cabinets which would double the storage but it would take up too much space in the living room. Several friends suggested cutting a hole in the wall for more storage but it shared the wall with the bedroom closet so that wasn't an option. Then we looked at moving the cabinet to another wall that is shared with the hallway closet. With the help of my brother-in-law we opened up the wall and framed an opening but I knew I needed some kind of lateral support for the cabinet to prevent it from leaning sideways so we made the opening only as high as the permanent horizontal shelf which is about 2/3 of the height of the cabinet. We also needed to reroute some electrical wiring in the wall.
 |  |
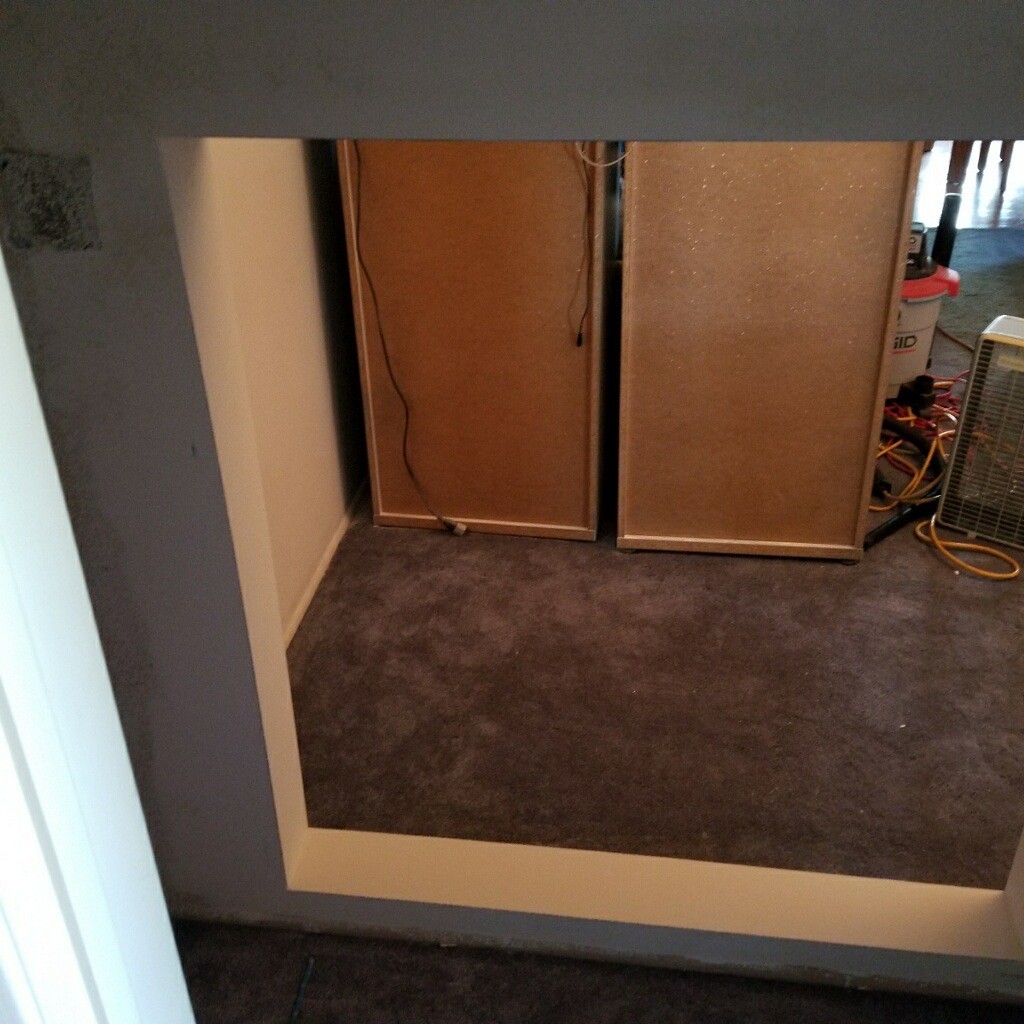 |  |
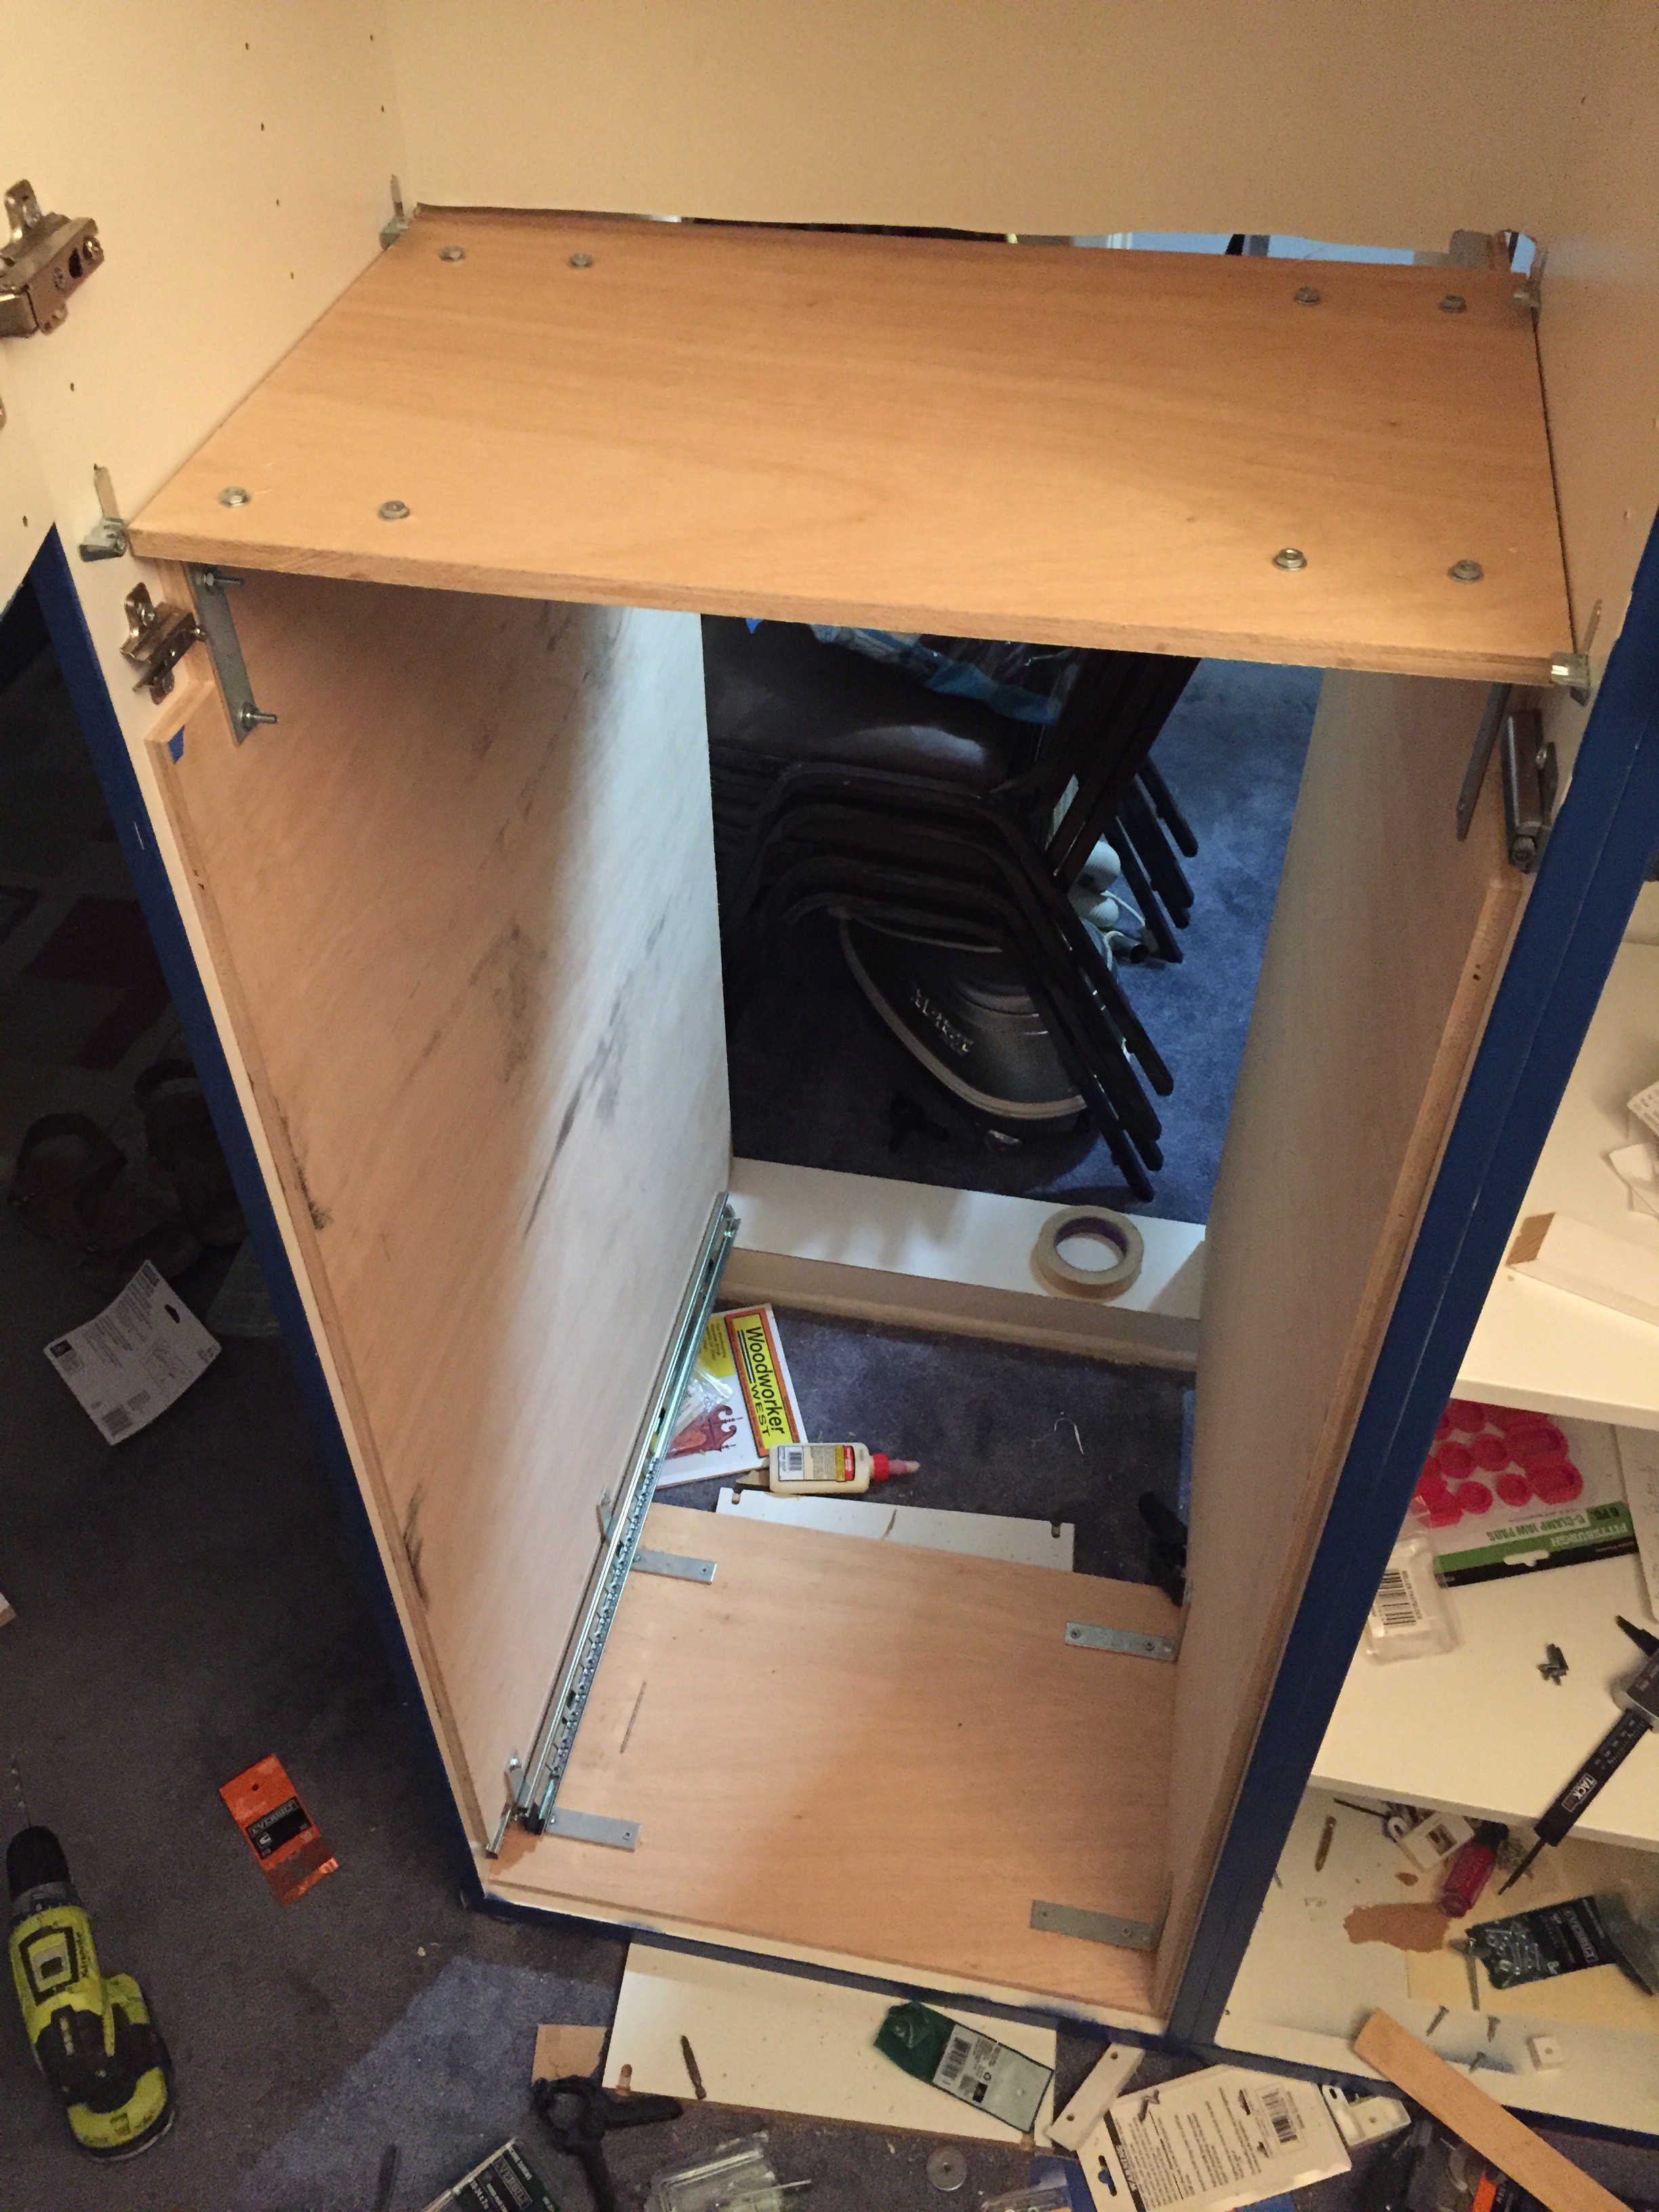
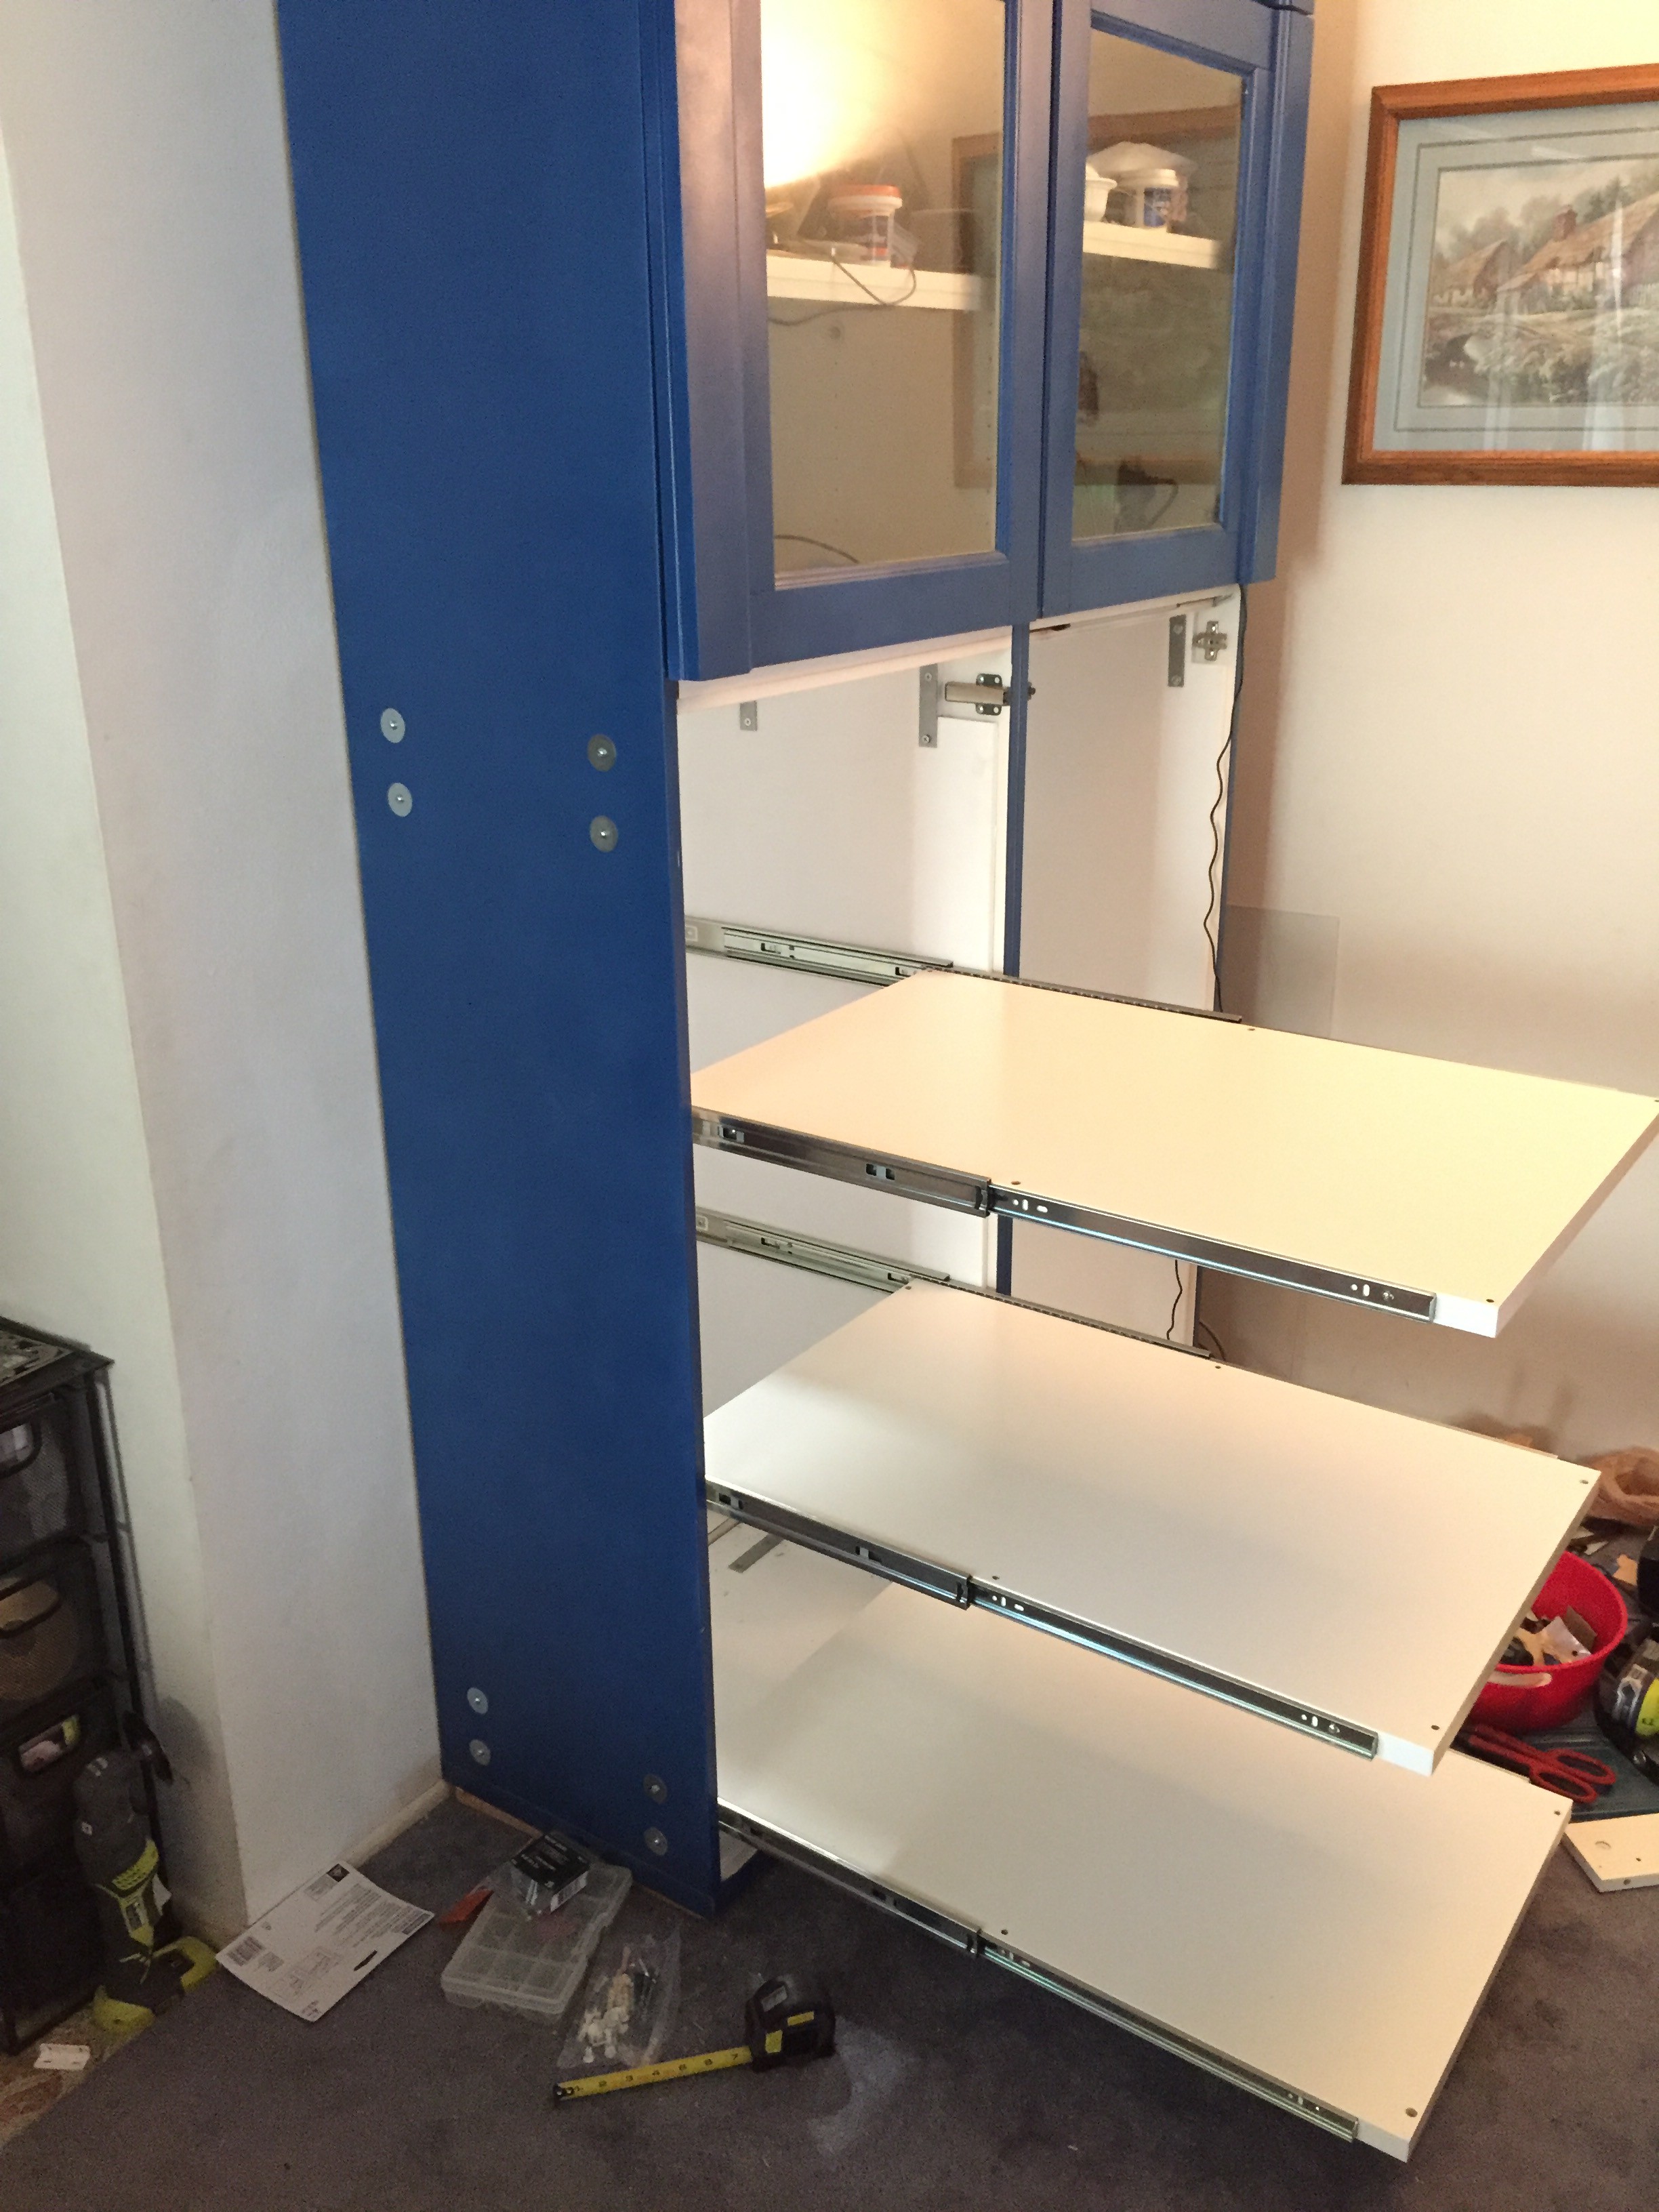
I then started looking at how to add drawers that could slide out but push back into the opening behind the cabinet. The doors on the IKEA cabinets are about 23" wide and I was able to find 28" full extension drawer slides. I wanted the drawers to be open in front and with sides that are just tall enough to keep the boxes from falling out. Another trip to IKEA and we found shelves that were 30" long but I'd have to find a way to add sides and a back. However as we cut more and more of the cardboard back and added more weight the cabinet walls started to cave it. I had to add 1/2" plywood on each side of the drawers to reinforce the cabinet.
 | 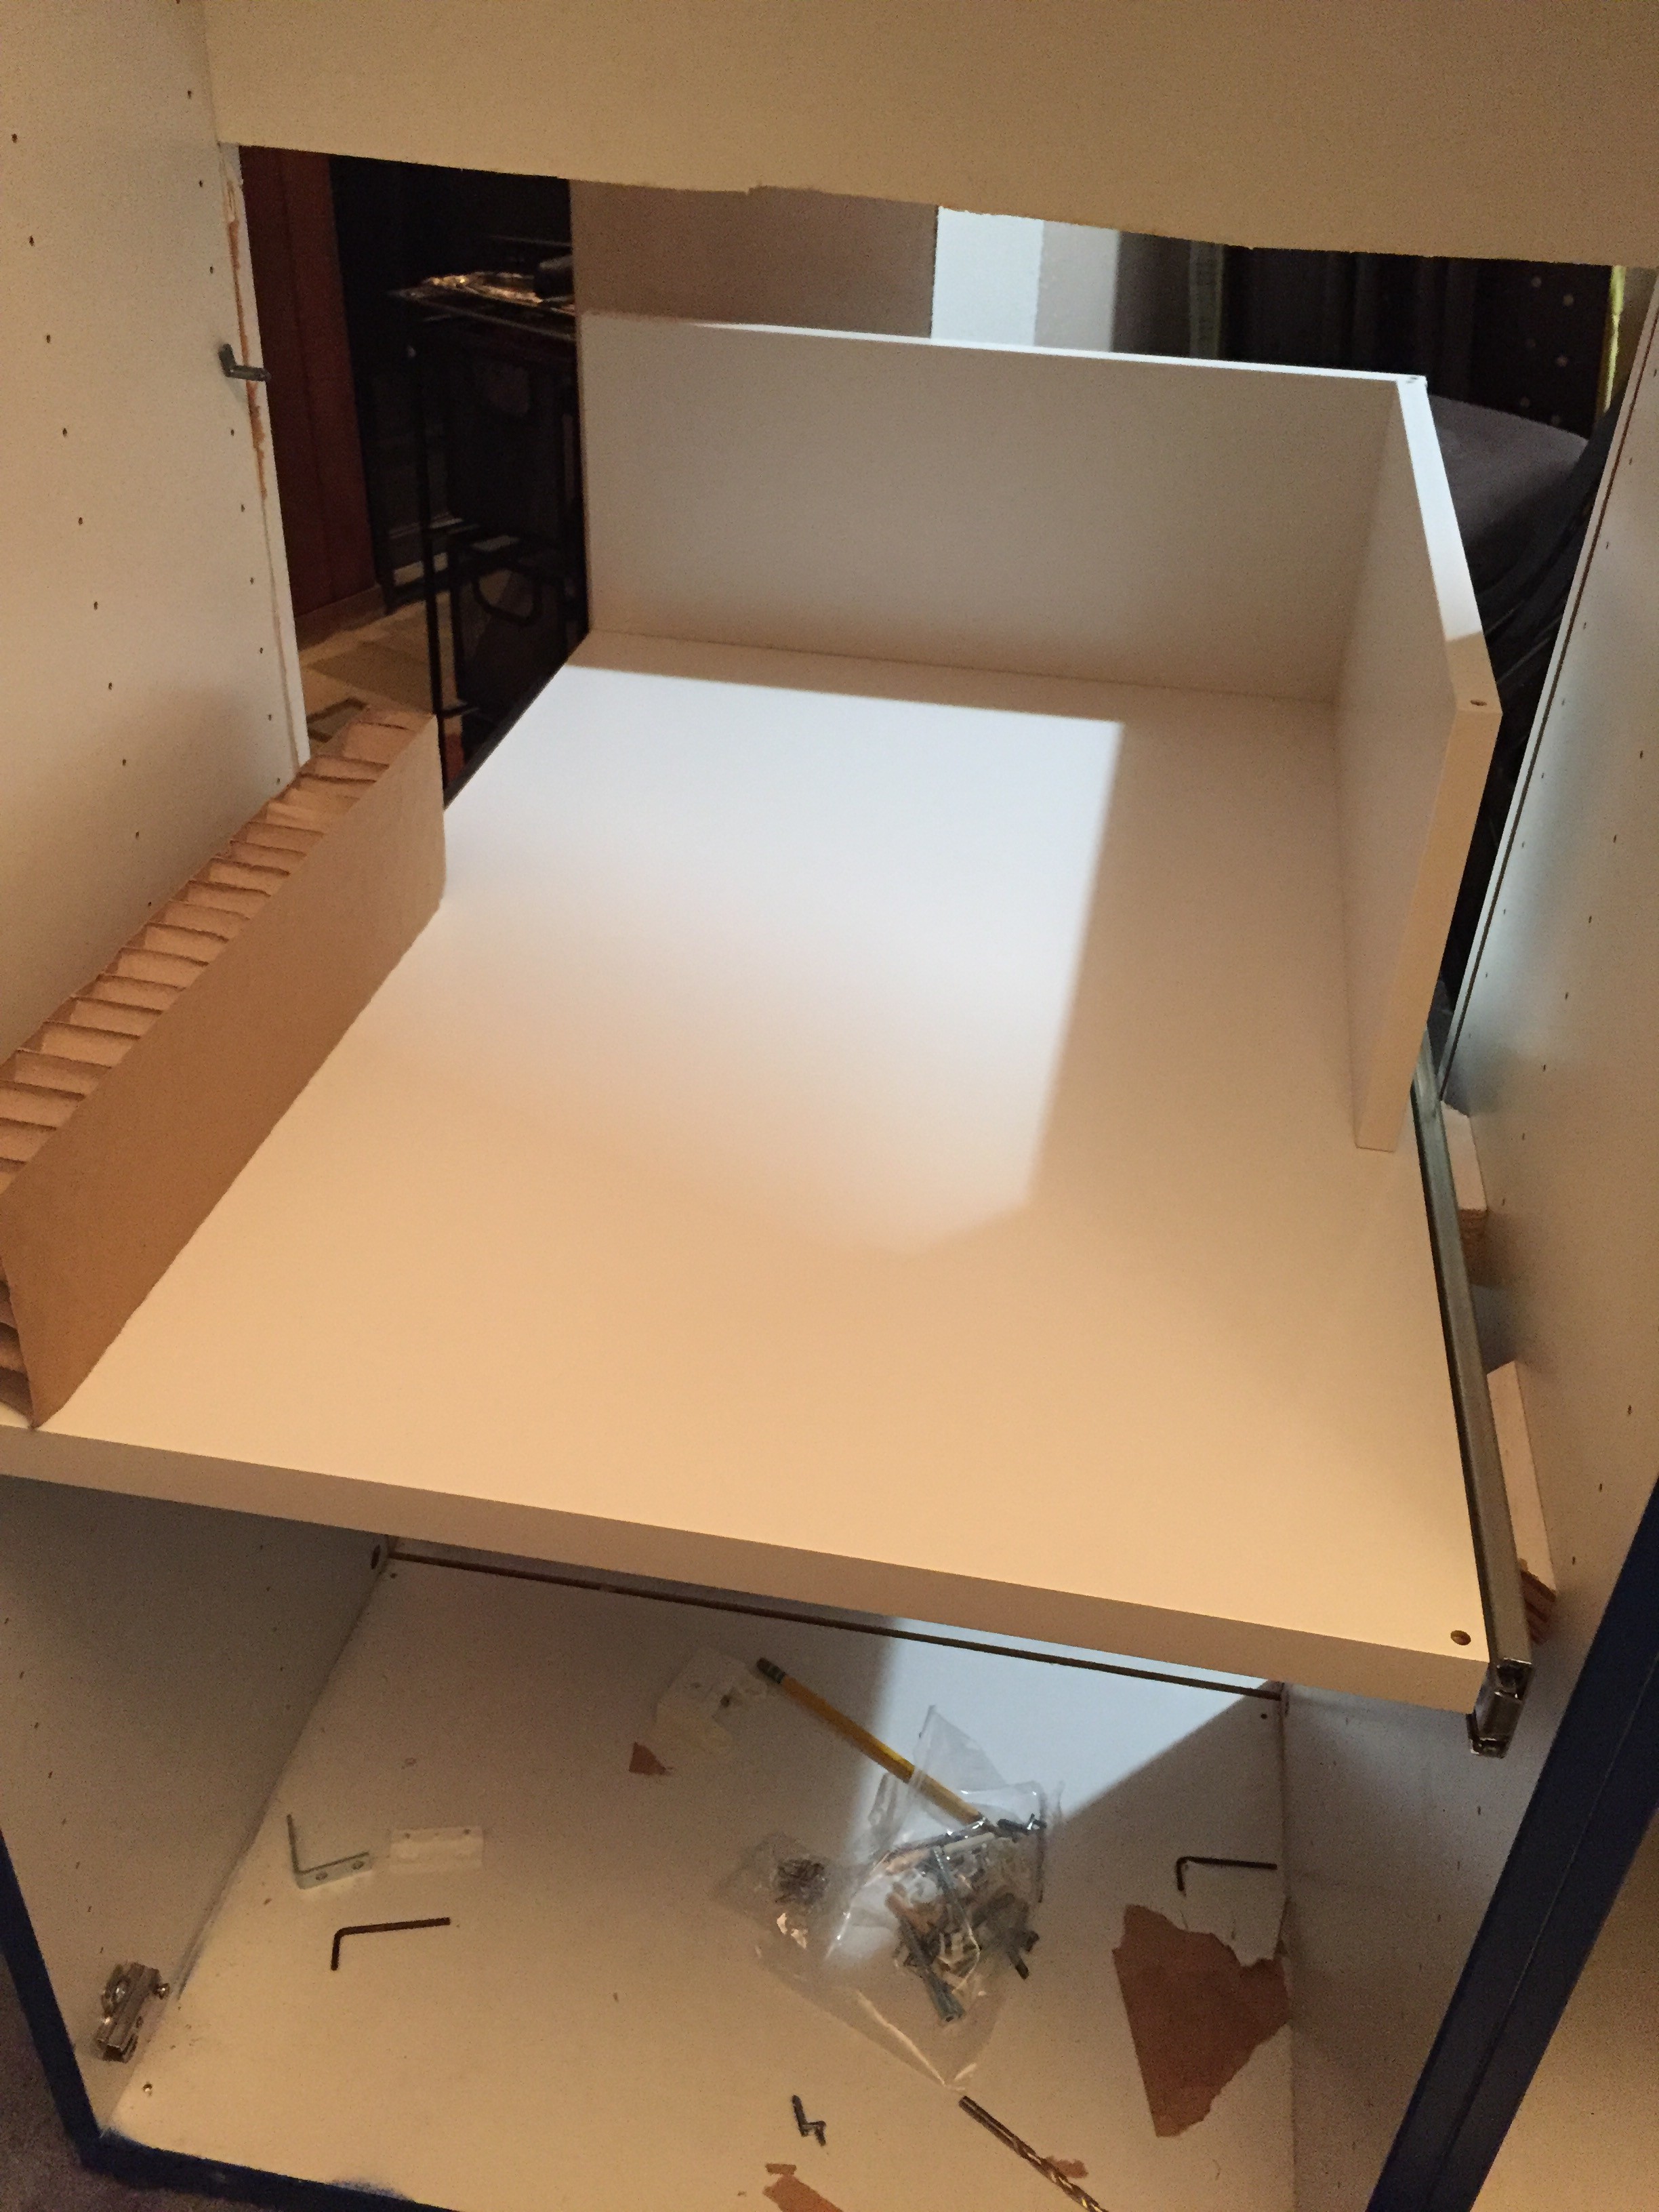 |
 |  |
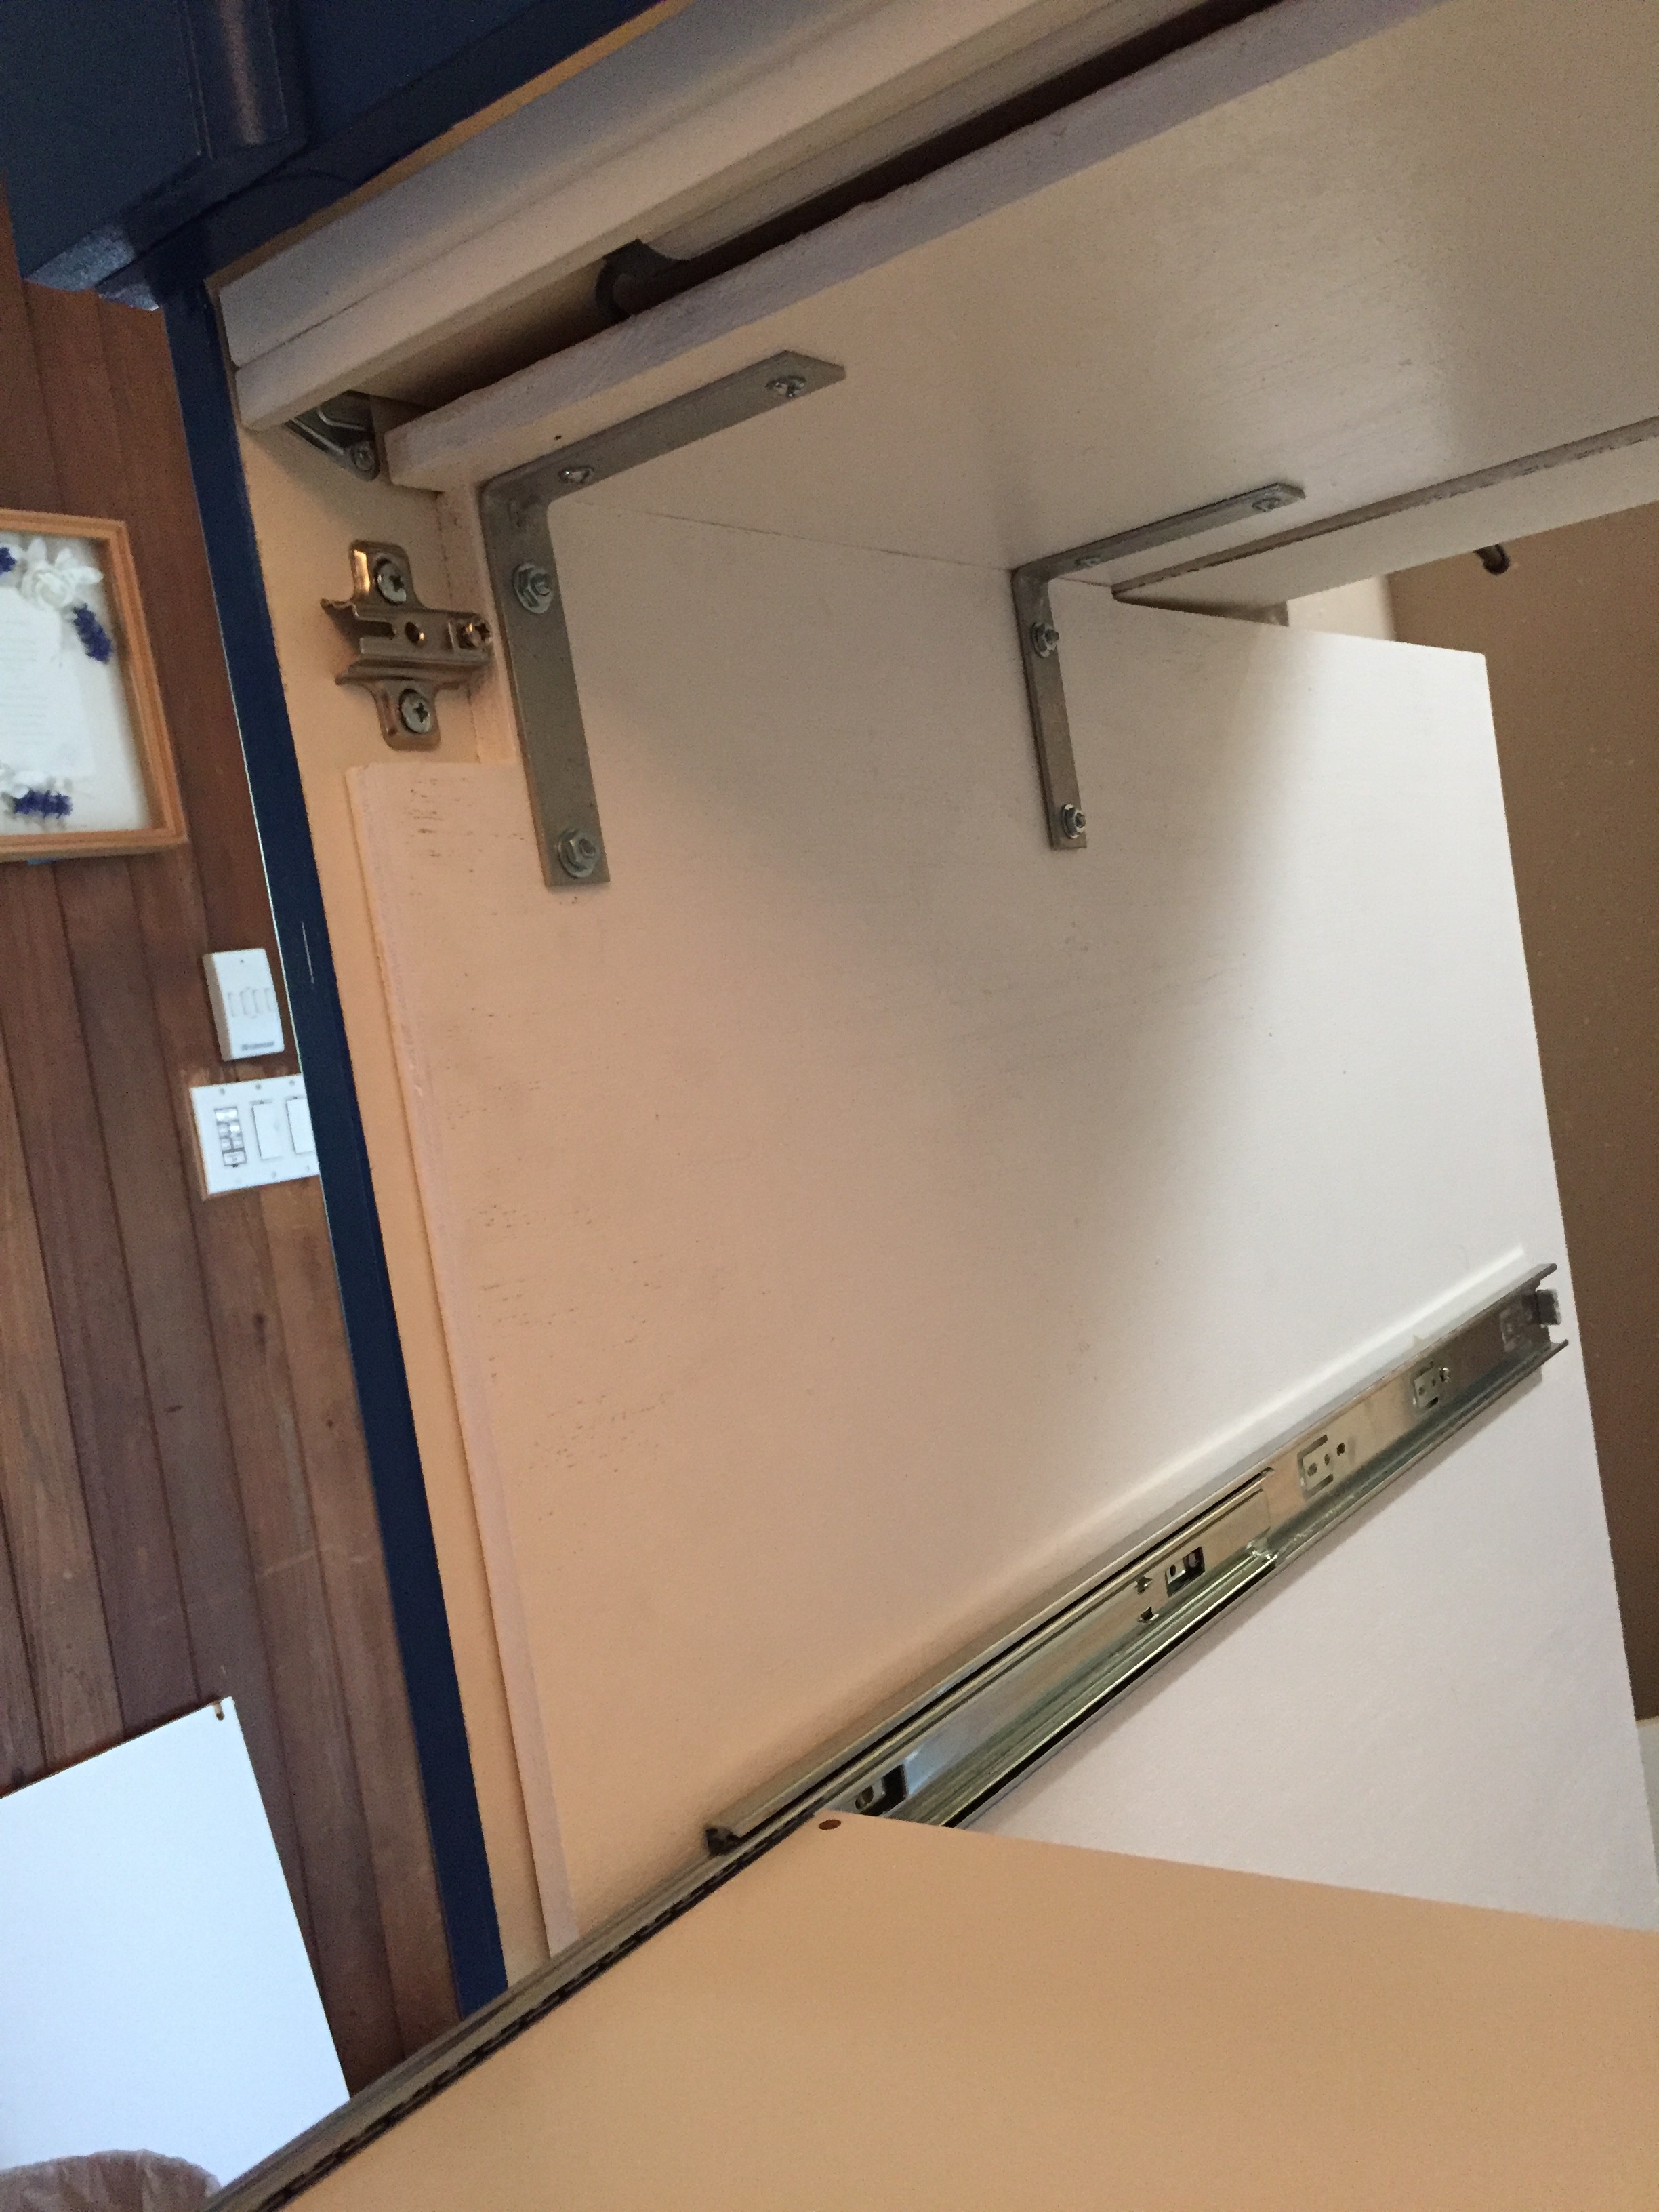 | 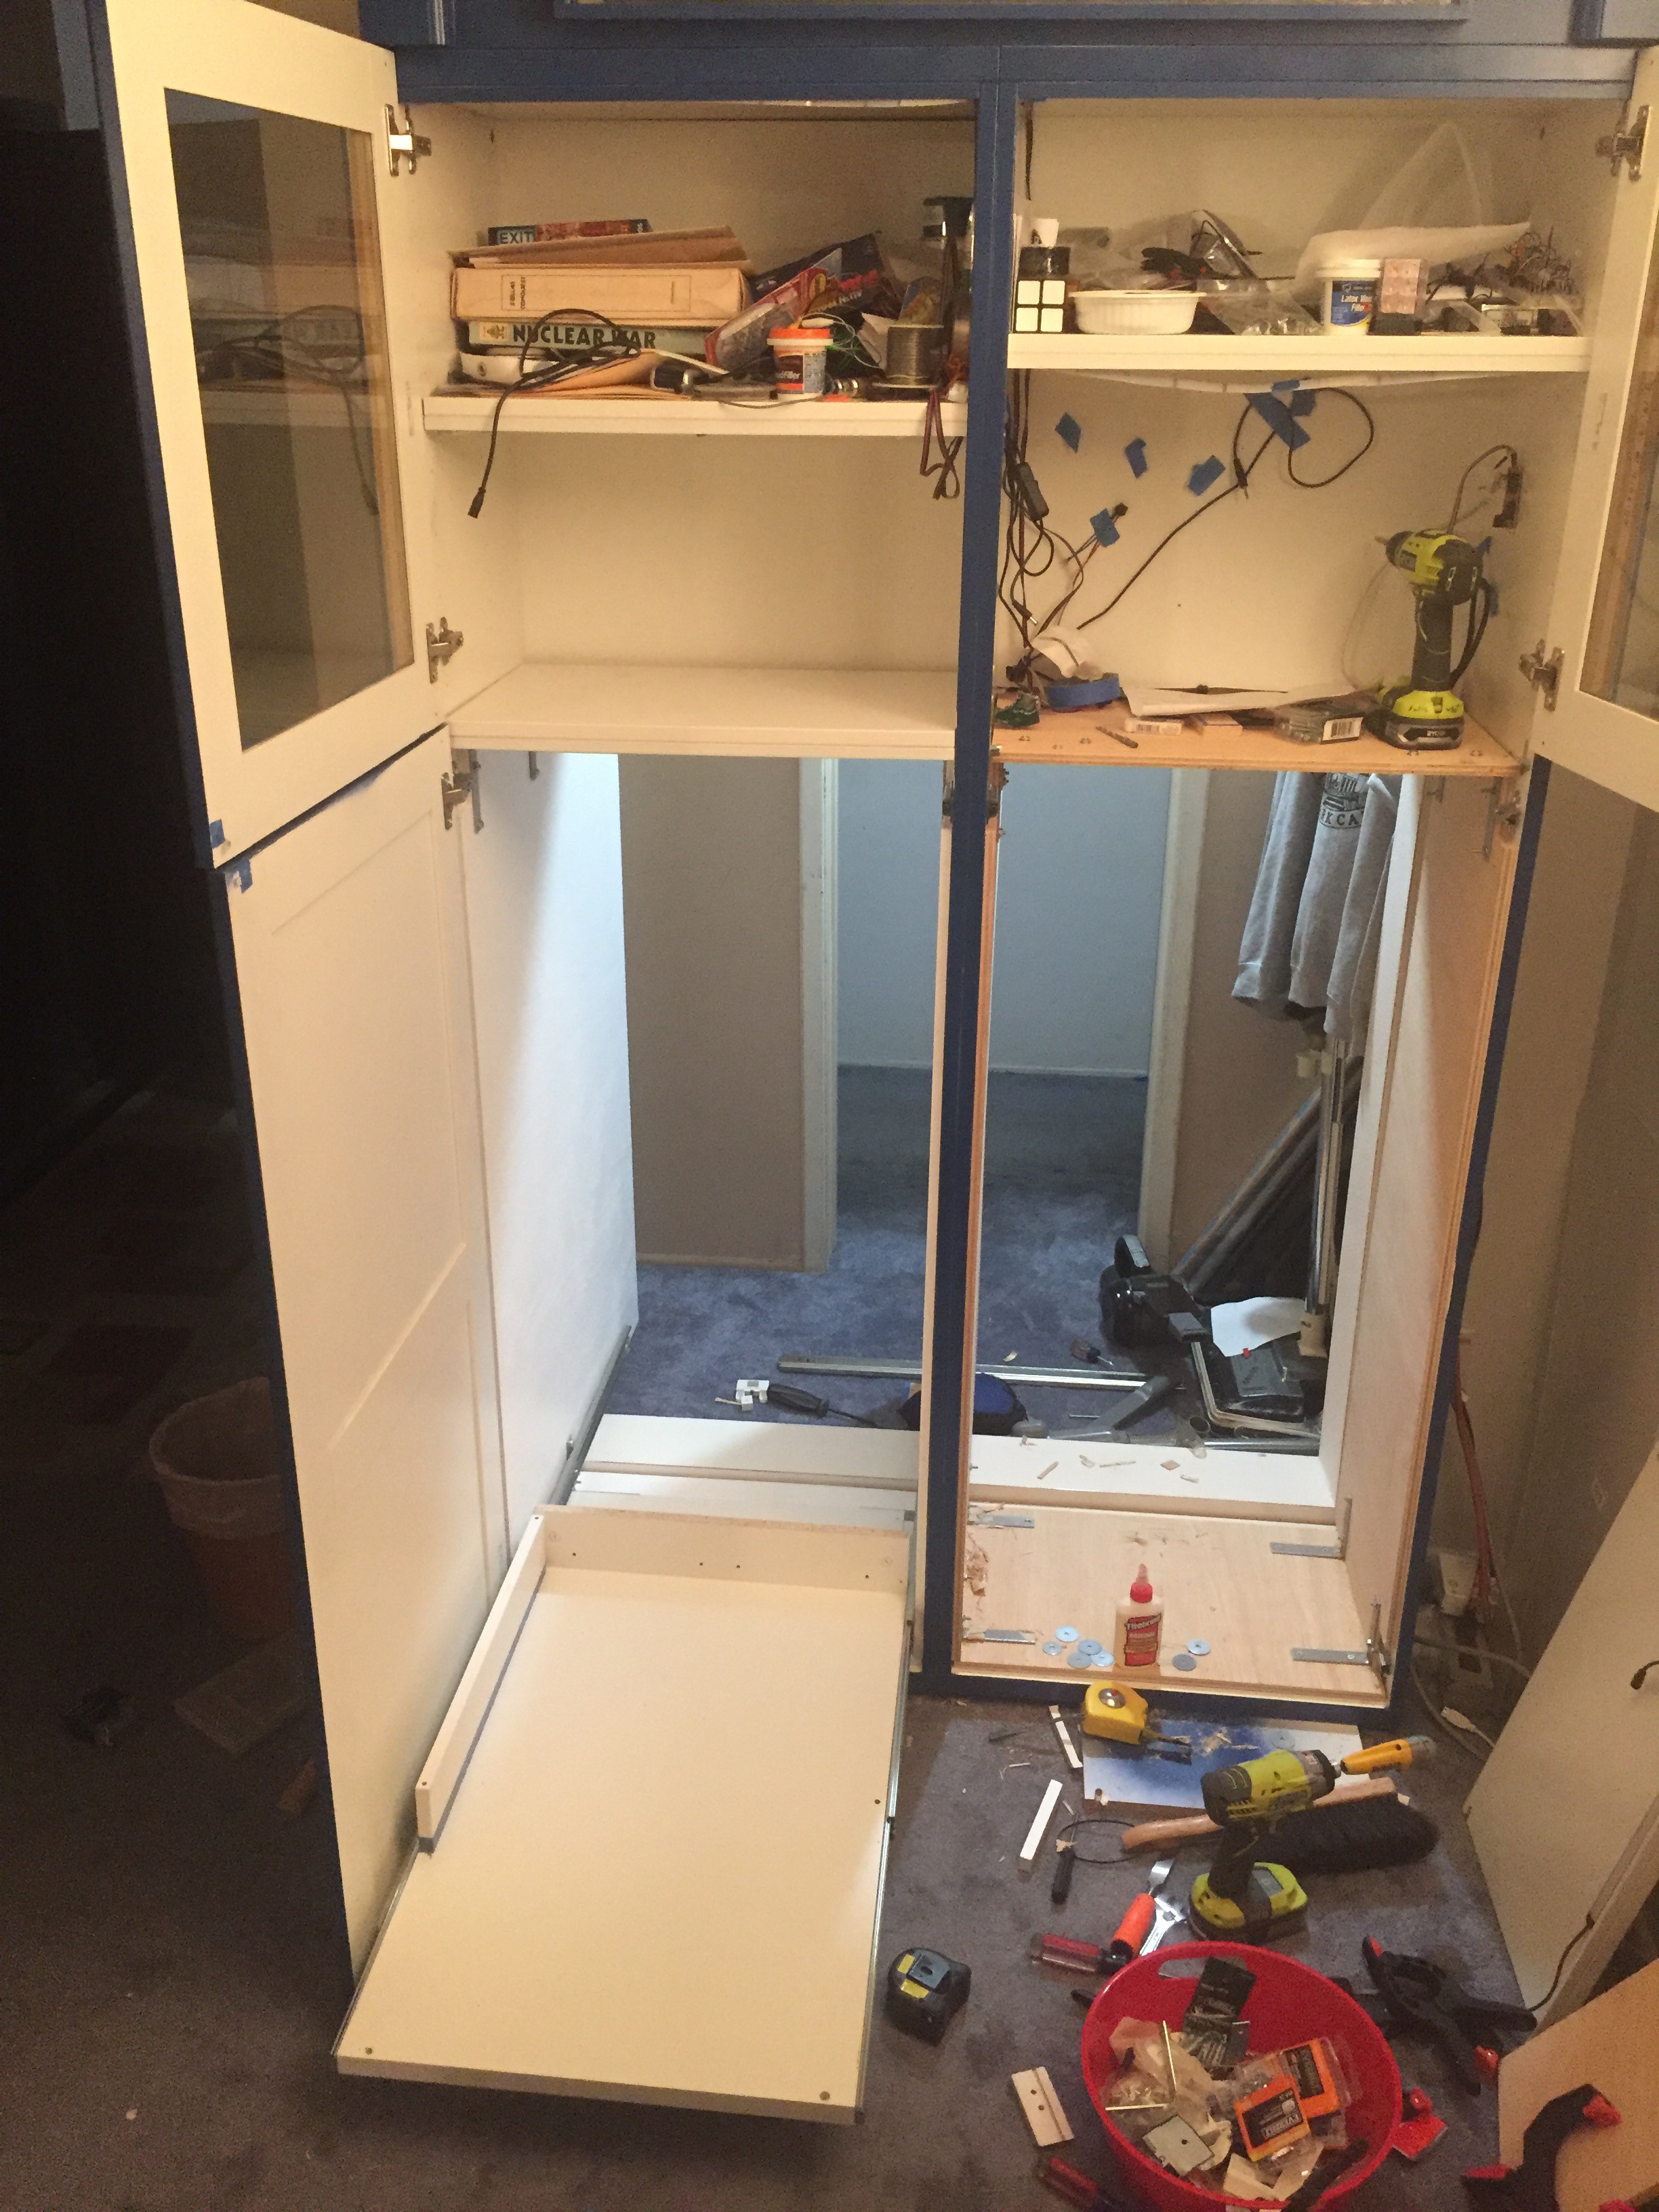 |
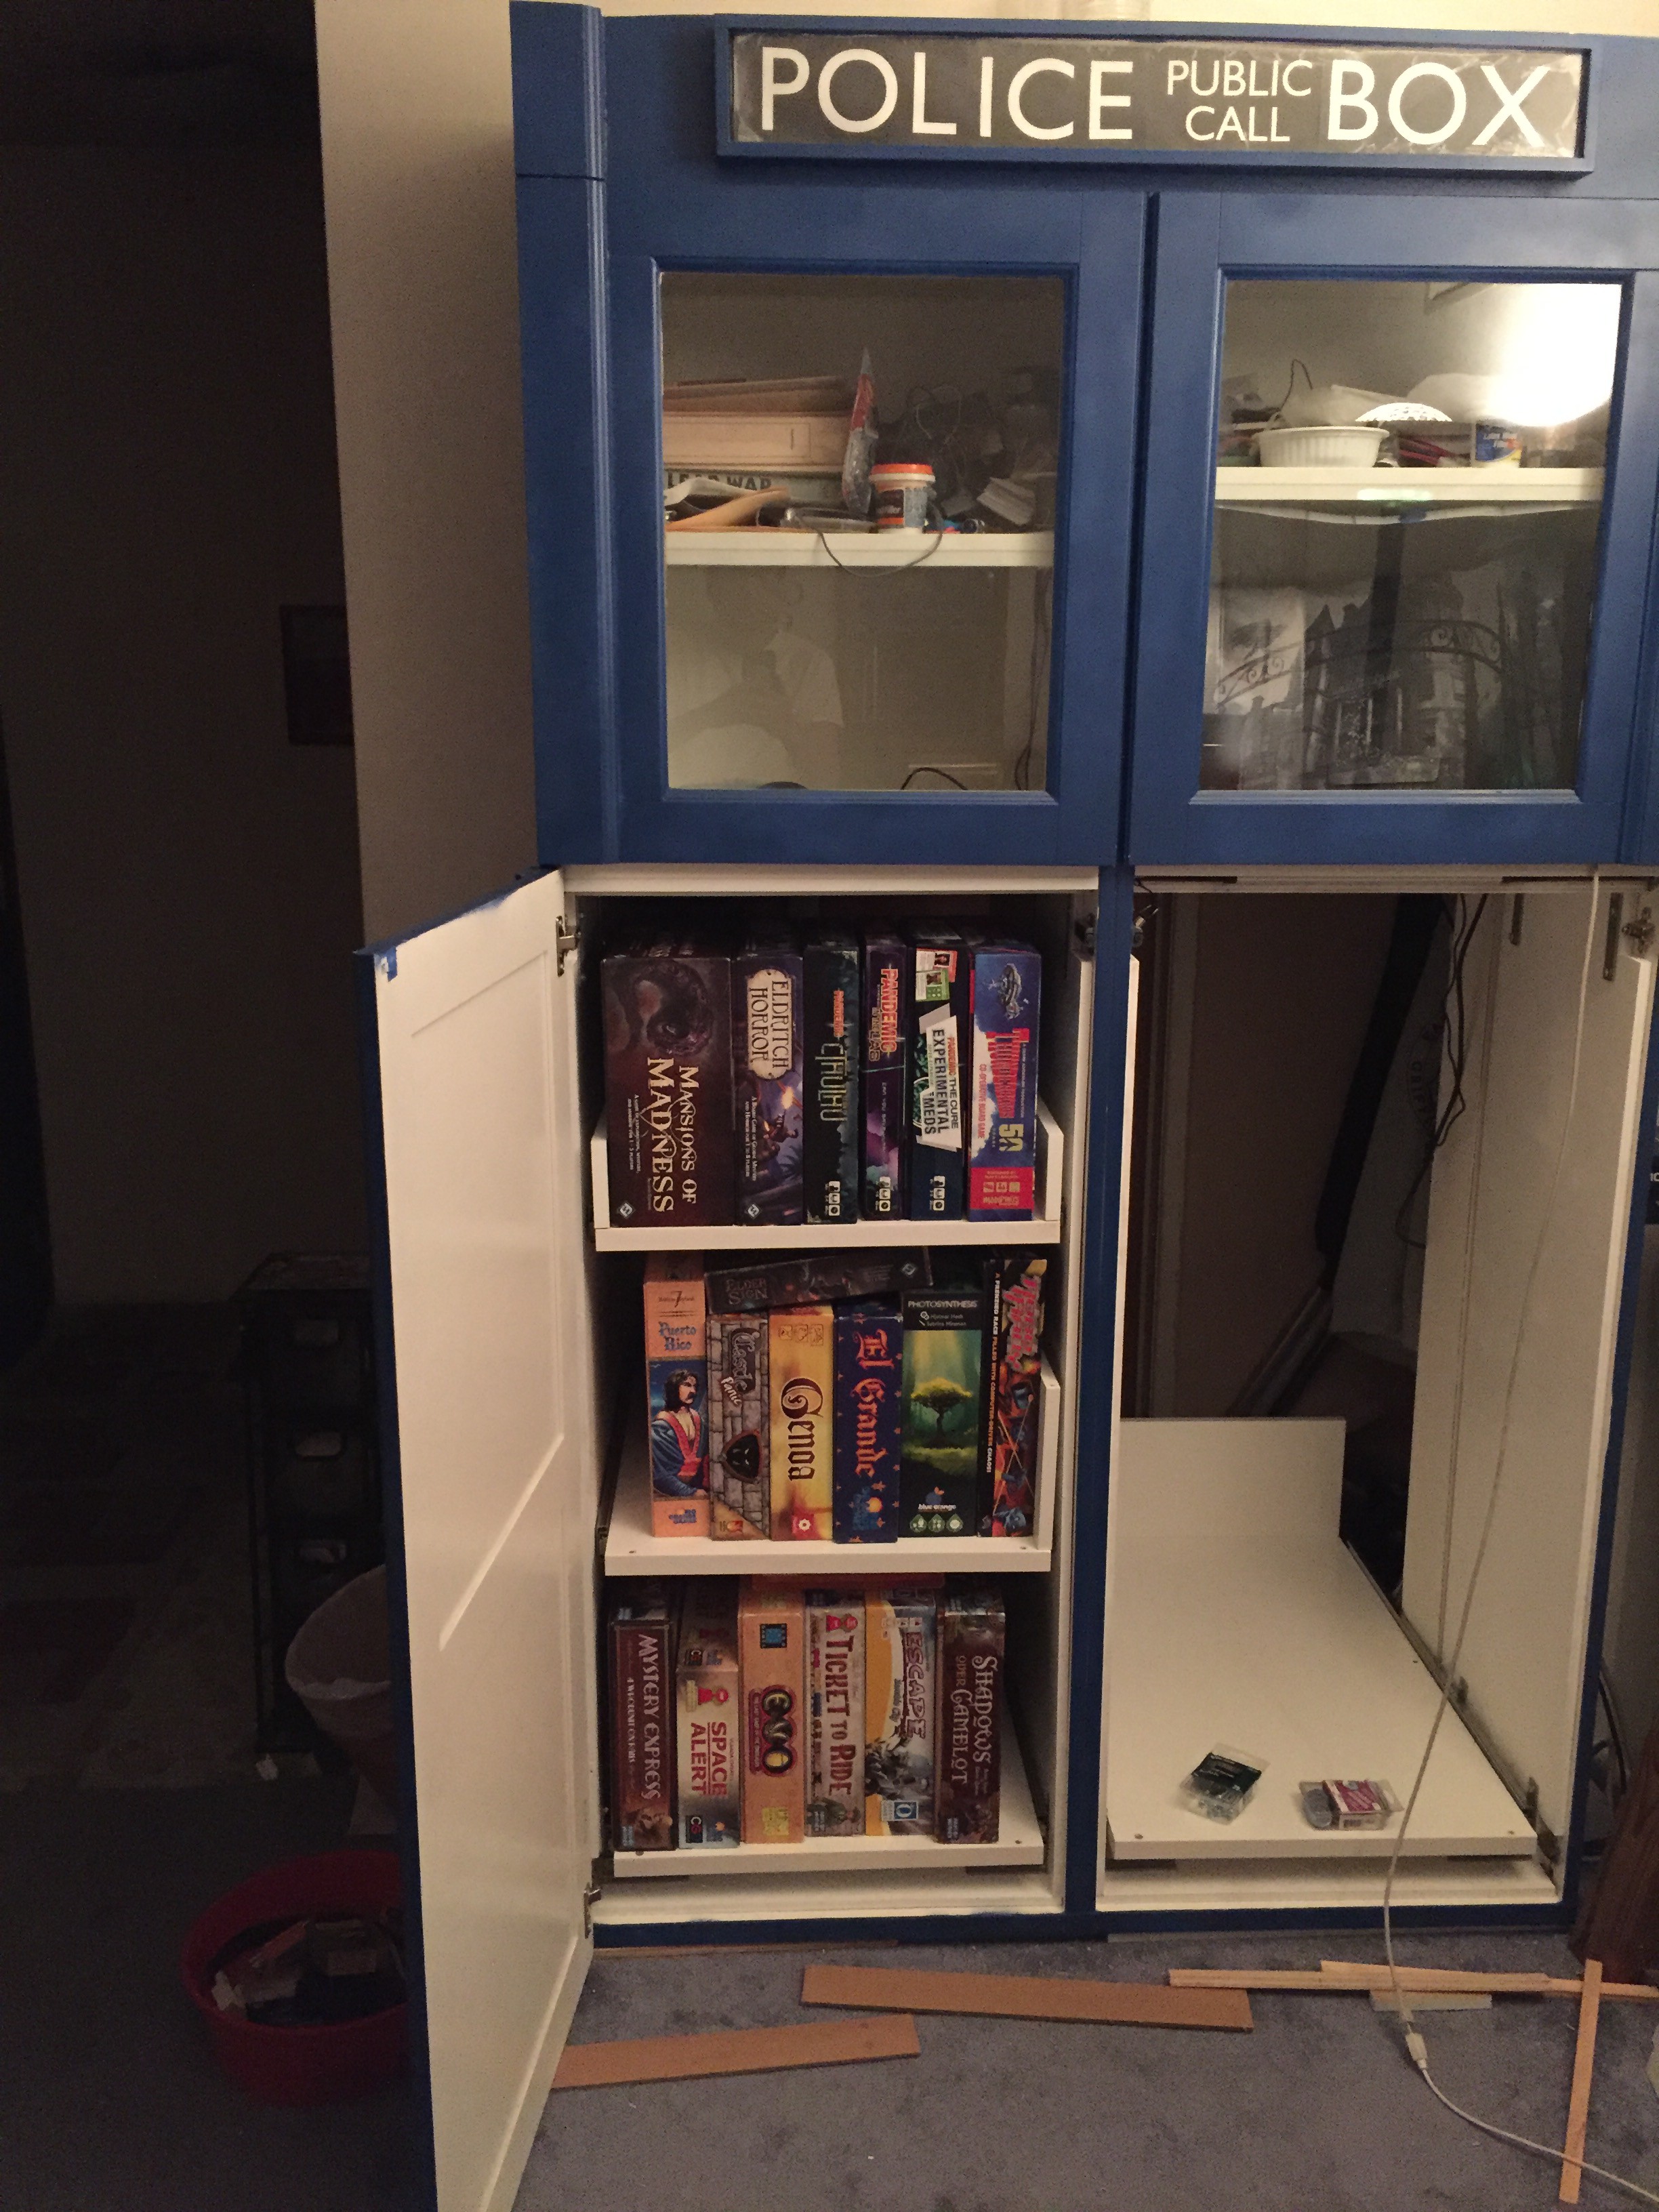
I opted to add 2 more slides at the bottom for a total of 6. Then on yet another trip to IKEA we found some other shelves that I could hack to create the back and sides that are 5" tall to allow you to find games. Again the cabinet doors are 23" wide and the wall shared with the hallway closet is about 6" think so the drawers will extend 4" past the doors so it's obviously "Bigger on the inside!".
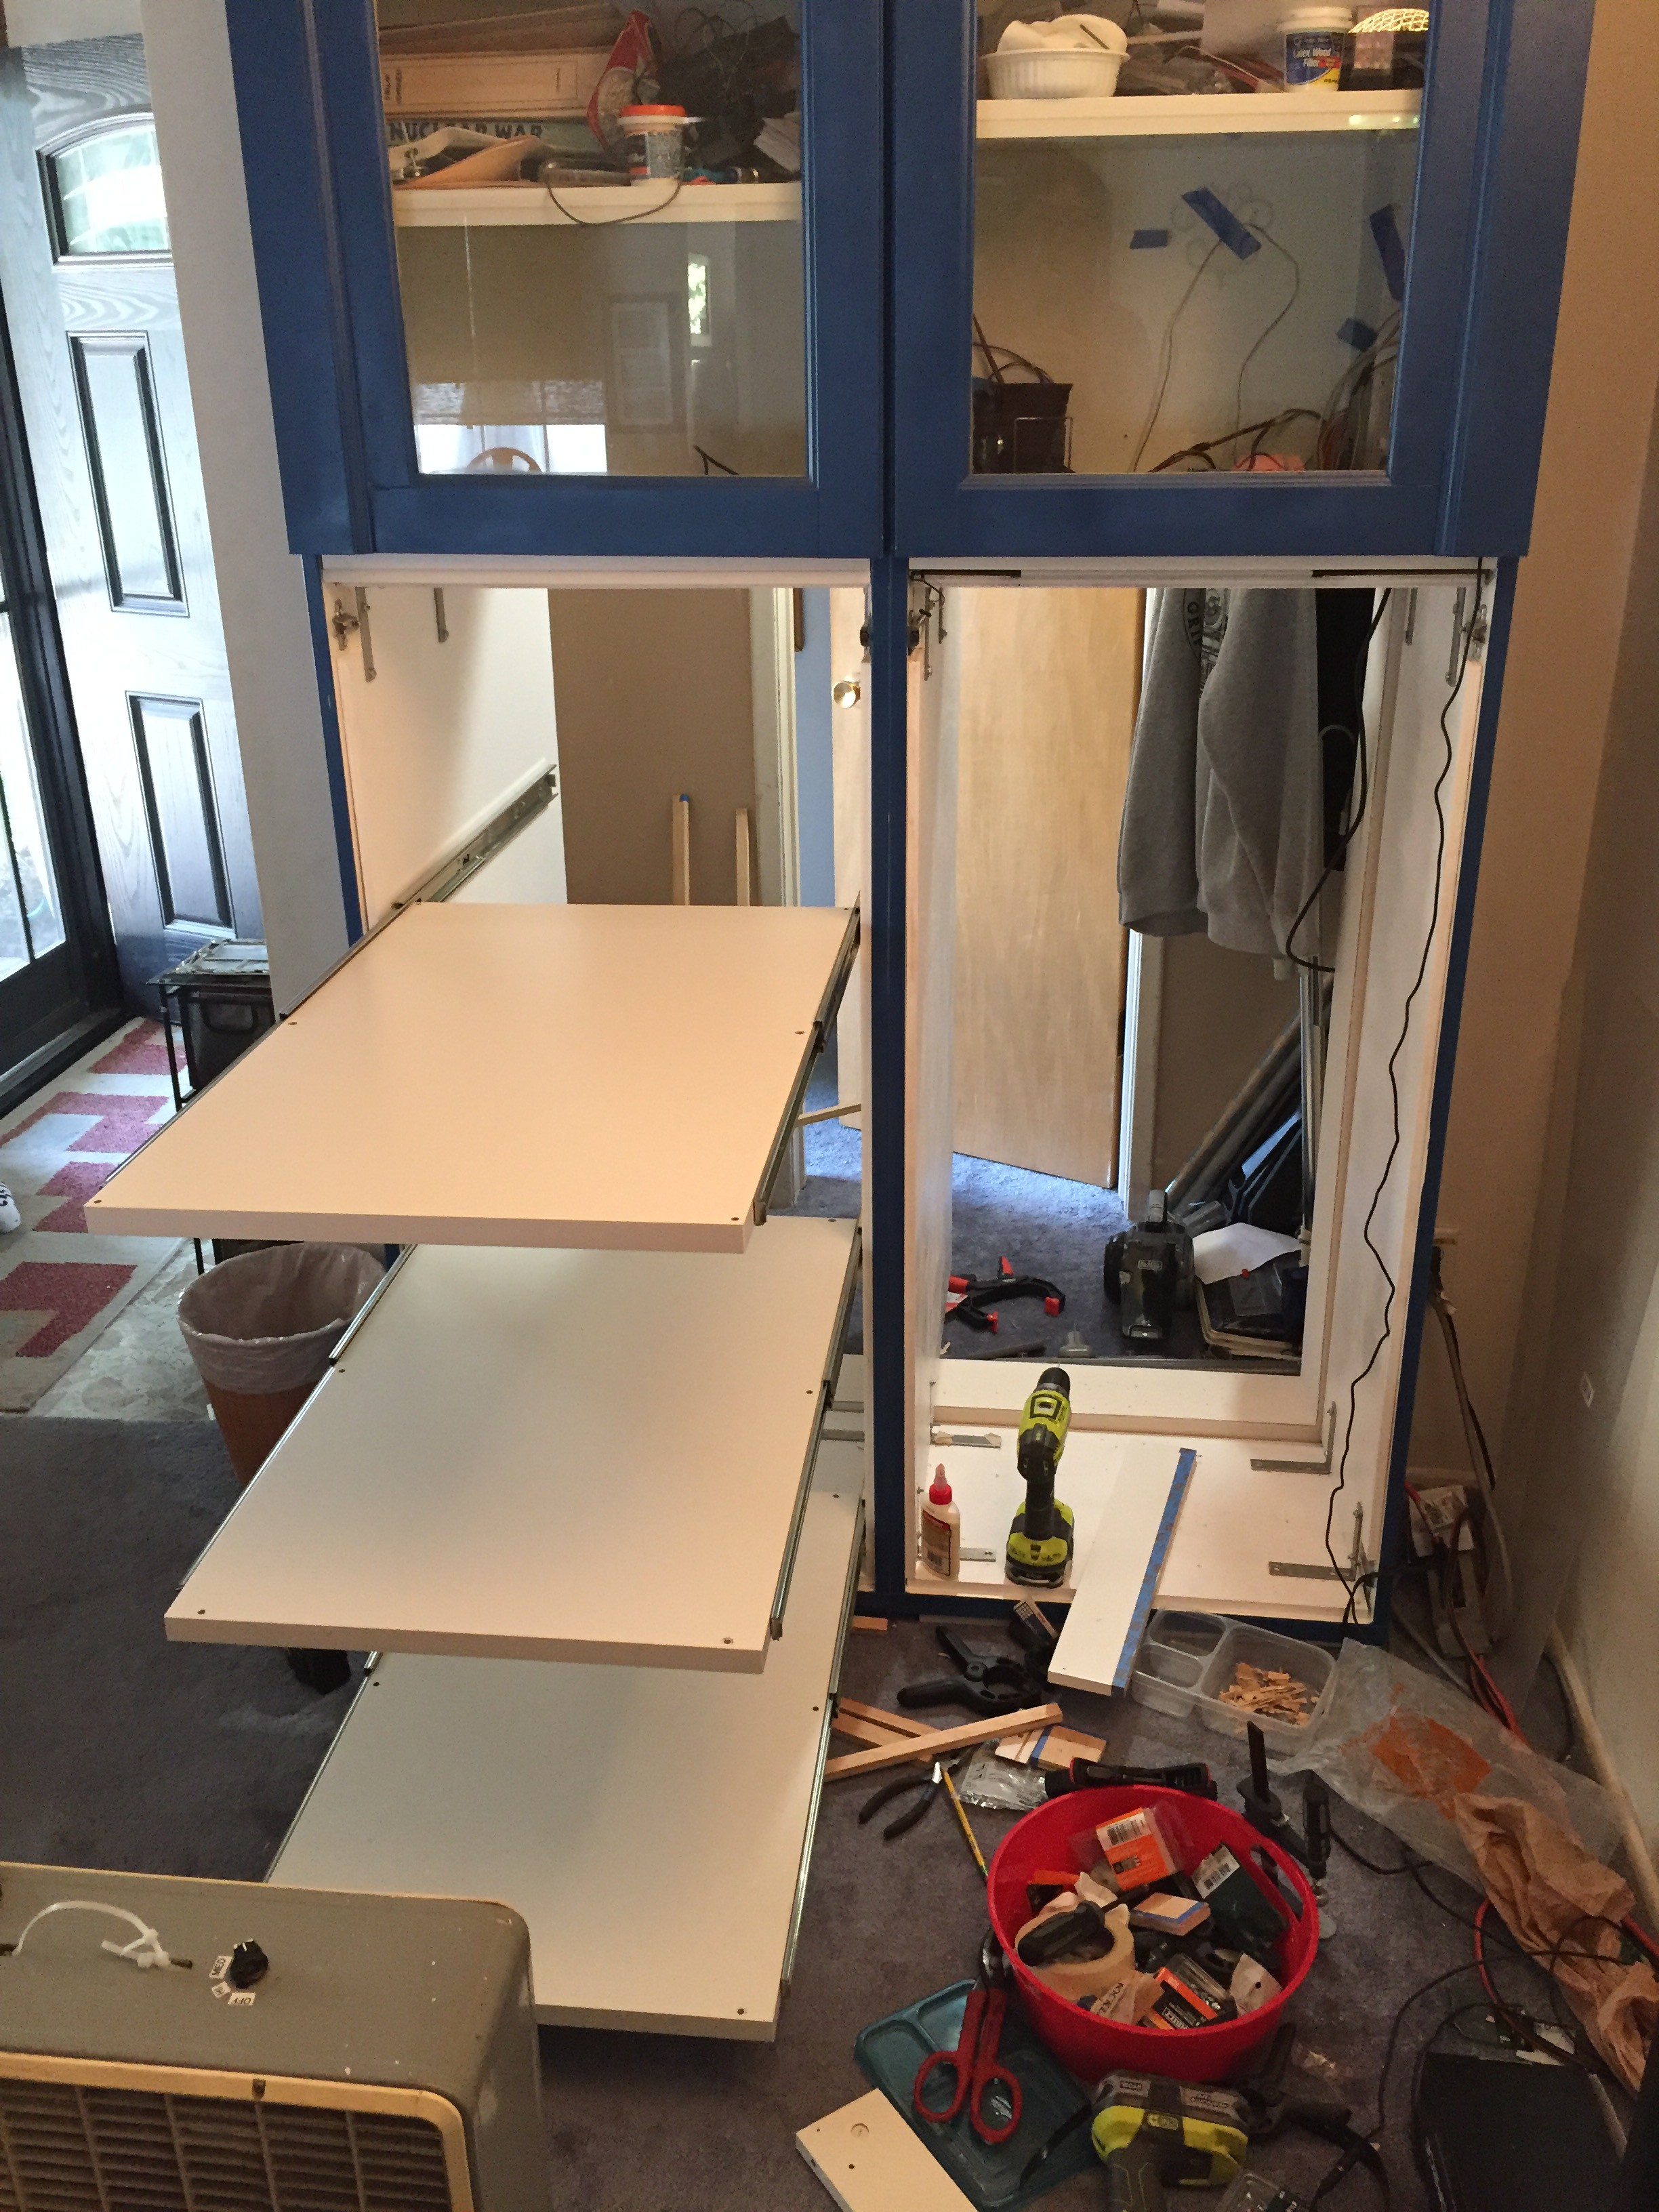 |  |
 |  |
 | 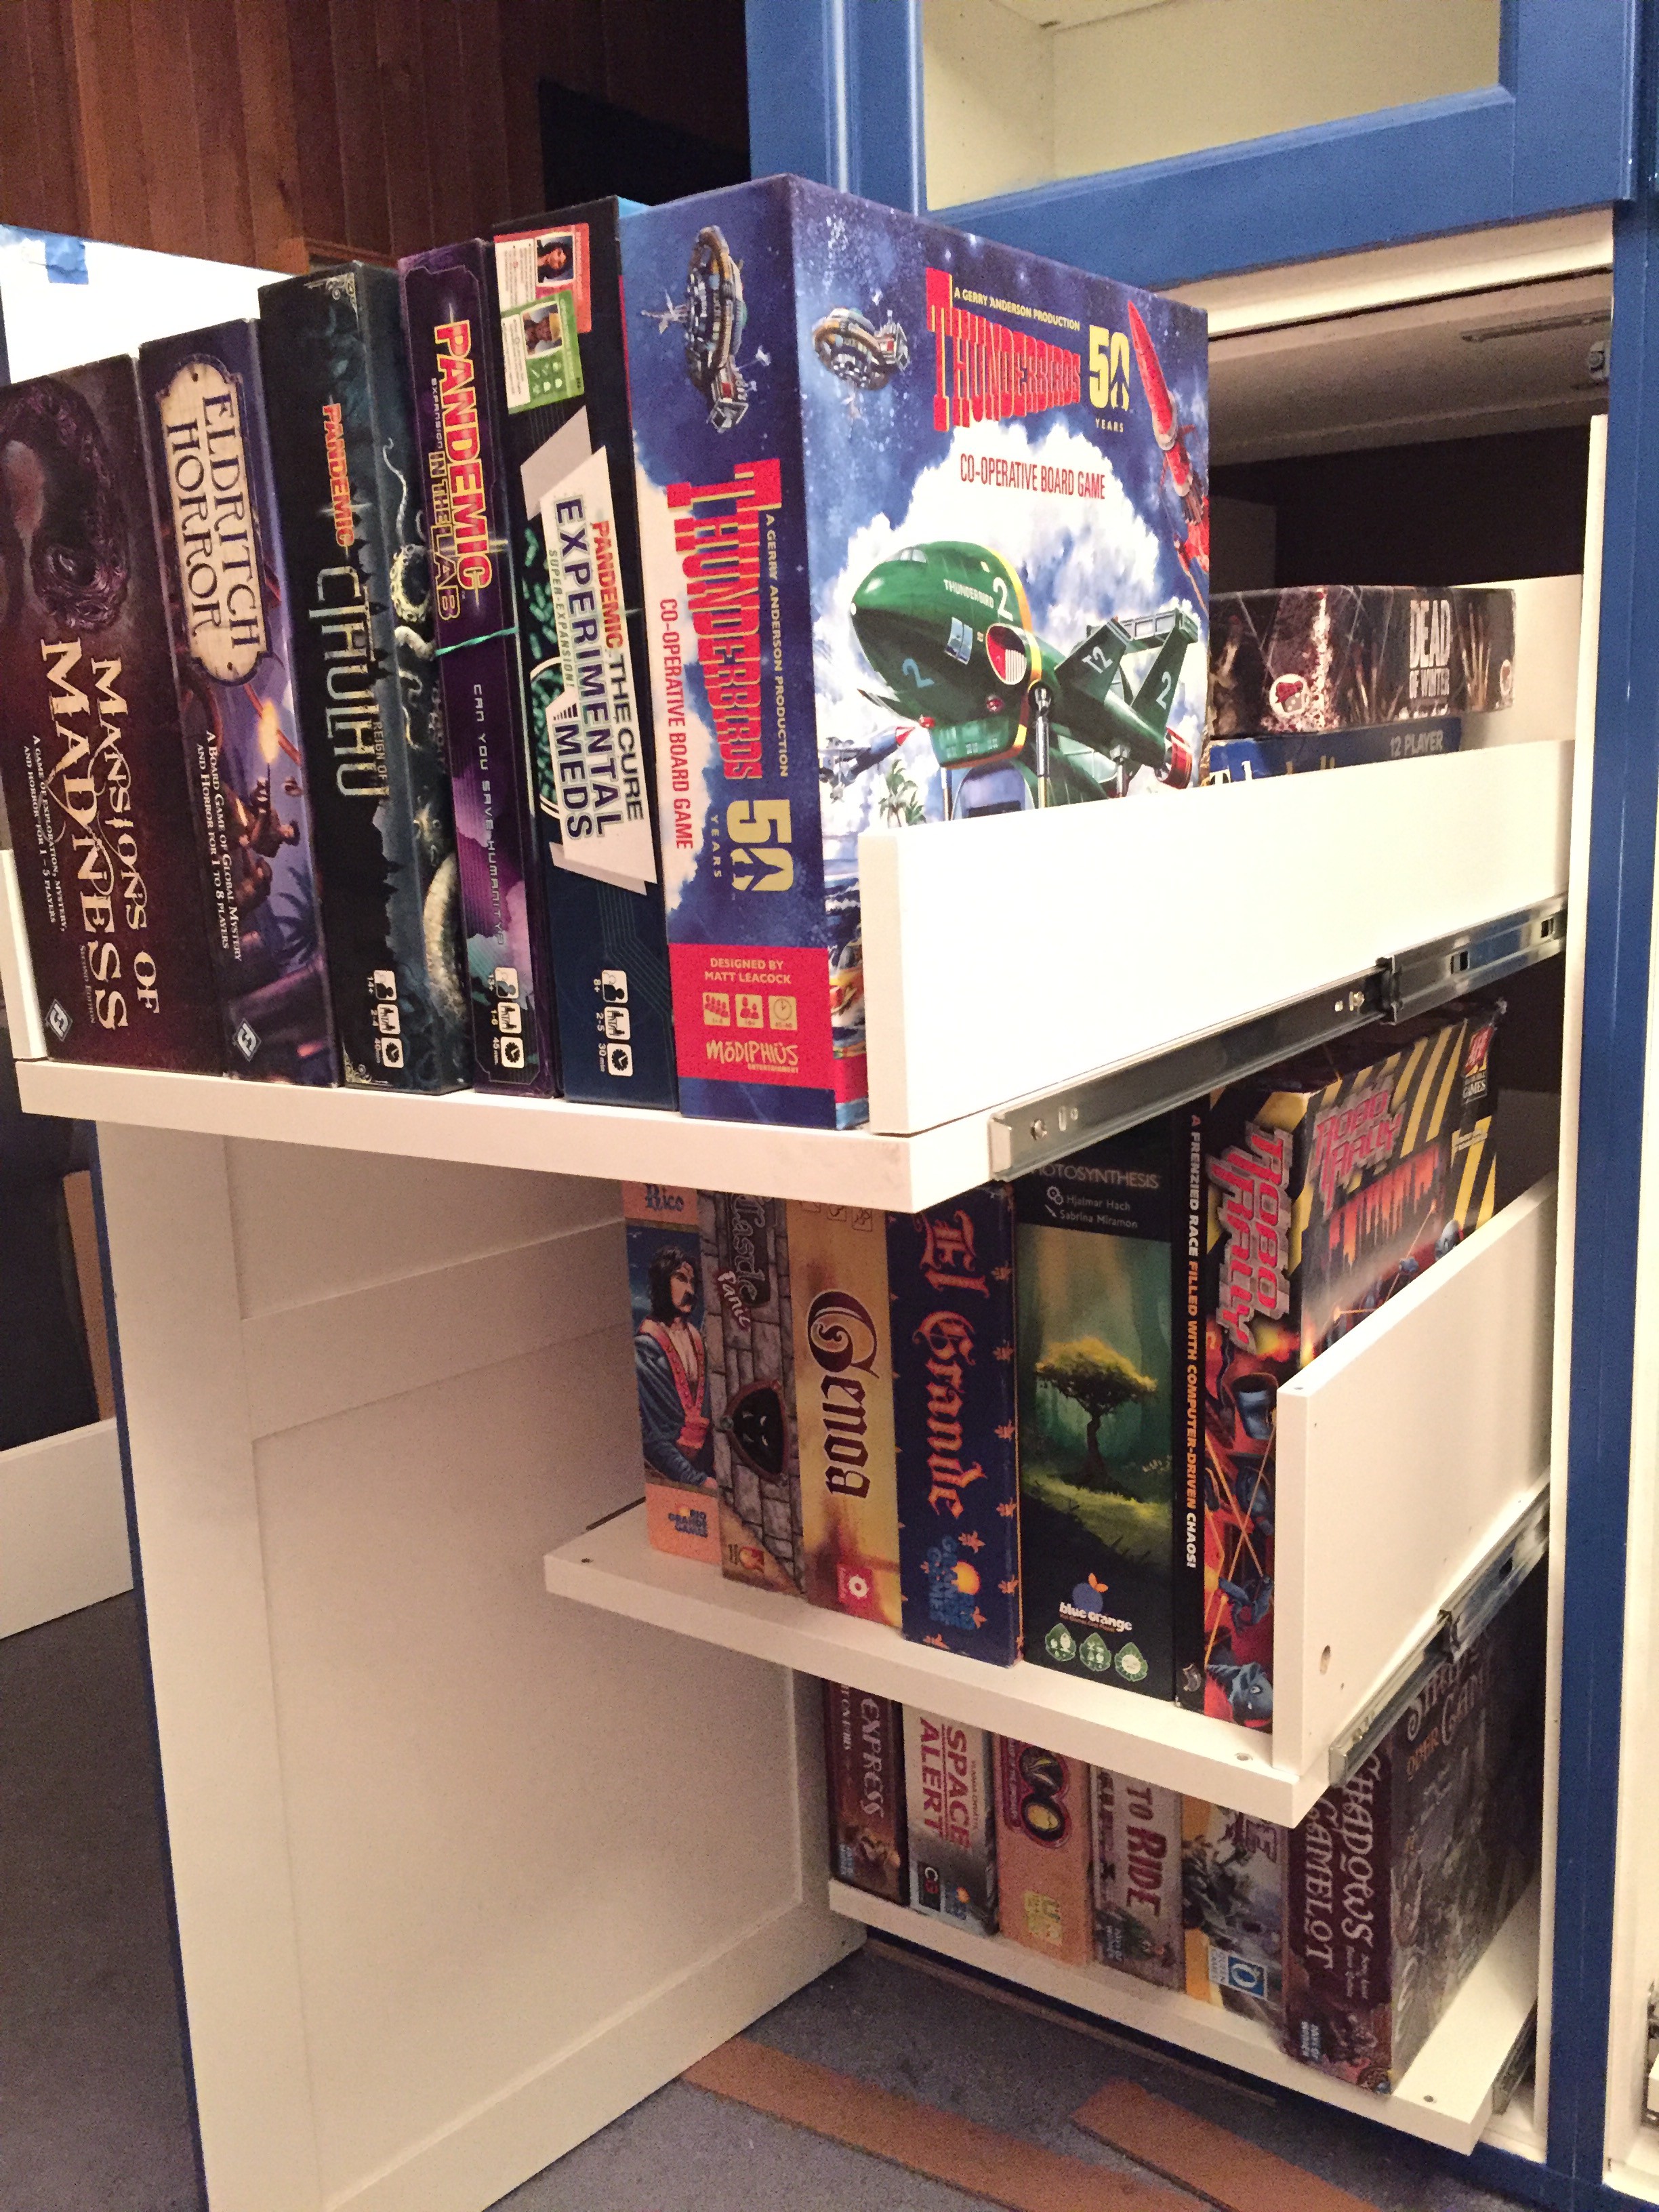 |
 |  |
I found some under cabinet LED light strips that I mounted under the drawers that I can use as drawer pulls and used corded speaker wire underneath and in the back for cord management. These are white only LED lights and they are powered by one of the unused PWM outputs on the ATX shield and are programmed so they only come on when the lower doors are open.
Here are a couple of videos demonstrating how far the drawers slide out from the cabinet. Please note that the drawers are NOT motorized, I asked my son to move the drawers from the back.
Finally here are a couple of fun videos we made showing how our TARDIS is "Bigger on the Inside"
2020 to 2022
During the pandemic I was able to work from home but most of my spare time was taken up with other projects but I was able to do a few things. I added a set of switches mounted on the top right side of the cabinet to do the following:
- Stop all audio playback
- Play next theme song
- Play next sound effect
- Reset Arduino and audio shield
I also found a really nifty tinted acrylic case tall enough for the Arduino Mega with two shields (WiFi in the middle and the ATX shield with MOSFETs on top).
Recently a friend provided me with a one piece vinyl sheet for the "Police Public Call Box" sign - thanks Zack!
Arduino Project Enclosure with fan- "Mega-II" by Marty Rice on Tindie
Membrane 1x4 Keypad from Adafruit
 |   | ||
 |  | ||
 |  | ||
Future plans
- Restructure code
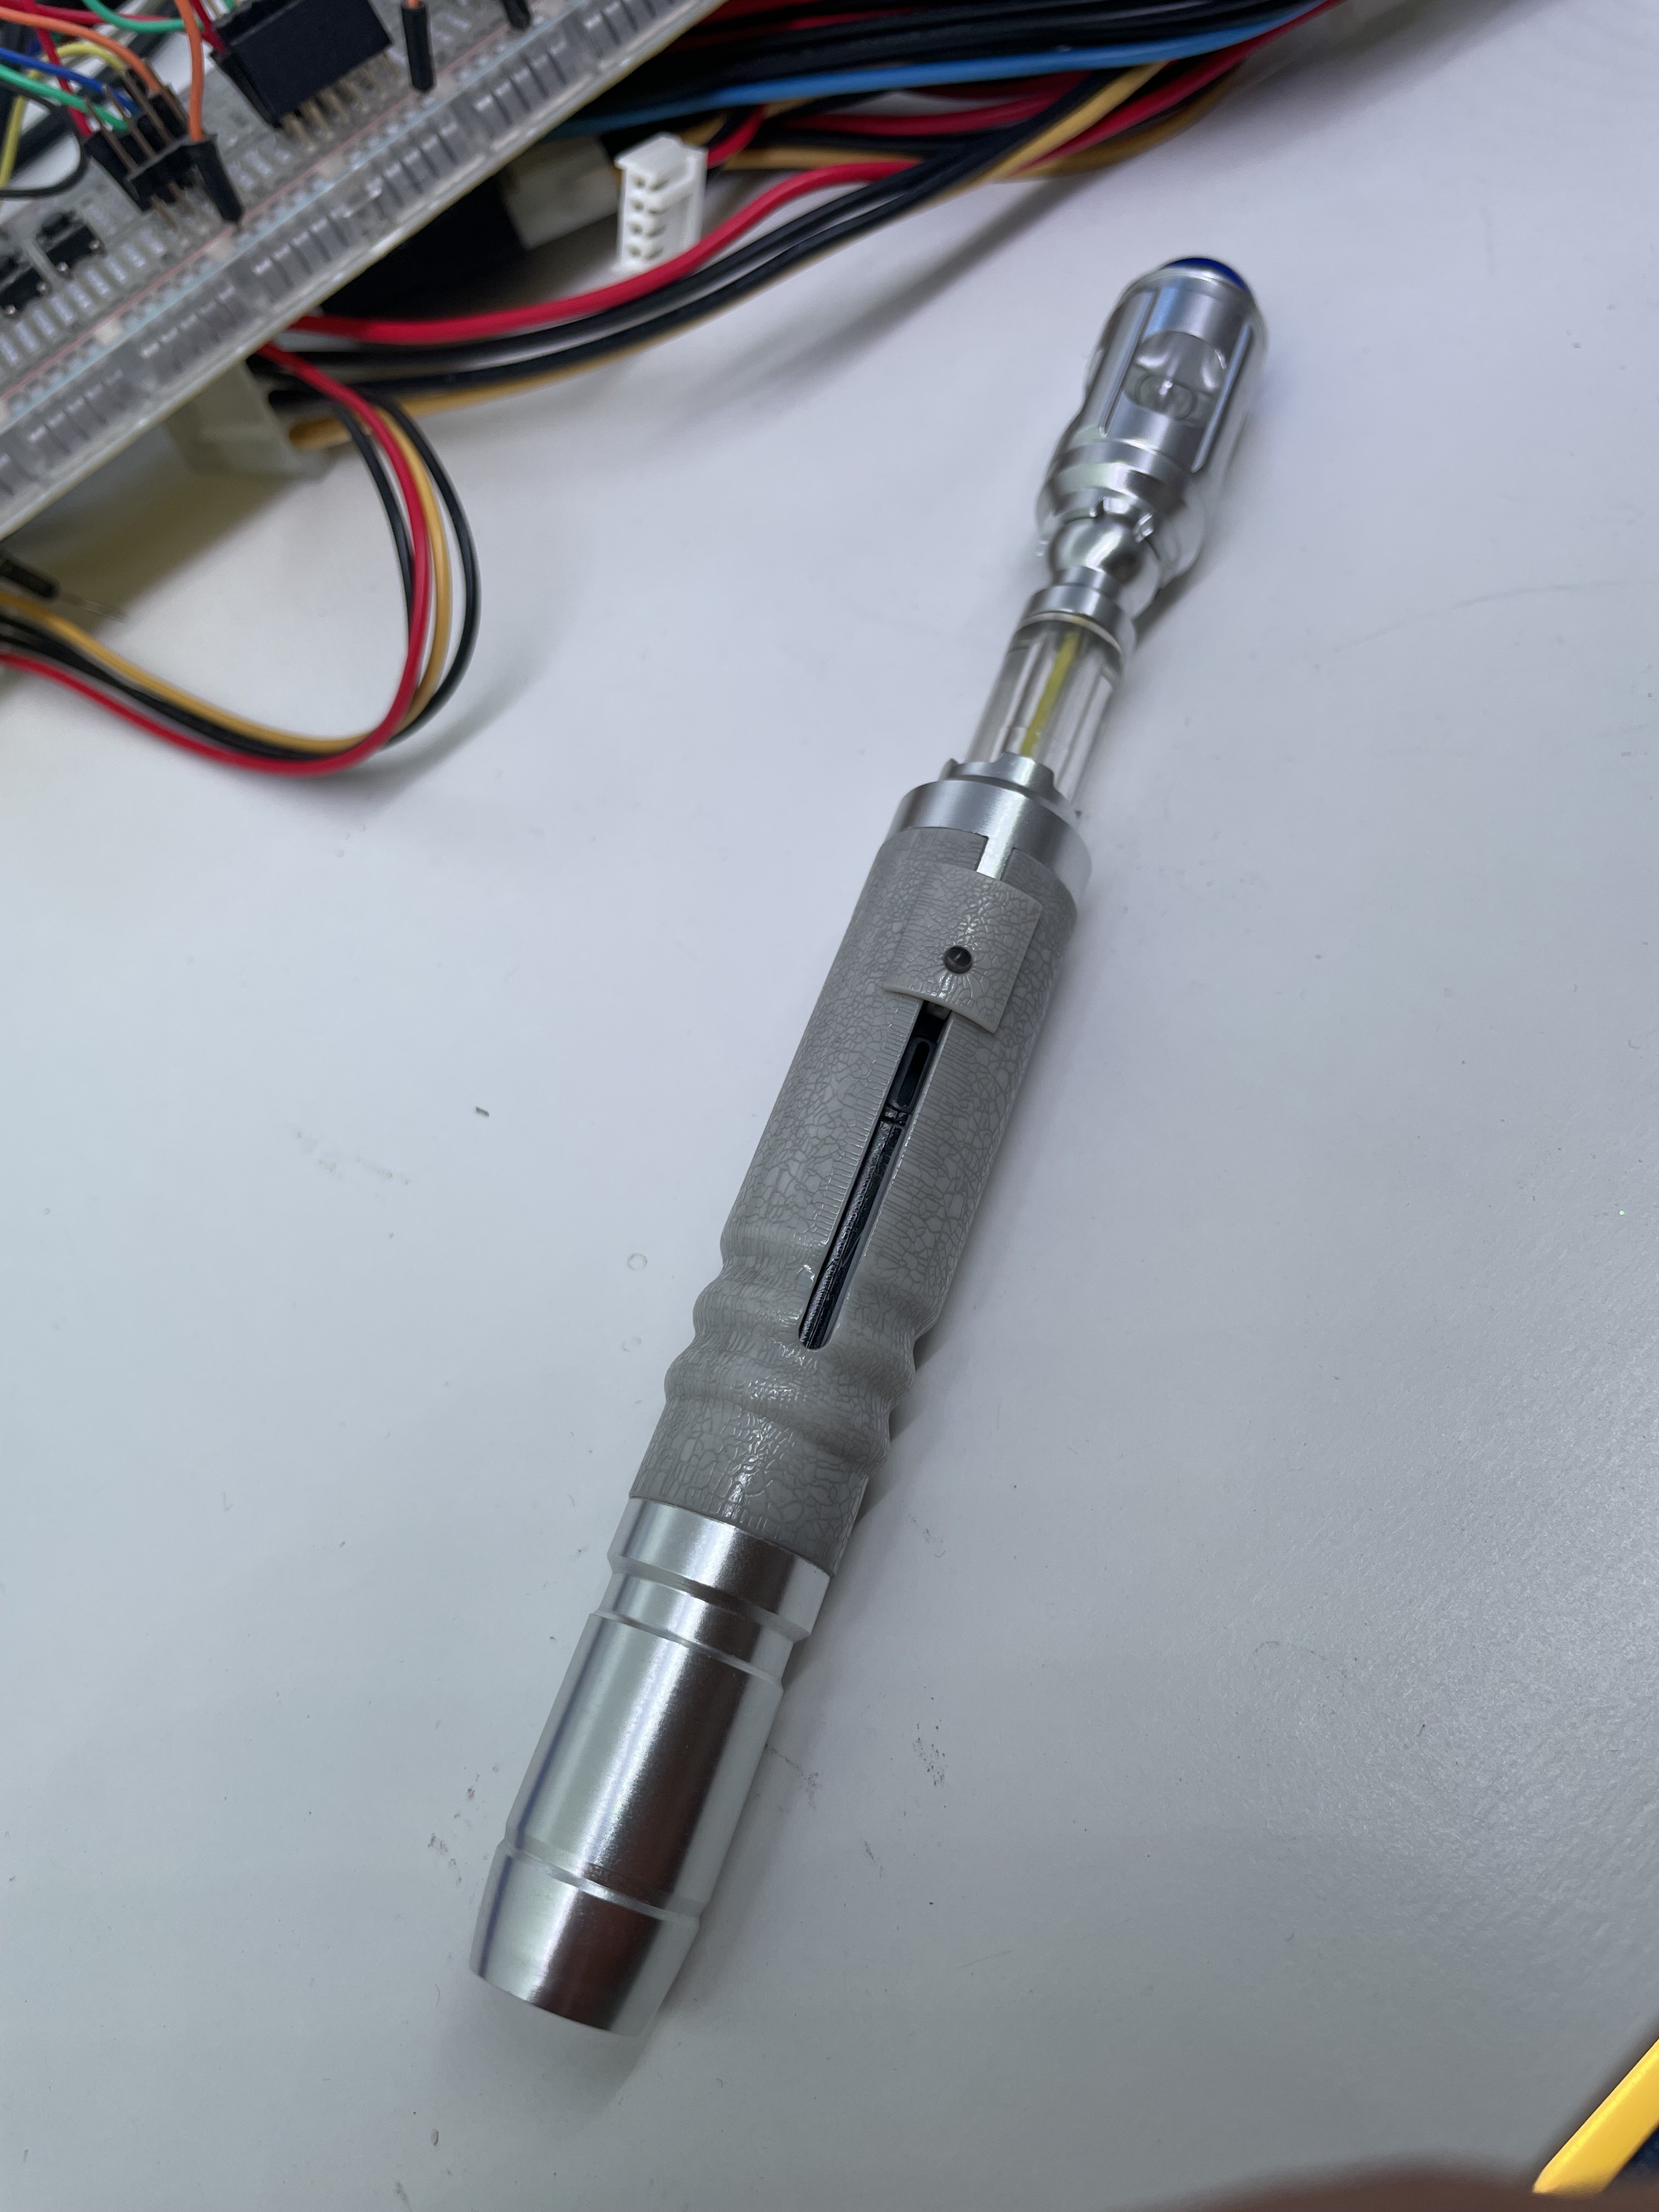
- Add IR remote control using sonic screwdriver
- Integrate with other IoT devices in the house