 silver2row
The PrintrBot is done at about 19" * 6" j* 6" for now. I have moved to another build of sorts w/ the Recore A7 and a Monoprice Maker Select Plus printer. Things are working w/ five steppers, a couple enhancements on the build from the older hardware, and it is way faster than the older model PrintrBot 1403.
So, w/out further ado, I would like to post my build if you are indeed for a controller and need a jump start...
https://github.com/silver2row/Recore_Klipper_Configs.git is my github.com account w/ repo for the A6 on the PrintrBot and the Recore A7 on the Maker Select Plus 3D Printer.
Enjoy and share if noteworthy... I have been printing w/ PETG at a fast pace for sometime now. I like the extra build space and how this mostly metal printer is put together. Tough, sturdy, and full of issues. Got to fix it again...bbl!
Here is a small update. The printer, PrintrBot 1403 Simple Metal, has been partially upgraded. It can now print 19.75" * 6" * 6" or roughly 500mm * 152mm * 152mm. I am still working on the Y_Axis, i.e. as it needs to be equipped to handle the bed build environment.
So, the (19.75" ^ 2) and the Z_axis at around 6" is well in the realm of something I have not done before this time. Large build area on X and Y and something simple for Z. I have an either Capacitive Probe or Inductive Probe handling the homing and Klipper configs for the Z_Axis. Klipper is really some nice source for being able to print large build areas w/ large perimeters.
Although this older printer is very slow and nonmobile at the moment, it can print and to the extent in which I described earlier. I have learned some caveats of the Klipper firmware which has made printing on this printer and others very precise. I have actually been very surprised w/ the assistance of the Klipper people on their discourse and their knowledge of the docs, 3D Printing in general w/ specifics, and all around good service has helped me become more docile when enraged at my lack of understanding.
Okay. So, this is another attempt I have made to incorporate a Monoprice Maker Select Plus w/ Recore A7 controller into a full blown Klipper firmware enabled printer. It is faster than my 1403, e.g. travel and print speeds. It has a larger build environment which has enabled me to print hard to touch prints at such speeds. Now, I am sure there are more able printers w/ better do-dads and gadgets at higher expenses. I am not disregarding this fact. Both printers for me so far are much fun to the point I actually have built them up and outward in parts and so on.
I reached out to the Slice Engineering and Swiss-Micro. Both companies if not the same have had parts where I can basically tear down my printer, exchange matching parts, and switch some firmware sections in the configs, print, and then enjoy a relaxing beverage.
Also...
I went and broke some dear parts from Slice Engineering. I contacted them about it. I was not in the mood nor the market to get reimbursed or gyp the system. I wanted them to understand the complexity of my issue as it pertained to their parts. All in all, they listened and sent warm regards. Luckily, I ordered two of the throat-hotend-MK10 attached parts.
The MK10 seemed to be a popular make and model. Not so much from what I can tell. I have been savagely researching more and more USA MFG. in 3D Printing, smaller part manufacturing, that tends to learn towards what I have already purchased. Inevitably, I have found Slice and Swiss to handle most of what I already do.
Outside of those two companies, I found COEX3D. It seems they mfg, here in the states, filament and have access to an older Dupont filament of choice called Hytrel. Anyway, I do not normally handle such rubbery materials, i.e. as I print for rigidness while having a longer-lasting effect to the entire finished part.
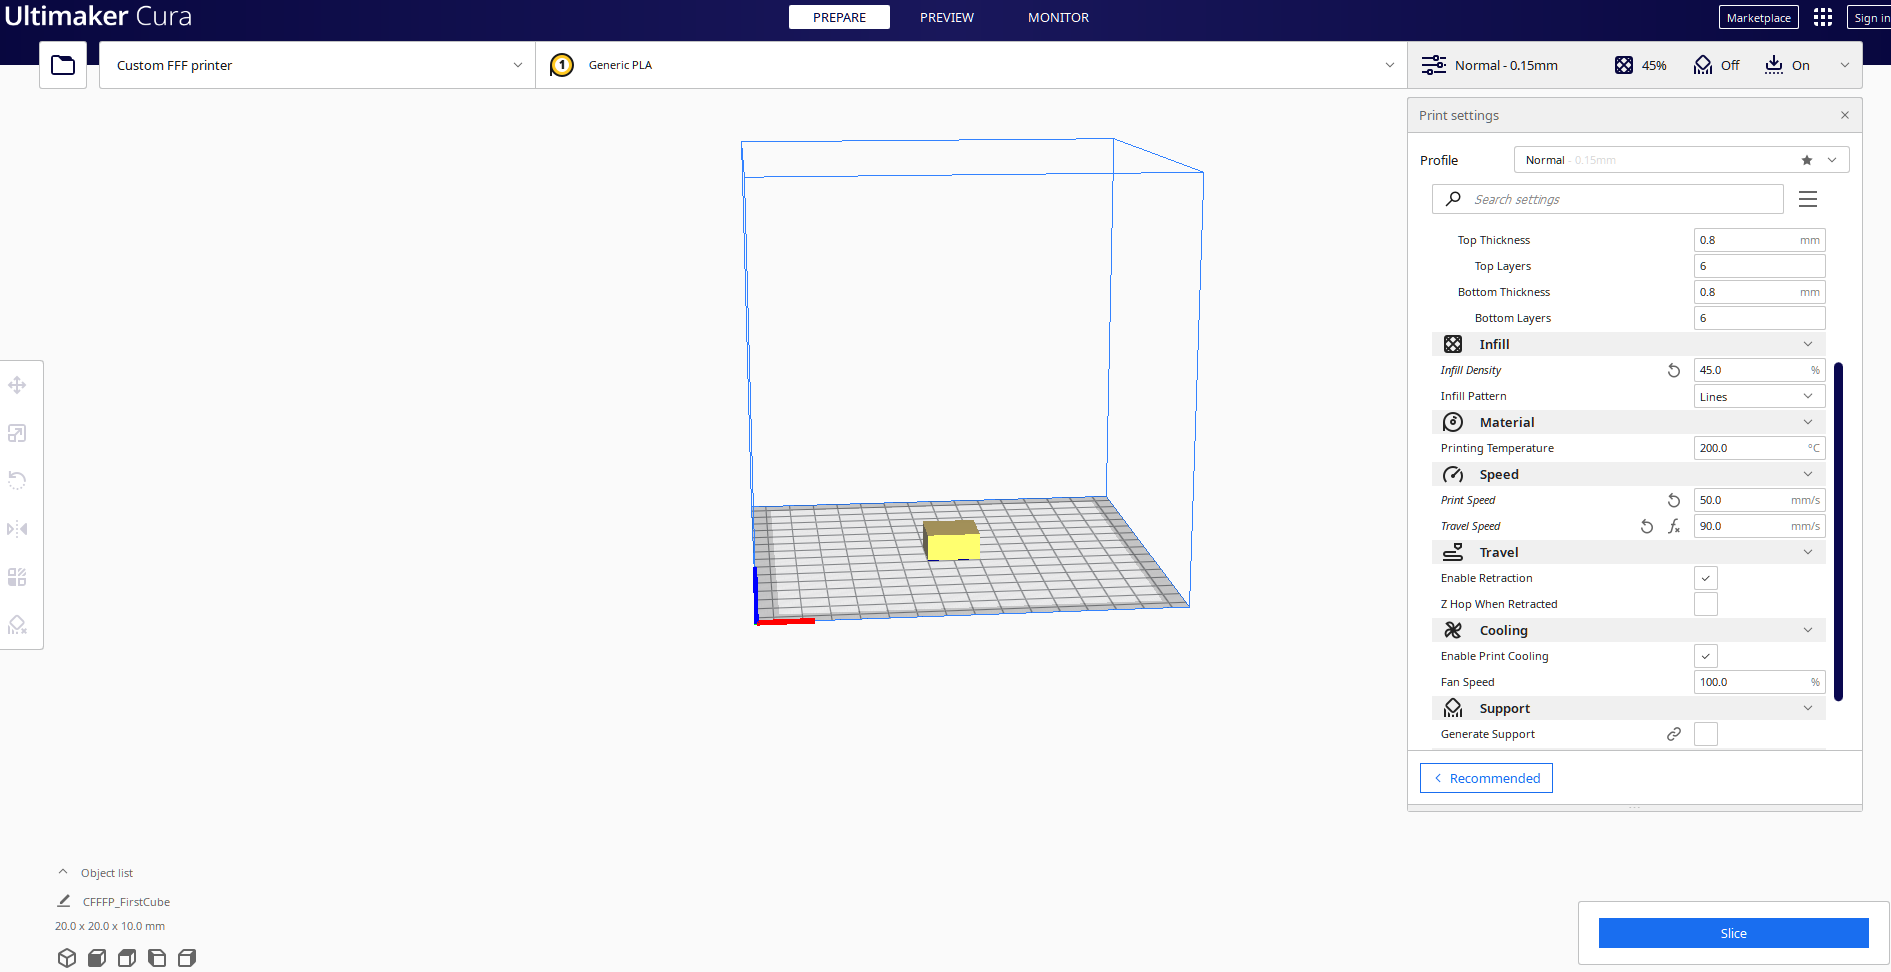
For instance, four to six bottom layers, a 45% infill w/ lines, and four to six top layers. Sometimes I double...
Read more »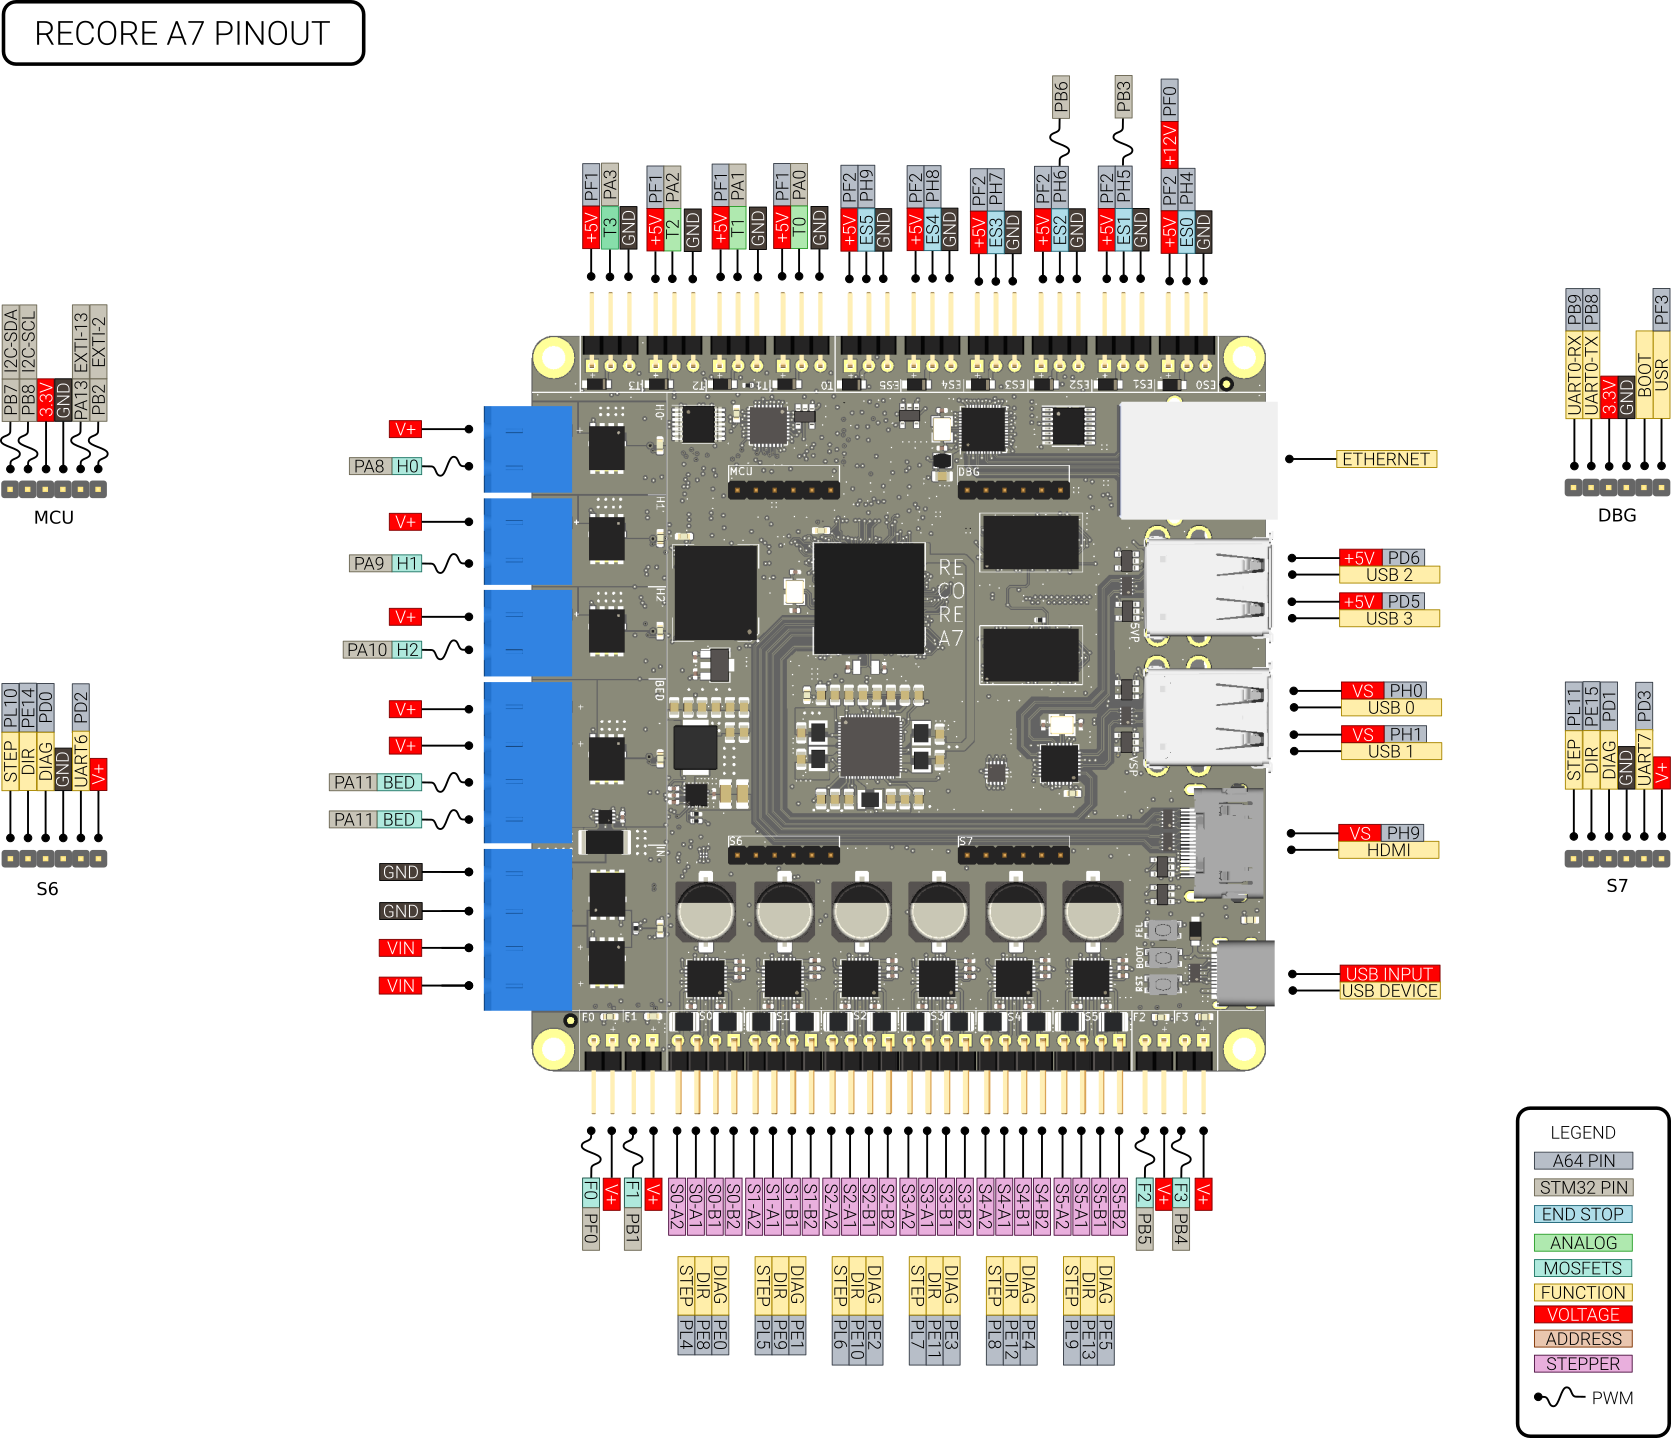


 Electroniclovers123
 clearchris
 marble
Finally tuning adjustments in my slicer CURA source and on the Recore via klipper should make for some wood craving ooze to be made. I have never printed in wood type spools. I cannot wait. Send rations.