Close
0%
0%

HAL 9000

The ever-watchful eye of my Home Assistant-controlled house

Similar projects worth following
It all started with some friendly jesting from my housemates about the sentience of the house as I continually add more creations and automations… It became obvious to me that I needed to re-create HAL and he needed to be connected to my Home Assistant instance. What started out as a simple 3D print/build turned into a hub for pretty much any sensor I could think of that MIGHT be useful in our living room.

I started off doing some casual searching for other folks’ creations, figuring I could print something up really fast based on another’s design. I ran across some designs using a 4” arcade button, which looked really good and solved the only part of the build that wasn’t 3D-printable (not to mention it was essentially full-scale). It slowly morphed from a standalone prop, to a case for the raspberry pi that’s running my Home Assistant instance to a standalone device CONNECTED to my Home Assistant instance with myriad sensors. I also ultimately chose to design my own case from scratch, as it’s such a simple design to begin with and it would be easier to make my own customizations (plus, sometimes it’s just more fun to make something all yourself).

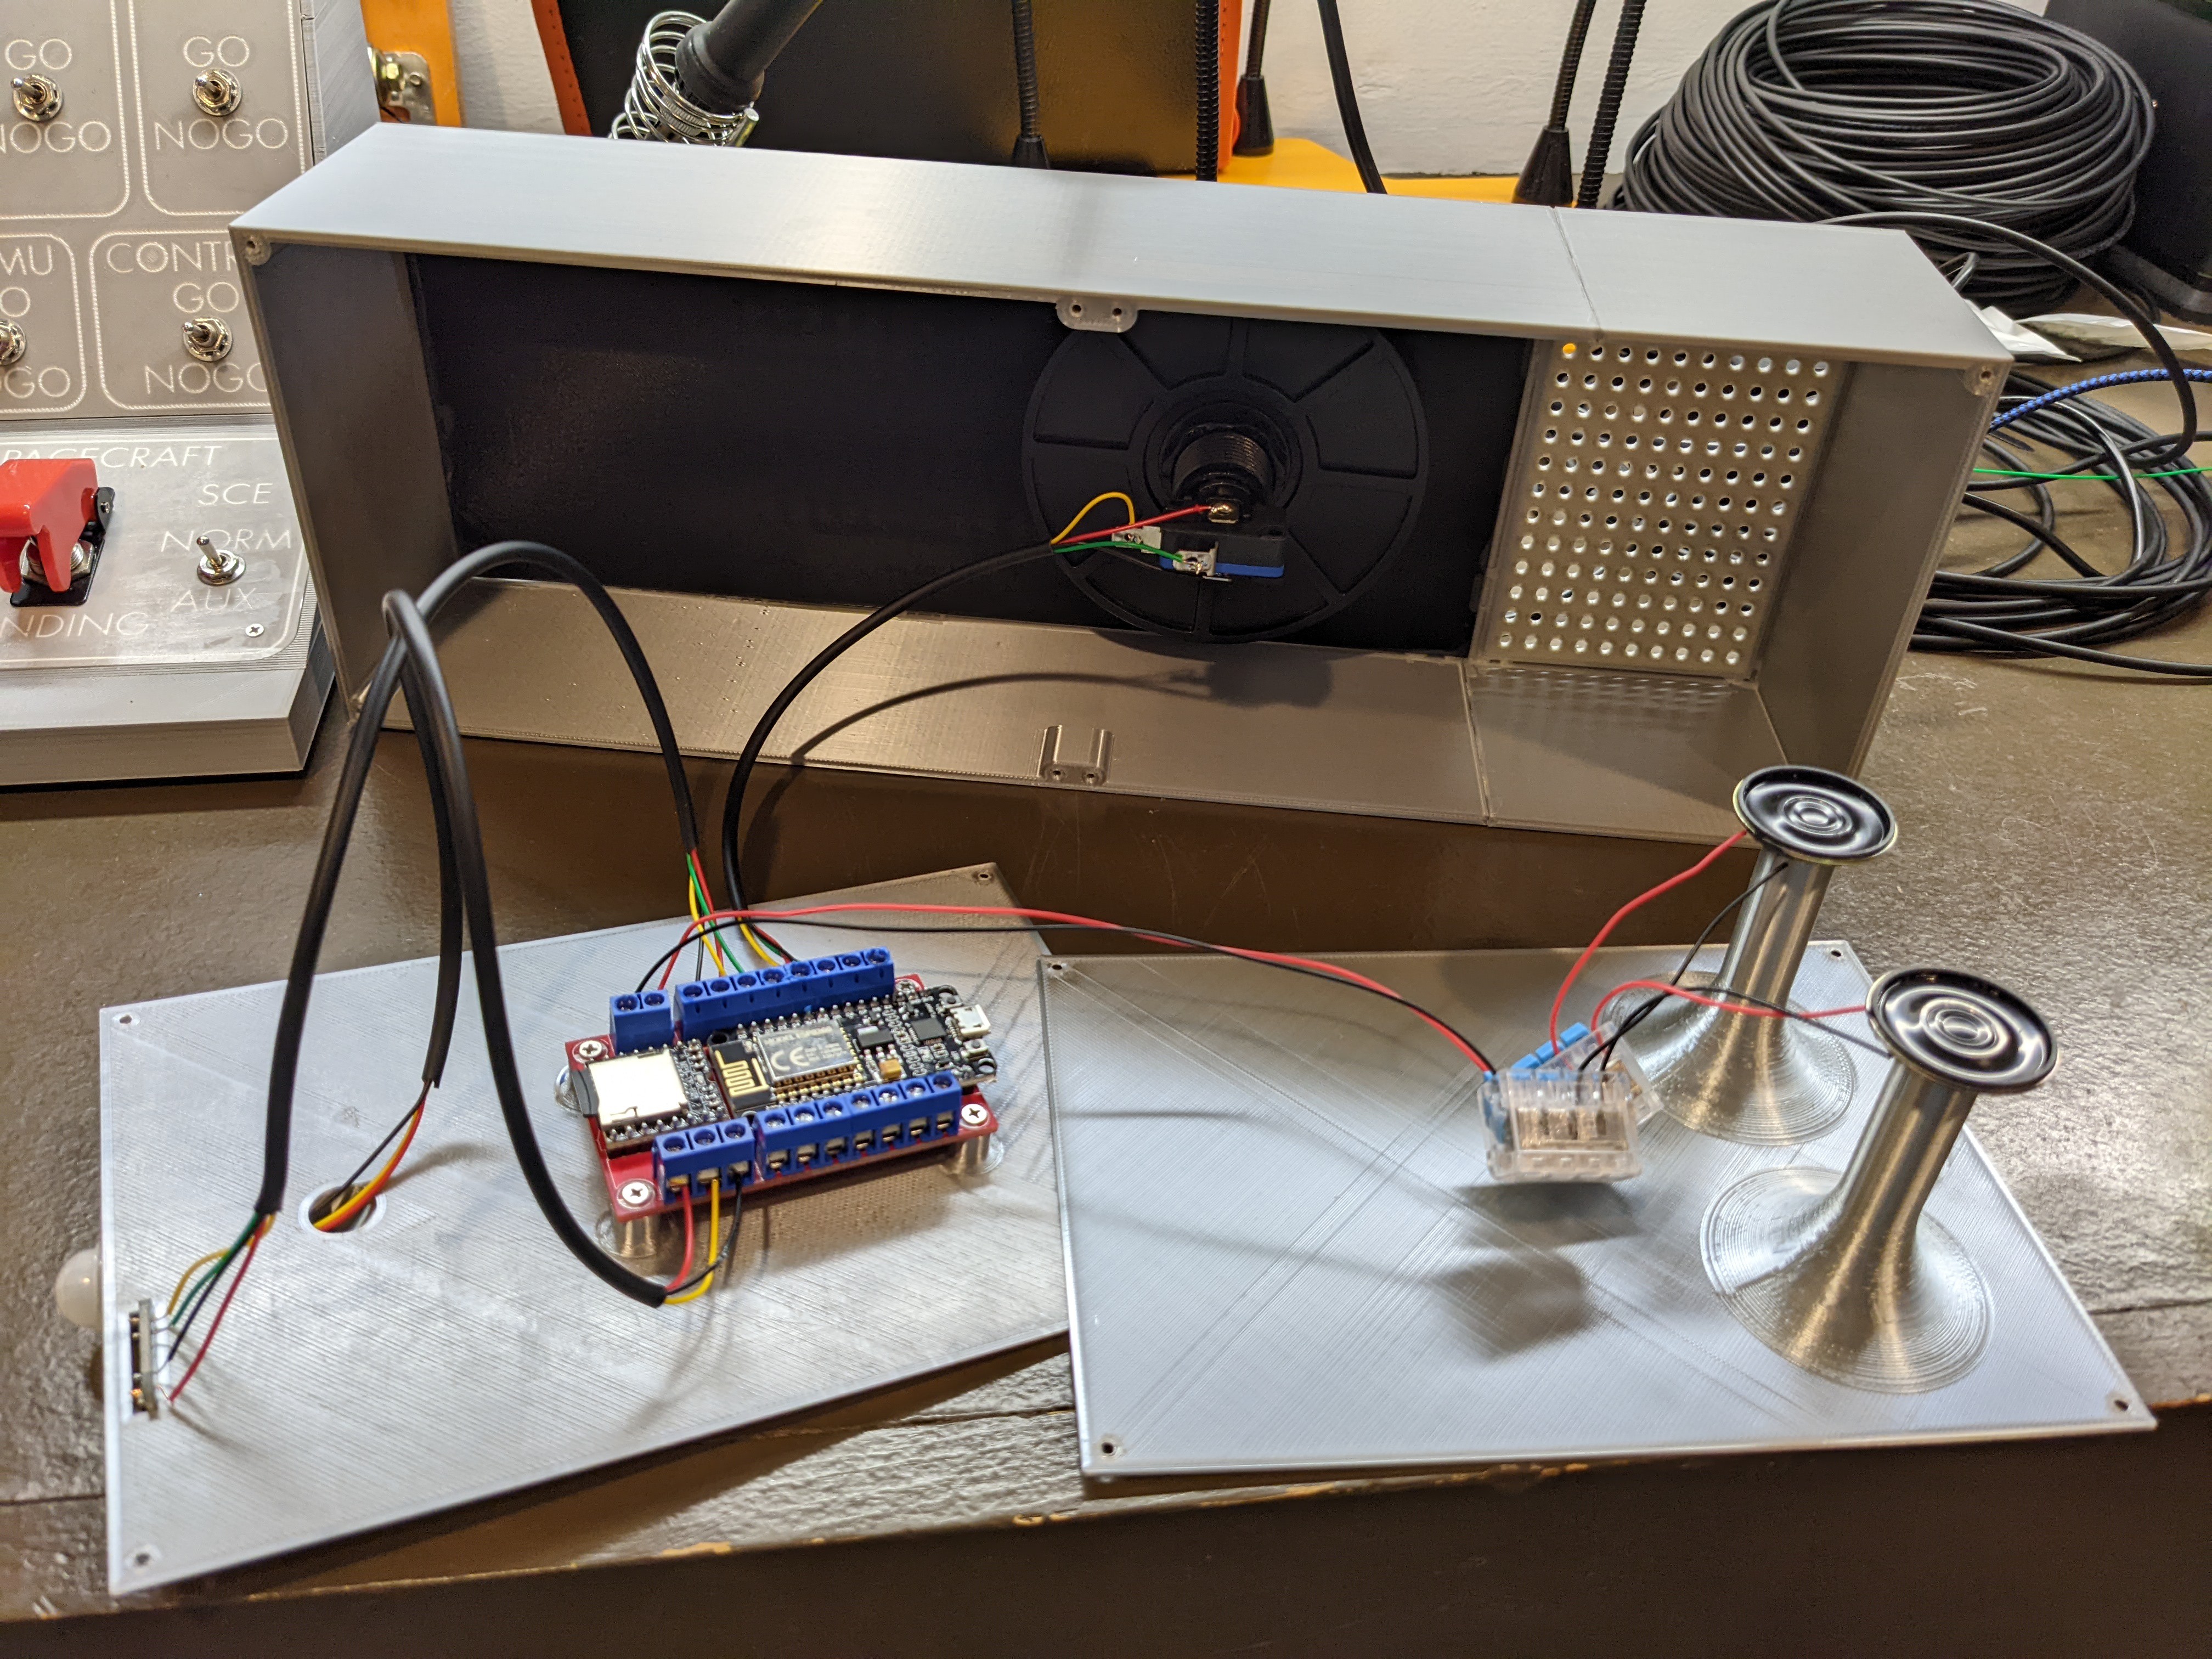
I knew from the beginning that at a minimum I wanted it to be able to play audio clips of HAL and the use of the arcade button made the triggering of that even easier (although I also ended up supplementing this with a motion sensor). I used an ESP8266 as the brains and used ESPHome to ‘program’ it, using a DF-Player Mini for the audio with some small speakers powered directly by it. While I obviously could have done all of this with a non-Wi-Fi board and handled all of the control locally, I SPECIFICALLY wanted everything connected and controlled by my Home Assistant instance (partly to add to the ‘sentience’ of my HAL, but also so I could add all sorts of other sensors for use in other automation projects since he’s located in such a central hub of my home).

For the audio clips I spent some time finding and downloading all the best HAL quotes/clips I could find from the movie and then cleaned up those that had lots of background noise (primarily ones from the end of the movie). After organizing/formatting them as the DF-Player Mini prefers, I popped them on an SD card and had a functional HAL. A few days of printing all of the pieces, a little bit of gluing and painting (the ring around the arcade button required some silver paint), printing the decal and I was more or less ‘done’.

Ultimately, I added a motion sensor to also trigger HAL. Because I’d already printed everything, I started off just having the sensor peak out the top of the back panel (so pointing straight up). This had the partially intended benefit of also making it so it only triggers when you walk RIGHT UP to it, which since it’s in my living room, is a plus (neither me, nor my significant other want it going off ALL the time). Since all of the automation is handled by Home Assistant, I added a condition that motion only triggers HAL when my Chromecast ISN’T playing anything (that way it doesn’t go off when we’re watching something).

I also added a lux sensor. HAL himself doesn’t actually use it, but it’s a convenient location to put it so I can automatically turn my living room lights on when it gets dark in the evening (or it’s just particularly cloudy out). I still have several pins left on the EPS8266 and some potential ideas for adding extra sensors that could be useful to have in my living room; we’ll see what gets added down the line.

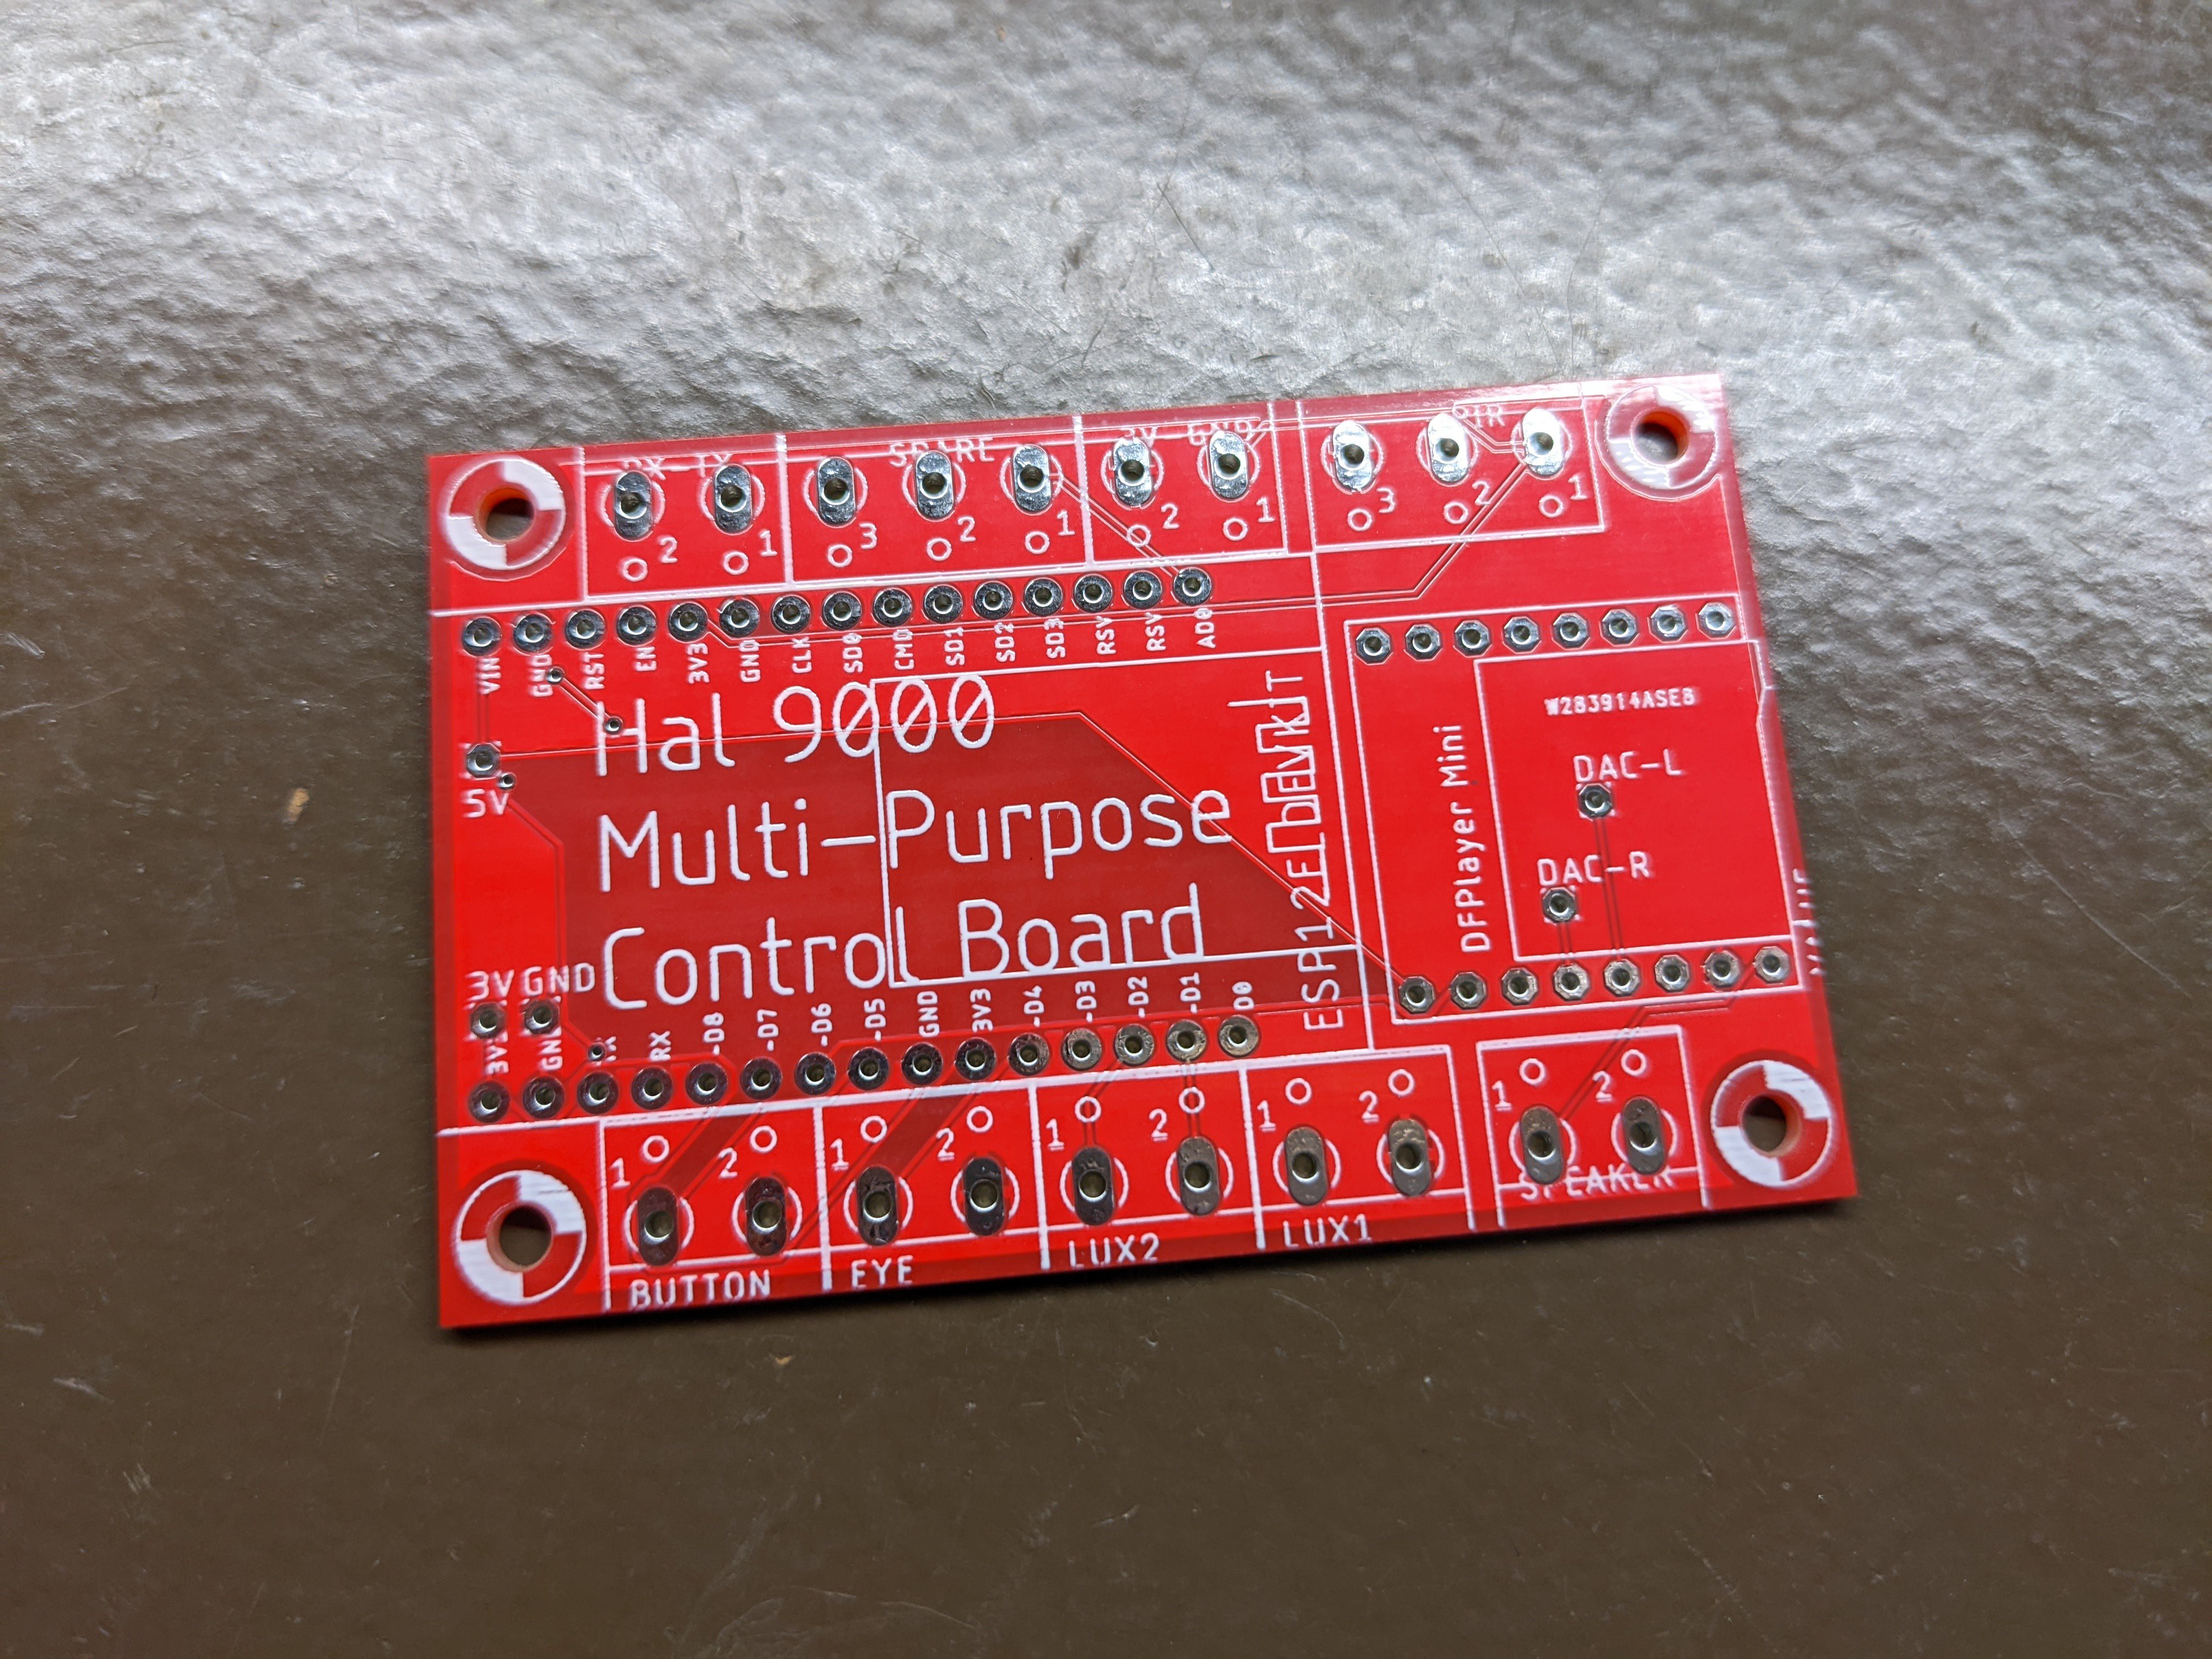
To finish everything up, I modified the back panel to integrate the 2 sensors I’m currently using and designed my own PCB (still waiting for it to make its way around the globe) to make it more permanent. I specifically included screw terminals for all of the ESP8266 I/O pins so that adding additional sensors is easy. It also makes the PCB a little more ‘general-purpose’, so hopefully I can find another project or 2 where it’s ‘good enough’ and quicker than manually soldering something up. Hope you enjoy!

hal-redacted.yaml

The YAML file I used with ESPHome to flash my ESP8266 (with all the sensitive bits redacted)

yaml - 4.14 kB - 04/14/2022 at 20:33

Download

01.zip

The audio files I used, formatted for the DFPlayer Mini and cleaned up as-needed. Obviously I don't own the rights to these files.

x-zip-compressed - 4.11 MB - 04/14/2022 at 20:32

Download

Hal.brd

Eagle Board File

brd - 61.93 kB - 04/14/2022 at 22:31

Download

Hal.sch

Eagle Schematic File

sch - 68.40 kB - 04/14/2022 at 22:31

Download

View all 9 components

  • PCBs, Music and Windows

    Ben Brooks05/03/2022 at 14:50 0 comments

    The PCBs I had printed up finally arrived!

    Took a little longer than I expected to get it all soldered up (so many wires!), and the fact that the screw terminals I bought are junk didn't help (about 1 in three had screws that seemed to be cross-threaded and of course I didn't realize this until AFTER I had soldered them to the board). But now it's nice and tidy and I shouldn't have to worry about any wires popping loose off of the breadboard.

    I also added a track of the theme music to the SD card, and adjusted my code such that it plays whenever the button is pressed (Found out the other day that my 1-yo daughter LOVES the song, so now it's always a button-press away).

    I've also since added a magnetic sensor to a window that's by Hal, that I use for other automations in my house (specifically to alert me when the outside enthalpy is lower than the inside, I'm not in heating mode and the window is currently closed). No other sensors currently planned, so I THINK this project is finally all done...

  • Videos Added

    Ben Brooks04/15/2022 at 15:34 0 comments

    I finally got a chance to take some videos of my 'mostly' finished project (surprising how hard it is to do that with 2 little ones :) ). Did both the obligatory "I'm Sorry Dave..." and my favorite, the "Daisy" song.

  • It's DONE! Well, mostly...

    Ben Brooks04/14/2022 at 22:28 0 comments

    Finally finished this one up, including designing and ordering the PCB. Now the shipping waiting game.

    Most everything is on the page now, but I've still got a few odds and ends to add.

View all 3 project logs

  • 1
    Purchase/Gather Components

    This is one of the easier projects I’ve made for someone else to copy. Everything is either easily purchased or easily printed and assembly is quite easy. Use the components list to grab everything you need. I included links to the exact items I used, although in my case I had several of these items in my parts bin.

  • 2
    Print Everything

    Pretty self-explanatory. I took me a few days’ worth of printing (and then a little extra for the few things I had to re-design).

  • 3
    Parts… ASSEMBLE!

    Also, pretty self-explanatory. I used super-glue to attach the top and bottom of the enclosure, and then Elmer’s glue to attach the front panels and speakers (I wanted to ability to somewhat easily remove them if needed, in case I needed to modify something). So far, they’ve held just fine, but if they ever start to fall or droop, I’ll just super-glue them as well.

View all 7 instructions

Enjoy this project?

Share

Discussions

Saabman wrote 04/14/2022 at 23:50 point

Thats looks quiet neat. Do you have any video of it in operation?

  Are you sure? yes | no

Ben Brooks wrote 04/15/2022 at 15:30 point

You beat me to it! I'm actually getting ready to upload some videos right now.

  Are you sure? yes | no

Similar Projects

Does this project spark your interest?

Become a member to follow this project and never miss any updates