 Antoine
Since we didn't manage to make the Raspberry work during the sessions at school, I went to a friend's house who already used a Raspberry Pi to help me set this up. We went threw a few different steps :
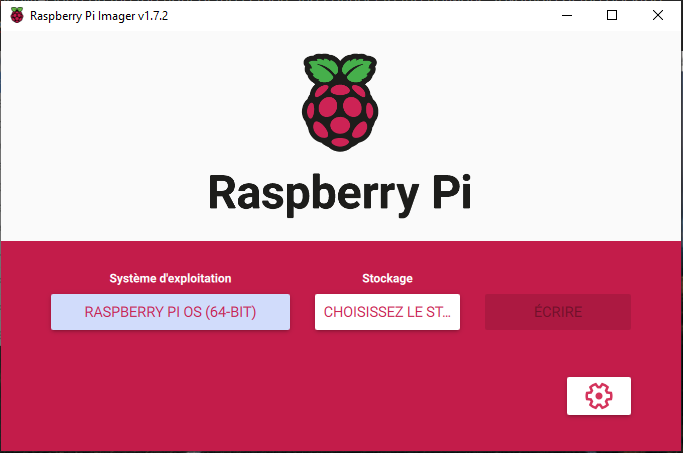
- First of all, we need to install the OS on the microSD card : download the "Raspberry Pi Imager" , plug the SD card on your computer, select the OS "Raspberry PI OS (64 bits)" and choose your SD card before starting writing.
- Then, we need to comunicate with the Raspberry : plug a keyboard and a mouse on the USB ports of the card, and plug a microHMDI to HDMI cable between the card and a screen. The raspberry is working like a computer so we need some peripherals to communicate easily. You'll see the desktop of the raspberry on the screen and you can use the mouse and the keyboard (in QWERTY) to control it.
NB : you can set everything up by modifying the SSH files of the microSD card if you want to do this headless, but we had a lot of trouble doing it this way so we chost this method.
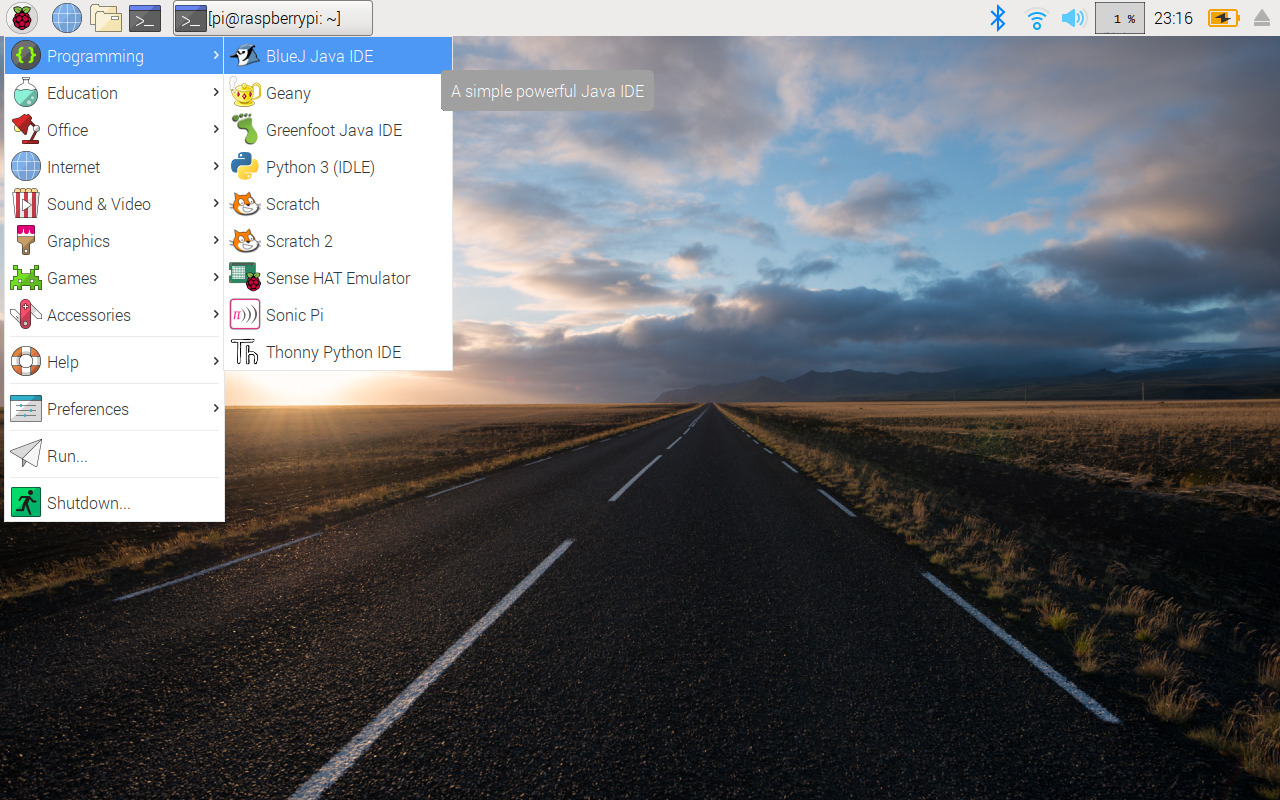
- Next step is to connect the raspberry to a network/hotspot on which you can connect your programming computer. We chost to make an hotspot on our cellphone to always be able to have the same network wherever we go. We only need to connect it to the WiFi like a regular computer, we click on the WiFi logo on the top right of the screen and connect to the network. (example of the desktop below)
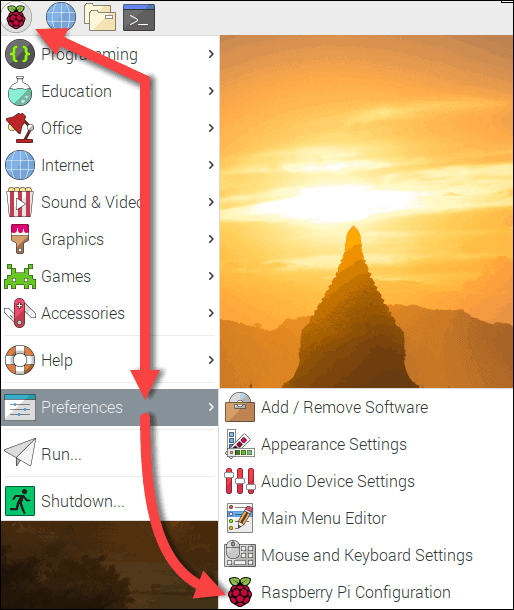
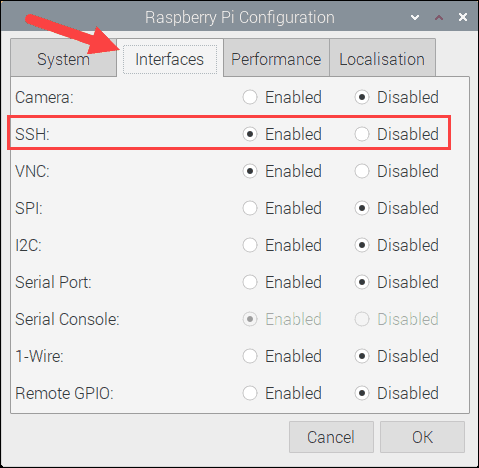
- Now you should configure SSH on the raspberry PI. In order to do it, you need to click on the raspberry on the desktop, go to preferences and click on Raspberry Pi Configuration. Then you should be able to enable the SSH through a menu. Try to restart the raspberry to be sure the SSH is well activated.
(see this tutorial online if you need help https://phoenixnap.com/kb/enable-ssh-raspberry-pi)
- The last step is to connect your computer to command the raspberry : For this step, you need a computer connected on the same network as the raspberry PI. You have to open a Unix console (I use Ubuntu) on your computer to start the setup. If you're using a Android phone to create the hotspot you can see the IP-adress of the connected devices in the parameters of the hotspot, you need to find the IP-adress of the Raspberry. To connect to it, type "sudo ssh username@ip_adress" to connect to it (the password is pi for me).
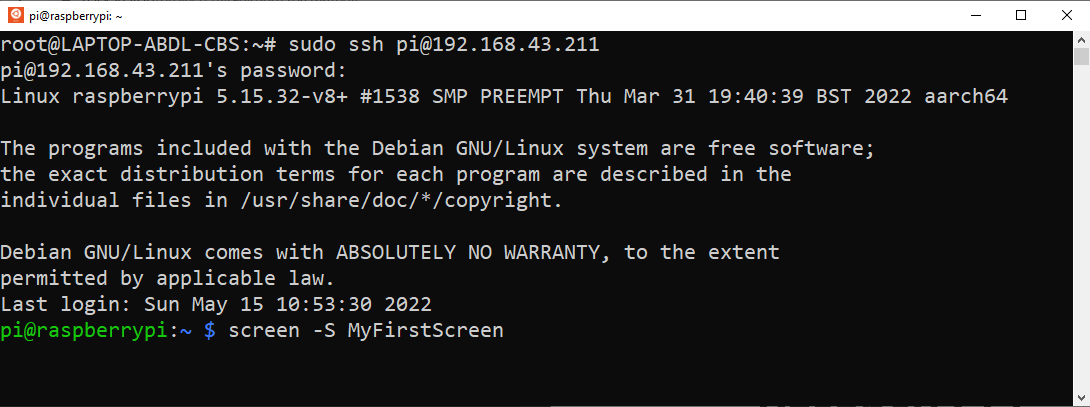
Once you are connected, you directly talk to the console of the raspberry by your command prompt.
Tip : If you close the Console, the programs would stop working. If you want it to keep going, you can create a "Screen" on the console and connect to it, allowing you to close the console without killing it on the raspberry. You only need to type : "screen -S NameOfYourScreen" when you just have been connected to the raspberry or : "screen -r NameOfYourScreen" if you want to connect back to a screen you already created.
Now you're connected to the raspberry console, you can start coding using classic Unix commands (install Python3 ...) but we'll see it more in details during the next session.
Discussions
Become a Hackaday.io Member
Create an account to leave a comment. Already have an account? Log In.