 JP Gleyzes
Nothing complex to build your PullStruder machine
you will have to find in your scrapyard
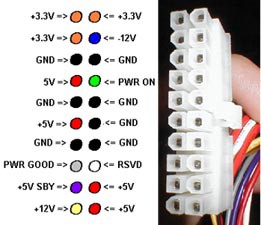
- a PC tower ATX power supply (note that any DC 5V power supply able to deliver 1A or more will work !)

To use this power supply you will have to short the green cable (power On) on the big connector with any black one (gnd). This is explained several times on internet. Pick any link you want !

Then you can pick the ground on any black wire and the +5V on any red one !
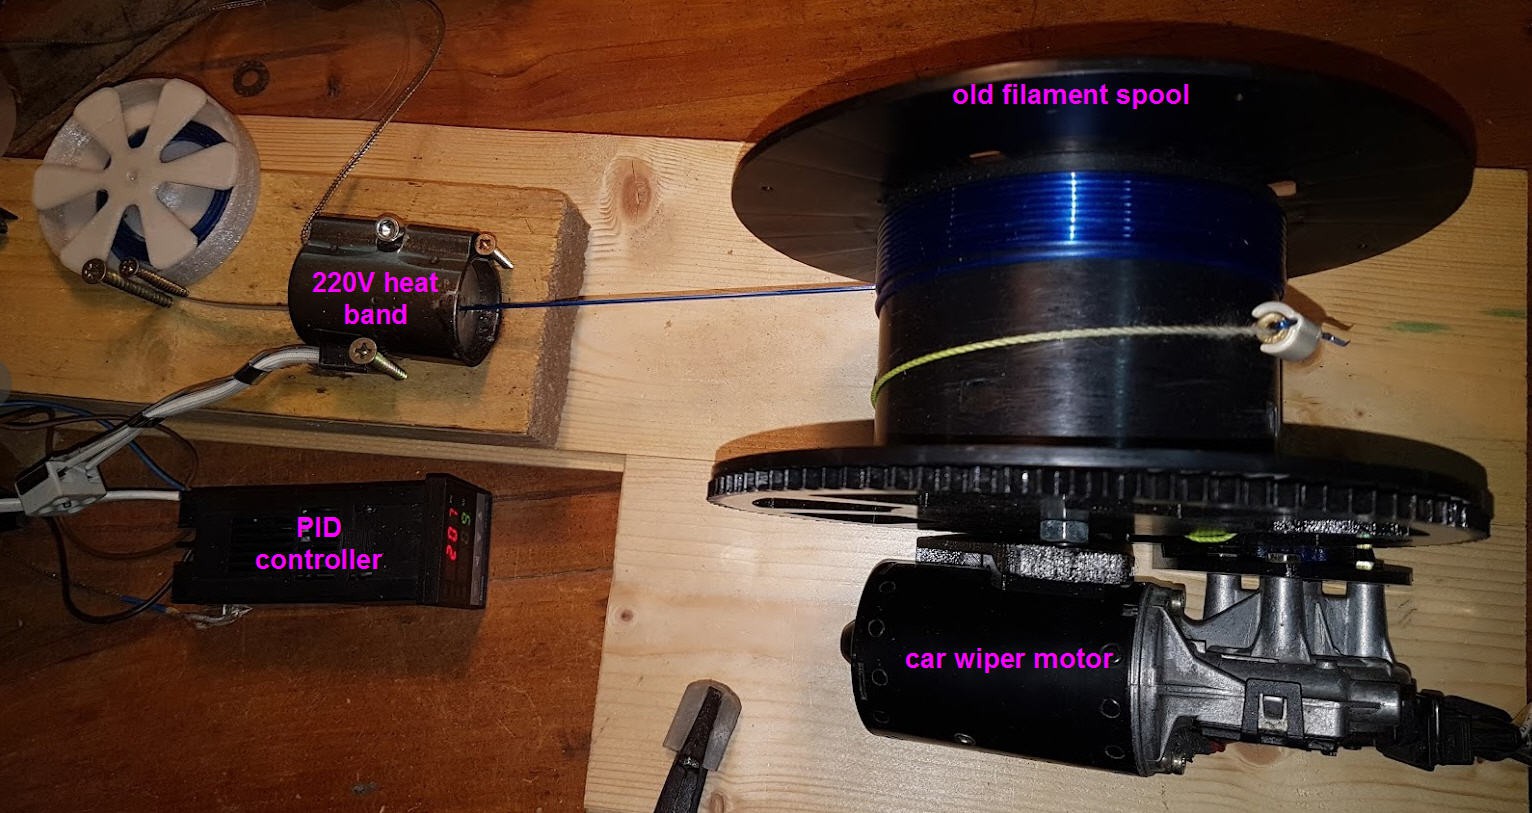
- a wiper motor
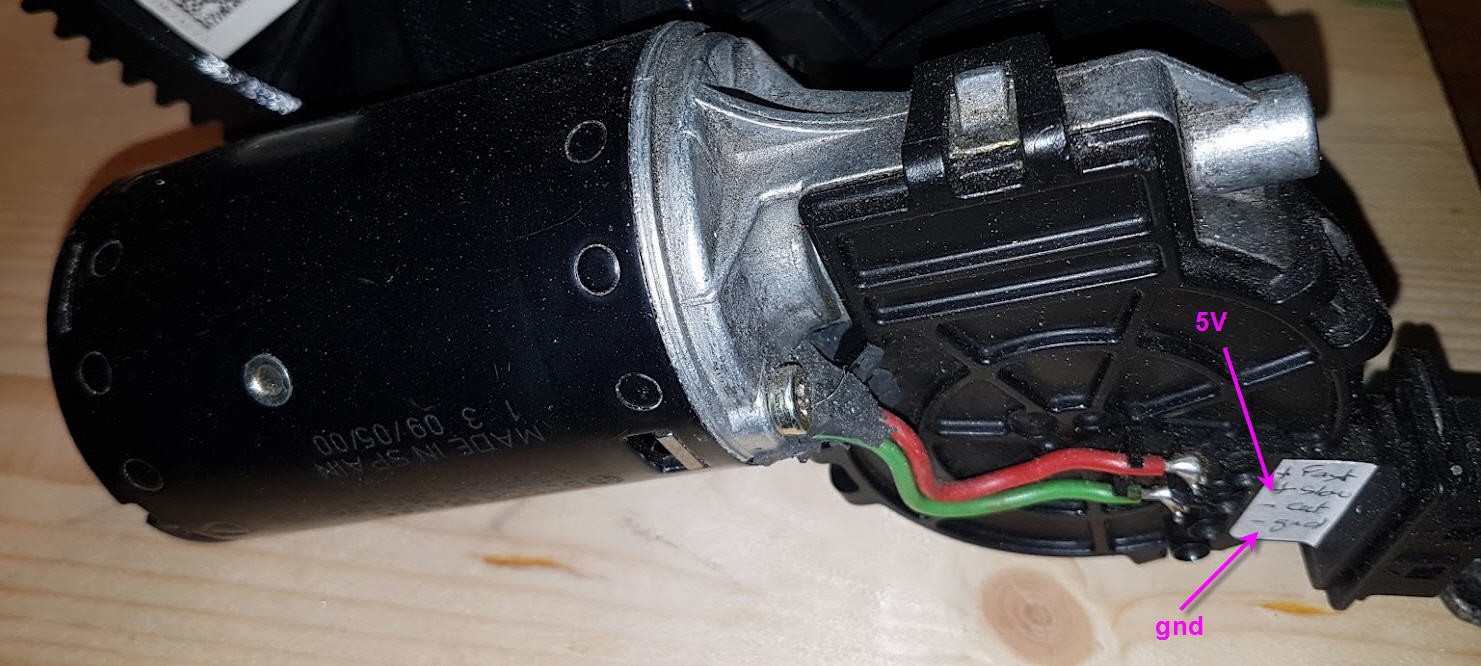
I used an old car wiper motor. It has classically two speeds and should be powered at 12V.
Mine is a Bosch 954 065.
However to get a strong slow motion I power it at 5V on the slow speed
You will have to search a little how to get the right wires !
Here they are on my wiper motor. Finally if the motor is not rotating in the right direction, simply reverse the two wires !
You will have to buy
- a full temperature controller :

- A heat band (one compliant with your MAINS value 220V or 110V)

Then you should print all the parts

The old filament spool is going between the two spacers and is fixed with a 8mm rod + 2x8 mm nuts
The wiper is also fixed on its support on the left side.
All the 3d printed parts are fixed on a wooden base. Be sure to align evrything and cut the 8mm rod at the exact dimension of your filament spool (plus nuts + bearings + a little margin)!
You can find the parts on my thingiverse account.
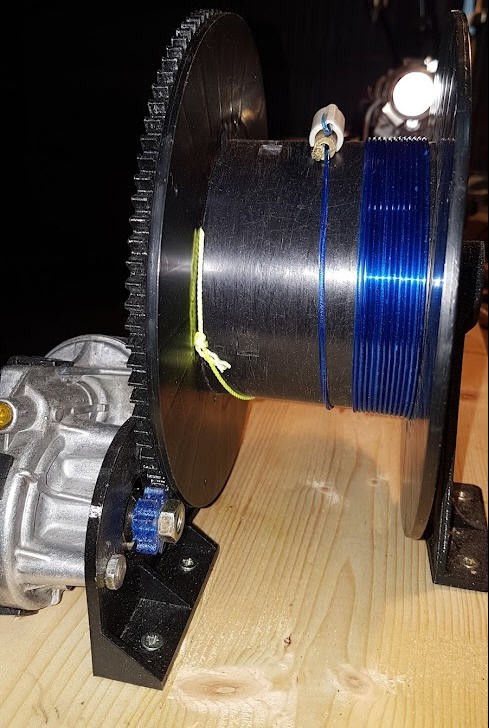
If you print the parts in PLA (which I did), it will be Ok but after some time (weeks), the small gear (in blue on the picture) may break... Reprint it with PET plastic bottle which is much stronger than any other filament !
Finishing the hotEnd
There is still something missing in your PullStruder : the hotEnd
Go again in your scrapyard and look for any cylinder of metal that could fit into your heater.
Preferably use aluminium or copper for better heat conduction and ease of machining...
I found a 35mm diameter cylinder 35mm height.
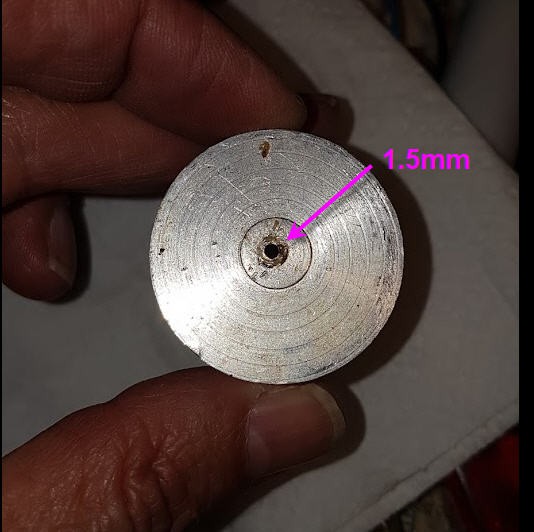
Drill it in the center with several bits from 1.5mm to 12mm. It does not have to be very precise, but the smallest diameter must be 1.5mm and should span over 2mm long.
This will make a kind of steps into which the ribbon can enter and progressively shrink down to 1.5mm. It will then expand a little after the extrusion to reach the magic figure : 1.75mm (almost !)
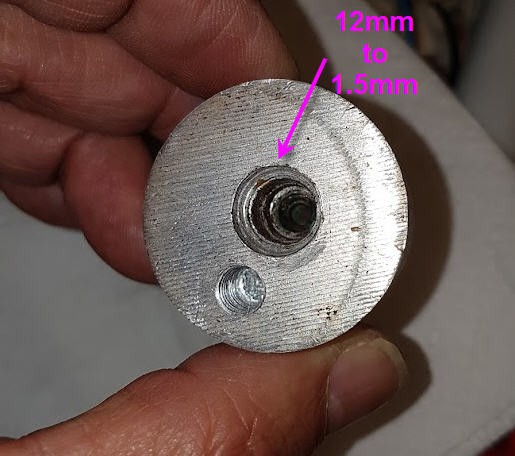
A second hole is drilled on the input side to accomodate the thermocouple. you can thread it with a tap.
Wiring the temperature controller
Be careful when wiring the PID and the temperature controller. Mains voltage can be lethal, check and re check your wirings.
- You MUST connect the earth wire to protect yourself in case of any leakage of current into the heating element.
- You MUST protect the Mains terminal blocks so that you cannot touch them by mistake.
If you are not familiar with these dangers, please ask an electrician to help you. Don't risk your life ...
This being said (and understood) wiring the PID is not very complex. If you bought the recommended REX-C100 model then it is like this. If not, refer to the user guide !
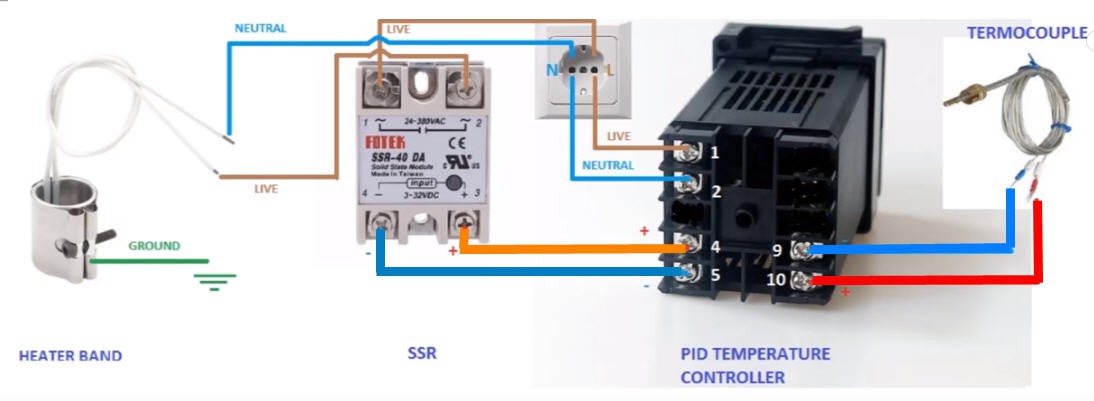
Basically,
- the thermocouple goes into pins 9 and 10 (beware of the polarity). It is not a dangerous voltage.
- The plus and minus of the PID and the Solid State Relay go on pins 4 and 5 (beware of the polarity as a few PID have pins 4 and 5 swaped compared to this picture... ). It is not a dangerous voltage.
- the ground of the heat band will go to the ground of your installation (it is not dangerous !)
- neutral and live of the MAINS are wired as on the top left of the picture. You can swap Live and neutral. But NEVER touch directly these pins... MAINS is lethal...
Now
- put the other end of the thermocouple into the devoted hole of the aluminium block .
- Fix the aluminium block into the heat band.
- Put all this in a safe place and power the unit. The PID should display temperature, the heat band will heat very fast and will stabilize at the setpoint.
DO NOT TOUCH the heatband you can burn yourself badly... Even when the power is disconnected, temperature will decrease slowly... DO NOT TOUCH the heat band...
If you suceeded in doing all this, then your pullStruder is almost finished and you can test it !
Discussions
Become a Hackaday.io Member
Create an account to leave a comment. Already have an account? Log In.