Intro
Hi, this is Jatin creator of the jtech youtube channel link www.youtube.com/jtech9
Project details - This charger prevents our battery from getting overcharged. When the battery is full, it automatically cuts off the power.

All details are given here you can make your charger by following these steps.
STEP:1
First of all, we have to design our printed circuit board you can use any PCB design software. and if you don't want to design you can simply use my PCB Garber file for free. Download Garber file from here
STEP:2
Order PCB I am using jlcpcb for PCB manufacturing jlcpcb is one of the most popular PCB manufacturers in the world they provide good quality PCB for just a few dollars if you are working on any PCB related project you can try out https://jlcpcb.com/ they are happier to be a part of this project.

I received my PCB in a few days and the packaging quality is superb so there is no risk of damage during shipment. try out jlcpcb here jlcpcb

STEP:3
here are the component details you can buy from the local market or any online store.

Here is the components list
- Resistor 1k
- 5mm led
- 16v 1000uf capacitor
- 1n4007 diode
- Screw terminal
- Dc jack
- 5v relay
- Pot 103
- Bc547
- Voltage display
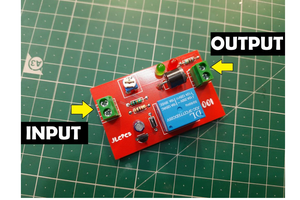
Here we will install all the components inside the PCB.

Our PCB is now ready

Step:4
Here we are making a box using MDF board any other material work well like PVC sheet, plastic sheet, or cardboard. and you can select the dimension according to your box size, and design.


Finally, our MDF board is ready.

Step:5
Now I am marking on the box so we can make a hole to install the dc jack.


Step:6
Now we are ready to install the rest of the components in the box here I am fitting 2 dc jacks for input and output.

Step:7
Our 80% work is done now we are complete all the rest connection and then we on the charger for the fisrt time and then we will calibrate and set it for 12v battery.

Step:8
All connection is done now we are fit our pcb into mdf board use glue gun here or double side tape in case of components replace.

Step:9
Now we are calibrate our charger using screw driver we will rotate the pot resistor.

Step:10
Our charger is and we are testing it now. i am using 12v battery here this battery voltage is low

I am connected 12v adapter in input of our battery chagrer and connected the battery on output side.


Our battery start charging it will take more then 2 hour after reaching volatge 12v chagrer auto cut the battery power supply and save our battery to getting over charge.

 ElectroBoy
 CYUL
CYUL
 Jose Ignacio Romero
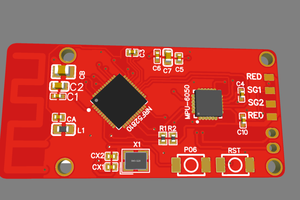
 UltraReidar