 Sagar 001
I got my hands on REYAX Lora modules, and in this tutorial, we will configure these modules to communicate with each other. Lora platform is known for its long range as specified by the name LoRa (Long range radio). The normal communication distance is 8Km with rubber ducky antenna. Internet is not required in these trans-receiver modules. So, used to operate electric appliances in villages with this low-cost module.
We can design a pcb prototype using JLCPCB service, starting just in $2 for 5 pcs. If you sign-up using this link you will get coupons of $30 and new user rewards. Checkout to JLCPCB and turn your projects into amazing products.
Reyax Lora:
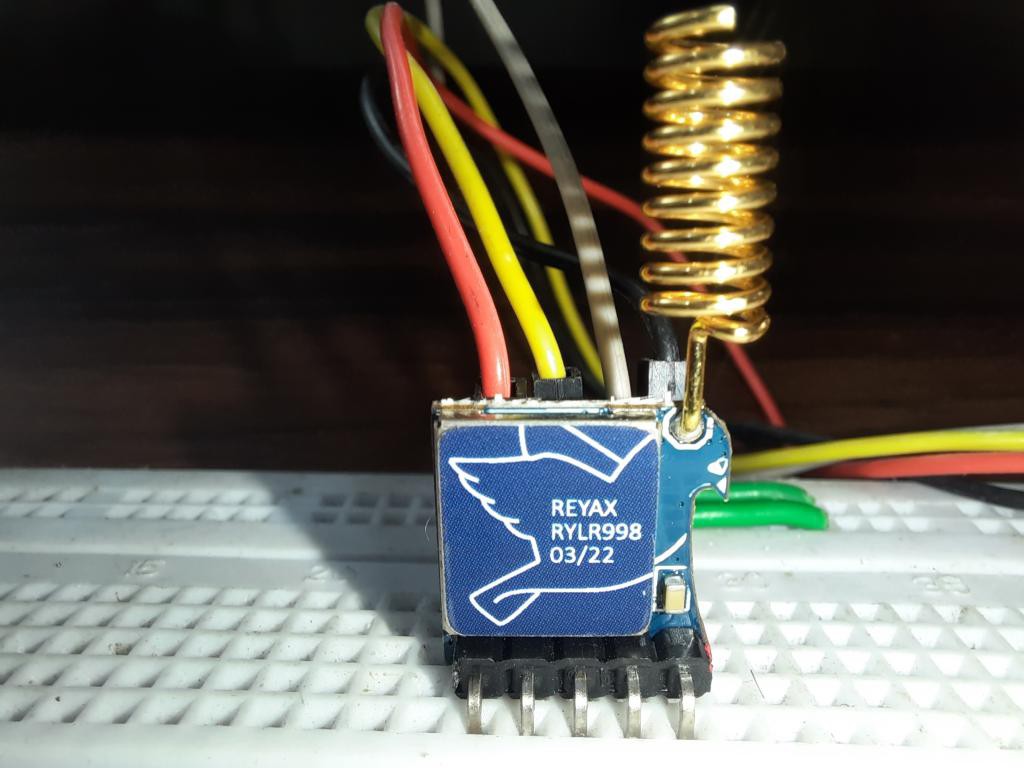
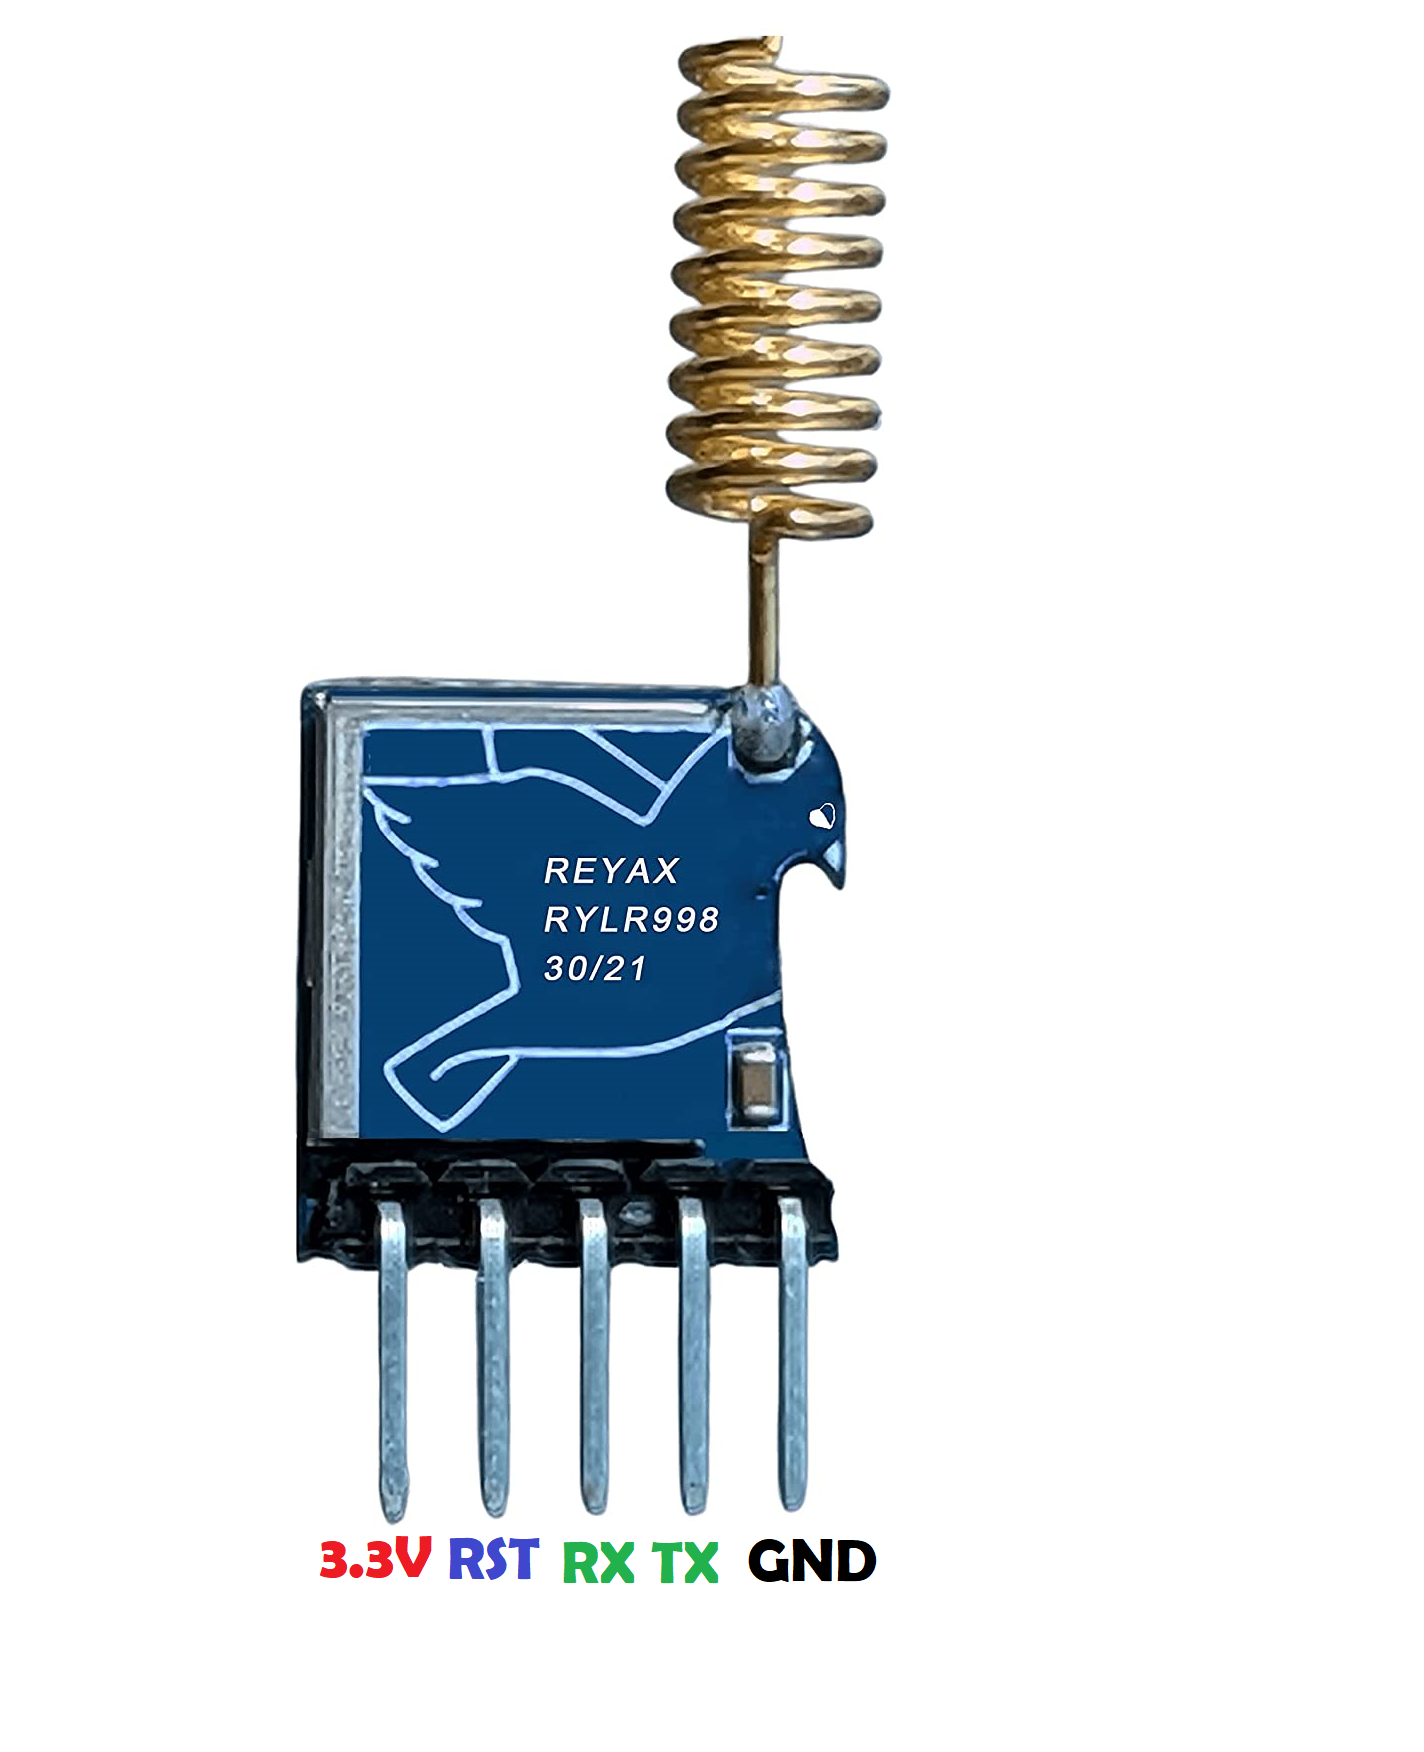
The RYLR998 transceiver module feature the LoRa long range modem that provides ultra-long range spread spectrum communication and high interference immunity whilst minimizing current consumption. This one supports UART protocol and has an inbuilt low power Nuvaton’s microcontroller. So, only few connections are needed to be done externally & can be operated on 3.3volts.

Features:
NUVOTON MCU & Semtech LoRa Engine
Excellent blocking immunity
Smart receiving power saving mode
High sensitivity
Control easily by AT commands
Built-in antenna
Components required:

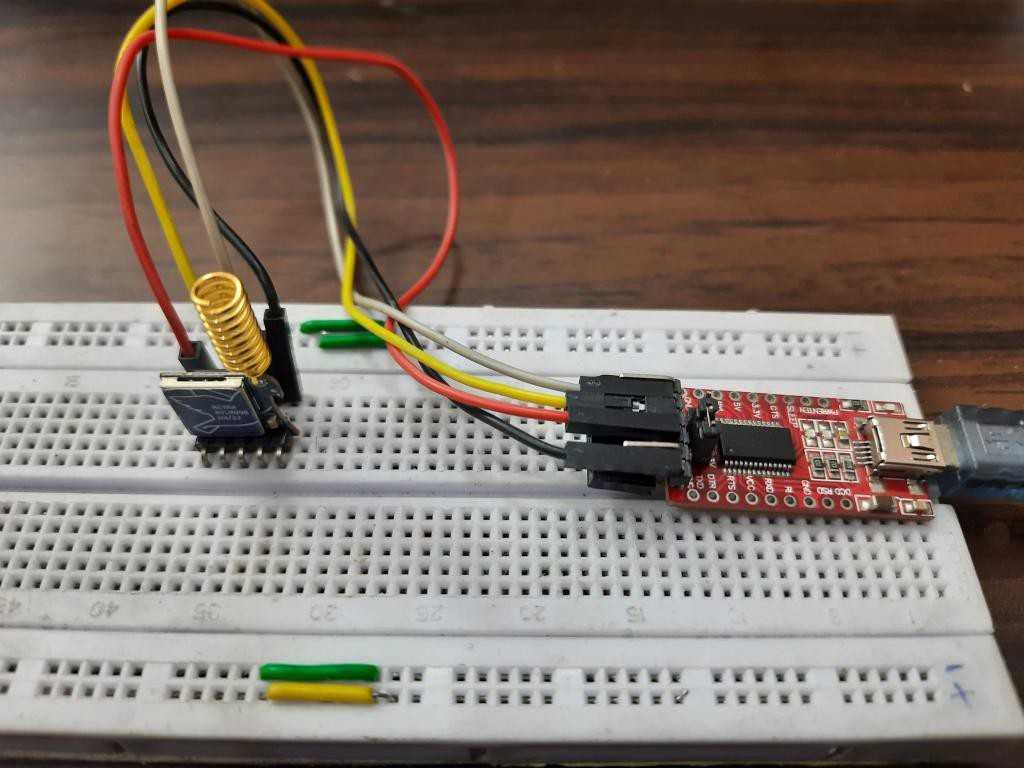
1) FTDI or CH340G programmer
2) LORA modules
3) Breadboard
4) Jumper wires
5) Battery(5v)
6) USB cable
Connections with Lora:
This radio module has inbuilt nuvoton's microcontroller, which is required to set up the connection using UART(RX-TX). But this need a external programmer board to convert USB data into Serial data.

So here I am using FTDI232RL programmer chip, the connection is very simple as shown in the figure.
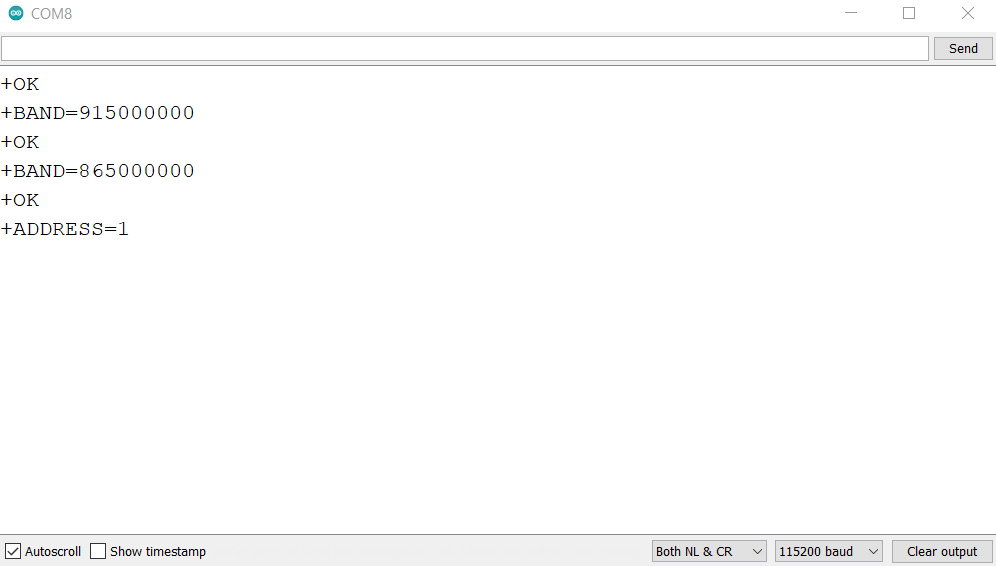
First, set the correct COM port and then by choosing Arduino Nano or any other as microcontroller board open the Serial monitor. By default, the baud rate is 115200 and frequency is 865Mhz.
Start With AT command to check the connection between Lora and programmer board, this will show a +OK message on the serial monitor.
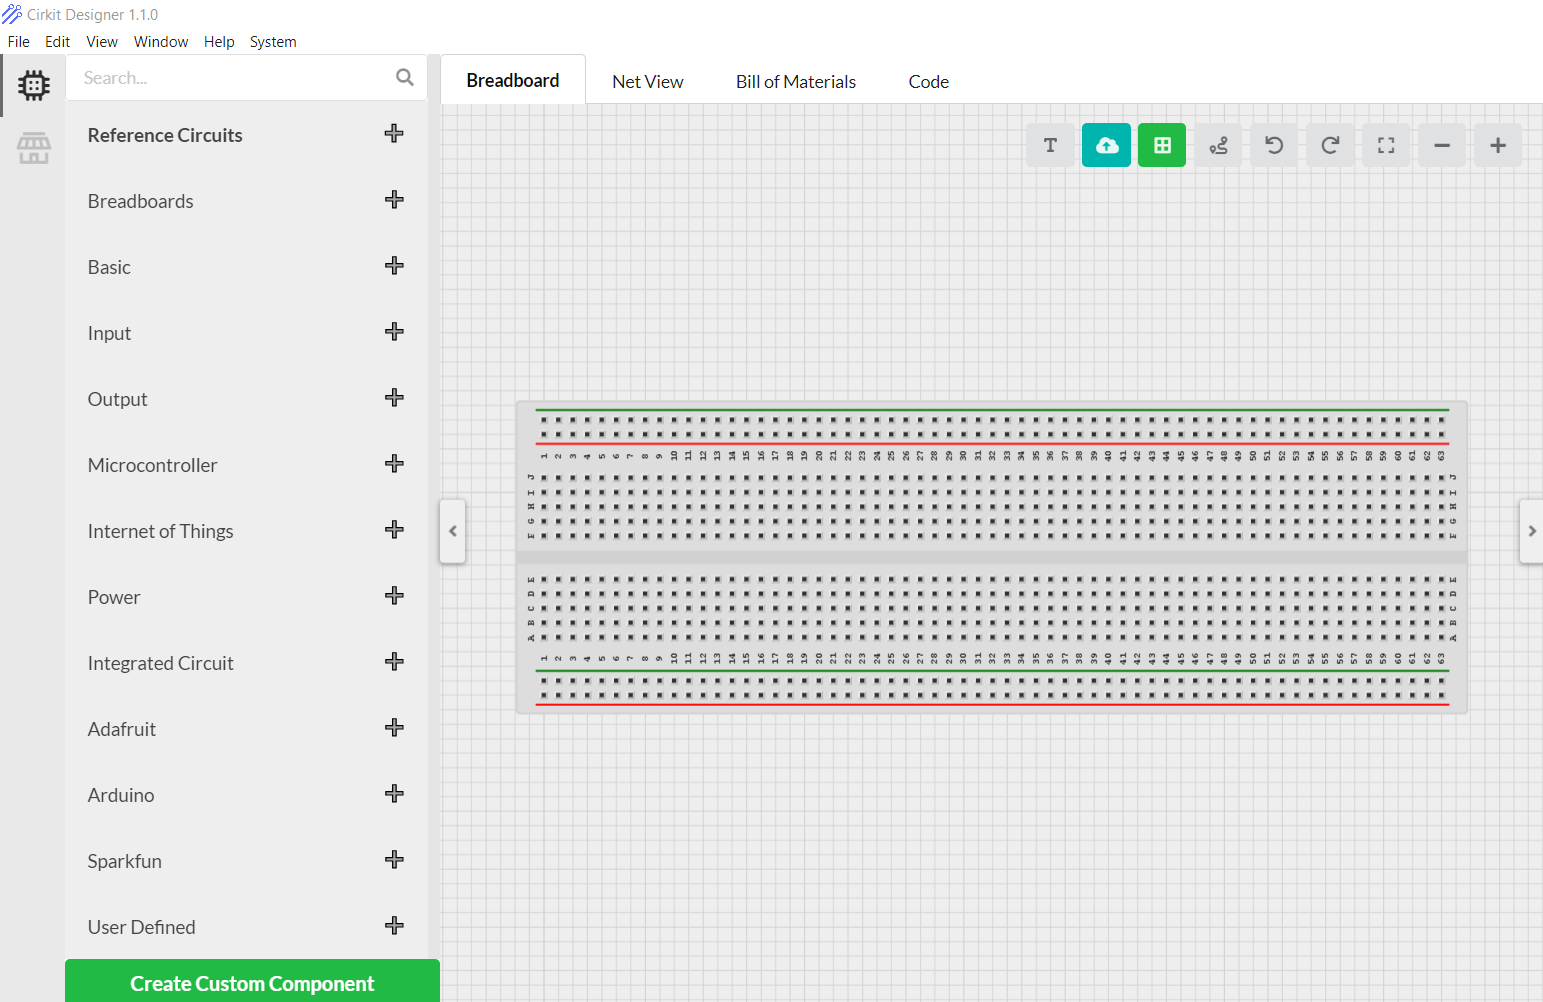
I am using Cirkit designer software for a long time, this is one stop solution to all of my projects with arduino. You can design breadboard schematics, wire diagrams. Now coming with BOM, custom component creating option and inbuilt code compilation option. Try Cirkit designer software in free from here and present your circuits in a good way.
Configuration menu:
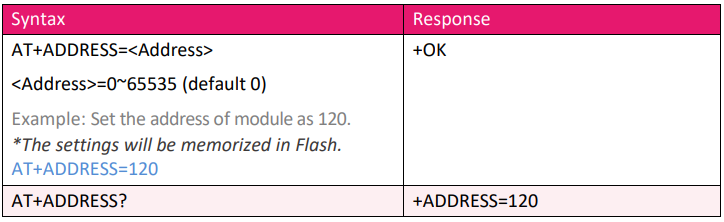
1. Use “AT+ADDRESS” to set ADDRESS. The ADDRESS is regard as the identification of transmitter or specified receiver.
2. Use “AT+NETWORKID” to set the ID of LoRa® network. This is a Group function. Only by setting the same NETWORKID can the modules communicate with each other. If the ADDRESS of specified receiver is belonged to different group, it is not able to communicate with each other.
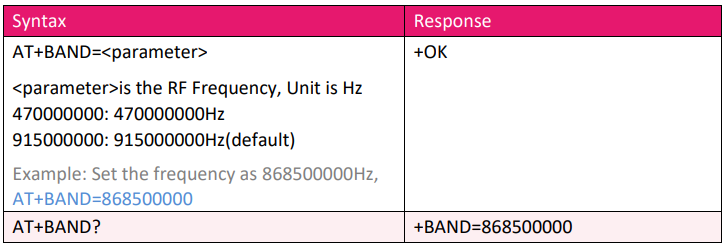
3. Use” AT+BAND” to set the centre frequency of wireless band. The transmitter and the receiver are required to use the same frequency to communicate with each other.
4. Use” AT+PARAMETER” to set the RF wireless parameters. The transmitter and the receiver are required to set the same parameters to communicate with each other.
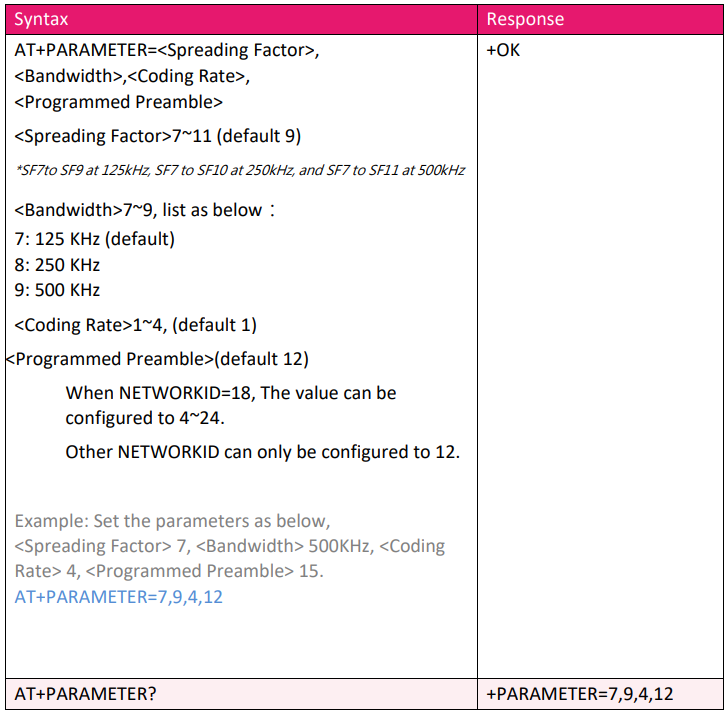
The parameters of which as follows:
[1] : The larger the SF is, the better the sensitivity is. But the transmission time will take longer.
[2] : The smaller the bandwidth is, the better the sensitivity is. But the transmission time will take longer.
[3] : The coding rate will be the fastest if setting it as 1.
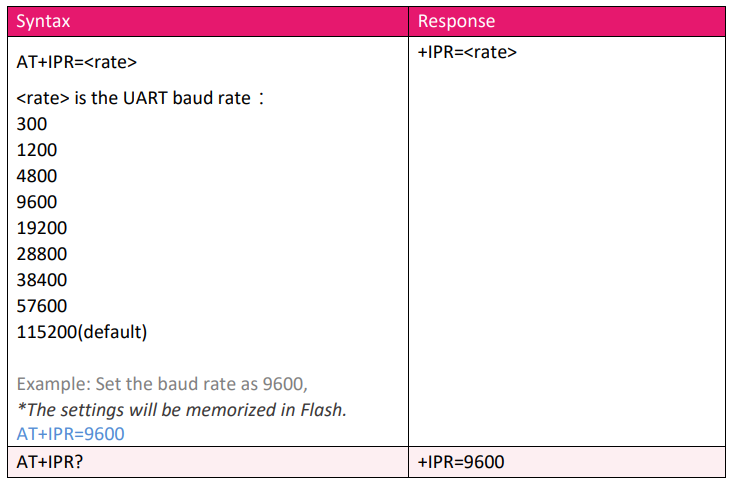
[4] : Preamble code. If the preamble code is bigger, it will result in the less opportunity of losing data. Generally preamble code can be set above 10 if under the permission of the transmission time. Recommend to set “AT + PARAMETER = 9,7,1,12”
5. Use “AT+SEND” to send data to the specified ADDRESS. Please use “LoRa Modem Calculator Tool” to calculate the transmission time. Due to the program used by the module, the payload part will increase more 8 bytes than the actual data length.
Application and Scope:
LoRa always plays with the range, good range radio modules can be used to do ON/OFF any machine, transfer data and communication without internet.
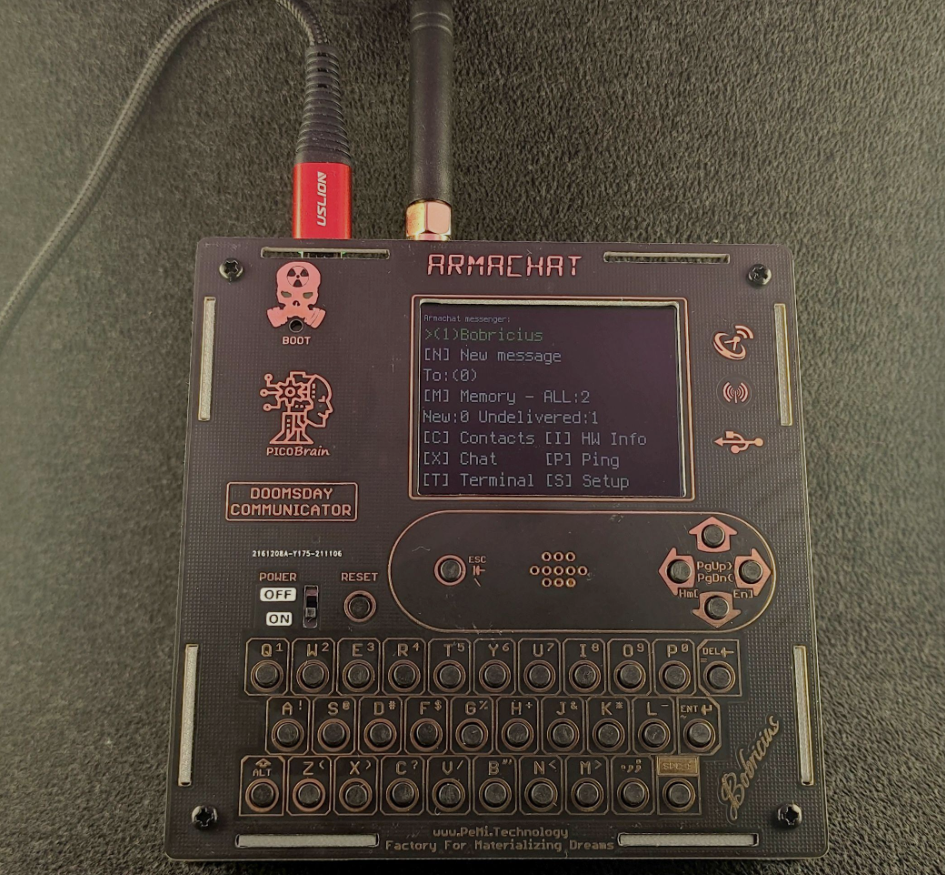
We will make a project using Arduino, display and keypad with JLCPCB prototype service. A good long range LoRa messenger/communicator. Which is absolutely like a walkie talkie.
Most of my projects are completed because of using JLCPCB SMT assembly service. Providing cheapest SMT assembly just in $8 and quality remains amazing. This is an article on full review of JLCPCB assembly, see is it worth?