 Ovidiu
It is fully autonomous and it can run on a full 18650 battery for about 5 days if there is no sun, otherwise it can run indefinitely thanks to the 1W solar panel.
The KA75330 voltage detector will cut power to everything if the battery voltage is below 3.3V. This allows it to recover even after being completely discharged and when the sun is slowly rising (thus avoiding ESP brownouts)
During sleep it uses less tham 1mA, however the sensors use 100mA during the heating period so some values are updated less often.
Sensors and modules:
MICS-6814 - for measuring gas concentrations
CCS-811 - for measuring CO2
ADS-1115 - for precisely measuring the (analog) output of the MICS sensor
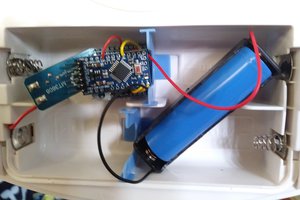
TP4056 - Battery charging module
ESP32 C3 Mini (Lolin)
Thermistor - for measuring the battery temp. V3 of this project will stop charging when temps are not safe but for this one I am just gathering data
Case: slightly modified version of https://www.thingiverse.com/thing:2282869
PCB: Custom design by me using EasyEDA
All data is sent to home assistant through the internet through HTTP POST so the weather station need to be in range of WIFI.
Input: 3.3V - 6V (charged by solar panel or USB)
Power use: 30mA - 110mA (during operation), <1mA (during sleep)

 Brian Gilbert
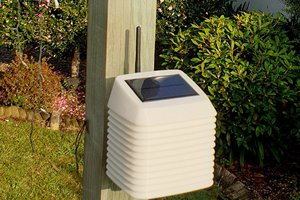
 Open Green Energy
 facelessloser
 Christian Moll
I like your project, it's very interesting, specially the use of KA75330.
Taking a look on it helped me to solve some issues I've had on battery powered projects (currently I'm working on a battery powered moisture sensors project) and how to get the batteries to last some days.
So, it would be nice if you could upload a schematic image in order to see how are components arranged on layout.
I'd like to know how do you check battery voltage: do you use a voltage divider?
C3 mini max input voltage is 3.6V, so you're using a voltage divider too, am I right?
Have you sensed the C3 mini power consumption on deep sleep? I've not found information internet about it.
Thanks in advance for your help.