Close
0%
0%

EMT Conduit-Mounted Wind Sensors

A telescoping wind speed + direction measurement station made using EMT conduit and Arduino.

Similar projects worth following
I present a method for using simple off-the-shelf electronics to continuously measure (1) wind speed, and (2) wind direction as part of a custom weather station project.

Introduction

This article is part of a series discussing methods for adding sensing capabilities to a DIY telescoping pole project made from EMT conduit. Here I present a method for using simple off-the-shelf electronics to continuously measure (1) wind speed, and (2) wind direction as part of a custom weather station project. The demo video is shared below:

Weather stations (both commercially-available and do-it-yourself (DIY) feature one or more of the following sensing capabilities:

  • Wind speed (anemometer)
  • Wind direction (weather vane)
  • Air pressure (barometer)
  • Humidity (hygrometer)
  • Volume of rain (rain gauge)
  • Air temperature (thermometer)

Commercial weather stations available for online purchase are convenient, but are also often:

  • Expensive
  • Non-customizable
  • Near-impossible to interface with hobbyist controllers such as Arduino or Raspberry Pi

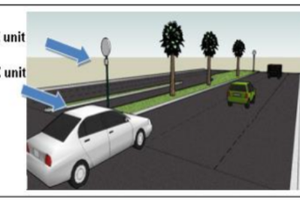
Regardless, these kinds of products are still sometimes the best option for home weather station projects - in those cases, a telescoping pole constructed from EMT conduit (readily available from hardware stores such as Home Depot or Lowes) made using a telescoping coupling can serve as a low-cost and study mount such all-in-one weather stations.

For all other situations where a DIY solution is more appropriate for your project, in this article I present a method to measure and log wind speed and wind direction using low-cost, off-the-shelf electronics and hardware. More functionality can be added to this platform with the optional electronics modules listed in the Supplies section.

Disclosure: Some of the links in this article are affiliate links. This means that, at zero cost to you, I will earn an affiliate commission if you click through the link and finalize a purchase.

Telescoping EMT Conduit Wind Speed and Direction Station Using Arduino
EMT Conduit Telescoping Coupling System from Elation Sports Technologies

Standard Tesselated Geometry - 429.87 kB - 05/15/2022 at 06:03

Download

Standard Tesselated Geometry - 356.63 kB - 05/15/2022 at 06:03

Download

Standard Tesselated Geometry - 99.11 kB - 05/15/2022 at 06:03

Download

View all 17 components

  • 1
    Step 1: Telescoping Pole Setup ​

    First, prepare the pieces of EMT conduit which will telescope inside of one another:

    1. Wear protective equipment (e.g. safety glasses). Safety first!
    2. Mark the desired cut length for the EMT conduit using a marker. For this article, we used three 5-foot lengths of 1", 3/4", and 1/2" EMT conduit.
    3. Use a rotary cutting tool to cut the conduit to length.
    4. Remove the sharp edge on the cut using a metal wire, or a rotary deburring tool or reamer.
    5. Process the conduit as desired (paint, powder coat, etc.)
    EMT Conduit Cutting Instructions

    Assemble your telescoping pole - creating a telescoping pole from EMT conduit is easy using the telescoping coupling/clamp system from Elation Sports Technologies:

    1. Press-fit the inner sleeve onto the smaller piece of conduit.
    2. Install the injection-molded coupling/clamp onto the larger piece of conduit using a Phillips head screwdriver.
    3. Extend the pole to the desired length by sliding the smaller piece of conduit, and then tightening the hand knob.


    EMT Conduit Telescoping Coupling Installation Instructions

    Additionally, for this project, in order to mount the wind speed and wind direction sensors on separate pieces of 1/2" EMT conduit, I utilized a conduit bender tool to bend and then cut to length an S-shaped piece of conduit. There are multiple video tutorials online detailing how to bend EMT conduit using this tool.

    1/2" EMT Conduit Bent into S-Shape
  • 2
    Step 2: 3D Printed Parts and Mounting the Electronics

    To mount the electronics to the EMT conduit, I designed several custom 3D-printed parts, all of which can be found for free to download from Thingiverse (links are below):

    1. 2 x Wind sensor mount
    2. 2 x 1/2" EMT conduit side-to-side clamp
    3. 1 x 1/2" EMT Solderless breadboard snap-on mount

    I printed the parts using 100% infill on a Voxelab Aires 3D printer and 1.75mm diameter black PLA filament. The mechanical hardware used to mount the electronics are:

    1. 8 x M4 screw, 14mm length
    2. 8 x M4 hex nut
    3. 4 x 10-32 machine screw, 1/2" length
    4. 4 x 10-32 hex nut
    1/2" EMT Conduit Wind Sensor Mount
    1/2" EMT Conduit Solderless Breadboard Mount
    1/2" EMT Conduit Side-by-Side Mount
    Voxelabs Aries 3D Printer with Wind Speed Sensor Mount
    Wind Direction Sensor Mounted on 1/2" EMT Conduit
    Arduino Nano Mounted on 1/2" EMT Conduit
    1/2" EMT Conduit Mounted Side-to-Side
    Mounted Wind Speed and Direction Sensors with Arduino

    An alternative method for mounting the S-shaped 1/2" EMT conduit piece to the telescoping conduit pole is to drill through both pieces of conduit and secure them using a 1/4"-20 bolt and nut.

  • 3
    Step 3: Wiring

    The wind speed and wind direction sensors are connected to the Arduino according to the wiring diagram shared below. They are supplied with 5V, and output an analog signal proportional to their measured quantities (i.e. wind speed or wind direction angle.)

    Arduino Workflow - Wind Speed and Direction Sensors

    I removed the caps from the wind sensors to see how they work. They each have a printed circuit board (PCB) mounted inside, with the primary sensor located on the top side, and the processing circuitry on the underside. Both styles of sensors used for this article output an analog output signal from 0 to 5V which updates approximately every 0.8 seconds, and which can be directly read by the Arduino. Other variations of the wind sensors are available for different voltage ranges, and for current or pulse output.

    Wind Speed Sensor Interior
    Wind Speed Sensor Underside

    The wind speed sensor uses a break-beam/optical limit switch (photointerrupter) and plastic tabs on the rotating upper piece; when the sensor is blocked versus unblocked by the plastic tabs, a 5V pulse is detected and counted by the PCB, and the rate of those pulses correlates with the rotation speed, and thus the wind speed.

    Wind Direction Sensor Interior
    Wind Direction Sensor Underside

    The wind direction sensor utilizes either a hall effect sensor, or a digital magnetic encoder, with a radially-polarized disc-shaped magnet mounted on the underside of the upper rotating portion of the wind sensor. The magnetic sensor is able to measure the magnetic field strength to determine the orientation of the radially-polarized magnet, which therefore tells us the direction that the wind is blowing. YouTuber James Bruton published a video illustrating this principle.

View all 5 instructions

Enjoy this project?

Share

Discussions

Similar Projects

Does this project spark your interest?

Become a member to follow this project and never miss any updates