 Hulk
HulkCrypto Mining using microcontrollers, wait what!!! Are you serious? How?
Believe it or not, the rig you see onscreen actually mines a crypto currency called DUINO-Coin (ᕲ) or DUCO.
The total cost of this rig is only $35.
Now, if you believe me! then, grab yourself a cup of coffee, sit back and watch this video and start your journey into cryptocurrency with DUINO-Coin!
What is DUINO-Coin?

DUINO-Coin (ᕲ) was founded in 2019 and is a for-fun project. This project was developed by a team of young developers that focuses on energy efficient mining. It's mostly, but not only, dedicated to people who are just starting out in the crypto world and it doesn't require any expensive hardware.
DUCO is a transparent, open-source, centralized, eco-friendly coin that focuses on mining with low-powered devices like Arduino. DUCO tries to achieve a reward system using "Kolka" a name derived from Coca Cola making the low-powered devices like Arduino earn almost the same or even "more" than a powerful device like CPUs or GPUs. It also prevents people from building huge mining farms. It causes each additional miner to earn a bit less from the previous one.
DUCO is "centralized" and has an "infinite supply" and hence you can mine this coin forever.
You can Mine DUCO using:
Android smartphone
Computer's CPU
Arduino (or compatible AVR)
Raspberry Pi, Orange Pi or Banana Pi
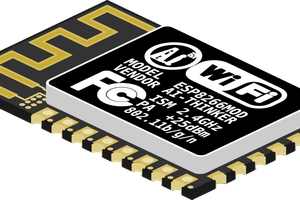
ESP8266/ESP32 (or compatible boards)
Internet browser on PC or smart-TVs
Arduinos using ESP8266 as a host
Arduinos using Raspberry Pi as a host
Centralization: Making Arduino and other low powered devices not only profitable, but just possible would be impossible to maintain if the coin was decentralized. Hence, DuCo is a centralized coin with it's own chain. It is however possible to wrap (convert) DUCOs to wDUCO, bscDUCO, celoDUCO or maticDUCO to store them in decentralized form on another coin's chain.
To start your journey, have a look at the getting started with Duino-Coin webpage. Then, create a wallet to store your coins. Next, download the miner binaries for the device you are going to mine the coin.
If you are super tech savvy, then have a look at the coins whitepapers. The link is in the description below.
In my setup, I am mining DUCO using NodeMCU.
Schema

The setup is very simple. In my setup I have added an extra LED to give my board a bit of Si-Fi look.
Mining with ESP boards allows you to mine headlessly - you don't need to have them connected to a computer as they have their own Wi-Fi capabilities to connect to the server.
The Board
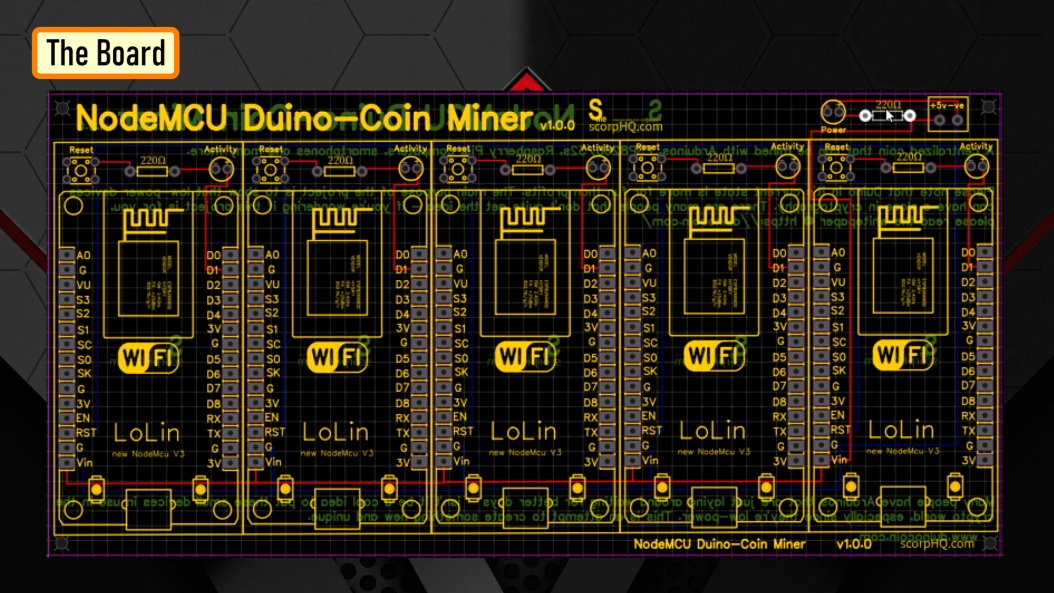
Now, lets have a look at my board. You can hookup, 5 x NodeMCUs to this board. Each NodeMCU has its own flashing LED. The board can be powered using just 5v using a USB cable.
So, this is how the NodeMCU DUCO Miner blade looks like in 3D.

Soldering

Lets start by soldering all the small components to the board.
I first soldered all the LEDs and the resistances to the board.
Since I care a lot about my Sensors and Microcontrollers, I am not going to solder them directly to the board. Instead I am soldering 'female pin headers' to the board which will house the NodeMCUs in them.
Finally, I soldered a USB cable to power the blade. I extracted this cable from a broken iPhone's charger.
Code

I downloaded the code from the DUINO-coins website. The current version is 3.0. I downloaded the windows version and then added my code block to make the blue LED flash on my blade.
In the code, you just need to edit few line in the top section to add your Wi-Fi details and the name of the NodeMCU.
If you're using an ESP8266 board, you can set the clock speed (Tools > CPU frequency) to 160 MHz to achieve better hash-rates.

Then, just go ahead and upload the code one by one to all your NodeMCU's. Before adding the NodeMCU to your rig, it is a good idea to check it using the Arduino Serial Monitor (Tools > Serial Monitor), set the baud rate to...
Read more »
 andriy.malyshenko
 Morning.Star
 Splendide_Mendax
Pleasure