 Jan Schlieper
Here are a few links to the main hardware components used:
- Grasshopper LoRaWAN Development Board
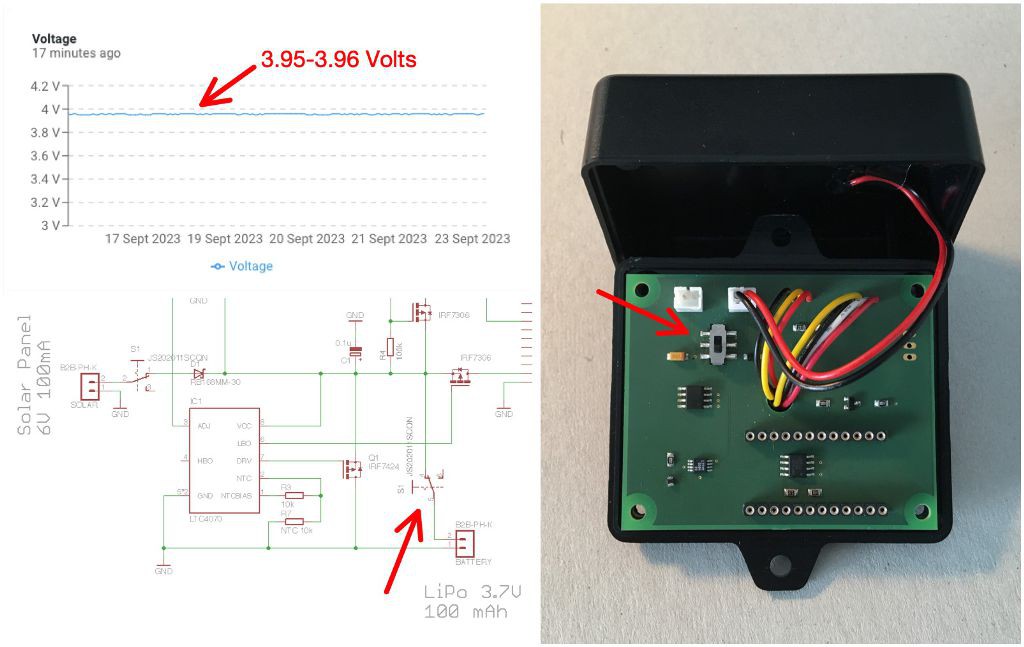
- LTC4070 Li-Ion/Polymer Shunt Battery Charger System
- HX711 SparkFun Load Cell Amplifier
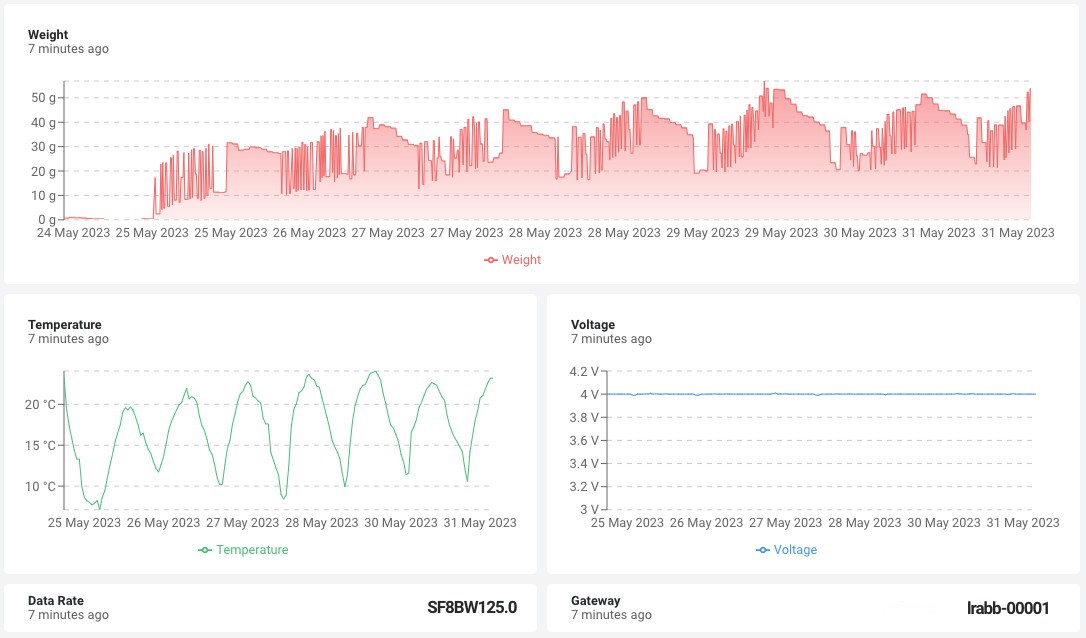
- TSic 306 Temperature Sensor
- TAL221 500g Miniature Load Cell
- NAU7802 SparkFun Load Cell Amplifier
And here are links to the software used:
- Arduino IDE
- The Things Network
- Datacake Low Code IoT Platform

 Marius Taciuc
 Andrey Bykanov
 Jung Hoon Lee