 Rahul Khanna
Hardware Build
First of all, I would like to thank Avnet, Octonion, and Microsoft for supporting this project with the amazing SmartEdge Agile with Brainium portal, I really felt informed using this board and able to achieve some of the complex projects integrated within a PCB.

Packed and Sealed parcel

The Kit
You can purchase the SmartEdge Agile for $110 from Avnet.
Step 1: Getting Started with SmartEdge Agile (Content from Avnet)
With SmartEdge Agile, you can use the same solution for all stages of your IoT project from proof of concept and value to pilot and production—with confidence that constant software and firmware updates along with reference designs and related BOMs keep you on the edge of the cloud and the cutting edge of development.
This SmartEdge is made with the following architecture.
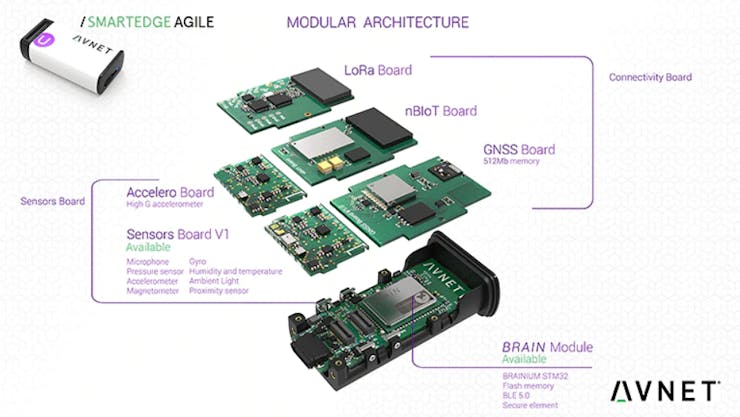
Image from Avnet
SmartEdge Agile is powered by an STM32 controller, and consists of Flash Memory, BLE 5.0, Accelerometer with High G measurement, a microphone, Gyroscope, Pressure sensor, Humidity Sensor, Temperature sensor, Ambient light, Magnetometer, Proximity Sensor, LoRa board for com, GNSS Board and with LiPo battery.
That's a huge list of peripherals within a highly portable and lightweight Edge device.

Image from Avnet
Now, this is how the device is used.
First we build a data set. i.e Then we train the model and test it. And Finally we deploy the model generated to the edge device.
Step 2: Creating a Brainium Portal
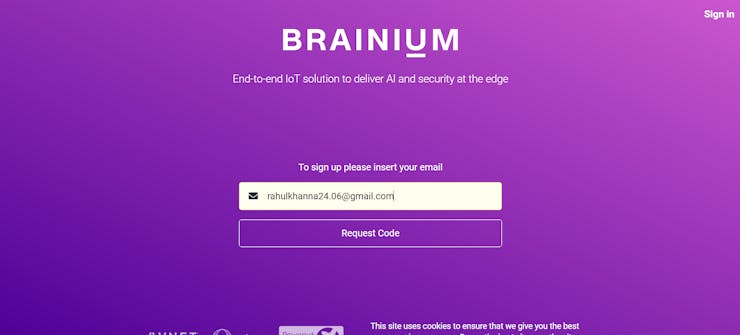
Visit https://www.brainium.com/ and enter your email ID to create a free account
Once you receive the request code, you will be directed to a web page where you need to fill in your personal details and password.
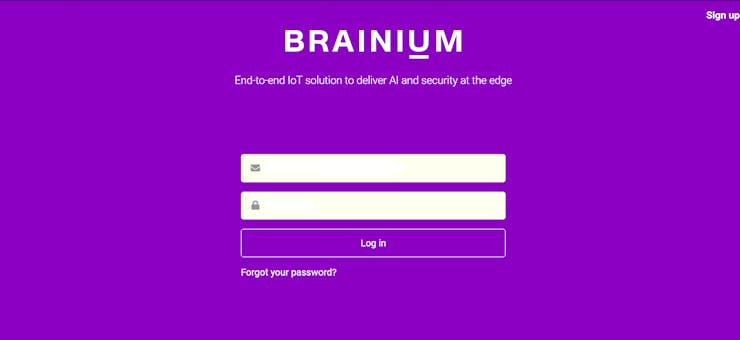
If you had registered successfully, enter your credentials to log in to your brainium portal.
After logging into your brainium portal, you can find a studio like this.

Download the Brainium Gateway Application on your device and pair the device with your mobile.

In my case, I had installed it on an Android mobile
Open the Projects tab and click on the "Create Project" icon to create a new project

Type a "Name" for the new project and click on the "Create Project" button

Now the project is created successfully and click on the project. A new window appears

Since I had created an Application for the first time and the SmartEdge is not connected to the Gateway, the primary step is to connect the Edge device to the Brainium gateway.
To connect the Edge device to the Brainium gateway, press the push button on the device and the color of the led changes, which means the device is ready to pair with the Gateway.
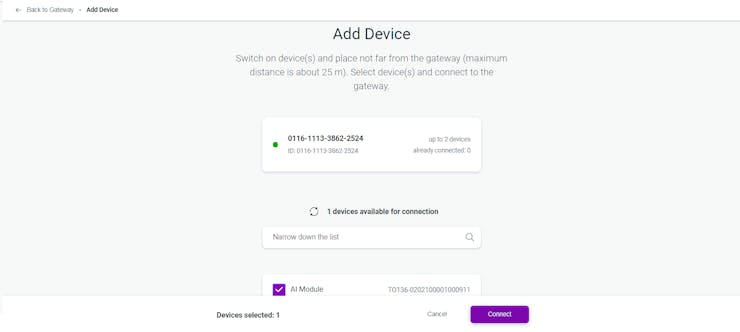
Now, open the android app and pair it with the edge. Once it is done, click on Add device on brainium portal and a new page opens.
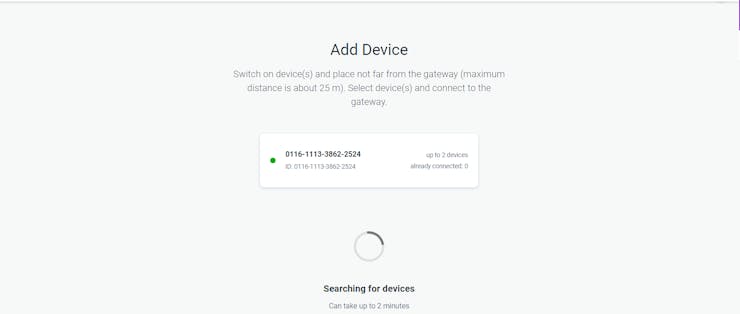
After few minutes, you can find your edge device in the list.

Select the device from the list and click confirm button.
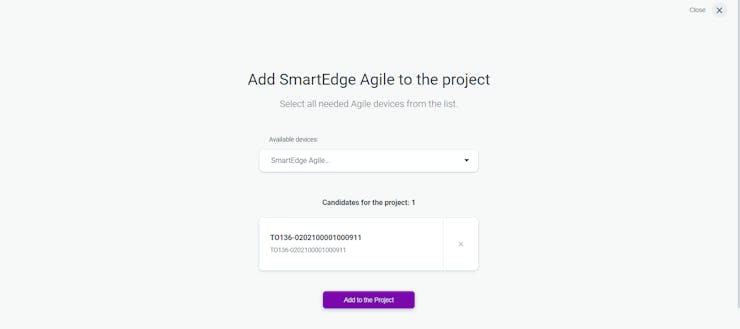
Now the device is added to your brainium portal.

Add the device to our project as shown below
On the dashboard, you can find the device name, version, gateway and the projects to which the device is assigned to and other parameters.

Click on the update button to update the latest firmware on the device.

Now the setup is complete and the device is connected to the brainium gateway. Next, we can try to interface the sensors present on the edge device.
Step 3: Interfacing with SmartEdge Agile (Project Dashboard)
The Edge device is connected to the Brainium gateway. What's next?
Now we can test the connection by publishing various sensor data to the Portal which can be displayed using widgets.
Click on Create Widget button on the project created.

Select the Widget and the type of the widget from the drop-down list on the Create New Widget tab. Here I had chosen an Air humidity sensor and the type of data will be displayed as plain data.

After selection click the next button and choose the edge device if you have added many and click finish to create the widget.

Now the widget is created and added to the project's workspace. To enable real-time tracking, click on the "Start tracking" button.

Usually, all the sensors are configured to be in the OFF state to reduce the battery consumption. In the "Tracking Settings", choose the edge device and turn on the required sensors to enable live tracking.

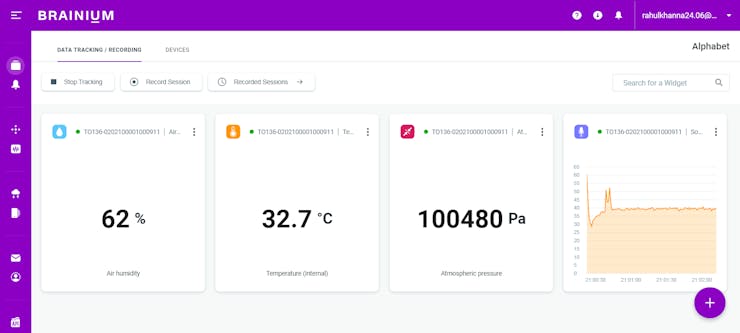
Once the setting is complete, you can find the real-time data on the widget on the project page.

Now, with the same procedure, many sensor data can be published on the Brainium portal as shown below.
Step 4: Interfacing with SmartEdge Agile (Project Alphabet)
This project is made for testing purposes where I had planned to train a model for Alphabets. If you're keen on the Gauntlet, then kindly skip this step.
Create and Train a Model
Here I'm using the project which was created in the previous session. (i.e Project Alphabet)
In the Motion Recognition tab, Click on the Plus button to start the Workspace.

Name the Workspace and click on the "Create Workspace" button to proceed. Here I use "Alphabet" as my workspace name.

Now the Work space is created. Open the work space to enter the configurations.

The List is empty on the new workspace. Enter the motion name for which the model has to be trained.

After you enter the motion name, click the plus button to add the motion into the list. Click on the Record button to start the training of the model.

Select the device which is used to train the model and the iteration of the motion to be recorded and click the Start record button to train the model,
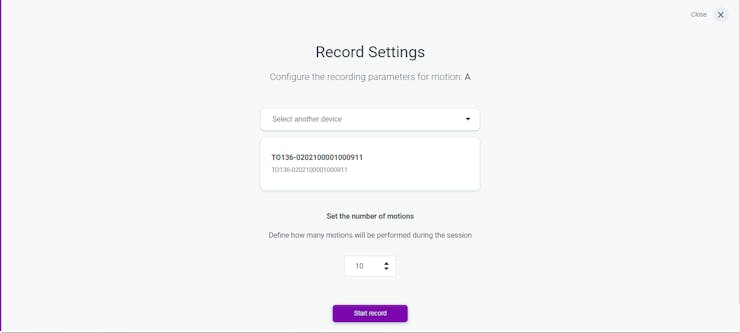
Now repeat the motion for the specified iterations and click on the stop recording button to process the recording. In my case, I had repeated the action for 10 times which is labeled as A.
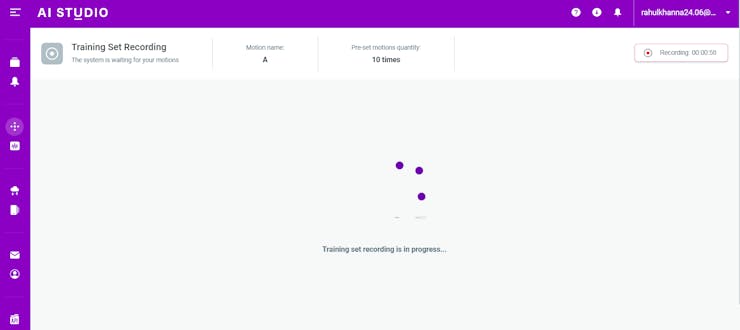
Once the processing is done, the number of motion detected is displayed under the label.

If you click on the view all, the pattern waveform from the accelero, gyro and magnetometer is used to record the motion and

Similarly record all the required motion patterns by following the previous steps.
And select all the motion recording which has to be trained for the model.
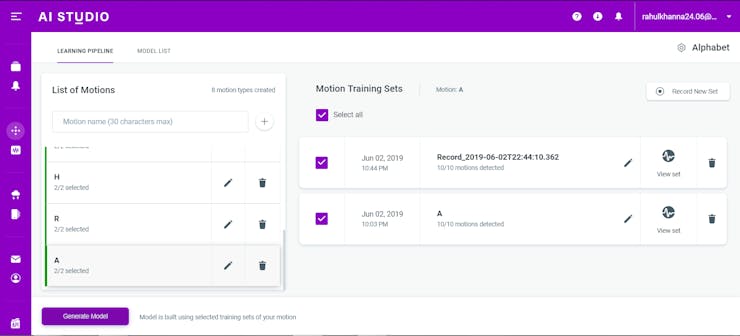
Once the recording are selected, Click on the Generate Model icon to train the model. This takes few minutes to train the model with the motion recordings
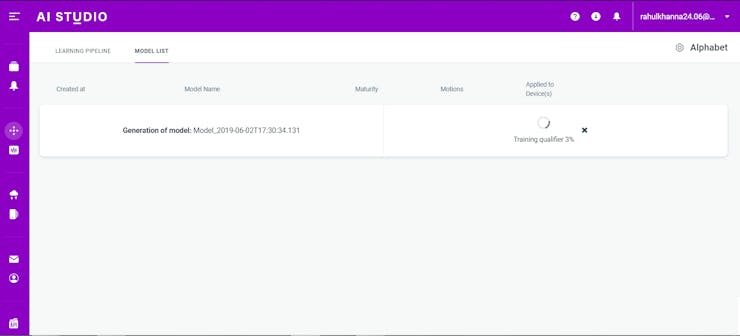
Once the model is trained, the parameters such as model maturity, motion detected and the device to which the model is applied are notified.

Click on "See Details" to know more about computation made by the classifier
Here you can see the accuracy and the Precision of the model. On the next image, we can see the confusion matrix. This confusion matrix gives the information such as actual positive, actual negative, true positive, true negative.

Now it's time to test the model. Click on "New widget" and select AI Widget tab.
Here select the widget as "Motion List" and click next.

Now select the device and click finish button.

And now you can see the motion pattern and motion list on the widget in real-time.

Output
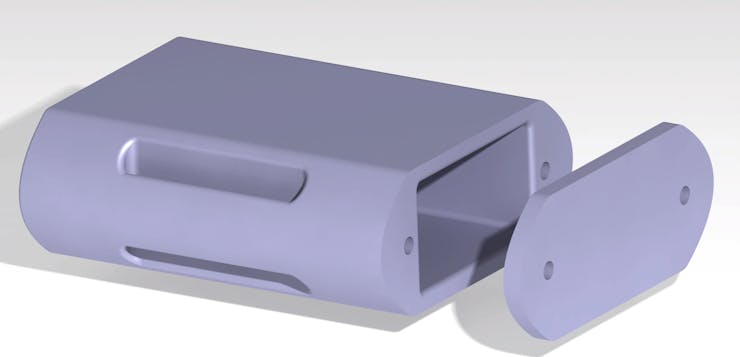
Step 5: 3D-Printed Enclosure
- I had made a 3D-printed enclosure for this project.
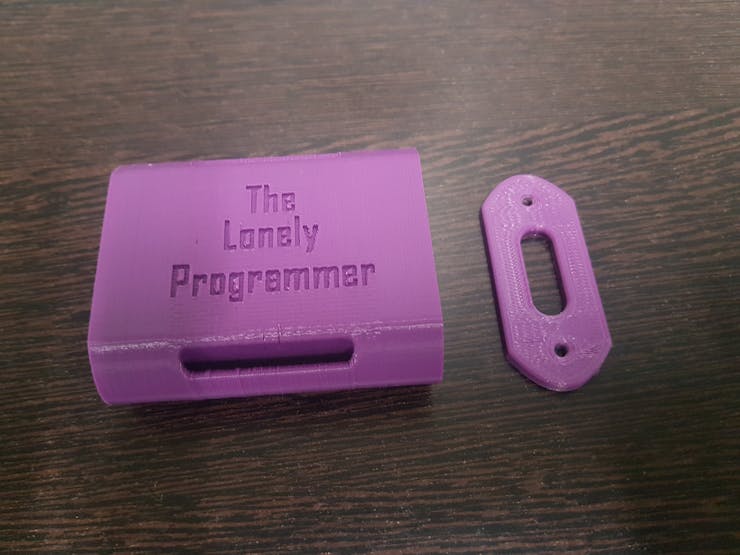
The Enclosure
- The making of the 3D-printed enclosure is shown below.
- The necessary files for printing the enclosure are in the Repository. Do try and make one for yourself

Top view
Side view
- Now Insert the device inside the enclosure and I would look something like this

Enclosure with the Edge device
I got a few Velcro straps from the nearby store and made it like a watch strap.

Velcro strap
Attach the scrap to the enclosure and this is what it looks like.

The Gauntlet
Interfacing with SmartEdge Agile (Project Smart Editor)
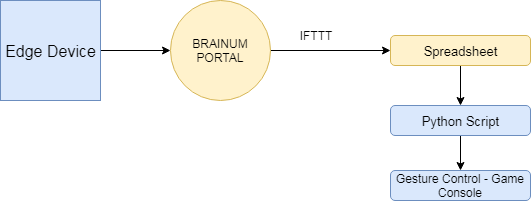
So this is how it works. First we connect the Edge Device to Brainium portal. The Model will be trained with the required gestures. With the IFTTT, the gesture is mapped to Google spreadsheet. Next using the Python script, we extract the gestures respectively. With the action code, we program the response with respective to the gestures.
To create a gesture-based photo-editing controller, we follow these steps.

With the above system, we can change the image size, zoom in, zoom out,
Step 6: Setting Up IFTTT - Gesture-Based Photo Editor
- Visit www.ifttt.com and create an account
- Search for Brainium and you can find a lot of applets from brainium

- Search for "Storeall Brainium alerts in Google sheets file" and Turn on the applet

- Once you turn on the applet, it will ask for permission to access your Google sheets and Brainium portal.
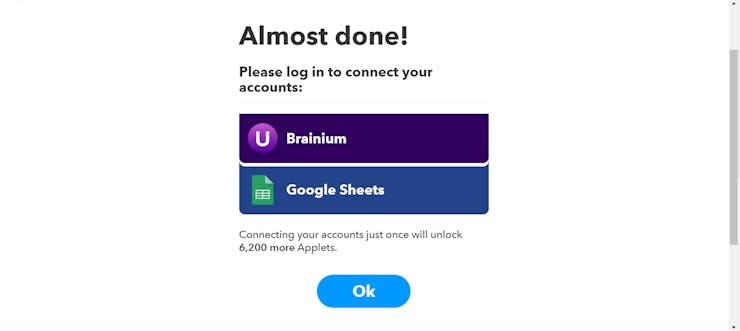
- Login to your brainium portal and click the Allow button

- To enable the permission for Google Sheets, Login to your gmail account and it will direct you to the permission site. Click on the allow button to continue further.

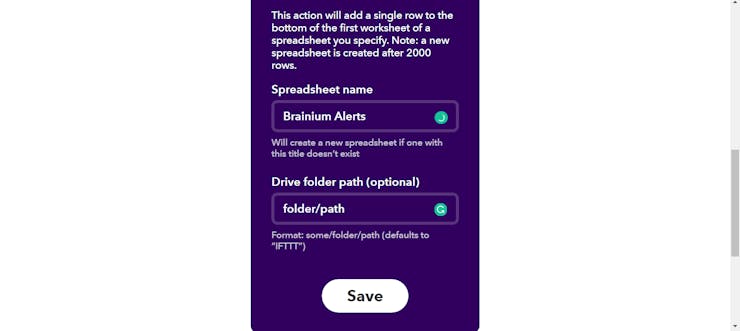
- Now you can configure the applet. Navigate to My applets -> Brainium -> to view all the applets enabled. Select the Brainium applet to configure.

IFTTT
- Here we name the Sheet as Brainium Alerts and click on Save button. Note that the file is created and updated on the Google drive whenever there is an alert
IFTTT
- And now we are done. When there is an alert on the brainium portal, it reflects on the Google Spreadsheet via IFTTT
Creating Google Spreadsheet - Gesture-Based Photo Editor
Once the IFTTT is done, the sensor data from the Edge device is appended to the Google Sheets whenever an alert is generated, and this is how the output looks like

Sheet
To access the Google Sheets from the Python script, follow the steps below
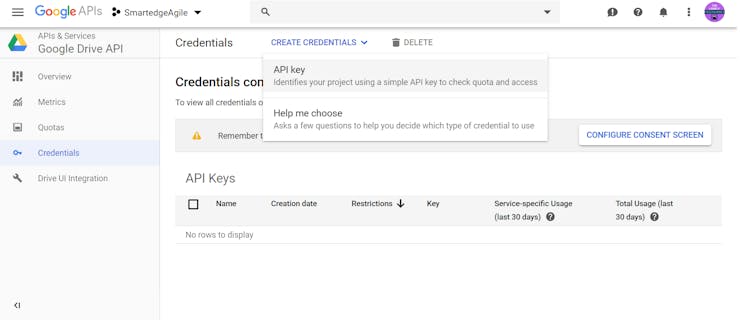
- Navigate to the Google Developers Console and create a new project
- Give your project a suitable name and then click create

Google API
Then add Google Drive API to our project which will allow us to access spreadsheet inside of Google Sheets for our account.

Create Credentials -> API Key on the Google Drive API
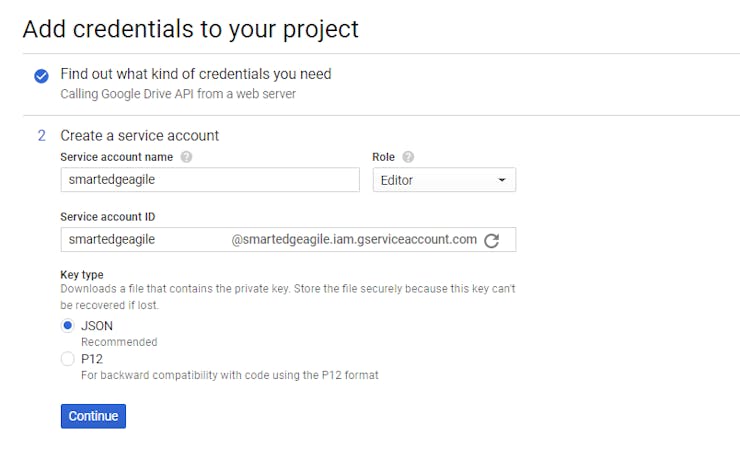
Now we add the credentials to our project with the following specs.

Next, we will create a service account named "smartedgeagile" and assigned it the role ProjectEditor which will allow it to access and edit all the data within the API. Clicking continue will generate a JSON file that I will rename and add it to the project as AI_secret.json.
Then open the JSON file in a text editor and Inside the file, you can locate an email address property called “client_email”, if we copy that and take it over to our spreadsheet on the cloud, we can share that particular spreadsheet with the email address we provide to give us access to it from the API.
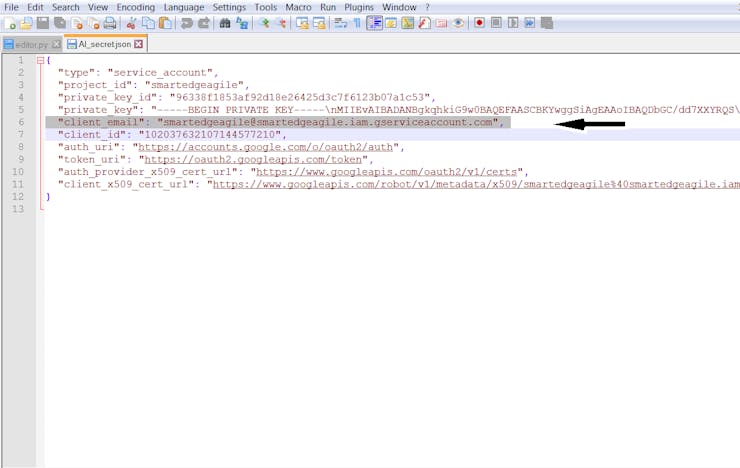
Share the sheet to the client email ID by pasting the client's email ID.

Now, The sheet can be accessed using the Python script with the help of Google drive API.
Step 7: Python Script - Gesture-Based Photo Editor
On writing the Python script from the scratch, the core of the project is to control the application with the gesture and we have the gesture decoded on the Google sheet. Now the next step will be extracting the alphabet from the sheet and executing the action according to the gesture.

Keystroke:
First we import these library for the generation of keystroke
import pyautogui
import time
The Following line is used to call the keystroke function
pyautogui.keyUp(Key)
Sheet:
Make sure that Step 6 is done properly in order to access the data from the google sheets.
- We use these packages to access the sheet.
import gspreadfrom oauth2client.service_account import ServiceAccountCredentials
- create a gspread client authorizing it using the credentials
scope = ['https://spreadsheets.google.com/feeds','https://www.googleapis.com/auth/drive']creds = ServiceAccountCredentials.from_json_keyfile_name('AI_secret.json', scope)client = gspread.authorize(creds)
- Now, We can access our google sheets so we’ll call a client.open and pass it the spreadsheet name and getting access to sheet1.
sheet = client.open('Brainium Alerts').sheet1
- Since the alert is stored on the 7th column, we extract that particular value from the sheet.
values_list = sheet.col_values(7)pp.pprint(values_list[-1])
- Once we extract the last value, the action respective to the alert is executed.
Editor:
Now we set the macros for the editing application. Here I use Adobe Photoshop for the demonstration.
Depending on the Key_value, the keystroke is executed using Python script. We define the macros in Photoshop for the following commands.
Hue ---> Crtl + U & Tab
Levels ---> Crtl + L & Tab
Curves ---> Crtl + M & Tab
Invert ---> Crtl + I
Enter ---> enter key
Swipe Left ---> LEFT
Swipe Right ---> RIGHT
Increase ---> UP
Decrease ---> DOWN
Undo ---> Crtl + Z
Redo ---> Shift + Crtl + Z
*************************************************************************************
Interfacing with SmartEdge Agile (Project Game Console)
So this is how it works. First we connect the Edge Device to Brainium portal. The Model will be trained with the required gestures. With the IFTTT, the gesture is mapped to Google spreadsheet. Next using the Python script, we extract the gestures respectively. With the action code, we program the response with respective to the gestures.
To create a gesture-based game controller, we follow these steps.
With the above system, we can easily play game with gestures.
Step 8: Setting Up IFTTT - Gesture-Based Game Console
- Visit www.ifttt.com and create an account
- Search for Brainium and you can find a lot of applets from brainium
- Search for "Storeall Brainium alerts in Google sheets file" and Turn on the applet
- Once you turn on the applet, it will ask for permission to access your Google sheets and Brainium portal.
- Login to your brainium portal and click the Allow button
- To enable the permission for Google Sheets, Login to your gmail account and it will direct you to the permission site. Click on the allow button to continue further.
- Now you can configure the applet. Navigate to My applets -> Brainium -> to view all the applets enabled. Select the Brainium applet to configure.
IFTTT
- Here we name the Sheet as Brainium Alerts and click on Save button. Note that the file is created and updated on the Google drive whenever there is an alert
IFTTT
- And now we are done. When there is an alert on the brainium portal, it reflects on the Google Spreadsheet via IFTTT
Step 9: Python Script - Gesture-Based Game Console
Here the Python script is similar to the previous script.
Keystroke:
First we import these library for the generation of keystroke
import pyautogui
import time
The Following line is used to call the keystroke function
pyautogui.keyUp(Key)
Sheet:
Make sure that Step 6 is done properly in order to access the data from the google sheets.
- We use these packages to access the sheet.
import gspreadfrom oauth2client.service_account import ServiceAccountCredentials
- create a gspread client authorizing it using the credentials
scope = ['https://spreadsheets.google.com/feeds','https://www.googleapis.com/auth/drive']creds = ServiceAccountCredentials.from_json_keyfile_name('AI_secret.json', scope)client = gspread.authorize(creds)
- Now, We can access our google sheets so we’ll call a client.open and pass it the spreadsheet name and getting access to sheet1.
sheet = client.open('Brainium Alerts').sheet1
- Since the alert is stored on the 7th column, we extract that particular value from the sheet.
values_list = sheet.col_values(7)pp.pprint(values_list[-1])
- Once we extract the last value, the action respective to the alert is executed.
Game:
Now we set the macros for the Game. Depending on the Key_value, the keystroke is executed using python script. We define the controls in game for the following commands.
Forward ---> W
Back ---> S
Left ---> A
Right --> D
Jump ---> Spacebar
Drive ---> Circle
*******************************************************************************
Step 10: Integration of Code
I had made a Windows Application to execute the python script.
Both the Python script and the application are added to the GitHub Repository.
- Run the windows application
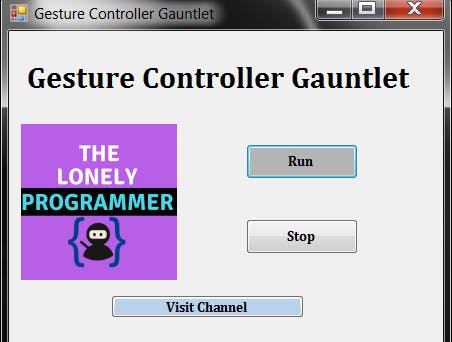
- Click on Run button and locate the python script file.

- Once you click open button, the python script is executed and Runs in background.
- Click on Stop button to close the windows application.
NOTE:Make sure that you install all the dependency required for the python script to execute properly.
*********************************************************************************************************
Step 12: Working of the Gauntlet
Now it's showtime, and I had made a Gauntlet which can help me control device through gestures. Have a look at it's Functioning.
- Project Alphabet
Output - Image of Project Alphabet
This project is the base line of the entire gauntlet. It was trained and tested for various alphabets and output is displayed as widget
- Project SmartEditor
Run "editor.py" script using the windows application.
Here, I've used gesture controls for commands such as Hue, Levels, Curves, Invert, Swipe Left, Swipe Right, Increase, Decrease, Undo, and Redo. On average, it takes at least three to five seconds to identify the gesture pattern. It can be further expanded with minor modifications to the script and the training model.
Kind Attention:
This project is indented to create a wide impact in gesture-based applications. It can be further expanded by making minor tweaks in the Python script and brainium application.
You can find the scripts, application, and enclosure files on my GitHub repository attached.
The dev board costs about $110 which can be purchased from Avnet and this solution is very cheap and powerful.