 Wing-Sum Law
Overview
I've always wanted my own neon sign, but lack the willingness to pay for the real deal. Besides, as an artist, I wanted to design my own. Luckily for me, you can buy pseudo-neon lights – LED strips embedded sideways in colorful silicone that effectively imitate an actual neon light. Using many of these strips, a 24V 5A power supply, some wood sheets, and a lot of soldering, I put together my own version of a neon sign.
Design
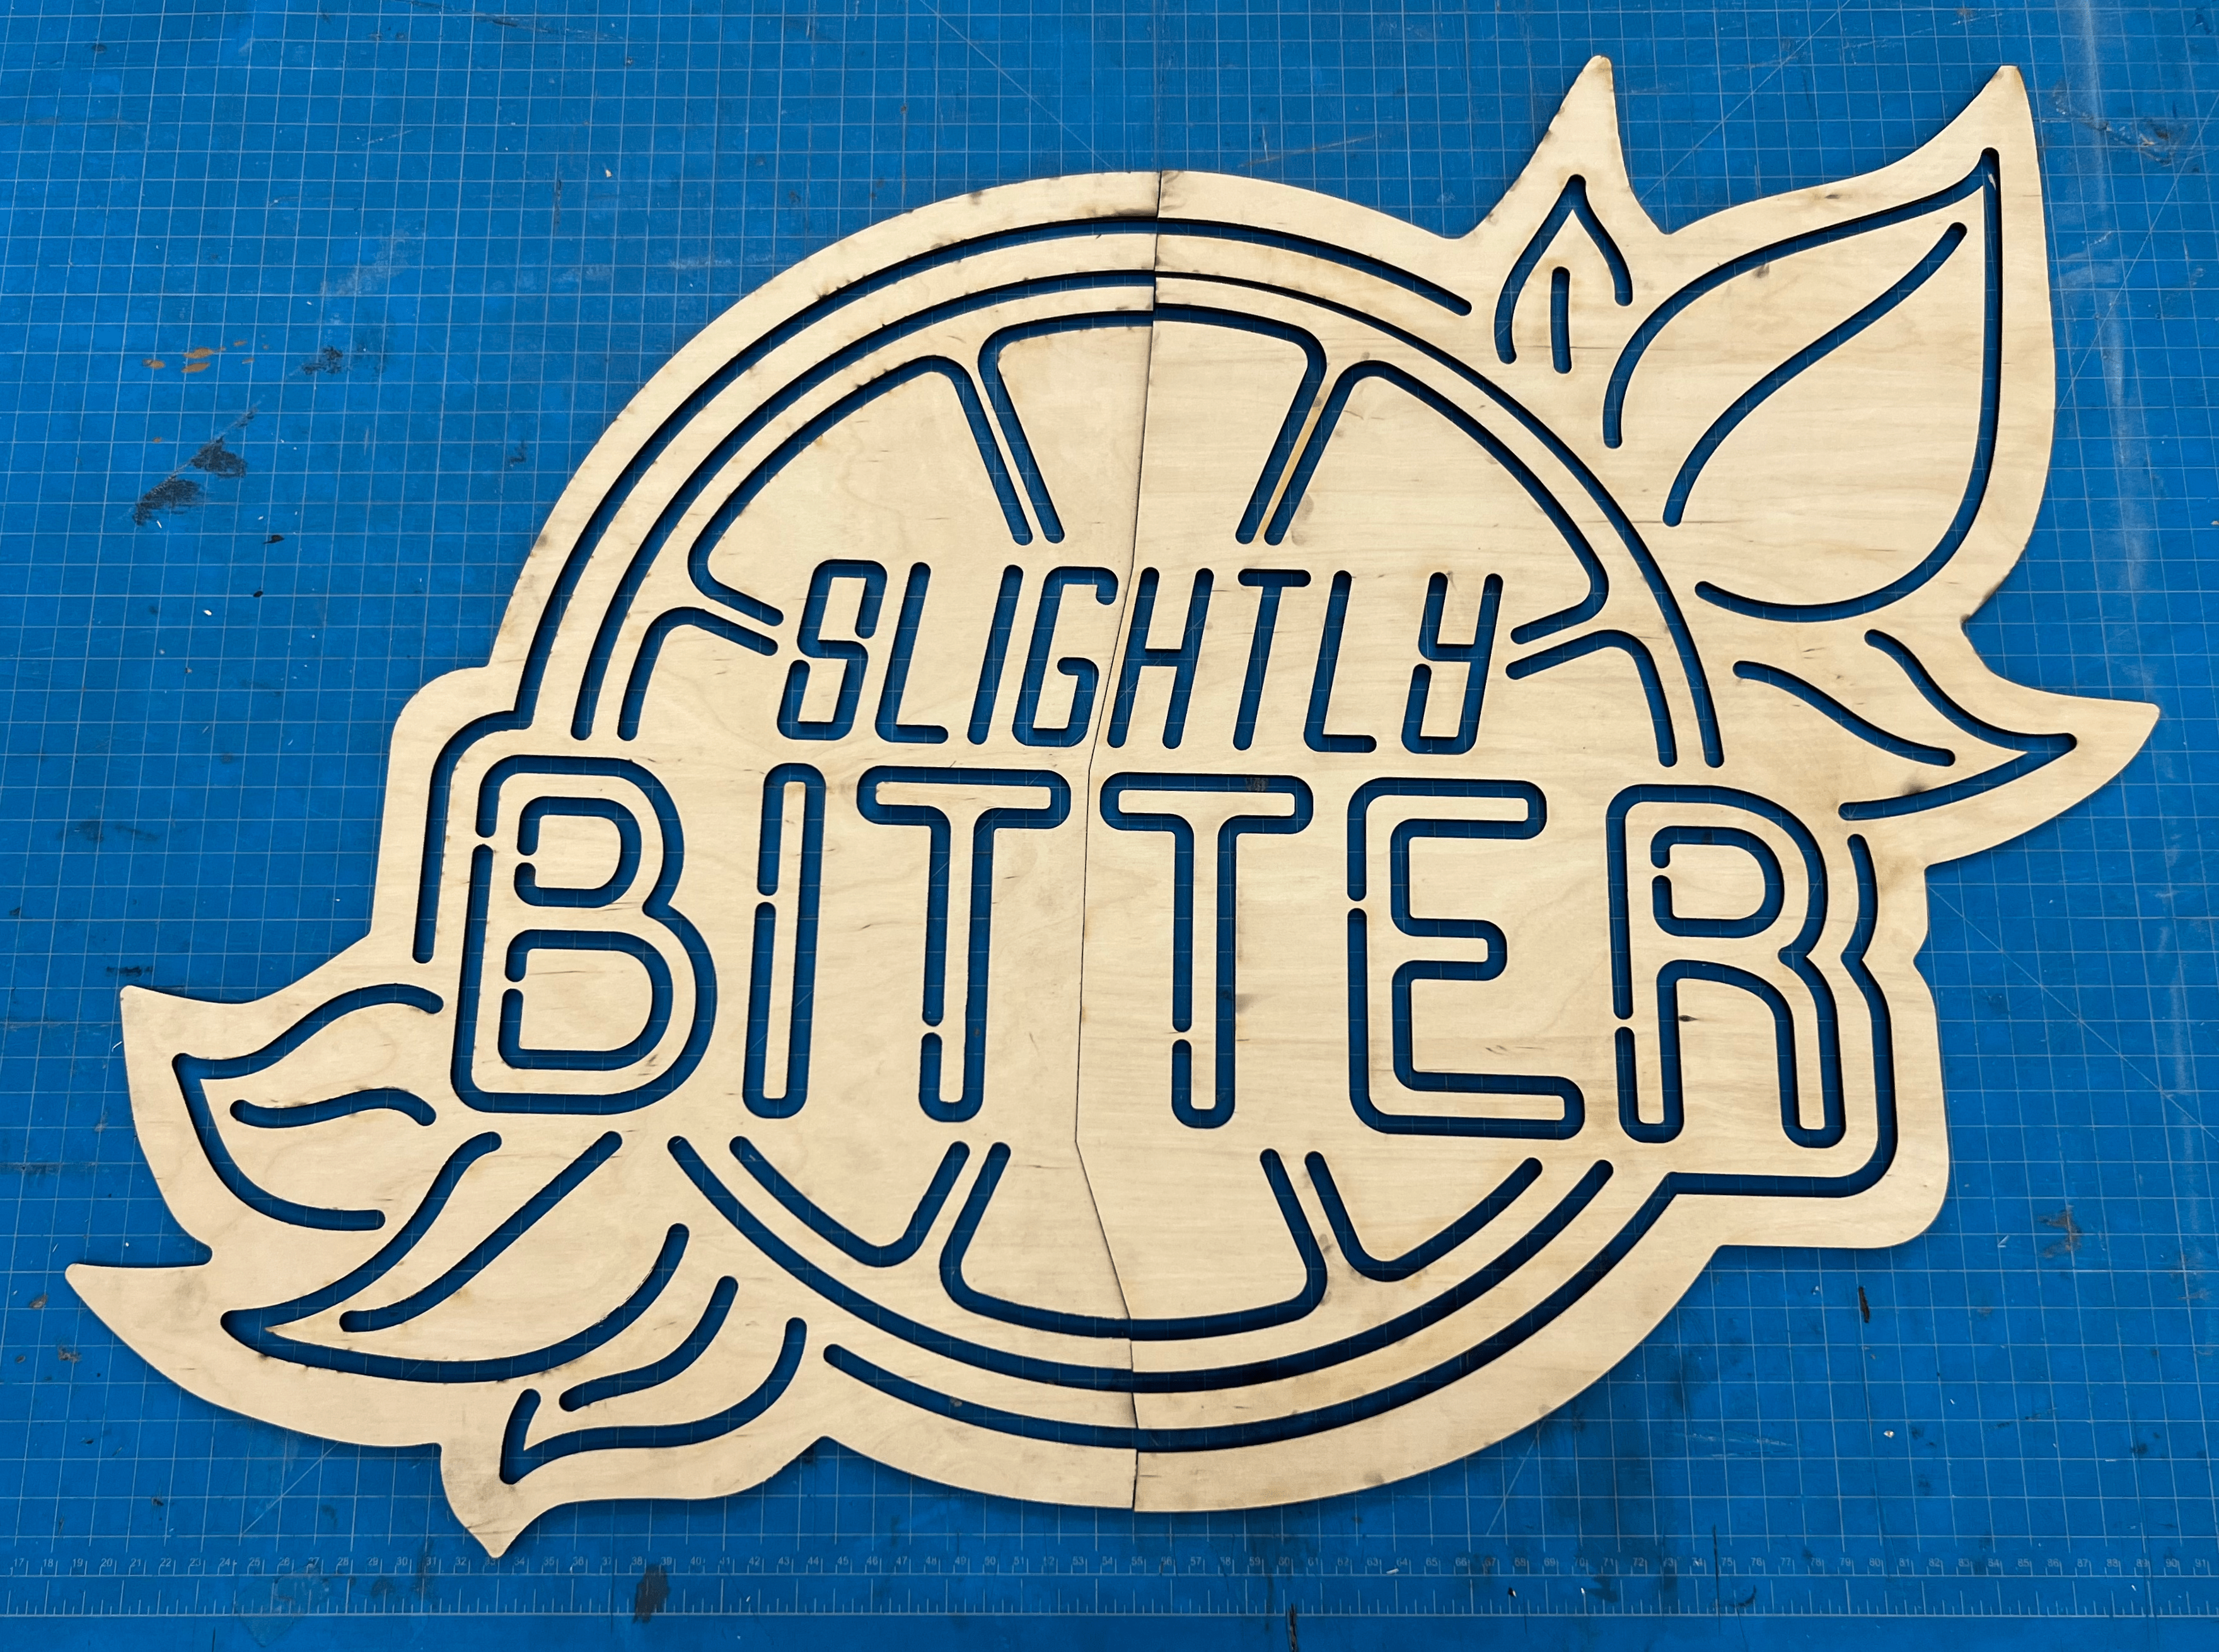
I created the design for the sign using Adobe Illustrator, but any vector graphics editor will work as well. Each stroke line was 6.2 mm wide (the width of the LED strips + some extra wiggle room).

After finishing the line work representing each LED strip, I used the outline stroke action in Adobe Illustrator to create the lines actually cut by the laser cutter. I ended up splitting the design down the middle to make it fit into the laser cutter.

Electronics
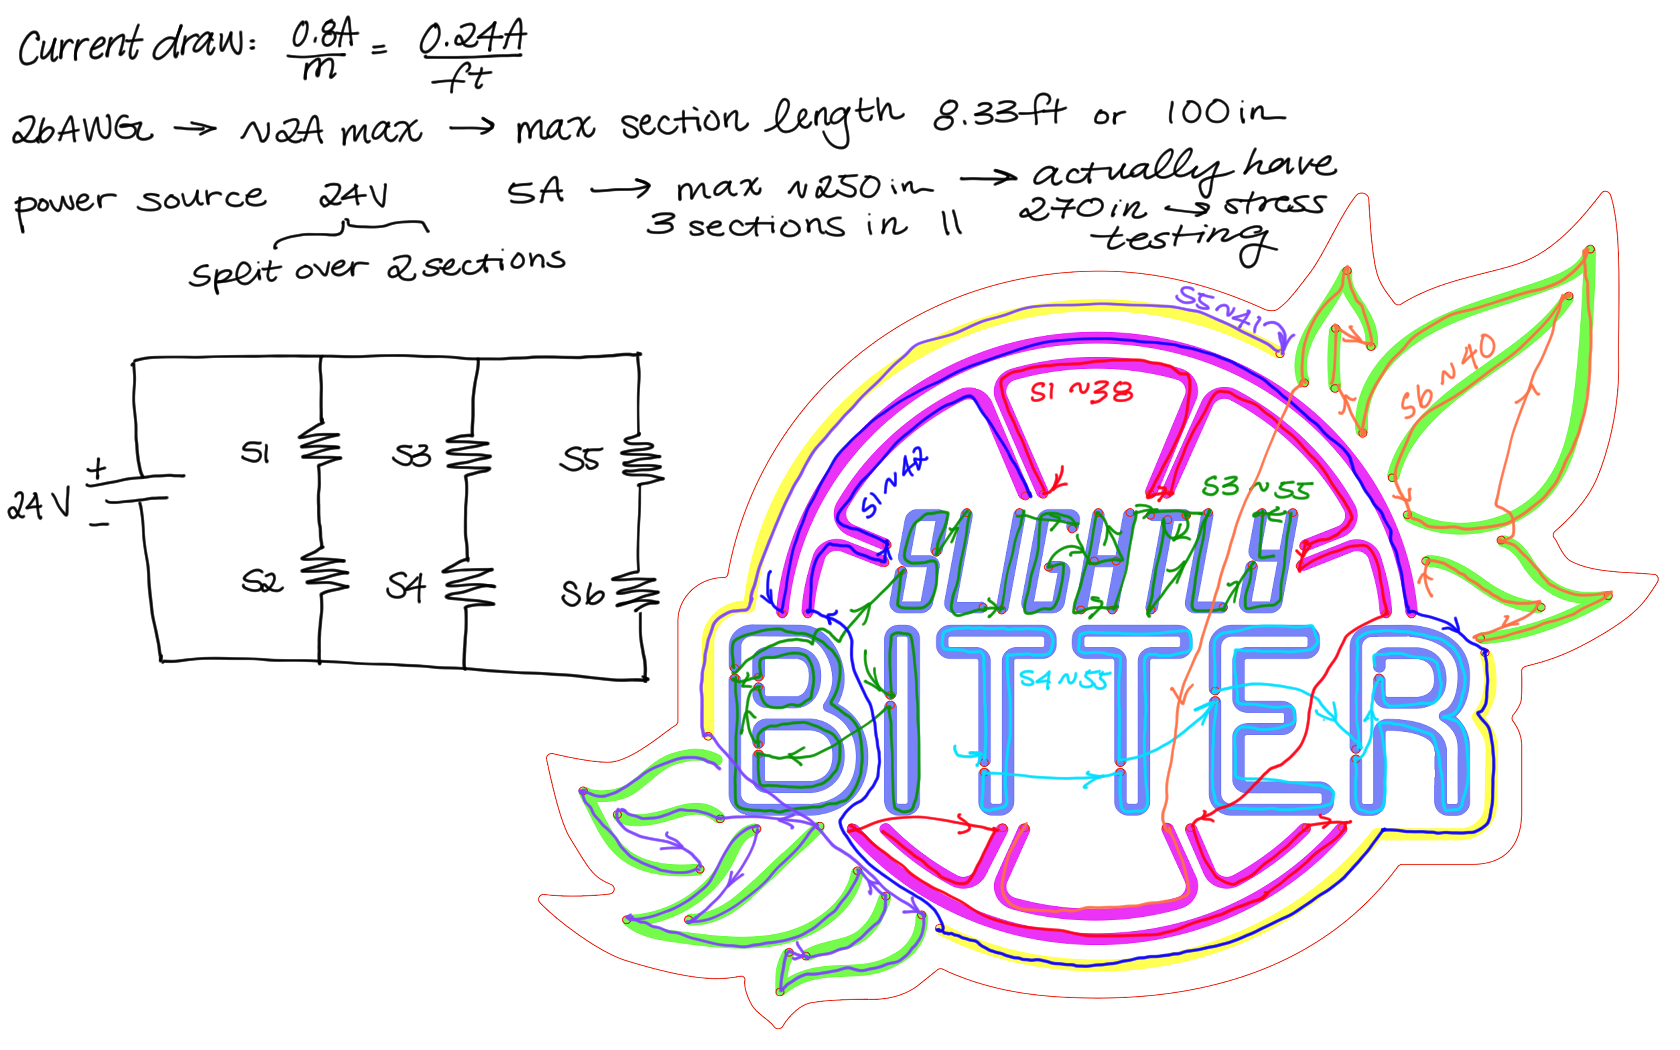
Manufacturer indicates that the LED strips should be powered by 12V and can expect to draw 0.8A per meter. Since I wanted a pretty long length of LED strips, I knew I'd need more power than a regular 12V supply could give, so I went with a 24V supply.
Using 24V meant having to split the voltage over two strips of LEDs in series, and putting each of the series pairs in parallel to split the current. Keeping in mind the current draw rating of the wire I was using, I split the LED strips into 6 approximately equal lengths, and put them into the circuit roughly drawn below.
 Theo
Theo
 Rich Morrissey

 davedarko