 Max.K
Max.KFrom the beginning I knew that I wanted to go with a retro design. I had a few details in mind that I wanted to incorporate:
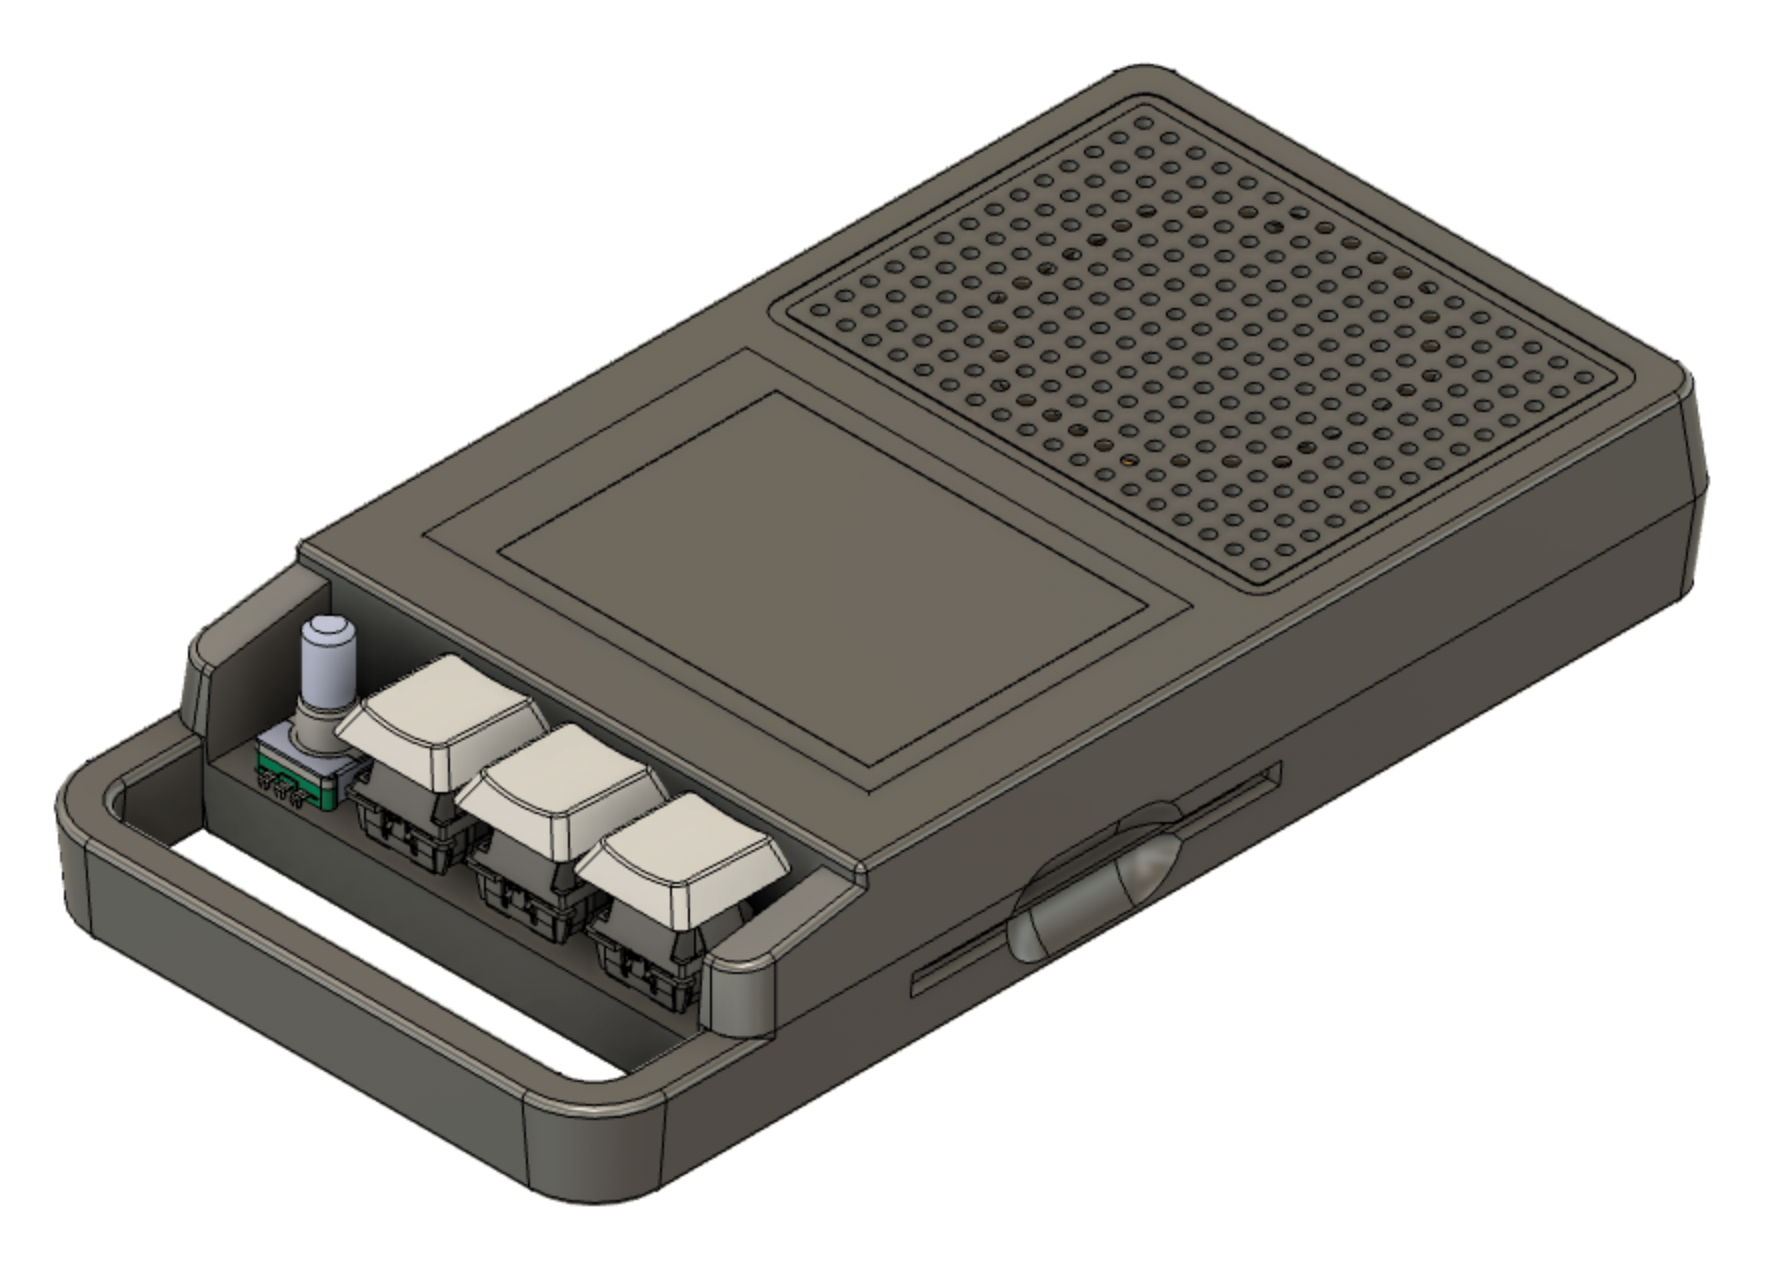
The interface would be as simplistic as possible, with the classic buttons you can find on any cassette recorder. These recorders usually need big keys to actuate the tape mechanism. Regular mechanical keyboard keys are similar in size and travel, so these were ideal for the project.
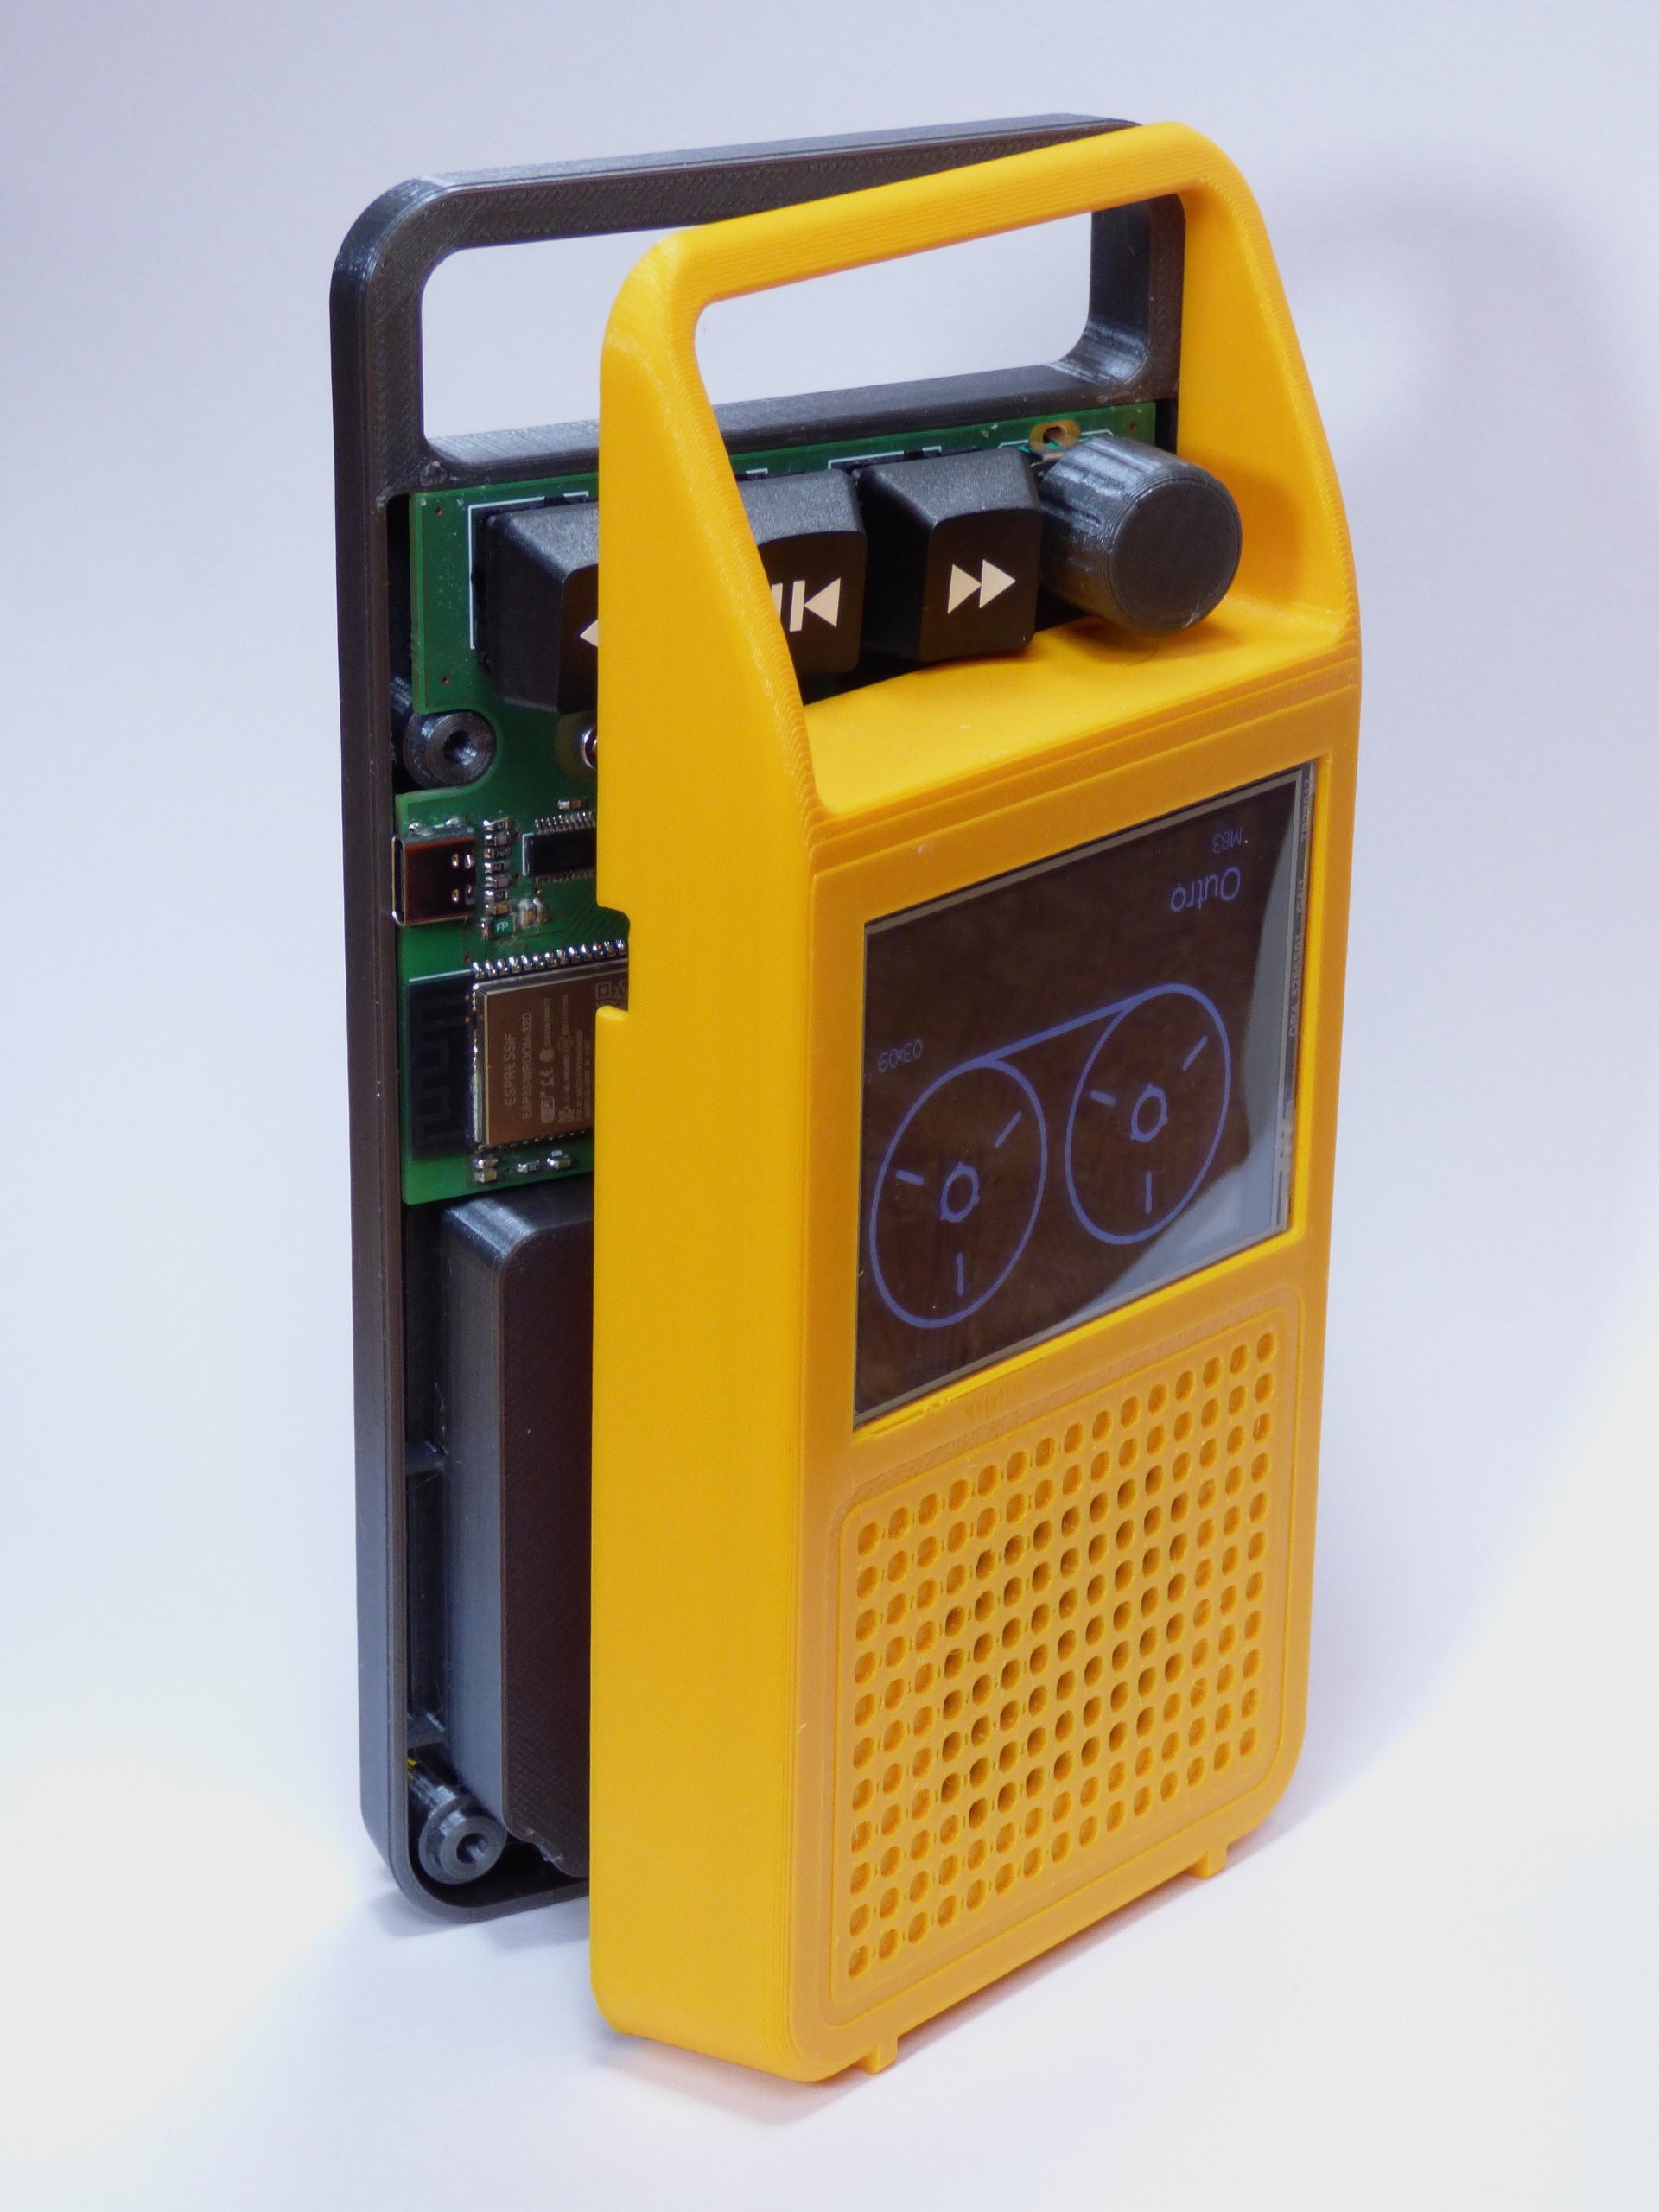
Cassette Recorders also have a nice way to show the tape reels rotating through a window. Instead of the physical tape, a screen would be used to show an animation of the spools. The sharp memory LCD would have been perfect for this, but without a protective cover, it would have been too fragile for a portable device like this. So I instead opted for a regular color LCD.
Usually, rechargeable Lithium-Ion cells are the go-to option for something like this. But with the retro-tone of the project, regular AA cells seemed more fitting.
With the buttons, screen and 4x AA batteries selected, the overall size of the device was set. I started to draw some concepts in Fusion360 that would allow me to arrange all the components while needing only a single custom PCB. These first designs looked really flat and boring.
When I searched the web for some inspiration I came across the Philips 113, a portable record player from the 1970s. From this I took over the color theme and smooth shape.
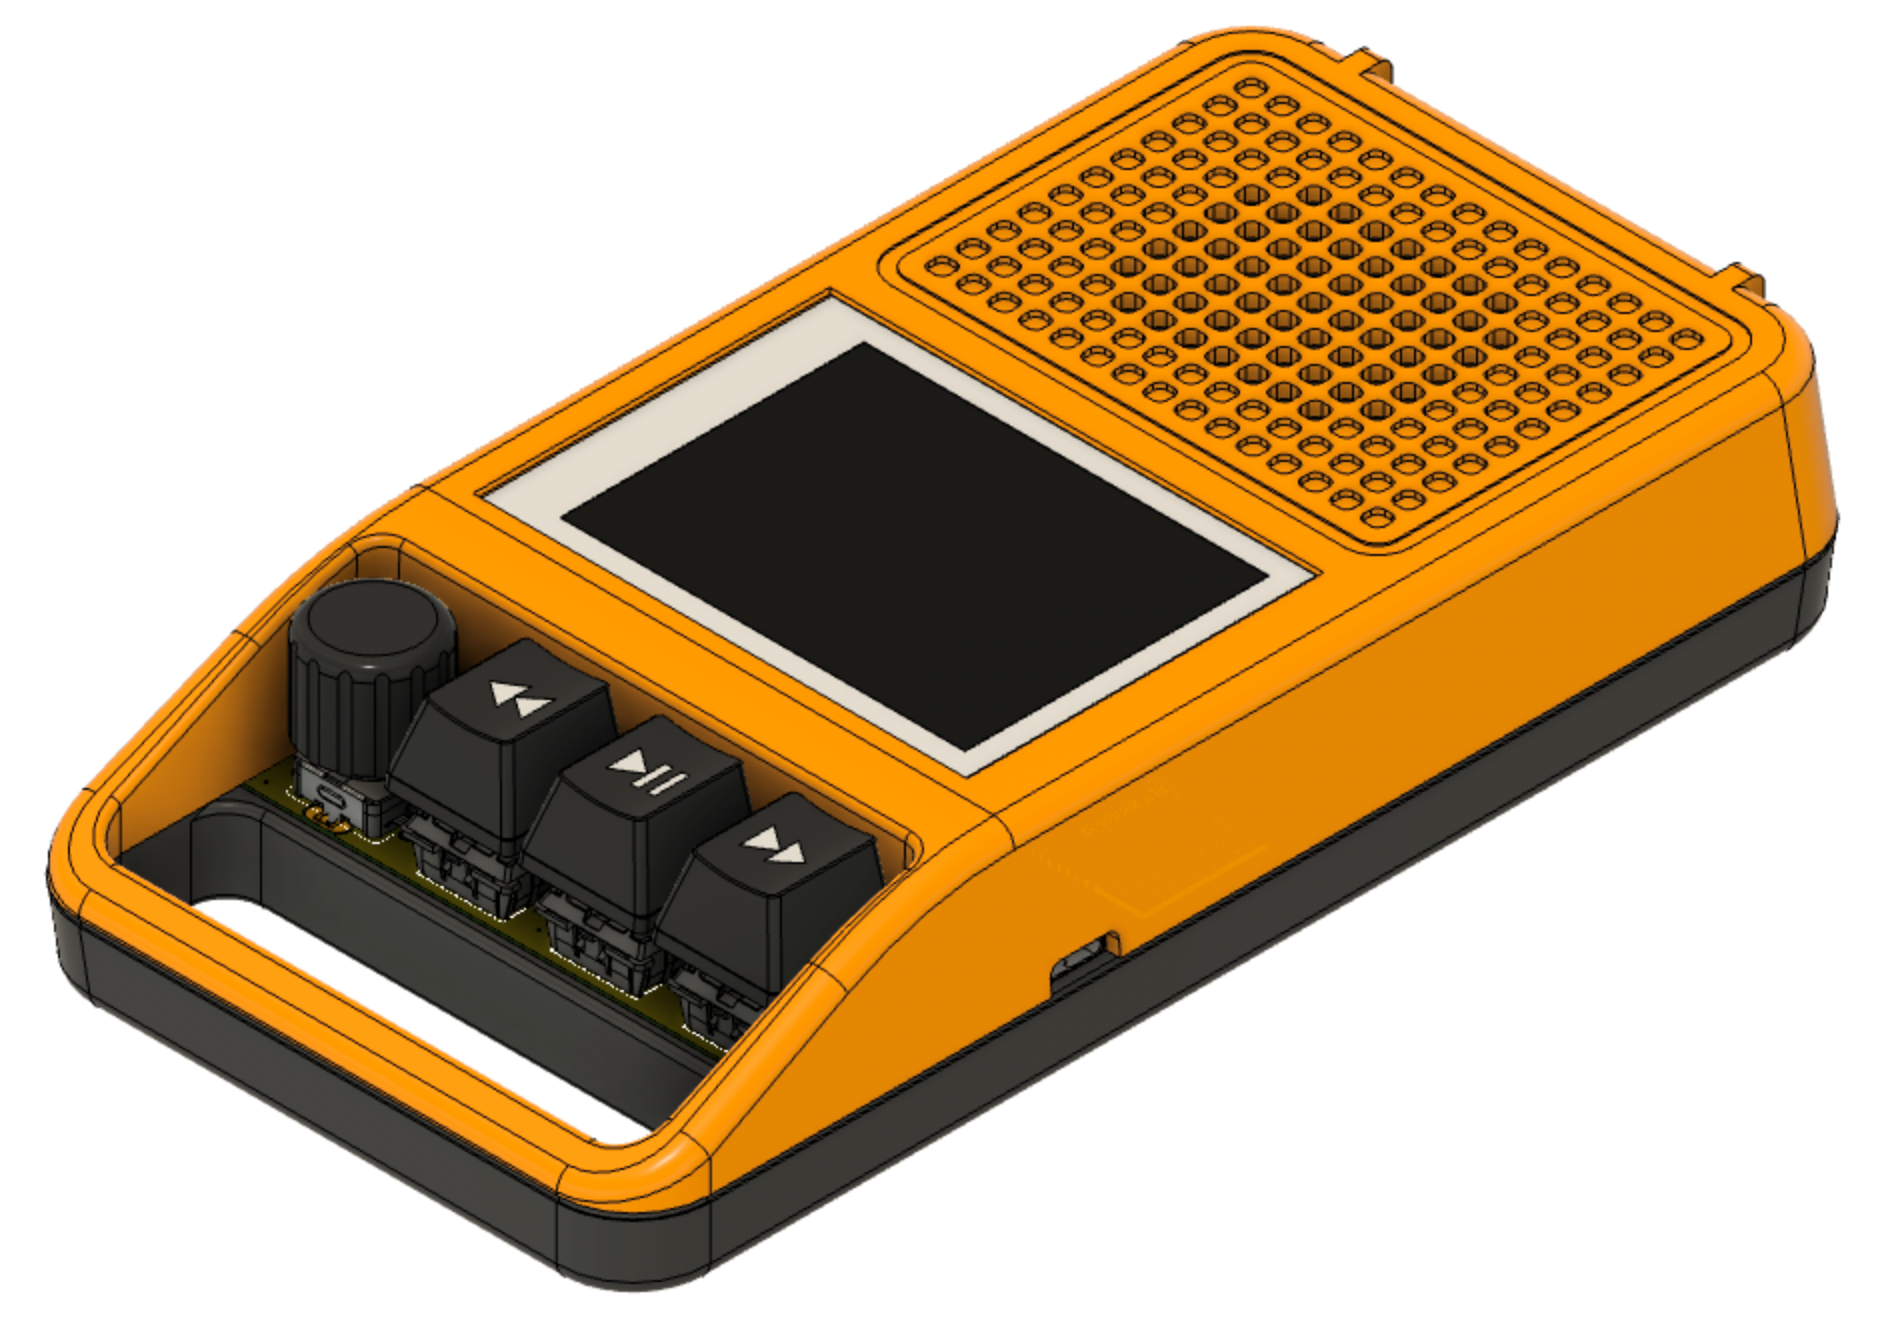
As most of my previous 3D-printed cases, this one is also made up of two half shells that are connected together by screws. I also included draft angles and a separation line to add to the molded part look. On the bottom a battery holder is secured in its slot, which has a 3D-printed cover that locks in place nicely.
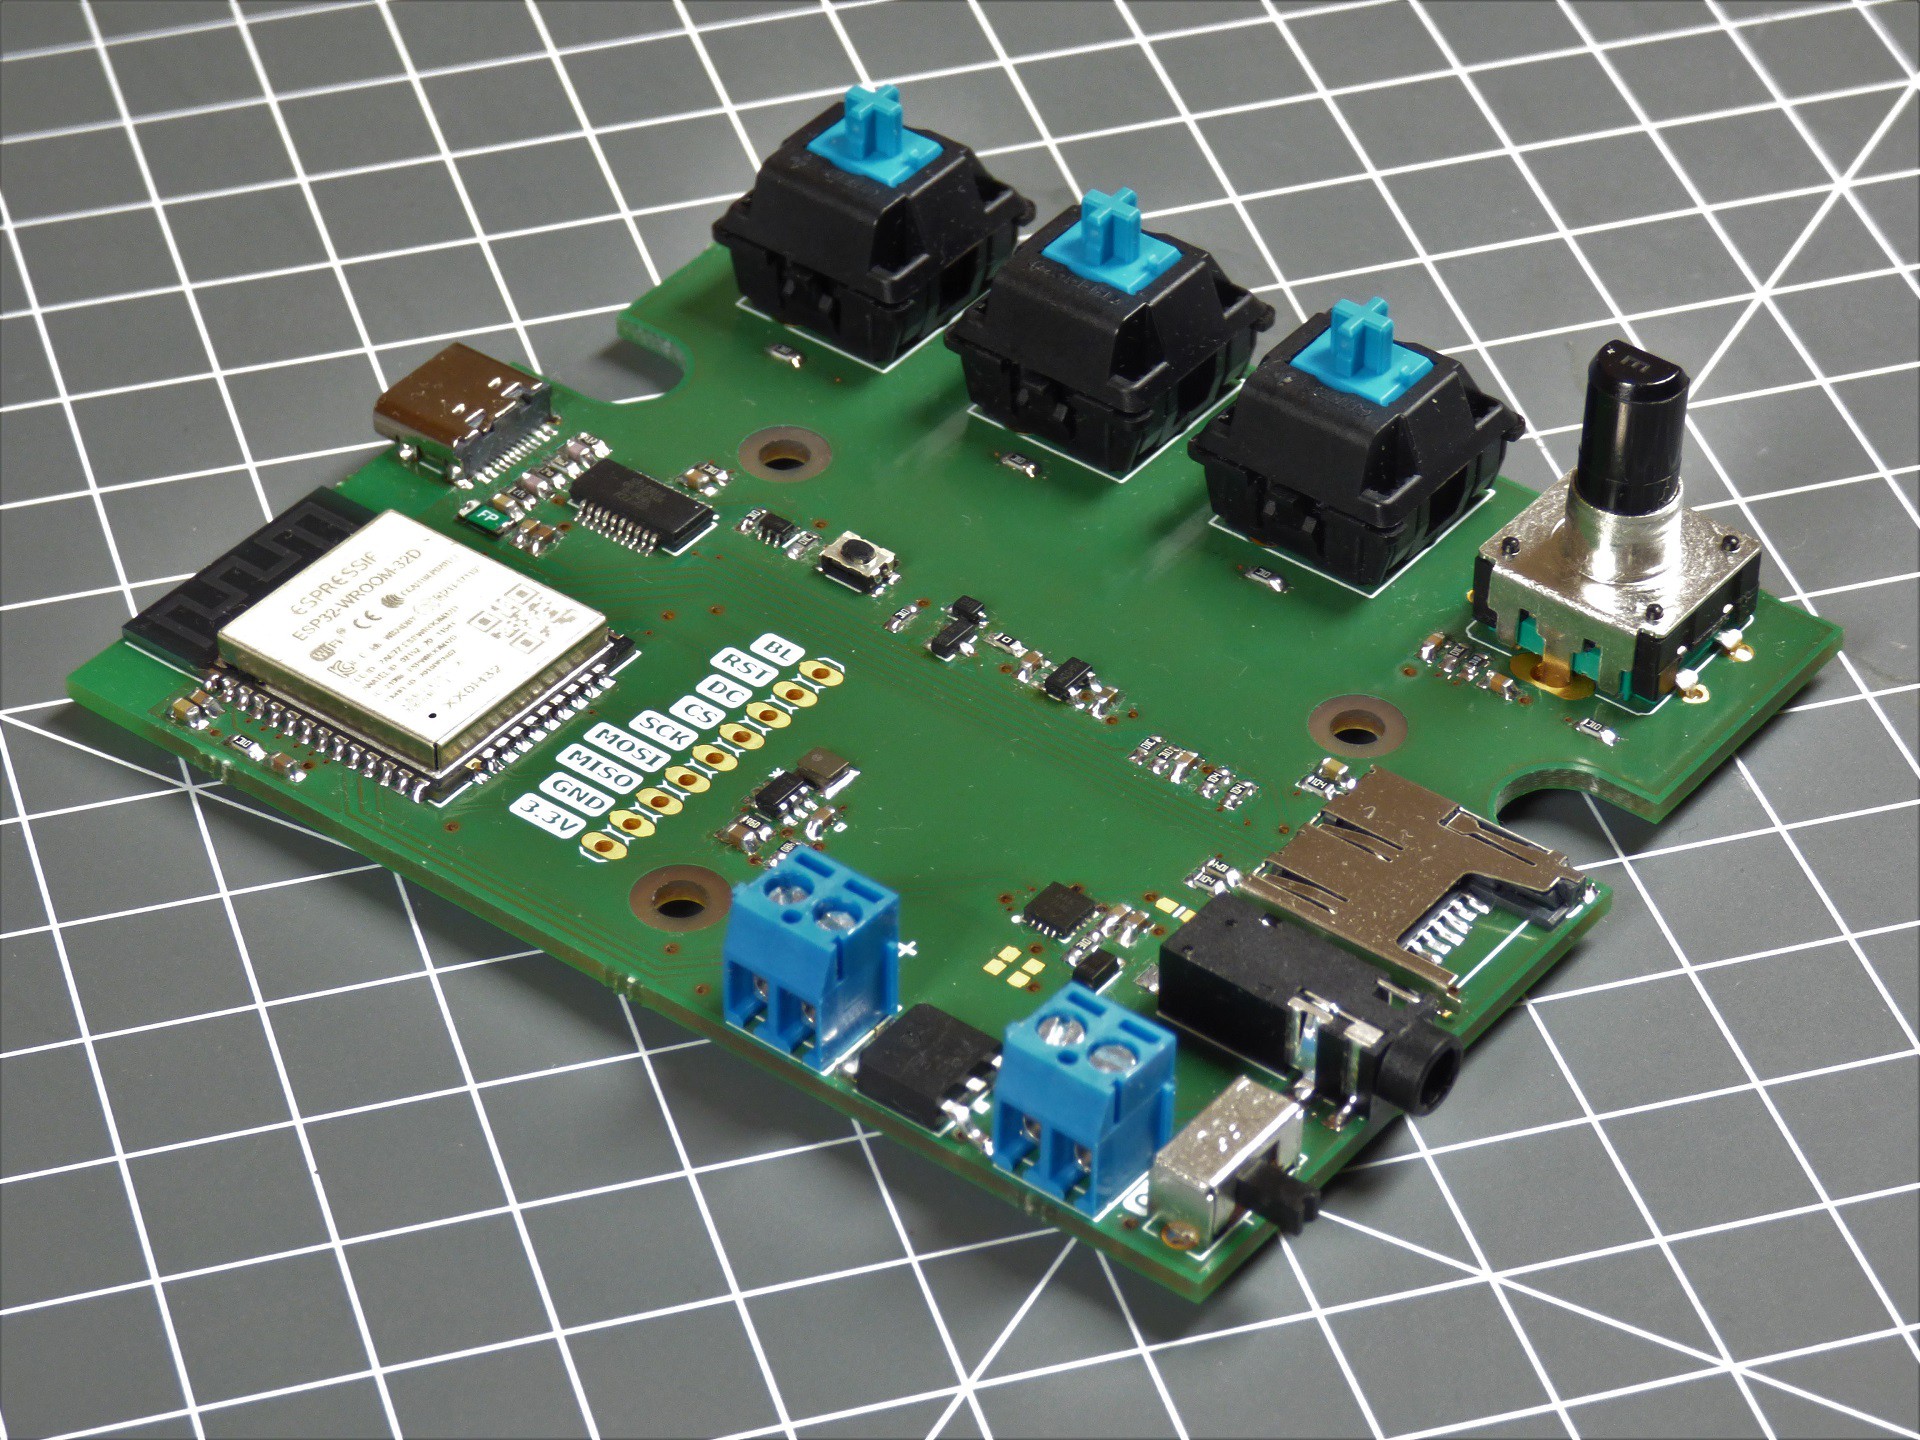
A custom PCB is necessary for the electronic components. Because of the raging component shortage the selection of processors was limited to pretty much only the ESP32. It has plenty of power to drive a display while decoding audio. The integrated WiFi means that features like internet radio can be added later through a software update. The ESP32 also has a I2S peripheral for an external audio amplifier. For this I selected the Maxim MAX98357A which is a common mono amplifier. Even though there’s only one internal speaker, I would have pick a stereo amp. But most of these devices are out of stock indefinitely. This means that a headphone that’s plugged into the 3.5mm jack also only plays mono audio. This is unfortunate but acceptable for an audiobook-centered device. Audio files are stored on a micro SD card, for which the PCB has a slot. The SPI display is connected through cables, which allows the top and bottom halves of the case to be separated later. To deal with the wide voltage range of AA batteries (1…1.5V), the 5V display gets its own boost converter.
Discussions
Become a Hackaday.io Member
Create an account to leave a comment. Already have an account? Log In.