Emilio P.G. Ficara
ColorLamp
This device does not have to be built, just buy a module (USB dongle) on the Internet and download some free software. Let's see the module (actually, there are two). You can use both, because in the attachment that you will find at the bottom of the article, there are two distinct versions of the firmware.
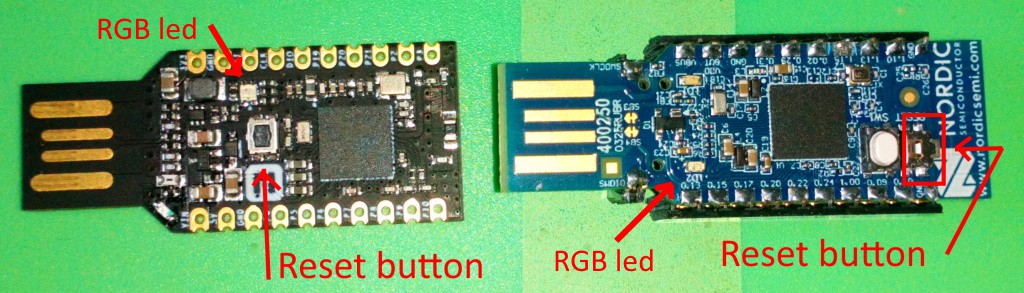
Both modules are small HW development platforms for Nordic's nRF52840 chip (to see how interesting it is, I recommend visiting the manufacturer's website ). I used this component for the first time in November 2018, while I was on business in Germany. I found a project started and to be finished and I had to study everything, because I did not know neither the micro, nor the development environment. It wasn't easy, but in the end I made it and developed other interesting things as well. The development environment was based on the Zephyr platform (RTOS created by the Linux Foundation) which since then I continue to use for my programs even here in Italy, where I returned last summer and where I am now (I hope temporarily) blocked due to "restrictions". I installed the Zephyr and the Nordic development tools on a Linux Ubuntu VM and it works well even with a "scarce" laptop with 4GB of ram in all.
The module on the right is a product of Nordic itself and you can find its characteristics at this link . The other, on the other hand, is a product whose characteristics are described at this link and also here, where there is a substantial documentation. The Nordic model I bought from an electronic component supplier, while the second I bought on "a well-known online sales site starting with A". I thought the second was a clone of the first but not. The corresponding I / O (but in different positions) are only 4. On the Nordic there are more: 3 I / O lines, a programmable LED and a button. On the other is a 3.3V voltage regulator with more than enough current to power various additional peripherals. The second module has all the pins on the strip connectors, while the Nordic has two signals "out", but always at a pitch of 2.54mm close to the USB connector. These signals are SWDCLK and SWDIO which are used to connect a J-Link interface. In the other module, we find the same signals (plus an external reset) on the strip connector and therefore we lose the 3 I / O lines. The voltage regulator of the Nordic, however, despite being programmable, supplies very little current (about 30mA and also feeds the internal circuits) and therefore I usually put an external regulator in my projects that foresee peripherals at 3.3V.
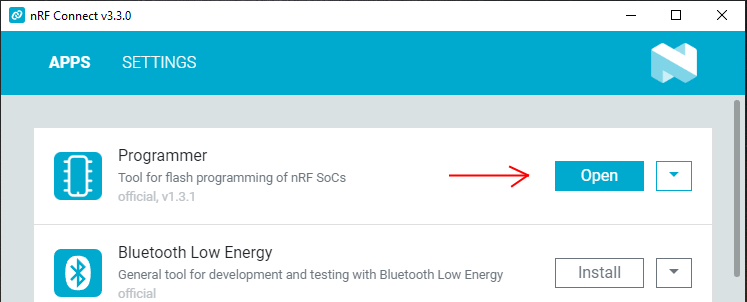
To program the flash memory of the module (both one and the other) we need a software that we find on the Nordic website at this link . It's there for Windows, Linux, and Mac, so you can install it anywhere!
Once installed, we will need to add the programming section. The software is truly "vast" and full of potential, but let's proceed step by step:
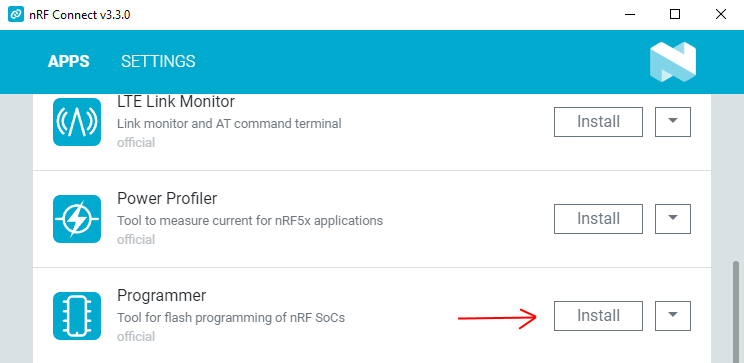
Click on Install and we will have our programmer ready to use:
To program the modules, just put them in a USB port on the computer where the program was installed. Inside the firmware, in both modules, there is a specific BOOTLOADER that allows you to modify the programs present. Of course, when writing your own firmware application, you have to be careful not to end up in the memory areas occupied by MBR and BOOTLOADER. If you do, the micro can only be reprogrammed with a J-Link interface! However, with my firmware that you find at the bottom of the article, you are not in danger.
Program the module
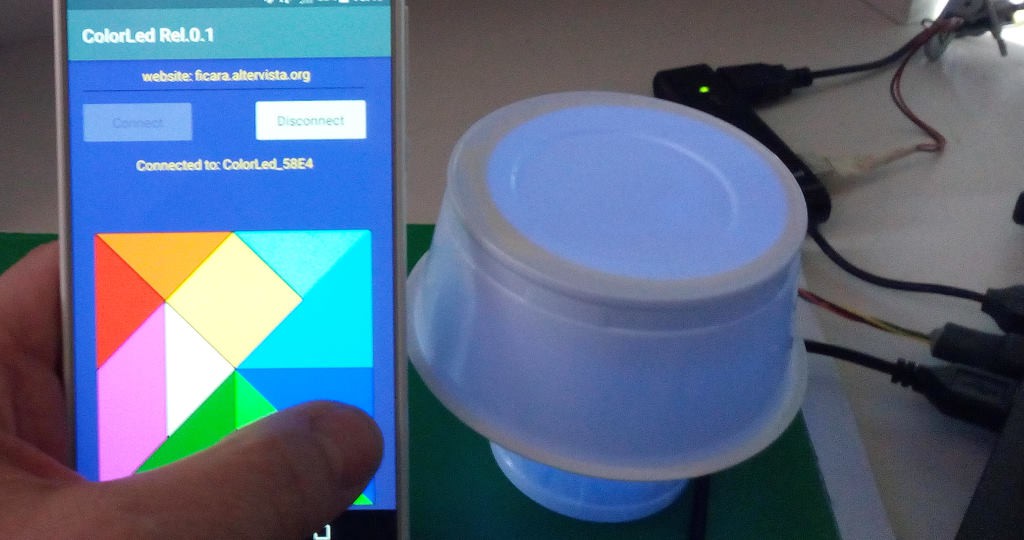
Well, how does this work? In summary, when the module is reset by Power-On, the user's App is executed, while if the reset comes from the small button (see where it is located in the first photo above) then the programming / update mode is started. This mode, in both modules, is highlighted with the RGB LED flashing red, turning on and off with a dimmer effect.
The Nordic module is supplied without any user App and therefore as soon as it is powered...
Read more »
 Seth
Seth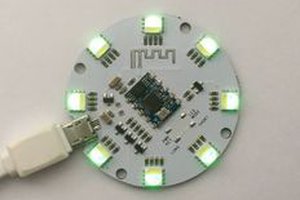
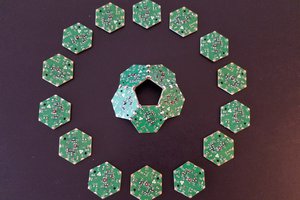
 Hexabitz