For those of you that just want to run the DSKY using the internal software simulator, congratulations! Your model is complete. For those of you that want to connect to an external AGC, you will need to wire up the 26-pin connector.
The external AGC I am working on is comprised of TTL chips and therefore uses 0-5v voltage levels. The DSKY uses a Raspberry Pi that is CMOS based and uses 0-3.3v levels. This requires voltage level conversion on the lines. There are many solutions from making your own from discrete components to using fancy chips. The Channel bus lines are bidirectional. I chose a simple yet clean solution, pre-manufactured boards using MOSFETs. You can pick up a bag of five 8-line converters for under $10. Two are required for the Channel bus and two are required for the control lines.
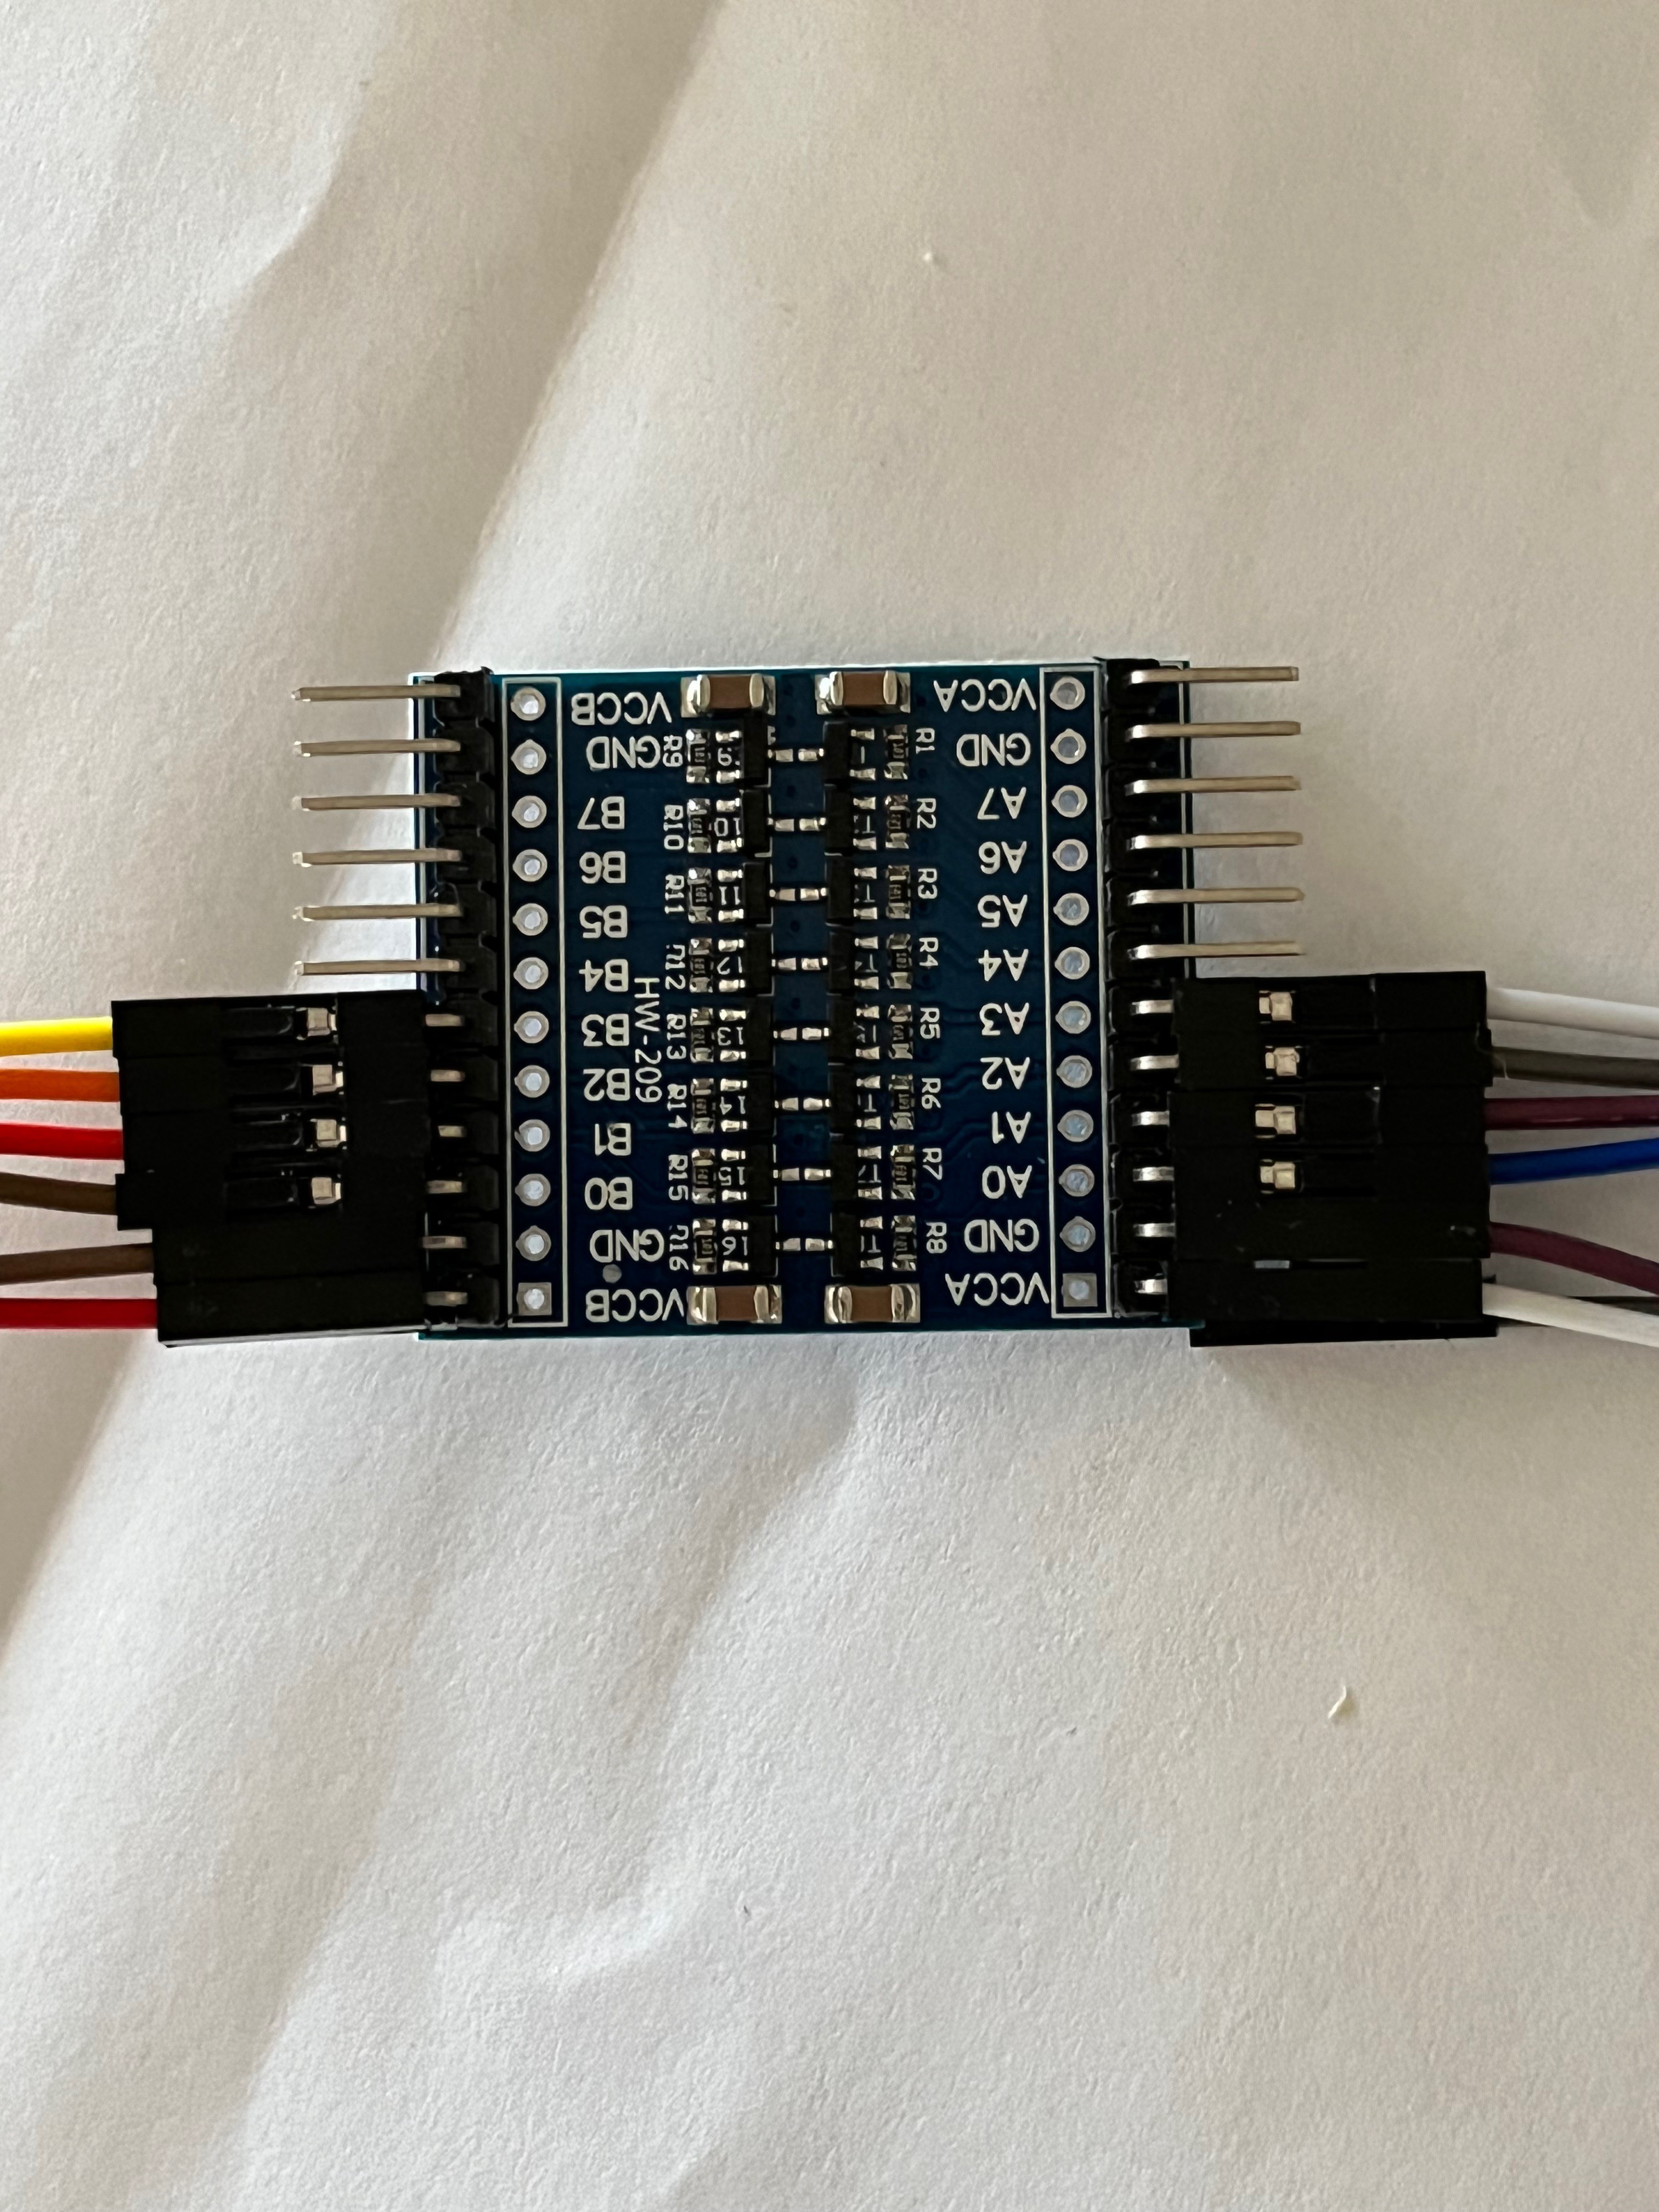
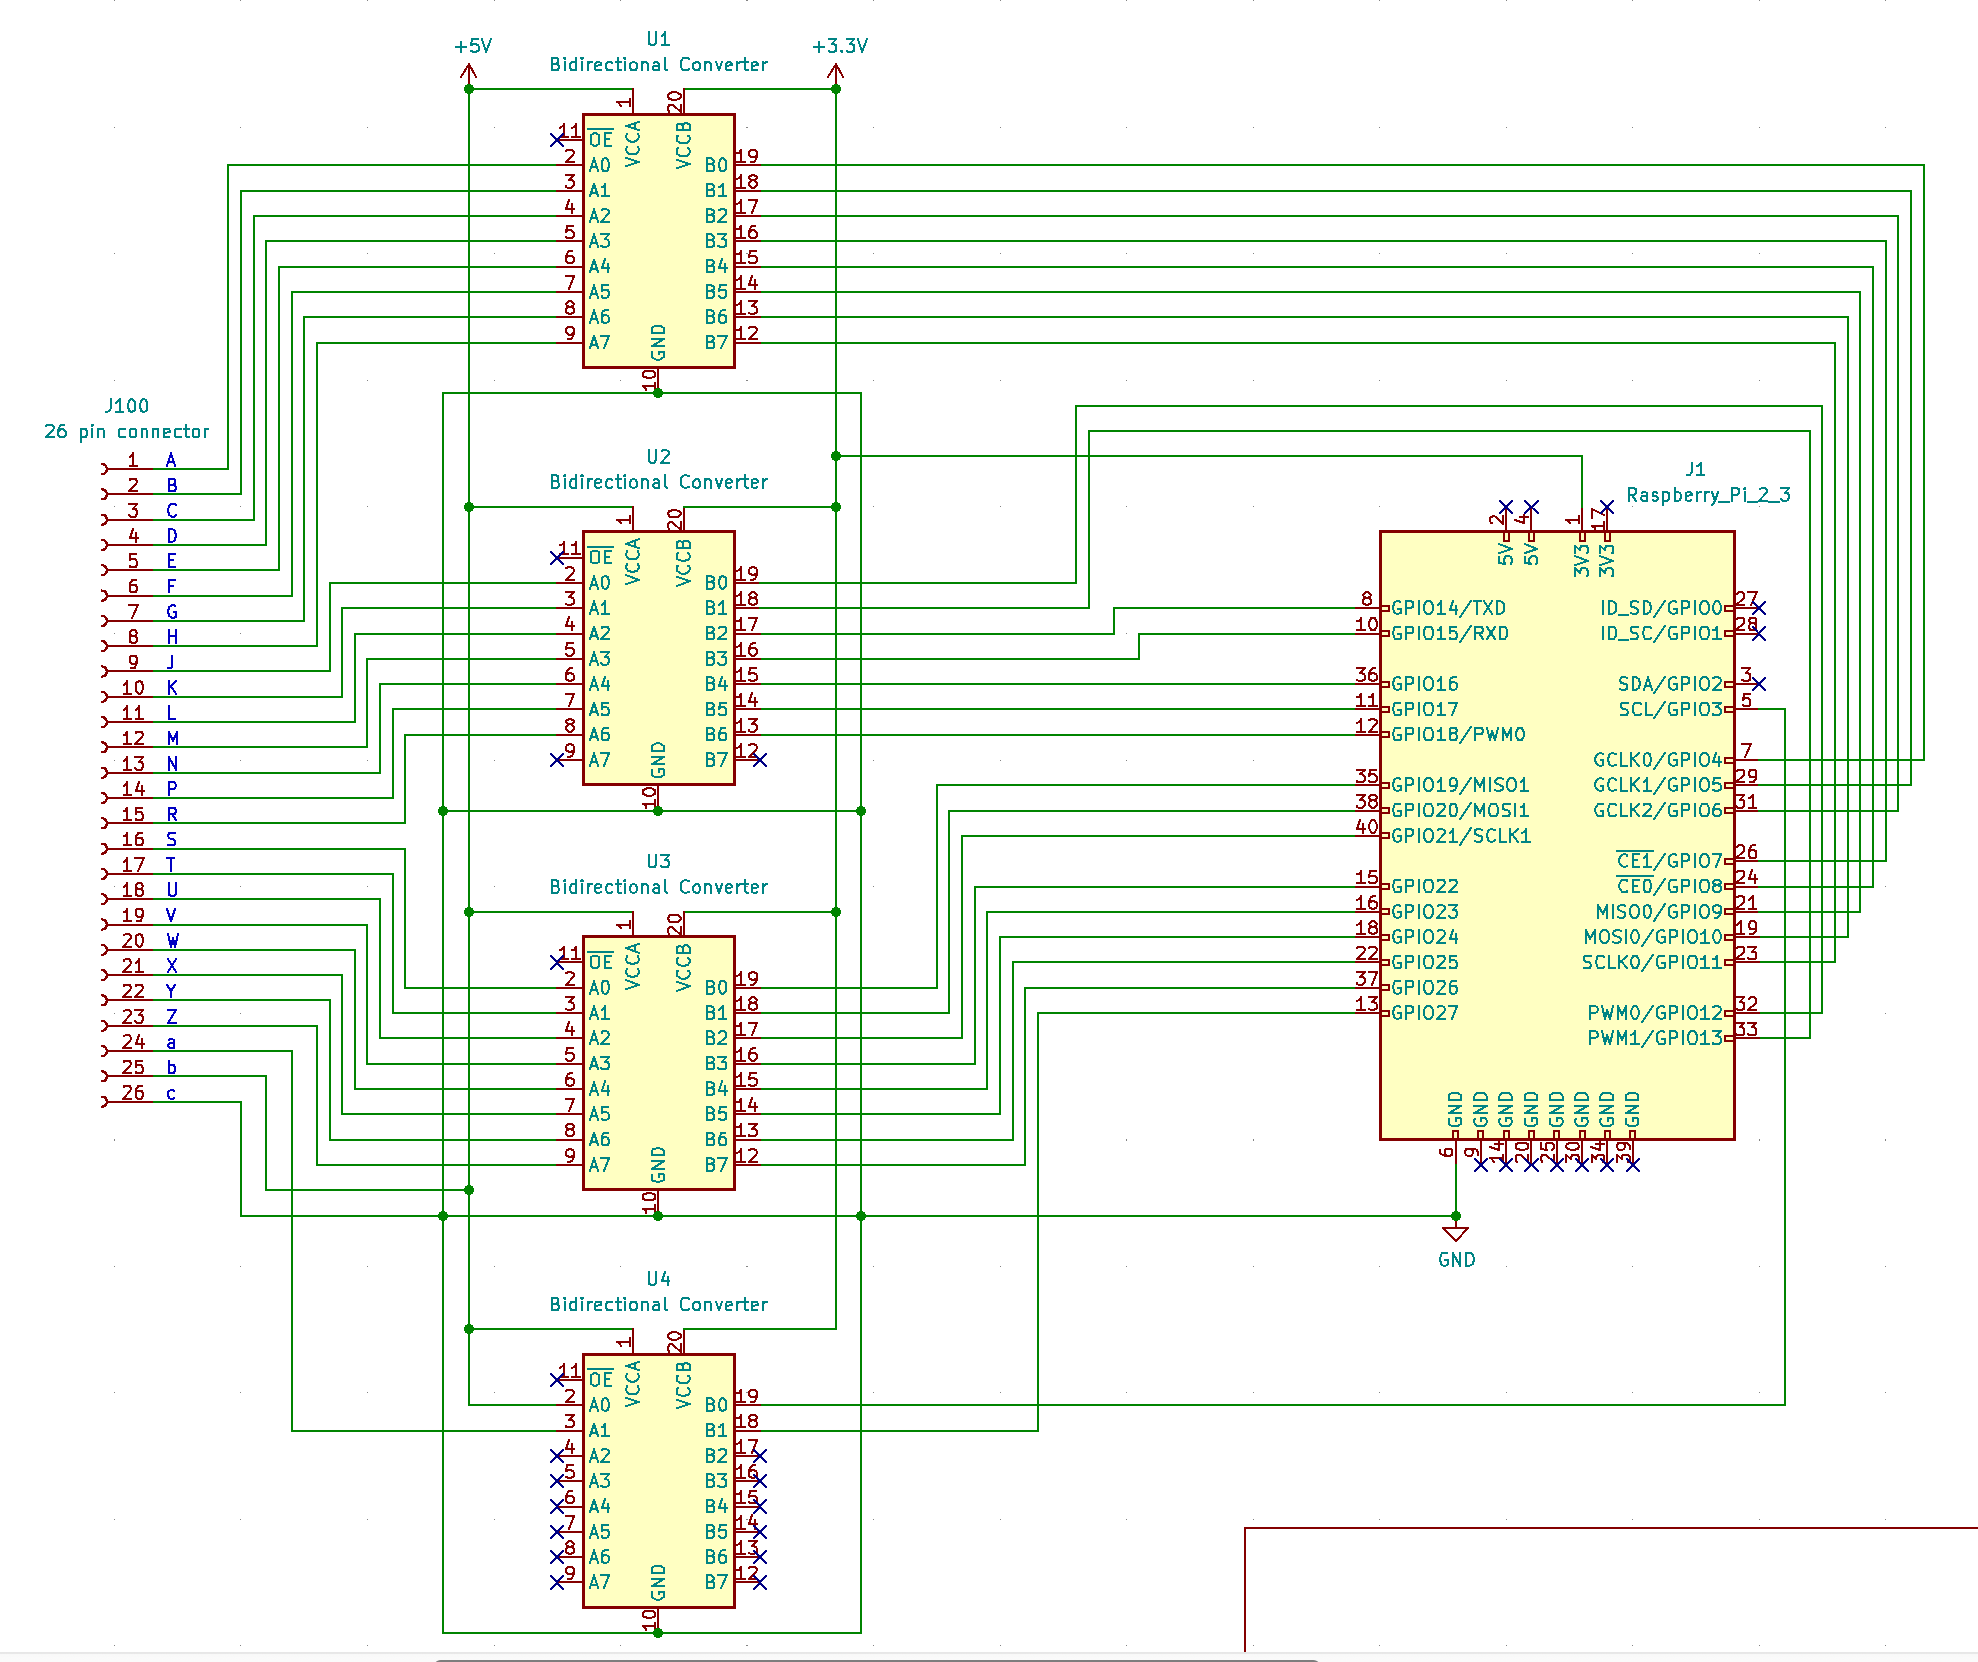
KiCad did not have a symbol for this level converter so I chose a device that is essentially the same except it has an output enable pin that I didn't use.
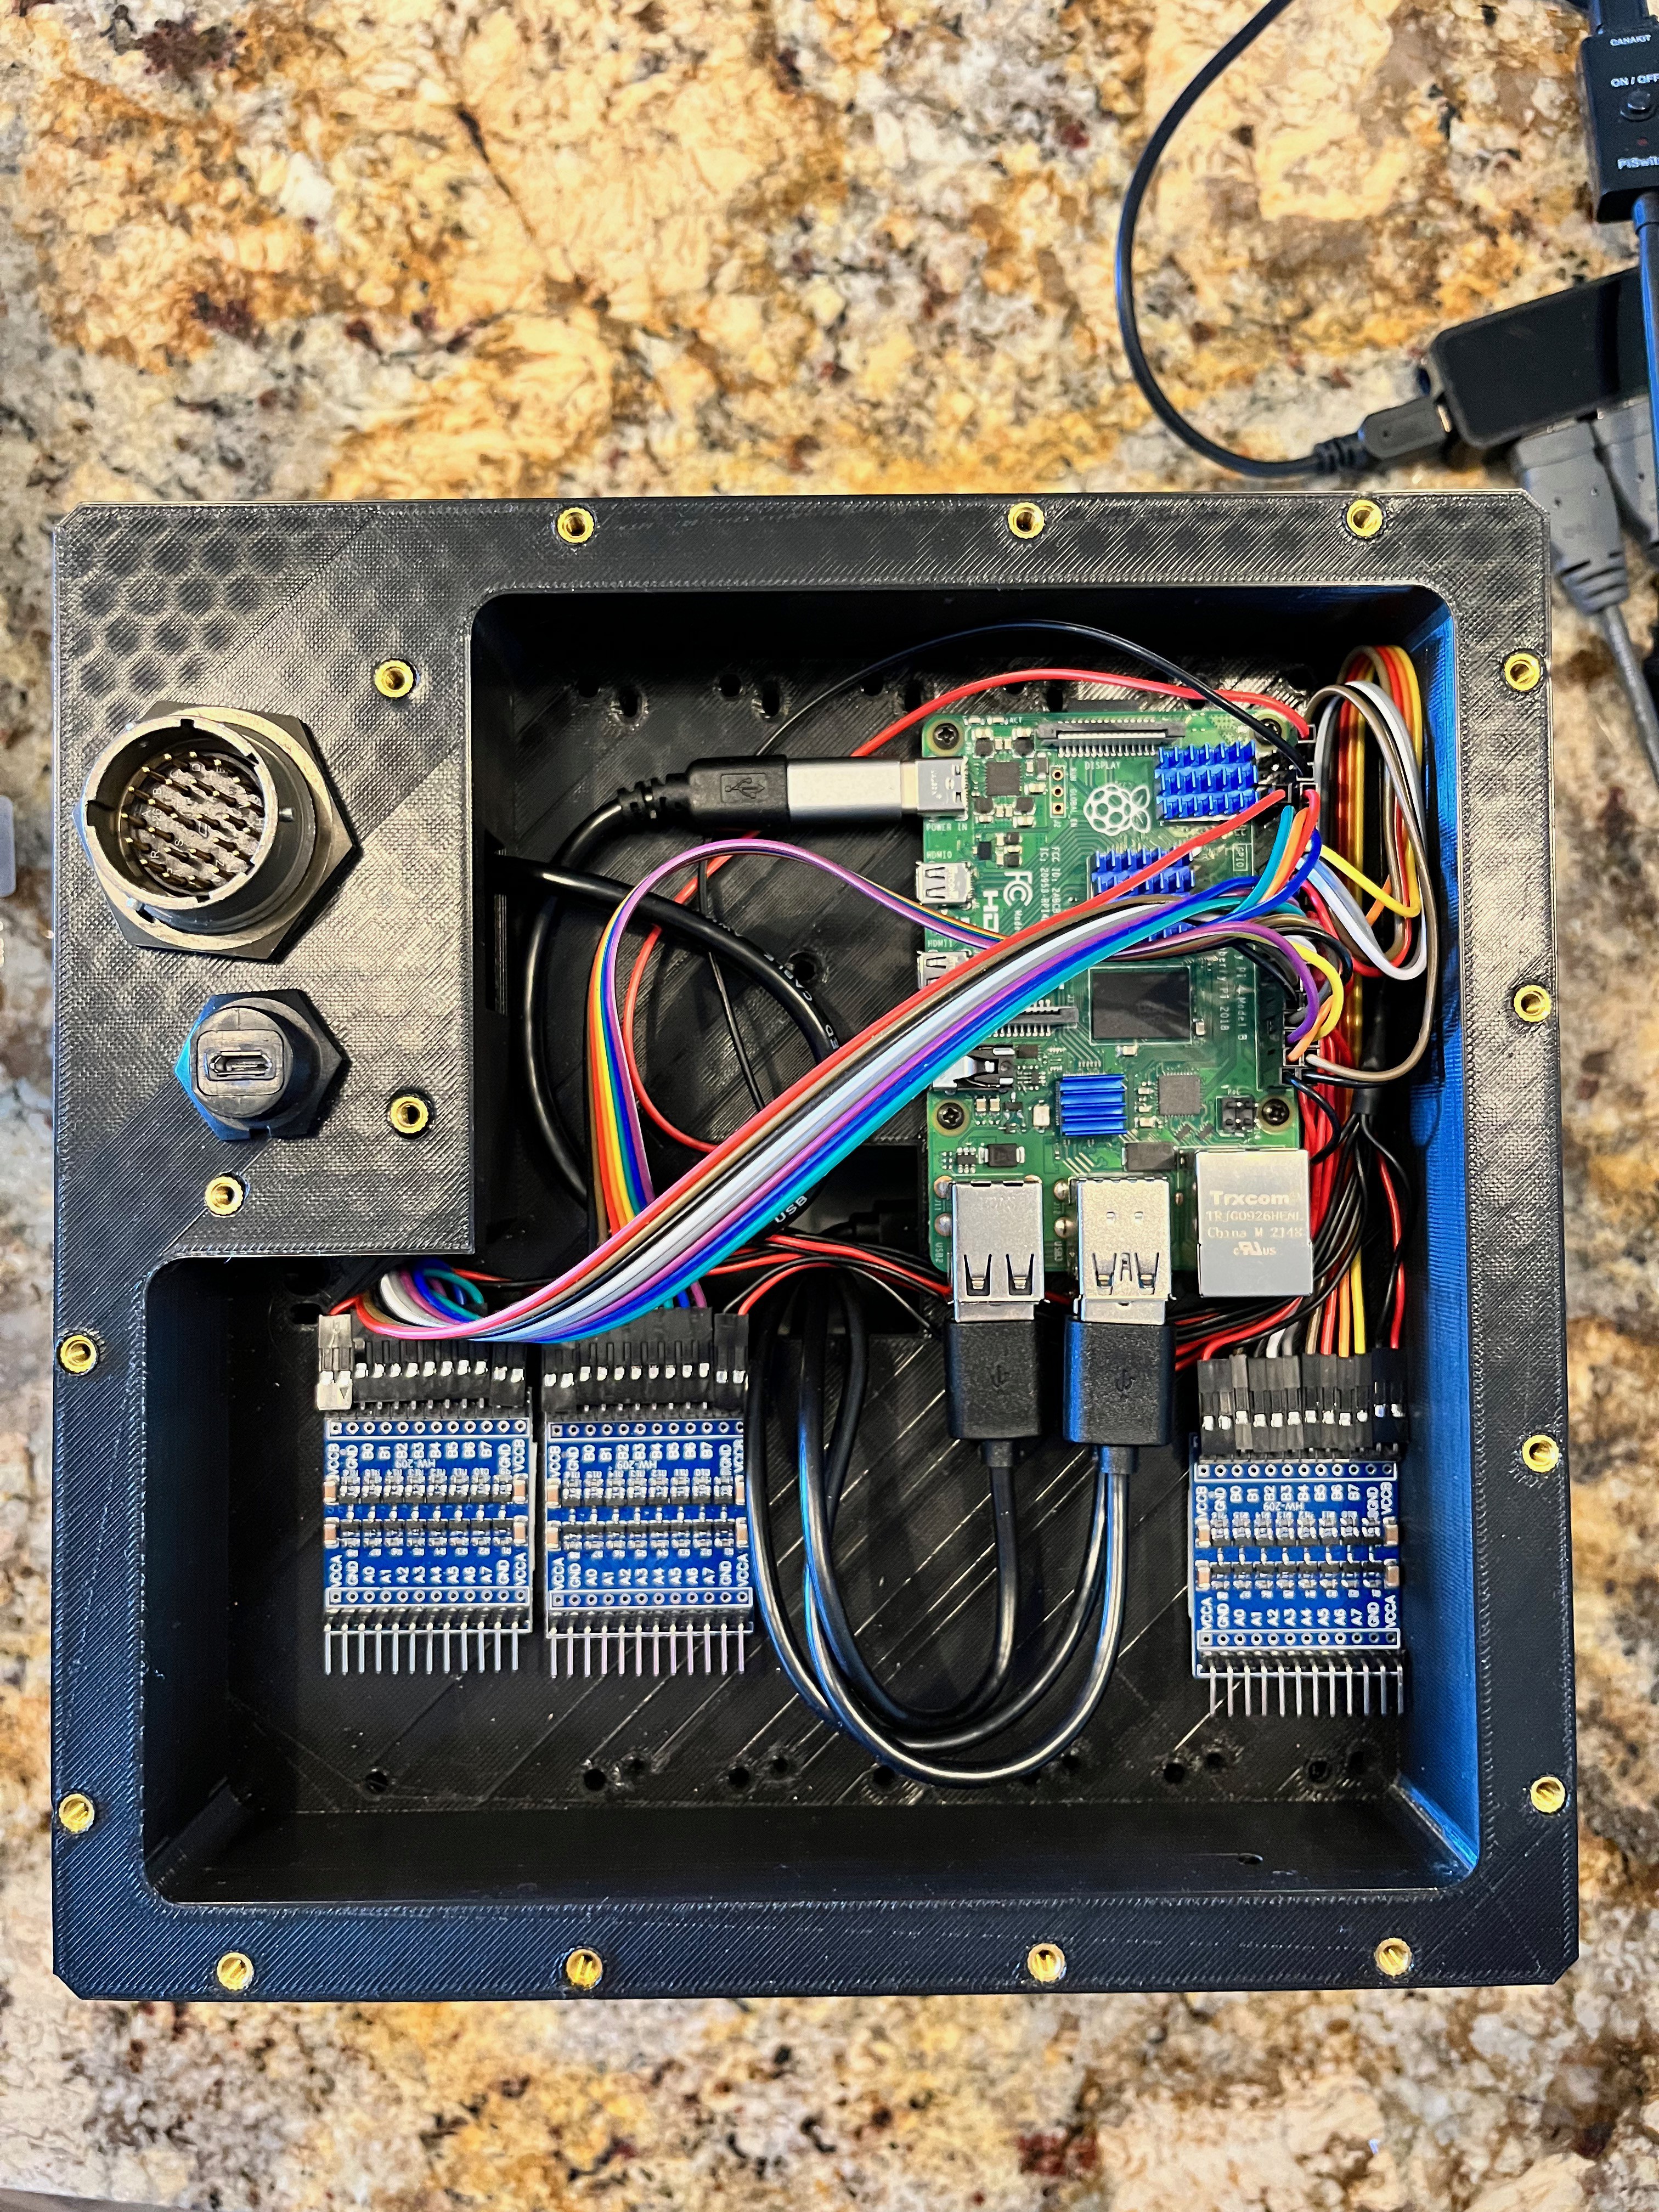
Here are the level converters installed with double sided foam tape. There were no mounting holes, but a smooth back.
Discussions
Become a Hackaday.io Member
Create an account to leave a comment. Already have an account? Log In.