 JP Gleyzes
A Hard disk drive motor has more coils than this simple triphased motor. Practically I have found 24 stable positions.
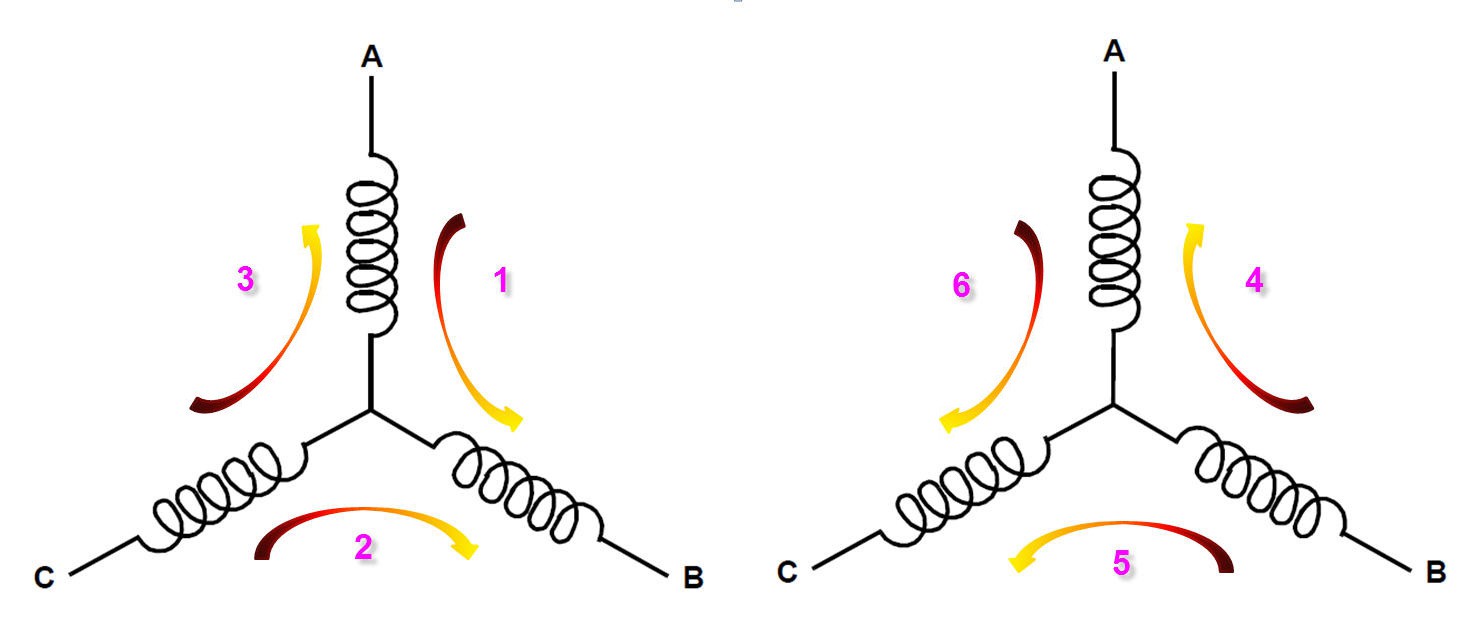
The basis sequence of 6 positions is thus repeated 4 times. And 24 is a very convenient number for a clock !
As we have 24 stable positions, we can have twice 12 hours marks very easily. Simply power the coils on the stable positions in sequence and the disk will jump as would do a stepper motor on these positions.

This being said we still need a way to trigger the coils depending on the current position of the rotor...
The simplest method to drive a BLDC is to have a motor equiped with hall sensors. These three sensors are positionned just in between the stator teeths and allow to trigger 3 successive stable positions of the rotor. (On the picture you can see an old floppy motor with its Hall sensors clearly visible). Note the positions of these sensors which are the same as the stable rotor positions on the above picture.
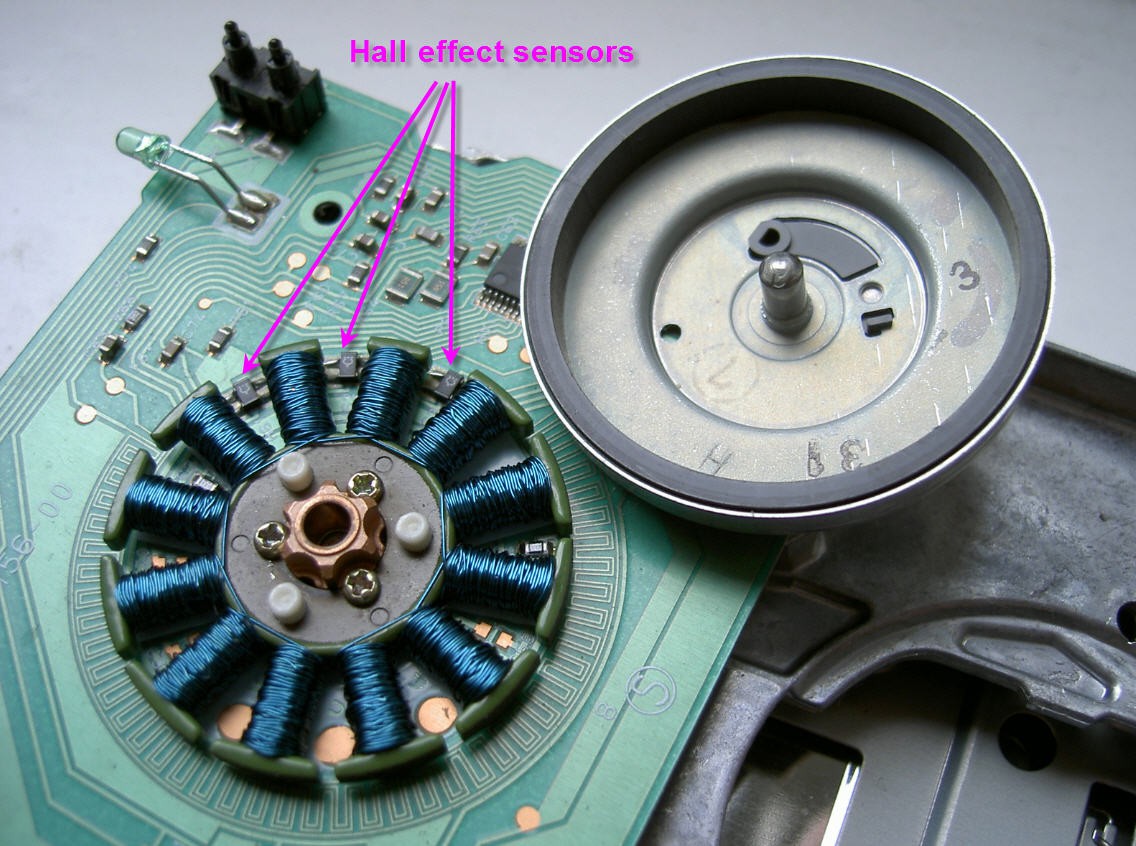
A hard drive motor does not have hall effect sensors... They use another technics to find the rotor position. This "sensorless BEFM" technics is efficient but much more complex to implement...
I have thus decided to replace the hall effect sensors by a single sensor : the RPR220 phototransistor.
This sensor allows me to check the 12:00 position of the clock and to check the stable position 6 of the rotor. The bottom platter must be carefully aligned with this stable position. I will show you latter how to do.
This being done, knowing that there are 24 stable positions, you just have to know the duration of a full rotation, to divide it by 24 to get the duration of a full step. You can commutate the position n°1 when you see the dark spot and then trigger the following 23 steps in sequence.
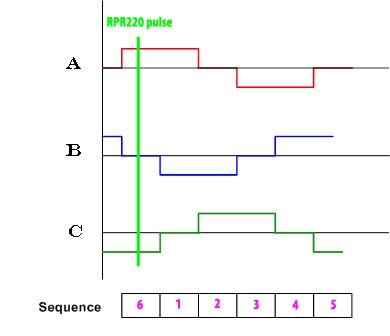
Basically it means that instead of having 3 hall sensors we only have one.... Thus if you want to rotate the disk you just have to "launch the rotation" using the stepper mode technics (increment the driving sequence one by one). when you see the phototransitor pulse you are on position 6.
Now go on pulsing the sequence but at higher speed and measure the time to see again the RPR pulse. Knowing this rotation period you can estimate the theoritical timing of the two missing sensors and trigger the respective pulses precisely. And increase the speed...
This is exactly what is implemented into the firmware. Simple and efficient unless you want to increase too much the speed... where the motor will stall!
It may seem simple but bear in mind that you have to start the disk in "stepper mode" accelerate it and when the speed is high enough switch to brushless mode. It can be a little tricky mainly if you remember that the disk is a 12V one powered only with 5V...
Of course the coils are not directly powered with 5V DC but are powered via a PWM signal to limit the current into them and to tune the rotation speed.
Discussions
Become a Hackaday.io Member
Create an account to leave a comment. Already have an account? Log In.