 jasonwinfieldnz
This project uses a ATX power supply, these supply a significant amount of current compared to a phone charger.
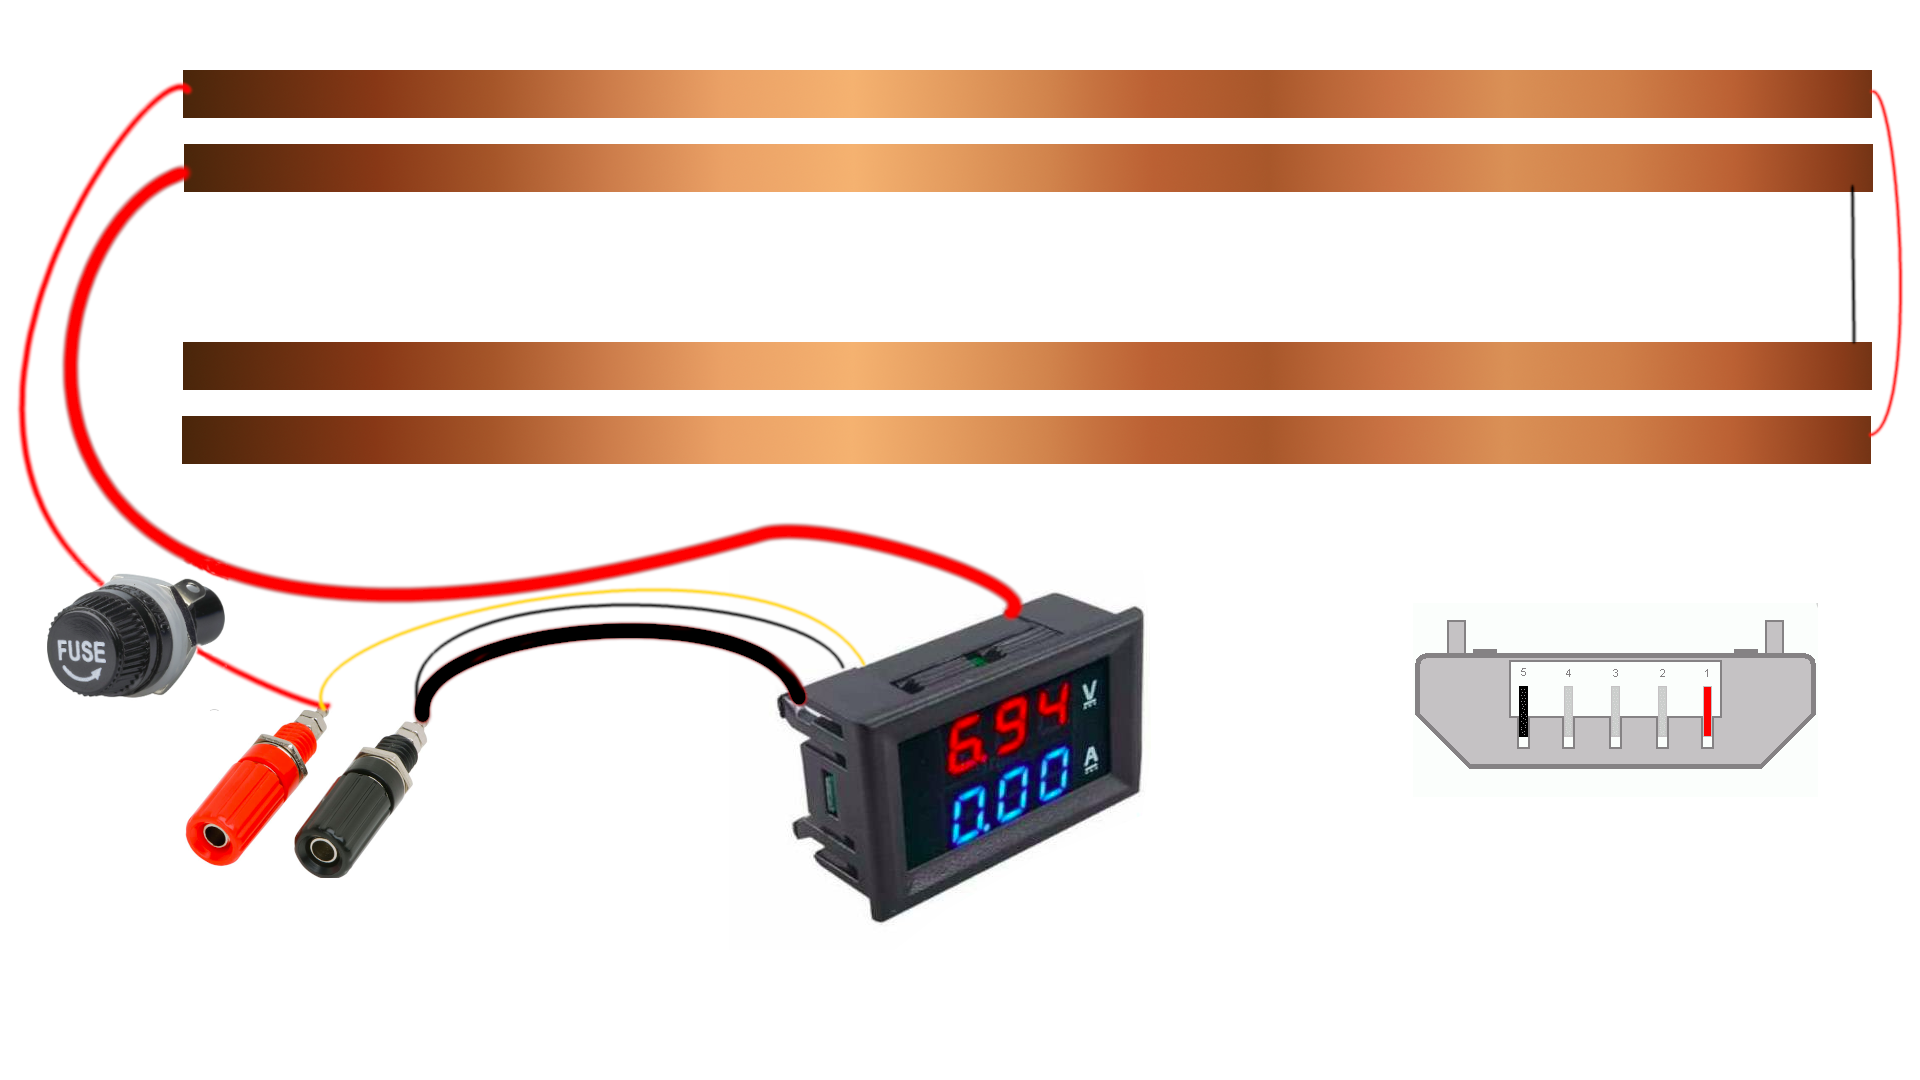
Power is delivered to each connect via copper wire strips and low-cost micro USB cables.
The result is a funky-looking functional battery charger.
 x-labz
 Benchoff
 Henrik Alexandersson
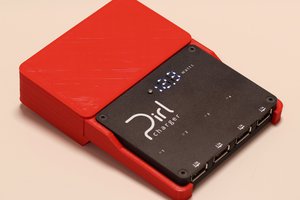
 Meta Unknown