 Sterling Baird
-
1QUICK START
👇Build Instructions Video Tutorial👇
See also the perspective article published in Matter and the build instructions published in Star Protocols.
- Prerequisites
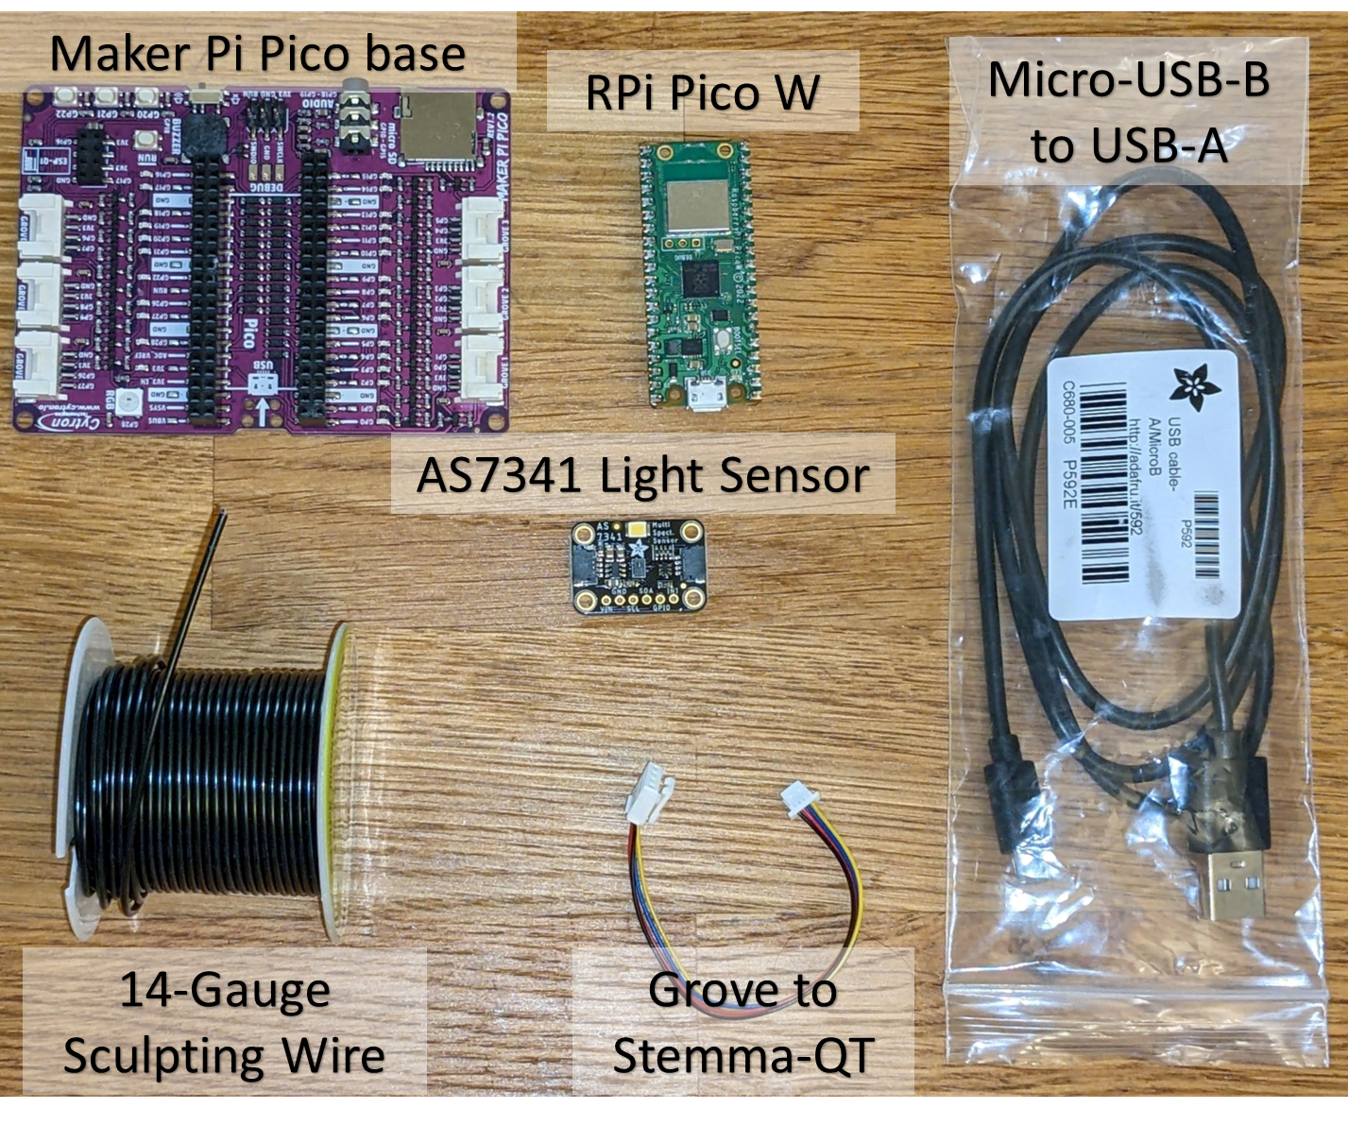
- Required parts [Self-contained Digikey Order] (60.80 USD + shipping as of 2022-10-20)
- Access to a 2.4 GHz WiFi network (SSID + password)
- Access to a computer (for initial setup only)
- Soldering iron and soldering wire (thinner is better in this case)
- (Optional) Before soldering, ensure the Pico W can successfully connect to a computer
- Hardware setup
- Solder the headers to the Pico W [MagPi guide]
- Thread the sculpting wire through the mounting holes on the Maker Pi Pico base and the AS7341
- Position the sensor so the pinhole is facing the RGB LED ~3-4" away
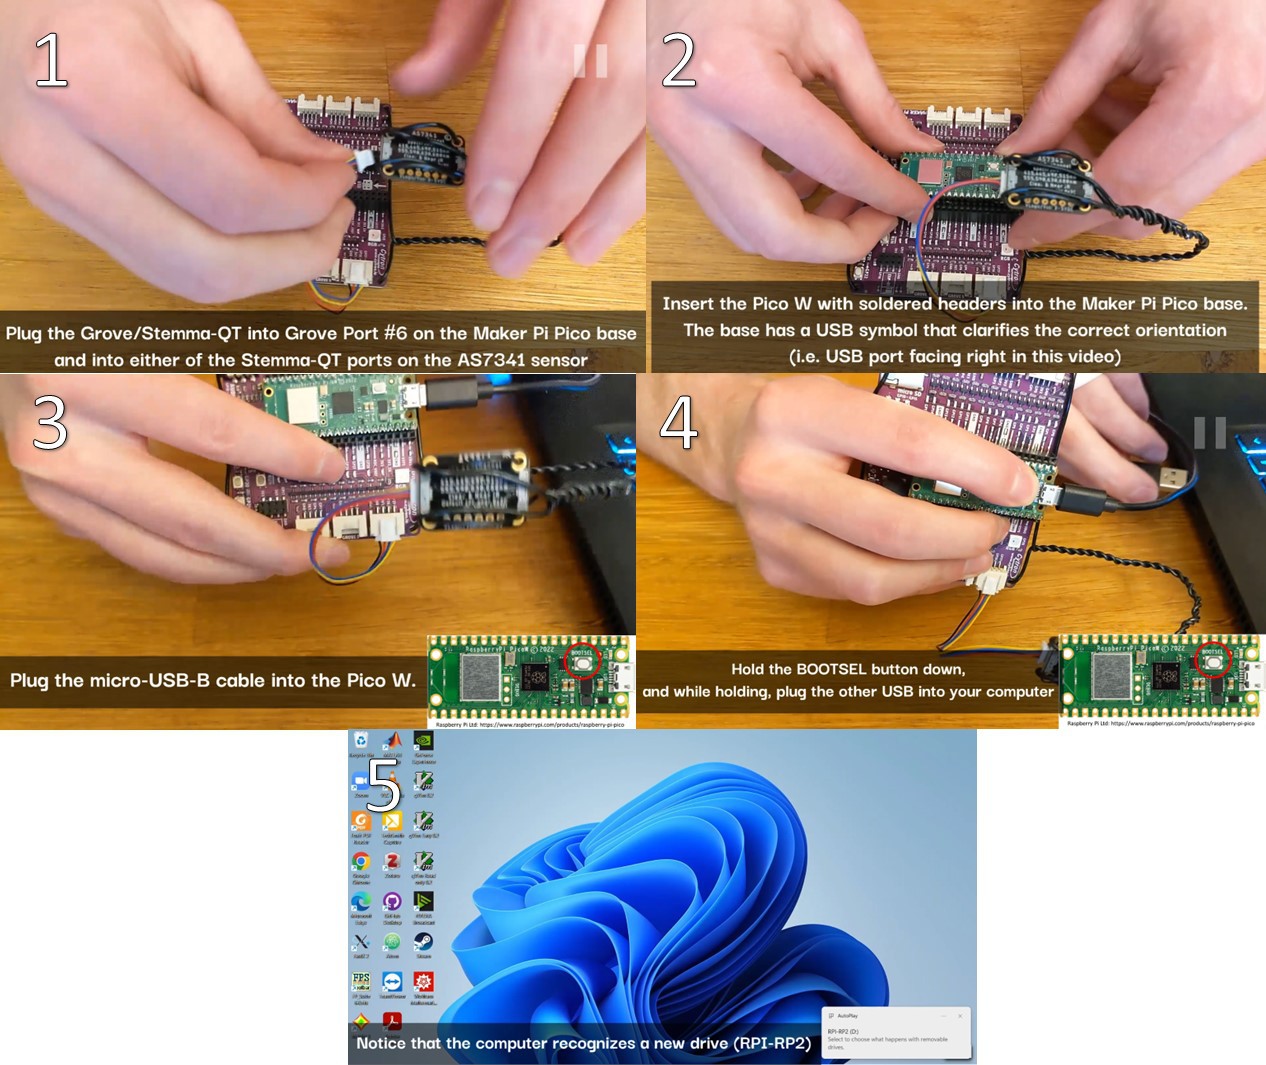
- Connect the Grove/Stemma-QT connector into Grove port 6 (GP26&27) and the AS7341
- Insert the Pico W into the Maker Pi Pico base
- Plug the micro-USB-B cable into the Pico W
- While holding the BOOTSEL button on the Pico W, plug the USB-A cable into a computer
- Software setup
- Download and install Thonny. Use the default settings: "Standard (default)"
- Click on the lower-right dropdown and "Install MicroPython" (Micropython variant: Raspberry Pi - Pico W / Pico WH)
- Change the interpreter from Local Python 3 to Micropython Raspberry Pi Pico
- In Thonny's menubar, click "View" then "Files" to open a sidebar
- Download sdl_demo.zip from the latest release at self-driving-lab-demo and unzip
- Open secrets.py, enter your WiFi network name (SSID) and password, and save
- While holding Ctrl (Windows) or Cmd (Mac), select "lib", "main.py", and "secrets.py", right click in the gray region, and click "Upload to /"
- Double-click to open main.py, click the green play button and note the PICO ID that prints to the command window ("prefix/picow/<PICO_ID>/")
- Control SDL-Demo from the cloud
- In the GitHub repository, navigate to notebooks/4.2-paho-mqtt-colab-sdl-demo-test.ipynb and click the "Open in Colab" badge
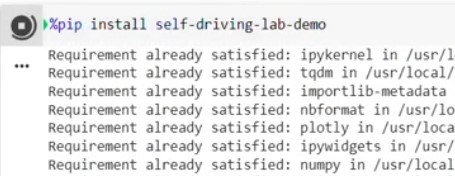
- Scroll to the first code cell and click the play button to install the self-driving-lab-demo Python package
- Copy the PICO ID from the Thonny editor and paste it in place of "test" (without quotes)
- Run the remaining code cells
- Instantiate a SelfDrivingLabDemo class
- Perform optimizations for grid search, random search, and Bayesian optimization
- Visually compare results
- Prerequisites
-
2Prerequisites
- Order the required parts [Self-contained Digikey Order] (60.80 USD + shipping as of 2022-10-20)
- The sculpting wire is also available at Amazon. Approximately 3' is required.
- The purpose of the wall adapter is so that, after initial setup, the SDL-Demo can be powered standalone
- The bill of materials is also available at Adafruit, though you may need to source a Pico W with headers or a Pico WH separately. See Raspberry Pi's supported resellers for the Pico W.
![]()
- Access to a 2.4 GHz WiFi network (SSID + password)
- The Pico W only supports 2.4 GHz WiFi networks. See self-driving-lab-demo #76 for additional context.
- WPA enterprise networks such as Eduroam and other networks that use captive portals (most schools, coffee shops, etc.) aren't supported. It needs to be a network such that on a computer, you can click on the WiFi name (SSID), enter the password, and click connect (no additional steps).
- Home networks can have both a 5G and a 2.4 GHz network (e.g. "My Network 5G" and "My Network")
- If you use a mobile hotspot, you may need to use your device's "extended compatibility" feature to drop the mobile hotspot from 5G to 2.4 GHz
- See also prepaid, long-expiry hotspot and classroom demo with standalone network access discussions
- The Pico W only supports 2.4 GHz WiFi networks. See self-driving-lab-demo #76 for additional context.
- Access to a computer (for initial setup only)
- At a minimum, the computer needs to be able to run the Thonny editor (lightweight) and it needs at least one USB-A port
- Access to a soldering iron and soldering wire (thinner is better in this case)
- (Optional) Before soldering, ensure the Pico W can successfully connect to a computer
- You can do this by holding the BOOTSEL button on the Pico W while connecting the Pico W to your computer via the USB cable. If a new drive appears, that indicates the Pico W is working normally
- Be careful only to heat the gold pads while soldering to avoid damaging the circuitry
- Order the required parts [Self-contained Digikey Order] (60.80 USD + shipping as of 2022-10-20)
-
3Hardware Setup
- Solder headers onto the Pico W
- Insert the Pico W headers into the Maker Pi Pico base
- Place the Pico W on top of the headers
- Solder the headers to the Pico W
- Remove the Pico W from the Maker Pi Pico base
- Prepare 3 feet of sculpting wire (cut with wire cutters or bend until it breaks)
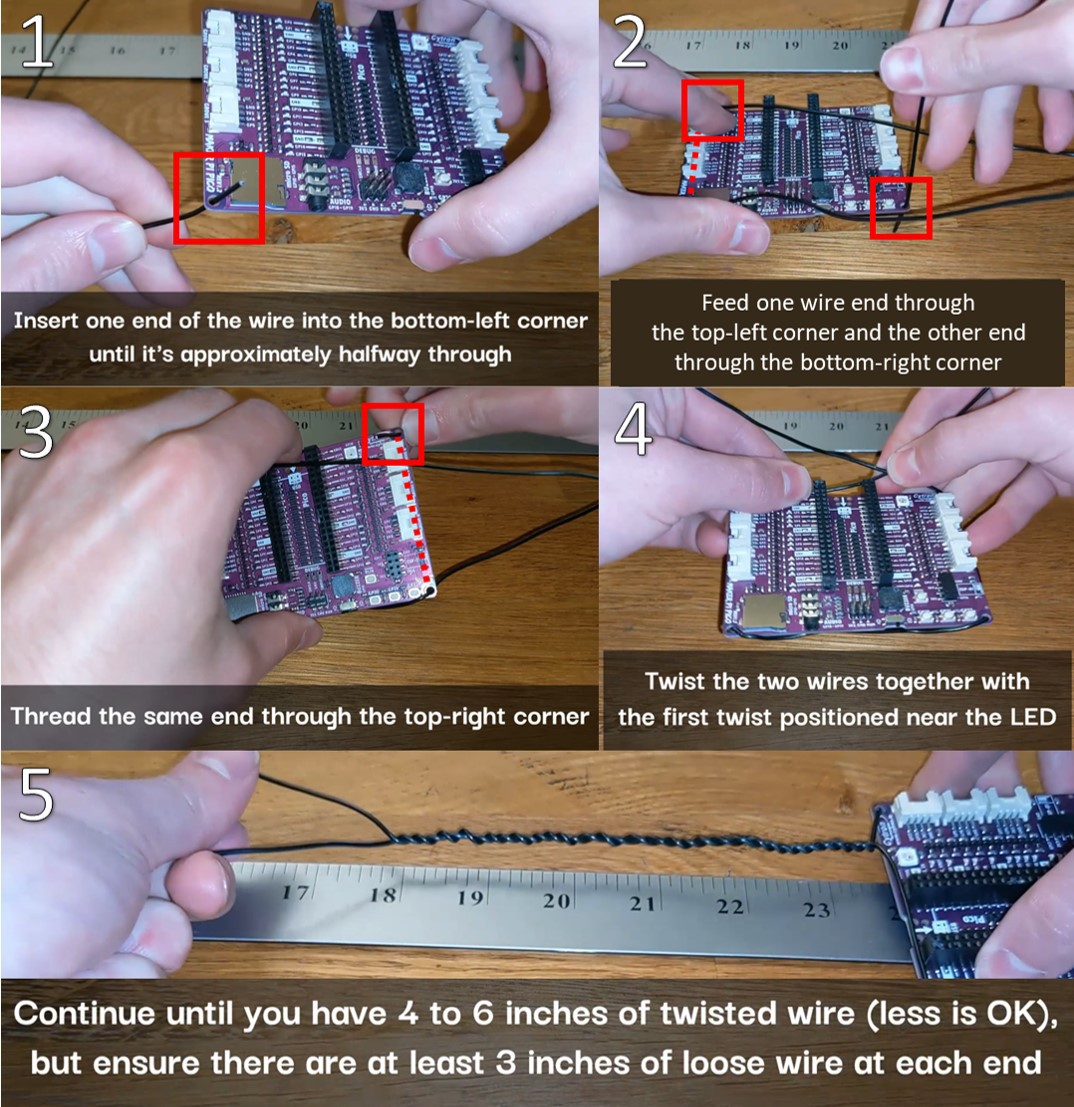
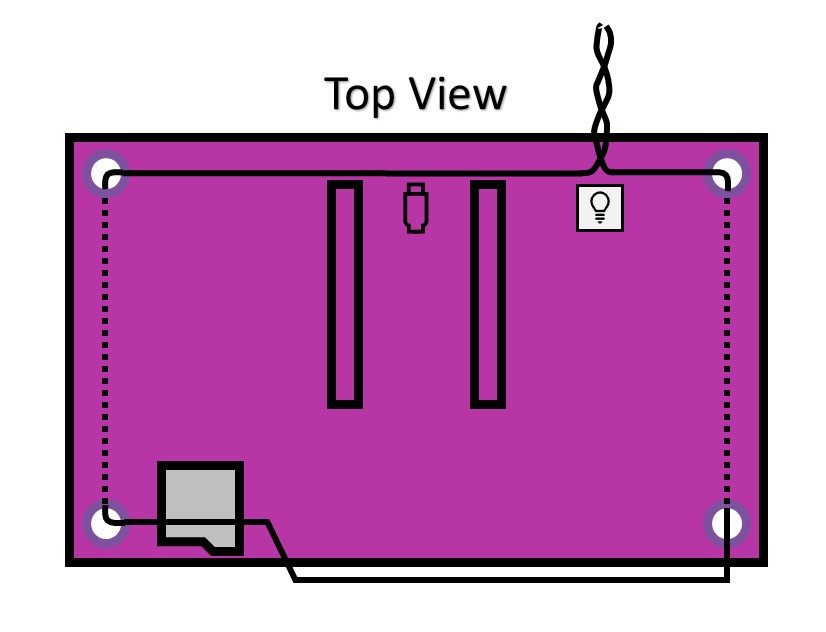
- Thread the sculpting wire through each mounting hole on the Maker Pi Pico base, then twist the wires together near the RGB LED. This setup will allow the position and orientation of the sensor to be both adjustable and steady. Continue twisting until you have 4 to 6 inches of twisted wire, and ensure that there are at least 3 inches of loose, untwisted wire at each end (the leftover, untwisted wire will be threaded through the mounting holes of the light sensor in the next step). For reference, a diagram is also attached below.
![]()
![]()
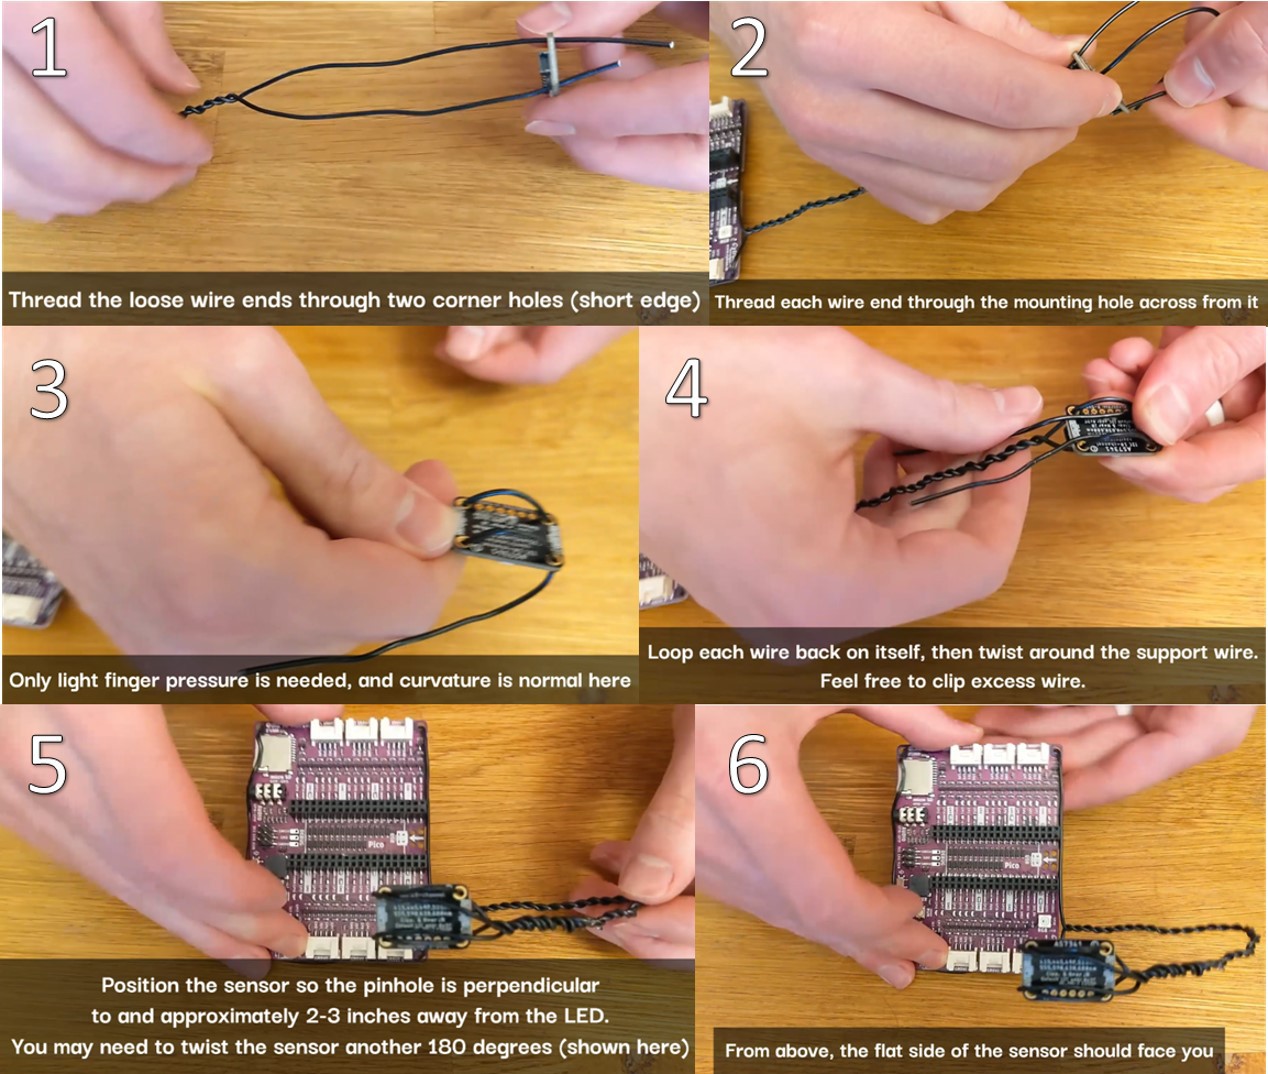
Thread the same sculpting wire through the AS7341 light sensor, and position the sensor so the pinhole is facing approximately 3 to 4 inches away from the RGB LED.
![]()
- Connect the Grove/Stemma-QT connector into Grove port 6 (GP26&27) and the AS7341, insert the Pico W, and while holding the BOOTSEL button, connect the Pico W to the computer.
![]()
- Solder headers onto the Pico W
-
4Software Setup
- Download and install Thonny, a Python IDE with native support for microcontrollers. Choose the platform appropriate for you (in my case, this is Windows 64-bit, Python 3.10). When installing, use the default settings: "Standard (default)".
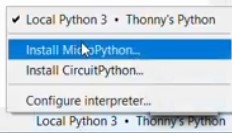
- Click on the lower-right dropdown and click "Install MicroPython"
![]()
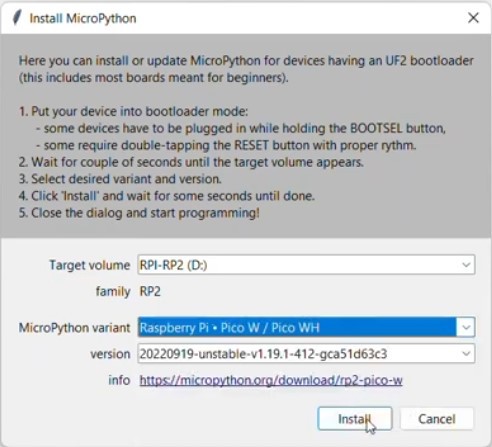
- Choose "Micropython variant: Raspberry Pi - Pico W / Pico WH" and click install
![]()
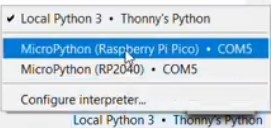
- Change the interpreter from Local Python 3 to MicroPython (Raspberry Pi Pico)
![]()
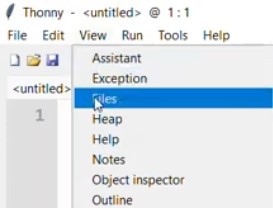
- In Thonny's menubar, click "View" then "Files" to open a sidebar
![]()
- Download sdl_demo.zip from the latest release at self-driving-lab-demo and unzip it
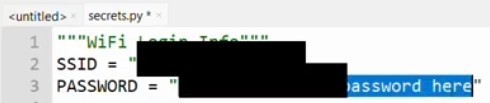
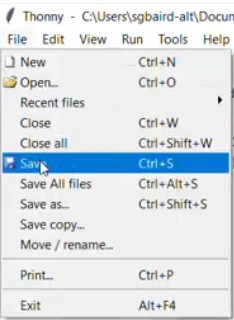
- In Thonny, navigate to the unzipped sdl_demo folder, open secrets.py, enter your WiFi network name (SSID) and password, and save secrets.py. Leave the other variables set as the defaults or follow the instructions in Steps 13 and 14 from the Star Protocols manuscript.
![]()
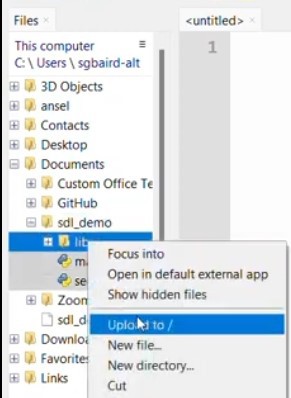
- While holding Ctrl (Windows) or Cmd (Mac), select "lib", "main.py", and "secrets.py", right click in the gray region, and click "Upload to /"
![]()
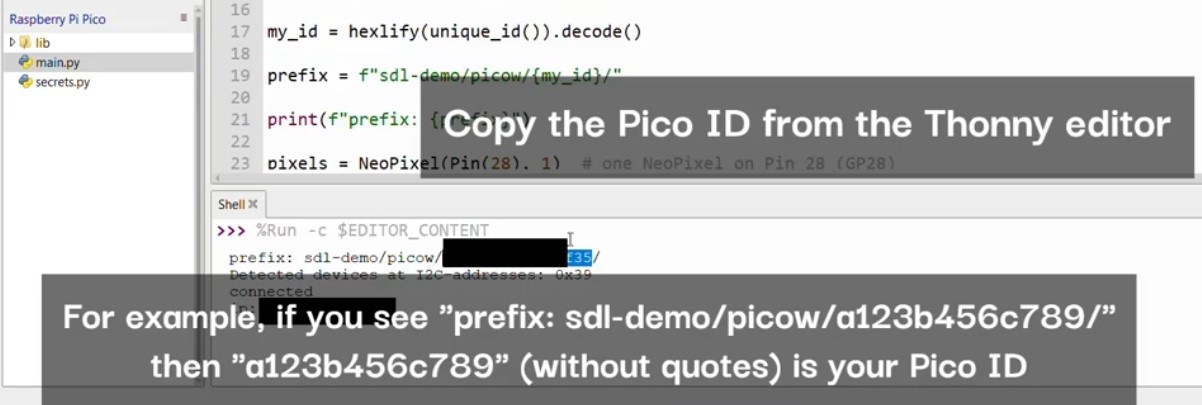
- Double click to open main.py, click the green play button, and note the PICO ID that prints to the command window ("prefix/picow/<PICO_ID>/")
-
5Control SDL-Demo from the cloud
- Open notebooks/4.2-paho-mqtt-colab-sdl-demo-test.ipynb in Google Colab
- Scroll to the first code cell and click the play button to install the self-driving-lab-demo Python package
![]()
- Copy the PICO ID from the Thonny editor and paste it in place of "test" (without quotes)
![]()
![]()
- Run the remaining code cells
- Instantiate a SelfDrivingLabDemo class
- Perform optimizations for grid search, random search, and Bayesian optimization
- Visually compare results
![]()
-
6Advanced optimization topics
See the notebooks at https://github.com/sparks-baird/self-driving-lab-demo/blob/main/notebooks/README.md#6-advanced-optimization for advanced optimization topics such as multi-objective, multi-fidelity, and batch optimization.
Autonomous Research Laboratories
A closed-loop spectroscopy laboratory demo using dimmable LEDs and a spectrophotometer. < $100, < 1 sq. ft, < 1 hr setup.


Discussions
Become a Hackaday.io Member
Create an account to leave a comment. Already have an account? Log In.