To make the experience fit your profile, pick a username and tell us what interests you.
We found and based on your interests.
Some more 9W bulbs arrived & they used exactly the 9W in a wall outlet. So the MOSFET circuit isn't giving the rated voltage. 3.3V isn't enough to turn on the IRF630's. A complementary transistor would be required.
Over the years, the existing MOSFET situation proved good enough. As they warmed up, they turned on more & got bright enough to do the job. It's still not the ideal 200W equivalent. There isn't a cascaded transistor which would be cost effective & compact enough. It would entail making a new board.
Eventually, the remote control stopped working. The problem is the CR2032's can't put out the 50mA required by the radio, 2Mhz micro & LED. They were going for a few ms & browning out. Lowering the clockspeed of PICs in the past didn't make any difference below 2Mhz, but if it did it would require also changing the baud rate on the receiver. The radio power got lowered & that seemed to extend the battery life. The mane solution is just having a lot of CR2032's & changing them out more often until an enclosure big enough for AA's can be made. The gopro isn't the ideal enclosure for packing all the other bits either.
The other thing which didn't work was the 1/4s transmit timeout. That got taken out & it just transmits as long as the button is pressed. It was intended to prevent interference from creating bounces, but what really happened was interference knocking out the 1/4 second packet. Debouncing on the receive side proved enough.
The pinball button ended up a glitchy pain in the mane. You don't want to be fighting a balky button in the dark at 4am.
A new enclosure for AA's, a better button are the key needs.
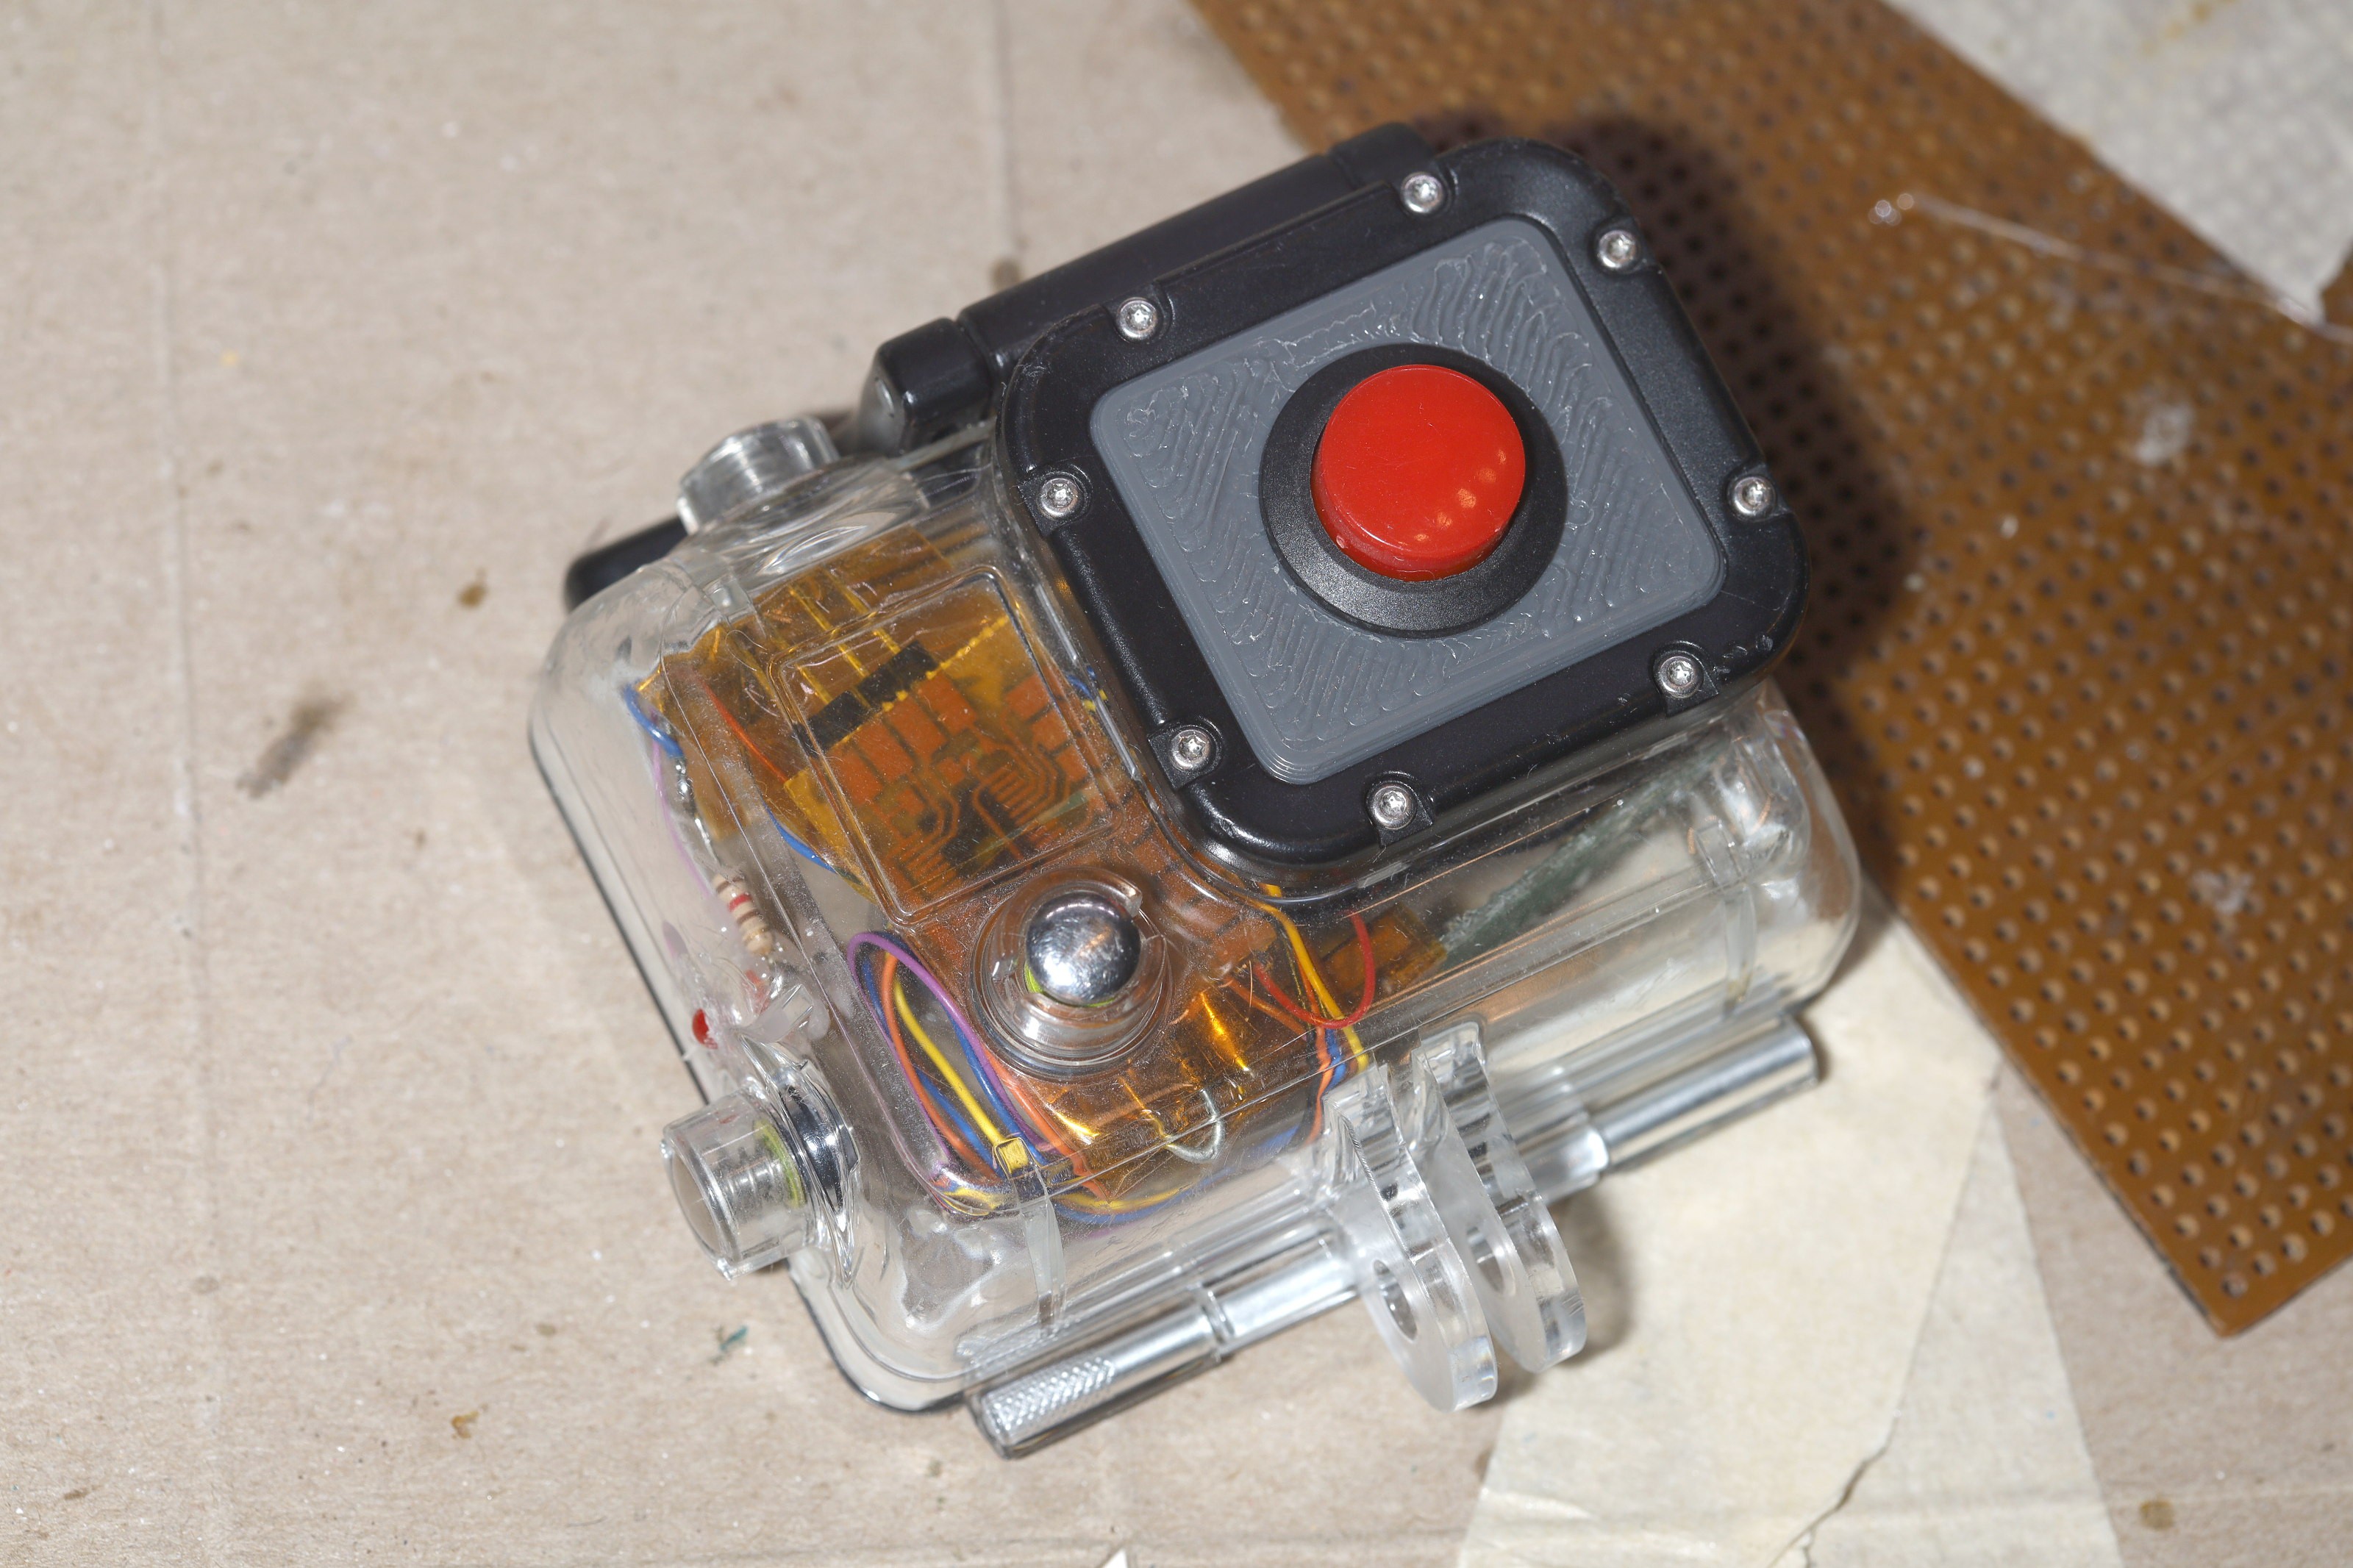
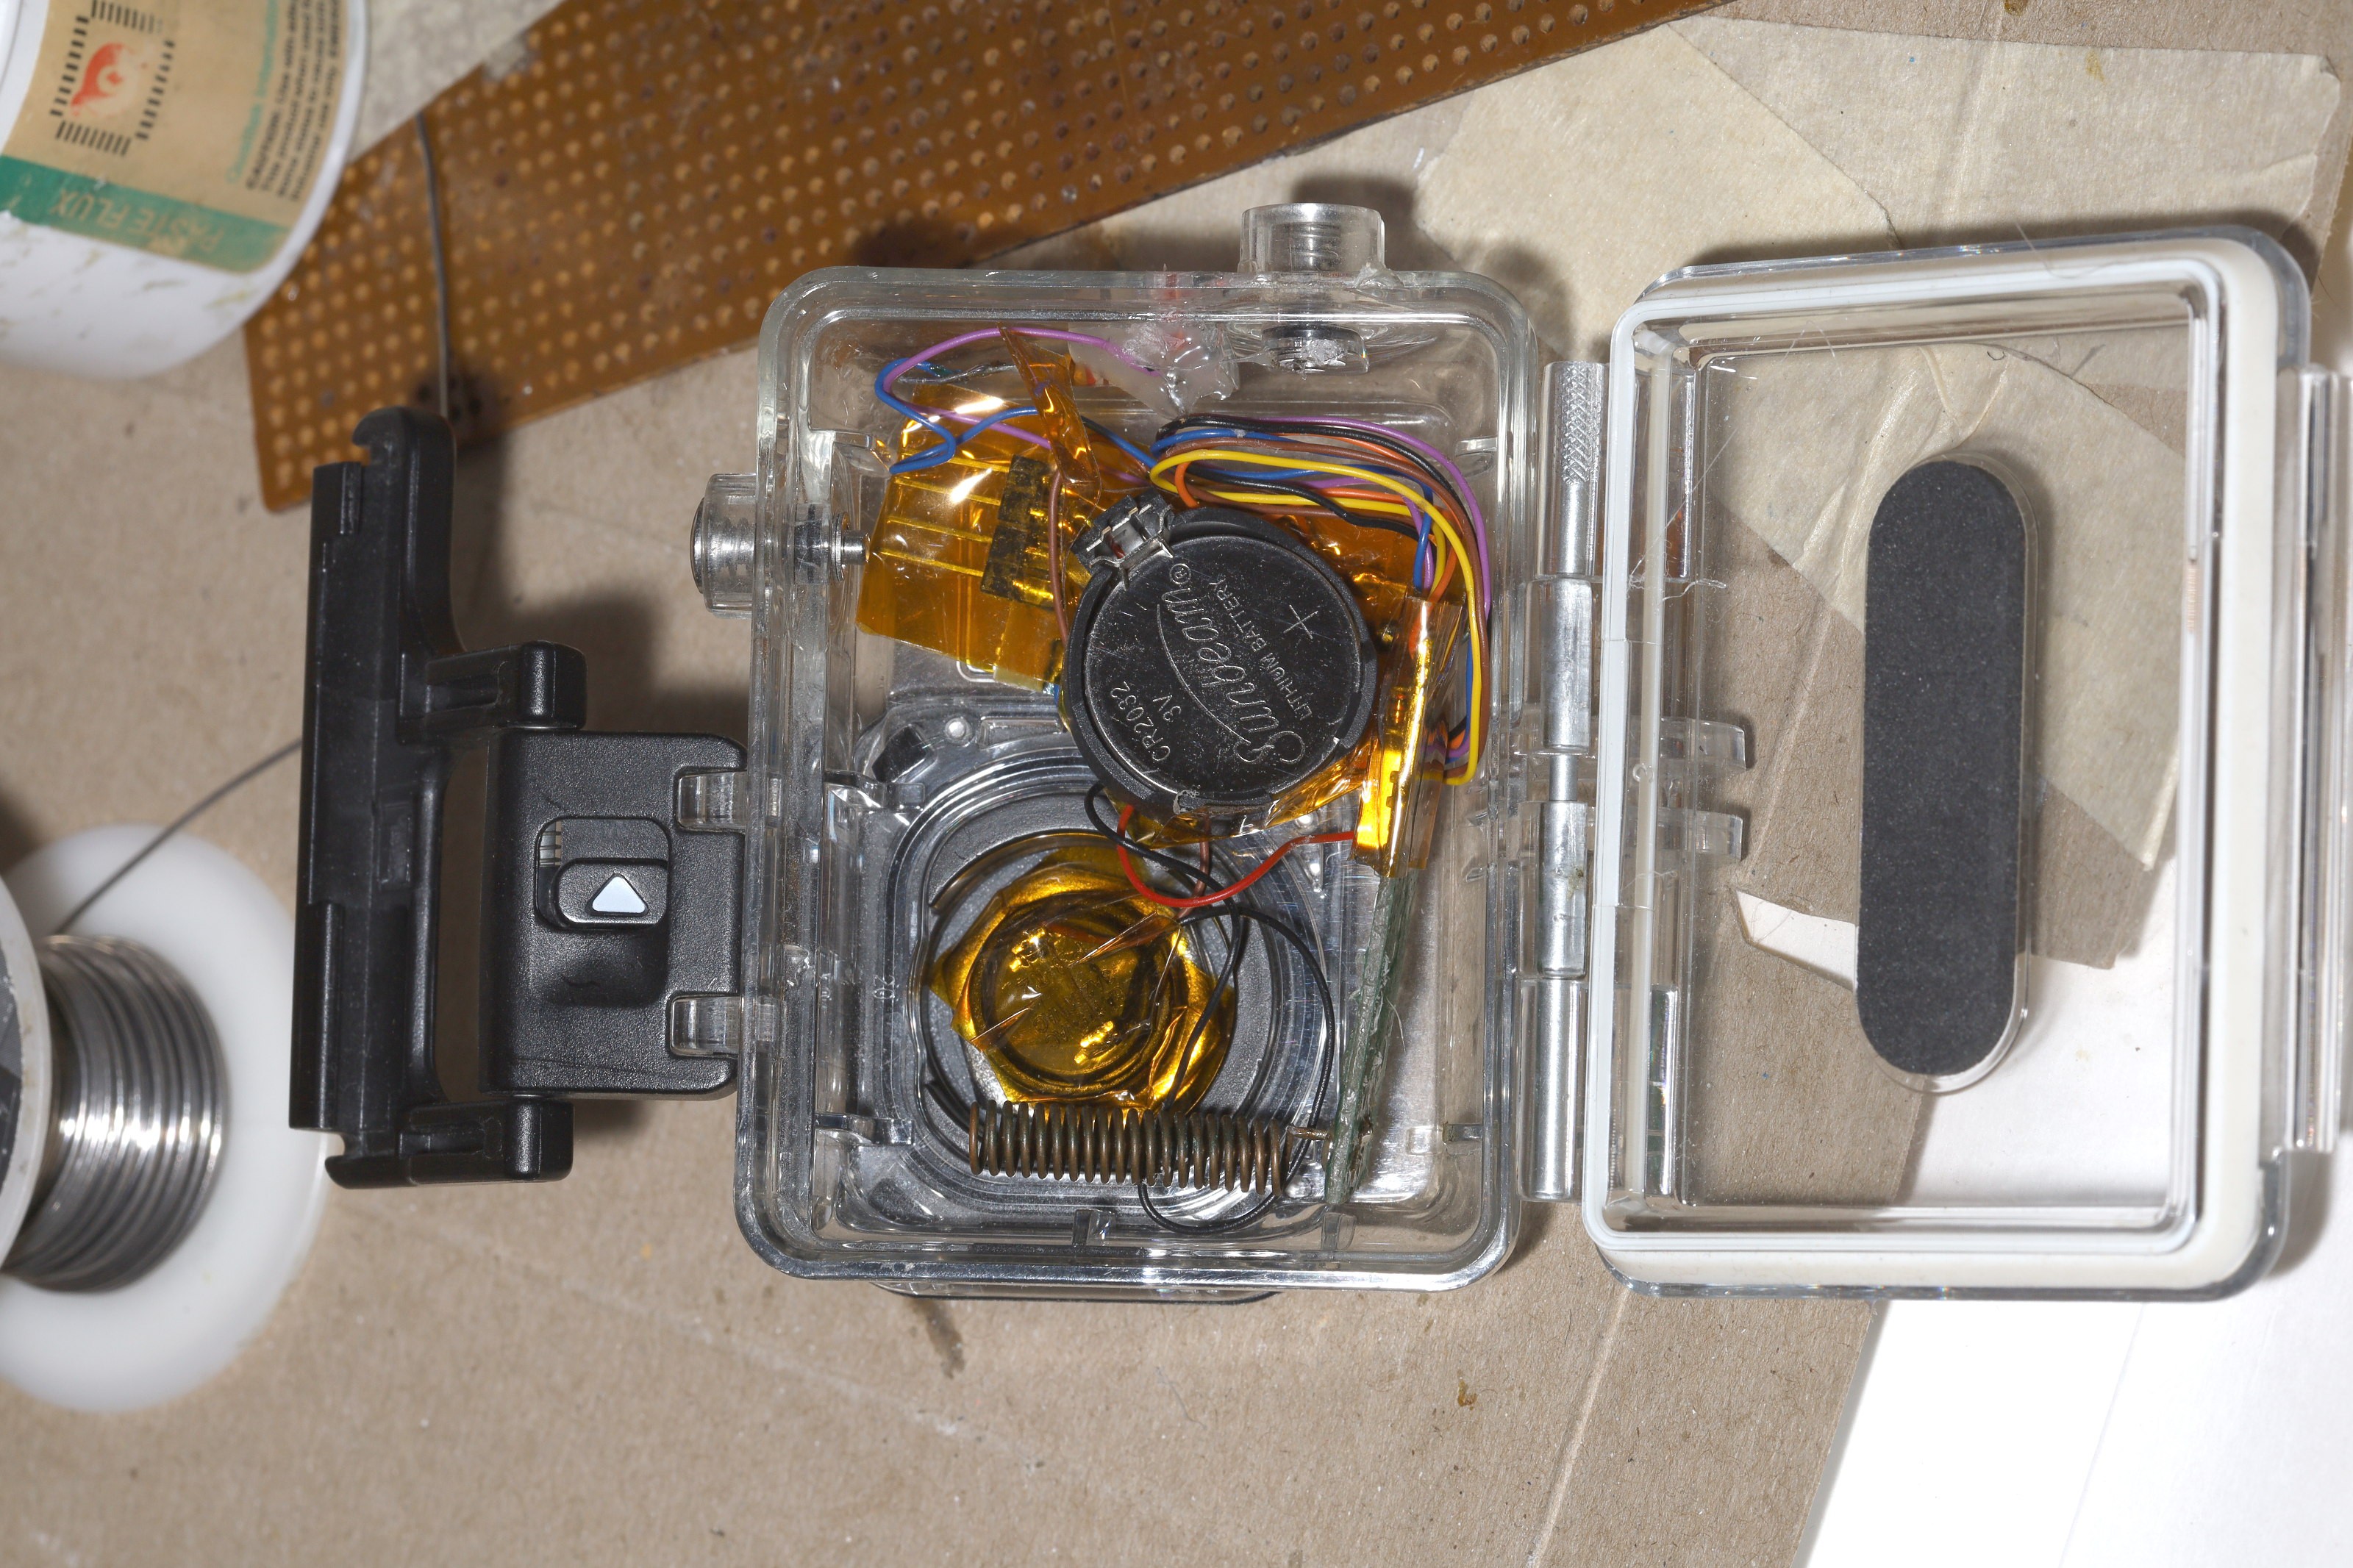
The remote control was an instant fail, so along came this new enclosure. The battery just flops around inside. It could use a foam stuffer to keep everything from moving, but it just sits on the bathroom counter. The idea is to have a big mashable button to get the light on in a hurry during a bowel emergency. A small button on an edge wouldn't do the job. The best way to avoid a bowel emergency is to have the equipment ready to deal with it.
Of course, the fan has to already be on for the remote control to work. There's going to be a delay from 1st seeing if the fan is on.
The light always comes on when the fan is 1st turned on. Note that there is a delay when turning on the light from the fan switch. The USB charger has a startup delay. Then the PIC has a startup delay. Fortunately, the firmware is smart enough to turn on the light before initializing the radio.
Remote control got a rearrangement to try to make it flat. It still had a slight bulge. It probably needs a 3rd row of screws.
A key requirement with these remotes is the hot glue bead to keep them from trapping water on the table. Then came the attachment to the GU24 adapter.
The solution was to get 2 adapters & use the 2 cathodes as solder points in a single adapter. The anodes were not solderable & were too close to the bare wires.
Then, these require wedging a small wire under some nuts. That took some doing.
Then somehow feeding the small wire down some tiny holes. It took some doing. Back in Shenzen, long runs of wire would have been fed through the holes before being farstened to the nuts.
Then came a final test. There were several hours of testing on the bench in the off & on positions. The off setting shows absolutely 0W on the power meter.
Despite every effort, the GU-24 socket is not polarized. The lion kingdom decided not to stress the wires by letting it hang for a photo op. It went in by 1st screwing in the adapter with the clamp partially over it, then sliding the assembly completely on while pulling wire out with tweezers, then tightening the clamp bolts. There was no way to see if the clamp bolts were evenly tightened, anything was wedged, or anything was contacting anything it shouldn't. There wasn't any clearance. The USB charger got a good squeeze.
When the pixies went through, the apartment amazingly didn't burn down.
There was a comparison with the same exposure settings. It's definitely putting out more light than the stock 15W despite 1 bulb being much brighter than the other. It may be more light pointing down instead of up.
The 1 capacitor pressed on the cover. Theoretically, the cover shouldn't exert enough pressure to bend the leads.
It makes a definite dark spot & the 1 bulb is definitely brighter while the other isn't doing anything but making heat. The 2 fans are clearly audible above the noise of the vent blower. When they clog with dust, it'll hopefully be obvious.
The vent blower hardly makes enough noise to believe it's doing anything but the hygrometer shows a significant drop when it's on.
The remote successfully toggles it from the other room. A nefarious roommate could turn it off while a lion is in the bathroom, but fortunately all the women told lions to get lost for 40 years & hit menopause so that isn't going to happen.
It was always going to be in PETG, printed at 250C. The lion kingdom has settled on 2mm being the thinnest practical wall for PETG & .8mm being the smallest nozzle.
The journey began with many ideas.
It took 2 printouts to finally get a reasonably useful one.
The LED panels ended up scotched on with thermal paste. The heat sink is a 1 of a kind scavenged piece of aluminum. The wiring is a mess. The mane point is as little wiring as possible is covering the LEDs. Logic GND has to be connected to both rectifier grounds or the bulb which isn't connected will flicker. 4 wires have to be soldered to each bulb. There's the manes live & neutral. Then there's the patch from the rectifier GND to the MOSFET. Changing bulbs is going to be a bitch.
A big question is if the fans are doing any good. There's a lot of wiring defeating the airflow. The power MOSFETs flop around on top of the heat sink. The temperature stays between 45-50C on the bench. Power stays in the 8.5W range despite having 2x9W bulbs.
There is an attempt to clamp on to the GU24 adapter. The unsolved problem is farstening the wire to the adapter. It ended up being speaker wire for the manes voltage. It's still unknown if it fits in the enclosure or if there's enough room to slide it on.
A simple remote control was fashioned. It was still not thick enough. The debounce & transmitter timeout were set at 1 second. There's a kind of waiting game to undo a button press. The mane reason for 1 second was so the LED would stay lit long enough to see it. The LED goes out when it stops transmitting.
The mane problems with this are condensation in winter & unstable current. Without PWM, the 15W ones rise from 10W cold to 15W as they heat up. The 9W ones rise from 5 to 6W. They don't have much of a current regulator & brightness highly depends on temperature. There's using a single 15W at full power, 2 9W at full power, or PWM with 2 15W. It might be good enough to add active cooling to lights running at full power. The idea with 2 lights is more coverage than a single light.
There's no way to use the 15W on anything else but manes voltage.
Along came a full mockup without properly trimmed wires, to see if it blew up. It was decided to use 2x9W at full power. They burned 8W cold. It turned out the bulb on the right wasn't a 9W as rated. It burned 3.6W when the bulb on the left burned 5.8W. A 2nd bulb on the right with the same number of LEDs still burned 3.6W. There's not much consistency in the ratings. There will be many discarded bulbs.
Manes voltage is star distributed from the phone charger's prongs. The phone charger's 5V powers the receiver. The phone charger's GND can be tied to the LED return path without drawing any current. The MOSFETS turn off the LED return path. No thyrister is required. The 5V side burns 400mA with the fans on.
The transmitter is a simple 3V thing which transmits a repeating 16 byte key when it's on. 4 bytes in the key contain a PWM value. The PWM value isn't saved on the receiver. It always starts at full power until the 1st remote control packet.
The debounce on the receiver is 1 second. The receiver toggles the MOSFETs if it gets a packet after the debounce period. The lion kingdom has only needed faster responsiveness when accidentally toggling the light. Debounce is a compromise between expected packet loss & desired responsiveness.
A more robust system might be to transmit packets for only 1/4 second & set the debounce to 1/4 second. If it transmits forever, it always eventually toggles the light twice when packets are lost for more than the debounce. The shorter transmit time decreases the chance of a dropped packet misfiring it but increases the chance of it never being received. The shorter debounce increases responsiveness but also the chance of a dropped packet misfiring it. The transmit time & debounce time have to be the same to eliminate any chance of a misfire.
Firmware updates are going to require dismantling the light.
The latest plan is a PETG frame which slides on to a GU-24 adapter. It holds 2-4 bare circuit boards from common 15W lightbulbs. The idea is to get them to last as long as possible by reducing them to the minimum amount of heat. They'll be in parallel. A transistor is added to the DC side to turn them off & apply PWM.
They're mounted on a common metal heat sink. The bottom is covered in acrylic to protect animals who open the enclosure. A common USB charger provides 5V to a 433Mhz radio receiver which provides the enable voltage.
A quick test showed the LED bulbs can't be wired in series to reduce their brightness. At 116V, they can be reduced to 7W but nothing that would make more light than heat can drop the voltage. The only way to underclock is parallel with PWM.
Ground for the 5V has to be the same as GND for the LEDs. GND for the LEDs goes to neutral through 100k. The MOSFET has to withstand 200V or it'll leak. The 15W uses a BP5118F regulator. There's no pinout for the BP5118F that would give an enable pin.
There was a test with 1khz pwm banging a MOSFET on 25% of the time.
This burned 4.5-5.5W, rising as the LED temperature rose. It seems the current regulator compensates for PWM by allowing maximum current. It would need a heatsink & cooling fan to have any chance of hitting 7.5W. At 33% duty cycle, it gets hot pretty fast & burns 7.5W. At least it showed any light can be made dimmable by modulating the DC ground.
The Riden showed 14W because the power meter & the inverter suck amps. Lions are the only animals who use a current limited inverter for testing 120V. Gootubers plug directly into the 15A wall to get the likes.
Most animals can't afford a bathroom fixture with independent fan & light switches so some kind of remote control is desired.
There are no GU24 wifi bulbs. There is a 100W wifi A21 bulb
https://www.amazon.com/Connected-Bluetooth-Smart-Tunable-Changing/dp/B08978J94N/
Lions have gotten by with a GU24 to A21 adapter, but this doesn't give the most light. The ideal solution would be a COB light
https://www.amazon.com/White-Engine-Integrated-Driver-floodlight/dp/B07PB23N6L/
https://www.amazon.com/dp/B08L4NDY9B
This would entail stuffing a triac, buck converter, simple radio chip, & GU24 adapter in the enclosure. The mane problem is cooling the COB light. There could be a fan heatsink. The lion kingdom doesn't believe IR would work near such a bright lightbulb.
Create an account to leave a comment. Already have an account? Log In.
Become a member to follow this project and never miss any updates
 Jakub Kaderka
 Yannick (Gigawipf)
 t.oster92
 lion mclionhead